
Create successful ePaper yourself
Turn your PDF publications into a flip-book with our unique Google optimized e-Paper software.
Features<br />
80C52 Compatible<br />
– 8051 Instruction Compatible<br />
– Six 8-bit I/O Ports (64 pins or 68 Pins Versions)<br />
– Four 8-bit I/O Ports (44 Pins Version)<br />
– Three 16-bit Timer/Counters<br />
– 256 bytes Scratch Pad RAM<br />
– 10 Interrupt Sources With 4 Priority Levels<br />
ISP (In-System Programming) Using Standard V CC Power Supply<br />
Integrated Power Monitor (POR/PFD) to Supervise Internal Power Supply<br />
Boot ROM Contains Low Level Flash Programming Routines and a Default Serial<br />
Loader<br />
High-speed Architecture<br />
– In Standard Mode:<br />
40 MHz (Vcc 2.7V to 5.5V, Both Internal and External Code Execution)<br />
60 MHz (Vcc 4.5V to 5.5V and Internal Code Execution Only)<br />
– In X2 Mode (6 Clocks/Machine Cycle)<br />
20 MHz (Vcc 2.7V to 5.5V, Both Internal and External Code Execution)<br />
30 MHz (Vcc 4.5V to 5.5V and Internal Code Execution Only)<br />
64K bytes On-chip Flash Program/<strong>Data</strong> Memory<br />
– Byte and Page (128 bytes) Erase and Write<br />
– 100k Write Cycles<br />
On-chip 1792 bytes Expanded RAM (XRAM)<br />
– Software Selectable Size (0, 256, 512, 768, 1024, 1792 bytes)<br />
– 768 bytes Selected at Reset for T89C51RD2 Compatibility<br />
On-chip 2048 bytes EEPROM block for <strong>Data</strong> Storage<br />
– 100k Write Cycles<br />
Dual <strong>Data</strong> Pointer<br />
32 KHz Crystal Oscillator<br />
Variable Length MOVX for Slow RAM/Peripherals<br />
Improved X2 Mode with Independant Selection for CPU and Each Peripheral<br />
Keyboard Interrupt Interface on Port 1<br />
SPI Interface (Master/Slave Mode)<br />
8-bit Clock Prescaler<br />
Two Wire Interface 400K bit/s<br />
Programmable Counter Array with:<br />
– High Speed Output<br />
–Compare/Capture<br />
– Pulse Width Modulator<br />
– Watchdog Timer Capabilities<br />
Asynchronous Port Reset<br />
Full Duplex Enhanced UART with Dedicated Internal Baud Rate Generator<br />
Low EMI (inhibit ALE)<br />
Hardware Watchdog Timer (One-time Enabled with Reset-Out), Power-Off Flag<br />
Power Control Modes: Idle Mode, Power-down Mode<br />
Power Supply: 2.7V to 5.5V<br />
Temperature Ranges: Industrial (-40 to +85°C)<br />
Packages: PLCC44, VQFP44, PLCC68 (1) , VQFP64 (1)<br />
Note: 1. Contact <strong>Atmel</strong> Sales for availability.<br />
Description<br />
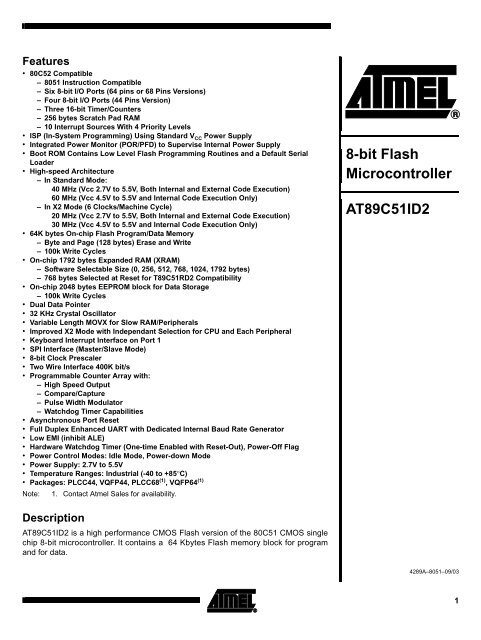
<strong>AT89C51ID2</strong> is a high performance CMOS Flash version of the 80C51 CMOS single<br />
chip 8-bit microcontroller. It contains a 64 Kbytes Flash memory block for program<br />
and for data.<br />
8-bit Flash<br />
Microcontroller<br />
<strong>AT89C51ID2</strong><br />
4289A–8051–09/03<br />
1
2 <strong>AT89C51ID2</strong><br />
The 64 Kbytes Flash memory can be programmed either in parallel mode or in serial<br />
mode with the ISP capability or with software. The programming voltage is internally<br />
generated from the standard VCC pin.<br />
The <strong>AT89C51ID2</strong> retains all features of the <strong>Atmel</strong> 80C52 with 256 bytes of internal<br />
RAM, a 10-source 4-level interrupt controller and three timer/counters.<br />
In addition, the <strong>AT89C51ID2</strong> has a Programmable Counter Array, an XRAM of 1792<br />
bytes, a Hardware Watchdog Timer, SPI and Keyboard, a more versatile serial channel<br />
that facilitates multiprocessor communication (EUART) and a speed improvement<br />
mechanism (X2 mode).<br />
The fully static design of the <strong>AT89C51ID2</strong> allows to reduce system power consumption<br />
by bringing the clock frequency down to any value, even DC, without loss of data.<br />
The <strong>AT89C51ID2</strong> has 2 software-selectable modes of reduced activity and 8-bit clock<br />
prescaler for further reduction in power consumption. In the Idle mode the CPU is frozen<br />
while the peripherals and the interrupt system are still operating. In the power-down<br />
mode the RAM is saved and all other functions are inoperative.<br />
The added features of the <strong>AT89C51ID2</strong> make it more powerful for applications that need<br />
pulse width modulation, high speed I/O and counting capabilities such as alarms, motor<br />
control, corded phones, smart card readers.<br />
Table 1. Memory Size and I/O pins<br />
<strong>AT89C51ID2</strong> Flash (bytes) XRAM (bytes)<br />
TOTAL RAM<br />
(bytes) I/O<br />
PLCC44/VQFP44 64K 1792 2048 34<br />
PLCC68/VQFP64 (1)<br />
64K 1792 2048 50<br />
1. For PLCC68 and VQFP64 packages, please contact <strong>Atmel</strong> sales office for availability.<br />
4289A–8051–09/03
Block Diagram<br />
Figure 1. Block Diagram<br />
4289A–8051–09/03<br />
XTALA1<br />
XTALA2<br />
XTALB1(1)<br />
XTALB2<br />
ALE/ PROG<br />
PSEN<br />
EA<br />
RD<br />
WR<br />
(2)<br />
(2)<br />
CPU<br />
RESET<br />
RxD<br />
TxD<br />
EUART<br />
RAM<br />
256x8<br />
Timer 0 INT<br />
Timer 1 Ctrl<br />
T0<br />
T1<br />
C51<br />
CORE<br />
(2) (2) (2) (2)<br />
INT0<br />
INT1<br />
IB-bus<br />
VCC<br />
Vss<br />
(2) (2)<br />
(1) (1) (1) (1)<br />
Flash<br />
64Kx8<br />
XRAM<br />
1792 x 8<br />
PCA Timer2<br />
Watch<br />
Dog<br />
Keyboard<br />
POR<br />
PFD<br />
Port 0 Port 1Port 2 Port 3 Port4 Port 5<br />
P0<br />
P1<br />
P2<br />
(1): Alternate function of Port 1<br />
(2): Alternate function of Port 3<br />
(3): Alternate function of Port I2<br />
P3<br />
ECI<br />
P4<br />
PCA<br />
T2EX<br />
T2<br />
Keyboard<br />
Parallel I/O Ports &<br />
External Bus SPI<br />
TWI<br />
P5<br />
<strong>AT89C51ID2</strong><br />
(1)<br />
(3) (3) (1) (1)(1)(1)<br />
SDA<br />
SCL<br />
MISO<br />
MOSI<br />
SCK<br />
SS<br />
BOOT<br />
2K x8<br />
ROM<br />
E² DATA<br />
2K x 8<br />
Regulator<br />
POR / PFD<br />
3
SFR Mapping The Special Function Registers (SFRs) of the <strong>AT89C51ID2</strong> fall into the following<br />
categories:<br />
4 <strong>AT89C51ID2</strong><br />
C51 core registers: ACC, B, DPH, DPL, PSW, SP<br />
I/O port registers: P0, P1, P2, P3, PI2<br />
Timer registers: T2CON, T2MOD, TCON, TH0, TH1, TH2, TMOD, TL0, TL1, TL2,<br />
RCAP2L, RCAP2H<br />
Serial I/O port registers: SADDR, SADEN, SBUF, SCON<br />
PCA (Programmable Counter Array) registers: CCON, CCAPMx, CL, CH, CCAPxH,<br />
CCAPxL (x: 0 to 4)<br />
Power and clock control registers: PCON<br />
Hardware Watchdog Timer registers: WDTRST, WDTPRG<br />
Interrupt system registers: IE0, IPL0, IPH0, IE1, IPL1, IPH1<br />
Keyboard Interface registers: KBE, KBF, KBLS<br />
SPI registers: SPCON, SPSTR, SPDAT<br />
2-wire Interface registers: SSCON, SSCS, SSDAT, SSADR<br />
BRG (Baud Rate Generator ) registers: BRL, BDRCON<br />
Flash register: FCON<br />
Clock Prescaler register: CKRL<br />
32 kHz Sub Clock Oscillator registers: CKSEL, OSSCON<br />
Others: AUXR, AUXR1, CKCON0, CKCON1<br />
4289A–8051–09/03
Table 2. C51 Core SFRs<br />
4289A–8051–09/03<br />
<strong>AT89C51ID2</strong><br />
Mnemonic Add Name 7 6 5 4 3 2 1 0<br />
ACC E0h Accumulator<br />
B F0h B Register<br />
PSW D0h Program Status Word CY AC F0 RS1 RS0 OV F1 P<br />
SP 81h Stack Pointer<br />
DPL 82h <strong>Data</strong> Pointer Low byte<br />
DPH 83h <strong>Data</strong> Pointer High byte<br />
Table 3. System Management SFRs<br />
Mnemonic Add Name 7 6 5 4 3 2 1 0<br />
PCON 87h Power Control SMOD1 SMOD0 - POF GF1 GF0 PD IDL<br />
AUXR 8Eh Auxiliary Register 0 - - M0 XRS2 XRS1 XRS0<br />
AUXR1 A2h Auxiliary Register 1 - -<br />
ENBOO<br />
T<br />
EXTRA<br />
M<br />
AO<br />
- GF3 0 - DPS<br />
CKRL 97h Clock Reload Register - - - - - - - -<br />
CKSEL 85h Clock Selection Register - - - - - - - CKS<br />
OSCON 86h Oscillator Control Register - - - - - SCLKT0 OscBEn OscAEn<br />
Table 4. Interrupt SFRs<br />
Mnemonic Add Name 7 6 5 4 3 2 1 0<br />
IEN0 A8h Interrupt Enable Control 0 EA EC ET2 ES ET1 EX1 ET0 EX0<br />
IEN1 B1h Interrupt Enable Control 1 - - - - - ESPI EI2C EKBD<br />
IPH0 B7h Interrupt Priority Control High 0 - PPCH PT2H PSH PT1H PX1H PT0H PX0H<br />
IPL0 B8h Interrupt Priority Control Low 0 - PPCL PT2L PSL PT1L PX1L PT0L PX0L<br />
IPH1 B3h Interrupt Priority Control High 1 - - - - - SPIH IE2CH KBDH<br />
IPL1 B2h Interrupt Priority Control Low 1 - - - - - SPIL IE2CL KBDL<br />
5
Table 5. Port SFRs<br />
Mnemonic Add Name 7 6 5 4 3 2 1 0<br />
P0 80h 8-bit Port 0<br />
P1 90h 8-bit Port 1<br />
P2 A0h 8-bit Port 2<br />
P3 B0h 8-bit Port 3<br />
P4 C0h 8-bit Port 4<br />
P5 E8h 8-bit Port 5 - - - -<br />
Table 6. Flash and EEPROM <strong>Data</strong> Memory SFR<br />
Mnemonic Add Name 7 6 5 4 3 2 1 0<br />
FCON D1h Flash Control FPL3 FPL2 FPL1 FPL0 FPS FMOD1 FMOD0 FBUSY<br />
EECON EEPROM data Control<br />
Table 7. Timer SFRs<br />
Mnemonic Add Name 7 6 5 4 3 2 1 0<br />
TCON 88h Timer/Counter 0 and 1 Control TF1 TR1 TF0 TR0 IE1 IT1 IE0 IT0<br />
TMOD 89h Timer/Counter 0 and 1 Modes GATE1 C/T1# M11 M01 GATE0 C/T0# M10 M00<br />
TL0 8Ah Timer/Counter 0 Low Byte<br />
TH0 8Ch Timer/Counter 0 High Byte<br />
TL1 8Bh Timer/Counter 1 Low Byte<br />
TH1 8Dh Timer/Counter 1 High Byte<br />
WDTRST A6h WatchDog Timer Reset<br />
WDTPRG A7h WatchDog Timer Program - - - - - WTO2 WTO1 WTO0<br />
T2CON C8h Timer/Counter 2 control TF2 EXF2 RCLK TCLK EXEN2 TR2 C/T2# CP/RL2#<br />
T2MOD C9h Timer/Counter 2 Mode - - - - - - T2OE DCEN<br />
RCAP2H CBh<br />
RCAP2L CAh<br />
Timer/Counter 2 Reload/Capture<br />
High byte<br />
Timer/Counter 2 Reload/Capture<br />
Low byte<br />
TH2 CDh Timer/Counter 2 High Byte<br />
TL2 CCh Timer/Counter 2 Low Byte<br />
6 <strong>AT89C51ID2</strong><br />
4289A–8051–09/03
Table 8. PCA SFRs<br />
4289A–8051–09/03<br />
<strong>AT89C51ID2</strong><br />
Mnemo<br />
-nic Add Name 7 6 5 4 3 2 1 0<br />
CCON D8h PCA Timer/Counter Control CF CR - CCF4 CCF3 CCF2 CCF1 CCF0<br />
CMOD D9h PCA Timer/Counter Mode CIDL WDTE - - - CPS1 CPS0 ECF<br />
CL E9h PCA Timer/Counter Low byte<br />
CH F9h PCA Timer/Counter High byte<br />
CCAPM0<br />
CCAPM1<br />
CCAPM2<br />
CCAPM3<br />
CCAPM4<br />
DAh<br />
DBh<br />
DCh<br />
DDh<br />
DEh<br />
PCA Timer/Counter Mode 0<br />
PCA Timer/Counter Mode 1<br />
PCA Timer/Counter Mode 2<br />
PCA Timer/Counter Mode 3<br />
PCA Timer/Counter Mode 4<br />
-<br />
ECOM0<br />
ECOM1<br />
ECOM2<br />
ECOM3<br />
ECOM4<br />
CAPP0<br />
CAPP1<br />
CAPP2<br />
CAPP3<br />
CAPP4<br />
CAPN0<br />
CAPN1<br />
CAPN2<br />
CAPN3<br />
CAPN4<br />
CCAP0H FAh PCA Compare Capture Module 0 H CCAP0H7 CCAP0H6 CCAP0H5 CCAP0H4<br />
CCAP1H FBh PCA Compare Capture Module 1 H CCAP1H7 CCAP1H6 CCAP1H5 CCAP1H4<br />
CCAP2H FCh PCA Compare Capture Module 2 H CCAP2H7 CCAP2H6 CCAP2H5 CCAP2H4<br />
CCAP3H FDh PCA Compare Capture Module 3 H CCAP3H7 CCAP3H6 CCAP3H5 CCAP3H4<br />
CCAP4H FEh PCA Compare Capture Module 4 H CCAP4H7 CCAP4H6 CCAP4H5 CCAP4H4<br />
CCAP0L<br />
CCAP1L<br />
CCAP2L<br />
CCAP3L<br />
CCAP4L<br />
EAh<br />
EBh<br />
ECh<br />
EDh<br />
EEh<br />
PCA Compare Capture Module 0 L<br />
PCA Compare Capture Module 1 L<br />
PCA Compare Capture Module 2 L<br />
PCA Compare Capture Module 3 L<br />
PCA Compare Capture Module 4 L<br />
Table 9. Serial I/O Port SFRs<br />
CCAP0L7<br />
CCAP1L7<br />
CCAP2L7<br />
CCAP3L7<br />
CCAP4L7<br />
CCAP0L6<br />
CCAP1L6<br />
CCAP2L6<br />
CCAP3L6<br />
CCAP4L6<br />
CCAP0L5<br />
CCAP1L5<br />
CCAP2L5<br />
CCAP3L5<br />
CCAP4L5<br />
CCAP0L4<br />
CCAP1L4<br />
CCAP2L4<br />
CCAP3L4<br />
CCAP4L4<br />
MAT0<br />
MAT1<br />
MAT2<br />
MAT3<br />
MAT4<br />
CCAP0H3<br />
CCAP1H3<br />
CCAP2H3<br />
CCAP3H3<br />
CCAP4H3<br />
CCAP0L3<br />
CCAP1L3<br />
CCAP2L3<br />
CCAP3L3<br />
CCAP4L3<br />
TOG0<br />
TOG1<br />
TOG2<br />
TOG3<br />
TOG4<br />
CCAP0H2<br />
CCAP1H2<br />
CCAP2H2<br />
CCAP3H2<br />
CCAP4H2<br />
CCAP0L2<br />
CCAP1L2<br />
CCAP2L2<br />
CCAP3L2<br />
CCAP4L2<br />
PWM0<br />
PWM1<br />
PWM2<br />
PWM3<br />
PWM4<br />
CCAP0H1<br />
CCAP1H1<br />
CCAP2H1<br />
CCAP3H1<br />
CCAP4H1<br />
CCAP0L1<br />
CCAP1L1<br />
CCAP2L1<br />
CCAP3L1<br />
CCAP4L1<br />
Mnemonic Add Name 7 6 5 4 3 2 1 0<br />
ECCF0<br />
ECCF1<br />
ECCF2<br />
ECCF3<br />
ECCF4<br />
CCAP0H0<br />
CCAP1H0<br />
CCAP2H0<br />
CCAP3H0<br />
CCAP4H0<br />
CCAP0L0<br />
CCAP1L0<br />
CCAP2L0<br />
CCAP3L0<br />
CCAP4L0<br />
SCON 98h Serial Control FE/SM0 SM1 SM2 REN TB8 RB8 TI RI<br />
SBUF 99h Serial <strong>Data</strong> Buffer<br />
SADEN B9h Slave Address Mask<br />
SADDR A9h Slave Address<br />
BDRCON 9Bh Baud Rate Control BRR TBCK RBCK SPD SRC<br />
BRL 9Ah Baud Rate Reload<br />
Table 10. SPI Controller SFRs<br />
Mnemonic Add Name 7 6 5 4 3 2 1 0<br />
SPCON C3h SPI Control SPR2 SPEN SSDIS MSTR CPOL CPHA SPR1 SPR0<br />
SPSTA C4h SPI Status SPIF WCOL SSERR MODF - - - -<br />
SPDAT C5h SPI <strong>Data</strong> SPD7 SPD6 SPD5 SPD4 SPD3 SPD2 SPD1 SPD0<br />
7
Table 11. Two-Wire Interface Controller SFRs<br />
Mnemonic Add Name 7 6 5 4 3 2 1 0<br />
SSCON 93h Synchronous Serial control SSCR2 SSPE SSSTA SSSTO SSI SSAA SSCR1 SSCR0<br />
SSCS 94h Synchronous Serial Status SSC4 SSC3 SSC2 SSC1 SSC0 0 0 0<br />
SSDAT 95h Synchronous Serial <strong>Data</strong> SSD7 SSD6 SSD5 SSD4 SSD3 SSD2 SSD1 SSD0<br />
SSADR 96h Synchronous Serial Address SSA7 SSA6 SSA5 SSA4 SSA3 SSA2 SSA1 SSGC<br />
Table 12. Keyboard Interface SFRs<br />
Mnemonic Add Name 7 6 5 4 3 2 1 0<br />
KBLS 9Ch Keyboard Level Selector KBLS7 KBLS6 KBLS5 KBLS4 KBLS3 KBLS2 KBLS1 KBLS0<br />
KBE 9Dh Keyboard Input Enable KBE7 KBE6 KBE5 KBE4 KBE3 KBE2 KBE1 KBE0<br />
KBF 9Eh Keyboard Flag Register KBF7 KBF6 KBF5 KBF4 KBF3 KBF2 KBF1 KBF0<br />
8 <strong>AT89C51ID2</strong><br />
4289A–8051–09/03
Table 13. SFR Mapping<br />
F8h<br />
F0h<br />
E8h<br />
E0h<br />
D8h<br />
D0h<br />
C8h<br />
C0h<br />
B8h<br />
B0h<br />
A8h<br />
A0h<br />
98h<br />
90h<br />
88h<br />
80h<br />
4289A–8051–09/03<br />
Table below shows all SFRs with their address and their reset value.<br />
Bit<br />
addressable Non Bit addressable<br />
<strong>AT89C51ID2</strong><br />
0/8 1/9 2/A 3/B 4/C 5/D 6/E 7/F<br />
PI2<br />
XXXX XX11<br />
B<br />
0000 0000<br />
P5 bit<br />
addressable<br />
1111 1111<br />
ACC<br />
0000 0000<br />
CCON<br />
00X0 0000<br />
PSW<br />
0000 0000<br />
T2CON<br />
0000 0000<br />
P4<br />
1111 1111<br />
IPL0<br />
X000 000<br />
P3<br />
1111 1111<br />
IEN0<br />
0000 0000<br />
P2<br />
1111 1111<br />
SCON<br />
0000 0000<br />
P1<br />
1111 1111<br />
TCON<br />
0000 0000<br />
P0<br />
1111 1111<br />
CH<br />
0000 0000<br />
CL<br />
0000 0000<br />
CMOD<br />
00XX X000<br />
FCON (1)<br />
XXXX 0000<br />
T2MOD<br />
XXXX XX00<br />
SADEN<br />
0000 0000<br />
IEN1<br />
XXXX X000<br />
SADDR<br />
0000 0000<br />
SBUF<br />
XXXX XXXX<br />
TMOD<br />
0000 0000<br />
SP<br />
0000 0111<br />
CCAP0H<br />
XXXX XXXX<br />
CCAP0L<br />
XXXX XXXX<br />
CCAPM0<br />
X000 0000<br />
EECON<br />
xxxx xx00<br />
RCAP2L<br />
0000 0000<br />
IPL1<br />
XXXX X000<br />
AUXR1<br />
XXXX X0X0<br />
BRL<br />
0000 0000<br />
TL0<br />
0000 0000<br />
DPL<br />
0000 0000<br />
CCAP1H<br />
XXXX XXXX<br />
CCAP1L<br />
XXXX XXXX<br />
CCAPM1<br />
X000 0000<br />
RCAP2H<br />
0000 0000<br />
SPCON<br />
0001 0100<br />
IPH1<br />
XXXX X111<br />
BDRCON<br />
XXX0 0000<br />
SSCON<br />
0000 0000<br />
TL1<br />
0000 0000<br />
DPH<br />
0000 0000<br />
CCAP2H<br />
XXXX XXXX<br />
CCAP2L<br />
XXXX XXXX<br />
CCAPM2<br />
X000 0000<br />
TL2<br />
0000 0000<br />
SPSTA<br />
0000 0000<br />
KBLS<br />
0000 0000<br />
SSCS<br />
1111 1000<br />
TH0<br />
0000 0000<br />
CCAP3H<br />
XXXX XXXX<br />
CCAP3L<br />
XXXX XXXX<br />
CCAPM3<br />
X000 0000<br />
TH2<br />
0000 0000<br />
SPDAT<br />
XXXX XXXX<br />
KBE<br />
0000 0000<br />
SSDAT<br />
1111 1111<br />
TH1<br />
0000 0000<br />
CKSEL<br />
XXXX XXX0<br />
CCAP4H<br />
XXXX XXXX<br />
CCAP4L<br />
XXXX XXXX<br />
CCAPM4<br />
X000 0000<br />
WDTRST<br />
XXXX XXXX<br />
KBF<br />
0000 0000<br />
SSADR<br />
1111 1110<br />
AUXR<br />
XX00 1000<br />
OSSCON<br />
XXXX X001<br />
P5 byte<br />
Addressable<br />
1111 1111<br />
IPH0<br />
X000 0000<br />
CKCON1<br />
XXXX XXX0<br />
WDTPRG<br />
XXXX X000<br />
CKRL<br />
1111 1111<br />
CKCON0<br />
0000 0000<br />
PCON<br />
00X1 0000<br />
0/8 1/9 2/A 3/B 4/C 5/D 6/E 7/F<br />
Reserved<br />
FFh<br />
F7h<br />
EFh<br />
E7h<br />
DFh<br />
D7h<br />
CFh<br />
C7h<br />
BFh<br />
B7h<br />
AFh<br />
A7h<br />
9Fh<br />
97h<br />
8Fh<br />
87h<br />
9
Pin Configurations<br />
10 <strong>AT89C51ID2</strong><br />
P1.5/CEX2/MISO<br />
P1.6/CEX3/SCK<br />
P1.7/CEx4/MOSI<br />
RST<br />
P3.0/RxD<br />
PI2.1/SDA<br />
P3.1/TxD<br />
P3.2/INT0<br />
P3.3/INT1<br />
P3.4/T0<br />
P3.5/T1<br />
P1.4/CEX1<br />
P1.3/CEX0<br />
P1.2/ECI<br />
P1.1/T2EX/SS<br />
P1.0/T2/XTALB1<br />
XTALB2<br />
VCC<br />
P0.0/AD0<br />
P0.1/AD1<br />
P0.2/AD2<br />
P0.3/AD3<br />
6 5 4 3 2 1 44 43 42 41 40<br />
7<br />
39<br />
8<br />
38<br />
9<br />
37<br />
10<br />
36<br />
11<br />
12 <strong>AT89C51ID2</strong><br />
35<br />
34<br />
13 PLCC44<br />
33<br />
14<br />
32<br />
15<br />
31<br />
16<br />
30<br />
17<br />
29<br />
18 19 20 21 22 23 24 25 26 27 28<br />
P3.6/WR<br />
P3.7/RD<br />
XTAL2<br />
XTAL1<br />
VSS<br />
NIC*<br />
P2.0/A8<br />
P2.1/A9<br />
P2.2/A10<br />
P2.3/A11<br />
P2.4/A12<br />
P1.5/CEX2/MISO<br />
P1.6/CEX3/SCK<br />
P1.7/CEX4/MOSI<br />
RST<br />
P3.0/RxD<br />
PI2.1/SDA<br />
P3.1/TxD<br />
P3.2/INT0<br />
P3.3/INT1<br />
P3.4/T0<br />
P3.5/T1<br />
P0.4/AD4<br />
P0.5/AD5<br />
P0.6/AD6<br />
P0.7/AD7<br />
EA<br />
PI2.0/SCL<br />
ALE/PROG<br />
PSEN<br />
P2.7/A15<br />
P2.6/A14<br />
P2.5/A13<br />
P1.4/CEX1<br />
P1.3/CEX0<br />
P1.2/ECI<br />
P1.1/T2EX/SS<br />
P1.0/T2/XTALB1<br />
XTALB2<br />
VCC<br />
P0.0/AD0<br />
P0.1/AD1<br />
P0.2/AD2<br />
P0.3/AD3<br />
44 43 42 41 40 39 38 37 36 35 34<br />
1<br />
33<br />
2<br />
32<br />
3<br />
31<br />
4<br />
30<br />
5<br />
6<br />
7<br />
<strong>AT89C51ID2</strong><br />
VQFP44 1.4<br />
29<br />
28<br />
27<br />
8<br />
26<br />
9<br />
25<br />
10<br />
24<br />
11<br />
12 13 14 15 16 17 18 19 20 21 22<br />
23<br />
P3.6/WR<br />
P3.7/RD<br />
XTAL2<br />
XTAL1<br />
VSS<br />
NIC*<br />
P2.0/A8<br />
P2.1/A9<br />
P2.2/A10<br />
P2.3/A11<br />
P2.4/A12<br />
P0.4/AD4<br />
P0.5/AD5<br />
P0.6/AD6<br />
P0.7/AD7<br />
EA<br />
PI2.0/SCL<br />
ALE/PROG<br />
PSEN<br />
P2.7/A15<br />
P2.6/A14<br />
P2.5/A13<br />
4289A–8051–09/03
11<br />
<strong>AT89C51ID2</strong><br />
4289A–8051–09/03<br />
50<br />
49<br />
48<br />
47<br />
44<br />
45<br />
46<br />
P4.5<br />
P3.7/RD#<br />
XTAL2<br />
XTAL1<br />
P4.4<br />
P3.6/WR#<br />
P4.3<br />
NIC<br />
NIC<br />
P3.1/TxD<br />
P3.2/INT0#<br />
P3.3/INT1#<br />
P3.4/T0<br />
P3.5/T1<br />
37<br />
38<br />
39<br />
40<br />
41<br />
42<br />
43<br />
<strong>AT89C51ID2</strong><br />
PLCC68<br />
P0.4/AD4<br />
P5.4<br />
P5.3<br />
P0.5/AD5<br />
P0.6/AD6<br />
NIC<br />
P0.7/AD7<br />
EA#<br />
PI2.0/SCL<br />
ALE<br />
P1.6/CEX3/SCK<br />
P1.7/CEX4/MOSI<br />
RST<br />
NIC<br />
NIC<br />
NIC<br />
P3.0/RxD<br />
NIC<br />
SDA<br />
P1.5/CEX2/MISO<br />
60<br />
59<br />
58<br />
57<br />
56<br />
55<br />
54<br />
53<br />
51<br />
52<br />
10<br />
11<br />
12<br />
13<br />
14<br />
15<br />
16<br />
17<br />
19<br />
18<br />
27<br />
28<br />
29<br />
30<br />
31<br />
32<br />
33<br />
34<br />
35<br />
36<br />
9<br />
8<br />
7<br />
6<br />
5<br />
3<br />
2<br />
1<br />
68<br />
P5.0<br />
P2.4/A12<br />
P2.3/A11<br />
P4.7<br />
P2.2/A10<br />
P4.6<br />
P2.0/A8<br />
P2.1/A9<br />
NIC<br />
VSS<br />
P5.5<br />
P0.3/AD3<br />
P0.2/AD2<br />
P5.6<br />
P0.1/AD1<br />
P0.0/AD0<br />
P5.7<br />
VCC<br />
XTALB2<br />
P1.0/T2/XTALB1<br />
4<br />
PSEN#<br />
NIC<br />
P2.7/A15<br />
P2.6/A14<br />
P5.2<br />
P5.1<br />
P2.5/A13<br />
67<br />
65<br />
64<br />
63<br />
62<br />
61<br />
66<br />
20<br />
21<br />
22<br />
23<br />
26<br />
25<br />
24<br />
P4.0<br />
P1.1/T2EX/SS#<br />
P1.2/ECI<br />
P1.3/CEX0<br />
P4.1<br />
P1.4/CEX1<br />
P4.2<br />
NIC: Not Internaly Connected<br />
54<br />
53<br />
52<br />
51<br />
50<br />
49<br />
<strong>AT89C51ID2</strong><br />
VQFP64<br />
P0.4/AD4<br />
P5.4<br />
P5.3<br />
P0.5/AD5<br />
P0.6/AD6<br />
P0.7/AD7<br />
EA#<br />
PI2.0/SCL<br />
ALE<br />
PSEN#<br />
P1.5/CEX2/MISO<br />
P1.6/CEX3/SCK<br />
P1.7/A17/CEX4/MOSI<br />
RST<br />
NIC<br />
NIC<br />
NIC<br />
P3.0/RxD<br />
SDA<br />
P4.2<br />
48<br />
47<br />
46<br />
45<br />
44<br />
43<br />
42<br />
41<br />
39<br />
40<br />
1<br />
2<br />
3<br />
4<br />
5<br />
6<br />
7<br />
8<br />
10<br />
9<br />
17<br />
18<br />
19<br />
20<br />
21<br />
22<br />
23<br />
24<br />
25<br />
26<br />
64<br />
63<br />
62<br />
61<br />
60<br />
59<br />
58<br />
57<br />
56<br />
55<br />
P2.4/A12<br />
P2.3/A11<br />
P4.7<br />
P2.2/A10<br />
P2.1/A9<br />
NIC<br />
P4.6<br />
P2.0/A8<br />
VSS<br />
P4.5<br />
P5.5<br />
P0.3/AD3<br />
P0.2/AD2<br />
P5.6<br />
P0.1/AD1<br />
P0.0/AD0<br />
P5.7<br />
VCC<br />
XTALB2<br />
P1.0/T2/XTALB1<br />
11<br />
12<br />
13<br />
16<br />
15<br />
14<br />
P4.0<br />
P1.1/T2EX/SS#<br />
P1.2/ECI<br />
P1.3/CEX0<br />
P4.1<br />
P1.4/CEX1<br />
38<br />
37<br />
36<br />
33<br />
34<br />
35<br />
P3.7/RD#<br />
XTAL2<br />
XTAL1<br />
P4.4<br />
P3.6/WR#<br />
P4.3<br />
NIC<br />
P3.1/TxD<br />
P3.2/INT0#<br />
P3.3/INT1#<br />
P3.4/T0<br />
P3.5/T1<br />
27<br />
28<br />
29<br />
30<br />
31<br />
32<br />
P2.7/A15<br />
P2.6/A14<br />
P5.2<br />
P5.1<br />
P2.5/A13<br />
P5.0
Table 14. Pin Description<br />
Mnemonic<br />
Pin Number<br />
PLCC44 VQFP44 PLCC68 VQFP64<br />
12 <strong>AT89C51ID2</strong><br />
Type<br />
Name and Function<br />
V SS 22 16 51 40 I Ground: 0V reference<br />
V CC 44 38 17 8 I<br />
P0.0 - P0.7 43 - 36 37 - 30<br />
P1.0 - P1.7 2 - 9 40 - 44<br />
1 - 3<br />
15, 14,<br />
12, 11,<br />
9,6, 5, 3<br />
19, 21,<br />
22, 23,<br />
25, 27,<br />
28, 29<br />
6, 5, 3, 2,<br />
64,<br />
61,60,59<br />
10, 12,<br />
13, 14,<br />
16, 18,<br />
19, 20<br />
2 40 19 10 I/O P1.0: Input/Output<br />
3 41 21 12 I/O P1.1: Input/Output<br />
I/O<br />
I/O<br />
Power Supply: This is the power supply voltage for normal, idle and<br />
power-down operation<br />
Port 0: Port 0 is an open-drain, bidirectional I/O port. Port 0 pins that have<br />
1s written to them float and can be used as high impedance inputs. Port 0<br />
must be polarized to V CC or V SS in order to prevent any parasitic current<br />
consumption. Port 0 is also the multiplexed low-order address and data bus<br />
during access to external program and data memory. In this application, it<br />
uses strong internal pull-up when emitting 1s. Port 0 also inputs the code<br />
bytes during EPROM programming. External pull-ups are required during<br />
program verification during which P0 outputs the code bytes.<br />
Port 1: Port 1 is an 8-bit bidirectional I/O port with internal pull-ups. Port 1<br />
pins that have 1s written to them are pulled high by the internal pull-ups<br />
and can be used as inputs. As inputs, Port 1 pins that are externally pulled<br />
low will source current because of the internal pull-ups. Port 1 also receives<br />
the low-order address byte during memory programming and verification.<br />
Alternate functions for <strong>AT89C51ID2</strong> Port 1 include:<br />
I/O T2 (P1.0): Timer/Counter 2 external count input/Clockout<br />
I XTALB1 (P1.0): Sub Clock input to the inverting oscillator amplifier<br />
I T2EX: Timer/Counter 2 Reload/Capture/Direction Control<br />
I SS: SPI Slave Select<br />
4 42 22 13 I/O P1.2: Input/Output<br />
I ECI: External Clock for the PCA<br />
5 43 23 14 I/O P1.3: Input/Output<br />
6 44 25 16 I/O P1.4: Input/Output<br />
7 1 27 18 I/O P1.5: Input/Output<br />
I/O CEX0: Capture/Compare External I/O for PCA module 0<br />
I/O CEX1: Capture/Compare External I/O for PCA module 1<br />
I/O CEX2: Capture/Compare External I/O for PCA module 2<br />
I/O MISO: SPI Master Input Slave Output line<br />
8 2 28 19 I/O P1.6: Input/Output<br />
When SPI is in master mode, MISO receives data from the slave peripheral.<br />
When SPI is in slave mode, MISO outputs data to the master controller.<br />
I/O CEX3: Capture/Compare External I/O for PCA module 3<br />
I/O SCK: SPI Serial Clock<br />
9 3 29 20 I/O P1.7: Input/Output:<br />
4289A–8051–09/03
Table 14. Pin Description (Continued)<br />
Mnemonic<br />
XTALA1 21 15 49 38 I<br />
4289A–8051–09/03<br />
I/O CEX4: Capture/Compare External I/O for PCA module 4<br />
I/O MOSI: SPI Master Output Slave Input line<br />
<strong>AT89C51ID2</strong><br />
When SPI is in master mode, MOSI outputs data to the slave peripheral.<br />
When SPI is in slave mode, MOSI receives data from the master controller.<br />
Crystal A 1: Input to the inverting oscillator amplifier and input to the internal<br />
clock generator circuits.<br />
XTALA2 20 14 48 37 O Crystal A 2: Output from the inverting oscillator amplifier<br />
XTALB1 2 40 10 19 I<br />
Crystal B 1: (Sub Clock) Input to the inverting oscillator amplifier and input<br />
to the internal clock generator circuits.<br />
XTALB2 1 39 9 18 O Crystal B 2: (Sub Clock) Output from the inverting oscillator amplifier<br />
P2.0 - P2.7 24 - 31 18 - 25<br />
P3.0 - P3.7 11,<br />
13 - 19<br />
P4.0 - P4.7<br />
P5.0 - P5.7<br />
5,<br />
7 - 13<br />
54, 55,<br />
56, 58,<br />
59, 61,<br />
64, 65<br />
34, 39,<br />
40, 41,<br />
42, 43,<br />
45, 47<br />
43, 44,<br />
45, 47,<br />
48, 50,<br />
53, 54<br />
25, 28,<br />
29, 30,<br />
31, 32,<br />
34, 36<br />
11 5 34 25 I RXD (P3.0): Serial input port<br />
13 7 39 28 O TXD (P3.1): Serial output port<br />
14 8 40 29 I INT0 (P3.2): External interrupt 0<br />
15 9 41 30 I INT1 (P3.3): External interrupt 1<br />
16 10 42 31 I T0 (P3.4): Timer 0 external input<br />
17 11 43 32 I T1 (P3.5): Timer 1 external input<br />
I/O<br />
I/O<br />
Port 2: Port 2 is an 8-bit bidirectional I/O port with internal pull-ups. Port 2<br />
pins that have 1s written to them are pulled high by the internal pull-ups<br />
and can be used as inputs. As inputs, Port 2 pins that are externally pulled<br />
low will source current because of the internal pull-ups. Port 2 emits the<br />
high-order address byte during fetches from external program memory and<br />
during accesses to external data memory that use 16-bit addresses (MOVX<br />
@DPTR).In this application, it uses strong internal pull-ups emitting 1s.<br />
During accesses to external data memory that use 8-bit addresses (MOVX<br />
@Ri), port 2 emits the contents of the P2 SFR.<br />
Port 3: Port 3 is an 8-bit bidirectional I/O port with internal pull-ups. Port 3<br />
pins that have 1s written to them are pulled high by the internal pull-ups<br />
and can be used as inputs. As inputs, Port 3 pins that are externally pulled<br />
low will source current because of the internal pull-ups. Port 3 also serves<br />
the special features of the 80C51 family, as listed below.<br />
18 12 45 34 O WR (P3.6): External data memory write strobe<br />
19 13 47 36 O RD (P3.7): External data memory read strobe<br />
- -<br />
- -<br />
Pin Number<br />
PLCC44 VQFP44 PLCC68 VQFP64<br />
20, 24,<br />
26, 44,<br />
46, 50,<br />
53, 57<br />
60, 62,<br />
63, 7, 8,<br />
10, 13,<br />
16<br />
11, 15,<br />
17,33,<br />
35,39,<br />
42, 46<br />
49, 51,<br />
52, 62,<br />
63, 1, 4,<br />
7<br />
Type<br />
I/O<br />
I/O<br />
Name and Function<br />
Port 4: Port 4 is an 8-bit bidirectional I/O port with internal pull-ups. Port 5<br />
pins that have 1s written to them are pulled high by the internal pull-ups<br />
and can be used as inputs. As inputs, Port 4 pins that are externally pulled<br />
low will source current because of the internal pull-ups.<br />
Port 5: Port 5 is an 8-bit bidirectional I/O port with internal pull-ups. Port 3<br />
pins that have 1s written to them are pulled high by the internal pull-ups<br />
and can be used as inputs. As inputs, Port 5 pins that are externally pulled<br />
low will source current because of the internal pull-ups.<br />
13
Table 14. Pin Description (Continued)<br />
Mnemonic<br />
PI2.0 - PI2.1<br />
Pin Number<br />
PLCC44 VQFP44 PLCC68 VQFP64<br />
34, 12 28, 6 1, 36 57, 26<br />
34 28 1 57 I/O SCL (PI2.0): 2-wire Serial Clock<br />
12 6 36 26 I/O<br />
RST 10 4 30 21 I<br />
14 <strong>AT89C51ID2</strong><br />
Type<br />
Name and Function<br />
Port I2: Port I2 is an open drain. It can be used as inputs (must be polarized<br />
to Vcc with external resistor to prevent any parasitic current consumption).<br />
SCL output the serial clock to slave peripherals<br />
SCL input the serial clock from master<br />
SDA (PI2.1): 2-wire Serial <strong>Data</strong><br />
SDA is the bidirectional 2-wire data line<br />
Reset: A high on this pin for two machine cycles while the oscillator is running,<br />
resets the device. An internal diffused resistor to V SS permits a poweron<br />
reset using only an external capacitor to V CC. This pin is an output when<br />
the hardware watchdog forces a system reset.<br />
ALE/PROG 33 27 68 56 O (I) Address Latch Enable/Program Pulse: Output pulse for latching the low<br />
byte of the address during an access to external memory. In normal operation,<br />
ALE is emitted at a constant rate of 1/6 (1/3 in X2 mode) the oscillator<br />
frequency, and can be used for external timing or clocking. Note that one<br />
ALE pulse is skipped during each access to external data memory. This pin<br />
is also the program pulse input (PROG) during Flash programming. ALE<br />
can be disabled by setting SFR’s AUXR.0 bit. With this bit set, ALE will be<br />
inactive during internal fetches.<br />
PSEN 32 26 67 55 O Program Strobe ENable: The read strobe to external program memory.<br />
When executing code from the external program memory, PSEN is activated<br />
twice each machine cycle, except that two PSEN activations are<br />
skipped during each access to external data memory. PSEN is not activated<br />
during fetches from internal program memory.<br />
EA 35 29 2 58 I External Access Enable: EA must be externally held low to enable the<br />
device to fetch code from external program memory locations 0000H to<br />
FFFFH. If security level 1 is programmed, EA will be internally latched on<br />
Reset.<br />
4289A–8051–09/03
Oscillators<br />
4289A–8051–09/03<br />
<strong>AT89C51ID2</strong><br />
Overview Two oscillators are available for CPU:<br />
OSCA used for high frequency: Up to 40 MHz<br />
OSCB used for low frequency: 32.768 kHz<br />
Several operating modes are available and programmable by software:<br />
to switch OSCA to OSCB and vice-versa<br />
to stop OSCA or OSCB to reduce consumption<br />
In order to optimize the power consumption and the execution time needed for a specific<br />
task, an internal prescaler feature has been implemented between the selected oscillator<br />
and the CPU.<br />
Registers Table 15. CKSEL Register<br />
CKSEL - Clock Selection Register (85h)<br />
7 6 5 4 3 2 1 0<br />
- - - - - - - CKS<br />
Bit<br />
Number<br />
Bit<br />
Mnemonic Description<br />
7 - Reserved<br />
6 - Reserved<br />
5 - Reserved<br />
4 - Reserved<br />
3 - Reserved<br />
2 - Reserved<br />
1 - Reserved<br />
0 CKS<br />
CPU Oscillator Select Bit: (CKS)<br />
Cleared, CPU and peripherals connected to OSCB<br />
Set, CPU and peripherals connected to OSCA<br />
Programmed by hardware after a Power-up regarding Hardware Security Byte<br />
(HSB).HSB.OSC (Default setting, OSCA selected)<br />
Reset Value = 0000 000’HSB.OSC’b (see Hardware Security Byte (HSB))<br />
Not bit addressable<br />
15
16 <strong>AT89C51ID2</strong><br />
Table 16. OSCCON Register<br />
OSCCON- Oscillator Control Register (86h)<br />
7 6 5 4 3 2 1 0<br />
- - - - - SCLKT0 OscBEn OscAEn<br />
Bit<br />
Number<br />
Bit<br />
Mnemonic Description<br />
7 - Reserved<br />
6 - Reserved<br />
5 - Reserved<br />
4 - Reserved<br />
3 - Reserved<br />
2 SCLKT0<br />
1 OscBEn<br />
0 OscAEn<br />
Reset Value = XXXX X0’HSB.OSC’’HSB.OSC’b (see Hardware Security Byte (HSB))<br />
Not bit addressable<br />
Table 17. CKRL Register<br />
CKRL - Clock Reload Register<br />
Reset Value = 1111 1111b<br />
Not bit addressable<br />
Sub Clock Timer0<br />
Cleared by software to select T0 pin<br />
Set by software to select T0 Sub Clock<br />
Cleared by hardware after a Power Up<br />
OscB enable bit<br />
Set by software to run OscB<br />
Cleared by software to stop OscB<br />
Programmed by hardware after a Power-up regarding HSB.OSC (Default<br />
cleared, OSCB stopped)<br />
OscA enable bit<br />
Set by software to run OscA<br />
Cleared by software to stop OscA<br />
Programmed by hardware after a Power-up regarding HSB.OSC(Default Set,<br />
OSCA runs)<br />
7 6 5 4 3 2 1 0<br />
- - - - - - - -<br />
Bit<br />
Number Mnemonic Description<br />
7:0 CKRL<br />
Clock Reload Register:<br />
Prescaler value<br />
4289A–8051–09/03
4289A–8051–09/03<br />
Table 18. PCON Register<br />
PCON - Power Control Register (87h)<br />
Reset Value = 00X1 0000b<br />
Not bit addressable<br />
<strong>AT89C51ID2</strong><br />
7 6 5 4 3 2 1 0<br />
SMOD1 SMOD0 - POF GF1 GF0 PD IDL<br />
Bit<br />
Number<br />
Bit<br />
Mnemonic Description<br />
7 SMOD1<br />
6 SMOD0<br />
5 -<br />
4 POF<br />
3 GF1<br />
2 GF0<br />
1 PD<br />
0 IDL<br />
Serial port Mode bit 1<br />
Set to select double baud rate in mode 1, 2 or 3.<br />
Serial port Mode bit 0<br />
Cleared to select SM0 bit in SCON register.<br />
Set to select FE bit in SCON register.<br />
Reserved<br />
The value read from this bit is indeterminate. Do not set this bit.<br />
Power-Off Flag<br />
Cleared to recognize next reset type.<br />
Set by hardware when VCC rises from 0 to its nominal voltage. Can also be set<br />
by software.<br />
General purpose Flag<br />
Cleared by software for general purpose usage.<br />
Set by software for general purpose usage.<br />
General purpose Flag<br />
Cleared by software for general purpose usage.<br />
Set by software for general purpose usage.<br />
Power-Down mode bit<br />
Cleared by hardware when reset occurs.<br />
Set to enter power-down mode.<br />
Idle mode bit<br />
Cleared by hardware when interrupt or reset occurs.<br />
Set to enter idle mode.<br />
17
Functional Block<br />
Diagram<br />
Figure 2. Functional Oscillator Block Diagram<br />
XtalA1<br />
XtalA2<br />
PwdOscA<br />
Operating Modes<br />
Reset A hardware RESET puts the Clock generator in the following state:<br />
Functional Modes<br />
OscA<br />
OscAEn<br />
OSCCON<br />
XtalB1<br />
XtalB2<br />
FOSCA<br />
PwdOscB<br />
18 <strong>AT89C51ID2</strong><br />
Reset<br />
:2<br />
OscB<br />
OscBEn<br />
OSCCON<br />
CKRL<br />
1<br />
0<br />
X2<br />
CKCON0<br />
The selected oscillator depends on OSC bit in Hardware Security Byte (HSB).<br />
HSB.OSC = 1 (Oscillator A selected)<br />
OscAEn = 1 & OscBEn = 0: OscA is running, OscB is stopped.<br />
CKS = 1: OscA is selected for CPU.<br />
HSB.OSC = 0 (Oscillator B selected)<br />
OscAEn = 0 & OscBEn = 1: OscB is running, OscA is stopped.<br />
CKS = 0: OscB is selected for CPU.<br />
CLK Peripheral Clock<br />
PERIPH<br />
Normal Modes CPU and Peripherals clock depend on the software selection using CKCON0,<br />
CKCON1 and CKRL registers<br />
CKS bit in CKSEL register selects either OscA or OscB<br />
CKRL register determines the frequency of the OscA clock.<br />
Reload<br />
8-bit<br />
Prescaler-Divider<br />
0<br />
1<br />
CKRL=0xFF?<br />
FOSCB<br />
1<br />
0<br />
CKS<br />
CKSEL<br />
Idle<br />
CLK<br />
CPU<br />
:128 Sub<br />
Clock<br />
CPU clock<br />
4289A–8051–09/03
4289A–8051–09/03<br />
<strong>AT89C51ID2</strong><br />
It is always possible to switch dynamically by software from OscA to OscB, and vice<br />
versa by changing CKS bit.<br />
Idle Modes IDLE modes are achieved by using any instruction that writes into PCON.0 bit (IDL)<br />
IDLE modes A and B depend on previous software sequence, prior to writing into<br />
PCON.0 bit:<br />
IDLE MODE A: OscA is running (OscAEn = 1) and selected (CKS = 1)<br />
IDLE MODE B: OscB is running (OscBEn = 1) and selected (CKS = 0)<br />
The unused oscillator OscA or OscB can be stopped by software by clearing<br />
OscAEn or OscBEn respectively.<br />
IDLE mode can be canceled either by Reset, or by activation of any enabled<br />
interruption<br />
In both cases, PCON.0 bit (IDL) is cleared by hardware<br />
Exit from IDLE modes will leave Oscillators control bits (OscEnA, OscEnB, CKS)<br />
unchanged.<br />
Power Down Modes POWER DOWN modes are achieved by using any instruction that writes into<br />
PCON.1 bit (PD)<br />
POWER DOWN modes A and B depend on previous software sequence, prior to<br />
writing into PCON.1 bit:<br />
Both OscA and OscB will be stopped.<br />
POWER DOWN mode can be cancelled either by a hardware Reset, an external<br />
interruption, or the keyboard interrupt.<br />
By Reset signal: The CPU will restart according to OSC bit in Hardware Security Bit<br />
(HSB) register.<br />
By INT0 or INT1 interruption, if enabled: (standard behavioral), request on Pads<br />
must be driven low enough to ensure correct restart of the oscillator which was<br />
selected when entering in Power down.<br />
By keyboard Interrupt if enabled: a hardware clear of the PCON.1 flag ensure the<br />
restart of the oscillator which was selected when entering in Power down.<br />
Table 19. Overview<br />
PCON.1 PCON.0 OscBEn OscAEn CKS Selected Mode Comment<br />
0 0 0 1 1<br />
0 0 1 1 1<br />
0 0 1 0 0<br />
0 0 1 1 0<br />
NORMAL MODE<br />
A, OscB stopped<br />
NORMAL MODE<br />
A, OscB running<br />
NORMAL MODE<br />
B, OscA stopped<br />
NORMAL MODE<br />
B, OscA running<br />
X X 0 0 X INVALID<br />
X X X 0 1 INVALID<br />
X X 0 X 0 INVALID<br />
Default mode after power-up or<br />
Warm Reset<br />
Default mode after power-up or<br />
Warm Reset + OscB running<br />
OscB running and selected<br />
OscB running and selected +<br />
OscA running<br />
OscA & OscB cannot be stopped<br />
at the same time<br />
OscA must not be stopped, as<br />
used for CPU and peripherals<br />
OscB must not be stopped as<br />
used for CPU and peripherals<br />
19
Design Considerations<br />
Oscillators Control PwdOscA and PwdOscB signals are generated in the Clock generator and used to<br />
control the hard blocks of oscillators A and B.<br />
PwdOscA =’1’ stops OscA<br />
PwdOscB =’1’ stops OscB<br />
The following tables summarize the Operating modes:<br />
Prescaler Divider A hardware RESET puts the prescaler divider in the following state:<br />
– CKRL = FFh: FCLK CPU = FCLK PERIPH = FOSCA /2 (Standard C51 feature)<br />
CKS signal selects OSCA or OSCB: F CLK OUT = FOSCA or FOSCB Any value between FFh down to 00h can be written by software into CKRL register<br />
in order to divide frequency of the selected oscillator:<br />
– CKRL = 00h: minimum frequency<br />
FCLK CPU = FCLK PERIPH = FOSCA /1020 (Standard Mode)<br />
FCLK CPU = FCLK PERIPH = FOSCA /510 (X2 Mode)<br />
– CKRL = FFh: maximum frequency<br />
FCLK CPU = FCLK PERIPH = FOSCA /2 (Standard Mode)<br />
FCLK CPU = FCLK PERIPH = FOSCA (X2 Mode)<br />
20 <strong>AT89C51ID2</strong><br />
Table 19. Overview (Continued)<br />
PCON.1 PCON.0 OscBEn OscAEn CKS Selected Mode Comment<br />
0 1 X 1 1 IDLE MODE A<br />
0 1 1 X 0 IDLE MODE B<br />
1 X X 1 X<br />
POWER DOWN<br />
MODE<br />
The CPU is off, OscA supplies the<br />
peripherals, OscB can be disabled<br />
(OscBEn = 0)<br />
The CPU is off, OscB supplies the<br />
peripherals, OscA can be disabled<br />
(OscAEn = 0)<br />
The CPU and peripherals are off,<br />
OscA and OscB are stopped<br />
PCON.1 OscAEn PwdOscA Comments<br />
0 1 0 OscA running<br />
1 X 1<br />
0 0 1<br />
OscA stopped by<br />
Power-down mode<br />
OscA stopped by<br />
clearing OscAEn<br />
PCON.1 OscBEn PwdOscB Comments<br />
0 1 0 OscB running<br />
1 X 1<br />
0 0 1<br />
OscB stopped by<br />
Power-down mode<br />
OscB stopped by<br />
clearing OscBEn<br />
4289A–8051–09/03
4289A–8051–09/03<br />
– FCLK CPU and FCLK PERIPH , for CKRL0xFF<br />
In X2 Mode:<br />
In X1 Mode:<br />
F CPU<br />
F CPU<br />
Timer 0: Clock Inputs Figure 3. Timer 0: Clock Inputs<br />
FCLK PERIPH :6<br />
T0 pin<br />
Sub Clock<br />
Gate<br />
INT0<br />
TR0<br />
0<br />
1<br />
SCLKT0<br />
OSCCON<br />
= FCLKPERIPH<br />
= FCLKPERIPH<br />
0<br />
1<br />
C/T<br />
TMOD<br />
F OSCA<br />
= ----------------------------------------------<br />
2 × ( 255 – CKRL)<br />
F OSCA<br />
= ----------------------------------------------<br />
4 × ( 255 – CKRL)<br />
Control<br />
Timer 0<br />
<strong>AT89C51ID2</strong><br />
Note: The SCLKT0 bit in OSCCON register allows to select Timer 0 Subsidiary clock.<br />
SCLKT0 = 0: Timer 0 uses the standard T0 pin as clock input (Standard mode)<br />
SCLKT0 = 1: Timer 0 uses the special Sub Clock as clock input, this feature can be use<br />
as periodic interrupt for time clock.<br />
21
Enhanced Features In comparison to the original 80C52, the <strong>AT89C51ID2</strong> implements some new features,<br />
which are:<br />
22 <strong>AT89C51ID2</strong><br />
X2 option<br />
Dual <strong>Data</strong> Pointer<br />
Extended RAM<br />
Programmable Counter Array (PCA)<br />
Hardware Watchdog<br />
SPI interface<br />
4-level interrupt priority system<br />
power-off flag<br />
ONCE mode<br />
ALE disabling<br />
Enhanced features on the UART and the timer 2<br />
X2 Feature The <strong>AT89C51ID2</strong> core needs only 6 clock periods per machine cycle. This feature<br />
called ‘X2’ provides the following advantages:<br />
Divide frequency crystals by 2 (cheaper crystals) while keeping same CPU power.<br />
Save power consumption while keeping same CPU power (oscillator power saving).<br />
Save power consumption by dividing dynamically the operating frequency by 2 in<br />
operating and idle modes.<br />
Increase CPU power by 2 while keeping same crystal frequency.<br />
In order to keep the original C51 compatibility, a divider by 2 is inserted between the<br />
XTAL1 signal and the main clock input of the core (phase generator). This divider may<br />
be disabled by software.<br />
Description The clock for the whole circuit and peripherals is first divided by two before being used<br />
by the CPU core and the peripherals.<br />
This allows any cyclic ratio to be accepted on XTAL1 input. In X2 mode, as this divider is<br />
bypassed, the signals on XTAL1 must have a cyclic ratio between 40 to 60%.<br />
Figure 4 shows the clock generation block diagram. X2 bit is validated on the rising edge<br />
of the XTAL1÷2 to avoid glitches when switching from X2 to STD mode. Figure 5 shows<br />
the switching mode waveforms.<br />
Figure 4. Clock Generation Diagram<br />
XTAL1 2<br />
FXTAL<br />
XTAL1:2<br />
0<br />
1<br />
X2<br />
CKCON0<br />
F OSC<br />
CKRL<br />
8 bit Prescaler<br />
F CLK CPU<br />
F CLK PERIPH<br />
4289A–8051–09/03
Figure 5. Mode Switching Waveforms<br />
4289A–8051–09/03<br />
XTAL1<br />
XTAL1:2<br />
X2 bit<br />
CPU clock<br />
F OSC<br />
STD Mode X2 Mode<br />
STD Mode<br />
<strong>AT89C51ID2</strong><br />
The X2 bit in the CKCON0 register (see Table 20) allows a switch from 12 clock periods<br />
per instruction to 6 clock periods and vice versa. At reset, the speed is set according to<br />
X2 bit of Hardware Security Byte (HSB). By default, Standard mode is active. Setting the<br />
X2 bit activates the X2 feature (X2 mode).<br />
The T0X2, T1X2, T2X2, UartX2, PcaX2, and WdX2 bits in the CKCON0 register (See<br />
Table 20.) and SPIX2 bit in the CKCON1 register (see Table 21) allows a switch from<br />
standard peripheral speed (12 clock periods per peripheral clock cycle) to fast peripheral<br />
speed (6 clock periods per peripheral clock cycle). These bits are active only in X2<br />
mode.<br />
23
24 <strong>AT89C51ID2</strong><br />
Table 20. CKCON0 Register<br />
CKCON0 - Clock Control Register (8Fh)<br />
7 6 5 4 3 2 1 0<br />
TWIX2 WDX2 PCAX2 SIX2 T2X2 T1X2 T0X2 X2<br />
Bit<br />
Number<br />
Bit<br />
Mnemonic Description<br />
7 TWIX2<br />
6 WDX2<br />
5 PCAX2<br />
4 SIX2<br />
3 T2X2<br />
2 T1X2<br />
1 T0X2<br />
0 X2<br />
2-wire clock (This control bit is validated when the CPU clock X2 is set; when X2<br />
is low, this bit has no effect)<br />
Cleared to select 6 clock periods per peripheral clock cycle.<br />
Set to select 12 clock periods per peripheral clock cycle.<br />
Watchdog Clock<br />
(This control bit is validated when the CPU clock X2 is set; when X2 is low, this bit<br />
has no effect).<br />
Cleared to select 6 clock periods per peripheral clock cycle.<br />
Set to select 12 clock periods per peripheral clock cycle.<br />
Programmable Counter Array Clock<br />
(This control bit is validated when the CPU clock X2 is set; when X2 is low, this bit<br />
has no effect).<br />
Cleared to select 6 clock periods per peripheral clock cycle. Set to select 12 clock<br />
periods per peripheral clock cycle.<br />
Enhanced UART Clock (Mode 0 and 2)<br />
(This control bit is validated when the CPU clock X2 is set; when X2 is low, this bit<br />
has no effect).<br />
Cleared to select 6 clock periods per peripheral clock cycle. Set to select 12 clock<br />
periods per peripheral clock cycle.<br />
Timer2 Clock<br />
(This control bit is validated when the CPU clock X2 is set; when X2 is low, this bit<br />
has no effect).<br />
Cleared to select 6 clock periods per peripheral clock cycle.<br />
Set to select 12 clock periods per peripheral clock cycle.<br />
Timer1 Clock<br />
(This control bit is validated when the CPU clock X2 is set; when X2 is low, this bit<br />
has no effect).<br />
Cleared to select 6 clock periods per peripheral clock cycle. Set to select 12 clock<br />
periods per peripheral clock cycle.<br />
Timer0 Clock<br />
(This control bit is validated when the CPU clock X2 is set; when X2 is low, this bit<br />
has no effect).<br />
Cleared to select 6 clock periods per peripheral clock cycle. Set to select 12 clock<br />
periods per peripheral clock cycle.<br />
CPU Clock<br />
Cleared to select 12 clock periods per machine cycle (STD mode) for CPU and<br />
all the peripherals. Set to select 6clock periods per machine cycle (X2 mode) and<br />
to enable the individual peripherals’X2’ bits. Programmed by hardware after<br />
Power-up regarding Hardware Security Byte (HSB), Default setting, X2 is<br />
cleared.<br />
Reset Value = 0000 000’HSB. X2’b (See “Hardware Security Byte”)<br />
Not bit addressable<br />
4289A–8051–09/03
4289A–8051–09/03<br />
Table 21. CKCON1 Register<br />
CKCON1 - Clock Control Register (AFh)<br />
Reset Value = XXXX XXX0b<br />
Not bit addressable<br />
<strong>AT89C51ID2</strong><br />
7 6 5 4 3 2 1 0<br />
- - - - - - - SPIX2<br />
Bit<br />
Number<br />
Bit<br />
Mnemonic Description<br />
7 - Reserved<br />
6 - Reserved<br />
5 - Reserved<br />
4 - Reserved<br />
3 - Reserved<br />
2 - Reserved<br />
1 - Reserved<br />
0 SPIX2<br />
SPI (This control bit is validated when the CPU clock X2 is set; when X2 is low,<br />
this bit has no effect).<br />
Clear to select 6 clock periods per peripheral clock cycle.<br />
Set to select 12 clock periods per peripheral clock cycle.<br />
25
Dual <strong>Data</strong> Pointer<br />
Register DPTR<br />
Figure 6. Use of Dual Pointer<br />
26 <strong>AT89C51ID2</strong><br />
7<br />
AUXR1(A2H)<br />
The additional data pointer can be used to speed up code execution and reduce code<br />
size.<br />
The dual DPTR structure is a way by which the chip will specify the address of an external<br />
data memory location. There are two 16-bit DPTR registers that address the external<br />
memory, and a single bit called DPS = AUXR1.0 (see Table 22) that allows the program<br />
code to switch between them (Refer to Figure 6).<br />
0<br />
DPS<br />
DPTR1<br />
DPTR0<br />
DPH(83H) DPL(82H)<br />
External <strong>Data</strong> Memory<br />
4289A–8051–09/03
4289A–8051–09/03<br />
Table 22. AUXR1 register<br />
AUXR1- Auxiliary Register 1(0A2h)<br />
<strong>AT89C51ID2</strong><br />
7 6 5 4 3 2 1 0<br />
Bit<br />
Number<br />
- - ENBOOT - GF3 0 - DPS<br />
7 -<br />
6 -<br />
Reset Value: XXXX XX0X0b<br />
Not bit addressable<br />
Note: *Bit 2 stuck at 0; this allows to use INC AUXR1 to toggle DPS without changing GF3.<br />
ASSEMBLY LANGUAGE<br />
Bit<br />
Mnemonic Description<br />
5 ENBOOT<br />
4 -<br />
Reserved<br />
The value read from this bit is indeterminate. Do not set this bit.<br />
Reserved<br />
The value read from this bit is indeterminate. Do not set this bit.<br />
Enable Boot Flash<br />
Cleared to disable boot ROM.<br />
Set to map the boot ROM between F800h - 0FFFFh.<br />
Reserved<br />
The value read from this bit is indeterminate. Do not set this bit.<br />
3 GF3 This bit is a general purpose user flag. *<br />
2 0 Always cleared.<br />
1 -<br />
0 DPS<br />
Reserved<br />
The value read from this bit is indeterminate. Do not set this bit.<br />
<strong>Data</strong> Pointer Selection<br />
Cleared to select DPTR0.<br />
Set to select DPTR1.<br />
; Block move using dual data pointers<br />
; Modifies DPTR0, DPTR1, A and PSW<br />
; note: DPS exits opposite of entry state<br />
; unless an extra INC AUXR1 is added<br />
;<br />
00A2 AUXR1 EQU 0A2H<br />
;<br />
0000 909000MOV DPTR,#SOURCE ; address of SOURCE<br />
0003 05A2 INC AUXR1 ; switch data pointers<br />
0005 90A000 MOV DPTR,#DEST ; address of DEST<br />
0008 LOOP:<br />
0008 05A2 INC AUXR1 ; switch data pointers<br />
000A E0 MOVX A,@DPTR ; get a byte from SOURCE<br />
000B A3 INC DPTR ; increment SOURCE address<br />
000C 05A2 INC AUXR1 ; switch data pointers<br />
000E F0 MOVX @DPTR,A ; write the byte to DEST<br />
000F A3 INC DPTR ; increment DEST address<br />
0010 70F6JNZ LOOP ; check for 0 terminator<br />
0012 05A2 INC AUXR1 ; (optional) restore DPS<br />
27
28 <strong>AT89C51ID2</strong><br />
INC is a short (2 bytes) and fast (12 clocks) way to manipulate the DPS bit in the AUXR1<br />
SFR. However, note that the INC instruction does not directly force the DPS bit to a particular<br />
state, but simply toggles it. In simple routines, such as the block move example,<br />
only the fact that DPS is toggled in the proper sequence matters, not its actual value. In<br />
other words, the block move routine works the same whether DPS is ’0’ or ’1’ on entry.<br />
Observe that without the last instruction (INC AUXR1), the routine will exit with DPS in<br />
the opposite state.<br />
4289A–8051–09/03
Expanded RAM<br />
(XRAM)<br />
Figure 7. Internal and External <strong>Data</strong> Memory Address<br />
4289A–8051–09/03<br />
0FFh to 6FFh 0FFh<br />
00<br />
<strong>AT89C51ID2</strong><br />
The <strong>AT89C51ID2</strong> provides additional Bytes of random access memory (RAM) space for<br />
increased data parameter handling and high level language usage.<br />
<strong>AT89C51ID2</strong> devices have expanded RAM in external data space configurable up to<br />
1792bytes (see Table 23.).<br />
The <strong>AT89C51ID2</strong> has internal data memory that is mapped into four separate<br />
segments.<br />
The four segments are:<br />
1. The Lower 128 bytes of RAM (addresses 00h to 7Fh) are directly and indirectly<br />
addressable.<br />
2. The Upper 128 bytes of RAM (addresses 80h to FFh) are indirectly addressable<br />
only.<br />
3. The Special Function Registers, SFRs, (addresses 80h to FFh) are directly<br />
addressable only.<br />
4. The expanded RAM bytes are indirectly accessed by MOVX instructions, and<br />
with the EXTRAM bit cleared in the AUXR register (see Table 23).<br />
The lower 128 bytes can be accessed by either direct or indirect addressing. The Upper<br />
128 bytes can be accessed by indirect addressing only. The Upper 128 bytes occupy<br />
the same address space as the SFR. That means they have the same address, but are<br />
physically separate from SFR space.<br />
XRAM<br />
Upper<br />
128 bytes<br />
Internal<br />
Ram<br />
indirect accesses<br />
80h 80h<br />
7Fh<br />
00<br />
Lower<br />
128 bytes<br />
Internal<br />
Ram<br />
direct or indirect<br />
accesses<br />
0FFh<br />
Special<br />
Function<br />
Register<br />
direct accesses<br />
0FFFFh<br />
00FFh up to 06FFh<br />
0000<br />
External<br />
<strong>Data</strong><br />
Memory<br />
When an instruction accesses an internal location above address 7Fh, the CPU knows<br />
whether the access is to the upper 128 bytes of data RAM or to SFR space by the<br />
addressing mode used in the instruction.<br />
Instructions that use direct addressing access SFR space. For example: MOV<br />
0A0H, # data, accesses the SFR at location 0A0h (which is P2).<br />
Instructions that use indirect addressing access the Upper 128 bytes of data RAM.<br />
For example: MOV @R0, # data where R0 contains 0A0h, accesses the data byte<br />
at address 0A0h, rather than P2 (whose address is 0A0h).<br />
The XRAM bytes can be accessed by indirect addressing, with EXTRAM bit cleared<br />
and MOVX instructions. This part of memory which is physically located on-chip,<br />
logically occupies the first bytes of external data memory. The bits XRS0 and XRS1<br />
are used to hide a part of the available XRAM as explained in Table 23. This can be<br />
29
30 <strong>AT89C51ID2</strong><br />
useful if external peripherals are mapped at addresses already used by the internal<br />
XRAM.<br />
With EXTRAM = 0, the XRAM is indirectly addressed, using the MOVX instruction in<br />
combination with any of the registers R0, R1 of the selected bank or DPTR. An<br />
access to XRAM will not affect ports P0, P2, P3.6 (WR) and P3.7 (RD). For<br />
example, with EXTRAM = 0, MOVX @R0, # data where R0 contains 0A0H,<br />
accesses the XRAM at address 0A0H rather than external memory. An access to<br />
external data memory locations higher than the accessible size of the XRAM will be<br />
performed with the MOVX DPTR instructions in the same way as in the standard<br />
80C51, with P0 and P2 as data/address busses, and P3.6 and P3.7 as write and<br />
read timing signals. Accesses to XRAM above 0FFH can only be done by the use of<br />
DPTR.<br />
With EXTRAM = 1 , MOVX @Ri and MOVX @DPTR will be similar to the standard<br />
80C51.MOVX @ Ri will provide an eight-bit address multiplexed with data on Port0<br />
and any output port pins can be used to output higher order address bits. This is to<br />
provide the external paging capability. MOVX @DPTR will generate a sixteen-bit<br />
address. Port2 outputs the high-order eight address bits (the contents of DPH) while<br />
Port0 multiplexes the low-order eight address bits (DPL) with data. MOVX @ Ri and<br />
MOVX @DPTR will generate either read or write signals on P3.6 (WR) and P3.7<br />
(RD).<br />
The stack pointer (SP) may be located anywhere in the 256 bytes RAM (lower and<br />
upper RAM) internal data memory. The stack may not be located in the XRAM.<br />
The M0 bit allows to stretch the XRAM timings; if M0 is set, the read and write pulses<br />
are extended from 6 to 30 clock periods. This is useful to access external slow<br />
peripherals.<br />
4289A–8051–09/03
Registers Table 23. AUXR Register<br />
AUXR - Auxiliary Register (8Eh)<br />
4289A–8051–09/03<br />
Reset Value = XX00 10’HSB. XRAM’0b<br />
Not bit addressable<br />
<strong>AT89C51ID2</strong><br />
7 6 5 4 3 2 1 0<br />
- - M0 XRS2 XRS1 XRS0 EXTRAM AO<br />
Bit<br />
Number<br />
7 -<br />
6 -<br />
Bit<br />
Mnemonic Description<br />
5 M0<br />
Reserved<br />
The value read from this bit is indeterminate. Do not set this bit.<br />
Reserved<br />
The value read from this bit is indeterminate. Do not set this bit.<br />
Pulse length<br />
Cleared to stretch MOVX control: the RD/ and the WR/ pulse length is 6 clock<br />
periods (default).<br />
Set to stretch MOVX control: the RD/ and the WR/ pulse length is 30 clock<br />
periods.<br />
4 XRS2 XRAM Size<br />
3 XRS1<br />
XRS2 XRS1XRS0XRAM size<br />
0 0 0 256 bytes<br />
0 0 1 512 bytes<br />
2 XRS0<br />
0<br />
0<br />
1<br />
1<br />
0 768 bytes(default)<br />
1 1024 bytes<br />
1 0 0 1792 bytes<br />
1 EXTRAM<br />
0 AO<br />
EXTRAM bit<br />
Cleared to access internal XRAM using movx @ Ri/ @ DPTR.<br />
Set to access external memory.<br />
Programmed by hardware after Power-up regarding Hardware Security Byte<br />
(HSB), default setting, XRAM selected.<br />
ALE Output bit<br />
Cleared, ALE is emitted at a constant rate of 1/6 the oscillator frequency (or 1/3 if<br />
X2 mode is used). (default) Set, ALE is active only during a MOVX or MOVC<br />
instruction is used.<br />
31
Reset<br />
Introduction The reset sources are : Power Management, Hardware Watchdog, PCA Watchdog and<br />
Reset input.<br />
32 <strong>AT89C51ID2</strong><br />
Figure 8. Reset schematic<br />
RST<br />
Power<br />
Monitor<br />
Hardware<br />
Watchdog<br />
PCA<br />
Watchdog<br />
Reset Input The Reset input can be used to force a reset pulse longer than the internal reset controlled<br />
by the Power Monitor. RST input has a pull-down resistor allowing power-on<br />
reset by simply connecting an external capacitor to V CC as shown in Figure 9. Resistor<br />
value and input characteristics are discussed in the Section “DC Characteristics” of the<br />
<strong>AT89C51ID2</strong> datasheet.<br />
Figure 9. Reset Circuitry and Power-On Reset<br />
RST<br />
R RST<br />
VSS<br />
a. RST input circuitry<br />
To internal reset<br />
Internal Reset<br />
VDD<br />
+<br />
RST<br />
b. Power-on Reset<br />
4289A–8051–09/03
Reset Output<br />
4289A–8051–09/03<br />
<strong>AT89C51ID2</strong><br />
As detailed in Section “Hardware Watchdog Timer”, page 108, the WDT generates a 96clock<br />
period pulse on the RST pin. In order to properly propagate this pulse to the rest of<br />
the application in case of external capacitor or power-supply supervisor circuit, a 1 kΩ<br />
resistor must be added as shown Figure 10.<br />
Figure 10. Recommended Reset Output Schematic<br />
VDD<br />
+<br />
VDD<br />
VSS<br />
RST<br />
1K<br />
RST<br />
<strong>AT89C51ID2</strong><br />
To other<br />
on-board<br />
circuitry<br />
33
Power Monitor The POR/PFD function monitors the internal power-supply of the CPU core memories<br />
and the peripherals, and if needed, suspends their activity when the internal power supply<br />
falls below a safety threshold. This is achieved by applying an internal reset to them.<br />
34 <strong>AT89C51ID2</strong><br />
By generating the Reset the Power Monitor insures a correct start up when<br />
<strong>AT89C51ID2</strong> is powered up.<br />
Description In order to startup and maintain the microcontroller in correct operating mode, V CC has<br />
to be stabilized in the V CC operating range and the oscillator has to be stabilized with a<br />
nominal amplitude compatible with logic level VIH/VIL.<br />
These parameters are controlled during the three phases: power-up, normal operation<br />
and power going down. See Figure 11.<br />
Figure 11. Power Monitor Block Diagram<br />
VCC<br />
Power On Reset<br />
Power Fail Detect<br />
Voltage Regulator<br />
XTAL1 (1)<br />
RST pin<br />
PCA<br />
Watchdog<br />
Hardware<br />
Watchdog<br />
Regulated<br />
Supply<br />
Internal Reset<br />
CPU core<br />
Memories<br />
Peripherals<br />
Note: 1. Once XTAL1 High and low levels reach above and below VIH/VIL. a 1024 clock<br />
period delay will extend the reset coming from the Power Fail Detect. If the power<br />
falls below the Power Fail Detect threshold level, the Reset will be applied<br />
immediately.<br />
The Voltage regulator generates a regulated internal supply for the CPU core the memories<br />
and the peripherals. Spikes on the external Vcc are smoothed by the voltage<br />
regulator.<br />
4289A–8051–09/03
Figure 12. Power Fail Detect<br />
Vcc<br />
4289A–8051–09/03<br />
Reset<br />
Vcc<br />
<strong>AT89C51ID2</strong><br />
The Power fail detect monitor the supply generated by the voltage regulator and generate<br />
a reset if this supply falls below a safety threshold as illustrated in the Figure 12<br />
below.<br />
When the power is applied, the Power Monitor immediately asserts a reset. Once the<br />
internal supply after the voltage regulator reach a safety level, the power monitor then<br />
looks at the XTAL clock input. The internal reset will remain asserted until the Xtal1 levels<br />
are above and below VIH and VIL. Further more. An internal counter will count 1024<br />
clock periods before the reset is de-asserted.<br />
If the internal power supply falls below a safety level, a reset is immediately asserted.<br />
t<br />
35
Timer 2 The Timer 2 in the <strong>AT89C51ID2</strong> is the standard C52 Timer 2.<br />
It is a 16-bit timer/counter: the count is maintained by two eight-bit timer registers, TH2<br />
and TL2 are cascaded. It is controlled by T2CON (Table 24) and T2MOD (Table 25)<br />
registers. Timer 2 operation is similar to Timer 0 and Timer 1.C/T2 selects F OSC /12<br />
(timer operation) or external pin T2 (counter operation) as the timer clock input. Setting<br />
TR2 allows TL2 to increment by the selected input.<br />
36 <strong>AT89C51ID2</strong><br />
Timer 2 has 3 operating modes: capture, autoreload and Baud Rate Generator. These<br />
modes are selected by the combination of RCLK, TCLK and CP/RL2 (T2CON).<br />
Refer to the <strong>Atmel</strong> 8-bit Microcontroller Hardware description for the description of Capture<br />
and Baud Rate Generator Modes.<br />
Timer 2 includes the following enhancements:<br />
Auto-reload mode with up or down counter<br />
Programmable clock-output<br />
Auto-Reload Mode The auto-reload mode configures Timer 2 as a 16-bit timer or event counter with automatic<br />
reload. If DCEN bit in T2MOD is cleared, Timer 2 behaves as in 80C52 (refer to<br />
the <strong>Atmel</strong> C51 Microcontroller Hardware description). If DCEN bit is set, Timer 2 acts as<br />
an Up/down timer/counter as shown in Figure 13. In this mode the T2EX pin controls the<br />
direction of count.<br />
When T2EX is high, Timer 2 counts up. Timer overflow occurs at FFFFh which sets the<br />
TF2 flag and generates an interrupt request. The overflow also causes the 16-bit value<br />
in RCAP2H and RCAP2L registers to be loaded into the timer registers TH2 and TL2.<br />
When T2EX is low, Timer 2 counts down. Timer underflow occurs when the count in the<br />
timer registers TH2 and TL2 equals the value stored in RCAP2H and RCAP2L registers.<br />
The underflow sets TF2 flag and reloads FFFFh into the timer registers.<br />
The EXF2 bit toggles when Timer 2 overflows or underflows according to the direction of<br />
the count. EXF2 does not generate any interrupt. This bit can be used to provide 17-bit<br />
resolution.<br />
4289A–8051–09/03
Programmable Clock-<br />
Output<br />
4289A–8051–09/03<br />
Figure 13. Auto-Reload Mode Up/Down Counter (DCEN = 1)<br />
FCLK PERIPH :6<br />
0<br />
1<br />
T2<br />
C/T2 TR2<br />
T2CON T2CON<br />
<strong>AT89C51ID2</strong><br />
T2EX:<br />
(DOWN COUNTING RELOAD VALUE)<br />
if DCEN=1, 1=UP<br />
FFh FFh<br />
(8-bit) (8-bit)<br />
if DCEN=1, 0=DOWN<br />
if DCEN = 0, up counting<br />
TL2<br />
(8-bit)<br />
RCAP2L<br />
(8-bit)<br />
TH2<br />
(8-bit)<br />
RCAP2H<br />
(8-bit)<br />
(UP COUNTING RELOAD VALUE)<br />
TOGGLE<br />
In the clock-out mode, Timer 2 operates as a 50%-duty-cycle, programmable clock generator<br />
(See Figure 14). The input clock increments TL2 at frequency F CLK PERIPH /2.The<br />
timer repeatedly counts to overflow from a loaded value. At overflow, the contents of<br />
RCAP2H and RCAP2L registers are loaded into TH2 and TL2.In this mode, Timer 2<br />
overflows do not generate interrupts. The formula gives the clock-out frequency as a<br />
function of the system oscillator frequency and the value in the RCAP2H and RCAP2L<br />
registers:<br />
Clock– OutFrequency<br />
F CLKPERIPH<br />
=<br />
--------------------------------------------------------------------------------------------<br />
4 × ( 65536 – RCAP2H ⁄ RCAP2L )<br />
For a 16 MHz system clock, Timer 2 has a programmable frequency range of 61 Hz<br />
(FCLK PERIPH /2 16 ) to 4 MHz (FCLK PERIPH /4). The generated clock signal is brought out to<br />
T2 pin (P1.0).<br />
Timer 2 is programmed for the clock-out mode as follows:<br />
Set T2OE bit in T2MOD register.<br />
Clear C/T2 bit in T2CON register.<br />
Determine the 16-bit reload value from the formula and enter it in RCAP2H/RCAP2L<br />
registers.<br />
Enter a 16-bit initial value in timer registers TH2/TL2.It can be the same as the<br />
reload value or a different one depending on the application.<br />
To start the timer, set TR2 run control bit in T2CON register.<br />
It is possible to use Timer 2 as a baud rate generator and a clock generator simultaneously.<br />
For this configuration, the baud rates and clock frequencies are not<br />
independent since both functions use the values in the RCAP2H and RCAP2L registers.<br />
TF2<br />
T2CON<br />
T2CON<br />
EXF2<br />
TIMER 2<br />
INTERRUPT<br />
37
38 <strong>AT89C51ID2</strong><br />
Figure 14. Clock-Out Mode C/T2 = 0<br />
T2EX<br />
FCLK PERIPH<br />
T2<br />
:6<br />
TR2<br />
T2CON<br />
Toggle<br />
Q D<br />
EXEN2<br />
T2CON<br />
TL2<br />
(8-bit)<br />
RCAP2L<br />
(8-bit)<br />
T2OE<br />
T2MOD<br />
EXF2<br />
T2CON<br />
TH2<br />
(8-bit)<br />
RCAP2H<br />
(8-bit)<br />
OVER-<br />
FLOW<br />
TIMER 2<br />
INTERRUPT<br />
4289A–8051–09/03
Registers Table 24. T2CON Register<br />
T2CON - Timer 2 Control Register (C8h)<br />
4289A–8051–09/03<br />
Reset Value = 0000 0000b<br />
Bit addressable<br />
<strong>AT89C51ID2</strong><br />
7 6 5 4 3 2 1 0<br />
TF2 EXF2 RCLK TCLK EXEN2 TR2 C/T2# CP/RL2#<br />
Bit<br />
Number<br />
Bit<br />
Mnemonic Description<br />
7 TF2<br />
6 EXF2<br />
5 RCLK<br />
4 TCLK<br />
3 EXEN2<br />
2 TR2<br />
1 C/T2#<br />
0 CP/RL2#<br />
Timer 2 overflow Flag<br />
Must be cleared by software.<br />
Set by hardware on Timer 2 overflow, if RCLK = 0 and TCLK = 0.<br />
Timer 2 External Flag<br />
Set when a capture or a reload is caused by a negative transition on T2EX pin if<br />
EXEN2=1.<br />
When set, causes the CPU to vector to Timer 2 interrupt routine when Timer 2<br />
interrupt is enabled.<br />
Must be cleared by software. EXF2 doesn’t cause an interrupt in Up/down<br />
counter mode (DCEN = 1).<br />
Receive Clock bit<br />
Cleared to use timer 1 overflow as receive clock for serial port in mode 1 or 3.<br />
Set to use Timer 2 overflow as receive clock for serial port in mode 1 or 3.<br />
Transmit Clock bit<br />
Cleared to use timer 1 overflow as transmit clock for serial port in mode 1 or 3.<br />
Set to use Timer 2 overflow as transmit clock for serial port in mode 1 or 3.<br />
Timer 2 External Enable bit<br />
Cleared to ignore events on T2EX pin for Timer 2 operation.<br />
Set to cause a capture or reload when a negative transition on T2EX pin is<br />
detected, if Timer 2 is not used to clock the serial port.<br />
Timer 2 Run control bit<br />
Cleared to turn off Timer 2.<br />
Set to turn on Timer 2.<br />
Timer/Counter 2 select bit<br />
Cleared for timer operation (input from internal clock system: F CLK PERIPH).<br />
Set for counter operation (input from T2 input pin, falling edge trigger). Must be 0<br />
for clock out mode.<br />
Timer 2 Capture/Reload bit<br />
If RCLK=1 or TCLK=1, CP/RL2# is ignored and timer is forced to auto-reload on<br />
Timer 2 overflow.<br />
Cleared to auto-reload on Timer 2 overflows or negative transitions on T2EX pin<br />
if EXEN2=1.<br />
Set to capture on negative transitions on T2EX pin if EXEN2=1.<br />
39
40 <strong>AT89C51ID2</strong><br />
Table 25. T2MOD Register<br />
T2MOD - Timer 2 Mode Control Register (C9h)<br />
7 6 5 4 3 2 1 0<br />
- - - - - - T2OE DCEN<br />
Bit<br />
Number<br />
7 -<br />
6 -<br />
5 -<br />
4 -<br />
3 -<br />
2 -<br />
Bit<br />
Mnemonic Description<br />
1 T2OE<br />
0 DCEN<br />
Reset Value = XXXX XX00b<br />
Not bit addressable<br />
Reserved<br />
The value read from this bit is indeterminate. Do not set this bit.<br />
Reserved<br />
The value read from this bit is indeterminate. Do not set this bit.<br />
Reserved<br />
The value read from this bit is indeterminate. Do not set this bit.<br />
Reserved<br />
The value read from this bit is indeterminate. Do not set this bit.<br />
Reserved<br />
The value read from this bit is indeterminate. Do not set this bit.<br />
Reserved<br />
The value read from this bit is indeterminate. Do not set this bit.<br />
Timer 2 Output Enable bit<br />
Cleared to program P1.0/T2 as clock input or I/O port.<br />
Set to program P1.0/T2 as clock output.<br />
Down Counter Enable bit<br />
Cleared to disable Timer 2 as up/down counter.<br />
Set to enable Timer 2 as up/down counter.<br />
4289A–8051–09/03
Programmable<br />
Counter Array PCA<br />
4289A–8051–09/03<br />
<strong>AT89C51ID2</strong><br />
The PCA provides more timing capabilities with less CPU intervention than the standard<br />
timer/counters. Its advantages include reduced software overhead and improved accuracy.<br />
The PCA consists of a dedicated timer/counter which serves as the time base for<br />
an array of five compare/capture modules. Its clock input can be programmed to count<br />
any one of the following signals:<br />
Peripheral clock frequency (F CLK PERIPH ) ÷ 6<br />
Peripheral clock frequency (F CLK PERIPH ) ÷ 2<br />
Timer 0 overflow<br />
External input on ECI (P1.2)<br />
Each compare/capture modules can be programmed in any one of the following modes:<br />
Rising and/or falling edge capture<br />
Software timer<br />
High-speed output<br />
Pulse width modulator<br />
Module 4 can also be programmed as a watchdog timer (See Section "PCA Watchdog<br />
Timer", page 52).<br />
When the compare/capture modules are programmed in the capture mode, software<br />
timer, or high speed output mode, an interrupt can be generated when the module executes<br />
its function. All five modules plus the PCA timer overflow share one interrupt<br />
vector.<br />
The PCA timer/counter and compare/capture modules share Port 1 for external I/O.<br />
These pins are listed below. If the port is not used for the PCA, it can still be used for<br />
standard I/O.<br />
PCA component External I/O Pin<br />
16-bit Counter P1.2 / ECI<br />
16-bit Module 0 P1.3 / CEX0<br />
16-bit Module 1 P1.4 / CEX1<br />
16-bit Module 2 P1.5 / CEX2<br />
16-bit Module 3 P1.6 / CEX3<br />
The PCA timer is a common time base for all five modules (See Figure 15). The timer<br />
count source is determined from the CPS1 and CPS0 bits in the CMOD register<br />
(Table 26) and can be programmed to run at:<br />
1/6 the peripheral clock frequency (FCLK PERIPH )<br />
1/2 the peripheral clock frequency (FCLK PERIPH )<br />
The Timer 0 overflow<br />
The input on the ECI pin (P1.2)<br />
41
Figure 15. PCA Timer/Counter<br />
Fclk periph /6<br />
Fclk periph / 2<br />
T0 OVF<br />
P1.2<br />
Idle<br />
42 <strong>AT89C51ID2</strong><br />
CH CL<br />
16 bit up/down counter<br />
CIDL WDTE<br />
CPS1 CPS0 ECF<br />
CF CR<br />
CCF4 CCF3 CCF2 CCF1 CCF0<br />
CMOD<br />
0xD9<br />
CCON<br />
0xD8<br />
overflow<br />
To PCA<br />
modules<br />
It<br />
4289A–8051–09/03
4289A–8051–09/03<br />
Table 26. CMOD Register<br />
CMOD - PCA Counter Mode Register (D9h)<br />
<strong>AT89C51ID2</strong><br />
7 6 5 4 3 2 1 0<br />
CIDL WDTE - - - CPS1 CPS0 ECF<br />
Bit<br />
Number<br />
Bit<br />
Mnemonic Description<br />
7 CIDL<br />
6 WDTE<br />
5 -<br />
4 -<br />
3 -<br />
Counter Idle Control<br />
Cleared to program the PCA Counter to continue functioning during idle Mode.<br />
Set to program PCA to be gated off during idle.<br />
Watchdog Timer Enable<br />
Cleared to disable Watchdog Timer function on PCA Module 4.<br />
Set to enable Watchdog Timer function on PCA Module 4.<br />
Reserved<br />
The value read from this bit is indeterminate. Do not set this bit.<br />
Reserved<br />
The value read from this bit is indeterminate. Do not set this bit.<br />
Reserved<br />
The value read from this bit is indeterminate. Do not set this bit.<br />
2 CPS1 PCA Count Pulse Select<br />
CPS1 CPS0Selected PCA input<br />
0 0 Internal clock fCLK PERIPH/6<br />
1 CPS0<br />
0 1 Internal clock fCLK PERIPH/2<br />
1 0 Timer 0 Overflow<br />
1 1 External clock at ECI/P1.2 pin (max rate = fCLK PERIPH/ 4)<br />
0 ECF<br />
PCA Enable Counter Overflow Interrupt<br />
Cleared to disable CF bit in CCON to inhibit an interrupt.<br />
Set to enable CF bit in CCON to generate an interrupt.<br />
Reset Value = 00XX X000b<br />
Not bit addressable<br />
The CMOD register includes three additional bits associated with the PCA (See<br />
Figure 15 and Table 26).<br />
The CIDL bit which allows the PCA to stop during idle mode.<br />
The WDTE bit which enables or disables the watchdog function on module 4.<br />
The ECF bit which when set causes an interrupt and the PCA overflow flag CF (in<br />
the CCON SFR) to be set when the PCA timer overflows.<br />
The CCON register contains the run control bit for the PCA and the flags for the PCA<br />
timer (CF) and each module (Refer to Table 27).<br />
Bit CR (CCON.6) must be set by software to run the PCA. The PCA is shut off by<br />
clearing this bit.<br />
Bit CF: The CF bit (CCON.7) is set when the PCA counter overflows and an<br />
interrupt will be generated if the ECF bit in the CMOD register is set. The CF bit can<br />
only be cleared by software.<br />
43
44 <strong>AT89C51ID2</strong><br />
Bits 0 through 4 are the flags for the modules (bit 0 for module 0, bit 1 for module 1,<br />
etc.) and are set by hardware when either a match or a capture occurs. These flags<br />
also can only be cleared by software.<br />
Table 27. CCON Register<br />
CCON - PCA Counter Control Register (D8h)<br />
7 6 5 4 3 2 1 0<br />
CF CR - CCF4 CCF3 CCF2 CCF1 CCF0<br />
Bit<br />
Number<br />
Bit<br />
Mnemonic Description<br />
7 CF<br />
6 CR<br />
5 -<br />
4 CCF4<br />
3 CCF3<br />
2 CCF2<br />
1 CCF1<br />
0 CCF0<br />
PCA Counter Overflow flag<br />
Set by hardware when the counter rolls over. CF flags an interrupt if bit ECF in<br />
CMOD is set. CF<br />
may be set by either hardware or software but can only be cleared by software.<br />
PCA Counter Run control bit<br />
Must be cleared by software to turn the PCA counter off.<br />
Set by software to turn the PCA counter on.<br />
Reserved<br />
The value read from this bit is indeterminate. Do not set this bit.<br />
PCA Module 4 interrupt flag<br />
Must be cleared by software.<br />
Set by hardware when a match or capture occurs.<br />
PCA Module 3 interrupt flag<br />
Must be cleared by software.<br />
Set by hardware when a match or capture occurs.<br />
PCA Module 2 interrupt flag<br />
Must be cleared by software.<br />
Set by hardware when a match or capture occurs.<br />
PCA Module 1 interrupt flag<br />
Must be cleared by software.<br />
Set by hardware when a match or capture occurs.<br />
PCA Module 0 interrupt flag<br />
Must be cleared by software.<br />
Set by hardware when a match or capture occurs.<br />
Reset Value = 00X0 0000b<br />
Not bit addressable<br />
The watchdog timer function is implemented in module 4 (See Figure 18).<br />
The PCA interrupt system is shown in Figure 16.<br />
4289A–8051–09/03
Figure 16. PCA Interrupt System<br />
4289A–8051–09/03<br />
PCA Timer/Counter<br />
Module 0<br />
Module 1<br />
Module 2<br />
Module 3<br />
Module 4<br />
CMOD.0<br />
ECF<br />
CF CR<br />
ECCFn CCAPMn.0<br />
CCF4 CCF3 CCF2 CCF1 CCF0<br />
IE.6 IE.7<br />
EC EA<br />
<strong>AT89C51ID2</strong><br />
CCON<br />
0xD8<br />
To Interrupt<br />
priority decoder<br />
PCA Modules: each one of the five compare/capture modules has six possible functions.<br />
It can perform:<br />
16-bit Capture, positive-edge triggered<br />
16-bit Capture, negative-edge triggered<br />
16-bit Capture, both positive and negative-edge triggered<br />
16-bit Software Timer<br />
16-bit High Speed Output<br />
8-bit Pulse Width Modulator<br />
In addition, module 4 can be used as a Watchdog Timer.<br />
Each module in the PCA has a special function register associated with it. These registers<br />
are: CCAPM0 for module 0, CCAPM1 for module 1, etc. (See Table 28). The<br />
registers contain the bits that control the mode that each module will operate in.<br />
The ECCF bit (CCAPMn.0 where n=0, 1, 2, 3, or 4 depending on the module)<br />
enables the CCF flag in the CCON SFR to generate an interrupt when a match or<br />
compare occurs in the associated module.<br />
PWM (CCAPMn.1) enables the pulse width modulation mode.<br />
The TOG bit (CCAPMn.2) when set causes the CEX output associated with the<br />
module to toggle when there is a match between the PCA counter and the module's<br />
capture/compare register.<br />
The match bit MAT (CCAPMn.3) when set will cause the CCFn bit in the CCON<br />
register to be set when there is a match between the PCA counter and the module's<br />
capture/compare register.<br />
The next two bits CAPN (CCAPMn.4) and CAPP (CCAPMn.5) determine the edge<br />
that a capture input will be active on. The CAPN bit enables the negative edge, and<br />
the CAPP bit enables the positive edge. If both bits are set both edges will be<br />
enabled and a capture will occur for either transition.<br />
The last bit in the register ECOM (CCAPMn.6) when set enables the comparator<br />
function.<br />
45
46 <strong>AT89C51ID2</strong><br />
Table 28 shows the CCAPMn settings for the various PCA functions.<br />
Table 28. CCAPMn Registers (n = 0-4)<br />
CCAPM0 - PCA Module 0 Compare/Capture Control Register (0DAh)<br />
CCAPM1 - PCA Module 1 Compare/Capture Control Register (0DBh)<br />
CCAPM2 - PCA Module 2 Compare/Capture Control Register (0DCh)<br />
CCAPM3 - PCA Module 3 Compare/Capture Control Register (0DDh)<br />
CCAPM4 - PCA Module 4 Compare/Capture Control Register (0DEh)<br />
7 6 5 4 3 2 1 0<br />
- ECOMn CAPPn CAPNn MATn TOGn PWMn ECCFn<br />
Bit<br />
Number<br />
7 -<br />
Bit<br />
Mnemonic Description<br />
6 ECOMn<br />
5 CAPPn<br />
4 CAPNn<br />
3 MATn<br />
2 TOGn<br />
1 PWMn<br />
0 CCF0<br />
Reset Value = X000 0000b<br />
Not bit addressable<br />
Reserved<br />
The value read from this bit is indeterminate. Do not set this bit.<br />
Enable Comparator<br />
Cleared to disable the comparator function.<br />
Set to enable the comparator function.<br />
Capture Positive<br />
Cleared to disable positive edge capture.<br />
Set to enable positive edge capture.<br />
Capture Negative<br />
Cleared to disable negative edge capture.<br />
Set to enable negative edge capture.<br />
Match<br />
When MATn = 1, a match of the PCA counter with this module’s<br />
compare/capture register causes the<br />
CCFn bit in CCON to be set, flagging an interrupt.<br />
Toggle<br />
When TOGn = 1, a match of the PCA counter with this module’s<br />
compare/capture register causes the<br />
CEXn pin to toggle.<br />
Pulse Width Modulation Mode<br />
Cleared to disable the CEXn pin to be used as a pulse width modulated output.<br />
Set to enable the CEXn pin to be used as a pulse width modulated output.<br />
Enable CCF interrupt<br />
Cleared to disable compare/capture flag CCFn in the CCON register to generate<br />
an interrupt.<br />
Set to enable compare/capture flag CCFn in the CCON register to generate an<br />
interrupt.<br />
4289A–8051–09/03
4289A–8051–09/03<br />
Table 29. PCA Module Modes (CCAPMn Registers)<br />
ECOMn CAPPn CAPNn MATn TOGn PWMm ECCFn Module Function<br />
0 0 0 0 0 0 0 No Operation<br />
X 1 0 0 0 0 X<br />
X 0 1 0 0 0 X<br />
X 1 1 0 0 0 X<br />
1 0 0 1 0 0 X<br />
<strong>AT89C51ID2</strong><br />
There are two additional registers associated with each of the PCA modules. They are<br />
CCAPnH and CCAPnL and these are the registers that store the 16-bit count when a<br />
capture occurs or a compare should occur. When a module is used in the PWM mode<br />
these registers are used to control the duty cycle of the output (See Table 30 &<br />
Table 31).<br />
Table 30. CCAPnH Registers (n = 0-4)<br />
CCAP0H - PCA Module 0 Compare/Capture Control Register High (0FAh)<br />
CCAP1H - PCA Module 1 Compare/Capture Control Register High (0FBh)<br />
CCAP2H - PCA Module 2 Compare/Capture Control Register High (0FCh)<br />
CCAP3H - PCA Module 3 Compare/Capture Control Register High (0FDh)<br />
CCAP4H - PCA Module 4 Compare/Capture Control Register High (0FEh)<br />
Reset Value = 0000 0000b<br />
Not bit addressable<br />
16-bit capture by a positive-edge<br />
trigger on CEXn<br />
16-bit capture by a negative trigger<br />
on CEXn<br />
16-bit capture by a transition on<br />
CEXn<br />
16-bit Software Timer / Compare<br />
mode.<br />
1 0 0 1 1 0 X 16-bit High Speed Output<br />
1 0 0 0 0 1 0 8-bit PWM<br />
1 0 0 1 X 0 X Watchdog Timer (module 4 only)<br />
7 6 5 4 3 2 1 0<br />
- - - - - - - -<br />
Bit<br />
Number<br />
7-0 -<br />
Bit<br />
Mnemonic Description<br />
PCA Module n Compare/Capture Control<br />
CCAPnH Value<br />
47
48 <strong>AT89C51ID2</strong><br />
Table 31. CCAPnL Registers (n = 0-4)<br />
CCAP0L - PCA Module 0 Compare/Capture Control Register Low (0EAh)<br />
CCAP1L - PCA Module 1 Compare/Capture Control Register Low (0EBh)<br />
CCAP2L - PCA Module 2 Compare/Capture Control Register Low (0ECh)<br />
CCAP3L - PCA Module 3 Compare/Capture Control Register Low (0EDh)<br />
CCAP4L - PCA Module 4 Compare/Capture Control Register Low (0EEh)<br />
7 6 5 4 3 2 1 0<br />
- - - - - - - -<br />
Bit<br />
Number<br />
7-0 -<br />
Bit<br />
Mnemonic Description<br />
Reset Value = 0000 0000b<br />
Not bit addressable<br />
Table 32. CH Register<br />
CH - PCA Counter Register High (0F9h)<br />
Reset Value = 0000 0000b<br />
Not bit addressable<br />
Table 33. CL Register<br />
CL - PCA Counter Register Low (0E9h)<br />
Reset Value = 0000 0000b<br />
Not bit addressable<br />
PCA Module n Compare/Capture Control<br />
CCAPnL Value<br />
7 6 5 4 3 2 1 0<br />
- - - - - - - -<br />
Bit<br />
Number<br />
7-0 -<br />
Bit<br />
Mnemonic Description<br />
PCA counter<br />
CH Value<br />
7 6 5 4 3 2 1 0<br />
- - - - - - - -<br />
Bit<br />
Number<br />
7-0 -<br />
Bit<br />
Mnemonic Description<br />
PCA Counter<br />
CL Value<br />
4289A–8051–09/03
4289A–8051–09/03<br />
<strong>AT89C51ID2</strong><br />
PCA Capture Mode To use one of the PCA modules in the capture mode either one or both of the CCAPM<br />
bits CAPN and CAPP for that module must be set. The external CEX input for the module<br />
(on port 1) is sampled for a transition. When a valid transition occurs the PCA<br />
hardware loads the value of the PCA counter registers (CH and CL) into the module’s<br />
capture registers (CCAPnL and CCAPnH). If the CCFn bit for the module in the CCON<br />
SFR and the ECCFn bit in the CCAPMn SFR are set then an interrupt will be generated<br />
(Refer to Figure 17).<br />
Figure 17. PCA Capture Mode<br />
Cex.n<br />
16-bit Software Timer/<br />
Compare Mode<br />
CF CR CCF4 CCF3 CCF2 CCF1 CCF0 CCON<br />
0xD8<br />
Capture<br />
PCA Counter/Timer<br />
CH CL<br />
CCAPnH CCA PnL<br />
ECOMn CAPPn CAPNn MATn TOGn PWMn ECCFn CCAPMn, n= 0 to 4<br />
0xDA to 0xDE<br />
PCA IT<br />
The PCA modules can be used as software timers by setting both the ECOM and MAT<br />
bits in the modules CCAPMn register. The PCA timer will be compared to the module’s<br />
capture registers and when a match occurs an interrupt will occur if the CCFn (CCON<br />
SFR) and the ECCFn (CCAPMn SFR) bits for the module are both set (See Figure 18).<br />
49
Figure 18. PCA Compare Mode and PCA Watchdog Timer<br />
Write t o<br />
CCAPnH<br />
Write to<br />
CCAPnL<br />
1 0<br />
Reset<br />
Enable<br />
50 <strong>AT89C51ID2</strong><br />
CF CR<br />
CCF4 CCF3 CCF2 CCF1 CCF0<br />
CCAP nH CCA PnL<br />
16 bit comparator<br />
CH CL<br />
PCA counter/timer<br />
ECOMn CA PPn CAPNn MATn TOGn PWMn ECCFn<br />
CCA PMn, n = 0 to 4<br />
0xDA to 0xDE<br />
Before enabling ECOM bit, CCAPnL and CCAPnH should be set with a non zero value,<br />
otherwise an unwanted match could happen. Writing to CCAPnH will set the ECOM bit.<br />
Once ECOM set, writing CCAPnL will clear ECOM so that an unwanted match doesn’t<br />
occur while modifying the compare value. Writing to CCAPnH will set ECOM. For this<br />
reason, user software should write CCAPnL first, and then CCAPnH. Of course, the<br />
ECOM bit can still be controlled by accessing to CCAPMn register.<br />
High Speed Output Mode In this mode the CEX output (on port 1) associated with the PCA module will toggle<br />
each time a match occurs between the PCA counter and the module's capture registers.<br />
To activate this mode the TOG, MAT, and ECOM bits in the module's CCAPMn SFR<br />
must be set (See Figure 19).<br />
Match<br />
CIDL WDTE<br />
CPS1 CPS0 ECF<br />
CCON<br />
0xD8<br />
CMOD<br />
0xD9<br />
PCA IT<br />
RESET *<br />
A prior write must be done to CCAPnL and CCAPnH before writing the ECOMn bit.<br />
4289A–8051–09/03
Figure 19. PCA High Speed Output Mode<br />
Write to<br />
CCAPnH<br />
Pulse Width Modulator<br />
Mode<br />
4289A–8051–09/03<br />
Write to<br />
CCAPnL<br />
1<br />
0<br />
Reset<br />
Enable<br />
CF CR<br />
CCAPnH CCAPnL<br />
16 bit comparator<br />
CH CL<br />
PCA counter/timer<br />
CCF4 CCF3 CCF2 CCF1 CCF0<br />
Match<br />
ECOMnCAPPn<br />
CAPNn MATn TOGn PWMn ECCFn<br />
<strong>AT89C51ID2</strong><br />
CCON<br />
0xD8<br />
PCA IT<br />
CEXn<br />
CCAPMn, n = 0 to 4<br />
0xDA to 0xDE<br />
Before enabling ECOM bit, CCAPnL and CCAPnH should be set with a non zero value,<br />
otherwise an unwanted match could happen.<br />
Once ECOM set, writing CCAPnL will clear ECOM so that an unwanted match doesn’t<br />
occur while modifying the compare value. Writing to CCAPnH will set ECOM. For this<br />
reason, user software should write CCAPnL first, and then CCAPnH. Of course, the<br />
ECOM bit can still be controlled by accessing to CCAPMn register.<br />
All of the PCA modules can be used as PWM outputs. Figure 20 shows the PWM function.<br />
The frequency of the output depends on the source for the PCA timer. All of the<br />
modules will have the same frequency of output because they all share the PCA timer.<br />
The duty cycle of each module is independently variable using the module's capture<br />
register CCAPLn. When the value of the PCA CL SFR is less than the value in the module's<br />
CCAPLn SFR the output will be low, when it is equal to or greater than the output<br />
will be high. When CL overflows from FF to 00, CCAPLn is reloaded with the value in<br />
CCAPHn. This allows updating the PWM without glitches. The PWM and ECOM bits in<br />
the module's CCAPMn register must be set to enable the PWM mode.<br />
51
52 <strong>AT89C51ID2</strong><br />
Figure 20. PCA PWM Mode<br />
Enable<br />
Overflow<br />
CCAPnH<br />
CCAPnL<br />
8 bit comparator<br />
ECOMn CAPPn CAPNn MATn TOGn PWMn ECCFn CCAPMn, n= 0 to 4<br />
0xDA to 0xDE<br />
PCA Watchdog Timer An on-board watchdog timer is available with the PCA to improve the reliability of the<br />
system without increasing chip count. Watchdog timers are useful for systems that are<br />
susceptible to noise, power glitches, or electrostatic discharge. Module 4 is the only<br />
PCA module that can be programmed as a watchdog. However, this module can still be<br />
used for other modes if the watchdog is not needed. Figure 18 shows a diagram of how<br />
the watchdog works. The user pre-loads a 16-bit value in the compare registers. Just<br />
like the other compare modes, this 16-bit value is compared to the PCA timer value. If a<br />
match is allowed to occur, an internal reset will be generated. This will not cause the<br />
RST pin to be driven high.<br />
CL<br />
PCA counter/timer<br />
CEXn<br />
In order to hold off the reset, the user has three options:<br />
1. periodically change the compare value so it will never match the PCA timer,<br />
2. periodically change the PCA timer value so it will never match the compare values, or<br />
3. disable the watchdog by clearing the WDTE bit before a match occurs and then reenable<br />
it.<br />
The first two options are more reliable because the watchdog timer is never disabled as<br />
in option #3. If the program counter ever goes astray, a match will eventually occur and<br />
cause an internal reset. The second option is also not recommended if other PCA modules<br />
are being used. Remember, the PCA timer is the time base for all modules;<br />
changing the time base for other modules would not be a good idea. Thus, in most applications<br />
the first solution is the best option.<br />
This watchdog timer won’t generate a reset out on the reset pin.<br />
“0”<br />
“1”<br />
4289A–8051–09/03
4289A–8051–09/03<br />
<strong>AT89C51ID2</strong><br />
Serial I/O Port The serial I/O port in the <strong>AT89C51ID2</strong> is compatible with the serial I/O port in the 80C52.<br />
It provides both synchronous and asynchronous communication modes. It operates as a<br />
Universal Asynchronous Receiver and Transmitter (UART) in three full-duplex modes<br />
(Modes 1, 2 and 3). Asynchronous transmission and reception can occur simultaneously<br />
and at different baud rates<br />
Serial I/O port includes the following enhancements:<br />
Framing error detection<br />
Automatic address recognition<br />
Framing Error Detection Framing bit error detection is provided for the three asynchronous modes (modes 1, 2<br />
and 3). To enable the framing bit error detection feature, set SMOD0 bit in PCON register<br />
(See Figure 21).<br />
Figure 21. Framing Error Block Diagram<br />
SM0/FE<br />
SM1<br />
SMOD1SMOD0<br />
SM2<br />
REN<br />
POF<br />
TB8<br />
GF1<br />
When this feature is enabled, the receiver checks each incoming data frame for a valid<br />
stop bit. An invalid stop bit may result from noise on the serial lines or from simultaneous<br />
transmission by two CPUs. If a valid stop bit is not found, the Framing Error bit (FE) in<br />
SCON register (See Table 37.) bit is set.<br />
Software may examine FE bit after each reception to check for data errors. Once set,<br />
only software or a reset can clear FE bit. Subsequently received frames with valid stop<br />
bits cannot clear FE bit. When FE feature is enabled, RI rises on stop bit instead of the<br />
last data bit (See Figure 22. and Figure 23.).<br />
Figure 22. UART Timings in Mode 1<br />
RI<br />
SMOD0=X<br />
-<br />
Start<br />
bit<br />
RB8<br />
GF0<br />
TI<br />
Set FE bit if stop bit is 0 (framing error) (SMOD0 = 1)<br />
PD<br />
To UART framing error control<br />
RI<br />
SM0 to UART mode control (SMOD0 = 0)<br />
<strong>Data</strong> byte<br />
IDL<br />
RXD D0 D1 D2 D3 D4 D5 D6 D7<br />
FE<br />
SMOD0=1<br />
SCON (98h)<br />
PCON (87h)<br />
Stop<br />
bit<br />
53
Automatic Address<br />
Recognition<br />
54 <strong>AT89C51ID2</strong><br />
Figure 23. UART Timings in Modes 2 and 3<br />
RI<br />
SMOD0=0<br />
RI<br />
SMOD0=1<br />
FE<br />
SMOD0=1<br />
RXD D0 D1 D2 D3 D4 D5 D6 D7 D8<br />
Start<br />
bit<br />
The automatic address recognition feature is enabled when the multiprocessor communication<br />
feature is enabled (SM2 bit in SCON register is set).<br />
Implemented in hardware, automatic address recognition enhances the multiprocessor<br />
communication feature by allowing the serial port to examine the address of each<br />
incoming command frame. Only when the serial port recognizes its own address, the<br />
receiver sets RI bit in SCON register to generate an interrupt. This ensures that the CPU<br />
is not interrupted by command frames addressed to other devices.<br />
If desired, the user may enable the automatic address recognition feature in mode 1.In<br />
this configuration, the stop bit takes the place of the ninth data bit. Bit RI is set only when<br />
the received command frame address matches the device’s address and is terminated<br />
by a valid stop bit.<br />
To support automatic address recognition, a device is identified by a given address and<br />
a broadcast address.<br />
Note: The multiprocessor communication and automatic address recognition features cannot<br />
be enabled in mode 0 (i. e. setting SM2 bit in SCON register in mode 0 has no effect).<br />
Given Address Each device has an individual address that is specified in SADDR register; the SADEN<br />
register is a mask byte that contains don’t-care bits (defined by zeros) to form the<br />
device’s given address. The don’t-care bits provide the flexibility to address one or more<br />
slaves at a time. The following example illustrates how a given address is formed.<br />
To address a device by its individual address, the SADEN mask byte must be 1111<br />
1111b.<br />
For example:<br />
SADDR0101 0110b<br />
SADEN1111 1100b<br />
Given0101 01XXb<br />
The following is an example of how to use given addresses to address different slaves:<br />
Slave A:SADDR1111 0001b<br />
SADEN1111 1010b<br />
Given1111 0X0Xb<br />
Slave B:SADDR1111 0011b<br />
SADEN1111 1001b<br />
Given1111 0XX1b<br />
Slave C:SADDR1111 0010b<br />
SADEN1111 1101b<br />
Given1111 00X1b<br />
<strong>Data</strong> byte Ninth<br />
bit<br />
Stop<br />
bit<br />
4289A–8051–09/03
4289A–8051–09/03<br />
<strong>AT89C51ID2</strong><br />
The SADEN byte is selected so that each slave may be addressed separately.<br />
For slave A, bit 0 (the LSB) is a don’t-care bit; for slaves B and C, bit 0 is a 1.To communicate<br />
with slave A only, the master must send an address where bit 0 is clear (e. g.<br />
1111 0000b).<br />
For slave A, bit 1 is a 1; for slaves B and C, bit 1 is a don’t care bit. To communicate with<br />
slaves B and C, but not slave A, the master must send an address with bits 0 and 1 both<br />
set (e. g. 1111 0011b).<br />
To communicate with slaves A, B and C, the master must send an address with bit 0 set,<br />
bit 1 clear, and bit 2 clear (e. g. 1111 0001b).<br />
Broadcast Address A broadcast address is formed from the logical OR of the SADDR and SADEN registers<br />
with zeros defined as don’t-care bits, e. g. :<br />
SADDR0101 0110b<br />
SADEN1111 1100b<br />
Broadcast =SADDR OR SADEN1111 111Xb<br />
The use of don’t-care bits provides flexibility in defining the broadcast address, however<br />
in most applications, a broadcast address is FFh. The following is an example of using<br />
broadcast addresses:<br />
Slave A:SADDR1111 0001b<br />
SADEN1111 1010b<br />
Broadcast1111 1X11b,<br />
Slave B:SADDR1111 0011b<br />
SADEN1111 1001b<br />
Broadcast1111 1X11B,<br />
Slave C:SADDR=1111 0011b<br />
SADEN1111 1101b<br />
Broadcast1111 1111b<br />
For slaves A and B, bit 2 is a don’t care bit; for slave C, bit 2 is set. To communicate with<br />
all of the slaves, the master must send an address FFh. To communicate with slaves A<br />
and B, but not slave C, the master can send and address FBh.<br />
Reset Addresses On reset, the SADDR and SADEN registers are initialized to 00h, i. e. the given and<br />
broadcast addresses are XXXX XXXXb (all don’t-care bits). This ensures that the serial<br />
port will reply to any address, and so, that it is backwards compatible with the 80C51<br />
microcontrollers that do not support automatic address recognition.<br />
55
Registers Table 34. SADEN Register<br />
SADEN - Slave Address Mask Register (B9h)<br />
Baud Rate Selection for<br />
UART for Mode 1 and 3<br />
56 <strong>AT89C51ID2</strong><br />
7 6 5 4 3 2 1 0<br />
Reset Value = 0000 0000b<br />
Not bit addressable<br />
Table 35. SADDR Register<br />
SADDR - Slave Address Register (A9h)<br />
7 6 5 4 3 2 1 0<br />
Reset Value = 0000 0000b<br />
Not bit addressable<br />
The Baud Rate Generator for transmit and receive clocks can be selected separately via<br />
the T2CON and BDRCON registers.<br />
Figure 24. Baud Rate Selection<br />
TIMER1<br />
TIMER2<br />
INT_BRG<br />
TIMER1<br />
TIMER2<br />
INT_BRG<br />
0<br />
1<br />
RCLK<br />
0<br />
1<br />
TCLK<br />
TIMER_BRG_RX<br />
TIMER_BRG_TX<br />
0<br />
1<br />
RBCK<br />
0<br />
1<br />
TBCK<br />
/ 16<br />
/ 16<br />
Rx Clock<br />
Tx Clock<br />
4289A–8051–09/03
Internal Baud Rate Generator<br />
(BRG)<br />
Figure 25. Internal Baud Rate<br />
4289A–8051–09/03<br />
F PER<br />
BRR<br />
Table 36. Baud Rate Selection Table UART<br />
TCLK<br />
(T2CON)<br />
RCLK<br />
(T2CON)<br />
TBCK<br />
(BDRCON)<br />
<strong>AT89C51ID2</strong><br />
When the internal Baud Rate Generator is used, the Baud Rates are determined by the<br />
BRG overflow depending on the BRL reload value, the value of SPD bit (Speed Mode)<br />
in BDRCON register and the value of the SMOD1 bit in PCON register.<br />
The baud rate for UART is token by formula:<br />
RBCK<br />
(BDRCON)<br />
Clock Source<br />
UART Tx<br />
Clock Source<br />
UART Rx<br />
0 0 0 0 Timer 1 Timer 1<br />
1 0 0 0 Timer 2 Timer 1<br />
0 1 0 0 Timer 1 Timer 2<br />
1 1 0 0 Timer 2 Timer 2<br />
X 0 1 0 INT_BRG Timer 1<br />
X 1 1 0 INT_BRG Timer 2<br />
0 X 0 1 Timer 1 INT_BRG<br />
1 X 0 1 Timer 2 INT_BRG<br />
X X 1 1 INT_BRG INT_BRG<br />
/6<br />
0<br />
1<br />
SPD<br />
2<br />
Baud_Rate =<br />
(1-SPD)<br />
6 ⋅ 32 ⋅ (256 -BRL)<br />
SMOD1 ⋅ FPER 2<br />
BRL = 256 -<br />
(1-SPD) 6 ⋅ 32 ⋅ Baud_Rate<br />
SMOD1 ⋅ FPER auto reload counter<br />
overflow<br />
BRG<br />
BRL<br />
/2<br />
0<br />
1<br />
SMOD1<br />
INT_BRG<br />
57
58 <strong>AT89C51ID2</strong><br />
Table 37. SCON Register<br />
SCON - Serial Control Register (98h)<br />
7 6 5 4 3 2 1 0<br />
FE/SM0 SM1 SM2 REN TB8 RB8 TI RI<br />
Bit<br />
Number<br />
7 FE<br />
Bit<br />
Mnemonic Description<br />
SM0<br />
6 SM1<br />
5 SM2<br />
4 REN<br />
3 TB8<br />
2 RB8<br />
1 TI<br />
0 RI<br />
Reset Value = 0000 0000b<br />
Bit addressable<br />
Framing Error bit (SMOD0=1)<br />
Clear to reset the error state, not cleared by a valid stop bit.<br />
Set by hardware when an invalid stop bit is detected.<br />
SMOD0 must be set to enable access to the FE bit.<br />
Serial port Mode bit 0<br />
Refer to SM1 for serial port mode selection.<br />
SMOD0 must be cleared to enable access to the SM0 bit.<br />
Serial port Mode bit 1<br />
SM0SM1ModeDescriptionBaud Rate<br />
0 0 0Shift RegisterFCPU PERIPH/6<br />
0 1 18-bit UARTVariable<br />
1 0 29-bit UARTFCPU PERIPH /32 or /16<br />
1 1 39-bit UARTVariable<br />
Serial port Mode 2 bit / Multiprocessor Communication Enable bit<br />
Clear to disable multiprocessor communication feature.<br />
Set to enable multiprocessor communication feature in mode 2 and 3, and<br />
eventually mode 1.This bit should be cleared in mode 0.<br />
Reception Enable bit<br />
Clear to disable serial reception.<br />
Set to enable serial reception.<br />
Transmitter Bit 8 / Ninth bit to transmit in modes 2 and 3<br />
Clear to transmit a logic 0 in the 9th bit.<br />
Set to transmit a logic 1 in the 9th bit.<br />
Receiver Bit 8 / Ninth bit received in modes 2 and 3<br />
Cleared by hardware if 9th bit received is a logic 0.<br />
Set by hardware if 9th bit received is a logic 1.<br />
In mode 1, if SM2 = 0, RB8 is the received stop bit. In mode 0 RB8 is not<br />
used.<br />
Transmit Interrupt flag<br />
Clear to acknowledge interrupt.<br />
Set by hardware at the end of the 8th bit time in mode 0 or at the beginning<br />
of the stop bit in the other modes.<br />
Receive Interrupt flag<br />
Clear to acknowledge interrupt.<br />
Set by hardware at the end of the 8th bit time in mode 0, see Figure 22.<br />
and Figure 23. in the other modes.<br />
4289A–8051–09/03
UART Registers Table 40. SADEN Register<br />
4289A–8051–09/03<br />
Table 38. Example of Computed Value When X2=1, SMOD1=1, SPD=1<br />
Table 39. Example of Computed Value When X2=0, SMOD1=0, SPD=0<br />
<strong>AT89C51ID2</strong><br />
Baud Rates F OSC = 16. 384 MHz F OSC = 24MHz<br />
The baud rate generator can be used for mode 1 or 3 (refer to Figure 24.), but also for<br />
mode 0 for UART, thanks to the bit SRC located in BDRCON register (Table 46.)<br />
SADEN - Slave Address Mask Register for UART (B9h)<br />
Reset Value = 0000 0000b<br />
Table 41. SADDR Register<br />
SADDR - Slave Address Register for UART (A9h)<br />
Reset Value = 0000 0000b<br />
BRL Error (%) BRL Error (%)<br />
115200 247 1.23 243 0.16<br />
57600 238 1.23 230 0.16<br />
38400 229 1.23 217 0.16<br />
28800 220 1.23 204 0.16<br />
19200 203 0.63 178 0.16<br />
9600 149 0.31 100 0.16<br />
4800 43 1.23 - -<br />
Baud Rates F OSC = 16. 384 MHz F OSC = 24MHz<br />
BRL Error (%) BRL Error (%)<br />
4800 247 1.23 243 0.16<br />
2400 238 1.23 230 0.16<br />
1200 220 1.23 202 3.55<br />
600 185 0.16 152 0.16<br />
7 6 5 4 3 2 1 0<br />
7 6 5 4 3 2 1 0<br />
59
60 <strong>AT89C51ID2</strong><br />
Table 42. SBUF Register<br />
SBUF - Serial Buffer Register for UART (99h)<br />
7 6 5 4 3 2 1 0<br />
Reset Value = XXXX XXXXb<br />
Table 43. BRL Register<br />
BRL - Baud Rate Reload Register for the internal baud rate generator, UART (9Ah)<br />
7 6 5 4 3 2 1 0<br />
Reset Value = 0000 0000b<br />
4289A–8051–09/03
4289A–8051–09/03<br />
Table 44. T2CON Register<br />
T2CON - Timer 2 Control Register (C8h)<br />
Reset Value = 0000 0000b<br />
Bit addressable<br />
<strong>AT89C51ID2</strong><br />
7 6 5 4 3 2 1 0<br />
TF2 EXF2 RCLK TCLK EXEN2 TR2 C/T2# CP/RL2#<br />
Bit<br />
Number<br />
Bit<br />
Mnemonic Description<br />
7 TF2<br />
6 EXF2<br />
5 RCLK<br />
4 TCLK<br />
3 EXEN2<br />
2 TR2<br />
1 C/T2#<br />
0 CP/RL2#<br />
Timer 2 overflow Flag<br />
Must be cleared by software.<br />
Set by hardware on timer 2 overflow, if RCLK = 0 and TCLK = 0.<br />
Timer 2 External Flag<br />
Set when a capture or a reload is caused by a negative transition on T2EX pin if<br />
EXEN2=1.<br />
When set, causes the CPU to vector to timer 2 interrupt routine when timer 2<br />
interrupt is enabled.<br />
Must be cleared by software. EXF2 doesn’t cause an interrupt in Up/down<br />
counter mode (DCEN = 1)<br />
Receive Clock bit for UART<br />
Cleared to use timer 1 overflow as receive clock for serial port in mode 1 or 3.<br />
Set to use timer 2 overflow as receive clock for serial port in mode 1 or 3.<br />
Transmit Clock bit for UART<br />
Cleared to use timer 1 overflow as transmit clock for serial port in mode 1 or 3.<br />
Set to use timer 2 overflow as transmit clock for serial port in mode 1 or 3.<br />
Timer 2 External Enable bit<br />
Cleared to ignore events on T2EX pin for timer 2 operation.<br />
Set to cause a capture or reload when a negative transition on T2EX pin is<br />
detected, if timer 2 is not used to clock the serial port.<br />
Timer 2 Run control bit<br />
Cleared to turn off timer 2.<br />
Set to turn on timer 2.<br />
Timer/Counter 2 select bit<br />
Cleared for timer operation (input from internal clock system: F CLK PERIPH).<br />
Set for counter operation (input from T2 input pin, falling edge trigger). Must be<br />
0 for clock out mode.<br />
Timer 2 Capture/Reload bit<br />
If RCLK=1 or TCLK=1, CP/RL2# is ignored and timer is forced to auto-reload on<br />
timer 2 overflow.<br />
Cleared to auto-reload on timer 2 overflows or negative transitions on T2EX pin<br />
if EXEN2=1.<br />
Set to capture on negative transitions on T2EX pin if EXEN2=1.<br />
61
62 <strong>AT89C51ID2</strong><br />
Table 45. PCON Register<br />
PCON - Power Control Register (87h)<br />
7 6 5 4 3 2 1 0<br />
SMOD1 SMOD0 - POF GF1 GF0 PD IDL<br />
Bit<br />
Number<br />
Bit<br />
Mnemonic Description<br />
7 SMOD1<br />
6 SMOD0<br />
5 -<br />
4 POF<br />
3 GF1<br />
2 GF0<br />
1 PD<br />
0 IDL<br />
Serial port Mode bit 1 for UART<br />
Set to select double baud rate in mode 1, 2 or 3.<br />
Serial port Mode bit 0 for UART<br />
Cleared to select SM0 bit in SCON register.<br />
Set to select FE bit in SCON register.<br />
Reserved<br />
The value read from this bit is indeterminate. Do not set this bit.<br />
Power-Off Flag<br />
Cleared to recognize next reset type.<br />
Set by hardware when VCC rises from 0 to its nominal voltage. Can also be set<br />
by software.<br />
General purpose Flag<br />
Cleared by user for general purpose usage.<br />
Set by user for general purpose usage.<br />
General purpose Flag<br />
Cleared by user for general purpose usage.<br />
Set by user for general purpose usage.<br />
Power-Down mode bit<br />
Cleared by hardware when reset occurs.<br />
Set to enter power-down mode.<br />
Idle mode bit<br />
Cleared by hardware when interrupt or reset occurs.<br />
Set to enter idle mode.<br />
Reset Value = 00X1 0000b<br />
Not bit addressable<br />
Power-off flag reset value will be 1 only after a power on (cold reset). A warm reset<br />
doesn’t affect the value of this bit.<br />
4289A–8051–09/03
4289A–8051–09/03<br />
Table 46. BDRCON Register<br />
BDRCON - Baud Rate Control Register (9Bh)<br />
Reset Value = XXX0 0000b<br />
Not bit addressablef<br />
<strong>AT89C51ID2</strong><br />
7 6 5 4 3 2 1 0<br />
- - - BRR TBCK RBCK SPD SRC<br />
Bit<br />
Number<br />
7 -<br />
6 -<br />
5 -<br />
Bit<br />
Mnemonic Description<br />
4 BRR<br />
3 TBCK<br />
2 RBCK<br />
1 SPD<br />
0 SRC<br />
Reserved<br />
The value read from this bit is indeterminate. Do not set this bit<br />
Reserved<br />
The value read from this bit is indeterminate. Do not set this bit<br />
Reserved<br />
The value read from this bit is indeterminate. Do not set this bit.<br />
Baud Rate Run Control bit<br />
Cleared to stop the internal Baud Rate Generator.<br />
Set to start the internal Baud Rate Generator.<br />
Transmission Baud rate Generator Selection bit for UART<br />
Cleared to select Timer 1 or Timer 2 for the Baud Rate Generator.<br />
Set to select internal Baud Rate Generator.<br />
Reception Baud Rate Generator Selection bit for UART<br />
Cleared to select Timer 1 or Timer 2 for the Baud Rate Generator.<br />
Set to select internal Baud Rate Generator.<br />
Baud Rate Speed Control bit for UART<br />
Cleared to select the SLOW Baud Rate Generator.<br />
Set to select the FAST Baud Rate Generator.<br />
Baud Rate Source select bit in Mode 0 for UART<br />
Cleared to select FOSC/12 as the Baud Rate Generator (FCLK PERIPH/6 in X2<br />
mode).<br />
Set to select the internal Baud Rate Generator for UARTs in mode 0.<br />
63
Interrupt System The <strong>AT89C51ID2</strong> has a total of 10 interrupt vectors: two external interrupts (INT0 and<br />
INT1), three timer interrupts (timers 0, 1 and 2), the serial port interrupt, SPI interrupt,<br />
Keyboard interrupt and the PCA global interrupt. These interrupts are shown in Figure<br />
26.<br />
Figure 26. Interrupt Control System<br />
INT0<br />
TF0<br />
INT1<br />
TF1<br />
PCA IT<br />
RI<br />
TI<br />
TF2<br />
EXF2<br />
KBD IT<br />
TWI IT<br />
SPI IT<br />
Individual Enable<br />
64 <strong>AT89C51ID2</strong><br />
IE0<br />
IE1<br />
IPH, IPL<br />
3<br />
0<br />
3<br />
0<br />
3<br />
0<br />
3<br />
0<br />
3<br />
0<br />
3<br />
0<br />
3<br />
0<br />
3<br />
0<br />
3<br />
0<br />
3<br />
0<br />
Global Disable<br />
High priority<br />
interrupt<br />
Interrupt<br />
polling<br />
sequence, decreasing from<br />
high to low priority<br />
Low priority<br />
interrupt<br />
Each of the interrupt sources can be individually enabled or disabled by setting or clearing<br />
a bit in the Interrupt Enable register (Table 51 and Table 49). This register also<br />
contains a global disable bit, which must be cleared to disable all interrupts at once.<br />
Each interrupt source can also be individually programmed to one out of four priority levels<br />
by setting or clearing a bit in the Interrupt Priority register (Table 52) and in the<br />
Interrupt Priority High register (Table 50 and Table 51) shows the bit values and priority<br />
levels associated with each combination.<br />
4289A–8051–09/03
4289A–8051–09/03<br />
<strong>AT89C51ID2</strong><br />
Registers The PCA interrupt vector is located at address 0033H, the SPI interrupt vector is located<br />
at address 0043H and Keyboard interrupt vector is located at address 004BH. All other<br />
vectors addresses are the same as standard C52 devices.<br />
Table 47. Priority Level Bit Values<br />
IPH. x IPL. x Interrupt Level Priority<br />
0 0 0 (Lowest)<br />
0 1 1<br />
1 0 2<br />
1 1 3 (Highest)<br />
A low-priority interrupt can be interrupted by a high priority interrupt, but not by another<br />
low-priority interrupt. A high-priority interrupt can’t be interrupted by any other interrupt<br />
source.<br />
If two interrupt requests of different priority levels are received simultaneously, the<br />
request of higher priority level is serviced. If interrupt requests of the same priority level<br />
are received simultaneously, an internal polling sequence determines which request is<br />
serviced. Thus within each priority level there is a second priority structure determined<br />
by the polling sequence.<br />
65
66 <strong>AT89C51ID2</strong><br />
Table 48. IENO Register<br />
IEN0 - Interrupt Enable Register (A8h)<br />
7 6 5 4 3 2 1 0<br />
EA EC ET2 ES ET1 EX1 ET0 EX0<br />
Bit<br />
Number<br />
Bit<br />
Mnemonic Description<br />
7 EA<br />
6 EC<br />
5 ET2<br />
4 ES<br />
3 ET1<br />
2 EX1<br />
1 ET0<br />
0 EX0<br />
Reset Value = 0000 0000b<br />
Bit addressable<br />
Enable All interrupt bit<br />
Cleared to disable all interrupts.<br />
Set to enable all interrupts.<br />
PCA interrupt enable bit<br />
Cleared to disable.<br />
Set to enable.<br />
Timer 2 overflow interrupt Enable bit<br />
Cleared to disable timer 2 overflow interrupt.<br />
Set to enable timer 2 overflow interrupt.<br />
Serial port Enable bit<br />
Cleared to disable serial port interrupt.<br />
Set to enable serial port interrupt.<br />
Timer 1 overflow interrupt Enable bit<br />
Cleared to disable timer 1 overflow interrupt.<br />
Set to enable timer 1 overflow interrupt.<br />
External interrupt 1 Enable bit<br />
Cleared to disable external interrupt 1.<br />
Set to enable external interrupt 1.<br />
Timer 0 overflow interrupt Enable bit<br />
Cleared to disable timer 0 overflow interrupt.<br />
Set to enable timer 0 overflow interrupt.<br />
External interrupt 0 Enable bit<br />
Cleared to disable external interrupt 0.<br />
Set to enable external interrupt 0.<br />
4289A–8051–09/03
4289A–8051–09/03<br />
Table 49. IPL0 Register<br />
IPL0 - Interrupt Priority Register (B8h)<br />
Reset Value = X000 0000b<br />
Bit addressable<br />
<strong>AT89C51ID2</strong><br />
7 6 5 4 3 2 1 0<br />
- PPCL PT2L PSL PT1L PX1L PT0L PX0L<br />
Bit<br />
Number<br />
7 -<br />
Bit<br />
Mnemonic Description<br />
6 PPCL<br />
5 PT2L<br />
4 PSL<br />
3 PT1L<br />
2 PX1L<br />
1 PT0L<br />
0 PX0L<br />
Reserved<br />
The value read from this bit is indeterminate. Do not set this bit.<br />
PCA interrupt Priority bit<br />
Refer to PPCH for priority level.<br />
Timer 2 overflow interrupt Priority bit<br />
Refer to PT2H for priority level.<br />
Serial port Priority bit<br />
Refer to PSH for priority level.<br />
Timer 1 overflow interrupt Priority bit<br />
Refer to PT1H for priority level.<br />
External interrupt 1 Priority bit<br />
Refer to PX1H for priority level.<br />
Timer 0 overflow interrupt Priority bit<br />
Refer to PT0H for priority level.<br />
External interrupt 0 Priority bit<br />
Refer to PX0H for priority level.<br />
67
68 <strong>AT89C51ID2</strong><br />
Table 50. IPH0 Register<br />
IPH0 - Interrupt Priority High Register (B7h)<br />
7 6 5 4 3 2 1 0<br />
Bit<br />
Number<br />
- PPCH PT2H PSH PT1H PX1H PT0H PX0H<br />
7 -<br />
Bit<br />
Mnemonic Description<br />
6 PPCH<br />
5 PT2H<br />
4 PSH<br />
3 PT1H<br />
2 PX1H<br />
1 PT0H<br />
0 PX0H<br />
Reset Value = X000 0000b<br />
Not bit addressable<br />
Reserved<br />
The value read from this bit is indeterminate. Do not set this bit.<br />
PCA interrupt Priority high bit.<br />
PPCHPPCLPriority Level<br />
0 0Lowest<br />
0 1<br />
1 0<br />
1 1Highest<br />
Timer 2 overflow interrupt Priority High bit<br />
PT2HPT2LPriority Level<br />
0 0Lowest<br />
0 1<br />
1 0<br />
1 1Highest<br />
Serial port Priority High bit<br />
PSH PSLPriority Level<br />
0 0Lowest<br />
0 1<br />
1 0<br />
1 1Highest<br />
Timer 1 overflow interrupt Priority High bit<br />
PT1HPT1L Priority Level<br />
0 0 Lowest<br />
0 1<br />
1 0<br />
1 1 Highest<br />
External interrupt 1 Priority High bit<br />
PX1HPX1LPriority Level<br />
0 0Lowest<br />
0 1<br />
1 0<br />
1 1Highest<br />
Timer 0 overflow interrupt Priority High bit<br />
PT0HPT0LPriority Level<br />
0 0Lowest<br />
0 1<br />
1 0<br />
1 1Highest<br />
External interrupt 0 Priority High bit<br />
PX0H PX0LPriority Level<br />
0 0Lowest<br />
0 1<br />
1 0<br />
1 1Highest<br />
4289A–8051–09/03
4289A–8051–09/03<br />
Table 51. IEN1 Register<br />
IEN1 - Interrupt Enable Register (B1h)<br />
Reset Value = XXXX X000b<br />
Bit addressable<br />
<strong>AT89C51ID2</strong><br />
7 6 5 4 3 2 1 0<br />
Bit<br />
Number<br />
- - - - - ESPI ETWI EKBD<br />
Bit<br />
Mnemonic Description<br />
7 - Reserved<br />
6 - Reserved<br />
5 - Reserved<br />
4 - Reserved<br />
3 - Reserved<br />
2 ESPI<br />
1 ETWI<br />
0 EKBD<br />
SPI interrupt Enable bit<br />
Cleared to disable SPI interrupt.<br />
Set to enable SPI interrupt.<br />
TWI interrupt Enable bit<br />
Cleared to disable TWI interrupt.<br />
Set to enable TWI interrupt.<br />
Keyboard interrupt Enable bit<br />
Cleared to disable keyboard interrupt.<br />
Set to enable keyboard interrupt.<br />
69
70 <strong>AT89C51ID2</strong><br />
Table 52. IPL1 Register<br />
IPL1 - Interrupt Priority Register (B2h)<br />
Table 53.<br />
7 6 5 4 3 2 1 0<br />
- - - - - SPIL TWIL KBDL<br />
Bit<br />
Number<br />
7 -<br />
6 -<br />
5 -<br />
4 -<br />
3 -<br />
Bit<br />
Mnemonic Description<br />
2 SPIL<br />
1 TWIL<br />
0 KBDL<br />
Reset Value = XXXX X000b<br />
Bit addressable<br />
Reserved<br />
The value read from this bit is indeterminate. Do not set this bit.<br />
Reserved<br />
The value read from this bit is indeterminate. Do not set this bit.<br />
Reserved<br />
The value read from this bit is indeterminate. Do not set this bit.<br />
Reserved<br />
The value read from this bit is indeterminate. Do not set this bit.<br />
Reserved<br />
The value read from this bit is indeterminate. Do not set this bit.<br />
SPI interrupt Priority bit<br />
Refer to SPIH for priority level.<br />
TWI interrupt Priority bit<br />
Refer to TWIH for priority level.<br />
Keyboard interrupt Priority bit<br />
Refer to KBDH for priority level.<br />
4289A–8051–09/03
4289A–8051–09/03<br />
Table 54. IPH1 Register<br />
IPH1 - Interrupt Priority High Register (B3h)<br />
Reset Value = XXXX X000b<br />
Not bit addressable<br />
<strong>AT89C51ID2</strong><br />
7 6 5 4 3 2 1 0<br />
- - - - - SPIH TWIH KBDH<br />
Bit<br />
Number<br />
7 -<br />
6 -<br />
5 -<br />
4 -<br />
3 -<br />
Bit<br />
Mnemonic Description<br />
2 SPIH<br />
1 TWIH<br />
0 KBDH<br />
Reserved<br />
The value read from this bit is indeterminate. Do not set this bit.<br />
Reserved<br />
The value read from this bit is indeterminate. Do not set this bit.<br />
Reserved<br />
The value read from this bit is indeterminate. Do not set this bit.<br />
Reserved<br />
The value read from this bit is indeterminate. Do not set this bit.<br />
Reserved<br />
The value read from this bit is indeterminate. Do not set this bit.<br />
SPI interrupt Priority High bit<br />
SPIH SPILPriority Level<br />
0 0 Lowest<br />
0 1<br />
1 0<br />
1 1 Highest<br />
TWI interrupt Priority High bit<br />
TWIH TWILPriority Level<br />
0 0 Lowest<br />
0 1<br />
1 0<br />
1 1 Highest<br />
Keyboard interrupt Priority High bit<br />
KB DH KBDLPriority Level<br />
0 0 Lowest<br />
0 1<br />
1 0<br />
1 1 Highest<br />
71
Interrupt Sources and<br />
Vector Addresses<br />
72 <strong>AT89C51ID2</strong><br />
Table 55. Interrupt Sources and Vector Addresses<br />
Number Polling Priority Interrupt Source<br />
Interrupt<br />
Request<br />
Vector<br />
Address<br />
0 0 Reset 0000h<br />
1 1 INT0 IE0 0003h<br />
2 2 Timer 0 TF0 000Bh<br />
3 3 INT1 IE1 0013h<br />
4 4 Timer 1 IF1 001Bh<br />
5 6 UART RI+TI 0023h<br />
6 7 Timer 2 TF2+EXF2 002Bh<br />
7 5 PCA CF + CCFn (n = 0-4) 0033h<br />
8 8 Keyboard KBDIT 003Bh<br />
9 9 TWI TWIIT 0043h<br />
9 9 SPI SPIIT 004Bh<br />
4289A–8051–09/03
Power Management<br />
4289A–8051–09/03<br />
<strong>AT89C51ID2</strong><br />
Introduction Two power reduction modes are implemented in the <strong>AT89C51ID2</strong>. The Idle mode and<br />
the Power-Down mode. These modes are detailed in the following sections. In addition<br />
to these power reduction modes, the clocks of the core and peripherals can be dynamically<br />
divided by 2 using the X2 mode detailed in Section “Enhanced Features”, page 22.<br />
Idle Mode Idle mode is a power reduction mode that reduces the power consumption. In this mode,<br />
program execution halts. Idle mode freezes the clock to the CPU at known states while<br />
the peripherals continue to be clocked. The CPU status before entering Idle mode is<br />
preserved, i.e., the program counter and program status word register retain their data<br />
for the duration of Idle mode. The contents of the SFRs and RAM are also retained. The<br />
status of the Port pins during Idle mode is detailed in Table 56.<br />
Entering Idle Mode To enter Idle mode, set the IDL bit in PCON register (see Table 57). The <strong>AT89C51ID2</strong><br />
enters Idle mode upon execution of the instruction that sets IDL bit. The instruction that<br />
sets IDL bit is the last instruction executed.<br />
Note: If IDL bit and PD bit are set simultaneously, the <strong>AT89C51ID2</strong> enters Power-Down mode.<br />
Then it does not go in Idle mode when exiting Power-Down mode.<br />
Exiting Idle Mode There are two ways to exit Idle mode:<br />
1. Generate an enabled interrupt.<br />
– Hardware clears IDL bit in PCON register which restores the clock to the<br />
CPU. Execution resumes with the interrupt service routine. Upon completion<br />
of the interrupt service routine, program execution resumes with the<br />
instruction immediately following the instruction that activated Idle mode.<br />
The general purpose flags (GF1 and GF0 in PCON register) may be used to<br />
indicate whether an interrupt occurred during normal operation or during Idle<br />
mode. When Idle mode is exited by an interrupt, the interrupt service routine<br />
may examine GF1 and GF0.<br />
2. Generate a reset.<br />
– A logic high on the RST pin clears IDL bit in PCON register directly and<br />
asynchronously. This restores the clock to the CPU. Program execution<br />
momentarily resumes with the instruction immediately following the<br />
instruction that activated the Idle mode and may continue for a number of<br />
clock cycles before the internal reset algorithm takes control. Reset<br />
initializes the <strong>AT89C51ID2</strong> and vectors the CPU to address C:0000h.<br />
Note: During the time that execution resumes, the internal RAM cannot be accessed; however,<br />
it is possible for the Port pins to be accessed. To avoid unexpected outputs at the Port<br />
pins, the instruction immediately following the instruction that activated Idle mode should<br />
not write to a Port pin or to the external RAM.<br />
Power-Down Mode The Power-Down mode places the <strong>AT89C51ID2</strong> in a very low power state. Power-Down<br />
mode stops the oscillator, freezes all clock at known states. The CPU status prior to<br />
entering Power-Down mode is preserved, i.e., the program counter, program status<br />
word register retain their data for the duration of Power-Down mode. In addition, the SFR<br />
73
74 <strong>AT89C51ID2</strong><br />
and RAM contents are preserved. The status of the Port pins during Power-Down mode<br />
is detailed in Table 56.<br />
Note: VCC may be reduced to as low as VRET during Power-Down mode to further reduce<br />
power dissipation. Take care, however, that VDD is not reduced until Power-Down mode<br />
is invoked.<br />
Entering Power-Down Mode To enter Power-Down mode, set PD bit in PCON register. The <strong>AT89C51ID2</strong> enters the<br />
Power-Down mode upon execution of the instruction that sets PD bit. The instruction<br />
that sets PD bit is the last instruction executed.<br />
Exiting Power-Down Mode<br />
Figure 27. Power-Down Exit Waveform Using INT1:0#<br />
INT1:0#<br />
OSC<br />
Active phase<br />
Note: If VCC was reduced during the Power-Down mode, do not exit Power-Down mode until<br />
VCC is restored to the normal operating level.<br />
There are two ways to exit the Power-Down mode:<br />
1. Generate an enabled external interrupt.<br />
– The <strong>AT89C51ID2</strong> provides capability to exit from Power-Down using INT0#,<br />
INT1#.<br />
Hardware clears PD bit in PCON register which starts the oscillator and<br />
restores the clocks to the CPU and peripherals. Using INTx# input,<br />
execution resumes when the input is released (see Figure 27). Execution<br />
resumes with the interrupt service routine. Upon completion of the interrupt<br />
service routine, program execution resumes with the instruction immediately<br />
following the instruction that activated Power-Down mode.<br />
Note: The external interrupt used to exit Power-Down mode must be configured as level sensitive<br />
(INT0# and INT1#) and must be assigned the highest priority. In addition, the<br />
duration of the interrupt must be long enough to allow the oscillator to stabilize. The execution<br />
will only resume when the interrupt is deasserted.<br />
Note: Exit from power-down by external interrupt does not affect the SFRs nor the internal RAM<br />
content.<br />
Power-down phase Oscillator restart phase Active phase<br />
2. Generate a reset.<br />
– A logic high on the RST pin clears PD bit in PCON register directly and<br />
asynchronously. This starts the oscillator and restores the clock to the CPU<br />
and peripherals. Program execution momentarily resumes with the<br />
instruction immediately following the instruction that activated Power-Down<br />
mode and may continue for a number of clock cycles before the internal<br />
reset algorithm takes control. Reset initializes the <strong>AT89C51ID2</strong> and vectors<br />
the CPU to address 0000h.<br />
Note: During the time that execution resumes, the internal RAM cannot be accessed; however,<br />
it is possible for the Port pins to be accessed. To avoid unexpected outputs at the Port<br />
4289A–8051–09/03
4289A–8051–09/03<br />
<strong>AT89C51ID2</strong><br />
pins, the instruction immediately following the instruction that activated the Power-Down<br />
mode should not write to a Port pin or to the external RAM.<br />
Note: Exit from power-down by reset redefines all the SFRs, but does not affect the internal<br />
RAM content.<br />
Table 56. Pin Conditions in Special Operating Modes<br />
Mode Port 0 Port 1 Port 2 Port 3 Port 4 ALE PSEN#<br />
Reset Floating High High High High High High<br />
Idle<br />
(internal<br />
code)<br />
Idle<br />
(external<br />
code)<br />
Power-<br />
Down(inter<br />
nal code)<br />
Power-<br />
Down<br />
(external<br />
code)<br />
<strong>Data</strong> <strong>Data</strong> <strong>Data</strong> <strong>Data</strong> <strong>Data</strong> High High<br />
Floating <strong>Data</strong> <strong>Data</strong> <strong>Data</strong> <strong>Data</strong> High High<br />
<strong>Data</strong> <strong>Data</strong> <strong>Data</strong> <strong>Data</strong> <strong>Data</strong> Low Low<br />
Floating <strong>Data</strong> <strong>Data</strong> <strong>Data</strong> <strong>Data</strong> Low Low<br />
75
Registers Table 57. PCON Register<br />
PCON (S87:h) Power configuration Register<br />
76 <strong>AT89C51ID2</strong><br />
7 6 5 4 3 2 1 0<br />
- - - POF GF1 GF0 PD IDL<br />
Bit<br />
Number<br />
7-5 -<br />
Bit<br />
Mnemonic Description<br />
4 POF<br />
3 GF1<br />
2 GF0<br />
1 PD<br />
0 IDL<br />
Reset Value= XXXX 0000b<br />
Reserved<br />
The value read from these bits is indeterminate. Do not set these bits.<br />
Power-Off Flag<br />
Cleared to recognize next reset type.<br />
Set by hardware when VCC rises from 0 to its nominal voltage. Can also be set<br />
by software.<br />
General Purpose flag 1<br />
One use is to indicate whether an interrupt occurred during normal operation or<br />
during Idle mode.<br />
General Purpose flag 0<br />
One use is to indicate whether an interrupt occurred during normal operation or<br />
during Idle mode.<br />
Power-Down Mode bit<br />
Cleared by hardware when an interrupt or reset occurs.<br />
Set to activate the Power-Down mode.<br />
If IDL and PD are both set, PD takes precedence.<br />
Idle Mode bit<br />
Cleared by hardware when an interrupt or reset occurs.<br />
Set to activate the Idle mode.<br />
If IDL and PD are both set, PD takes precedence.<br />
4289A–8051–09/03
<strong>AT89C51ID2</strong><br />
Keyboard Interface The <strong>AT89C51ID2</strong> implements a keyboard interface allowing the connection of a<br />
8 x n matrix keyboard. It is based on 8 inputs with programmable interrupt capability on<br />
both high or low level. These inputs are available as alternate function of P1 and allow to<br />
exit from idle and power down modes.<br />
4289A–8051–09/03<br />
The keyboard interface interfaces with the C51 core through 3 special function registers:<br />
KBLS, the Keyboard Level Selection register (Table 60), KBE, The Keyboard interrupt<br />
Enable register (Table 59), and KBF, the Keyboard Flag register (Table 58).<br />
Interrupt The keyboard inputs are considered as 8 independent interrupt sources sharing the<br />
same interrupt vector. An interrupt enable bit (KBD in IE1) allows global enable or disable<br />
of the keyboard interrupt (see Figure 28). As detailed in Figure 29 each keyboard<br />
input has the capability to detect a programmable level according to KBLS. x bit value.<br />
Level detection is then reported in interrupt flags KBF. x that can be masked by software<br />
using KBE. x bits.<br />
This structure allow keyboard arrangement from 1 by n to 8 by n matrix and allow usage<br />
of P1 inputs for other purpose.<br />
Figure 28. Keyboard Interface Block Diagram<br />
P1:x<br />
Figure 29. Keyboard Input Circuitry<br />
P1.0<br />
Vcc<br />
Internal Pullup<br />
KBLS. x<br />
KBE. x<br />
Power Reduction Mode P1 inputs allow exit from idle and power down modes as detailed in Section “Power<br />
Management”, page 73.<br />
0<br />
1<br />
Input Circuitry<br />
P1.1 Input Circuitry<br />
P1.2 Input Circuitry<br />
P1.3 Input Circuitry<br />
P1.4 Input Circuitry<br />
P1.5 Input Circuitry<br />
P1.6 Input Circuitry<br />
P1.7 Input Circuitry<br />
KBF. x<br />
KBD<br />
IE1<br />
KBDIT<br />
Keyboard Interface<br />
Interrupt Request<br />
77
Registers Table 58. KBF Register<br />
KBF-Keyboard Flag Register (9Eh)<br />
78 <strong>AT89C51ID2</strong><br />
7 6 5 4 3 2 1 0<br />
KBF7 KBF6 KBF5 KBF4 KBF3 KBF2 KBF1 KBF0<br />
Bit<br />
Number<br />
Bit<br />
Mnemonic Description<br />
7 KBF7<br />
6 KBF6<br />
5 KBF5<br />
4 KBF4<br />
3 KBF3<br />
2 KBF2<br />
1 KBF1<br />
0 KBF0<br />
Reset Value= 0000 0000b<br />
Keyboard line 7 flag<br />
Set by hardware when the Port line 7 detects a programmed level. It generates a<br />
Keyboard interrupt request if the KBKBIE. 7 bit in KBIE register is set.<br />
Must be cleared by software.<br />
Keyboard line 6 flag<br />
Set by hardware when the Port line 6 detects a programmed level. It generates a<br />
Keyboard interrupt request if the KBIE. 6 bit in KBIE register is set.<br />
Must be cleared by software.<br />
Keyboard line 5 flag<br />
Set by hardware when the Port line 5 detects a programmed level. It generates a<br />
Keyboard interrupt request if the KBIE. 5 bit in KBIE register is set.<br />
Must be cleared by software.<br />
Keyboard line 4 flag<br />
Set by hardware when the Port line 4 detects a programmed level. It generates a<br />
Keyboard interrupt request if the KBIE. 4 bit in KBIE register is set.<br />
Must be cleared by software.<br />
Keyboard line 3 flag<br />
Set by hardware when the Port line 3 detects a programmed level. It generates a<br />
Keyboard interrupt request if the KBIE. 3 bit in KBIE register is set.<br />
Must be cleared by software.<br />
Keyboard line 2 flag<br />
Set by hardware when the Port line 2 detects a programmed level. It generates a<br />
Keyboard interrupt request if the KBIE. 2 bit in KBIE register is set.<br />
Must be cleared by software.<br />
Keyboard line 1 flag<br />
Set by hardware when the Port line 1 detects a programmed level. It generates a<br />
Keyboard interrupt request if the KBIE. 1 bit in KBIE register is set.<br />
Must be cleared by software.<br />
Keyboard line 0 flag<br />
Set by hardware when the Port line 0 detects a programmed level. It generates a<br />
Keyboard interrupt request if the KBIE. 0 bit in KBIE register is set.<br />
Must be cleared by software.<br />
4289A–8051–09/03
4289A–8051–09/03<br />
Table 59. KBE Register<br />
KBE-Keyboard Input Enable Register (9Dh)<br />
<strong>AT89C51ID2</strong><br />
7 6 5 4 3 2 1 0<br />
KBE7 KBE6 KBE5 KBE4 KBE3 KBE2 KBE1 KBE0<br />
Bit<br />
Number<br />
Bit<br />
Mnemonic Description<br />
7 KBE7<br />
6 KBE6<br />
5 KBE5<br />
4 KBE4<br />
3 KBE3<br />
2 KBE2<br />
1 KBE1<br />
0 KBE0<br />
Reset Value= 0000 0000b<br />
Keyboard line 7 Enable bit<br />
Cleared to enable standard I/O pin.<br />
Set to enable KBF. 7 bit in KBF register to generate an interrupt request.<br />
Keyboard line 6 Enable bit<br />
Cleared to enable standard I/O pin.<br />
Set to enable KBF. 6 bit in KBF register to generate an interrupt request.<br />
Keyboard line 5 Enable bit<br />
Cleared to enable standard I/O pin.<br />
Set to enable KBF. 5 bit in KBF register to generate an interrupt request.<br />
Keyboard line 4 Enable bit<br />
Cleared to enable standard I/O pin.<br />
Set to enable KBF. 4 bit in KBF register to generate an interrupt request.<br />
Keyboard line 3 Enable bit<br />
Cleared to enable standard I/O pin.<br />
Set to enable KBF. 3 bit in KBF register to generate an interrupt request.<br />
Keyboard line 2 Enable bit<br />
Cleared to enable standard I/O pin.<br />
Set to enable KBF. 2 bit in KBF register to generate an interrupt request.<br />
Keyboard line 1 Enable bit<br />
Cleared to enable standard I/O pin.<br />
Set to enable KBF. 1 bit in KBF register to generate an interrupt request.<br />
Keyboard line 0 Enable bit<br />
Cleared to enable standard I/O pin.<br />
Set to enable KBF. 0 bit in KBF register to generate an interrupt request.<br />
79
80 <strong>AT89C51ID2</strong><br />
Table 60. KBLS Register<br />
KBLS-Keyboard Level Selector Register (9Ch)<br />
7 6 5 4 3 2 1 0<br />
KBLS7 KBLS6 KBLS5 KBLS4 KBLS3 KBLS2 KBLS1 KBLS0<br />
Bit<br />
Number<br />
Bit<br />
Mnemonic Description<br />
7 KBLS7<br />
6 KBLS6<br />
5 KBLS5<br />
4 KBLS4<br />
3 KBLS3<br />
2 KBLS2<br />
1 KBLS1<br />
0 KBLS0<br />
Reset Value= 0000 0000b<br />
Keyboard line 7 Level Selection bit<br />
Cleared to enable a low level detection on Port line 7.<br />
Set to enable a high level detection on Port line 7.<br />
Keyboard line 6 Level Selection bit<br />
Cleared to enable a low level detection on Port line 6.<br />
Set to enable a high level detection on Port line 6.<br />
Keyboard line 5 Level Selection bit<br />
Cleared to enable a low level detection on Port line 5.<br />
Set to enable a high level detection on Port line 5.<br />
Keyboard line 4 Level Selection bit<br />
Cleared to enable a low level detection on Port line 4.<br />
Set to enable a high level detection on Port line 4.<br />
Keyboard line 3 Level Selection bit<br />
Cleared to enable a low level detection on Port line 3.<br />
Set to enable a high level detection on Port line 3.<br />
Keyboard line 2 Level Selection bit<br />
Cleared to enable a low level detection on Port line 2.<br />
Set to enable a high level detection on Port line 2.<br />
Keyboard line 1 Level Selection bit<br />
Cleared to enable a low level detection on Port line 1.<br />
Set to enable a high level detection on Port line 1.<br />
Keyboard line 0 Level Selection bit<br />
Cleared to enable a low level detection on Port line 0.<br />
Set to enable a high level detection on Port line 0.<br />
4289A–8051–09/03
4289A–8051–09/03<br />
<strong>AT89C51ID2</strong><br />
2-wire Interface (TWI) This section describes the 2-wire interface. The 2-wire bus is a bi-directional 2-wire<br />
serial communication standard. It is designed primarily for simple but efficient integrated<br />
circuit (IC) control. The system is comprised of two lines, SCL (Serial Clock) and SDA<br />
(Serial <strong>Data</strong>) that carry information between the ICs connected to them. The serial data<br />
transfer is limited to 400 Kbit/s in standard mode. Various communication configuration<br />
can be designed using this bus. Figure 30 shows a typical 2-wire bus configuration. All<br />
the devices connected to the bus can be master and slave.<br />
Figure 30. 2-wire Bus Configuration<br />
SCL<br />
SDA<br />
device1 device2 device3 ...<br />
deviceN<br />
81
Figure 31. Block Diagram<br />
SDA<br />
PI2.1<br />
SCL<br />
PI2.0<br />
Input<br />
Filter<br />
Output<br />
Stage<br />
Input<br />
Filter<br />
Output<br />
Stage<br />
82 <strong>AT89C51ID2</strong><br />
Status<br />
Bits<br />
SSADR<br />
SSDAT<br />
Timer 1<br />
overflow<br />
SSCON<br />
SSCS<br />
Arbitration &<br />
Sink Logic<br />
Serial clock<br />
generator<br />
Address Register<br />
Comparator<br />
Shift Register<br />
Timing &<br />
Control<br />
logic<br />
Control Register<br />
Status<br />
Decoder<br />
Status Register<br />
8<br />
8<br />
8<br />
7<br />
ACK<br />
F CLK PERIPH /4<br />
Interrupt<br />
Internal Bus<br />
4289A–8051–09/03
4289A–8051–09/03<br />
<strong>AT89C51ID2</strong><br />
Description The CPU interfaces to the 2-wire logic via the following four 8-bit special function registers:<br />
the Synchronous Serial Control register (SSCON; Table 70), the Synchronous<br />
Serial <strong>Data</strong> register (SSDAT; Table 71), the Synchronous Serial Control and Status register<br />
(SSCS; Table 72) and the Synchronous Serial Address register (SSADR Table 75).<br />
SSCON is used to enable the TWI interface, to program the bit rate (see Table 63), to<br />
enable slave modes, to acknowledge or not a received data, to send a START or a<br />
STOP condition on the 2-wire bus, and to acknowledge a serial interrupt. A hardware<br />
reset disables the TWI module.<br />
SSCS contains a status code which reflects the status of the 2-wire logic and the 2-wire<br />
bus. The three least significant bits are always zero. The five most significant bits contains<br />
the status code. There are 26 possible status codes. When SSCS contains F8h,<br />
no relevant state information is available and no serial interrupt is requested. A valid status<br />
code is available in SSCS one machine cycle after SI is set by hardware and is still<br />
present one machine cycle after SI has been reset by software. to Table 69. give the<br />
status for the master modes and miscellaneous states.<br />
SSDAT contains a byte of serial data to be transmitted or a byte which has just been<br />
received. It is addressable while it is not in process of shifting a byte. This occurs when<br />
2-wire logic is in a defined state and the serial interrupt flag is set. <strong>Data</strong> in SSDAT<br />
remains stable as long as SI is set. While data is being shifted out, data on the bus is<br />
simultaneously shifted in; SSDAT always contains the last byte present on the bus.<br />
SSADR may be loaded with the 7-bit slave address (7 most significant bits) to which the<br />
TWI module will respond when programmed as a slave transmitter or receiver. The LSB<br />
is used to enable general call address (00h) recognition.<br />
Figure 32 shows how a data transfer is accomplished on the 2-wire bus.<br />
Figure 32. Complete <strong>Data</strong> Transfer on 2-wire Bus<br />
SDA<br />
SCL<br />
S<br />
start<br />
condition<br />
MSB<br />
1 2 7 8 9<br />
ACK<br />
The four operating modes are:<br />
Master Transmitter<br />
Master Receiver<br />
Slave transmitter<br />
Slave receiver<br />
acknowledgement<br />
signal from receiver<br />
1 2 3-8 9<br />
ACK<br />
clock line held low<br />
while interrupts are serviced<br />
acknowledgement<br />
signal from receiver<br />
P<br />
stop<br />
condition<br />
<strong>Data</strong> transfer in each mode of operation is shown in Table to Table 69 and Figure 33. to<br />
Figure 36.. These figures contain the following abbreviations:<br />
S : START condition<br />
R : Read bit (high level at SDA)<br />
83
84 <strong>AT89C51ID2</strong><br />
W: Write bit (low level at SDA)<br />
A: Acknowledge bit (low level at SDA)<br />
A: Not acknowledge bit (high level at SDA)<br />
<strong>Data</strong>: 8-bit data byte<br />
P : STOP condition<br />
In Figure 33 to Figure 36, circles are used to indicate when the serial interrupt flag is set.<br />
The numbers in the circles show the status code held in SSCS. At these points, a service<br />
routine must be executed to continue or complete the serial transfer. These service<br />
routines are not critical since the serial transfer is suspended until the serial interrupt<br />
flag is cleared by software.<br />
When the serial interrupt routine is entered, the status code in SSCS is used to branch<br />
to the appropriate service routine. For each status code, the required software action<br />
and details of the following serial transfer are given in Table to Table 69.<br />
Master Transmitter Mode In the master transmitter mode, a number of data bytes are transmitted to a slave<br />
receiver (Figure 33). Before the master transmitter mode can be entered, SSCON must<br />
be initialised as follows:<br />
Table 61. SSCON Initialization<br />
CR2 SSIE STA STO SI AA CR1 CR0<br />
bit rate 1 0 0 0 X bit rate bit rate<br />
CR0, CR1 and CR2 define the internal serial bit rate if external bit rate generator is not<br />
used. SSIE must be set to enable TWI. STA, STO and SI must be cleared.<br />
The master transmitter mode may now be entered by setting the STA bit. The 2-wire<br />
logic will now test the 2-wire bus and generate a START condition as soon as the bus<br />
becomes free. When a START condition is transmitted, the serial interrupt flag (SI bit in<br />
SSCON) is set, and the status code in SSCS will be 08h. This status must be used to<br />
vector to an interrupt routine that loads SSDAT with the slave address and the data<br />
direction bit (SLA+W).<br />
When the slave address and the direction bit have been transmitted and an acknowledgement<br />
bit has been received, SI is set again and a number of status code in SSCS<br />
are possible. There are 18h, 20h or 38h for the master mode and also 68h, 78h or B0h if<br />
the slave mode was enabled (AA=logic 1). The appropriate action to be taken for each<br />
of these status code is detailed in Table . This scheme is repeated until a STOP condition<br />
is transmitted.<br />
SSIE, CR2, CR1 and CR0 are not affected by the serial transfer and are referred to<br />
Table 7 to Table 11. After a repeated START condition (state 10h) the TWI module may<br />
switch to the master receiver mode by loading SSDAT with SLA+R.<br />
Master Receiver Mode In the master receiver mode, a number of data bytes are received from a slave transmitter<br />
(Figure 34). The transfer is initialized as in the master transmitter mode. When the<br />
START condition has been transmitted, the interrupt routine must load SSDAT with the<br />
7-bit slave address and the data direction bit (SLA+R). The serial interrupt flag SI must<br />
then be cleared before the serial transfer can continue.<br />
4289A–8051–09/03
4289A–8051–09/03<br />
<strong>AT89C51ID2</strong><br />
When the slave address and the direction bit have been transmitted and an acknowledgement<br />
bit has been received, the serial interrupt flag is set again and a number of<br />
status code in SSCS are possible. There are 40h, 48h or 38h for the master mode and<br />
also 68h, 78h or B0h if the slave mode was enabled (AA=logic 1). The appropriate<br />
action to be taken for each of these status code is detailed in Table . This scheme is<br />
repeated until a STOP condition is transmitted.<br />
SSIE, CR2, CR1 and CR0 are not affected by the serial transfer and are referred to<br />
Table 7 to Table 11. After a repeated START condition (state 10h) the TWI module may<br />
switch to the master transmitter mode by loading SSDAT with SLA+W.<br />
Slave Receiver Mode In the slave receiver mode, a number of data bytes are received from a master transmitter<br />
(Figure 35). To initiate the slave receiver mode, SSADR and SSCON must be loaded<br />
as follows:<br />
Table 62. SSADR: Slave Receiver Mode Initialization<br />
A6 A5 A4 A3 A2 A1 A0 GC<br />
own slave address<br />
The upper 7 bits are the address to which the TWI module will respond when addressed<br />
by a master. If the LSB (GC) is set the TWI module will respond to the general call<br />
address (00h); otherwise it ignores the general call address.<br />
Table 63. SSCON: Slave Receiver Mode Initialization<br />
CR2 SSIE STA STO SI AA CR1 CR0<br />
bit rate 1 0 0 0 1 bit rate bit rate<br />
CR0, CR1 and CR2 have no effect in the slave mode. SSIE must be set to enable the<br />
TWI. The AA bit must be set to enable the own slave address or the general call address<br />
acknowledgement. STA, STO and SI must be cleared.<br />
When SSADR and SSCON have been initialised, the TWI module waits until it is<br />
addressed by its own slave address followed by the data direction bit which must be at<br />
logic 0 (W) for the TWI to operate in the slave receiver mode. After its own slave<br />
address and the W bit have been received, the serial interrupt flag is set and a valid status<br />
code can be read from SSCS. This status code is used to vector to an interrupt<br />
service routine.The appropriate action to be taken for each of these status code is<br />
detailed in Table . The slave receiver mode may also be entered if arbitration is lost<br />
while TWI is in the master mode (states 68h and 78h).<br />
If the AA bit is reset during a transfer, TWI module will return a not acknowledge (logic 1)<br />
to SDA after the next received data byte. While AA is reset, the TWI module does not<br />
respond to its own slave address. However, the 2-wire bus is still monitored and<br />
address recognition may be resume at any time by setting AA. This means that the AA<br />
bit may be used to temporarily isolate the module from the 2-wire bus.<br />
Slave Transmitter Mode In the slave transmitter mode, a number of data bytes are transmitted to a master<br />
receiver (Figure 36). <strong>Data</strong> transfer is initialized as in the slave receiver mode. When<br />
SSADR and SSCON have been initialized, the TWI module waits until it is addressed by<br />
85
86 <strong>AT89C51ID2</strong><br />
its own slave address followed by the data direction bit which must be at logic 1 (R) for<br />
TWI to operate in the slave transmitter mode. After its own slave address and the R bit<br />
have been received, the serial interrupt flag is set and a valid status code can be read<br />
from SSCS. This status code is used to vector to an interrupt service routine. The appropriate<br />
action to be taken for each of these status code is detailed in Table . The slave<br />
transmitter mode may also be entered if arbitration is lost while the TWI module is in the<br />
master mode.<br />
If the AA bit is reset during a transfer, the TWI module will transmit the last byte of the<br />
transfer and enter state C0h or C8h. the TWI module is switched to the not addressed<br />
slave mode and will ignore the master receiver if it continues the transfer. Thus the master<br />
receiver receives all 1’s as serial data. While AA is reset, the TWI module does not<br />
respond to its own slave address. However, the 2-wire bus is still monitored and<br />
address recognition may be resume at any time by setting AA. This means that the AA<br />
bit may be used to temporarily isolate the TWI module from the 2-wire bus.<br />
Miscellaneous States There are two SSCS codes that do not correspond to a define TWI hardware state<br />
(Table 69 ). These codes are discuss hereafter.<br />
Status F8h indicates that no relevant information is available because the serial interrupt<br />
flag is not set yet. This occurs between other states and when the TWI module is not<br />
involved in a serial transfer.<br />
Status 00h indicates that a bus error has occurred during a TWI serial transfer. A bus<br />
error is caused when a START or a STOP condition occurs at an illegal position in the<br />
format frame. Examples of such illegal positions happen during the serial transfer of an<br />
address byte, a data byte, or an acknowledge bit. When a bus error occurs, SI is set. To<br />
recover from a bus error, the STO flag must be set and SI must be cleared. This causes<br />
the TWI module to enter the not addressed slave mode and to clear the STO flag (no<br />
other bits in SSCON are affected). The SDA and SCL lines are released and no STOP<br />
condition is transmitted.<br />
Notes the TWI module interfaces to the external 2-wire bus via two port pins: SCL (serial clock<br />
line) and SDA (serial data line). To avoid low level asserting on these lines when the<br />
TWI module is enabled, the output latches of SDA and SLC must be set to logic 1.<br />
Table 64. Bit Frequency Configuration<br />
Bit Frequency ( kHz)<br />
CR2 CR1 CR0 F OSCA= 12 MHz F OSCA = 16 MHz F OSCA divided by<br />
0 0 0 47 62.5 256<br />
0 0 1 53.5 71.5 224<br />
0 1 0 62.5 83 192<br />
0 1 1 75 100 160<br />
1 0 0 - - Unused<br />
1 0 1 100 133.3 120<br />
1 1 0 200 266.6 60<br />
1 1 1 0.5
Figure 33. Format and State in the Master Transmitter Mode<br />
MT<br />
4289A–8051–09/03<br />
Successfull<br />
transmission<br />
to a slave<br />
receiver<br />
Next transfer<br />
started with a<br />
repeated start<br />
condition<br />
Not acknowledge<br />
received after the<br />
slave address<br />
Not acknowledge<br />
received after a data<br />
byte<br />
Arbitration lost in slave<br />
address or data byte<br />
Arbitration lost and<br />
addressed as slave<br />
S SLA W A <strong>Data</strong> A P<br />
08h 18h 28h<br />
From master to slave<br />
From slave to master<br />
A P<br />
20h<br />
A or A continues<br />
38h<br />
Other master<br />
A continues<br />
68h<br />
Other master<br />
<strong>Data</strong> A<br />
n<br />
A P<br />
30h<br />
38h<br />
<strong>AT89C51ID2</strong><br />
S SLA W<br />
10h<br />
Other master<br />
A or A continues<br />
78h B0h To corresponding<br />
states in slave mode<br />
R<br />
MR<br />
Any number of data bytes and their associated<br />
acknowledge bits<br />
This number (contained in SSCS) corresponds<br />
to a defined state of the 2-wire bus<br />
87
Table 65. Status in Master Transmitter Mode<br />
Status<br />
Code<br />
SSSTA<br />
08h<br />
10h<br />
18h<br />
20h<br />
28h<br />
30h<br />
38h<br />
Status of the Twowire<br />
Bus and Twowire<br />
Hardware<br />
A START condition has<br />
been transmitted<br />
A repeated START<br />
condition has been<br />
transmitted<br />
SLA+W has been<br />
transmitted; ACK has<br />
been received<br />
SLA+W has been<br />
transmitted; NOT ACK<br />
has been received<br />
<strong>Data</strong> byte has been<br />
transmitted; ACK has<br />
been received<br />
<strong>Data</strong> byte has been<br />
transmitted; NOT ACK<br />
has been received<br />
Arbitration lost in<br />
SLA+W or data bytes<br />
88 <strong>AT89C51ID2</strong><br />
To/From SSDAT<br />
Application software response<br />
To SSCON<br />
SSSTA SSSTO SSI SSAA<br />
Next Action Taken by Two-wire Hardware<br />
Write SLA+W X 0 0 X SLA+W will be transmitted.<br />
Write SLA+W<br />
Write SLA+R<br />
Write data byte<br />
No SSDAT action<br />
No SSDAT action<br />
No SSDAT action<br />
Write data byte<br />
No SSDAT action<br />
No SSDAT action<br />
No SSDAT action<br />
Write data byte<br />
No SSDAT action<br />
No SSDAT action<br />
No SSDAT action<br />
Write data byte<br />
No SSDAT action<br />
No SSDAT action<br />
No SSDAT action<br />
No SSDAT action<br />
No SSDAT action<br />
X<br />
X<br />
0<br />
1<br />
0<br />
1<br />
0<br />
1<br />
0<br />
1<br />
0<br />
1<br />
0<br />
1<br />
0<br />
1<br />
0<br />
1<br />
0<br />
1<br />
0<br />
0<br />
0<br />
0<br />
1<br />
1<br />
0<br />
0<br />
1<br />
1<br />
0<br />
0<br />
1<br />
1<br />
0<br />
0<br />
1<br />
1<br />
0<br />
0<br />
0<br />
0<br />
0<br />
0<br />
0<br />
0<br />
0<br />
0<br />
0<br />
0<br />
0<br />
0<br />
0<br />
0<br />
0<br />
0<br />
0<br />
0<br />
0<br />
0<br />
X<br />
X<br />
X<br />
X<br />
X<br />
X<br />
X<br />
X<br />
X<br />
X<br />
X<br />
X<br />
X<br />
X<br />
X<br />
X<br />
X<br />
X<br />
X<br />
X<br />
SLA+W will be transmitted.<br />
SLA+R will be transmitted.<br />
Logic will switch to master receiver mode<br />
<strong>Data</strong> byte will be transmitted.<br />
Repeated START will be transmitted.<br />
STOP condition will be transmitted and SSSTO flag<br />
will be reset.<br />
STOP condition followed by a START condition will<br />
be transmitted and SSSTO flag will be reset.<br />
<strong>Data</strong> byte will be transmitted.<br />
Repeated START will be transmitted.<br />
STOP condition will be transmitted and SSSTO flag<br />
will be reset.<br />
STOP condition followed by a START condition will<br />
be transmitted and SSSTO flag will be reset.<br />
<strong>Data</strong> byte will be transmitted.<br />
Repeated START will be transmitted.<br />
STOP condition will be transmitted and SSSTO flag<br />
will be reset.<br />
STOP condition followed by a START condition will<br />
be transmitted and SSSTO flag will be reset.<br />
<strong>Data</strong> byte will be transmitted.<br />
Repeated START will be transmitted.<br />
STOP condition will be transmitted and SSSTO flag<br />
will be reset.<br />
STOP condition followed by a START condition will<br />
be transmitted and SSSTO flag will be reset.<br />
Two-wire bus will be released and not addressed<br />
slave mode will be entered.<br />
A START condition will be transmitted when the bus<br />
becomes free.<br />
4289A–8051–09/03
Figure 34. Format and State in the Master Receiver Mode<br />
MR<br />
4289A–8051–09/03<br />
Successfull<br />
transmission<br />
to a slave<br />
receiver<br />
Next transfer<br />
started with a<br />
repeated start<br />
condition<br />
Not acknowledge<br />
received after the<br />
slave address<br />
Arbitration lost in slave<br />
address or acknowledge bit<br />
Arbitration lost and<br />
addressed as slave<br />
S SLA R A <strong>Data</strong><br />
08h 40h 50h<br />
58h<br />
From master to slave<br />
From slave to master<br />
A P<br />
48h<br />
A or A continues<br />
38h<br />
Other master<br />
A continues<br />
68h<br />
Other master<br />
78h B0h<br />
<strong>Data</strong> A<br />
n<br />
A <strong>Data</strong> A P<br />
38h<br />
<strong>AT89C51ID2</strong><br />
S SLA R<br />
10h<br />
Other master<br />
A continues<br />
To corresponding<br />
states in slave mode<br />
W<br />
MT<br />
Any number of data bytes and their associated<br />
acknowledge bits<br />
This number (contained in SSCS) corresponds<br />
to a defined state of the 2-wire bus<br />
89
Table 66. Status in Master Receiver Mode<br />
Status<br />
Code<br />
SSSTA<br />
08h<br />
10h<br />
38h<br />
40h<br />
48h<br />
50h<br />
58h<br />
Status of the Twowire<br />
Bus and Twowire<br />
Hardware<br />
A START condition has<br />
been transmitted<br />
A repeated START<br />
condition has been<br />
transmitted<br />
Arbitration lost in<br />
SLA+R or NOT ACK<br />
bit<br />
SLA+R has been<br />
transmitted; ACK has<br />
been received<br />
SLA+R has been<br />
transmitted; NOT ACK<br />
has been received<br />
<strong>Data</strong> byte has been<br />
received; ACK has<br />
been returned<br />
<strong>Data</strong> byte has been<br />
received; NOT ACK<br />
has been returned<br />
90 <strong>AT89C51ID2</strong><br />
To/From SSDAT<br />
Application software response<br />
To SSCON<br />
SSSTA SSSTO SSI SSAA<br />
Next Action Taken by Two-wire Hardware<br />
Write SLA+R X 0 0 X SLA+R will be transmitted.<br />
Write SLA+R<br />
Write SLA+W<br />
No SSDAT action<br />
No SSDAT action<br />
No SSDAT action<br />
No SSDAT action<br />
No SSDAT action<br />
No SSDAT action<br />
No SSDAT action<br />
Read data byte<br />
Read data byte<br />
Read data byte<br />
Read data byte<br />
Read data byte<br />
X<br />
X<br />
0<br />
1<br />
0<br />
0<br />
1<br />
0<br />
1<br />
0<br />
0<br />
1<br />
0<br />
1<br />
0<br />
0<br />
0<br />
0<br />
0<br />
0<br />
0<br />
1<br />
1<br />
0<br />
0<br />
0<br />
1<br />
1<br />
0<br />
0<br />
0<br />
0<br />
0<br />
0<br />
0<br />
0<br />
0<br />
0<br />
0<br />
0<br />
0<br />
0<br />
X<br />
X<br />
X<br />
X<br />
0<br />
1<br />
X<br />
X<br />
X<br />
0<br />
1<br />
X<br />
X<br />
X<br />
SLA+R will be transmitted.<br />
SLA+W will be transmitted.<br />
Logic will switch to master transmitter mode.<br />
Two-wire bus will be released and not addressed<br />
slave mode will be entered.<br />
A START condition will be transmitted when the bus<br />
becomes free.<br />
<strong>Data</strong> byte will be received and NOT ACK will be<br />
returned.<br />
<strong>Data</strong> byte will be received and ACK will be returned.<br />
Repeated START will be transmitted.<br />
STOP condition will be transmitted and SSSTO flag<br />
will be reset.<br />
STOP condition followed by a START condition will<br />
be transmitted and SSSTO flag will be reset.<br />
4289A–8051–09/03
Figure 35. Format and State in the Slave Receiver Mode<br />
4289A–8051–09/03<br />
Reception of the own<br />
slave address and one or<br />
more data bytes. All are<br />
acknowledged.<br />
Last data byte received<br />
is not acknowledged.<br />
Arbitration lost as master<br />
and addressed as slave<br />
Reception of the general call<br />
address and one or more data<br />
bytes.<br />
Last data byte received is<br />
not acknowledged.<br />
Arbitration lost as master and<br />
addressed as slave by general call<br />
From master to slave<br />
From slave to master<br />
<strong>AT89C51ID2</strong><br />
S SLA W A <strong>Data</strong> A <strong>Data</strong> A P or S<br />
60h<br />
A<br />
68h<br />
80h 80h A0h<br />
A<br />
88h<br />
P or S<br />
General Call A <strong>Data</strong> A <strong>Data</strong> A P or S<br />
<strong>Data</strong> A<br />
n<br />
70h 90h 90h A0h<br />
A<br />
78h<br />
A<br />
98h<br />
P or S<br />
Any number of data bytes and their associated<br />
acknowledge bits<br />
This number (contained in SSCS) corresponds<br />
to a defined state of the 2-wire bus<br />
91
Table 67. Status in Slave Receiver Mode<br />
Status<br />
Code<br />
(SSCS)<br />
60h<br />
68h<br />
70h<br />
78h<br />
80h<br />
88h<br />
90h<br />
Status of the 2-wire bus and<br />
2-wire hardware<br />
Own SLA+W has been<br />
received; ACK has been<br />
returned<br />
Arbitration lost in SLA+R/W as<br />
master; own SLA+W has been<br />
received; ACK has been<br />
returned<br />
General call address has been<br />
received; ACK has been<br />
returned<br />
Arbitration lost in SLA+R/W as<br />
master; general call address<br />
has been received; ACK has<br />
been returned<br />
Previously addressed with<br />
own SLA+W; data has been<br />
received; ACK has been<br />
returned<br />
Previously addressed with<br />
own SLA+W; data has been<br />
received; NOT ACK has been<br />
returned<br />
Previously addressed with<br />
general call; data has been<br />
received; ACK has been<br />
returned<br />
92 <strong>AT89C51ID2</strong><br />
Application Software Response<br />
To/from SSDAT To SSCON<br />
No SSDAT action or<br />
No SSDAT action<br />
No SSDAT action or<br />
No SSDAT action<br />
No SSDAT action or<br />
No SSDAT action<br />
No SSDAT action or<br />
No SSDAT action<br />
No SSDAT action or<br />
No SSDAT action<br />
Read data byte or<br />
Read data byte or<br />
Read data byte or<br />
Read data byte<br />
Read data byte or<br />
Read data byte<br />
STA STO SI AA<br />
X<br />
X<br />
X<br />
X<br />
X<br />
X<br />
X<br />
X<br />
X<br />
X<br />
0<br />
0<br />
1<br />
1<br />
X<br />
X<br />
0<br />
0<br />
0<br />
0<br />
0<br />
0<br />
0<br />
0<br />
0<br />
0<br />
0<br />
0<br />
0<br />
0<br />
0<br />
0<br />
0<br />
0<br />
0<br />
0<br />
0<br />
0<br />
0<br />
0<br />
0<br />
0<br />
0<br />
0<br />
0<br />
0<br />
0<br />
0<br />
0<br />
1<br />
0<br />
1<br />
0<br />
1<br />
0<br />
1<br />
0<br />
1<br />
0<br />
1<br />
0<br />
1<br />
0<br />
1<br />
Next Action Taken By 2-wire Software<br />
<strong>Data</strong> byte will be received and NOT ACK will be<br />
returned<br />
<strong>Data</strong> byte will be received and ACK will be<br />
returned<br />
<strong>Data</strong> byte will be received and NOT ACK will be<br />
returned<br />
<strong>Data</strong> byte will be received and ACK will be<br />
returned<br />
<strong>Data</strong> byte will be received and NOT ACK will be<br />
returned<br />
<strong>Data</strong> byte will be received and ACK will be<br />
returned<br />
<strong>Data</strong> byte will be received and NOT ACK will be<br />
returned<br />
<strong>Data</strong> byte will be received and ACK will be<br />
returned<br />
<strong>Data</strong> byte will be received and NOT ACK will be<br />
returned<br />
<strong>Data</strong> byte will be received and ACK will be<br />
returned<br />
Switched to the not addressed slave mode; no<br />
recognition of own SLA or GCA<br />
Switched to the not addressed slave mode; own<br />
SLA will be recognised; GCA will be recognised if<br />
GC=logic 1<br />
Switched to the not addressed slave mode; no<br />
recognition of own SLA or GCA. A START<br />
condition will be transmitted when the bus<br />
becomes free<br />
Switched to the not addressed slave mode; own<br />
SLA will be recognised; GCA will be recognised if<br />
GC=logic 1. A START condition will be<br />
transmitted when the bus becomes free<br />
<strong>Data</strong> byte will be received and NOT ACK will be<br />
returned<br />
<strong>Data</strong> byte will be received and ACK will be<br />
returned<br />
4289A–8051–09/03
Table 67. Status in Slave Receiver Mode (Continued)<br />
Status<br />
Code<br />
(SSCS)<br />
98h<br />
A0h<br />
4289A–8051–09/03<br />
Status of the 2-wire bus and<br />
2-wire hardware<br />
Previously addressed with<br />
general call; data has been<br />
received; NOT ACK has been<br />
returned<br />
A STOP condition or repeated<br />
START condition has been<br />
received while still addressed<br />
as slave<br />
Application Software Response<br />
To/from SSDAT To SSCON<br />
Read data byte or<br />
Read data byte or<br />
Read data byte or<br />
Read data byte<br />
No SSDAT action or<br />
No SSDAT action or<br />
No SSDAT action or<br />
No SSDAT action<br />
STA STO SI AA<br />
0<br />
0<br />
1<br />
1<br />
0<br />
0<br />
1<br />
1<br />
0<br />
0<br />
0<br />
0<br />
0<br />
0<br />
0<br />
0<br />
0<br />
0<br />
0<br />
0<br />
0<br />
0<br />
0<br />
0<br />
0<br />
1<br />
0<br />
1<br />
0<br />
1<br />
0<br />
1<br />
<strong>AT89C51ID2</strong><br />
Next Action Taken By 2-wire Software<br />
Switched to the not addressed slave mode; no<br />
recognition of own SLA or GCA<br />
Switched to the not addressed slave mode; own<br />
SLA will be recognised; GCA will be recognised if<br />
GC=logic 1<br />
Switched to the not addressed slave mode; no<br />
recognition of own SLA or GCA. A START<br />
condition will be transmitted when the bus<br />
becomes free<br />
Switched to the not addressed slave mode; own<br />
SLA will be recognised; GCA will be recognised if<br />
GC=logic 1. A START condition will be<br />
transmitted when the bus becomes free<br />
Switched to the not addressed slave mode; no<br />
recognition of own SLA or GCA<br />
Switched to the not addressed slave mode; own<br />
SLA will be recognised; GCA will be recognised if<br />
GC=logic 1<br />
Switched to the not addressed slave mode; no<br />
recognition of own SLA or GCA. A START<br />
condition will be transmitted when the bus<br />
becomes free<br />
Switched to the not addressed slave mode; own<br />
SLA will be recognised; GCA will be recognised if<br />
GC=logic 1. A START condition will be<br />
transmitted when the bus becomes free<br />
93
Figure 36. Format and State in the Slave Transmitter Mode<br />
Reception of the<br />
own slave address<br />
and one or more<br />
data bytes<br />
Arbitration lost as master<br />
and addressed as slave<br />
Last data byte transmitted.<br />
Switched to not addressed<br />
slave (AA=0)<br />
From master to slave<br />
From slave to master<br />
Table 68. Status in Slave Transmitter Mode<br />
Status<br />
Code<br />
(SSCS)<br />
A8h<br />
B0h<br />
B8h<br />
Status of the 2-wire bus and<br />
2-wire hardware<br />
Own SLA+R has been<br />
received; ACK has been<br />
returned<br />
Arbitration lost in SLA+R/W as<br />
master; own SLA+R has been<br />
received; ACK has been<br />
returned<br />
<strong>Data</strong> byte in SSDAT has been<br />
transmitted; NOT ACK has<br />
been received<br />
94 <strong>AT89C51ID2</strong><br />
S SLA R A <strong>Data</strong> A <strong>Data</strong> P or S<br />
A<br />
A8h B8h C0h<br />
A<br />
B0h<br />
<strong>Data</strong> A<br />
n<br />
Application Software Response<br />
To/from SSDAT To SSCON<br />
Load data byte or<br />
Load data byte<br />
Load data byte or<br />
Load data byte<br />
Load data byte or<br />
Load data byte<br />
A<br />
C8h<br />
All 1’s<br />
P or S<br />
Any number of data bytes and their associated<br />
acknowledge bits<br />
This number (contained in SSCS) corresponds<br />
to a defined state of the 2-wire bus<br />
STA STO SI AA<br />
X<br />
X<br />
X<br />
X<br />
X<br />
X<br />
0<br />
0<br />
0<br />
0<br />
0<br />
0<br />
0<br />
0<br />
0<br />
0<br />
0<br />
0<br />
0<br />
1<br />
0<br />
1<br />
0<br />
1<br />
Next Action Taken By 2-wire Software<br />
Last data byte will be transmitted and NOT ACK<br />
will be received<br />
<strong>Data</strong> byte will be transmitted and ACK will be<br />
received<br />
Last data byte will be transmitted and NOT ACK<br />
will be received<br />
<strong>Data</strong> byte will be transmitted and ACK will be<br />
received<br />
Last data byte will be transmitted and NOT ACK<br />
will be received<br />
<strong>Data</strong> byte will be transmitted and ACK will be<br />
received<br />
4289A–8051–09/03
Table 68. Status in Slave Transmitter Mode (Continued)<br />
Status<br />
Code<br />
(SSCS)<br />
C0h<br />
C8h<br />
4289A–8051–09/03<br />
Status of the 2-wire bus and<br />
2-wire hardware<br />
<strong>Data</strong> byte in SSDAT has been<br />
transmitted; NOT ACK has<br />
been received<br />
Last data byte in SSDAT has<br />
been transmitted (AA=0); ACK<br />
has been received<br />
No SSDAT action or<br />
No SSDAT action or<br />
No SSDAT action or<br />
No SSDAT action<br />
Table 69. Miscellaneous Status<br />
Status<br />
Code<br />
(SSCS)<br />
F8h<br />
00h<br />
Application Software Response<br />
To/from SSDAT To SSCON<br />
No SSDAT action or<br />
No SSDAT action or<br />
No SSDAT action or<br />
No SSDAT action<br />
Status of the 2-wire<br />
bus and 2-wire<br />
hardware<br />
No relevant state<br />
information<br />
available; SI= 0<br />
Bus error due to an<br />
illegal START or<br />
STOP condition<br />
STA STO SI AA<br />
0<br />
0<br />
1<br />
1<br />
0<br />
0<br />
1<br />
1<br />
0<br />
0<br />
0<br />
0<br />
0<br />
0<br />
0<br />
0<br />
0<br />
0<br />
0<br />
0<br />
0<br />
0<br />
0<br />
0<br />
0<br />
1<br />
0<br />
1<br />
0<br />
1<br />
0<br />
1<br />
Application Software Response<br />
To/from<br />
SSDAT<br />
No SSDAT<br />
action<br />
No SSDAT<br />
action<br />
<strong>AT89C51ID2</strong><br />
Next Action Taken By 2-wire Software<br />
Switched to the not addressed slave mode; no<br />
recognition of own SLA or GCA<br />
Switched to the not addressed slave mode; own<br />
SLA will be recognised; GCA will be recognised if<br />
GC=logic 1<br />
Switched to the not addressed slave mode; no<br />
recognition of own SLA or GCA. A START<br />
condition will be transmitted when the bus<br />
becomes free<br />
Switched to the not addressed slave mode; own<br />
SLA will be recognised; GCA will be recognised if<br />
GC=logic 1. A START condition will be transmitted<br />
when the bus becomes free<br />
Switched to the not addressed slave mode; no<br />
recognition of own SLA or GCA<br />
Switched to the not addressed slave mode; own<br />
SLA will be recognised; GCA will be recognised if<br />
GC=logic 1<br />
Switched to the not addressed slave mode; no<br />
recognition of own SLA or GCA. A START<br />
condition will be transmitted when the bus<br />
becomes free<br />
Switched to the not addressed slave mode; own<br />
SLA will be recognised; GCA will be recognised if<br />
GC=logic 1. A START condition will be transmitted<br />
when the bus becomes free<br />
To SSCON<br />
STA STO SI AA<br />
Next Action Taken By 2-wire<br />
Software<br />
No SSCON action Wait or proceed current transfer<br />
0 1 0 X<br />
Only the internal hardware is<br />
affected, no STOP condition is<br />
sent on the bus. In all cases,<br />
the bus is released and STO is<br />
reset.<br />
95
Registers Table 70. SSCON Register<br />
SSCON - Synchronous Serial Control register (93h)<br />
96 <strong>AT89C51ID2</strong><br />
7 6 5 4 3 2 1 0<br />
CR2 SSIE STA STO SI AA CR1 CR0<br />
Bit<br />
Number<br />
Bit<br />
Mnemonic Description<br />
7 CR2<br />
6 SSIE<br />
5 STA<br />
4 ST0<br />
3 SI<br />
2 AA<br />
1 CR1<br />
0 CR0<br />
Control Rate bit 2<br />
See Table 64.<br />
Synchronous Serial Interface Enable bit<br />
Clear to disable the TWI module.<br />
Set to enable the TWI module.<br />
Start flag<br />
Set to send a START condition on the bus.<br />
Stop flag<br />
Set to send a STOP condition on the bus.<br />
Synchronous Serial Interrupt flag<br />
Set by hardware when a serial interrupt is requested.<br />
Must be cleared by software to acknowledge interrupt.<br />
Assert Acknowledge flag<br />
Clear in master and slave receiver modes, to force a not acknowledge (high level<br />
on SDA).<br />
Clear to disable SLA or GCA recognition.<br />
Set to recognise SLA or GCA (if GC set) for entering slave receiver or transmitter<br />
modes.<br />
Set in master and slave receiver modes, to force an acknowledge (low level on<br />
SDA).<br />
This bit has no effect when in master transmitter mode.<br />
Control Rate bit 1<br />
See Table 64.<br />
Control Rate bit 0<br />
See Table 64.<br />
Table 71. SSDAT (095h) - Syncrhonous Serial <strong>Data</strong> register (read/write)<br />
SD7 SD6 SD5 SD4 SD3 SD2 SD1 SD0<br />
7 6 5 4 3 2 1 0<br />
Bit<br />
Number<br />
Bit<br />
Mnemonic Description<br />
7 SD7 Address bit 7 or <strong>Data</strong> bit 7.<br />
6 SD6 Address bit 6 or <strong>Data</strong> bit 6.<br />
5 SD5 Address bit 5 or <strong>Data</strong> bit 5.<br />
4 SD4 Address bit 4 or <strong>Data</strong> bit 4.<br />
3 SD3 Address bit 3 or <strong>Data</strong> bit 3.<br />
2 SD2 Address bit 2 or <strong>Data</strong> bit 2.<br />
4289A–8051–09/03
4289A–8051–09/03<br />
Bit<br />
Number<br />
1 SD1 Address bit 1 or <strong>Data</strong> bit 1.<br />
0 SD0 Address bit 0 (R/W) or <strong>Data</strong> bit 0.<br />
<strong>AT89C51ID2</strong><br />
Table 72. SSCS (094h) read - Synchronous Serial Control and Status Register<br />
7 6 5 4 3 2 1 0<br />
SC4 SC3 SC2 SC1 SC0 0 0 0<br />
Table 73. SSCS Register: Read Mode - Reset Value = F8h<br />
Bit<br />
Number<br />
Bit<br />
Mnemonic Description<br />
0 0 Always zero<br />
1 0 Always zero<br />
2 0 Always zero<br />
3 SC0<br />
4 SC1<br />
5 SC2<br />
6 SC3<br />
7 SC4<br />
Status Code bit 0<br />
See to Table 69.<br />
Status Code bit 1<br />
See to Table 69.<br />
Status Code bit 2<br />
See to Table 69.<br />
Status Code bit 3<br />
See to Table 69.<br />
Status Code bit 4<br />
See to Table 69.<br />
Table 74. SSADR (096h) - Synchronus Serial Address Register (read/write)<br />
7 6 5 4 3 2 1 0<br />
A7 A6 A5 A4 A3 A2 A1 A0<br />
Table 75. SSADR Register - Reset value = FEh<br />
Bit<br />
Number<br />
Bit<br />
Mnemonic Description<br />
Bit<br />
Mnemonic Description<br />
7 A7 Slave Address bit 7<br />
6 A6 Slave Address bit 6<br />
5 A5 Slave Address bit 5<br />
4 A4 Slave Address bit 4<br />
3 A3 Slave Address bit 3<br />
2 A2 Slave Address bit 2<br />
1 A1 Slave Address bit 1<br />
97
98 <strong>AT89C51ID2</strong><br />
Bit<br />
Number<br />
Bit<br />
Mnemonic Description<br />
0 GC<br />
General Call bit<br />
Clear to disable the general call address recognition.<br />
Set to enable the general call address recognition.<br />
4289A–8051–09/03
Serial Port Interface<br />
(SPI)<br />
4289A–8051–09/03<br />
<strong>AT89C51ID2</strong><br />
The Serial Peripheral Interface module (SPI) allows full-duplex, synchronous, serial<br />
communication between the MCU and peripheral devices, including other MCUs.<br />
Features Features of the SPI module include the following:<br />
Full-duplex, three-wire synchronous transfers<br />
Master or Slave operation<br />
Eight programmable Master clock rates<br />
Serial clock with programmable polarity and phase<br />
Master Mode fault error flag with MCU interrupt capability<br />
Write collision flag protection<br />
Signal Description Figure 37 shows a typical SPI bus configuration using one Master controller and many<br />
Slave peripherals. The bus is made of three wires connecting all the devices:<br />
Master Output Slave Input<br />
(MOSI)<br />
Master Input Slave Output<br />
(MISO)<br />
Figure 37. SPI Master/Slaves interconnection<br />
Master<br />
MISO<br />
MOSI<br />
SCK<br />
SS<br />
PORT<br />
MISO<br />
MOSI<br />
SCK<br />
SS<br />
Slave 4<br />
0<br />
1<br />
2<br />
3<br />
MISO<br />
MOSI<br />
SCK<br />
SS<br />
The Master device selects the individual Slave devices by using four pins of a parallel<br />
port to control the four SS pins of the Slave devices.<br />
This 1-bit signal is directly connected between the Master Device and a Slave Device.<br />
The MOSI line is used to transfer data in series from the Master to the Slave. Therefore,<br />
it is an output signal from the Master, and an input signal to a Slave. A byte (8-bit word)<br />
is transmitted most significant bit (MSB) first, least significant bit (LSB) last.<br />
This 1-bit signal is directly connected between the Slave Device and a Master Device.<br />
The MISO line is used to transfer data in series from the Slave to the Master. Therefore,<br />
it is an output signal from the Slave, and an input signal to the Master. A byte (8-bit<br />
word) is transmitted most significant bit (MSB) first, least significant bit (LSB) last.<br />
SPI Serial Clock (SCK) This signal is used to synchronize the data movement both in and out the devices<br />
through their MOSI and MISO lines. It is driven by the Master for eight clock cycles<br />
which allows to exchange one byte on the serial lines.<br />
Slave Select (SS) Each Slave peripheral is selected by one Slave Select pin (SS). This signal must stay<br />
low for any message for a Slave. It is obvious that only one Master (SS high level) can<br />
VDD<br />
Slave 3<br />
Slave 1<br />
MISO<br />
MOSI<br />
SCK<br />
SS<br />
MISO<br />
MOSI<br />
SCK<br />
SS<br />
Slave 2<br />
99
100 <strong>AT89C51ID2</strong><br />
drive the network. The Master may select each Slave device by software through port<br />
pins (Figure 37). To prevent bus conflicts on the MISO line, only one slave should be<br />
selected at a time by the Master for a transmission.<br />
In a Master configuration, the SS line can be used in conjunction with the MODF flag in<br />
the SPI Status register (SPSTA) to prevent multiple masters from driving MOSI and<br />
SCK (See Error conditions).<br />
A high level on the SS pin puts the MISO line of a Slave SPI in a high-impedance state.<br />
The SS pin could be used as a general purpose if the following conditions are met:<br />
The device is configured as a Master and the SSDIS control bit in SPCON is set.<br />
This kind of configuration can be found when only one Master is driving the network<br />
and there is no way that the SS pin could be pulled low. Therefore, the MODF flag in<br />
the SPSTA will never be set (1) .<br />
The Device is configured as a Slave with CPHA and SSDIS control bits set (2) This<br />
kind of configuration can happen when the system comprises one Master and one<br />
Slave only. Therefore, the device should always be selected and there is no reason<br />
that the Master uses the SS pin to select the communicating Slave device.<br />
Note: 1. Clearing SSDIS control bit does not clear MODF.<br />
2. Special care should be taken not to set SSDIS control bit when CPHA =’0’ because in<br />
this mode, the SS is used to start the transmission.<br />
Baud rate In Master mode, the baud rate can be selected from a baud rate generator which is controlled<br />
by three bits in the SPCON register: SPR2, SPR1 and SPR0.The Master clock is<br />
chosen from one of seven clock rates resulting from the division of the internal clock by<br />
2, 4, 8, 16, 32, 64 or 128.<br />
Table 76 gives the different clock rates selected by SPR2:SPR1:SPR0:<br />
Table 76. SPI Master Baud Rate Selection<br />
SPR2 SPR1 SPR0 Clock Rate Baud rate divisor (BD)<br />
0 0 0 Don’t Use No BRG<br />
0 0 1 F CLK PERIPH /4 4<br />
0 1 0 F CLK PERIPH / 8 8<br />
0 1 1 F CLK PERIPH /16 16<br />
1 0 0 F CLK PERIPH /32 32<br />
1 0 1 F CLK PERIPH /64 64<br />
1 1 0 F CLK PERIPH /128 128<br />
1 1 1 Don’t Use No BRG<br />
4289A–8051–09/03
Functional Description Figure 38 shows a detailed structure of the SPI module.<br />
4289A–8051–09/03<br />
Figure 38. SPI Module Block Diagram<br />
Clock<br />
Divider<br />
SPI Interrupt Request<br />
FCLK PERIPH<br />
/4<br />
/8<br />
/16<br />
/32<br />
/64<br />
/128<br />
Clock<br />
Select<br />
SPR2 SPEN SSDIS MSTR CPOL<br />
Shift Register<br />
<strong>AT89C51ID2</strong><br />
Operating Modes The Serial Peripheral Interface can be configured as one of the two modes: Master<br />
mode or Slave mode. The configuration and initialization of the SPI module is made<br />
through one register:<br />
The Serial Peripheral CONtrol register (SPCON)<br />
Once the SPI is configured, the data exchange is made using:<br />
SPCON<br />
The Serial Peripheral STAtus register (SPSTA)<br />
The Serial Peripheral DATa register (SPDAT)<br />
During an SPI transmission, data is simultaneously transmitted (shifted out serially) and<br />
received (shifted in serially). A serial clock line (SCK) synchronizes shifting and sampling<br />
on the two serial data lines (MOSI and MISO). A Slave Select line (SS) allows<br />
individual selection of a Slave SPI device; Slave devices that are not selected do not<br />
interfere with SPI bus activities.<br />
When the Master device transmits data to the Slave device via the MOSI line, the Slave<br />
device responds by sending data to the Master device via the MISO line. This implies<br />
full-duplex transmission with both data out and data in synchronized with the same clock<br />
(Figure 39).<br />
7<br />
Internal Bus<br />
6<br />
5<br />
4<br />
Receive <strong>Data</strong> Register<br />
3<br />
SPI<br />
Control<br />
2<br />
1<br />
SPDAT<br />
0<br />
Clock<br />
Logic<br />
CPHA SPR1 SPR0<br />
SPCON<br />
Pin<br />
Control<br />
Logic<br />
SPIF WCOL SSERR<br />
MODF - - -<br />
SPSTA<br />
-<br />
M<br />
S<br />
MOSI<br />
MISO<br />
SCK<br />
SS<br />
8-bit bus<br />
1-bit signal<br />
101
102 <strong>AT89C51ID2</strong><br />
Figure 39. Full-Duplex Master-Slave Interconnection<br />
SPI<br />
Clock Generator<br />
8-bit Shift register<br />
Master MCU<br />
8-bit Shift register<br />
Master mode The SPI operates in Master mode when the Master bit, MSTR (1) , in the SPCON register<br />
is set. Only one Master SPI device can initiate transmissions. Software begins the transmission<br />
from a Master SPI module by writing to the Serial Peripheral <strong>Data</strong> Register<br />
(SPDAT). If the shift register is empty, the byte is immediately transferred to the shift<br />
register. The byte begins shifting out on MOSI pin under the control of the serial clock,<br />
SCK. Simultaneously, another byte shifts in from the Slave on the Master’s MISO pin.<br />
The transmission ends when the Serial Peripheral transfer data flag, SPIF, in SPSTA<br />
becomes set. At the same time that SPIF becomes set, the received byte from the Slave<br />
is transferred to the receive data register in SPDAT. Software clears SPIF by reading<br />
the Serial Peripheral Status register (SPSTA) with the SPIF bit set, and then reading the<br />
SPDAT.<br />
Slave mode The SPI operates in Slave mode when the Master bit, MSTR (2) , in the SPCON register is<br />
cleared. Before a data transmission occurs, the Slave Select pin, SS, of the Slave<br />
device must be set to’0’. SS must remain low until the transmission is complete.<br />
In a Slave SPI module, data enters the shift register under the control of the SCK from<br />
the Master SPI module. After a byte enters the shift register, it is immediately transferred<br />
to the receive data register in SPDAT, and the SPIF bit is set. To prevent an overflow<br />
condition, Slave software must then read the SPDAT before another byte enters the<br />
shift register (3) . A Slave SPI must complete the write to the SPDAT (shift register) at<br />
least one bus cycle before the Master SPI starts a transmission. If the write to the data<br />
register is late, the SPI transmits the data already in the shift register from the previous<br />
transmission.<br />
Transmission Formats Software can select any of four combinations of serial clock (SCK) phase and polarity<br />
using two bits in the SPCON: the Clock POLarity (CPOL (4) ) and the Clock PHAse<br />
(CPHA 4 ). CPOL defines the default SCK line level in idle state. It has no significant<br />
effect on the transmission format. CPHA defines the edges on which the input data are<br />
sampled and the edges on which the output data are shifted (Figure 40 and Figure 41).<br />
The clock phase and polarity should be identical for the Master SPI device and the communicating<br />
Slave device.<br />
MISO<br />
MOSI<br />
MISO<br />
MOSI<br />
SCK SCK<br />
SS<br />
VDD<br />
SS<br />
VSS<br />
Slave MCU<br />
1. The SPI module should be configured as a Master before it is enabled (SPEN set). Also<br />
the Master SPI should be configured before the Slave SPI.<br />
2. The SPI module should be configured as a Slave before it is enabled (SPEN set).<br />
3. The maximum frequency of the SCK for an SPI configured as a Slave is the bus clock<br />
speed.<br />
4. Before writing to the CPOL and CPHA bits, the SPI should be disabled (SPEN =’0’).<br />
4289A–8051–09/03
Figure 40. <strong>Data</strong> Transmission Format (CPHA = 0)<br />
4289A–8051–09/03<br />
SCK cycle number<br />
SPEN (internal)<br />
SCK (CPOL = 0)<br />
SCK (CPOL = 1)<br />
MOSI (from Master)<br />
MISO (from Slave)<br />
SS (to Slave)<br />
Capture point<br />
Figure 41. <strong>Data</strong> Transmission Format (CPHA = 1)<br />
SCK cycle number<br />
SPEN (internal)<br />
SCK (CPOL = 0)<br />
SCK (CPOL = 1)<br />
MOSI (from Master)<br />
MISO (from Slave)<br />
SS (to Slave)<br />
Capture point<br />
Figure 42. CPHA/SS Timing<br />
MISO/MOSI<br />
Master SS<br />
Slave SS<br />
(CPHA = 0)<br />
Slave SS<br />
(CPHA = 1)<br />
1 2 3 4 5 6 7 8<br />
MSB bit6 bit5 bit4 bit3 bit2 bit1 LSB<br />
MSB bit6 bit5 bit4 bit3 bit2 bit1 LSB<br />
1 2 3 4 5 6 7 8<br />
MSB bit6 bit5 bit4 bit3 bit2 bit1 LSB<br />
MSB bit6 bit5 bit4 bit3 bit2 bit1 LSB<br />
Byte 1 Byte 2 Byte 3<br />
<strong>AT89C51ID2</strong><br />
As shown in Figure 40, the first SCK edge is the MSB capture strobe. Therefore the<br />
Slave must begin driving its data before the first SCK edge, and a falling edge on the SS<br />
pin is used to start the transmission. The SS pin must be toggled high and then low<br />
between each byte transmitted (Figure 42).<br />
Figure 41 shows an SPI transmission in which CPHA is’1’. In this case, the Master<br />
begins driving its MOSI pin on the first SCK edge. Therefore the Slave uses the first<br />
SCK edge as a start transmission signal. The SS pin can remain low between transmissions<br />
(Figure 42). This format may be preffered in systems having only one Master and<br />
only one Slave driving the MISO data line.<br />
103
Error conditions The following flags in the SPSTA signal SPI error conditions:<br />
Mode Fault (MODF) Mode Fault error in Master mode SPI indicates that the level on the Slave Select (SS)<br />
pin is inconsistent with the actual mode of the device. MODF is set to warn that there<br />
may have a multi-master conflict for system control. In this case, the SPI system is<br />
affected in the following ways:<br />
An SPI receiver/error CPU interrupt request is generated,<br />
The SPEN bit in SPCON is cleared. This disable the SPI,<br />
The MSTR bit in SPCON is cleared<br />
When SS DISable (SSDIS) bit in the SPCON register is cleared, the MODF flag is set<br />
when the SS signal becomes’0’.<br />
However, as stated before, for a system with one Master, if the SS pin of the Master<br />
device is pulled low, there is no way that another Master attempt to drive the network. In<br />
this case, to prevent the MODF flag from being set, software can set the SSDIS bit in the<br />
SPCON register and therefore making the SS pin as a general purpose I/O pin.<br />
Clearing the MODF bit is accomplished by a read of SPSTA register with MODF bit set,<br />
followed by a write to the SPCON register. SPEN Control bit may be restored to its original<br />
set state after the MODF bit has been cleared.<br />
Write Collision (WCOL) A Write Collision (WCOL) flag in the SPSTA is set when a write to the SPDAT register is<br />
done during a transmit sequence.<br />
WCOL does not cause an interruption, and the transfer continues uninterrupted.<br />
Clearing the WCOL bit is done through a software sequence of an access to SPSTA<br />
and an access to SPDAT.<br />
Overrun Condition An overrun condition occurs when the Master device tries to send several data bytes<br />
and the Slave devise has not cleared the SPIF bit issuing from the previous data byte<br />
transmitted. In this case, the receiver buffer contains the byte sent after the SPIF bit was<br />
last cleared. A read of the SPDAT returns this byte. All others bytes are lost.<br />
This condition is not detected by the SPI peripheral.<br />
Interrupts Two SPI status flags can generate a CPU interrupt requests:<br />
104 <strong>AT89C51ID2</strong><br />
Table 77. SPI Interrupts<br />
Flag Request<br />
SPIF (SP data transfer) SPI Transmitter Interrupt request<br />
MODF (Mode Fault) SPI Receiver/Error Interrupt Request (if SSDIS =’0’)<br />
Serial Peripheral data transfer flag, SPIF: This bit is set by hardware when a transfer<br />
has been completed. SPIF bit generates transmitter CPU interrupt requests.<br />
Mode Fault flag, MODF: This bit becomes set to indicate that the level on the SS is<br />
inconsistent with the mode of the SPI. MODF with SSDIS reset, generates receiver/error<br />
CPU interrupt requests. When SSDIS is set, no MODF interrupt request is generated.<br />
Figure 43 gives a logical view of the above statements.<br />
4289A–8051–09/03
4289A–8051–09/03<br />
Figure 43. SPI Interrupt Requests Generation<br />
<strong>AT89C51ID2</strong><br />
Registers There are three registers in the module that provide control, status and data storage functions. These registers<br />
are describes in the following paragraphs.<br />
Serial Peripheral Control<br />
register (SPCON)<br />
SPIF<br />
MODF<br />
SSDIS<br />
SPI Transmitter SPI<br />
CPU Interrupt Request<br />
CPU Interrupt Request<br />
SPI Receiver/error<br />
CPU Interrupt Request<br />
The Serial Peripheral Control Register does the following:<br />
Selects one of the Master clock rates,<br />
Configure the SPI module as Master or Slave,<br />
Selects serial clock polarity and phase,<br />
Enables the SPI module,<br />
Frees the SS pin for a general purpose<br />
Table 78 describes this register and explains the use of each bit.<br />
Table 78. SPCON Register<br />
SPCON - Serial Peripheral Control Register (0C3H)<br />
7 6 5 4 3 2 1 0<br />
SPR2 SPEN SSDIS MSTR CPOL CPHA SPR1 SPR0<br />
Bit Number Bit Mnemonic Description<br />
7 SPR2<br />
6 SPEN<br />
5 SSDIS<br />
5 MSTR<br />
4 CPOL<br />
3 CPHA<br />
Serial Peripheral Rate 2<br />
Bit with SPR1 and SPR0 define the clock rate.<br />
Serial Peripheral Enable<br />
Cleared to disable the SPI interface.<br />
Set to enable the SPI interface.<br />
SS Disable<br />
Cleared to enable SS# in both Master and Slave modes.<br />
Set to disable SS# in both Master and Slave modes. In Slave mode,<br />
this bit has no effect if CPHA =’0’.<br />
When SSDIS is set, no MODF interrupt request is generated.<br />
Serial Peripheral Master<br />
Cleared to configure the SPI as a Slave.<br />
Set to configure the SPI as a Master.<br />
Clock Polarity<br />
Cleared to have the SCK set to’0’ in idle state.<br />
Set to have the SCK set to’1’ in idle low.<br />
Clock Phase<br />
Cleared to have the data sampled when the SCK leaves the idle<br />
state (see CPOL).<br />
Set to have the data sampled when the SCK returns to idle state (see<br />
CPOL).<br />
105
Serial Peripheral Status Register<br />
(SPSTA)<br />
106 <strong>AT89C51ID2</strong><br />
Bit Number Bit Mnemonic Description<br />
2 SPR1<br />
1 SPR0<br />
Reset Value= 0001 0100b<br />
Not bit addressable<br />
SPR2 SPR1 SPR0 Serial Peripheral Rate<br />
0 0 0 Invalid<br />
0 0 1 FCLK PERIPH /4<br />
0 1 0 FCLK PERIPH /8<br />
0 1 1 FCLK PERIPH /16<br />
1 0 0 FCLK PERIPH /32<br />
1 0 1 FCLK PERIPH /64<br />
1 1 0 FCLK PERIPH /128<br />
1 1 1 Invalid<br />
The Serial Peripheral Status Register contains flags to signal the following conditions:<br />
<strong>Data</strong> transfer complete<br />
Write collision<br />
Inconsistent logic level on SS pin (mode fault error)<br />
Table 79 describes the SPSTA register and explains the use of every bit in the register.<br />
Table 79. SPSTA Register<br />
SPSTA - Serial Peripheral Status and Control register (0C4H)<br />
7 6 5 4 3 2 1 0<br />
SPIF WCOL SSERR MODF - - - -<br />
Bit<br />
Number<br />
Bit<br />
Mnemonic Description<br />
7 SPIF<br />
6 WCOL<br />
5 SSERR<br />
4 MODF<br />
3 -<br />
Serial Peripheral data transfer flag<br />
Cleared by hardware to indicate data transfer is in progress or has been<br />
approved by a clearing sequence.<br />
Set by hardware to indicate that the data transfer has been completed.<br />
Write Collision flag<br />
Cleared by hardware to indicate that no collision has occurred or has been<br />
approved by a clearing sequence.<br />
Set by hardware to indicate that a collision has been detected.<br />
Synchronous Serial Slave Error flag<br />
Set by hardware when SS is deasserted before the end of a received data.<br />
Cleared by disabling the SPI (clearing SPEN bit in SPCON).<br />
Mode Fault<br />
Cleared by hardware to indicate that the SS pin is at appropriate logic level, or<br />
has been approved by a clearing sequence.<br />
Set by hardware to indicate that the SS pin is at inappropriate logic level.<br />
Reserved<br />
The value read from this bit is indeterminate. Do not set this bit<br />
4289A–8051–09/03
Serial Peripheral DATa register<br />
(SPDAT)<br />
4289A–8051–09/03<br />
Bit<br />
Number<br />
2 -<br />
1 -<br />
0 -<br />
Bit<br />
Mnemonic Description<br />
Reset Value= 00X0 XXXXb<br />
Not Bit addressable<br />
Reserved<br />
The value read from this bit is indeterminate. Do not set this bit<br />
Reserved<br />
The value read from this bit is indeterminate. Do not set this bit.<br />
Reserved<br />
The value read from this bit is indeterminate. Do not set this bit.<br />
<strong>AT89C51ID2</strong><br />
The Serial Peripheral <strong>Data</strong> Register (Table 80) is a read/write buffer for the receive data<br />
register. A write to SPDAT places data directly into the shift register. No transmit buffer is<br />
available in this model.<br />
A Read of the SPDAT returns the value located in the receive buffer and not the content<br />
of the shift register.<br />
Table 80. SPDAT Register<br />
SPDAT - Serial Peripheral <strong>Data</strong> Register (0C5H)<br />
7 6 5 4 3 2 1 0<br />
R7 R6 R5 R4 R3 R2 R1 R0<br />
Reset Value= Indeterminate<br />
R7:R0: Receive data bits<br />
SPCON, SPSTA and SPDAT registers may be read and written at any time while there<br />
is no on-going exchange. However, special care should be taken when writing to them<br />
while a transmission is on-going:<br />
Do not change SPR2, SPR1 and SPR0<br />
Do not change CPHA and CPOL<br />
Do not change MSTR<br />
Clearing SPEN would immediately disable the peripheral<br />
Writing to the SPDAT will cause an overflow<br />
107
Hardware Watchdog<br />
Timer<br />
108 <strong>AT89C51ID2</strong><br />
The WDT is intended as a recovery method in situations where the CPU may be subjected<br />
to software upset. The WDT consists of a 14-bit counter and the WatchDog Timer<br />
ReSeT (WDTRST) SFR. The WDT is by default disabled from exiting reset. To enable<br />
the WDT, user must write 01EH and 0E1H in sequence to the WDTRST, SFR location<br />
0A6H. When WDT is enabled, it will increment every machine cycle while the oscillator<br />
is running and there is no way to disable the WDT except through reset (either hardware<br />
reset or WDT overflow reset). When WDT overflows, it will drive an output RESET HIGH<br />
pulse at the RST-pin.<br />
Using the WDT To enable the WDT, user must write 01EH and 0E1H in sequence to the WDTRST, SFR<br />
location 0A6H. When WDT is enabled, the user needs to service it by writing to 01EH<br />
and 0E1H to WDTRST to avoid WDT overflow. The 14-bit counter overflows when it<br />
reaches 16383 (3FFFH) and this will reset the device. When WDT is enabled, it will<br />
increment every machine cycle while the oscillator is running. This means the user must<br />
reset the WDT at least every 16383 machine cycle. To reset the WDT the user must<br />
write 01EH and 0E1H to WDTRST. WDTRST is a write only register. The WDT counter<br />
cannot be read or written. When WDT overflows, it will generate an output RESET pulse<br />
at the RST-pin. The RESET pulse duration is 96 x TCLK PERIPH , where TCLK PERIPH = 1/FCLK PERIPH . To make the best use of the WDT, it should be serviced in those sections of code<br />
that will periodically be executed within the time required to prevent a WDT reset.<br />
To have a more powerful WDT, a 27 counter has been added to extend the Time-out<br />
capability, ranking from 16ms to 2s @ FOSCA = 12MHz. To manage this feature, refer to<br />
WDTPRG register description, Table 81.<br />
Table 81. WDTRST Register<br />
WDTRST - Watchdog Reset Register (0A6h)<br />
7 6 5 4 3 2 1 0<br />
- - - - - - - -<br />
Reset Value = XXXX XXXXb<br />
Write only, this SFR is used to reset/enable the WDT by writing 01EH then 0E1H in<br />
sequence.<br />
4289A–8051–09/03
WDT During Power Down<br />
and Idle<br />
4289A–8051–09/03<br />
Table 82. WDTPRG Register<br />
WDTPRG - Watchdog Timer Out Register (0A7h)<br />
Reset value = XXXX X000<br />
<strong>AT89C51ID2</strong><br />
7 6 5 4 3 2 1 0<br />
- - - - - S2 S1 S0<br />
Bit<br />
Number<br />
7 -<br />
6 -<br />
5 -<br />
4 -<br />
3 -<br />
Bit<br />
Mnemonic Description<br />
Reserved<br />
The value read from this bit is undetermined. Do not try to set this bit.<br />
2 S2 WDT Time-out select bit 2<br />
1 S1 WDT Time-out select bit 1<br />
0 S0 WDT Time-out select bit 0<br />
S2S1 S0 Selected Time-out<br />
0 0 0 (2 14 - 1) machine cycles, 16. 3 ms @ F OSCA =12 MHz<br />
0 0 1 (2 15 - 1) machine cycles, 32.7 ms @ F OSCA =12 MHz<br />
0 1 0 (2 16 - 1) machine cycles, 65. 5 ms @ F OSCA=12 MHz<br />
0 1 1 (2 17 - 1) machine cycles, 131 ms @ F OSCA =12 MHz<br />
1 0 0 (2 18 - 1) machine cycles, 262 ms @ F OSCA =12 MHz<br />
1 0 1 (2 19 - 1) machine cycles, 542 ms @ F OSCA=12 MHz<br />
1 1 0 (2 20 - 1) machine cycles, 1.05 s @ F OSCA =12 MHz<br />
1 1 1 (2 21 - 1) machine cycles, 2.09 s @ F OSCA =12 MHz<br />
In Power Down mode the oscillator stops, which means the WDT also stops. While in<br />
Power Down mode the user does not need to service the WDT. There are 2 methods of<br />
exiting Power Down mode: by a hardware reset or via a level activated external interrupt<br />
which is enabled prior to entering Power Down mode. When Power Down is exited<br />
with hardware reset, servicing the WDT should occur as it normally should whenever the<br />
<strong>AT89C51ID2</strong> is reset. Exiting Power Down with an interrupt is significantly different. The<br />
interrupt is held low long enough for the oscillator to stabilize. When the interrupt is<br />
brought high, the interrupt is serviced. To prevent the WDT from resetting the device<br />
while the interrupt pin is held low, the WDT is not started until the interrupt is pulled high.<br />
It is suggested that the WDT be reset during the interrupt service routine.<br />
To ensure that the WDT does not overflow within a few states of exiting of powerdown, it<br />
is better to reset the WDT just before entering powerdown.<br />
In the Idle mode, the oscillator continues to run. To prevent the WDT from resetting the<br />
<strong>AT89C51ID2</strong> while in Idle mode, the user should always set up a timer that will periodically<br />
exit Idle, service the WDT, and re-enter Idle mode.<br />
109
ONCE (TM) Mode (ON<br />
Chip Emulation)<br />
110 <strong>AT89C51ID2</strong><br />
The ONCE mode facilitates testing and debugging of systems using <strong>AT89C51ID2</strong> without<br />
removing the circuit from the board. The ONCE mode is invoked by driving certain<br />
pins of the <strong>AT89C51ID2</strong>; the following sequence must be exercised:<br />
Pull ALE low while the device is in reset (RST high) and PSEN is high.<br />
Hold ALE low as RST is deactivated.<br />
While the <strong>AT89C51ID2</strong> is in ONCE mode, an emulator or test CPU can be used to drive<br />
the circuit Table 83 shows the status of the port pins during ONCE mode.<br />
Normal operation is restored when normal reset is applied.<br />
Table 83. External Pin Status during ONCE Mode<br />
ALE PSEN Port 0 Port 1 Port 2 Port 3 Port I2 XTALA1/2 XTALB1/2<br />
Weak<br />
pull-up<br />
Weak<br />
pull-up<br />
Float<br />
Weak<br />
pull-up<br />
Weak<br />
pull-up<br />
Weak<br />
pull-up<br />
(a) "Once" is a registered trademark of Intel Corporation.<br />
Float Active Active<br />
4289A–8051–09/03
4289A–8051–09/03<br />
<strong>AT89C51ID2</strong><br />
Power-off Flag The power-off flag allows the user to distinguish between a “cold start” reset and a<br />
“warm start” reset.<br />
A cold start reset is the one induced by VCC switch-on. A warm start reset occurs while<br />
VCC is still applied to the device and could be generated for example by an exit from<br />
power-down.<br />
The power-off flag (POF) is located in PCON register (Table 84). POF is set by hardware<br />
when VCC rises from 0 to its nominal voltage. The POF can be set or cleared by<br />
software allowing the user to determine the type of reset.<br />
Table 84. PCON Register<br />
PCON - Power Control Register (87h)<br />
7 6 5 4 3 2 1 0<br />
SMOD1 SMOD0 - POF GF1 GF0 PD IDL<br />
Bit<br />
Number<br />
Bit<br />
Mnemonic Description<br />
7 SMOD1<br />
6 SMOD0<br />
5 -<br />
4 POF<br />
3 GF1<br />
2 GF0<br />
1 PD<br />
0 IDL<br />
Reset Value = 00X1 0000b<br />
Not bit addressable<br />
Serial port Mode bit 1<br />
Set to select double baud rate in mode 1, 2 or 3.<br />
Serial port Mode bit 0<br />
Cleared to select SM0 bit in SCON register.<br />
Set to select FE bit in SCON register.<br />
Reserved<br />
The value read from this bit is indeterminate. Do not set this bit.<br />
Power-Off Flag<br />
Cleared to recognize next reset type.<br />
Set by hardware when V CC rises from 0 to its nominal voltage. Can also be set by<br />
software.<br />
General purpose Flag<br />
Cleared by user for general purpose usage.<br />
Set by user for general purpose usage.<br />
General purpose Flag<br />
Cleared by user for general purpose usage.<br />
Set by user for general purpose usage.<br />
Power-Down mode bit<br />
Cleared by hardware when reset occurs.<br />
Set to enter power-down mode.<br />
Idle mode bit<br />
Cleared by hardware when interrupt or reset occurs.<br />
Set to enter idle mode.<br />
111
EEPROM <strong>Data</strong><br />
Memory<br />
112 <strong>AT89C51ID2</strong><br />
The 2K bytes on-chip EEPROM memory block is located at addresses 0000h to 07FFh<br />
of the XRAM/ERAM memory space and is selected by setting control bits in the EECON<br />
register.<br />
A read or write access to the EEPROM memory is done with a MOVX instruction.<br />
Write <strong>Data</strong> <strong>Data</strong> is written by byte to the EEPROM memory block as for an external RAM memory.<br />
The following procedure is used to write to the EEPROM memory:<br />
Check EEBUSY flag<br />
If the user application interrupts routines use XRAM memory space: Save and<br />
disable interrupts.<br />
Load DPTR with the address to write<br />
Store A register with the data to be written<br />
Set bit EEE of EECON register<br />
Execute a MOVX @DPTR, A<br />
Clear bit EEE of EECON register<br />
Restore interrupts.<br />
EEBUSY flag in EECON is then set by hardware to indicate that programming is in<br />
progress and that the EEPROM segment is not available for reading or writing.<br />
The end of programming is indicated by a hardware clear of the EEBUSY flag.<br />
Figure 44 represents the optimal write sequence to the on-chip EEPROM data memory.<br />
4289A–8051–09/03
4289A–8051–09/03<br />
Figure 44. Recommended EEPROM <strong>Data</strong> Write Sequence<br />
EEPROM <strong>Data</strong> Write<br />
Sequence<br />
EEBusy<br />
Cleared?<br />
Save & Disable IT<br />
EA= 0<br />
EEPROM <strong>Data</strong> Mapping<br />
EECON = 02h (EEE=1)<br />
<strong>Data</strong> Write<br />
DPTR= Address<br />
ACC= <strong>Data</strong><br />
Exec: MOVX @DPTR, A<br />
EEPROM Mapping<br />
EECON = 00h (EEE=0)<br />
Restore IT<br />
Last Byte<br />
to Load?<br />
<strong>AT89C51ID2</strong><br />
113
Read <strong>Data</strong> The following procedure is used to read the data stored in the EEPROM memory:<br />
114 <strong>AT89C51ID2</strong><br />
Check EEBUSY flag<br />
If the user application interrupts routines use XRAM memory space: Save and<br />
disable interrupts.<br />
Load DPTR with the address to read<br />
Set bit EEE of EECON register<br />
Execute a MOVX A, @DPTR<br />
Clear bit EEE of EECON register<br />
Restore interrupts.<br />
Figure 45. Recommended EEPROM <strong>Data</strong> Read Sequence<br />
EEPROM <strong>Data</strong> Read<br />
Sequence<br />
EEBusy<br />
Cleared?<br />
Save & Disable IT<br />
EA= 0<br />
EEPROM <strong>Data</strong> Mapping<br />
EECON = 02h (EEE=1)<br />
<strong>Data</strong> Read<br />
DPTR= Address<br />
ACC= <strong>Data</strong><br />
Exec: MOVX A, @DPTR<br />
Last Byte<br />
to Read?<br />
EEPROM <strong>Data</strong> Mapping<br />
EECON = 00h (EEE = 0<br />
Restore IT<br />
4289A–8051–09/03
Registers Table 85. EECON Register<br />
EECON (S:0D2h)<br />
EEPROM Control Register<br />
4289A–8051–09/03<br />
Reset Value = XXXX XX00b<br />
Not bit addressable<br />
<strong>AT89C51ID2</strong><br />
7 6 5 4 3 2 1 0<br />
- - - - - - EEE EEBUSY<br />
Bit Number<br />
7 - 2 -<br />
Bit<br />
Mnemonic Description<br />
1 EEE<br />
0 EEBUSY<br />
Reserved<br />
The value read from this bit is indeterminate. Do not set this bit.<br />
Enable EEPROM Space bit<br />
Set to map the EEPROM space during MOVX instructions (Write or Read to<br />
the EEPROM .<br />
Clear to map the XRAM space during MOVX.<br />
Programming Busy flag<br />
Set by hardware when programming is in progress.<br />
Cleared by hardware when programming is done.<br />
Can not be set or cleared by software.<br />
115
Reduced EMI Mode The ALE signal is used to demultiplex address and data buses on port 0 when used with<br />
external program or data memory. Nevertheless, during internal code execution, ALE<br />
signal is still generated. In order to reduce EMI, ALE signal can be disabled by setting<br />
AO bit.<br />
116 <strong>AT89C51ID2</strong><br />
The AO bit is located in AUXR register at bit location 0. As soon as AO is set, ALE is no<br />
longer output but remains active during MOVX and MOVC instructions and external<br />
fetches. During ALE disabling, ALE pin is weakly pulled high.<br />
Table 86. AUXR Register<br />
AUXR - Auxiliary Register (8Eh)<br />
7 6 5 4 3 2 1 0<br />
- - M0 XRS2 XRS1 XRS0 EXTRAM AO<br />
Bit<br />
Number<br />
7 -<br />
6 -<br />
Bit<br />
Mnemonic Description<br />
5 M0<br />
Reset Value = XX00 10’HSB. XRAM’0b<br />
Not bit addressable<br />
Reserved<br />
The value read from this bit is indeterminate. Do not set this bit.<br />
Reserved<br />
The value read from this bit is indeterminate. Do not set this bit.<br />
Pulse length<br />
Cleared to stretch MOVX control: the RD/ and the WR/ pulse length is 6 clock<br />
periods (default).<br />
Set to stretch MOVX control: the RD/ and the WR/ pulse length is 30 clock<br />
periods.<br />
4 XRS2 XRAM Size<br />
3 XRS1<br />
XRS2 XRS1XRS0XRAM size<br />
0 0 0 256 bytes<br />
0 0 1 512 bytes<br />
0 1 0 768 bytes(default)<br />
2 XRS0<br />
0 1 1 1024 bytes<br />
1 0 0 1792 bytes<br />
1 EXTRAM<br />
0 AO<br />
EXTRAM bit<br />
Cleared to access internal XRAM using movx @ Ri/ @ DPTR.<br />
Set to access external memory.<br />
Programmed by hardware after Power-up regarding Hardware Security Byte<br />
(HSB), default setting, XRAM selected.<br />
ALE Output bit<br />
Cleared, ALE is emitted at a constant rate of 1/6 the oscillator frequency (or 1/3 if<br />
X2 mode is used). (default) Set, ALE is active only during a MOVX or MOVC<br />
instruction is used.<br />
4289A–8051–09/03
4289A–8051–09/03<br />
<strong>AT89C51ID2</strong><br />
Flash Memory The Flash memory increases EPROM and ROM functionality with in-circuit electrical<br />
erasure and programming. It contains 64K bytes of program memory organized respectively<br />
in 512 pages of 128 bytes. This memory is both parallel and serial In-System<br />
Programmable (ISP). ISP allows devices to alter their own program memory in the<br />
actual end product under software control. A default serial loader (bootloader) program<br />
allows ISP of the Flash.<br />
The programming does not require external dedicated programming voltage. The necessary<br />
high programming voltage is generated on-chip using the standard V CC pins of<br />
the microcontroller.<br />
Features Flash internal program memory.<br />
Boot vector allows user provided Flash loader code to reside anywhere in the Flash<br />
memory space. This configuration provides flexibility to the user.<br />
Default loader in Boot ROM allows programming via the serial port without the need<br />
of a user provided loader.<br />
Up to 64K byte external program memory if the internal program memory is disabled<br />
(EA = 0).<br />
Programming and erase voltage with standard power supply.<br />
Read/Programming/Erase:<br />
Byte-wise read without wait state<br />
Byte or page erase and programming (10 ms)<br />
Typical programming time (64K bytes) is 22s with on chip serial bootloader<br />
Parallel programming with 87C51 compatible hardware interface to programmer<br />
Programmable security for the code in the Flash<br />
100k write cycles<br />
10 years data retention<br />
Flash Programming and<br />
Erasure<br />
The 64K bytes Flash is programmed by bytes or by pages of 128 bytes. It is not necessary<br />
to erase a byte or a page before programming. The programming of a byte or a<br />
page includes a self erase before programming.<br />
There are three methods of programming the Flash memory:<br />
First, the on-chip ISP bootloader may be invoked which will use low level routines to<br />
program the pages. The interface used for serial downloading of Flash is the UART.<br />
Second, the Flash may be programmed or erased in the end-user application by<br />
calling low-level routines through a common entry point in the Boot ROM.<br />
Third, the Flash may be programmed using the parallel method by using a<br />
conventional EPROM programmer. The parallel programming method used by<br />
these devices is similar to that used by EPROM 87C51 but it is not identical and the<br />
commercially available programmers need to have support for the <strong>AT89C51ID2</strong>.<br />
The bootloader and the Application Programming Interface (API) routines are<br />
located in the BOOT ROM.<br />
117
Flash Registers and<br />
Memory Map<br />
118 <strong>AT89C51ID2</strong><br />
The <strong>AT89C51ID2</strong> Flash memory uses several registers for his management:<br />
Hardware registers can only be accessed through the parallel programming modes<br />
which are handled by the parallel programmer.<br />
Software registers are in a special page of the Flash memory which can be<br />
accessed through the API or with the parallel programming modes. This page,<br />
called "Extra Flash Memory", is not in the internal Flash program memory<br />
addressing space.<br />
Hardware Register The only hardware register of the <strong>AT89C51ID2</strong> is called Hardware Security Byte (HSB).<br />
Table 87. Hardware Security Byte (HSB)<br />
7 6 5 4 3 2 1 0<br />
X2 BLJB OSC - XRAM LB2 LB1 LB0<br />
Bit<br />
Number<br />
Bit<br />
Mnemonic Description<br />
7 X2<br />
6 BLJB<br />
5 OSC<br />
4 - Reserved<br />
3 XRAM<br />
2-0 LB2-0<br />
X2 Mode<br />
Programmed to force X2 mode (6 clocks per instruction)<br />
Unprogrammed to force X1 mode, Standard Mode. (Default)<br />
Boot Loader Jump Bit<br />
Unprogrammed this bit to start the user’s application on next reset at address<br />
0000h.<br />
Programmed this bit to start the boot loader at address F800h (Default).<br />
Oscillator Bit<br />
Programmed to allow oscillator B at startup<br />
Unprogrammed this bit to allow oscillator A at startup ( Default).<br />
XRAM config bit (only programmable by programmer tools)<br />
Programmed to inhibit XRAM<br />
Unprogrammed, this bit to valid XRAM (Default)<br />
User Memory Lock Bits (only programmable by programmer tools)<br />
See Table 88<br />
Boot Loader Jump Bit (BLJB)<br />
One bit of the HSB, the BLJB bit, is used to force the boot address:<br />
When this bit is set the boot address is 0000h.<br />
When this bit is reset the boot address is F800h. By default, this bit is cleared and<br />
the ISP is enabled.<br />
Flash Memory Lock Bits The three lock bits provide different levels of protection for the on-chip code and data,<br />
when programmed as shown in Table 88.<br />
4289A–8051–09/03
4289A–8051–09/03<br />
Table 88. Program Lock Bits<br />
Program Lock Bits<br />
Security<br />
level LB0 LB1 LB2<br />
Protection description<br />
1 U U U No program lock features enabled.<br />
2 P U U<br />
3 X P U<br />
<strong>AT89C51ID2</strong><br />
MOVC instruction executed from external program memory is disabled<br />
from fetching code bytes from internal memory, EA is sampled and<br />
latched on reset, and further parallel programming of the on chip code<br />
memory is disabled.<br />
ISP and software programming with API are still allowed.<br />
Writing EEprom <strong>Data</strong> from external parallel programmer is disabled but<br />
still allowed from internal code execution.<br />
Same as 2, also verify code memory through parallel programming<br />
interface is disabled.<br />
Writing And Reading EEPROM <strong>Data</strong> from external parallel programmer<br />
is disabled but still allowed from internal code execution..<br />
4 X X P Same as 3, also external execution is disabled. (Default)<br />
Note: U: unprogrammed or "one" level.<br />
P: programmed or "zero" level.<br />
X: do not care<br />
WARNING: Security level 2 and 3 should only be programmed after Flash and code<br />
verification.<br />
These security bits protect the code access through the parallel programming interface.<br />
They are set by default to level 4. The code access through the ISP is still possible and<br />
is controlled by the "software security bits" which are stored in the extra Flash memory<br />
accessed by the ISP firmware.<br />
To load a new application with the parallel programmer, a chip erase must first be done.<br />
This will set the HSB in its inactive state and will erase the Flash memory. The part reference<br />
can always be read using Flash parallel programming modes.<br />
Default Values The default value of the HSB provides parts ready to be programmed with ISP:<br />
BLJB: Programmed force ISP operation.<br />
X2: Unprogrammed to force X1 mode (Standard Mode).<br />
XRAM: Unprogrammed to valid XRAM<br />
LB2-0: Security level four to protect the code from a parallel access with maximum<br />
security.<br />
Software Registers Several registers are used, in factory and by parallel programmers. These values are<br />
used by <strong>Atmel</strong> ISP.<br />
These registers are in the "Extra Flash Memory" part of the Flash memory. This block is<br />
also called "XAF" or eXtra Array Flash. They are accessed in the following ways:<br />
Commands issued by the parallel memory programmer.<br />
Commands issued by the ISP software.<br />
Calls of API issued by the application software.<br />
Several software registers described in Table 89.<br />
119
120 <strong>AT89C51ID2</strong><br />
Table 89. Default Values<br />
Mnemonic Definition Default value Description<br />
SBV Software Boot Vector FCh<br />
HSB Copy of the Hardware security byte 101x 1011b<br />
BSB Boot Status Byte 0FFh<br />
SSB Software Security Byte FFh<br />
Copy of the Manufacturer Code 58h ATMEL<br />
Copy of the Device ID #1: Family Code D7h C51 X2, Electrically Erasable<br />
Copy of the Device ID #2: memories size<br />
and type<br />
Copy of the Device ID #3: name and<br />
revision<br />
After programming the part by ISP, the BSB must be cleared (00h) in order to allow the<br />
application to boot at 0000h.<br />
The content of the Software Security Byte (SSB) is described in Table 89 and Table 92.<br />
To assure code protection from a parallel access, the HSB must also be at the required<br />
level.<br />
Table 90. Software Security Byte<br />
Table 91.<br />
ECh <strong>AT89C51ID2</strong> 64KB<br />
The two lock bits provide different levels of protection for the on-chip code and data,<br />
when programmed as shown to Table 92.<br />
EFh<br />
<strong>AT89C51ID2</strong> 64KB, Revision<br />
0<br />
7 6 5 4 3 2 1 0<br />
- - - - - - LB1 LB0<br />
Bit<br />
Number<br />
7 -<br />
6 -<br />
5 -<br />
4 -<br />
3 -<br />
2 -<br />
Bit<br />
Mnemonic Description<br />
1-0 LB1-0<br />
Reserved<br />
Do not clear this bit.<br />
Reserved<br />
Do not clear this bit.<br />
Reserved<br />
Do not clear this bit.<br />
Reserved<br />
Do not clear this bit.<br />
Reserved<br />
Do not clear this bit.<br />
Reserved<br />
Do not clear this bit.<br />
User Memory Lock Bits<br />
See Table 92<br />
4289A–8051–09/03
4289A–8051–09/03<br />
Table 92. Program Lock bits of the SSB<br />
<strong>AT89C51ID2</strong><br />
Note: U: unprogrammed or "one" level.<br />
P: programmed or "zero" level.<br />
X: do not care<br />
WARNING: Security level 2 and 3 should only be programmed after Flash and code<br />
verification.<br />
Flash Memory Status <strong>AT89C51ID2</strong> parts are delivered in standard with the ISP rom bootloader.<br />
Figure 46. Flash memory possible contents<br />
FFFFh<br />
0000h<br />
Virgin<br />
Memory Organization<br />
Default After ISP<br />
Program Lock Bits<br />
Security<br />
level LB0 LB1<br />
1 U U No program lock features enabled.<br />
Protection description<br />
2 P U ISP programming of the Flash is disabled.<br />
3 X P Same as 2, also verify through ISP programming interface is disabled.<br />
After ISP or parallel programming, the possible contents of the Flash memory are summarized<br />
on the figure below:<br />
Application Virgin<br />
or<br />
application<br />
Dedicated<br />
ISP<br />
After ISP<br />
Application<br />
After parallel<br />
programming<br />
Virgin<br />
or<br />
application<br />
Dedicated<br />
ISP<br />
After parallel<br />
programming<br />
Virgin<br />
or<br />
application<br />
After parallel<br />
programming<br />
When the EA pin high, the processor fetches instructions from internal program Flash. .<br />
If the EA pin is tied low, all program memory fetches are from external memory.<br />
121
Bootloader Architecture<br />
Introduction The bootloader manages a communication according to a specific defined protocol to<br />
provide the whole access and service on Flash memory. Furthermore, all accesses and<br />
routines can be called from the user application.<br />
access via<br />
specific<br />
protocol<br />
access from<br />
user<br />
application<br />
122 <strong>AT89C51ID2</strong><br />
Figure 47. Diagram Context Description<br />
Bootloader<br />
Acronyms ISP : In-System Programming<br />
SBV: Software Boot Vector<br />
BSB: Boot Status Byte<br />
SSB: Software Security Bit<br />
HW : Hardware Byte<br />
Flash memory<br />
4289A–8051–09/03
Functional Description<br />
Figure 48. Bootloader Functional Description<br />
4289A–8051–09/03<br />
Exernal host with<br />
Specific Protocol<br />
Communication<br />
ISP Communication<br />
Management<br />
Flash Memory<br />
Management<br />
Flash<br />
Memory<br />
User Call<br />
Management (API )<br />
<strong>AT89C51ID2</strong><br />
User<br />
Application<br />
On the above diagram, the on chip bootloader processes are:<br />
ISP Communication Management<br />
The purpose of this process is to manage the communication and its protocol between<br />
the on-chip bootloader and a external device. The on-chip ROM implement a serial protocol<br />
(see section Bootloader Protocol). This process translate serial communication<br />
frame (UART) into flash memory acess (read, write, erase ...).<br />
User Call Management<br />
Several Application Program Interface (API) calls are available for use by an application<br />
program to permit selective erasing and programming of Flash pages. All calls are made<br />
through a common interface (API calls), included in the ROM bootloader. The programming<br />
functions are selected by setting up the microcontroller’s registers before making a<br />
call to a common entry point (0xFFF0). Results are returned in the registers. The purpose<br />
on this process is to translate the registers values into internal Flash Memory<br />
Management.<br />
Flash Memory Management<br />
This process manages low level access to flash memory (performs read and write<br />
access).<br />
123
Bootloader Functionality<br />
Introduction<br />
124 <strong>AT89C51ID2</strong><br />
The bootloader can be activated by two means: Hardware conditions or regular boot<br />
process.<br />
The Hardware conditions (EA = 1, PSEN = 0) during the Reset# falling edge force the<br />
on-chip bootloader execution. This allows an application to be built that will normally<br />
execute the end user’s code but can be manually forced into default ISP operation.<br />
As PSEN is a an output port in normal operating mode after reset, user application<br />
should take care to release PSEN after falling edge of reset signal. The hardware conditions<br />
are sampled at reset signal falling edge, thus they can be released at any time<br />
when reset input is low.<br />
The on-chip bootloader boot process is shown Figure 49<br />
Hardware Conditions<br />
BLJB<br />
SBV<br />
Purpose<br />
The Hardware Conditions force the bootloader execution whatever BLJB,<br />
BSB and SBV values.<br />
The Boot Loader Jump Bit forces the application execution.<br />
BLJB = 0 => Boot loader execution.<br />
BLJB = 1 => Application execution<br />
The BLJB is a fuse bit in the Hardware Byte.<br />
That can be modified by hardware (programmer) or by software (API).<br />
Note:<br />
The BLJB test is perform by hardware to prevent any program<br />
execution..<br />
The Software Boot Vector contains the high address of custumer<br />
bootloader stored in the application.<br />
SBV = FCh (default value) if no custumer bootloader in user Flash.<br />
Note:<br />
The costumer bootloader is called by JMP [SBV]00h instruction.<br />
4289A–8051–09/03
Boot Process<br />
Figure 49. Bootloader Process<br />
Hardware<br />
Software<br />
4289A–8051–09/03<br />
PC=0000h<br />
USER APPLICATION<br />
BLJB=1<br />
ENBOOT=0<br />
RESET<br />
Hardware<br />
condition?<br />
BLJB!= 0<br />
?<br />
FCON = 00h<br />
?<br />
<strong>AT89C51ID2</strong><br />
Yes (PSEN = 0, EA = 1, and ALE =1 or not connected)<br />
FCON = 00h<br />
FCON = F0h<br />
F800h<br />
BSB = 00h<br />
?<br />
SBV = FCh<br />
?<br />
BLJB=0<br />
ENBOOT=1<br />
USER BOOT LOADER<br />
PC= [SBV]00h<br />
If BLJB=0 then ENBOOT bit (AUXR1) is set<br />
else ENBOOT bit (AUXR1) is cleared<br />
yes = hardware boot conditions<br />
<strong>Atmel</strong> BOOT LOADER<br />
125
ISP Protocol Description<br />
Physical Layer The UART used to transmit information has the following configuration:<br />
Character: 8-bit data<br />
Parity: none<br />
Stop: 2 bits<br />
Flow control: none<br />
Baudrate: autobaud is performed by the bootloader to compute the baudrate<br />
choosen by the host.<br />
Frame Description The Serial Protocol is based on the Intel Hex-type records.<br />
Intel Hex records consist of ASCII characters used to represent hexadecimal values and<br />
are summarized below<br />
126 <strong>AT89C51ID2</strong><br />
Figure 50. Intel Hex Type Frame<br />
Record Load Record<br />
Mark Reclen Offset Type<br />
’:’<br />
<strong>Data</strong><br />
or<br />
Info<br />
Checksum<br />
1-byte 1-byte 2-bytes 1-byte n-bytes 1-byte<br />
Record Mark:<br />
Record Mark is the start of frame. This field must contain ’:’.<br />
Reclen:<br />
Reclen specifies the number of bytes of information or data which follows the Record<br />
Type field of the record.<br />
Load Offset:<br />
Load Offset specifies the 16-bit starting load offset of the data bytes, therefore this field<br />
is used only for<br />
<strong>Data</strong> Program Record (see Section “ISP Commands Summary”).<br />
Record Type:<br />
Record Type specifies the command type. This field is used to interpret the remaining<br />
information within the frame. The encoding for all the current record types is described<br />
in Section “ISP Commands Summary”.<br />
<strong>Data</strong>/Info:<br />
<strong>Data</strong>/Info is a variable length field. It consists of zero or more bytes encoded as pairs of<br />
hexadecimal digits. The meaning of data depends on the Record Type.<br />
Checksum:<br />
The two’s complement of the 8-bit bytes that result from converting each pair of ASCII<br />
hexadecimal digits to one byte of binary, and including the Reclen field to and including<br />
the last byte of the <strong>Data</strong>/Info field. Therefore, the sum of all the ASCII pairs in a record<br />
after converting to binary, from the Reclen field to and including the Checksum field, is<br />
zero.<br />
4289A–8051–09/03
Functional Description<br />
4289A–8051–09/03<br />
<strong>AT89C51ID2</strong><br />
Software Security Bits (SSB) The SSB protects any Flash access from ISP command.<br />
The command "Program Software Security bit" can only write a higher priority level.<br />
There are three levels of security:<br />
level 0: NO_SECURITY (FFh)<br />
This is the default level.<br />
From level 0, one can write level 1 or level 2.<br />
Table 93. Software Security Byte Behavior<br />
level 1: WRITE_SECURITY (FEh )<br />
For this level it is impossible to write in the Flash memory, BSB and SBV.<br />
The Bootloader returns ’P’ on write access.<br />
From level 1, one can write only level 2.<br />
level 2: RD_WR_SECURITY (FCh<br />
The level 2 forbids all read and write accesses to/from the Flash/EEPROM memory.<br />
The Bootloader returns ’L’ on read or write access.<br />
Only a full chip erase in parallel mode (using a programmer) or ISP command can reset<br />
the software security bits.<br />
From level 2, one cannot read and write anything.<br />
Level 0 Level 1 Level 2<br />
Flash/EEprom Any access allowed Read only access allowed Any access not allowed<br />
Fuse bit Any access allowed Read only access allowed Any access not allowed<br />
BSB & SBV Any access allowed Read only access allowed Any access not allowed<br />
SSB Any access allowed Write level 2 allowed Read only access allowed<br />
Manufacturer info Read only access allowed Read only access allowed Read only access allowed<br />
Bootloader info Read only access allowed Read only access allowed Read only access allowed<br />
Erase block Allowed Not allowed Not allowed<br />
Full chip erase Allowed Allowed Allowed<br />
Blank Check Allowed Allowed Allowed<br />
127
Full Chip Erase The ISP command "Full Chip Erase" erases all User Flash memory (fills with FFh) and<br />
sets some bytes used by the bootloader at their default values:<br />
BSB = FFh<br />
SBV = FCh<br />
SSB = FFh and finally erase the Software Security Bits<br />
The Full Chip Erase does not affect the bootloader.<br />
Checksum Error When a checksum error is detected send ‘X’ followed with CR&LF.<br />
128 <strong>AT89C51ID2</strong><br />
4289A–8051–09/03
Flow Description<br />
4289A–8051–09/03<br />
<strong>AT89C51ID2</strong><br />
Overview An initialization step must be performed after each Reset. After microcontroller reset,<br />
the bootloader waits for an autobaud sequence ( see section ‘autobaud performance’).<br />
When the communication is initialized the protocol depends on the record type<br />
requested by the host.<br />
FLIP, a software utility to implement ISP programming with a PC, is available from the<br />
<strong>Atmel</strong> the web site.<br />
Communication Initialization The host initializes the communication by sending a ’U’ character to help the bootloader<br />
to compute the baudrate (autobaud).<br />
Figure 51. Initialization<br />
Host<br />
Bootloader<br />
Autobaud Performances The ISP feature allows a wide range of baud rates in the user application. It is also<br />
adaptable to a wide range of oscillator frequencies. This is accomplished by measuring<br />
the bit-time of a single bit in a received character. This information is then used to program<br />
the baud rate in terms of timer counts based on the oscillator frequency. The ISP<br />
feature requires that an initial character (an uppercase U) be sent to the <strong>AT89C51ID2</strong> to<br />
establish the baud rate. Table show the autobaud capability.<br />
Table 94. Autobaud Performances<br />
Init communication<br />
If (not received "U")<br />
Else<br />
Communication opened<br />
"U"<br />
"U"<br />
Performs autobaud<br />
Sends back U character<br />
Frequency (MHz)<br />
Baudrate (kHz) 1.8432 2 2.4576 3 3.6864 4 5 6 7.3728<br />
2400 OK OK OK OK OK OK OK OK OK<br />
4800 OK - OK OK OK OK OK OK OK<br />
9600 OK - OK OK OK OK OK OK OK<br />
19200 OK - OK OK OK - - OK OK<br />
38400 - - OK OK - OK OK OK<br />
57600 - - - - OK - - - OK<br />
115200 - - - - - - - - OK<br />
Frequency (MHz)<br />
Baudrate (kHz) 8 10 11.0592 12 14.746 16 20 24 26.6<br />
2400 OK OK OK OK OK OK OK OK OK<br />
129
Table 94. Autobaud Performances (Continued)<br />
Frequency (MHz)<br />
Baudrate (kHz) 1.8432 2 2.4576 3 3.6864 4 5 6 7.3728<br />
4800 OK OK OK OK OK OK OK OK OK<br />
9600 OK OK OK OK OK OK OK OK OK<br />
19200 OK OK OK OK OK OK OK OK OK<br />
38400 - - OK OK OK OK OK OK OK<br />
57600 - - OK - OK OK OK OK OK<br />
115200 - - OK - OK - - - -<br />
Command <strong>Data</strong> Stream<br />
Protocol<br />
Figure 52. Command Flow<br />
Host<br />
Sends first character of the<br />
Frame<br />
130 <strong>AT89C51ID2</strong><br />
All commands are sent using the same flow. Each frame sent by the host is echoed by<br />
the bootloader.<br />
":"<br />
":"<br />
Bootloader<br />
If (not received ":")<br />
Else<br />
Sends echo and start<br />
reception<br />
Sends frame (made of 2 ASCII Gets frame, and sends back ech<br />
characters per byte)<br />
for each received byte<br />
Echo analysis<br />
4289A–8051–09/03
Write / Program Commands This flow is common to the following frames:<br />
Flash / Eeprom Programming <strong>Data</strong> Frame<br />
EOF or <strong>Atmel</strong> Frame (only Programming <strong>Atmel</strong> Frame)<br />
Config Byte Programming <strong>Data</strong> Frame<br />
Baud Rate Frame<br />
Description<br />
Figure 53. Write/Program Flow<br />
Example<br />
4289A–8051–09/03<br />
Host<br />
Send Write Command<br />
OR<br />
OR<br />
Wait COMMAND_OK<br />
COMMAND FINISHED<br />
Wait Checksum Error<br />
COMMAND ABORTED<br />
Wait Security Error<br />
COMMAND ABORTED<br />
Write Command<br />
’X’ & CR & LF<br />
’P’ & CR & LF<br />
’.’ & CR & LF<br />
Send Checksum error<br />
Send Security error<br />
Bootloader<br />
Wait Write Command<br />
Checksum error<br />
NO_SECURITY<br />
Wait Programming<br />
Send COMMAND_OK<br />
Programming <strong>Data</strong> (write 55h at address 0010h in the Flash)<br />
HOST : 01 0010 00 55 9A<br />
BOOTLOADER : 01 0010 00 55 9A . CR LF<br />
Programming <strong>Atmel</strong> function (write SSB to level 2)<br />
HOST : 02 0000 03 05 01 F5<br />
BOOTLOADER : 02 0000 03 05 01 F5. CR LF<br />
Writing Frame (write BSB to 55h)<br />
HOST : 03 0000 03 06 00 55 9F<br />
BOOTLOADER : 03 0000 03 06 00 55 9F . CR LF<br />
<strong>AT89C51ID2</strong><br />
131
Blank Check Command<br />
Description<br />
Figure 54. Blank Check Flow<br />
Example<br />
Host<br />
Send Blank Check Command<br />
OR<br />
OR<br />
Wait Address not<br />
erased<br />
COMMAND FINISHED<br />
Wait Checksum Error<br />
COMMAND ABORTED<br />
Wait COMMAND_OK<br />
COMMAND FINISHED<br />
132 <strong>AT89C51ID2</strong><br />
Blank Check Command<br />
’X’ & CR & LF<br />
’.’ & CR & LF<br />
address & CR & LF<br />
Send COMMAND_OK<br />
Bootloader<br />
Wait Blank Check Command<br />
Send Checksum error<br />
Checksum error<br />
Flash blank<br />
Send first Address<br />
not erased<br />
Blank Check ok<br />
HOST : 05 0000 04 0000 7FFF 01 78<br />
BOOTLOADER : 05 0000 04 0000 7FFF 01 78 . CR LF<br />
Blank Check ko at address xxxx<br />
HOST : 05 0000 04 0000 7FFF 01 78<br />
BOOTLOADER : 05 0000 04 0000 7FFF 01 78 xxxx CR LF<br />
Blank Check with checksum error<br />
HOST : 05 0000 04 0000 7FFF 01 70<br />
BOOTLOADER : 05 0000 04 0000 7FFF 01 70 X CR LF CR LF<br />
4289A–8051–09/03
Display <strong>Data</strong><br />
Description<br />
Figure 55. Display Flow<br />
Host<br />
Note: The maximum size of block is 400h. To read more than 400h bytes, the Host must send a new command.<br />
4289A–8051–09/03<br />
Send Display Command<br />
OR<br />
Wait Display <strong>Data</strong><br />
All data read<br />
OR<br />
COMMAND FINISHED<br />
Wait Checksum Error<br />
COMMAND ABORTED<br />
Wait Security Error<br />
COMMAND ABORTED<br />
Display Command<br />
’X’ & CR & LF<br />
’L’ & CR & LF<br />
"Address = "<br />
"Reading value"<br />
CR & LF<br />
Send Checksum Error<br />
Send Security Error<br />
Bootloader<br />
Complet Frame<br />
<strong>AT89C51ID2</strong><br />
Wait Display Command<br />
Checksum error<br />
RD_WR_SECURITY<br />
Read <strong>Data</strong><br />
All data read<br />
Send Display <strong>Data</strong><br />
All data read<br />
COMMAND FINISHED<br />
133
Example<br />
Read Function This flow is similar for the following frames:<br />
Reading Frame<br />
EOF Frame/ <strong>Atmel</strong> Frame (only reading <strong>Atmel</strong> Frame)<br />
Description<br />
Figure 56. Read Flow<br />
Host<br />
Send Read Command<br />
OR<br />
OR<br />
Wait Value of <strong>Data</strong><br />
COMMAND FINISHED<br />
Wait Checksum Error<br />
COMMAND ABORTED<br />
Wait Security Error<br />
COMMAND ABORTED<br />
134 <strong>AT89C51ID2</strong><br />
Display data from address 0000h to 0020h<br />
HOST : 05 0000 04 0000 0020 00 D7<br />
BOOTLOADER : 05 0000 04 0000 0020 00 D7<br />
BOOTLOADER 0000=-----data------ CR LF (16 data)<br />
BOOTLOADER 0010=-----data------ CR LF (16 data)<br />
BOOTLOADER 0020=data CR LF ( 1 data)<br />
Read Command<br />
’X’ & CR & LF<br />
’L’ & CR & LF<br />
’value’ & ’.’ & CR & LF<br />
Send Checksum error<br />
Send Security error<br />
Bootloader<br />
Wait Read Command<br />
Checksum error<br />
RD_WR_SECURITY<br />
Read Value<br />
Send <strong>Data</strong> Read<br />
4289A–8051–09/03
Example<br />
4289A–8051–09/03<br />
Read function (read SBV)<br />
HOST : 02 0000 05 07 02 F0<br />
BOOTLOADER : 02 0000 05 07 02 F0 Value . CR LF<br />
<strong>Atmel</strong> Read function (read Bootloader version)<br />
HOST : 02 0000 01 02 00 FB<br />
BOOTLOADER : 02 0000 01 02 00 FB Value . CR LF<br />
<strong>AT89C51ID2</strong><br />
135
ISP Commands Summary<br />
136 <strong>AT89C51ID2</strong><br />
Table 95. ISP Commands Summary<br />
Command Command Name data[0] data[1] Command Effect<br />
00h Program <strong>Data</strong><br />
03h Write Function<br />
04h Display Function<br />
01h<br />
03h<br />
Program Nb <strong>Data</strong> Byte.<br />
Bootloader will accept up to 128<br />
(80h) data bytes. The data bytes<br />
should be 128 byte page flash<br />
boundary.<br />
00h Erase block0 (0000h-1FFFh)<br />
20h Erase block1 (2000h-3FFFh)<br />
40h Erase block2 (4000h-7FFFh)<br />
80h Erase block3 (8000h- BFFFh)<br />
C0h Erase block4 (C000h- FFFFh)<br />
00h Hardware Reset<br />
01h<br />
Ljmp Address (data[2:3]=<br />
Address)<br />
04h 00h Erase SBV & BSB<br />
05h<br />
06h<br />
00h Program SSB level 1<br />
01h Program SSB level 2<br />
00h<br />
01h<br />
Program BSB (value to write in<br />
data[2])<br />
Program SBV (value to write in<br />
data[2])<br />
07h - Full Chip Erase<br />
0Ah<br />
02h<br />
04h<br />
08h<br />
<strong>Data</strong>[0:1] = start address<br />
<strong>Data</strong> [2:3] = end address<br />
<strong>Data</strong>[4] = 00h -> Display<br />
data<br />
<strong>Data</strong>[4] = 01h -> Blank<br />
check<br />
Program Osc fuse (value to write<br />
in data[2])<br />
Program BLJB fuse (value to<br />
write in data[2])<br />
Program X2 fuse (value to write in<br />
data[2])<br />
Display <strong>Data</strong><br />
Blank Check<br />
4289A–8051–09/03
4289A–8051–09/03<br />
Table 95. ISP Commands Summary (Continued)<br />
05h Read Function<br />
00h<br />
<strong>AT89C51ID2</strong><br />
Command Command Name data[0] data[1] Command Effect<br />
07h<br />
00h Manufacturer Id<br />
01h Device Id #1<br />
02h Device Id #2<br />
03h Device Id #3<br />
00h Read SSB<br />
01h Read BSB<br />
02h Read SBV<br />
06h Read Extra Byte<br />
0Bh 00h Read Hardware Byte<br />
0Eh<br />
00h Read Device Boot ID1<br />
01h Read Device Boot ID2<br />
0Fh 00h Read Bootloader Version<br />
137
API Call Description Several Application Program Interface (API) calls are available for use by an application<br />
program to permit selective erasing and programming of Flash pages. All calls are made<br />
through a common interface, PGM_MTP. The programming functions are selected by<br />
setting up the microcontroller’s registers before making a call to PGM_MTP at FFF0h.<br />
Results are returned in the registers.<br />
Table 96. API Call Summary<br />
138 <strong>AT89C51ID2</strong><br />
When several bytes have to be programmed, it is highly recommended to use the <strong>Atmel</strong><br />
API “PROGRAM DATA PAGE” call. Indeed, this API call writes up to 128 bytes in a single<br />
command.<br />
All routines for software access are provided in the C Flash driver available on <strong>Atmel</strong><br />
web site.<br />
The API calls description and arguments are shown in Table<br />
Command R1 A DPTR0 DPTR1 Returned Value Command Effect<br />
READ MANUF ID 00h XXh 0000h XXh ACC=Manufacturer Id Read Manufacturer identifier<br />
READ DEVICE ID1 00h XXh 0001h XXh ACC= Device Id 1 Read Device identifier 1<br />
READ DEVICE ID2 00h XXh 0002h XXh ACC=Device Id 2 Read Device identifier 2<br />
READ DEVICE ID3 00h XXh 0003h XXh ACC=Device Id 3 Read Device identifier 3<br />
ERASE BLOCK 01h XXh<br />
PROGRAM DATA<br />
BYTE<br />
ERASE BOOT<br />
VECTOR<br />
02h<br />
Byte value to<br />
program<br />
PROGRAM SSB 05h XXh<br />
PROGRAM BSB 06h<br />
DPH=00h<br />
Erase block 0<br />
DPH=20h Erase block 1<br />
DPH=40h 00h ACC=DPH Erase block 2<br />
DPH=80h Erase block 3<br />
DPH=C0h Erase block 4<br />
Address of<br />
byte to<br />
program<br />
ACC=0 : DONE<br />
04h XXh XXh XXh ACC=FCh<br />
New BSB<br />
value<br />
DPH=00h<br />
DPL=00h<br />
DPH=00h<br />
DPL=01h<br />
DPH=00h<br />
DPL=10h<br />
DPH=00h<br />
DPL=11h<br />
00h ACC= SSB value<br />
Program one <strong>Data</strong> Byte in user flash<br />
Erase Software boot vector and boot status<br />
byte. (SBV=FCh and BSB=FFh)<br />
Set SSB level 1<br />
Set SSB level 2<br />
Set SSB level 0<br />
Set SSB level 1<br />
0000h XXh none Program boot status byte<br />
PROGRAM SBV 06h<br />
New SBV<br />
value<br />
0001h XXh none Program software boot vector<br />
READ SSB 07h XXh 0000h XXh ACC=SSB Read Software Security Byte<br />
READ HSB 07h XXh 0004h XXh ACC=HSB Read Hardware Byte<br />
READ BSB 07h XXh 0001h XXh ACC=BSB Read Boot Status Byte<br />
READ SBV 07h XXh 0002h XXh ACC=SBV Read Software Boot Vector<br />
4289A–8051–09/03
Table 96. API Call Summary (Continued)<br />
PROGRAM DATA<br />
PAGE 09h<br />
4289A–8051–09/03<br />
Number of<br />
byte to<br />
program<br />
Address of<br />
the first byte<br />
to program in<br />
the Flash<br />
memory<br />
Address in<br />
XRAM of the<br />
first data to<br />
program<br />
ACC=0 : DONE<br />
<strong>AT89C51ID2</strong><br />
Command R1 A DPTR0 DPTR1 Returned Value Command Effect<br />
READ MANUF ID 00h XXh 0000h XXh ACC=Manufacturer Id Read Manufacturer identifier<br />
READ DEVICE ID1 00h XXh 0001h XXh ACC= Device Id 1 Read Device identifier 1<br />
READ DEVICE ID2 00h XXh 0002h XXh ACC=Device Id 2 Read Device identifier 2<br />
READ DEVICE ID3 00h XXh 0003h XXh ACC=Device Id 3 Read Device identifier 3<br />
ERASE BLOCK 01h XXh<br />
DPH=00h<br />
Erase block 0<br />
DPH=20h Erase block 1<br />
DPH=40h 00h ACC=DPH Erase block 2<br />
DPH=80h Erase block 3<br />
DPH=C0h Erase block 4<br />
Program up to 128 bytes in user flash.<br />
Remark: number of bytes to program is<br />
limited such as the Flash write remains in a<br />
single 128bytes page. Hence, when ACC is<br />
128, valid values of DPL are 00h, or, 80h.<br />
PROGRAM X2 FUSE 0Ah<br />
Fuse value<br />
00h or 01h<br />
0008h XXh none Program X2 fuse bit with ACC<br />
PROGRAM BLJB<br />
FUSE<br />
0Ah<br />
Fuse value<br />
00h or 01h<br />
0004h XXh none Program BLJB fuse bit with ACC<br />
READ BOOT ID1 0Eh XXh DPL=00h XXh ACC=ID1 Read boot ID1<br />
READ BOOT ID2 0Eh XXh DPL=01h XXh ACC=ID2 Read boot ID2<br />
READ BOOT VERSION 0Fh XXh XXXXh XXh ACC=Boot_Version Read bootloader version<br />
139
Electrical Characteristics<br />
Absolute Maximum Ratings<br />
I = industrial ........................................................-40°C to 85°C<br />
Storage Temperature .................................... -65°C to + 150°C<br />
Voltage on V CC to V SS (standard voltage) .........-0.5V to + 6.5V<br />
Voltage on V CC to V SS (low voltage)..................-0.5V to + 4.5V<br />
Voltage on Any Pin to V SS ..........................-0.5V to V CC + 0.5V<br />
Power Dissipation ........................................................... 1 W (2)<br />
DC Parameters<br />
T A = -40°C to +85°C; V SS = 0V; V CC =2.7V to 5.5V; F = 0 to 60 MHz<br />
140 <strong>AT89C51ID2</strong><br />
Note: Stresses at or above those listed under “Absolute<br />
Maximum Ratings” may cause permanent damage to<br />
the device. This is a stress rating only and functional<br />
operation of the device at these or any other conditions<br />
above those indicated in the operational<br />
sections of this specification is not implied. Exposure<br />
to absolute maximum rating conditions may affect<br />
device reliability.<br />
Power dissipation is based on the maximum allowable<br />
die temperature and the thermal resistance of<br />
the package.<br />
Symbol Parameter Min Typ Max Unit Test Conditions<br />
V IL Input Low Voltage -0.5 0.2 V CC - 0.1 V<br />
V IH Input High Voltage except RST, XTAL1 0.2 V CC + 0.9 V CC + 0.5 V<br />
V IH1 Input High Voltage RST, XTAL1 0.7 V CC V CC + 0.5 V<br />
V OL<br />
V OL1<br />
V OH<br />
V OH1<br />
Output Low Voltage, ports 1, 2, 3, 4 (6)<br />
Output Low Voltage, port 0, ALE, PSEN (6)<br />
Output High Voltage, ports 1, 2, 3, 4<br />
Output High Voltage, port 0, ALE, PSEN<br />
VCC - 0.3<br />
VCC - 0.7<br />
VCC - 1.5<br />
0.9 V CC<br />
VCC - 0.3<br />
VCC - 0.7<br />
VCC - 1.5<br />
0.9 V CC<br />
0.3<br />
0.45<br />
1.0<br />
V<br />
V<br />
V<br />
0.45 V<br />
0.3<br />
0.45<br />
1.0<br />
V<br />
V<br />
V<br />
0.45 V<br />
V<br />
V<br />
V<br />
V<br />
V<br />
V<br />
V<br />
V<br />
VCC = 4.5V to 5.5V<br />
IOL = 100 µA (4)<br />
I OL = 1.6 mA (4)<br />
I OL = 3.5 mA (4)<br />
VCC = 2.7V to 5.5V<br />
IOL = 0.8 mA (4)<br />
VCC = 4.5V to 5.5V<br />
IOL = 200 µA (4)<br />
I OL = 3.2 mA (4)<br />
I OL = 7.0 mA (4)<br />
VCC = 2.7V to 5.5V<br />
IOL = 1.6 mA (4)<br />
VCC = 5V ± 10%<br />
IOH = -10 µA<br />
IOH = -30 µA<br />
IOH = -60 µA<br />
VCC = 2.7V to 5.5V<br />
IOH = -10 µA<br />
VCC = 5V ± 10%<br />
IOH = -200 µA<br />
IOH = -3.2 mA<br />
IOH = -7.0 mA<br />
VCC = 2.7V to 5.5V<br />
IOH = -10 µA<br />
4289A–8051–09/03
T A = -40°C to +85°C; V SS = 0V; V CC =2.7V to 5.5V; F = 0 to 60 MHz (Continued)<br />
4289A–8051–09/03<br />
<strong>AT89C51ID2</strong><br />
Symbol Parameter Min Typ Max Unit Test Conditions<br />
R RST RST Pull-down Resistor 50 200 (5)<br />
Notes: 1. Operating I CC is measured with all output pins disconnected; XTAL1 driven with T CLCH , T CHCL = 5 ns (see Figure 60), V IL =<br />
V SS + 0.5V, V IH = V CC - 0.5V; XTAL2 N.C.; EA = RST = Port 0 = V CC . I CC would be slightly higher if a crystal oscillator used<br />
(see Figure 57).<br />
2. Idle I CC is measured with all output pins disconnected; XTAL1 driven with T CLCH , T CHCL = 5 ns, V IL = V SS + 0.5V, V IH = V CC -<br />
0.5V; XTAL2 N.C; Port 0 = V CC ; EA = RST = V SS (see Figure 58).<br />
3. Power-down I CC is measured with all output pins disconnected; EA = V CC , PORT 0 = V CC ; XTAL2 NC.; RST = V SS (see Figure<br />
59).<br />
4. Capacitance loading on Ports 0 and 2 may cause spurious noise pulses to be superimposed on the V OLS of ALE and Ports 1<br />
and 3. The noise is due to external bus capacitance discharging into the Port 0 and Port 2 pins when these pins make 1 to 0<br />
transitions during bus operation. In the worst cases (capacitive loading 100 pF), the noise pulse on the ALE line may exceed<br />
0.45V with maxi V OL peak 0.6V. A Schmitt Trigger use is not necessary.<br />
5. Typical values are based on a limited number of samples and are not guaranteed. The values listed are at room temperature<br />
and 5V.<br />
6. Under steady state (non-transient) conditions, I OL must be externally limited as follows:<br />
Maximum I OL per port pin: 10 mA<br />
Maximum I OL per 8-bit port:<br />
Port 0: 26 mA<br />
Ports 1, 2 and 3: 15 mA<br />
Maximum total I OL for all output pins: 71 mA<br />
If I OL exceeds the test condition, V OL may exceed the related specification. Pins are not guaranteed to sink current greater<br />
than the listed test conditions.<br />
Figure 57. I CC Test Condition, Active Mode<br />
250 kΩ<br />
I IL Logical 0 Input Current ports 1, 2, 3, 4 and 5 -50 µA V IN = 0.45V<br />
I LI Input Leakage Current ±10 µA 0.45V < V IN < V CC<br />
I TL Logical 1 to 0 Transition Current, ports 1, 2, 3, 4 -650 µA V IN = 2.0V<br />
C IO Capacitance of I/O Buffer 10 pF<br />
F C = 3 MHz<br />
T A = 25°C<br />
I PD Power-down Current 75 150 µA 2.7 < V CC < 5.5V (3)<br />
I CCOP Power Supply Current on normal mode 0.4 x Frequency (MHz) + 5 mA V CC = 5.5V (1)<br />
I CCIDLE Power Supply Current on idle mode 0.3 x Frequency (MHz) + 5 mA V CC = 5.5V (2)<br />
I CCWRITE Power Supply Current on flash or EEdata write 0.8 x Frequency (MHz) + 15 mA V CC = 5.5V<br />
t WRITE Flash or EEdata programming time 7 10 ms 2.7 < V CC < 5.5V<br />
(NC)<br />
CLOCK<br />
SIGNAL<br />
V CC<br />
RST<br />
XTAL2<br />
XTAL1<br />
V SS<br />
V CC<br />
I CC<br />
P0<br />
EA<br />
V CC<br />
V CC<br />
All other pins are disconnected.<br />
141
AC Parameters<br />
Explanation of the AC<br />
Symbols<br />
142 <strong>AT89C51ID2</strong><br />
Figure 58. I CC Test Condition, Idle Mode<br />
(NC)<br />
CLOCK<br />
SIGNAL<br />
RST EA<br />
XTAL2<br />
XTAL1<br />
V SS<br />
V CC<br />
Figure 59. I CC Test Condition, Power-down Mode<br />
(NC)<br />
RST EA<br />
XTAL2<br />
XTAL1<br />
V SS<br />
V CC<br />
I CC<br />
P0<br />
V CC<br />
V CC<br />
I CC<br />
P0<br />
V CC<br />
Figure 60. Clock Signal Waveform for I CC Tests in Active and Idle Modes<br />
V CC<br />
VCC-0.5V 0.45V<br />
TCHCL TCLCH TCLCH = TCHCL = 5ns.<br />
All other pins are disconnected.<br />
All other pins are disconnected.<br />
0.7V CC<br />
0.2V CC-0.1<br />
Each timing symbol has 5 characters. The first character is always a “T” (stands for<br />
time). The other characters, depending on their positions, stand for the name of a signal<br />
or the logical status of that signal. The following is a list of all the characters and what<br />
they stand for.<br />
Example:TAVLL = Time for Address Valid to ALE Low.<br />
TLLPL = Time for ALE Low to PSEN Low.<br />
(Load Capacitance for port 0, ALE and PSEN = 100 pF; Load Capacitance for all other<br />
outputs = 80 pF.)<br />
Table 97 Table 100, and Table 103 give the description of each AC symbols.<br />
Table 98, Table 99, Table 101 and Table 104 gives the range for each AC parameter.<br />
4289A–8051–09/03
External Program Memory<br />
Characteristics<br />
4289A–8051–09/03<br />
<strong>AT89C51ID2</strong><br />
Table 98, Table 99 and Table 105 give the frequency derating formula of the AC parameter<br />
for each speed range description. To calculate each AC symbols. take the x value<br />
in the correponding column (-M or -L) and use this value in the formula.<br />
Example: TLLIU for -M and 20 MHz, Standard clock.<br />
x = 35 ns<br />
T 50 ns<br />
TCCIV = 4T - x = 165 ns<br />
Table 97. Symbol Description<br />
Symbol Parameter<br />
T Oscillator clock period<br />
T LHLL<br />
T AVLL<br />
T LLAX<br />
T LLIV<br />
T LLPL<br />
T PLPH<br />
T PLIV<br />
T PXIX<br />
T PXIZ<br />
T AVIV<br />
T PLAZ<br />
ALE pulse width<br />
Address Valid to ALE<br />
Address Hold After ALE<br />
ALE to Valid Instruction In<br />
ALE to PSEN<br />
PSEN Pulse Width<br />
PSEN to Valid Instruction In<br />
Input Instruction Hold After PSEN<br />
Input Instruction Float After PSEN<br />
Address to Valid Instruction In<br />
PSEN Low to Address Float<br />
Table 98. AC Parameters for a Fix Clock<br />
Symbol -M -L Units<br />
Min Max Min Max<br />
T 25 25 ns<br />
T LHLL 35 35 ns<br />
T AVLL 5 5 ns<br />
T LLAX 5 5 ns<br />
T LLIV n 65 65 ns<br />
T LLPL 5 5 ns<br />
T PLPH 50 50 ns<br />
T PLIV 30 30 ns<br />
T PXIX 0 0 ns<br />
T PXIZ 10 10 ns<br />
T AVIV 80 80 ns<br />
T PLAZ 10 10 ns<br />
143
144 <strong>AT89C51ID2</strong><br />
Table 99. AC Parameters for a Variable Clock<br />
Symbol Type<br />
Standard<br />
Clock X2 Clock<br />
X parameter for<br />
-M range<br />
X parameter for<br />
-L range Units<br />
T LHLL Min 2 T - x T - x 15 15 ns<br />
T AVLL Min T - x 0.5 T - x 20 20 ns<br />
T LLAX Min T - x 0.5 T - x 20 20 ns<br />
T LLIV Max 4 T - x 2 T - x 35 35 ns<br />
T LLPL Min T - x 0.5 T - x 15 15 ns<br />
T PLPH Min 3 T - x 1.5 T - x 25 25 ns<br />
T PLIV Max 3 T - x 1.5 T - x 45 45 ns<br />
T PXIX Min x x 0 0 ns<br />
T PXIZ Max T - x 0.5 T - x 15 15 ns<br />
T AVIV Max 5 T - x 2.5 T - x 45 45 ns<br />
T PLAZ Max x x 10 10 ns<br />
4289A–8051–09/03
External Program Memory<br />
Read Cycle<br />
External <strong>Data</strong> Memory<br />
Characteristics Table 100. Symbol Description<br />
4289A–8051–09/03<br />
ALE<br />
PSEN<br />
PORT 0<br />
PORT 2<br />
T PLIV<br />
TPLAZ<br />
INSTR IN A0-A7 INSTR IN<br />
A0-A7<br />
INSTR IN<br />
ADDRESS<br />
OR SFR-P2<br />
T LHLL<br />
TLLAX TAVLL T AVIV<br />
T LLIV<br />
T LLPL<br />
T PLPH<br />
ADDRESS A8-A15<br />
Symbol Parameter<br />
T RLRH<br />
T WLWH<br />
T RLDV<br />
T RHDX<br />
T RHDZ<br />
T LLDV<br />
T AVDV<br />
T LLWL<br />
T AVWL<br />
T QVWX<br />
T QVWH<br />
T WHQX<br />
T RLAZ<br />
T WHLH<br />
T PXIX<br />
RD Pulse Width<br />
WR Pulse Width<br />
RD to Valid <strong>Data</strong> In<br />
<strong>Data</strong> Hold After RD<br />
<strong>Data</strong> Float After RD<br />
12 T CLCL<br />
ALE to Valid <strong>Data</strong> In<br />
Address to Valid <strong>Data</strong> In<br />
ALE to WR or RD<br />
Address to WR or RD<br />
<strong>Data</strong> Valid to WR Transition<br />
<strong>Data</strong> Set-up to WR High<br />
<strong>Data</strong> Hold After WR<br />
RD Low to Address Float<br />
RD or WR High to ALE high<br />
T PXIZ<br />
T PXAV<br />
ADDRESS A8-A15<br />
<strong>AT89C51ID2</strong><br />
145
146 <strong>AT89C51ID2</strong><br />
Table 101. AC Parameters for a Fix Clock<br />
Symbol<br />
-M -L<br />
Min Max Min Max<br />
T RLRH 125 125 ns<br />
T WLWH 125 125 ns<br />
T RLDV 95 95 ns<br />
T RHDX 0 0 ns<br />
T RHDZ 25 25 ns<br />
T LLDV 155 155 ns<br />
T AVDV 160 160 ns<br />
T LLWL 45 105 45 105 ns<br />
T AVWL 70 70 ns<br />
T QVWX 5 5 ns<br />
T QVWH 155 155 ns<br />
T WHQX 10 10 ns<br />
T RLAZ 0 0 ns<br />
T WHLH 5 45 5 45 ns<br />
Table 102. AC Parameters for a Variable Clock<br />
Symbol Type<br />
Standard<br />
Clock X2 Clock<br />
X parameter for<br />
-M range<br />
X parameter for<br />
-L range Units<br />
T RLRH Min 6 T - x 3 T - x 25 25 ns<br />
T WLWH Min 6 T - x 3 T - x 25 25 ns<br />
T RLDV Max 5 T - x 2.5 T - x 30 30 ns<br />
T RHDX Min x x 0 0 ns<br />
T RHDZ Max 2 T - x T - x 25 25 ns<br />
T LLDV Max 8 T - x 4T -x 45 45 ns<br />
T AVDV Max 9 T - x 4.5 T - x 65 65 ns<br />
T LLWL Min 3 T - x 1.5 T - x 30 30 ns<br />
T LLWL Max 3 T + x 1.5 T + x 30 30 ns<br />
T AVWL Min 4 T - x 2 T - x 30 30 ns<br />
T QVWX Min T - x 0.5 T - x 20 20 ns<br />
T QVWH Min 7 T - x 3.5 T - x 20 20 ns<br />
T WHQX Min T - x 0.5 T - x 15 15 ns<br />
T RLAZ Max x x 0 0 ns<br />
T WHLH Min T - x 0.5 T - x 20 20 ns<br />
T WHLH Max T + x 0.5 T + x 20 20 ns<br />
Units<br />
4289A–8051–09/03
External <strong>Data</strong> Memory Write<br />
Cycle<br />
4289A–8051–09/03<br />
ALE<br />
PSEN<br />
WR<br />
PORT 0<br />
PORT 2<br />
External <strong>Data</strong> Memory Read Cycle<br />
ALE<br />
PSEN<br />
RD<br />
PORT 0<br />
PORT 2<br />
Serial Port Timing - Shift<br />
Register Mode<br />
ADDRESS<br />
OR SFR-P2<br />
ADDRESS<br />
OR SFR-P2<br />
T LLAX<br />
Table 103. Symbol Description<br />
T QVWH<br />
A0-A7 DATA OUT<br />
T AVWL<br />
T LLAX<br />
T LLWL<br />
T QVWX<br />
T WLWH<br />
ADDRESS A8-A15 OR SFR P2<br />
A0-A7 DATA IN<br />
T AVWL<br />
T LLWL<br />
T LLDV<br />
T AVDV<br />
Symbol Parameter<br />
T XLXL<br />
T QVHX<br />
T XHQX<br />
T XHDX<br />
T XHDV<br />
T RLAZ<br />
T RLRH<br />
ADDRESS A8-A15 OR SFR P2<br />
Serial port clock cycle time<br />
Output data set-up to clock rising edge<br />
Output data hold after clock rising edge<br />
Input data hold after clock rising edge<br />
Clock rising edge to input data valid<br />
T WHLH<br />
T WHLH<br />
T RHDX<br />
<strong>AT89C51ID2</strong><br />
T WHQX<br />
T RHDZ<br />
147
Shift Register Timing<br />
Waveforms<br />
INSTRUCTION<br />
ALE<br />
CLOCK<br />
External Clock Drive<br />
Waveforms<br />
148 <strong>AT89C51ID2</strong><br />
Table 104. AC Parameters for a Fix Clock<br />
Symbol<br />
Table 105. AC Parameters for a Variable Clock<br />
-M -L<br />
Min Max Min Max<br />
T XLXL 300 300 ns<br />
T QVHX 200 200 ns<br />
T XHQX 30 30 ns<br />
T XHDX 0 0 ns<br />
T XHDV 117 117 ns<br />
Symbol Type<br />
Standard<br />
Clock X2 Clock<br />
X Parameter For<br />
-M Range<br />
X Parameter For<br />
-L Range Units<br />
T XLXL Min 12 T 6 T ns<br />
T QVHX Min 10 T - x 5 T - x 50 50 ns<br />
T XHQX Min 2 T - x T - x 20 20 ns<br />
T XHDX Min x x 0 0 ns<br />
T XHDV Max 10 T - x 5 T- x 133 133 ns<br />
0 1 2 3 4 5 6 7 8<br />
OUTPUT DATA<br />
0 1 2 3 4 5 6 7<br />
WRITE to SBUF<br />
TXHDV TXHDX SET TI<br />
INPUT DATA VALID VALID VALID VALID VALID VALID VALID VALID<br />
CLEAR RI<br />
T QVXH<br />
T XLXL<br />
V CC -0.5V<br />
0.45V<br />
T XHQX<br />
0.7V CC<br />
0.2V CC -0.1<br />
T CHCL<br />
T CLCX<br />
T CLCL<br />
T CHCX<br />
T CLCH<br />
SET RI<br />
Units<br />
4289A–8051–09/03
AC Testing Input/Output<br />
Waveforms<br />
Float Waveforms<br />
4289A–8051–09/03<br />
INPUT/OUTPUT<br />
V CC -0.5V<br />
0.2 V CC + 0.9<br />
0.2 V CC - 0.1<br />
<strong>AT89C51ID2</strong><br />
AC inputs during testing are driven at V CC - 0.5 for a logic “1” and 0.45V for a logic “0”.<br />
Timing measurement are made at V IH min for a logic “1” and V IL max for a logic “0”.<br />
For timing purposes as port pin is no longer floating when a 100 mV change from load<br />
voltage occurs and begins to float when a 100 mV change from the loaded V OH /V OL level<br />
occurs. I OL /I OH ≥ ± 20 mA.<br />
Clock Waveforms Valid in normal clock mode. In X2 mode XTAL2 must be changed to XTAL2/2.<br />
0.45V<br />
V OH - 0.1V<br />
V OL + 0.1V<br />
FLOAT<br />
V LOAD<br />
V LOAD + 0.1V<br />
V LOAD - 0.1V<br />
149
Figure 61. Internal Clock Signals<br />
INTERNAL<br />
CLOCK<br />
XTAL2<br />
ALE<br />
This diagram indicates when signals are clocked internally. The time it takes the signals to propagate to the pins, however,<br />
ranges from 25 to 125 ns. This propagation delay is dependent on variables such as temperature and pin loading. Propagation<br />
also varies from output to output and component. Typically though (T A = 25°C fully loaded) RD and WR propagation<br />
delays are approximately 50 ns. The other signals are typically 85 ns. Propagation delays are incorporated in the AC<br />
specifications.<br />
150 <strong>AT89C51ID2</strong><br />
STATE4 STATE5 STATE6 STATE1 STATE2 STATE3 STATE4 STATE5<br />
P1 P2 P1 P2 P1 P2 P1 P2 P1 P2 P1 P2 P1 P2 P1 P2<br />
EXTERNAL PROGRAM MEMORY FETCH<br />
PSEN<br />
P0<br />
P2 (EXT)<br />
READ CYCLE<br />
RD<br />
P0<br />
P2<br />
WRITE CYCLE<br />
WR<br />
P0<br />
P2<br />
THESE SIGNALS ARE NOT ACTIVATED DURING THE<br />
EXECUTION OF A MOVX INSTRUCTION<br />
DATA PCL OUT DATA PCL OUT DATA PCL OUT<br />
SAMPLED SAMPLED SAMPLED<br />
FLOAT FLOAT FLOAT<br />
INDICATES ADDRESS TRANSITIONS<br />
DPL OR Rt OUT<br />
DATA<br />
SAMPLED<br />
FLOAT<br />
INDICATES DPH OR P2 SFR TO PCH TRANSITION<br />
RXD SAMPLED<br />
PCL OUT (IF PROGRAM<br />
MEMORY IS EXTERNAL)<br />
PCL OUT (EVEN IF PROGRAM<br />
MEMORY IS INTERNAL)<br />
PCL OUT (IF PROGRAM<br />
MEMORY IS EXTERNAL)<br />
PORT OPERATION<br />
MOV PORT SRC<br />
OLD DATA NEW DATA<br />
P0 PINS SAMPLED<br />
P0 PINS SAMPLED<br />
MOV DEST P0<br />
MOV DEST PORT (P1. P2. P3)<br />
(INCLUDES INTO. INT1. TO T1)<br />
P1, P2, P3 PINS SAMPLED P1, P2, P3 PINS SAMPLED<br />
SERIAL PORT SHIFT CLOCK<br />
TXD (MODE 0)<br />
DPL OR Rt OUT<br />
DATA OUT<br />
INDICATES DPH OR P2 SFR TO PCH TRANSITION<br />
RXD SAMPLED<br />
4289A–8051–09/03
Ordering Information<br />
4289A–8051–09/03<br />
Table 106. Possible Order Entries<br />
Part Number Supply Voltage<br />
<strong>AT89C51ID2</strong>-SLSIM<br />
<strong>AT89C51ID2</strong><br />
Temperature<br />
Range Package Packing<br />
PLCC44 Stick<br />
<strong>AT89C51ID2</strong>-RLTIM VQFP44 Tray<br />
2.7V-5.5V Industrial<br />
<strong>AT89C51ID2</strong>-SMSIM (1) PLCC68 Stick<br />
<strong>AT89C51ID2</strong>-RDTIM (1) VQFP64 Tray<br />
Note: 1. For PLCC68 and VQFP64 packages, please contact <strong>Atmel</strong> sales office for<br />
availability.<br />
151
Packaging Information<br />
PLCC44<br />
152 <strong>AT89C51ID2</strong><br />
4289A–8051–09/03
VQFP44<br />
4289A–8051–09/03<br />
<strong>AT89C51ID2</strong><br />
153
VQFP64<br />
154 <strong>AT89C51ID2</strong><br />
4289A–8051–09/03
PLCC68<br />
4289A–8051–09/03<br />
<strong>AT89C51ID2</strong><br />
155
Table of Contents<br />
156 <strong>AT89C51ID2</strong><br />
Features................................................................................................. 1<br />
Description ............................................................................................ 1<br />
Block Diagram....................................................................................... 3<br />
SFR Mapping......................................................................................... 4<br />
Pin Configurations.............................................................................. 10<br />
Oscillators ........................................................................................... 15<br />
Overview............................................................................................................. 15<br />
Registers............................................................................................................. 15<br />
Functional Block Diagram................................................................................... 18<br />
............................................................................................................................ 18<br />
Operating Modes ................................................................................................ 18<br />
Design Considerations........................................................................................ 20<br />
Timer 0: Clock Inputs.......................................................................................... 21<br />
Enhanced Features............................................................................. 22<br />
X2 Feature .......................................................................................................... 22<br />
Dual <strong>Data</strong> Pointer Register DPTR...................................................... 26<br />
Expanded RAM (XRAM) ..................................................................... 29<br />
Registers............................................................................................................. 31<br />
Reset .................................................................................................... 32<br />
Introduction ......................................................................................................... 32<br />
Reset Input ......................................................................................................... 32<br />
Reset Output....................................................................................................... 33<br />
Power Monitor..................................................................................... 34<br />
Description.......................................................................................................... 34<br />
Timer 2 ................................................................................................. 36<br />
Auto-Reload Mode.............................................................................................. 36<br />
Programmable Clock-Output .............................................................................. 37<br />
Registers............................................................................................................. 39<br />
Programmable Counter Array PCA................................................... 41<br />
PCA Capture Mode............................................................................................. 49<br />
16-bit Software Timer/ Compare Mode............................................................... 49<br />
High Speed Output Mode ................................................................................... 50<br />
4289A–8051–09/03
4289A–8051–09/03<br />
<strong>AT89C51ID2</strong><br />
Pulse Width Modulator Mode.............................................................................. 51<br />
PCA Watchdog Timer ......................................................................................... 52<br />
Serial I/O Port ...................................................................................... 53<br />
Framing Error Detection ..................................................................................... 53<br />
Automatic Address Recognition.......................................................................... 54<br />
Registers............................................................................................................. 56<br />
Baud Rate Selection for UART for Mode 1 and 3............................................... 56<br />
UART Registers.................................................................................................. 59<br />
Interrupt System ................................................................................. 64<br />
Registers............................................................................................................. 65<br />
Interrupt Sources and Vector Addresses............................................................ 72<br />
Power Management ............................................................................ 73<br />
Introduction ......................................................................................................... 73<br />
Idle Mode ............................................................................................................ 73<br />
Power-Down Mode ............................................................................................. 73<br />
Registers............................................................................................................. 76<br />
Keyboard Interface ............................................................................. 77<br />
Registers............................................................................................................. 78<br />
2-wire Interface (TWI) ......................................................................... 81<br />
Description.......................................................................................................... 83<br />
Notes .................................................................................................................. 86<br />
Registers............................................................................................................. 96<br />
Serial Port Interface (SPI)................................................................... 99<br />
Features.............................................................................................................. 99<br />
Signal Description............................................................................................... 99<br />
Functional Description ...................................................................................... 101<br />
Hardware Watchdog Timer .............................................................. 108<br />
Using the WDT ................................................................................................. 108<br />
WDT During Power Down and Idle................................................................... 109<br />
ONCE(TM) Mode (ON Chip Emulation) ........................................... 110<br />
Power-off Flag................................................................................... 111<br />
EEPROM <strong>Data</strong> Memory..................................................................... 112<br />
Write <strong>Data</strong>......................................................................................................... 112<br />
Read <strong>Data</strong>......................................................................................................... 114<br />
Registers........................................................................................................... 115<br />
157
158 <strong>AT89C51ID2</strong><br />
Reduced EMI Mode........................................................................... 116<br />
Flash Memory.................................................................................... 117<br />
Features............................................................................................................ 117<br />
Flash Programming and Erasure...................................................................... 117<br />
Flash Registers and Memory Map.................................................................... 118<br />
Flash Memory Status........................................................................................ 121<br />
Memory Organization ....................................................................................... 121<br />
Bootloader Architecture .................................................................................... 122<br />
ISP Protocol Description................................................................................... 126<br />
Functional Description ...................................................................................... 127<br />
Flow Description ............................................................................................... 129<br />
API Call Description.......................................................................................... 138<br />
Electrical Characteristics................................................................. 140<br />
Absolute Maximum Ratings .............................................................................. 140<br />
DC Parameters ................................................................................................. 140<br />
AC Parameters ................................................................................................. 142<br />
Ordering Information........................................................................ 151<br />
Packaging Information ..................................................................... 152<br />
PLCC44 ............................................................................................................ 152<br />
VQFP44 ............................................................................................................ 153<br />
VQFP64 ............................................................................................................ 154<br />
PLCC68 ............................................................................................................ 155<br />
4289A–8051–09/03
<strong>Atmel</strong> Corporation <strong>Atmel</strong> Operations<br />
2325 Orchard Parkway<br />
San Jose, CA 95131, USA<br />
Tel: 1(408) 441-0311<br />
Fax: 1(408) 487-2600<br />
Regional Headquarters<br />
Europe<br />
<strong>Atmel</strong> Sarl<br />
Route des Arsenaux 41<br />
Case Postale 80<br />
CH-1705 Fribourg<br />
Switzerland<br />
Tel: (41) 26-426-5555<br />
Fax: (41) 26-426-5500<br />
Asia<br />
Room 1219<br />
Chinachem Golden Plaza<br />
77 Mody Road Tsimshatsui<br />
East Kowloon<br />
Hong Kong<br />
Tel: (852) 2721-9778<br />
Fax: (852) 2722-1369<br />
Japan<br />
9F, Tonetsu Shinkawa Bldg.<br />
1-24-8 Shinkawa<br />
Chuo-ku, Tokyo 104-0033<br />
Japan<br />
Tel: (81) 3-3523-3551<br />
Fax: (81) 3-3523-7581<br />
Memory<br />
2325 Orchard Parkway<br />
San Jose, CA 95131, USA<br />
Tel: 1(408) 441-0311<br />
Fax: 1(408) 436-4314<br />
Microcontrollers<br />
2325 Orchard Parkway<br />
San Jose, CA 95131, USA<br />
Tel: 1(408) 441-0311<br />
Fax: 1(408) 436-4314<br />
La Chantrerie<br />
BP 70602<br />
44306 Nantes Cedex 3, France<br />
Tel: (33) 2-40-18-18-18<br />
Fax: (33) 2-40-18-19-60<br />
ASIC/ASSP/Smart Cards<br />
Zone Industrielle<br />
13106 Rousset Cedex, France<br />
Tel: (33) 4-42-53-60-00<br />
Fax: (33) 4-42-53-60-01<br />
1150 East Cheyenne Mtn. Blvd.<br />
Colorado Springs, CO 80906, USA<br />
Tel: 1(719) 576-3300<br />
Fax: 1(719) 540-1759<br />
Scottish Enterprise Technology Park<br />
Maxwell Building<br />
East Kilbride G75 0QR, Scotland<br />
Tel: (44) 1355-803-000<br />
Fax: (44) 1355-242-743<br />
RF/Automotive<br />
Theresienstrasse 2<br />
Postfach 3535<br />
74025 Heilbronn, Germany<br />
Tel: (49) 71-31-67-0<br />
Fax: (49) 71-31-67-2340<br />
1150 East Cheyenne Mtn. Blvd.<br />
Colorado Springs, CO 80906, USA<br />
Tel: 1(719) 576-3300<br />
Fax: 1(719) 540-1759<br />
Biometrics/Imaging/Hi-Rel MPU/<br />
High Speed Converters/RF <strong>Data</strong>com<br />
Avenue de Rochepleine<br />
BP 123<br />
38521 Saint-Egreve Cedex, France<br />
Tel: (33) 4-76-58-30-00<br />
Fax: (33) 4-76-58-34-80<br />
Literature Requests<br />
www.atmel.com/literature<br />
Disclaimer: <strong>Atmel</strong> Corporation makes no warranty for the use of its products, other than those expressly contained in the Company’s standard<br />
warranty which is detailed in <strong>Atmel</strong>’s Terms and Conditions located on the Company’s web site. The Company assumes no responsibility for any<br />
errors which may appear in this document, reserves the right to change devices or specifications detailed herein at any time without notice, and<br />
does not make any commitment to update the information contained herein. No licenses to patents or other intellectual property of <strong>Atmel</strong> are<br />
granted by the Company in connection with the sale of <strong>Atmel</strong> products, expressly or by implication. <strong>Atmel</strong>’s products are not authorized for use<br />
as critical components in life support devices or systems.<br />
© <strong>Atmel</strong> Corporation 2003. All rights reserved. <strong>Atmel</strong> ® and combinations thereof are the trademarks of <strong>Atmel</strong> Corporation or its subsidiaries.<br />
Other terms and product names may be the trademarks of others.<br />
Printed on recycled paper.<br />
4289A–8051–09/03