How to Install Prestashop with Apache and Free Let's Encrypt SSL on Debian 12
This tutorial exists for these OS versions
- Debian 12 (Bookworm)
- Debian 11 (Bullseye)
- Debian 9 (Stretch)
On this page
Prestashop is a free open-source e-commerce solution written in PHP. It allows you to host and create online shops yourself and grow your online business. Prestashop is a fully customisable and feature-rich e-commerce solution that allows you to create comprehensive e-commerce websites. Prestashop is now used by more than 250,000 online shops around the world and is available in 65 languages.
In this tutorial, I will guide you step by step through the installation of PrestaShop on a Debian 12 server. You install PrestaShop with the LAMP stack (Apache2, MariaDB and PHP) and then secure your PrestaShop installation with SL/TLS certificates via Letsencrypt.
Prerequisites
Before you start, please have the following ready:
- A Debian 12 server.
- A non-root user with administrator privileges.
- A domain name pointed to the server IP address.
Installing Dependencies
PrestaShop is an open-source platform for creating an online store written in PHP with MariaDB/MySQL as the database. In the following step, you will install dependencies for PrestaShop, which includes LAMP Stack (Apache2, MariaDB, and PHP) packages with some additional PHP extensions. You will install specifically PHP 8.1 via a third-party repository because the current PrestaShop still does not yet support PHP 8.2.
First, run the following command to add a third-party PHP repository and GPG key to your Debian system.
sudo curl -sSLo /usr/share/keyrings/deb.sury.org-php.gpg https://packages.sury.org/php/apt.gpg
sudo sh -c 'echo "deb [signed-by=/usr/share/keyrings/deb.sury.org-php.gpg] https://packages.sury.org/php/ $(lsb_release -sc) main" > /etc/apt/sources.list.d/php.list'
Update and refresh your Debian package index by executing the following apt command.
sudo apt update

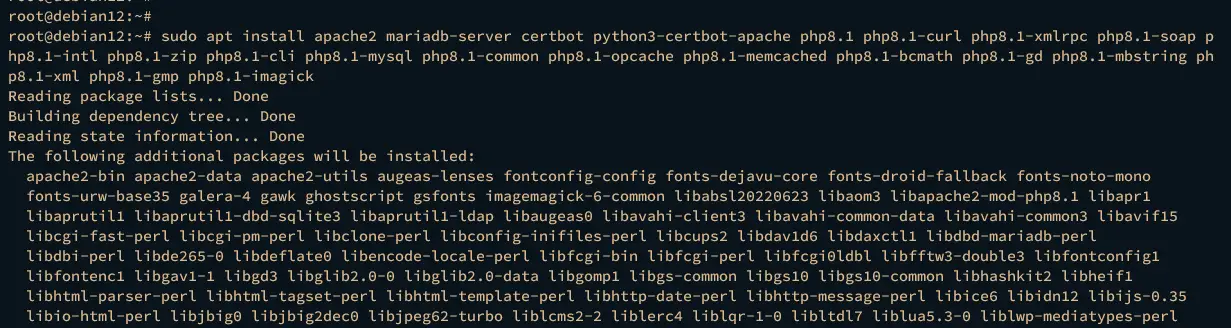
Once the repository is updated, install dependencies for PrestaShop using the following command. This will install LAMP Stack (Apache2, MariaDB, PHP 8.1) packages, Certbot, Certbot Apache plugin, and additional PHP extensions that are required by PrestaShop.
sudo apt install apache2 mariadb-server certbot python3-certbot-apache php8.1 php8.1-curl php8.1-xmlrpc php8.1-soap php8.1-intl php8.1-zip php8.1-cli php8.1-mysql php8.1-common php8.1-opcache php8.1-memcached php8.1-bcmath php8.1-gd php8.1-mbstring php8.1-xml php8.1-gmp php8.1-imagick unzip
Type y to proceed with the installation.
After dependencies are installed, verify each dependency using the following command.
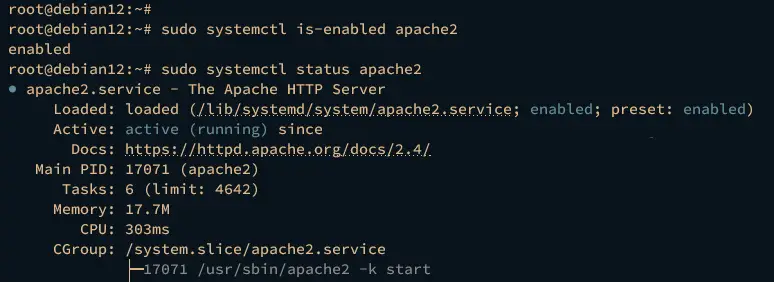
Verify the apache2 service to ensure that the service is running by executing the systemctl command below.
sudo systemctl is-enabled apache2
sudo systemctl status apache2
The following result will be shown, which confirms that apache2 service is running and enabled.
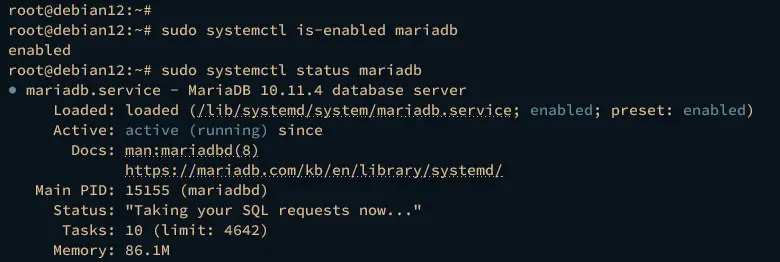
Now verify the mariadb service using the following command.
sudo systemctl is-enabled mariadb
sudo systemctl status mariadb
The displayed output below confirms that the mariadb service is running and enabled.
Lastly, run the following command to verify your PHP version and list enabled extensions.
php -v
php -m
You should see that PHP 8.1 is installed on your Debian machine with the list extensions enabled.

Configuring MariaDB Server
Now that you've installed dependencies for PrestaShop, the next step is to secure your MariaDB Server installation via the mariadb-secure-installation utility. Then, you will need to create a new database and user for PrestaShop.
Execute the mariadb-secure-installation command below to secure your MariaDB Server installation.
sudo mariadb-secure-installation
Input Y to confirm and apply the new configuration, or n for No, and reject it. Below of MariaDB Server configurations that you will be asked for:
- Switch to unix_socket authentication?. Input n and press ENTER. The default MariaDB root user is already protected. optionally, you can also enable it by typing y for yes.
- Change the root password?. Input y to confirm and set up your new MariaDB root password.
- Remove anonymous user?. Input y to confirm.
- Disallow root login remotely? Input y to confirm. Only local connection will be allowed if you are using the MariaDB root user.
- Remove test database and access to it?. Input y to confirm and remove the default database 'test'.
- Lastly, input y again to reload all tables privileges on your MariaDB server and apply new changes.
Next, run the mariadb client command below to log in to the MariaDB Server. Input your MariaDB root password when prompted.
sudo mariadb -u root -p
Once logged in, execute the following queries to create a new database prestashopdb, a user prestashop, with the password is password. The new MariaDB database and user here will be the user for PrestaShop installation.
CREATE DATABASE prestashopdb;
GRANT ALL PRIVILEGES ON prestashopdb.* TO 'prestashop'@'localhost' IDENTIFIED BY 'password';
FLUSH PRIVILEGES;

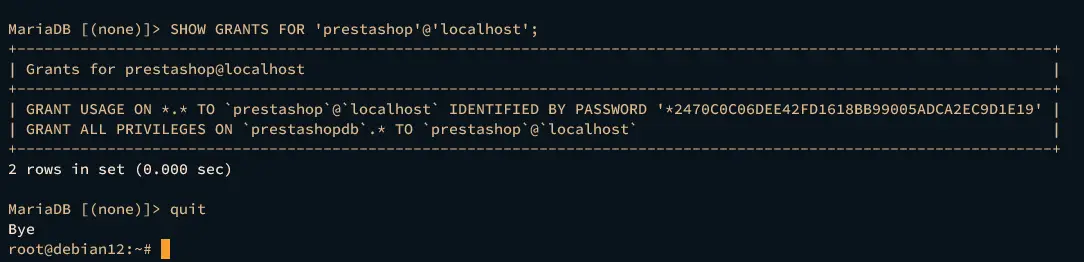
Next, run the following query to verify the MariaDB user prestashop.
SHOW GRANTS FOR 'prestashop'@'localhost';
The displayed output below reveals that the MariaDB user prestashop is allowed to access the database prestashopdb.
Lastly, type quit to exit from the MariaDB Server.
Configuring PHP
After configuring MariaDB Server, you will configure your PHP installation by modifying the php.ini file. Then, you will also verify your environment to ensure that everything related to PHP configuration is met with PrestaShop requirements.
Open the default PHP configuration /etc/php/8.1/apache2/php.ini using the following nano editor command.
sudo nano /etc/php/8.1/apache2/php.ini
Change the configuration below and be sure to adjust the date.timezone and memory_limit parameters with your server environment.
date.timezone = Europe/Amsterdam
max_execution_time = 130
memory_limit = 256M
allow_url_fopen = On
allow_url_include = Off
post_max_size = 128M
upload_max_filesize = 128M
max_input_vars = 5000
Save the file and exit the editor when you're done.
Next, run the following systemctl command to restart the apache2 service and apply the changes.
sudo systemctl restart apache2
Now that you've configured PHP, you will verify that your server environment is ready for PrestaShop installation. This can be done by using the environment checker provided by PrestaShop.
Move to the /var/www/html directory and download the environment check script via the wget command below. You will see the file v1.1.tar.gz on your current working directory.
cd /var/www/html
wget https://github.com/PrestaShop/php-ps-info/archive/refs/tags/v1.1.tar.gz
Extract the file v1.1.tar.gz and rename the extracted directory to check-ps.
tar -xf v1.1.tar.gz
mv php-ps-info-1.1 check-ps
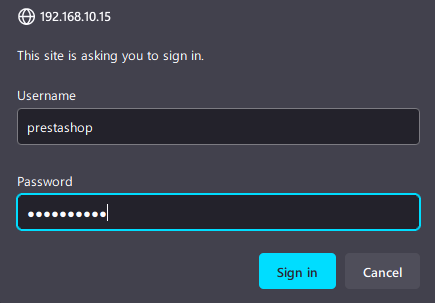
Lastly, open your web browser and visit the server IP address followed by the path check-ps to access the PrestaShop environment checker script, such as http://192.168.10.15/check-ps/phppsinfo.php.
Input the default username prestashop and password prestashop, then click Sign in.
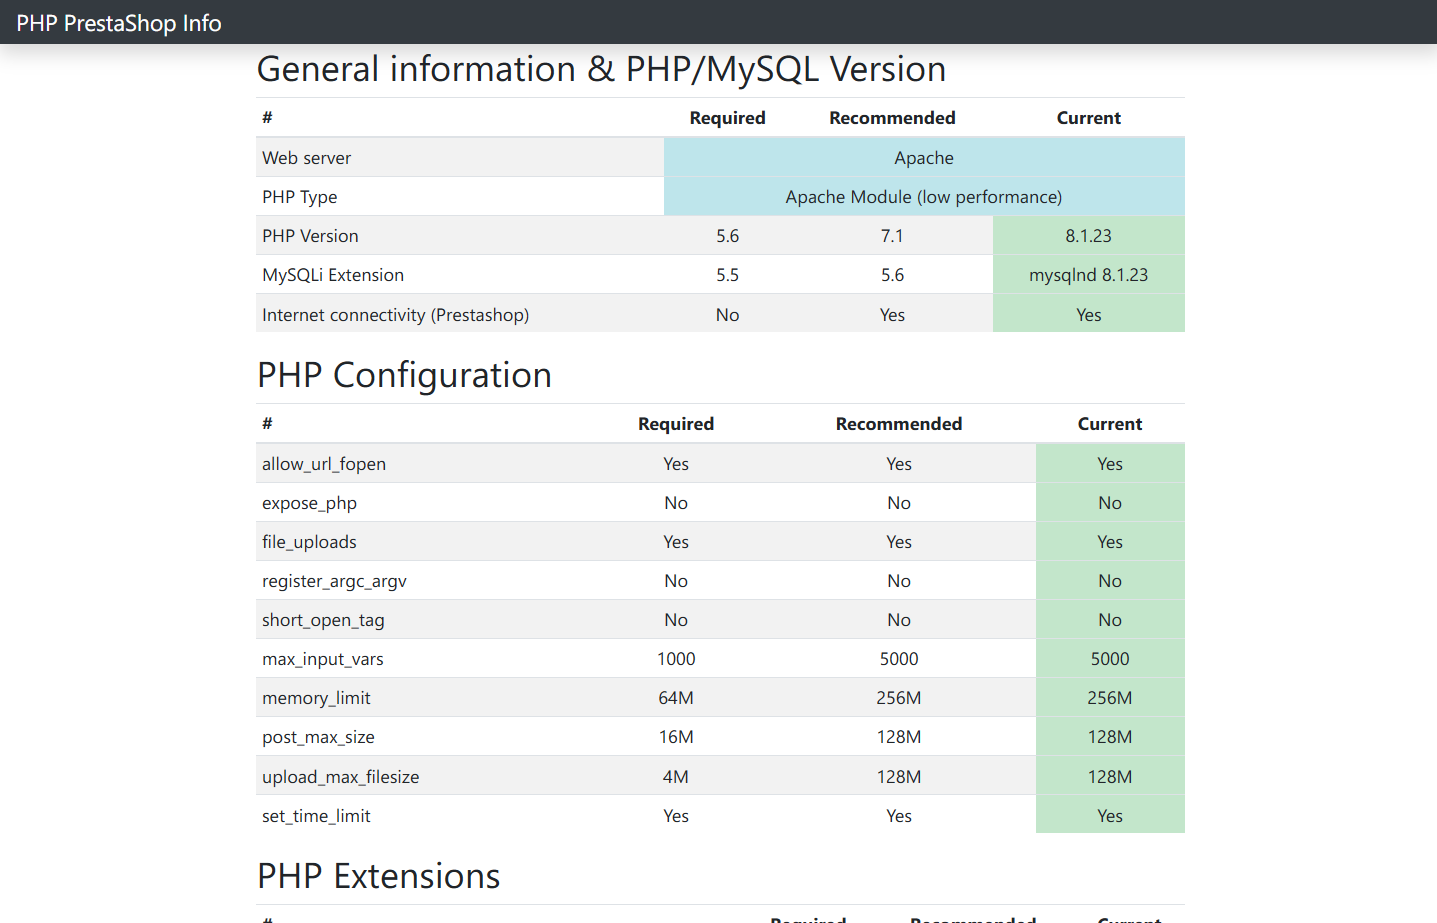
Ensure that your dependencies, PHP configurations, and PHP extensions are met with the PrestaShop requirements. If not, you can adjust your settings based on the recommendation on the page.
Downloading Prestashop
Now that the MariaDB Server and PHP are configured, the next step is to download the PrestaShop source code and configure the installation directory with proper permission and ownership.
Move your working directory to /var/www/ and download the PrestaShop source code via the wget command below. Be sure to check the PrestaShop release page to get the latest version of PrestaShop.
cd /var/www/
wget https://github.com/PrestaShop/PrestaShop/releases/download/8.1.2/prestashop_8.1.2.zip
Now extract the PrestaShop source code via the unzip command below. You should see the PrestaShop source within the zip file prestashop.zip.
unzip prestashop_8.1.2.zip
Extract the file prestashop.zip using the unzip command below to the target directory /var/www/prestashop. The PrestaShop source code will be extracted to the prestashop directory, so your Prestashop installation directory should be /var/www/prestashop.
unzip prestashop.zip -d /var/www/prestashop
Lastly, run the following command to set up the proper ownership and permission for the PrestaShop installation directory /var/www/prestashop. The ownership should use www-data with the permission u+rw, which means the owner can read and write to the target directory.
sudo chown -R www-data:www-data /var/www/prestashop
sudo chmod u+rw /var/www/prestashop
Configuring Apache2 Virtual Host
In the following step, you will create a new Apache2 virtual host configuration that will be used to run prestaShop. So before that, ensure that you've your domain name pointed to a server IP address.
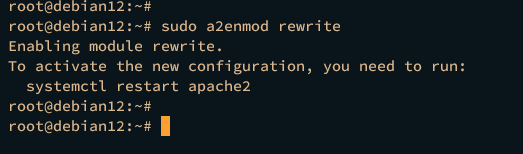
To start, run the following command to enable the rewrite module for Apache.
sudo a2enmod rewrite
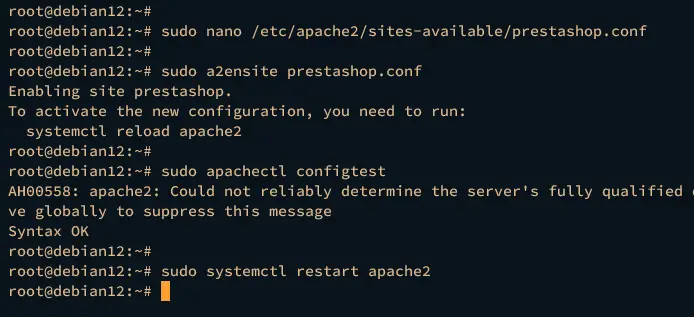
Then, create a new virtual host configuration /etc/apache2/sites-available/prestashop.conf using the nano editor command.
sudo nano /etc/apache2/sites-available/prestashop.conf
Insert the following configuration and be sure to change the domain name within the ServerName parameter.
<VirtualHost *:80>

    ServerAdmin [email protected]
    DocumentRoot /var/www/prestashop
    ServerName hwdomain.io

    <Directory /var/www/prestashop>
        # enable the .htaccess rewrites
        AllowOverride All
        Options +Indexes
        Require all granted

        # Disable back office token
        # SetEnv _TOKEN_ disabled
    </Directory>

    ErrorLog /var/log/apache2/prestashop.error.log
    CustomLog /var/log/apache2/prestashop.access.log combined
</VirtualHost>
Save and close the file when you're done.
Next, run the following command to activate the virtual host file prestashop.conf and verify your Apache configuration.
sudo a2ensite prestashop.conf
sudo apachectl configtest
If you've proper Apache configuration, the output Syntax OK will be displayed.
Now run the systemctl command below to restart the apache2 service and apply the changes.
sudo systemctl restart apache2
Lastly, generate the SSL/TLS certificates for your PrestaShop domain name by executing the following certbot command. Be sure to change the email address and the domain name with your information.
sudo certbot --apache --agree-tos --no-eff-email --redirect --hsts --staple-ocsp --email [email protected] -d hwdomain.io
Once the process is finished, your virtual host file prestashop.conf will automatically configured with HTTPS and your SSL/TLS certificates will be available at /etc/letsencrypt/live/hwdomain.io directory.
Installing PrestaShop via Command Line
At this point, you can now finish up your PrestaShop installation via web UI or command line. In this example, you'll finish your PrestaShop installation via the command line.
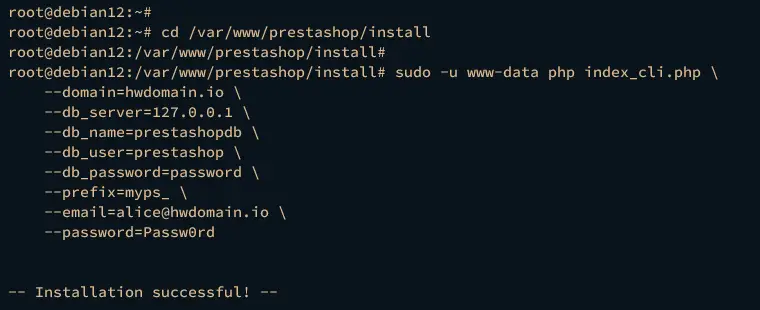
Go to the PrestaShop installation directory /var/www/prestashop/install.
cd /var/www/prestashop/install
Run the index_cli.php script like the following to start PrestaShop installation via the command line. Be sure to change the details of a domain name, MariaDB database host, name, username, and password. Also, be sure to change the email address and password that will be used as admin for PrestaShop.
sudo -u www-data php index_cli.php --domain=hwdomain.io --db_server=127.0.0.1 --db_name=prestashopdb --db_user=prestashop --db_password=password --prefix=myps_ [email protected] --password=Passw0rd
Once the installation is finished, the output "Installation successful" will be shown like the following.
Next, run the following command to set up proper permission for some PrestaShop directories. This will allow the www-data as the owner to read and write to those target directories.
sudo chmod u+rw /var/www/prestashop/var/cache
sudo chmod u+rw /var/www/prestashop/var/logs
sudo chmod u+rw /var/www/prestashop/img
sudo chmod u+rw /var/www/prestashop/mails
sudo chmod u+rw /var/www/prestashop/modules
sudo chmod u+rw /var/www/prestashop/translations
sudo chmod u+rw /var/www/prestashop/upload
sudo chmod u+rw /var/www/prestashop/download
sudo chmod u+rw /var/www/prestashop/app/config
sudo chmod u+rw /var/www/prestashop/app/Resources/translations
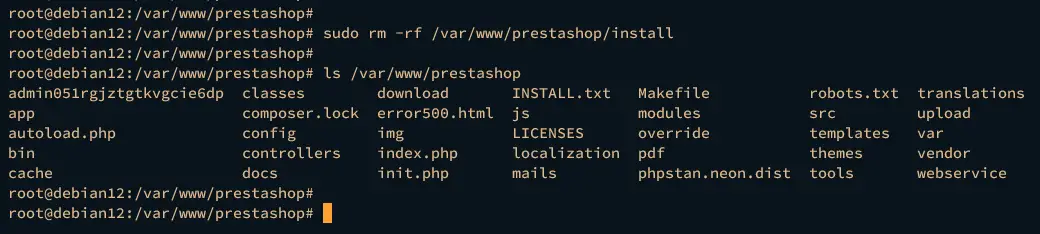
Now run the command below to remove the /var/www/prestashop/install directory and secure your PrestaShop installation.
sudo rm -rf /var/www/prestashop/install
Then, open your web browser and visit your PrestaShop domain name, such as http://hwdomain.io/. Once the installation is successful, you should be redirected to a secure HTTPS connection, and you should see the default homepage of your PrestaShop installation.

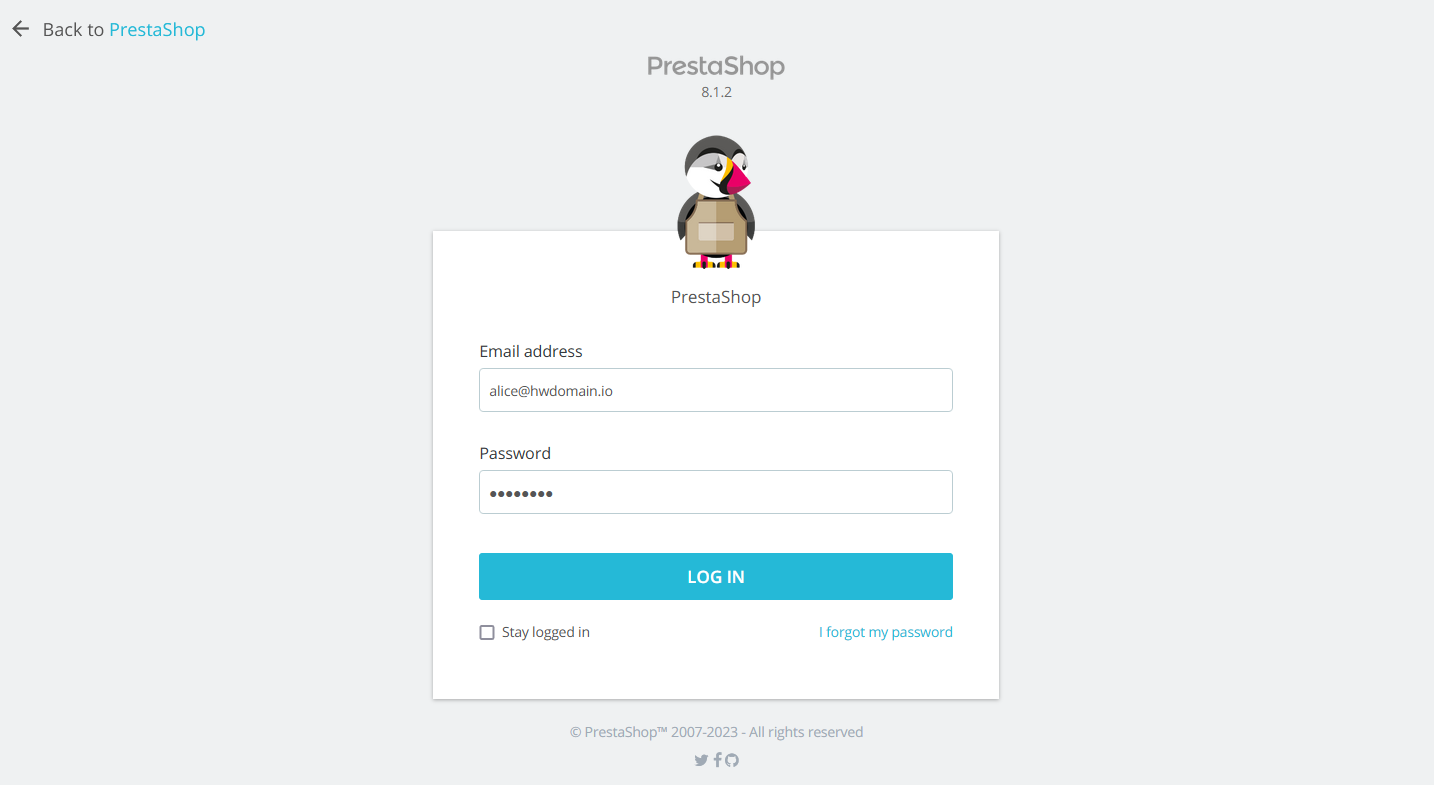
Next, visit the PrestaShop domain name followed by the admin path, such as https://hwdomain.io/admin/. If everything goes well, you should be redirected to the PrestaShop login page. Also, you can see the default URL path for PrestaShop has changed to admin051rgjztgtkvgcie6dp.
Input your admin user and password, then click Login.
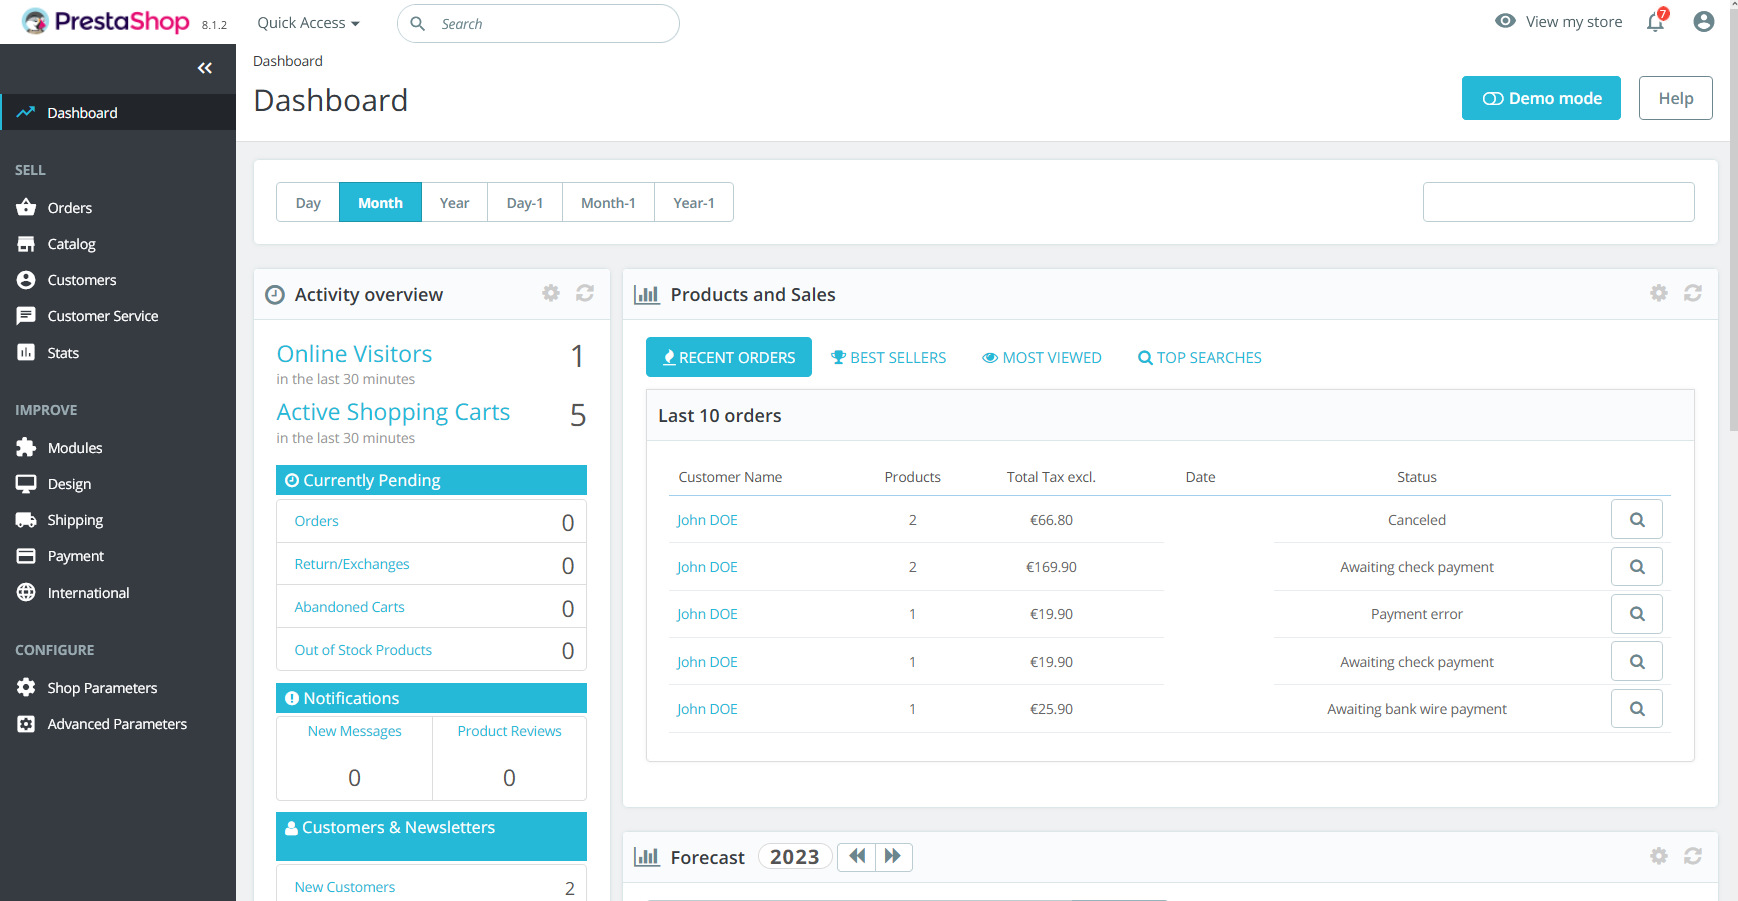
If you have a proper admin user and password, you should be presented with the PrestaShop administration dashboard.
Another consideration, you can run the following command to check the PrestaShop login admin.
ls /var/www/prestashop
The output below shows that the PrestaShop admin page is available at admin051rgjztgtkvgcie6dp.
Conclusion
To conclude, you've now successfully installed PrestaShop on Debian 12 step-by-step. You've installed PrestaShop 8 with LAMP Stack (Apache2, MariaDB, and PHP) and secured PrestaShop installation with SSL/TLS certificates. Furthermore, you've also learned how to start PrestaShop installation via the command line. Now you can add new themes and additional extensions to extend your PrestaShop installation.

