NSX Advanced Load Balancer Installation and Configuration Series – Part 1
Welcome to Part 1 of the installation and configuration series. In this post we’ll guide you on how to deploy and integrate NSX Advanced Load Balancer (Avi) into a VMware vCenter cloud.
Introduction to NSX Advanced Load Balancer
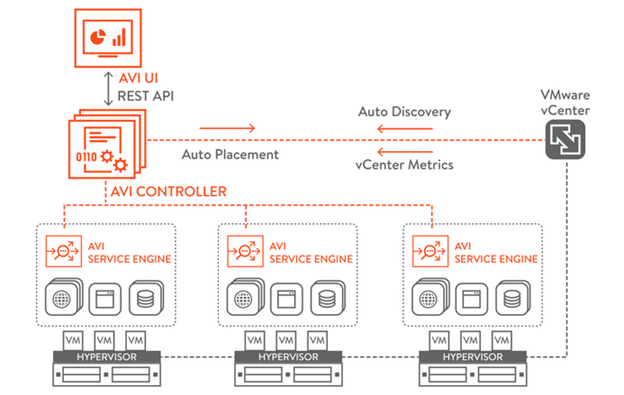
The Avi Vantage platform is built on software-defined principles, enabling a next generation architecture to deliver the flexibility and simplicity expected by IT and lines of business. The Avi Vantage architecture separates the data and control planes to deliver application services beyond load balancing.
The NSX ALB platform has three core components:
- Controller Cluster
The NSX ALB Controller is the single point of management and control that serves as the “brain” of the entire system and for high availability is typically deployed as a three-node cluster. As its name implies, the Controller implements the control plane. - Service Engines
NSX ALB Service Engines (SEs) handle all data plane operations by receiving and executing instructions from the Controller. The SEs perform load balancing and all client- and server-facing network interactions. It collects real-time application telemetry from application traffic flows - Admin Console
The NSX ALB admin Console is a modern web-based user interface that provides role-based access to control, manage and monitor applications.
Lab Topology
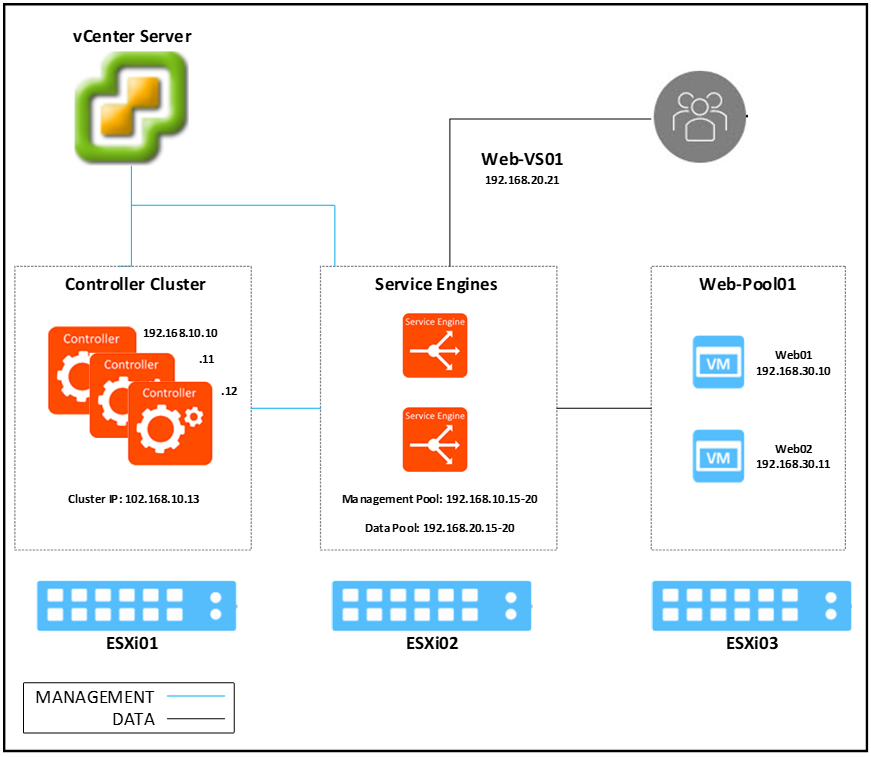
| Component | IP Address | FQDN |
| vCenter Server | 10.10.10.10/24 | vc01.mm.local |
| ESXi 01 | 10.10.10.11/24 | esxi01.mm.local |
| ESXi 02 | 10.10.10.12/24 | esxi02.mm.local |
| ESXi 03 | 10.10.10.13/24 | esxi03.mm.local |
| Controller 01 | 192.168.10.10/24 | avi-ctrl01.mm.local |
| Controller 02 | 192.168.10.11/24 | avi-ctrl02.mm.local |
| Controller 03 | 192.168.10.12/24 | avi-ctrl03.mm.local |
| Controller Cluster | 192.168.10.13/24 | avi-ctrl.mm.local |
| Web server 01 | 192.168.30.10/24 | web01.mm.local |
| Web server 02 | 192.168.30.11/24 | web02.mm.local |
| Web Virtual Service | 192.168.20.21/24 | ho-web.mm.local |
| Management IP Pool | 192.168.10.15-20 | |
| Data IP Pool | 192.168.20.15-20 |
Deploying NSX ALB Controller OVA
- Use the below link to download the NSX ALB software latest version
https://kb.vmware.com/s/article/82049
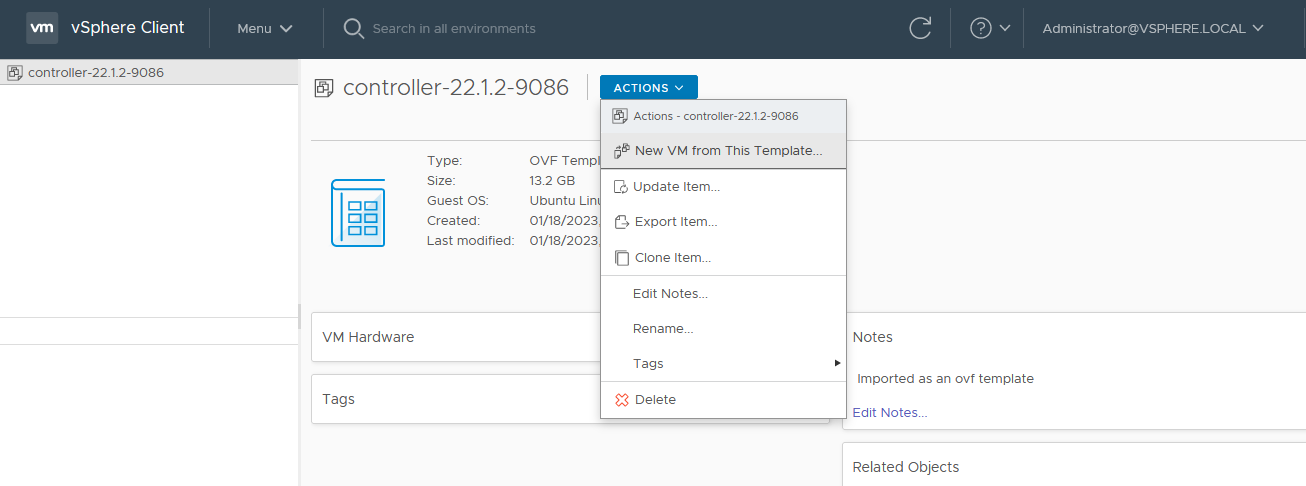
- Log into the vCenter server, create a new content library and upload the NSX ALB ova file.

- Deploy the NSX ALB Controller virtual machine by following the steps mentioned below:
- Click on ACTIONS and select New VM from This Template.
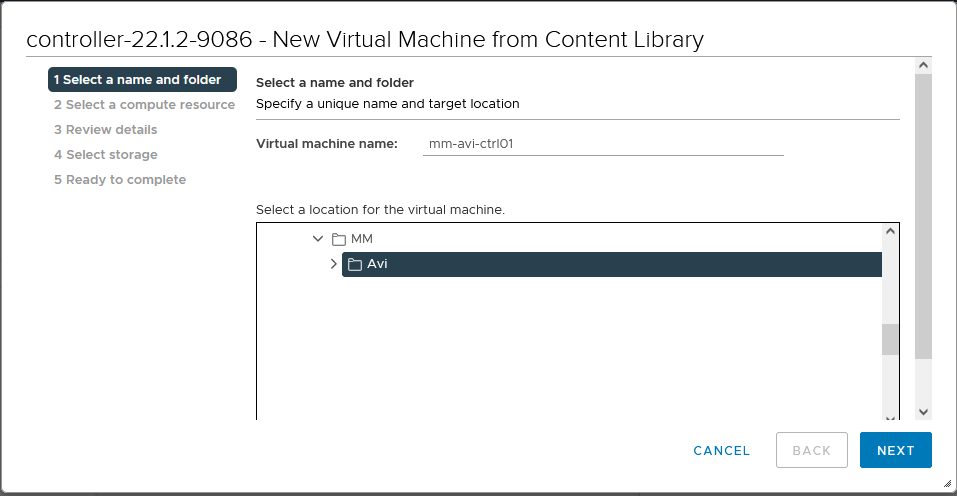
- Specify a name and select a location for the virtual machine.
- Select a compute resource.
- Select a storage and choose Thick Provision Lazy Zeroed for disk format.
- Choose a port group.
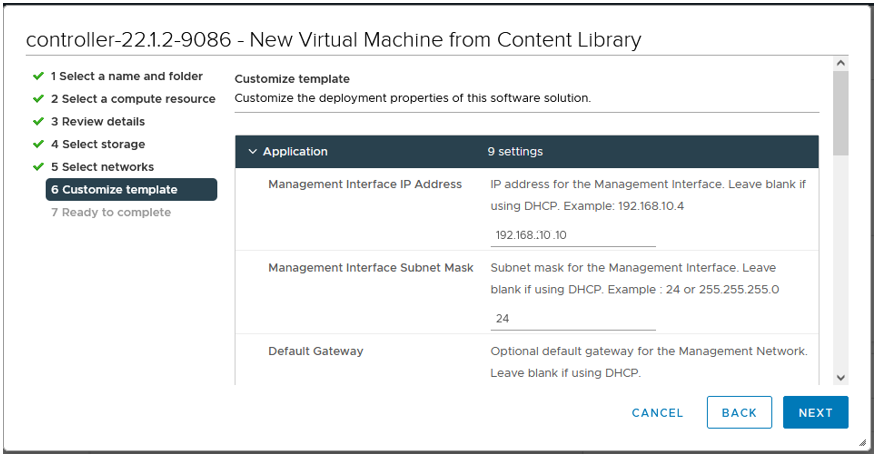
The Controller requires only one management IP address which will be used by the Controller to communicate with vCenter and Service Engines.
- Specify the management IP address and default gateway.
- Click finish to start the deployment process.
Note: After you install the OVA and before you power the Controllers on, edit the hardware resources and change the CPU, memory, and disk to the minimum recommended values for production. Refer to Controller Sizing guide for more details. - Power on the VM.
- Click on ACTIONS and select New VM from This Template.
Performing NSX ALB Controller Initial Setup
From your browser open the NSX ALB Controller using the management IP address.
- Configure the basic system settings:
- Provide a password for the admin user and enter the email address which is optional.
Email address will be used for password reset operation and for email notification in case of any triggered alert.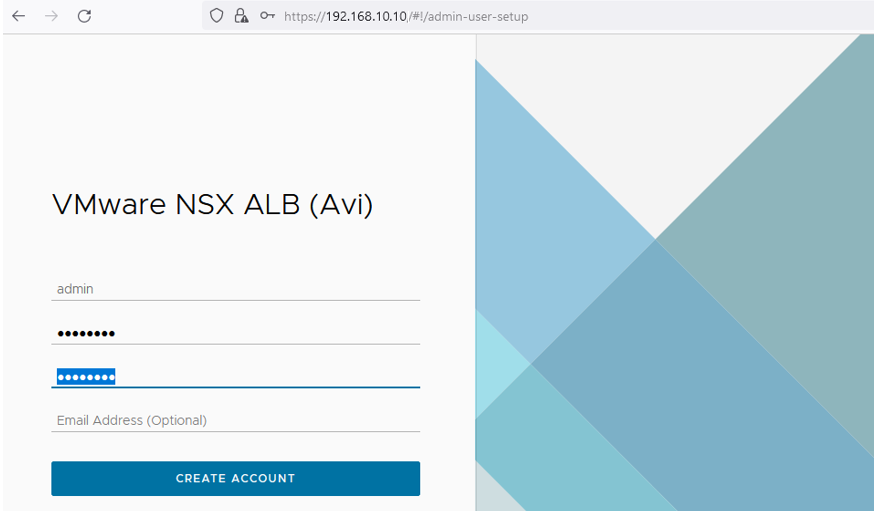
- Provide a Passphrase and DNS information.
Passphrase is used for configuration export and periodic backup.
- Select the Email/SMTP configuration. In my case I’ll select None as this will be configured later.
- For Multi-Tenant, keep the default configuration.
- Uncheck the Setup Cloud After checkbox.
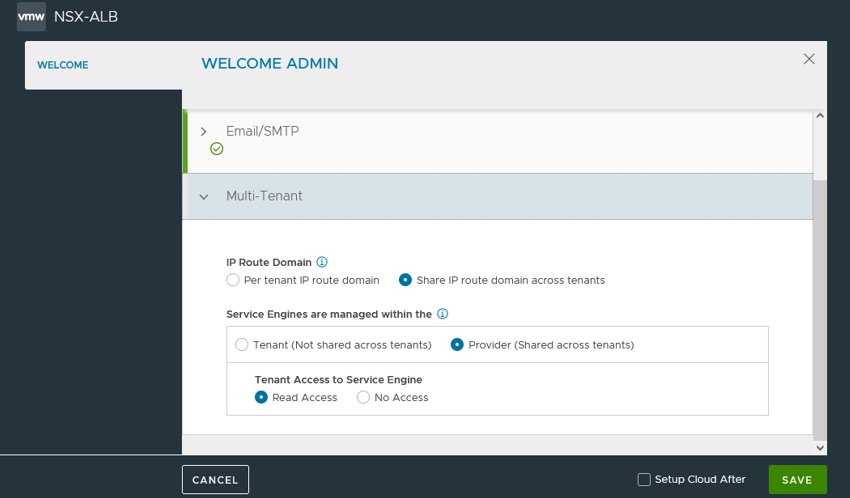
Click Save after specifying the necessary details and the Controller window will be displayed.
- Provide a password for the admin user and enter the email address which is optional.
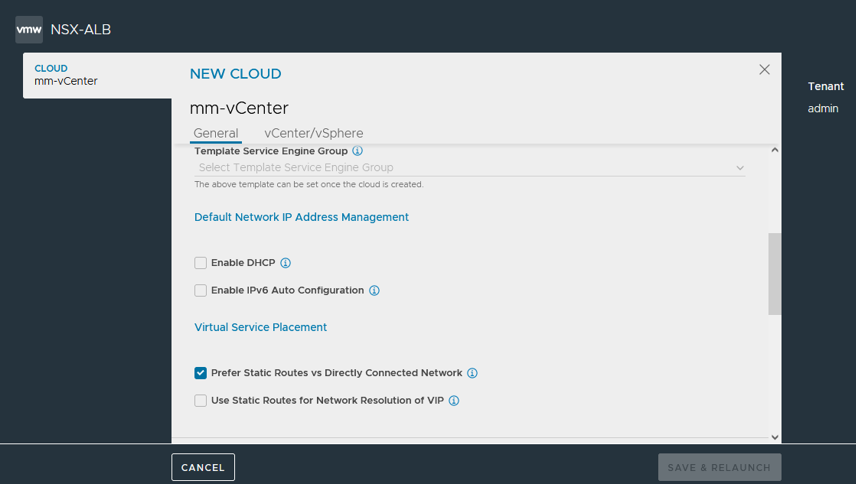
Configure the VMware Cloud
A cloud is a container for NSX ALB service elements, and SE groups (therefore SEs) are always scoped within a cloud.
Cloud can be created in two modes write access and no access. In write access mode, controllers manage the full lifecycle of Service Engines, while in no access mode administrators are responsible for that.
Note: vCenter Read Access mode is no longer supported.
- Configure the VMware vCenter/vSphere ESX cloud by selecting that option in Create drop-down list.

- Provide a Name for the cloud and select VMware vCenter/vSphere ESX from the type menu.

- Management IP address for Service Engines will be assigned statically using IP pool, so no need for the DHCP.
- Configure vCenter cloud Credentials.
the vCenter user is assigned certain roles that allow the Controller to manage the load balancer lifecycle. The user is mapped to two roles during the role configuration on vCenter. One of the roles is applied at the vCenter root level and another at the folder level where the Service Engines are created by the Controller.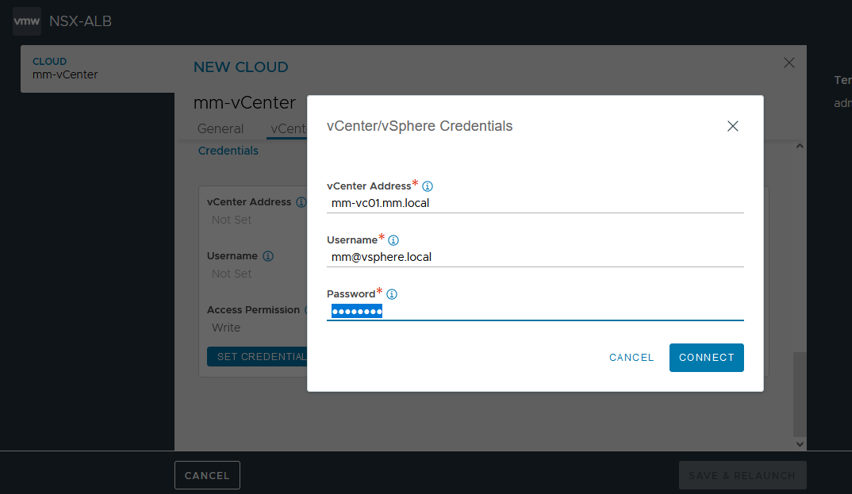
- Select the Data Center and the Content Library.
Note: Starting from version 21.1.1 vCenter integration was enhanced and Content Library can be utilized for storing the Service Engine OVA image.
- Specify the Management Network details after saving and relaunching, and then click SAVE.
The management network will be used to assign IP address to the Service Engine management interface.
IP Address Pool will belong to the management network 192.168.10.15-192.168.10.20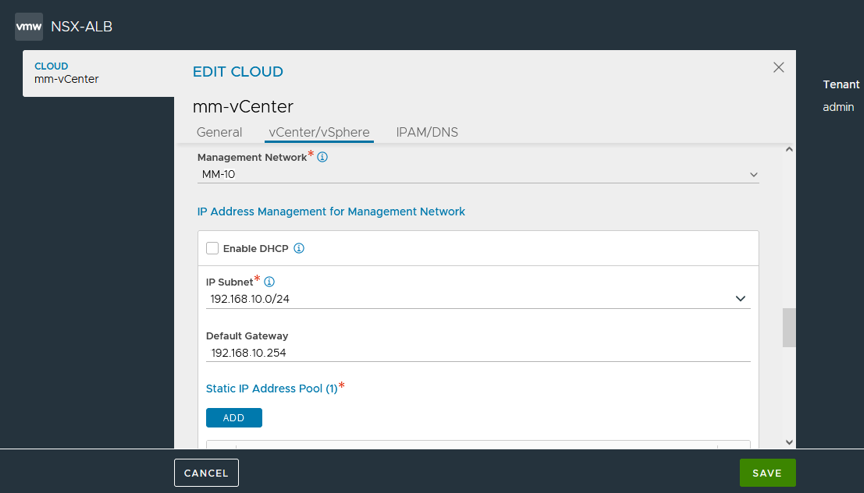
![]()

