The Cisco Web Security Appliance (WSA) acts as a proxy that intercepts and monitors internet traffic and applies policies to secure the internal network from malware, data loss and other internet-based threats. The WSA can be deployed using dedicated physical appliances or a virtual image.
In this post we will cover configuring the basic WSA settings from initial boot to initial configuration and filtering user traffic.
WSA Configuration
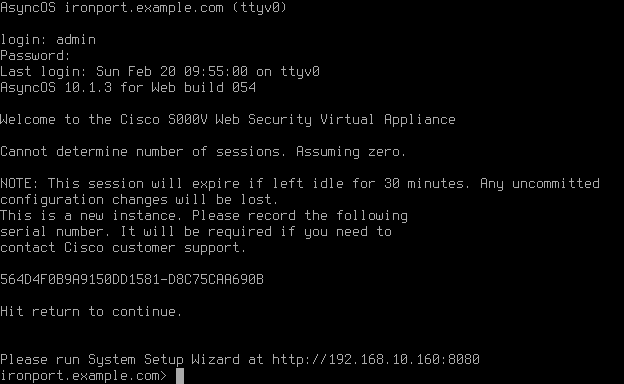
- Boot the appliance and connect using a console cable
- When prompted enter the username as admin and password as ironport
If the Management interface M1 is connected to a VLAN with DHCP configured the interface will automatically receive an IP address, the next steps cover configuring a static IP address.
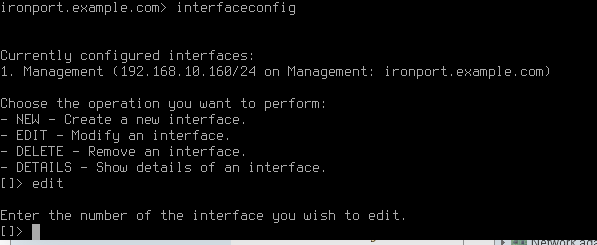
- To configure the Management interface, use the command interfaceconfig
- Type Edit
- Enter the number you wish to edit, in this instance 1 for the management interface is the only option
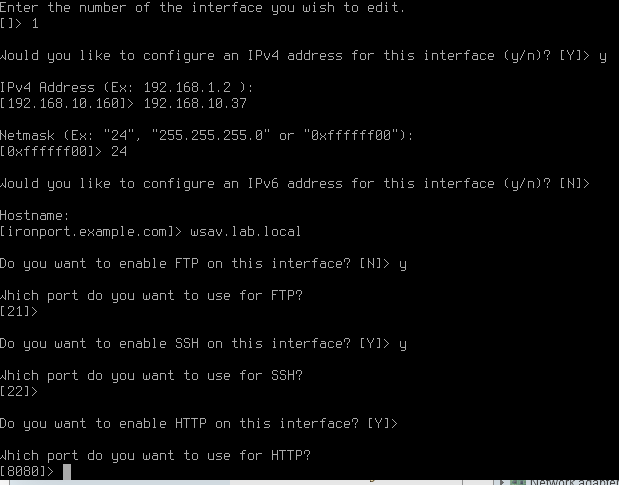
- When prompted select the interface to edit, 1 for M1
- Select Y to configure an IPv4 address
- Enter the IPv4 Address
- Enter the Netmask
- Select Y or N to configure an IPv6 address
- Enter a Hostname
- Select Y or N to enable FTP on this interface and select the port
- Select Y or N to enable SSH on this interface and select the port
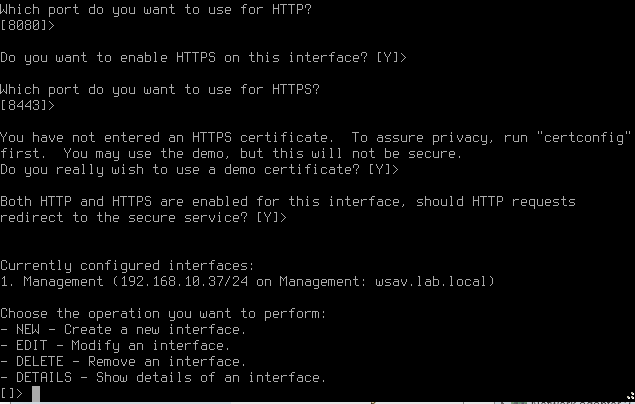
- Select Y or N to enable HTTP on this interface and select the port
- Select Y or N to enable HTTPS on this interface and select the port
- Select Y to use a demo certificate (this can be replaced later).
- Select Y to redirect HTTP requests to HTTPS
- Run the command setgateway is used to specify the default gateway
- Enter the default gateway for the M1 interface.
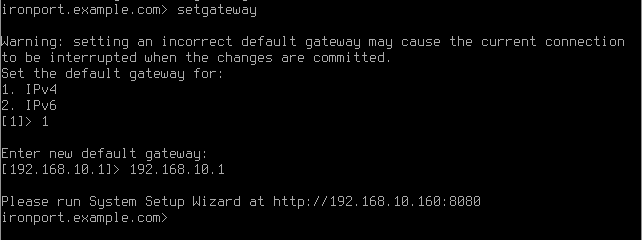
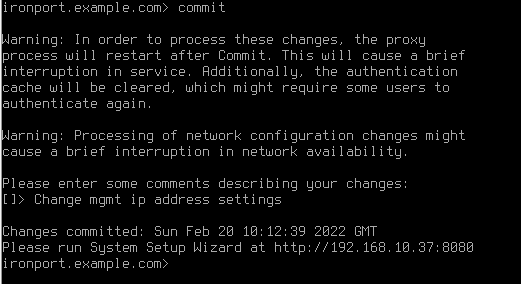
- Once the network settings have been configured, save the changes using the commit command
Before using the WSA the license file must be installed. The license file can be downloaded from the Cisco website
- Save the ZIP file to the local computer and extract the license XML file.
- Open the XML file in a text editor such as Notepad++, Atom, Sublime Text etc (opening the XML file with notepad or a web browser may cause malformed syntax errors when pasting into the CLI).
- Highlight the text of the license file and copy.
- From the CLI of the WSAv run the command loadlicense
You have 2 options loading the license, either copy the license XML file using FTP/SCP or copy/paste into the CLI

- Select option 1 to paste via CLI
- Paste the contents of the license file
- When prompted select yes to accept the license agreement
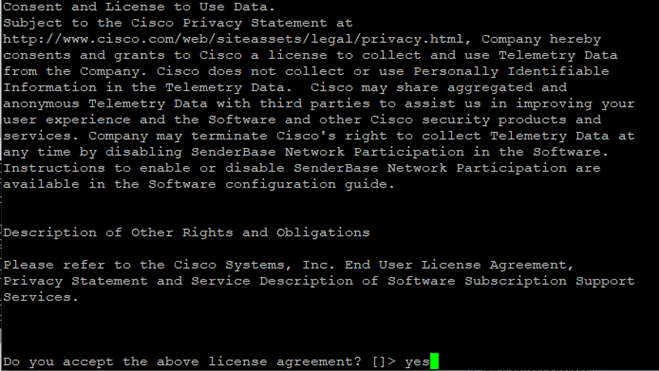
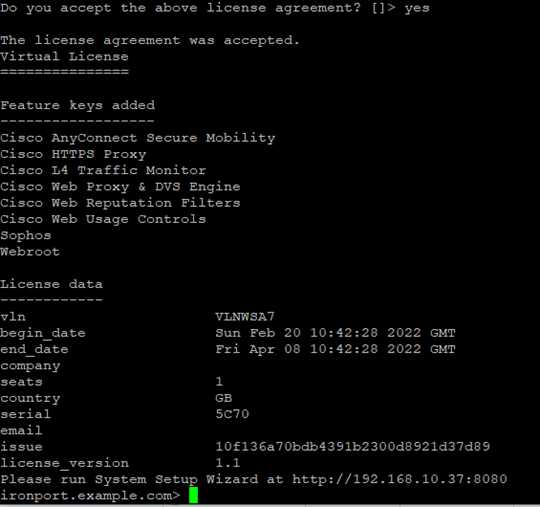
If successful, the screen output will confirm license agreement was accepted and list the available feature keys.
-
From a computer navigate to the URL as specified on the CLI, http://mgmtipaddress:8080 this will redirect to https.
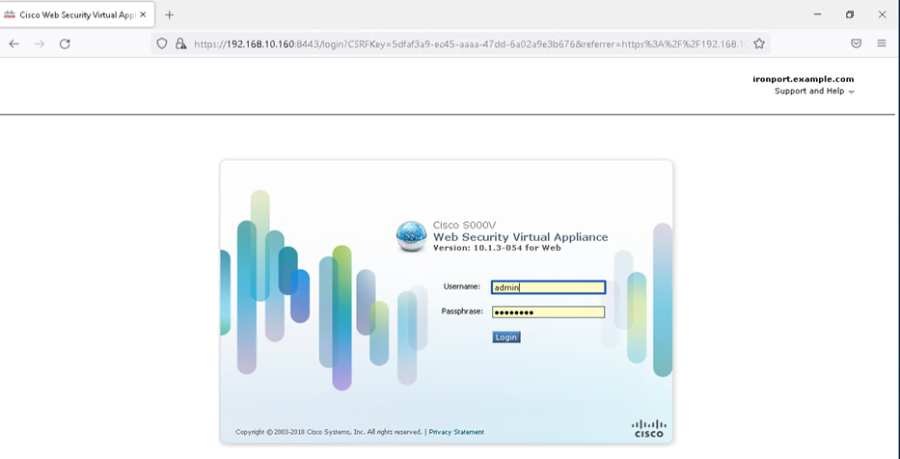
- Login using the default username admin and password ironport
- Navigate to System Administration > System Setup Wizard
NOTE – The setup wizard would be unable to proceed any further with the license file installed in the previous step.
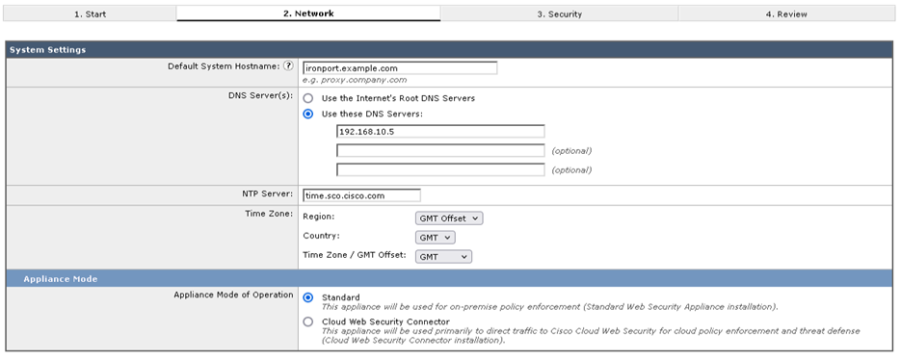
- Enter the relevant details for hostname, DNS, NTP, Time Zone and Appliance Mode of operation.
- Click Next
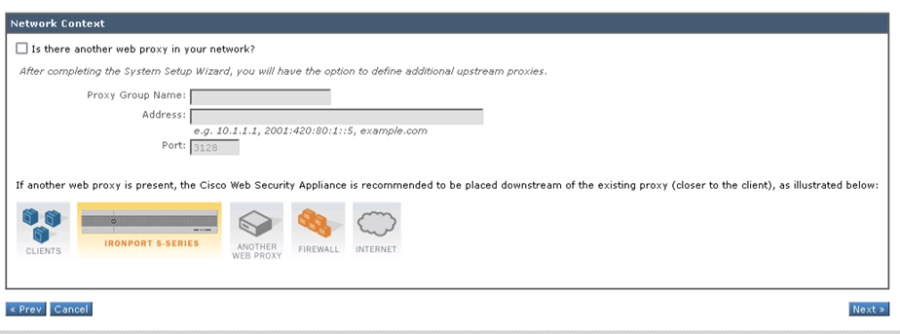
- If there is another web proxy in the network, select the tick box and enter the details, else click Next to continue
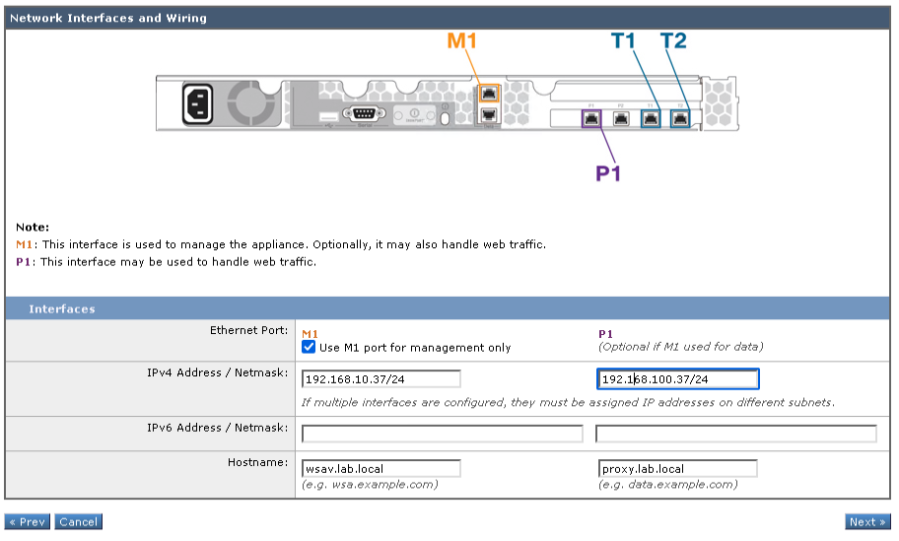
The WSA has multiple network interface, each interface can be configured for specific functions. In this scenario the M1 interface will be dedicated for management only traffic and P1 will be used for proxy traffic.
- Select Use M1 port for management only.
- Enter the IP address and netmask for the P1 interface.
- Enter the hostname for the P1 interface.
- Click Next to continue
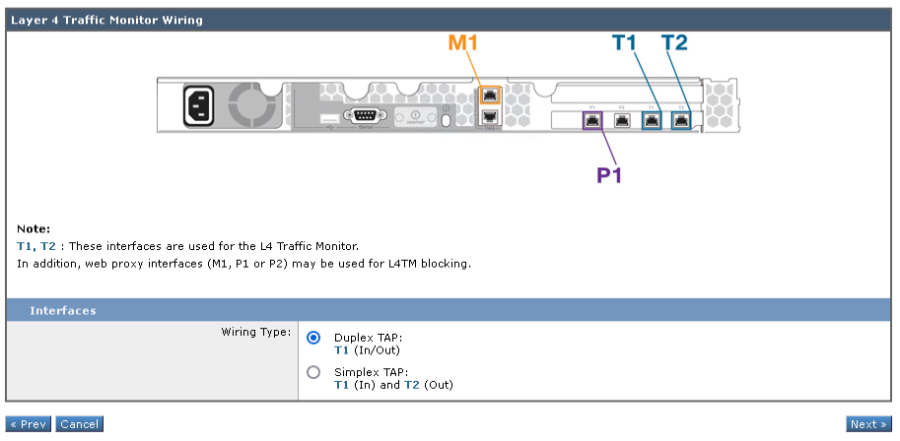
- Select the wiring type for the L4 Traffic Monitor
- Click Next to continue
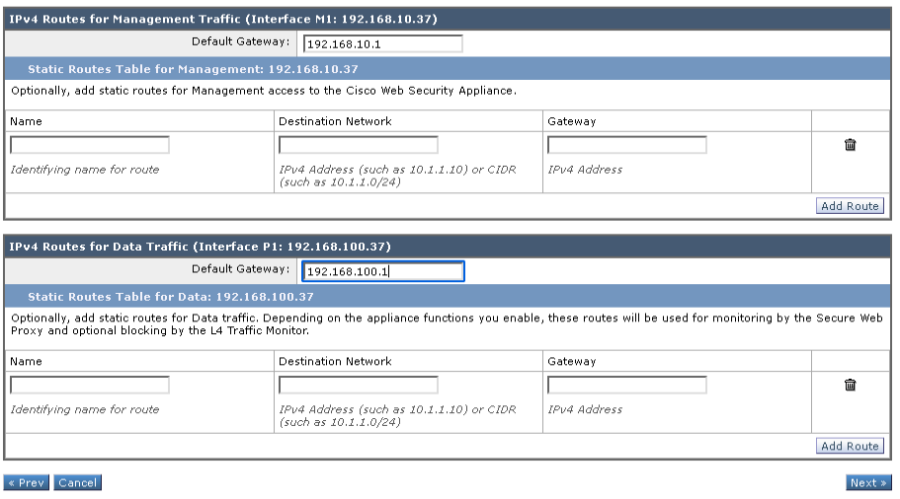
The management and data interfaces have their own routing tables and require static routes, or a default gateway configured. The M1 interface should already have a default gateway configured during the initial steps.
- Enter the default gateway of the P1 interface.
- Click Next to continue.
The WSA supports Transparent or Forward Proxy (Explicit) mode, this Cisco post explains more information about both modes. For the WSA to accept transparent connections, it must be connected to a Layer 4 switch or WCCP router. When configured in transparent mode the WSA responds to both transparent and explicit HTTP requests. In explicit mode the WSA only responds to explicit HTTP requests.
- Optional, change the Transparent redirection device if none leave as default and click Next.

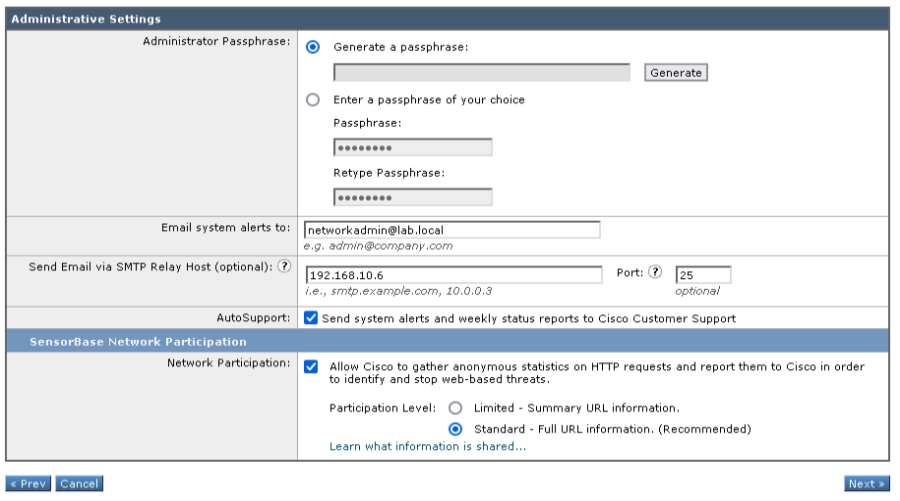
- Enter an administrator passphrase for a new password to login to the WSA.
- Enter an email address to send system alerts
- Enter the SMTP relay host information.
- Click Next to continue.
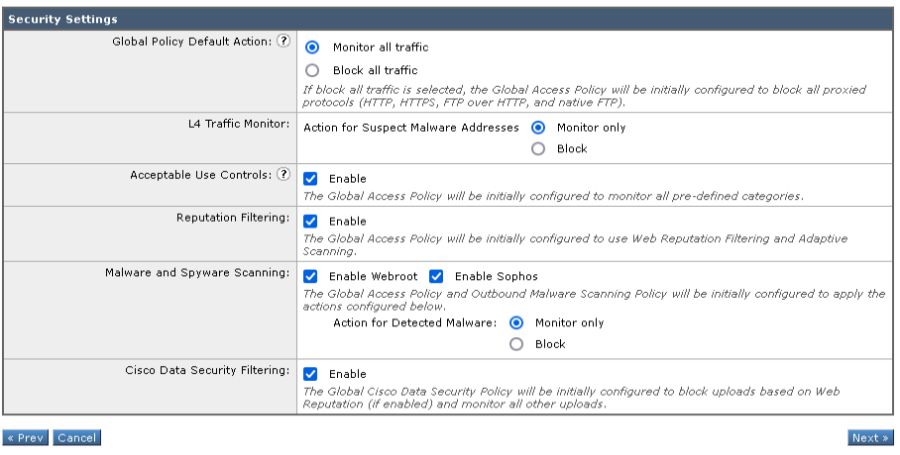
- Leave the Security Settings as default, they can be amended later.
- Click Next to continue.
- Review the configuration and if necessary, click Previous to amend.
- Click Install This Configuration
The initial setup of the Cisco WSAv appliance is now complete.
Testing/Verification
As the WSA is configured in explicit mode, the proxy settings will need to be manually configured on the test client’s web browser.
- Open a web browser, in this example Mozilla Firefox is used
- In the search bar type about:preferences#general
- Scroll to the bottom of the page, under the Network Settings section click Settings
- Select Manual proxy configuration
- Enter the FQDN of the WSA’s P1 interface (as configured in the previous steps).
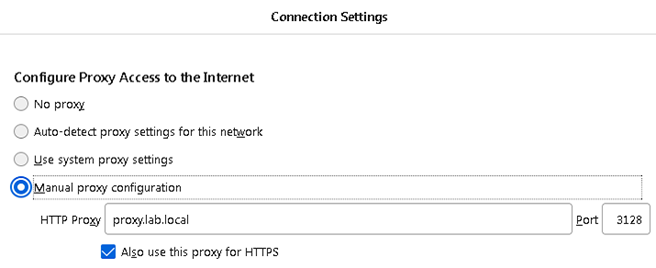
- Click Ok
- Browse the internet, to confirm connectivity – with the default configuration the WSA should allow all traffic and not prompt for authentication.
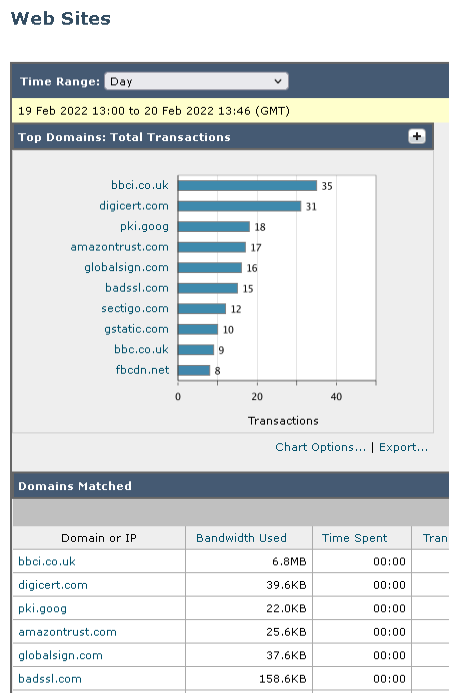
- Login to the WSA Web Console and navigate to Reporting > Web Sites.
If the WSA is working correctly the reports should confirm activity under the top domains section.
This is the very basic configuration of the Cisco WSA completed.

One thought on “WSA initial setup”