Power BI using Service Principal with Synapse SQL Pool
Posted by denglishbi on September 14, 2022
In this post I will go over a topic that is frequently asked about and that is using a Service Principal account with Power BI when connecting to data sources. Currently today none of the built-in connectors support this capability natively, but the SQL Server ODBC driver does support the use of a Service Principal account. The one caveat with using an ODBC driver with Power BI is that a gateway would be required once the report is published to the service.
For the example that I will present here I will be do the following:
- Create a Service Principal account (App Registration) in Azure
- Grant the Service Principal account permissions to the Synapse Workspace Dedicated SQL Pool database (Adventure Works DW schema)
- Install and configure the SQL Server ODBC driver (including the System DSN)
- Create a dataset and report using the ODBC source connection in Power BI
- Publish the report in a different tenant than the Synapse Workspace
- Configure a gateway to use in the Power BI service with the dataset
- Refresh the Power BI dataset and view the report in the service
As noted above in this example not everything will be in a single tenant, so that is a slight twist and I have worked with customers where this type of a configuration was needed. This means that the database will reside in one Azure tenant and the report and dataset will be in another and everything will work.
First step is to create the Service Principal account in the Azure portal. In Azure Active Directory in the portal you will go into App registrations and pick the option to add a New registration. When you create the new account this is where you can determine if it can be used multitenant or not and in my example that is what I selected.

Once that is created in the new App registration you will need to create a New client secret which will be used as the password when connecting to the database for authentication purposes. When creating the secret you can determine when it will expire as well.

Once you create this you will want to copy the Value for the client secret and store this in a secure location, that will be the password we will use later. The other item that you will need to capture that will be used as the Login Id or the User Name when connecting to the database is the client Application ID and you can get that guid value on the Overview page for the App registration you created.

The second step is to grant permissions for the Service Principal account to be able to access the database. You can run the following script once you are connected to the database and in this case I am using a Synapse Dedicated SQL Pool database where I have loaded the Adventure Works DW database. Whether you run the script in the Synapse Workspace or using SSMS or Azure Data Studio it will all work the same.

The third step now is to download and install the SQL Server ODBC driver (I will be using the 64-bit which will be required on the gateway to work with the service) and then configure the System DSN. If the machine you are using doesn’t already have the Visual Studio C++ Redistributable runtime libraries installed that will be required for the driver install.
Once the driver is installed then you can launch the ODBC Data Source Administration (64-bit), click on the System DSN tab, click the Add button, select ODBC Driver XX for SQL Server, and click Finish button.
There will be quite a few screenshots showing the configuration of the System DSN. The first page in the wizard is pretty straightforward provide a name for the DSN and provide the SQL Server instance name (you can see in my example below we are connecting to a Synapse database.

The next page is where the hidden Easter egg is where you can select the Azure Service Principal authentication. This is where you will put provide the Application ID and the Client Secret Value for the Login ID and Password.

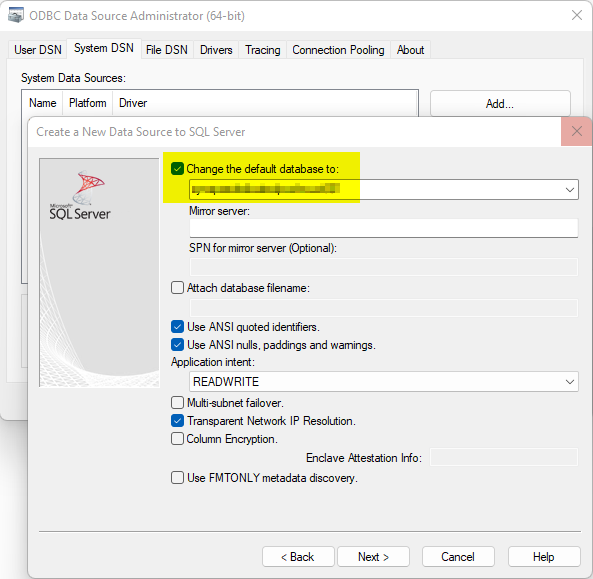
The next page is where you can provide the default database name you will be connecting to and after this you can click through until the end where you get a change to test the connectivity.

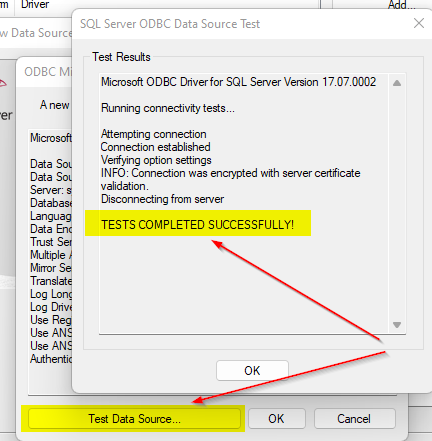
The last page is where you can test the data source connectivity and if you did everything as expected you should see the “TESTS COMPLETED SUCCESSFULLY!” message.

Once you have completed this configuration wizard and the connectivity worked successfully you will then see the new System DSN added as shown below.

So far so good, we are about half-way through the process;)
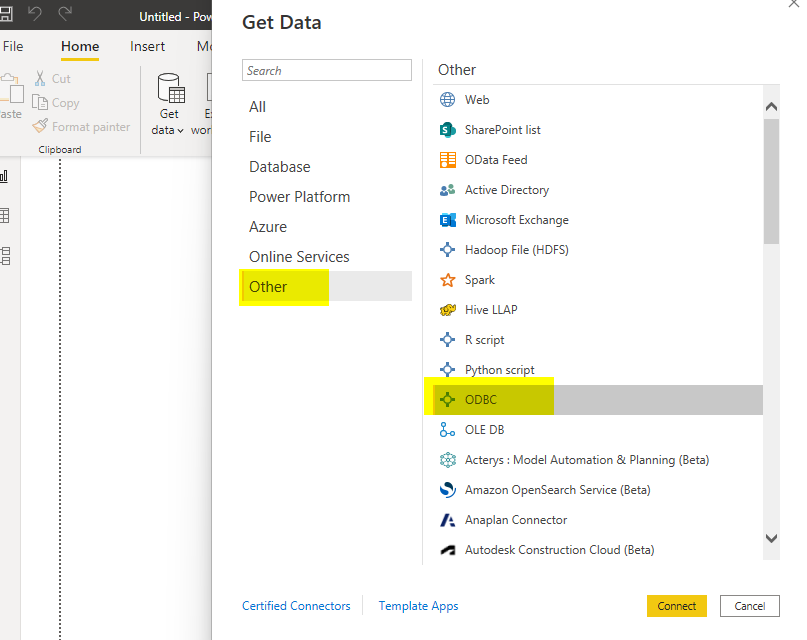
The fourth step is to open Power BI Desktop and Get Data using ODBC option as shown below.

For the ODBC Data source name (DSN) you will provide the name you entered when creating the System DSN in the previous step.

Once connected with the System DSN you will then be presented with the Navigator as shown below to search and browse the database.

Now simply select the tables that we want to include in our data model and in this example I selected five tables, four dimension tables and one fact table.

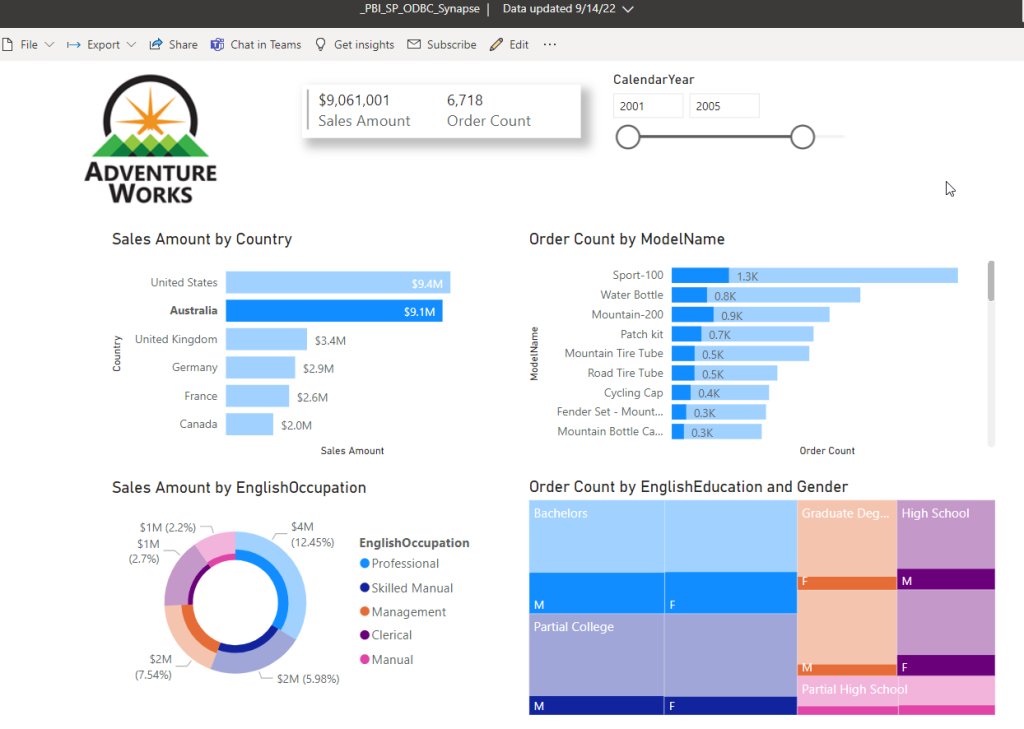
After I selected the tables I went through the transform steps keeping the columns that I wanted to use in the report or for the relationships and renamed the tables. Once the data was loaded I then verified the relationships and created a few measures as well hid some of the columns. I then quickly put together the report below, nothing fancy by any means.

The fifth step is simply publishing the report to the Power BI service and in this particular case I decided to deploy this to my demo tenant versus my primary organizational tenant. To do this I made sure in Power BI Desktop to login with my demo tenant account and then publish the report. For this there isn’t much to show, simply switched the account I was logged into within Power BI Desktop and then published the report.
The sixth step is getting the gateway ready which will be needed since I am using an ODBC data source. In my demo tenant I already had a virtual machine already available in my Azure subscription, so I went ahead and started it up, remoted into the virtual machine, downloaded and installed the SQL Server ODBC driver, and then configured the System DSN just like we did in the previous steps above.
Once the virtual machine was configured and running the next thing to do is to review the settings of the dataset that was deployed with the report in the previous step and specifically we want to look at the Gateway connection as shown below.

In the above screenshot I selected the action arrow on the gateway I configured with the ODBC driver and for the data source in the dataset clicked on the link to Add to gateway option. This will then open up a dialog to add a new data source to the gateway as shown below where you will need to add a Data source name and for authentication provide the Application ID and Client Secret Value again for the Service Principal account. Once you have done this you can click Create.

Once the data source has been added to the gateway then we simply need to map this in the Gateway connection, click Apply, and then we can proceed to the next step of running the data refresh!

The seventh and final step is to run the dataset refresh and view the report to make sure everything is working as expected. After running the on-demand refresh and reviewing the dataset refresh history in the settings we see it completed successfully!

And then if we view the report and interact with the slicers and visuals we can see everything is working as expected.

That completes the post covering the topic of being able to use a Service Principal account to connect to a data source for a Power BI report. Currently the only option that I am aware of is the one I have shown, which is using the SQL Server ODBC driver. In this example I used it to connect to a Synapse Workspace Dedicated SQL Pool database located in one Azure tenant and run a report and dataset that was published in a separate tenant.
Let me know what you think and thanks for checking out this post, I hope you found this useful:)


 Subscribe to Blog feed
Leave a comment