


Introduction:
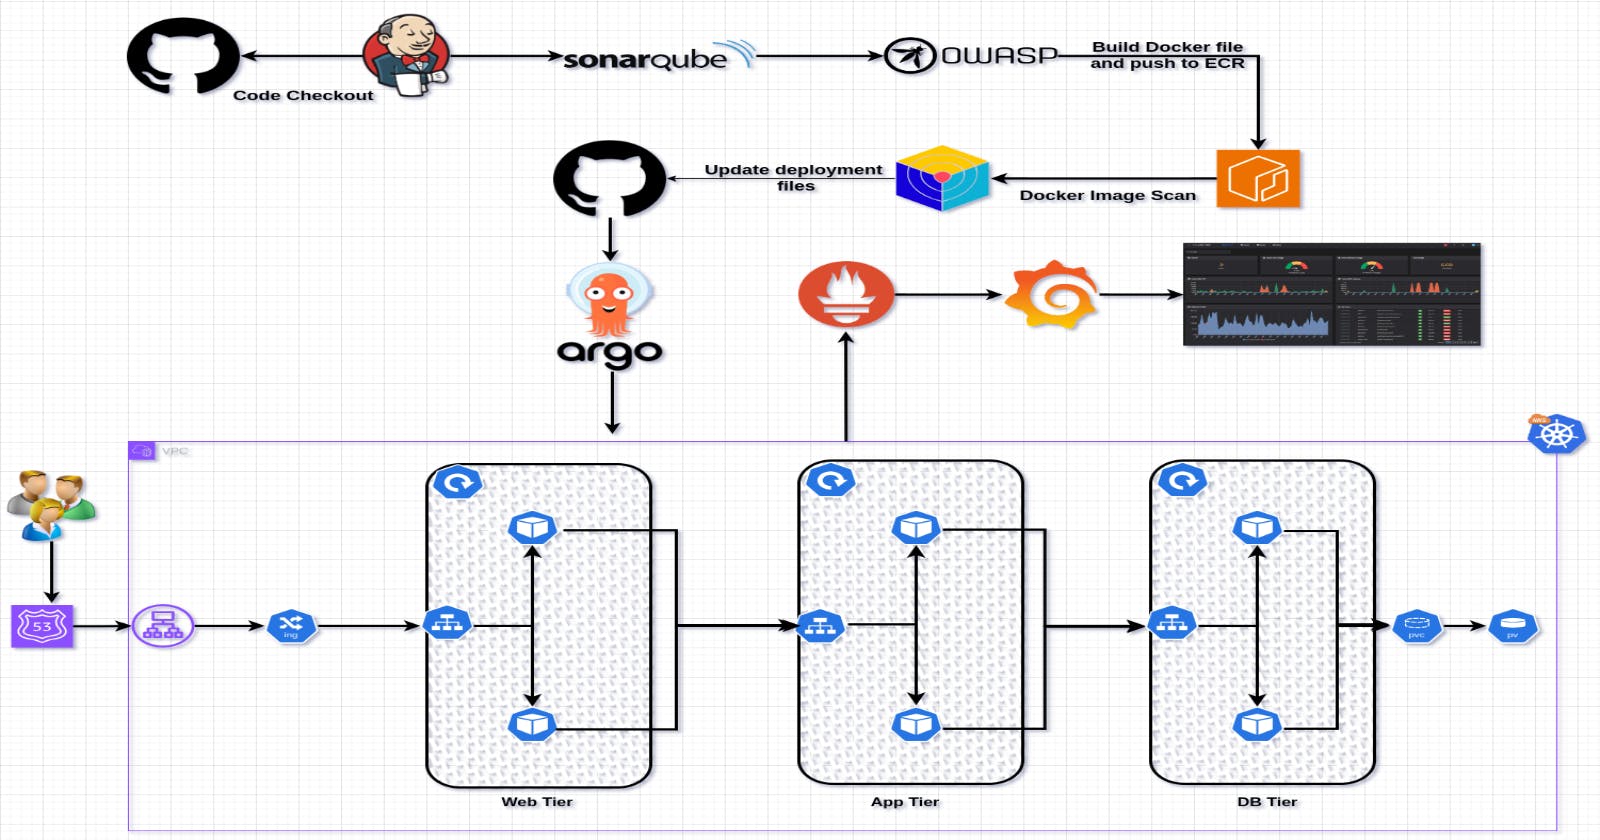
🌟 Welcome to Project 17: CI/CD for a 3-Tier ToDo Application! 🚀 In this journey, we'll navigate through setting up a robust Continuous Integration and Continuous Delivery pipeline using AWS, Kubernetes, and Terraform. 💻 The project aims to streamline the development and deployment of a ToDo application, ensuring efficiency and scalability. 🌐 From launching an EC2 instance to configuring monitoring with Prometheus and Grafana, we'll cover each step comprehensively. 🛠️ Get ready to embrace modern DevOps practices, simplify workflows, and elevate your software development experience! 🚀✨
Technologies Used in This Project:
AWS (Amazon Web Services):
- Purpose: AWS provides the infrastructure for hosting our EC2 instance, EKS cluster, and ECR repositories. Leveraging AWS services ensures scalability, reliability, and seamless integration with other tools.
Terraform:
- Purpose: Terraform is employed for infrastructure as code (IaC), enabling the automated provisioning and management of AWS resources. This ensures consistency in our environment and simplifies the setup of the Jenkins server.
Jenkins:
- Purpose: Jenkins serves as the backbone of our CI/CD pipeline. It automates the build, test, and deployment processes, enhancing collaboration and efficiency among development teams.
Docker:
- Purpose: Docker facilitates containerization, encapsulating application code and dependencies. This ensures consistency across different environments, easing deployment and minimizing compatibility issues.
Kubernetes (EKS):
- Purpose: Kubernetes orchestrates containerized applications, providing scalability and resilience. EKS (Elastic Kubernetes Service) simplifies the deployment and management of Kubernetes clusters on AWS.
ArgoCD:
- Purpose: ArgoCD automates the deployment of applications in Kubernetes. It ensures consistency between the desired and actual state of applications, promoting continuous delivery in a Kubernetes environment.
Prometheus and Grafana:
- Purpose: Prometheus monitors Kubernetes clusters, collecting metrics and alerts. Grafana visualizes these metrics, providing insights into the system's health and performance, crucial for maintaining reliability.
SonarQube:
- Purpose: SonarQube performs static code analysis, identifying and fixing code quality issues early in the development process. This enhances code maintainability, security, and overall software quality.
Project Overview:
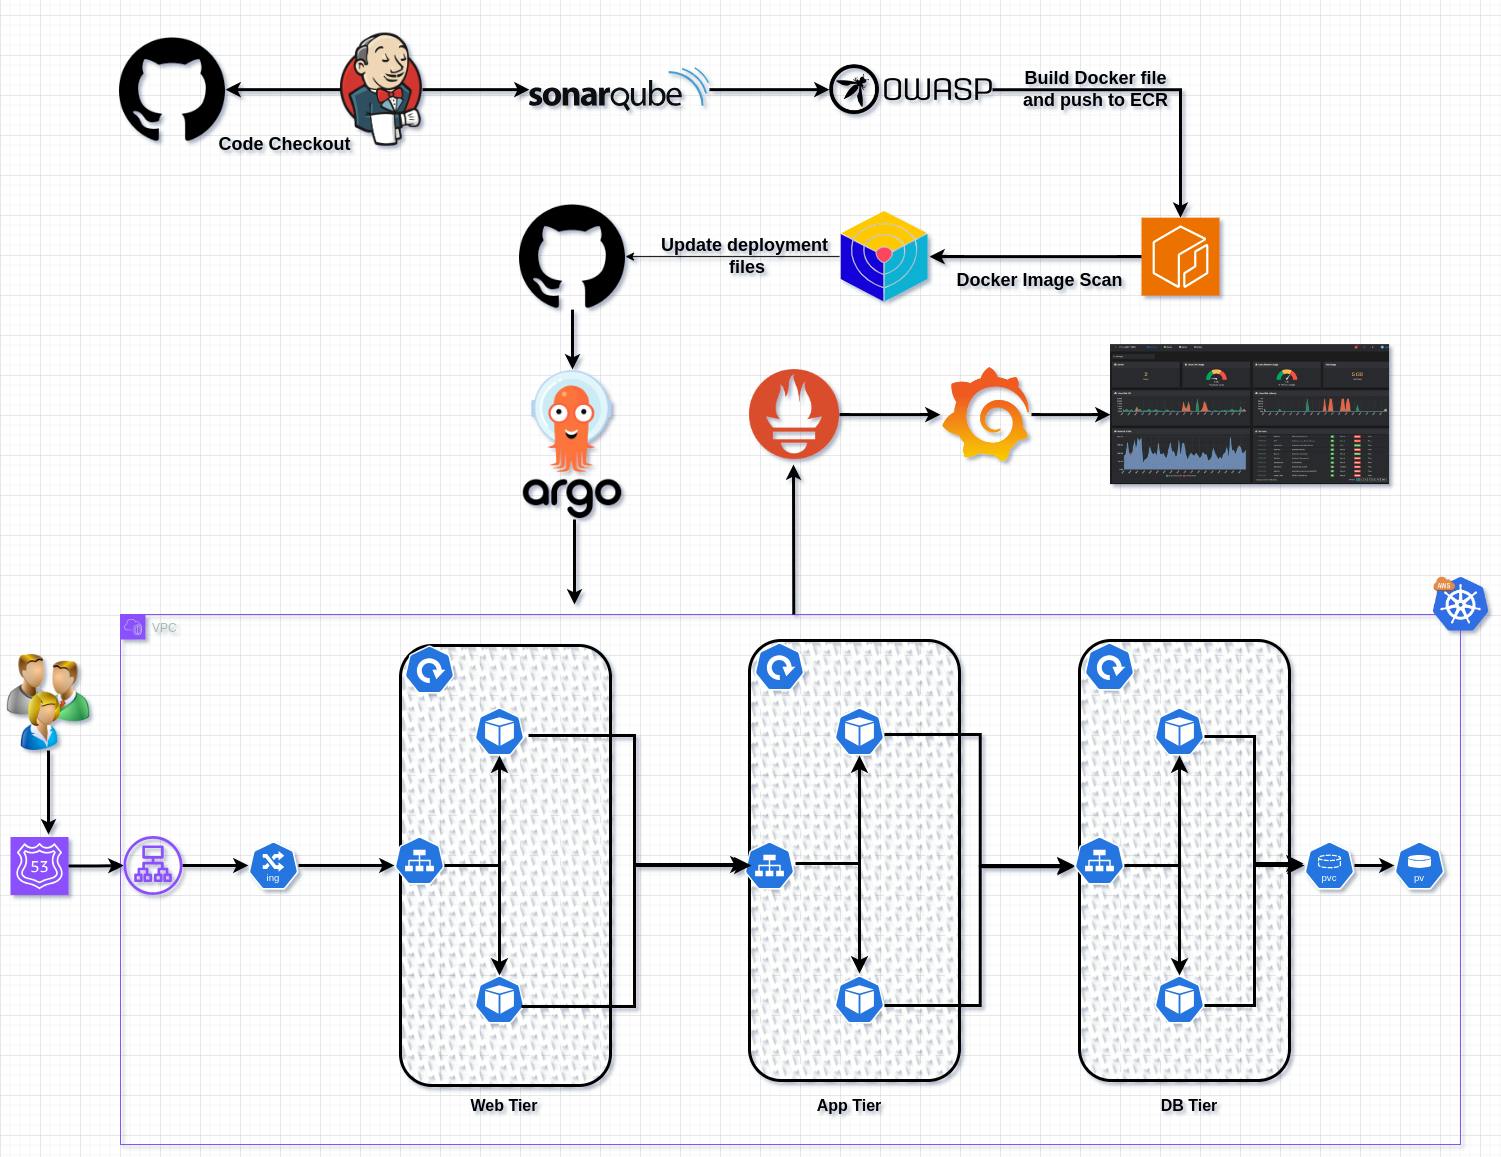
Project:
GITHUB REPO: https://github.com/patelajay745/ThreeTierAppToDoApp.git
Step 1 : Launch Ec2 Instance with Ubnuntu AMI and t2.large type. I have used following terraform file to launch it.
# main.tf

provider "aws" {
  region = "us-east-1"
}

variable "vpc-name" {
    default = "Jenkins-vpc"
}

variable "igw-name" {
    default = "Jenkins-igw"
}

variable "rt-name" {
    default = "Jenkins-route-table"
}

variable "subnet-name" {
    default = "Jenkins-subnet"
}

variable "sg-name" {
    default = "Jenkins-sg"
}

variable "instance-name" {
    default = "Jenkins-server"
}

variable "key-name" {
    default = "ajay-admin"
}

variable "iam-role" {
    default = "Jenkins-iam-role"
}

variable "ami_id" {
    default = "ami-0c7217cdde317cfec"
}

resource "aws_vpc" "vpc" {
  cidr_block = "10.0.0.0/16"

  tags = {
    Name = var.vpc-name
  }
}

resource "aws_internet_gateway" "igw" {
  vpc_id = aws_vpc.vpc.id

  tags = {
    Name = var.igw-name
  }
}

resource "aws_subnet" "public-subnet" {
  vpc_id                  = aws_vpc.vpc.id
  cidr_block              = "10.0.1.0/24"
  availability_zone       = "us-east-1a"
  map_public_ip_on_launch = true

  tags = {
    Name = var.subnet-name
  }
}

resource "aws_route_table" "rt" {
  vpc_id = aws_vpc.vpc.id
  route {
    cidr_block = "0.0.0.0/0"
    gateway_id = aws_internet_gateway.igw.id
  }

  tags = {
    Name = var.rt-name
  }
}

resource "aws_route_table_association" "rt-association" {
  route_table_id = aws_route_table.rt.id
  subnet_id      = aws_subnet.public-subnet.id
}

resource "aws_security_group" "security-group" {
  vpc_id      = aws_vpc.vpc.id
  description = "Allowing Jenkins, Sonarqube, SSH Access"

  ingress = [
    for port in [22, 8080, 9000, 9090, 80] : {
      description      = "TLS from VPC"
      from_port        = port
      to_port          = port
      protocol         = "tcp"
      ipv6_cidr_blocks = ["::/0"]
      self             = false
      prefix_list_ids  = []
      security_groups  = []
      cidr_blocks      = ["0.0.0.0/0"]
    }
  ]

  egress {
    from_port   = 0
    to_port     = 0
    protocol    = "-1"
    cidr_blocks = ["0.0.0.0/0"]
  }

  tags = {
    Name = var.sg-name
  }
}

resource "aws_instance" "ec2" {
  ami                    = var.ami_id
  instance_type          = "t2.large"
  key_name               = var.key-name
  subnet_id              = aws_subnet.public-subnet.id
  vpc_security_group_ids = [aws_security_group.security-group.id]
  iam_instance_profile   = aws_iam_instance_profile.instance-profile.name
  root_block_device {
    volume_size = 30
  }

  tags = {
    Name = var.instance-name
  }
}

resource "aws_iam_instance_profile" "instance-profile" {
  name = "Jenkins-instance-profile"
  role = aws_iam_role.iam-role.name
}

resource "aws_iam_role_policy_attachment" "iam-policy" {
  role        = aws_iam_role.iam-role.name
  policy_arn  = "arn:aws:iam::aws:policy/AdministratorAccess"
}

resource "aws_iam_role" "iam-role" {
  name               = var.iam-role
  assume_role_policy = <<EOF
{
  "Version": "2012-10-17",
  "Statement": [
    {
      "Effect": "Allow",
      "Principal": {
        "Service": "ec2.amazonaws.com"
      },
      "Action": "sts:AssumeRole"
    }
  ]
}
EOF
}
Step 2: Install Required packages.
Install the required packages by SSHing into the EC2 instance.
Create two scripts, namely "packages.sh"
#!/bin/bash
# For Ubuntu 22.04
# Intsalling Java
sudo apt update -y
sudo apt install openjdk-17-jre -y
sudo apt install openjdk-17-jdk -y
java --version

# Installing Jenkins
curl -fsSL https://pkg.jenkins.io/debian/jenkins.io-2023.key | sudo tee \
  /usr/share/keyrings/jenkins-keyring.asc > /dev/null
echo deb [signed-by=/usr/share/keyrings/jenkins-keyring.asc] \
  https://pkg.jenkins.io/debian binary/ | sudo tee \
  /etc/apt/sources.list.d/jenkins.list > /dev/null
sudo apt-get update -y
sudo apt-get install jenkins -y

# Installing Docker
#!/bin/bash
sudo apt update
sudo apt install docker.io -y
sudo usermod -aG docker jenkins
sudo usermod -aG docker ubuntu
sudo systemctl restart docker
sudo chmod 777 /var/run/docker.sock

# If you don't want to install Jenkins, you can create a container of Jenkins
# docker run -d -p 8080:8080 -p 50000:50000 --name jenkins-container jenkins/jenkins:lts

# Run Docker Container of Sonarqube
#!/bin/bash
docker run -d  --name sonar -p 9000:9000 sonarqube:lts-community


# Installing AWS CLI
#!/bin/bash
curl "https://awscli.amazonaws.com/awscli-exe-linux-x86_64.zip" -o "awscliv2.zip"
sudo apt install unzip -y
unzip awscliv2.zip
sudo ./aws/install

# Installing Kubectl
#!/bin/bash
sudo apt update
sudo apt install curl -y
sudo curl -LO "https://dl.k8s.io/release/v1.28.4/bin/linux/amd64/kubectl"
sudo chmod +x kubectl
sudo mv kubectl /usr/local/bin/
kubectl version --client


# Installing eksctl
#! /bin/bash
curl --silent --location "https://github.com/weaveworks/eksctl/releases/latest/download/eksctl_$(uname -s)_amd64.tar.gz" | tar xz -C /tmp
sudo mv /tmp/eksctl /usr/local/bin
eksctl version

# Installing Terraform
#!/bin/bash
wget -O- https://apt.releases.hashicorp.com/gpg | sudo gpg --dearmor -o /usr/share/keyrings/hashicorp-archive-keyring.gpg
echo "deb [signed-by=/usr/share/keyrings/hashicorp-archive-keyring.gpg] https://apt.releases.hashicorp.com $(lsb_release -cs) main" | sudo tee /etc/apt/sources.list.d/hashicorp.list
sudo apt update
sudo apt install terraform -y

# Installing Trivy
#!/bin/bash
sudo apt-get install wget apt-transport-https gnupg lsb-release -y
wget -qO - https://aquasecurity.github.io/trivy-repo/deb/public.key | sudo apt-key add -
echo deb https://aquasecurity.github.io/trivy-repo/deb $(lsb_release -sc) main | sudo tee -a /etc/apt/sources.list.d/trivy.list
sudo apt update
sudo apt install trivy -y


# Intalling Helm
#! /bin/bash
sudo snap install helm --classic
Execute script using the following command.
chmod 777 packages.sh
./packages.sh
☕ Enjoy a cup of coffee while everything gets set up. It might take a bit, but your patience will pay off with a hassle-free configuration. 😊✨
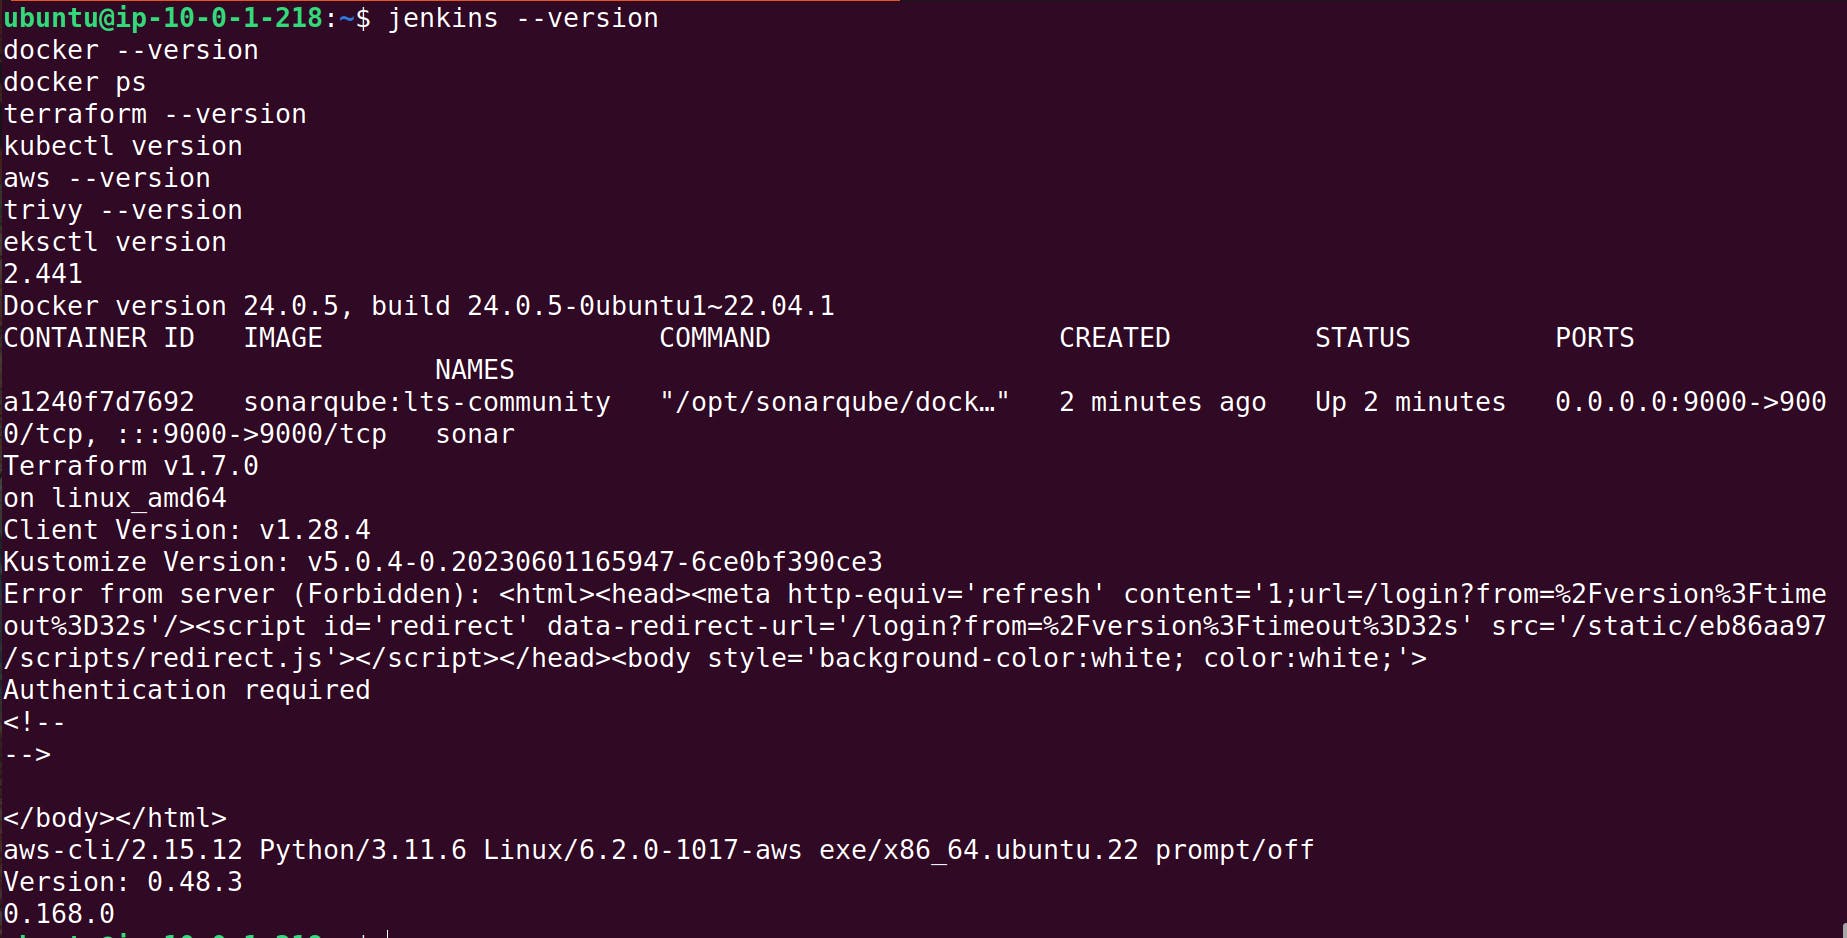
Verify the installation of all packages.
jenkins --version
docker --version
docker ps
terraform --version
kubectl version
aws --version
trivy --version
eksctl version
Step 3: Establish a connection between Jenkins and SonarQube.
Copy the IP address of the EC2 instance and paste it into the browser.
<Ec2-ip:8080>
It will prompt for a password.
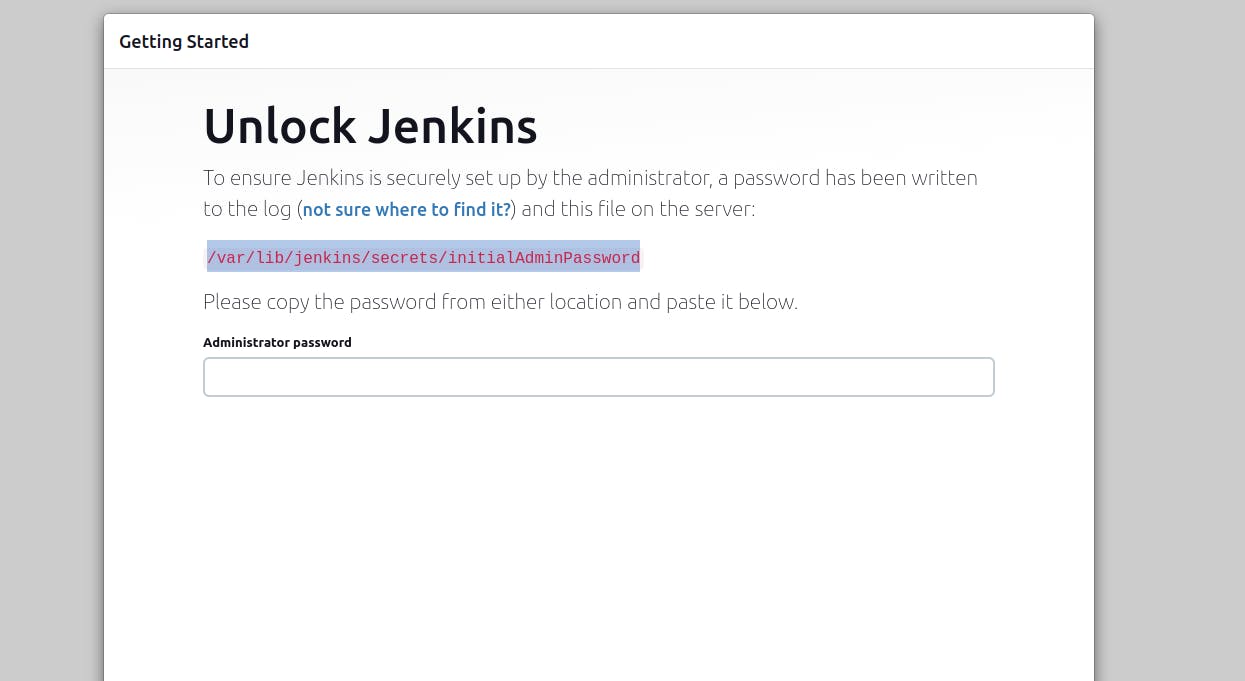
Retrieve the password and complete the installation.

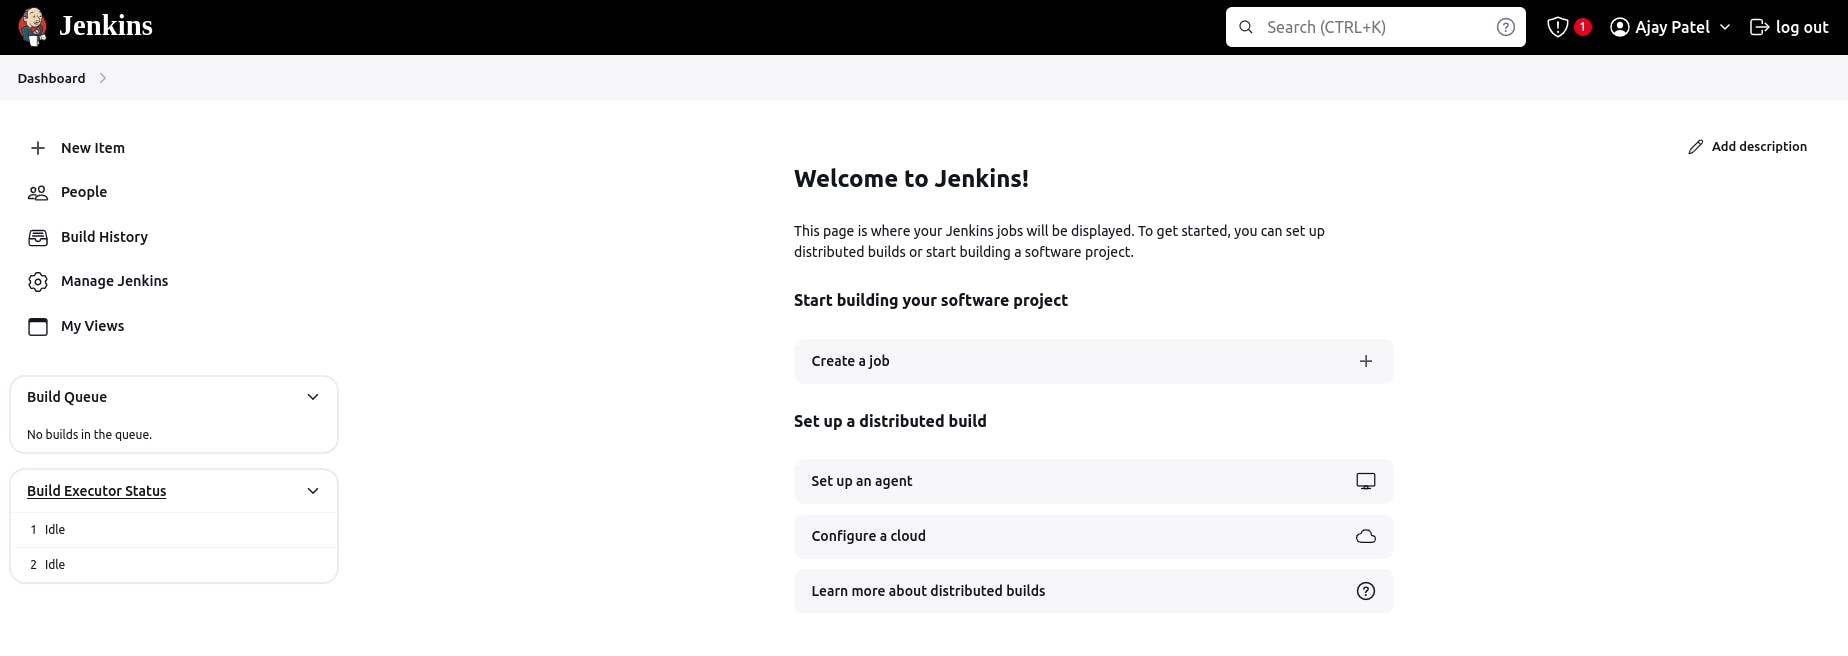
Jenkins Dashboard.
Now access SonarQube using:
<ec2-ip:9000>
It will ask for the default username and password. Enter "admin" in both.
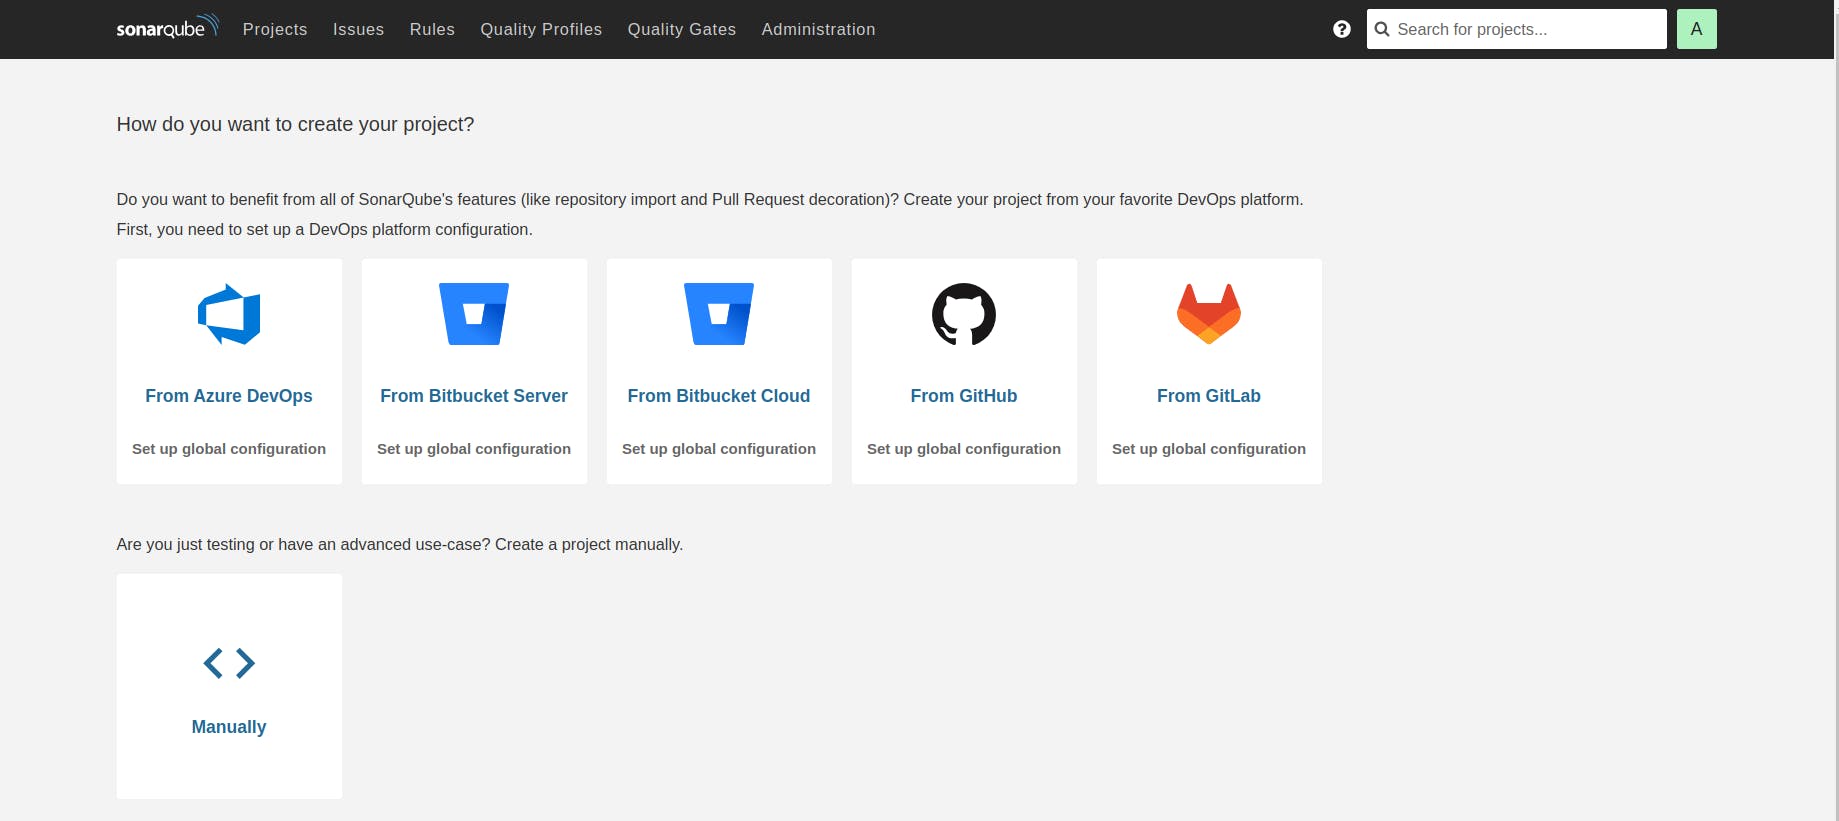
The SonarQube dashboard will look like this.
Step 4: Plugin Installation and Setup (Java, Sonar, Node.js, OWASP, Docker)
Navigate to the Jenkins dashboard.
Go to "Manage Jenkins" → "Plugins" → "Available Plugins."
Search for the following plugins:
Eclipse Temurin Installer
SonarQube Scanner
OWASP Dependency-Check
Docker
Docker Commons
Docker Pipeline
Docker API
Docker Build Step

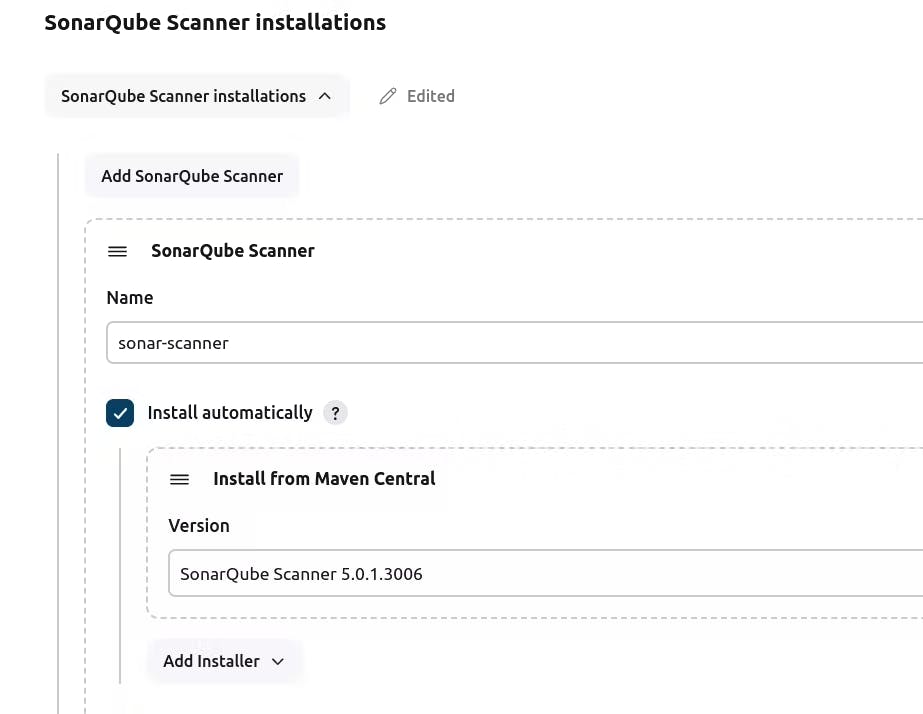
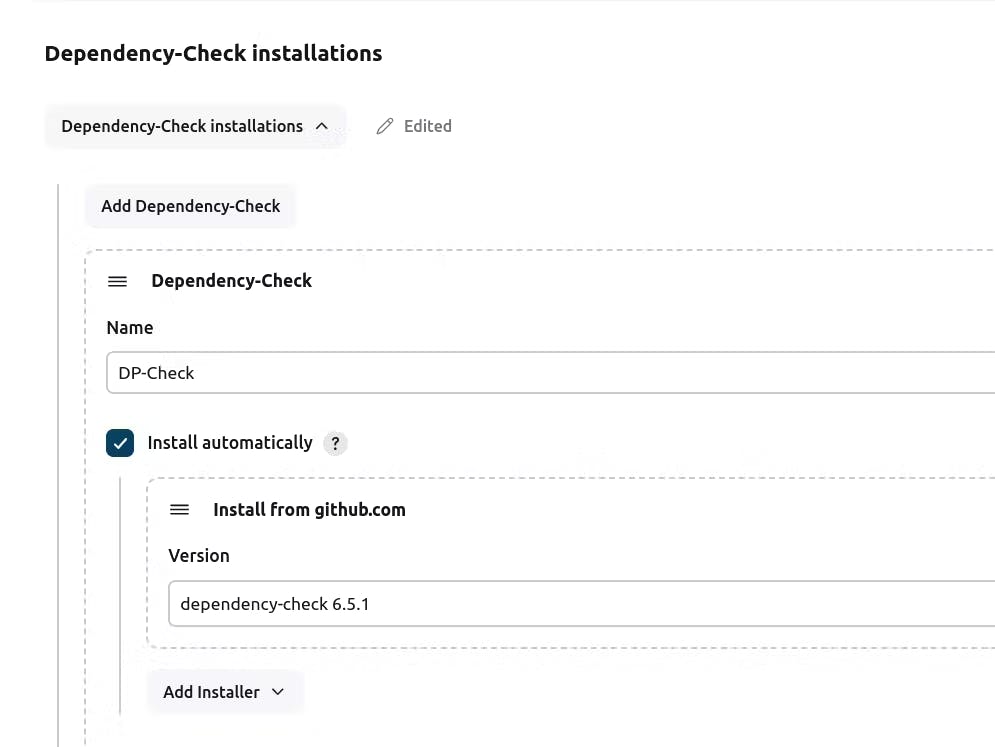
Step 5: Configuration of Global tools.
Navigate to "Manage Jenkins" → "Tools" → "SonarQube Scanner"
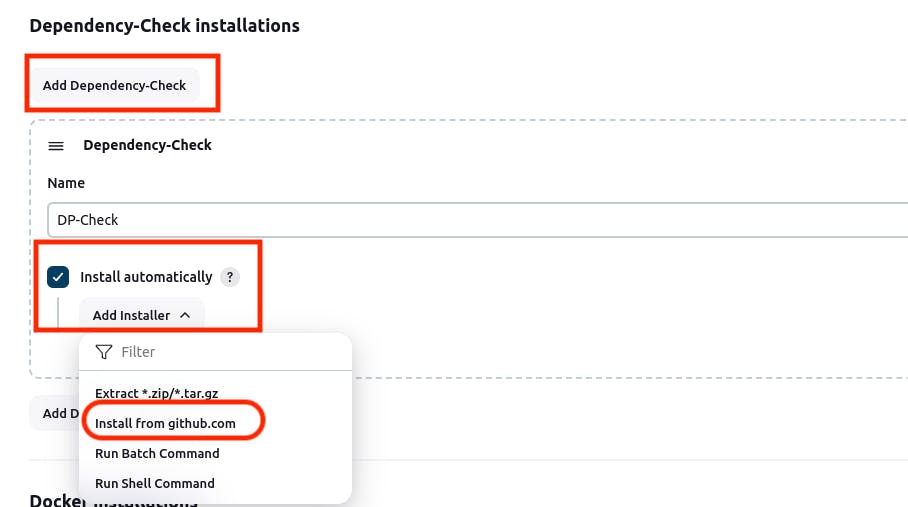
For Owasp:
For Docker:
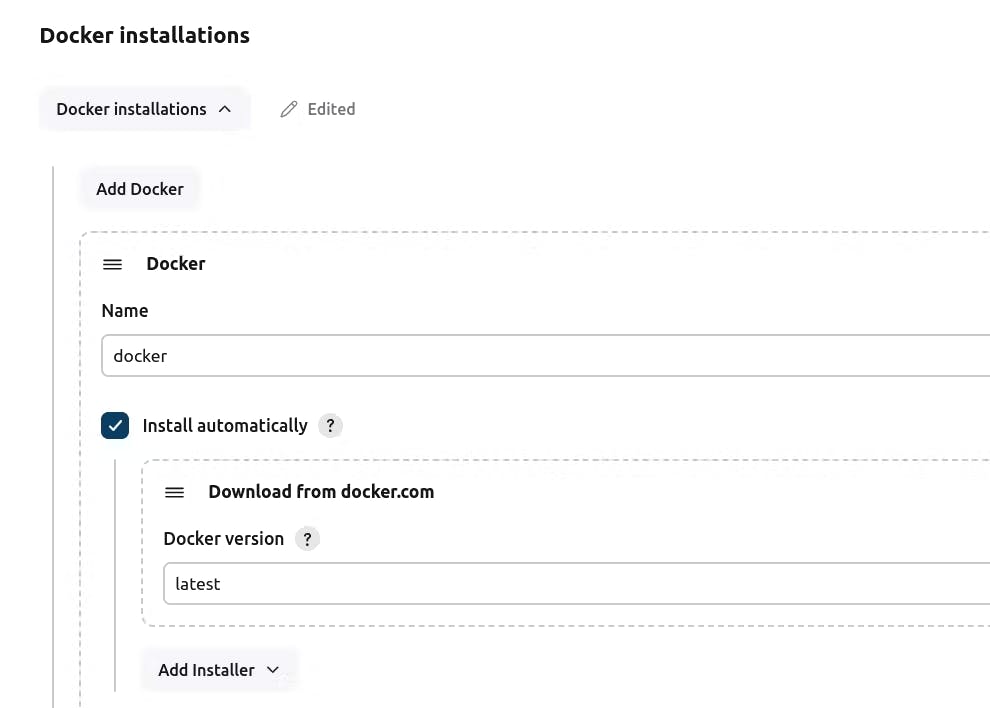
Click on "Apply and Save."
Step 6: Configure Sonar Server in Manage Jenkins
Retrieve the Public IP Address of your EC2 Instance. Since SonarQube operates on Port 9000, access it via <Public IP>:9000.
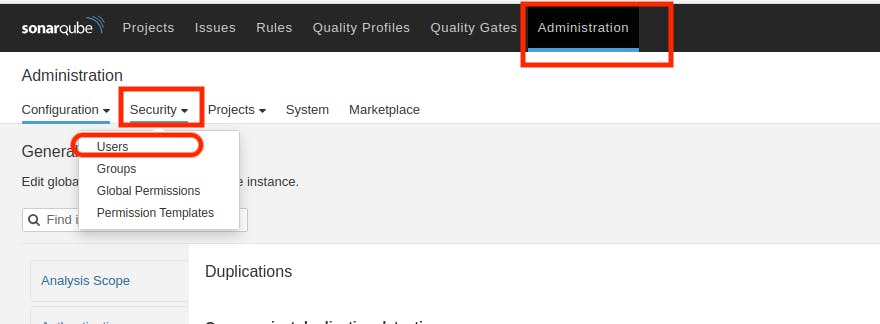
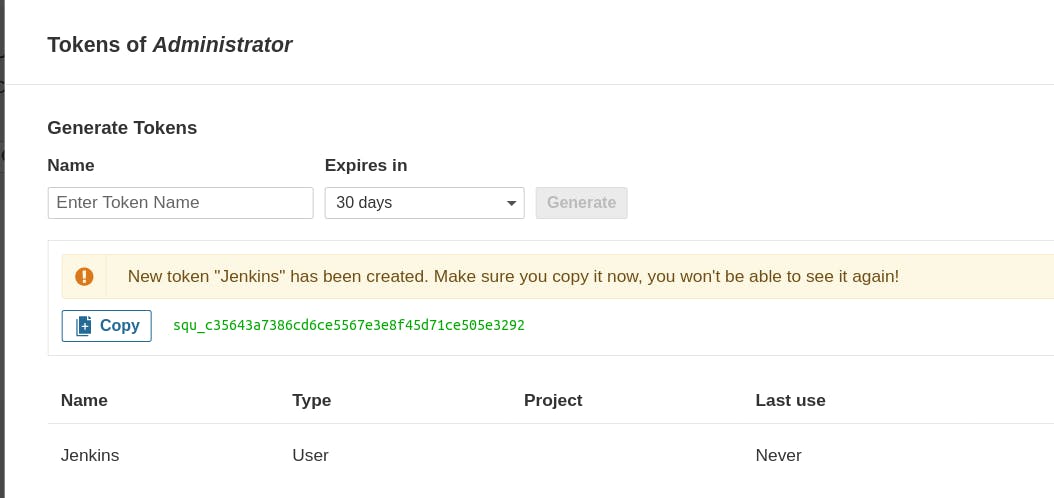
Visit your SonarQube Server, navigate to Administration → Security → Users, click on Tokens, update the token by assigning it a name, and then generate the token.
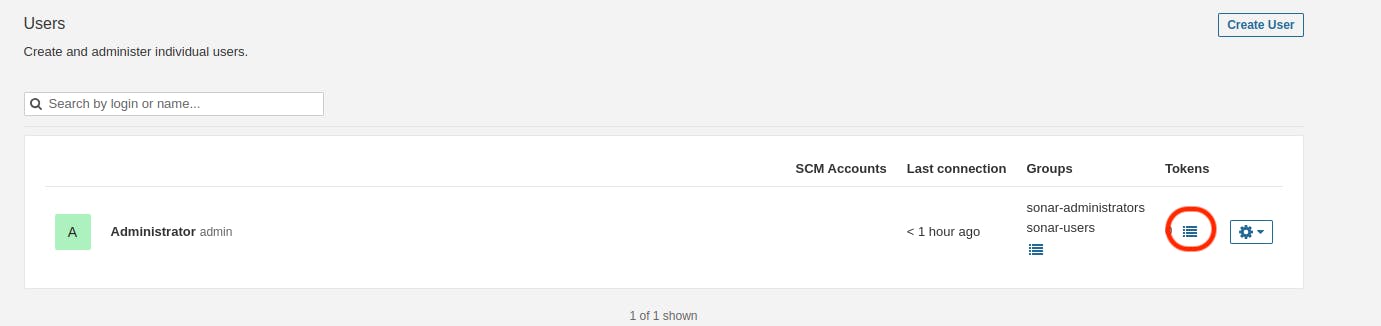
Enter name of token then click on "Generate"
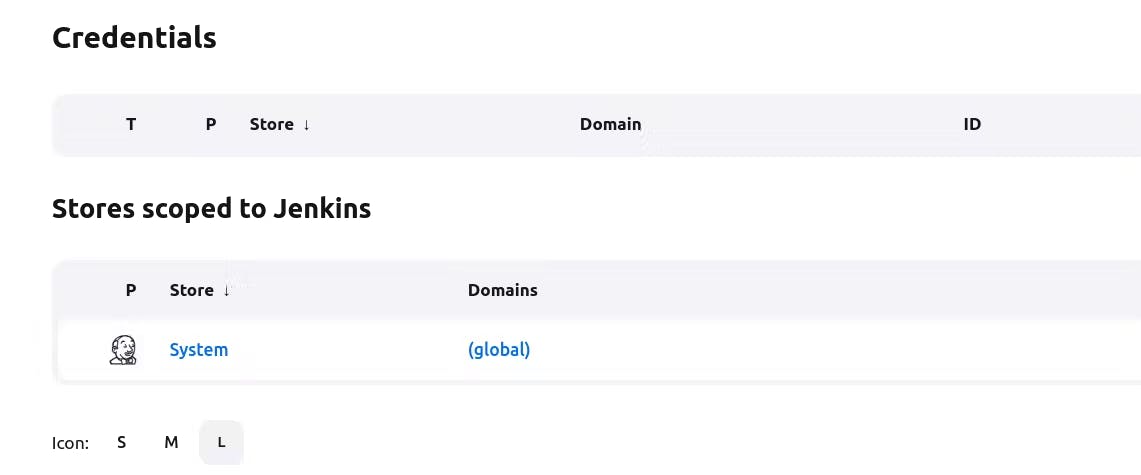
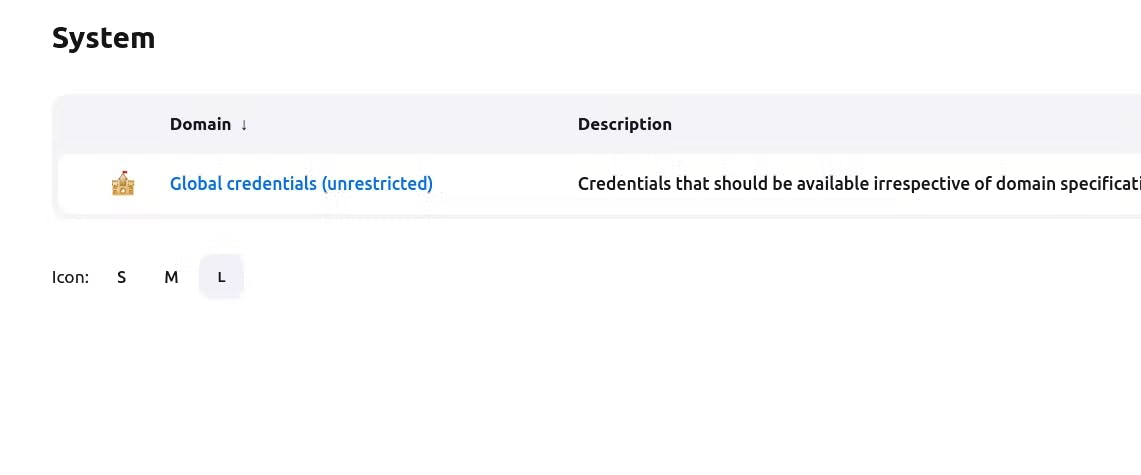
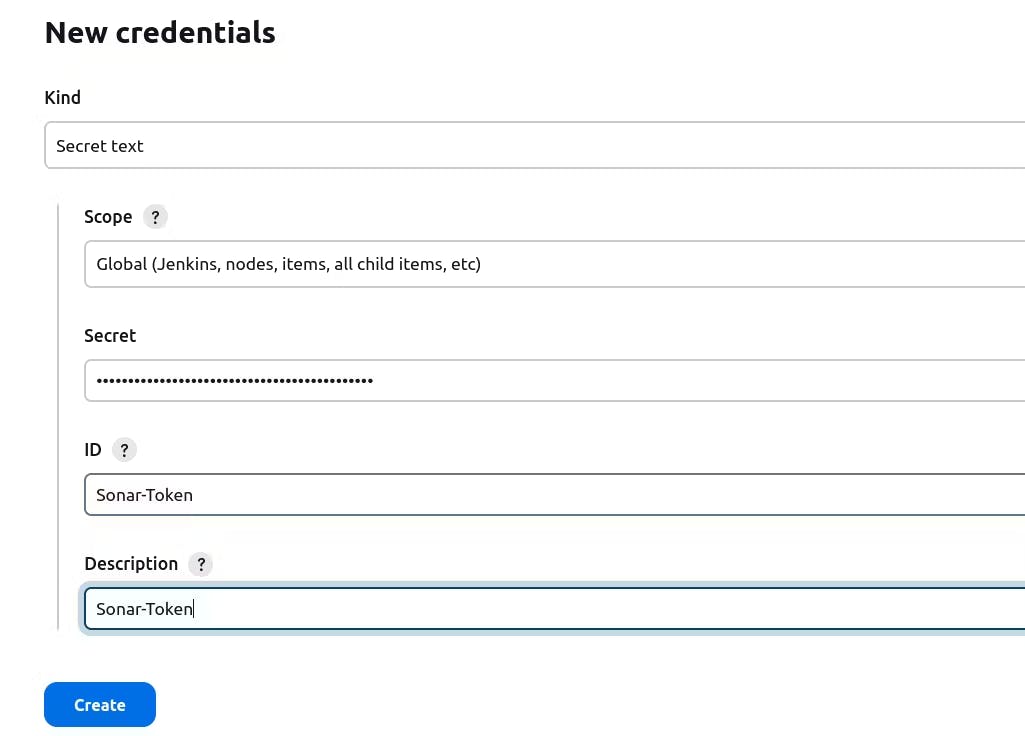
Copy the token, then go to the Jenkins Dashboard → Manage Jenkins → Credentials → Add Secret Text. The entry should resemble this.

Now, Navigate to Dashboard → Manage Jenkins → System and Add like the below image.
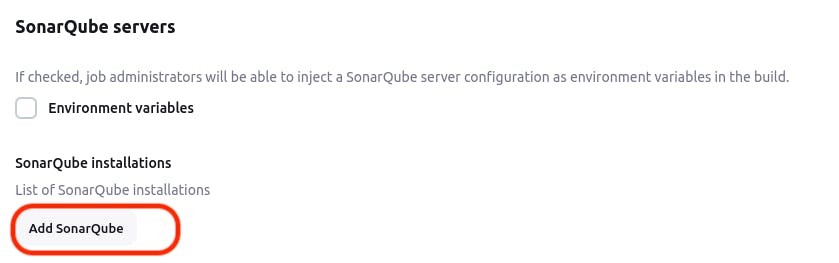
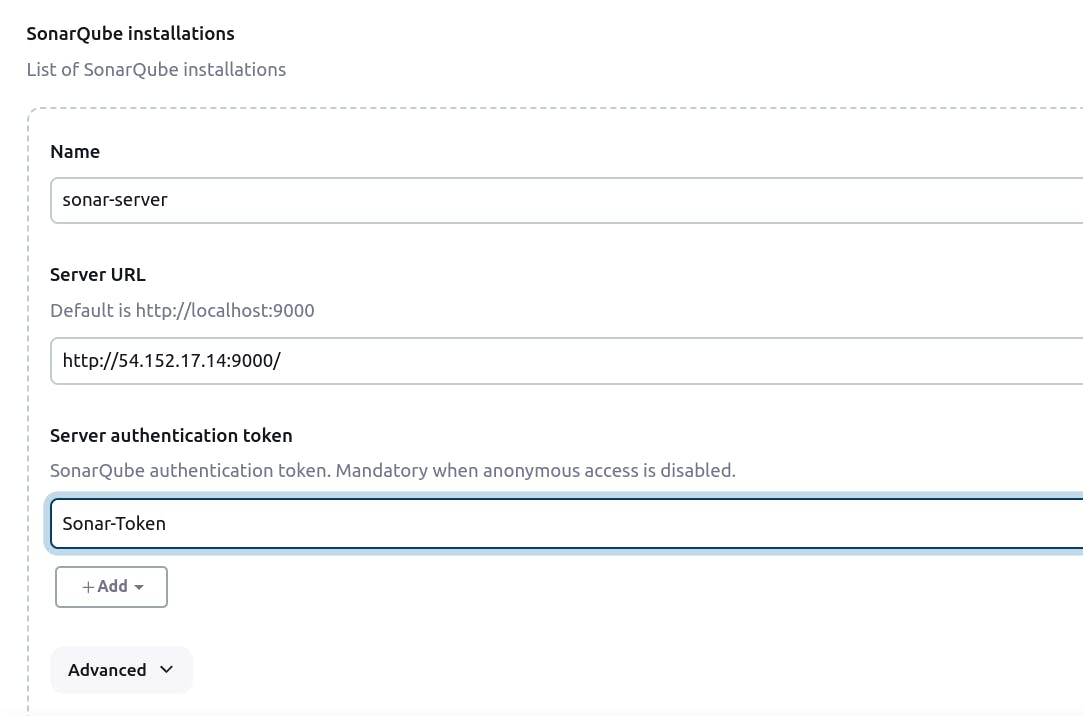
Click on "Apply and Save."
In the Sonarqube Dashboard, also include a quality gate by navigating to Administration → Configuration → Webhooks.
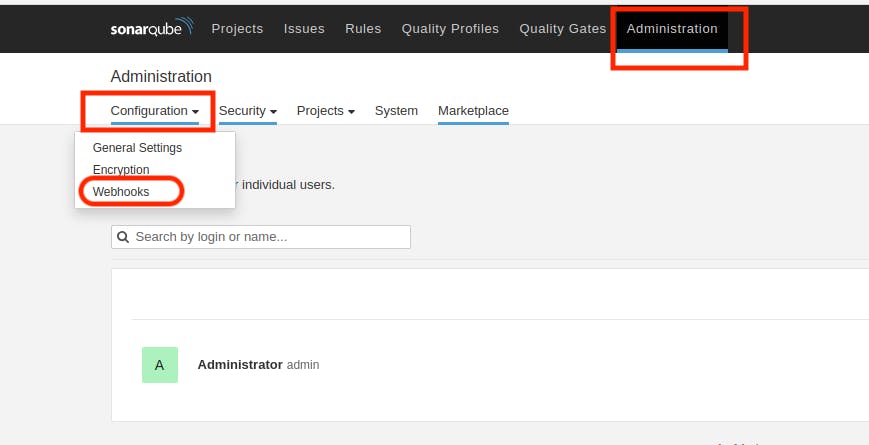
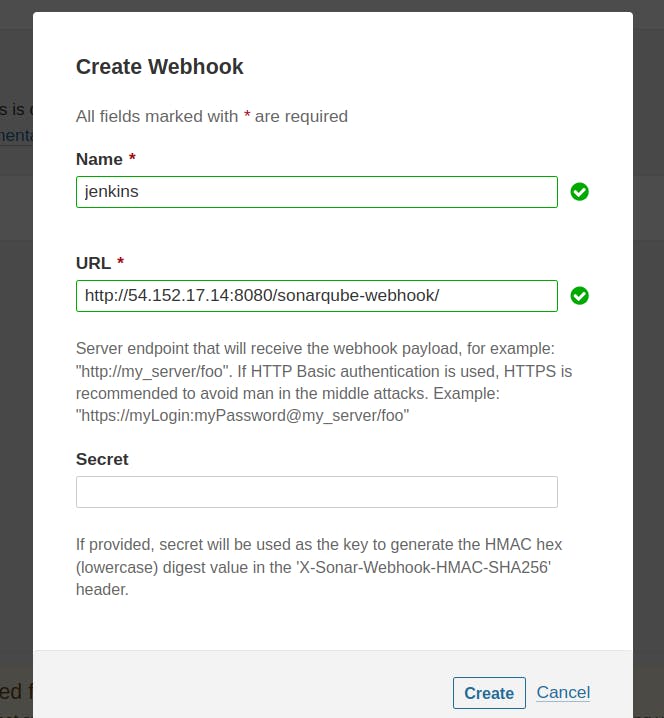
Click on "Create"
In URL Section:
<http://jenkins-public-ip:8080>/sonarqube-webhook/>
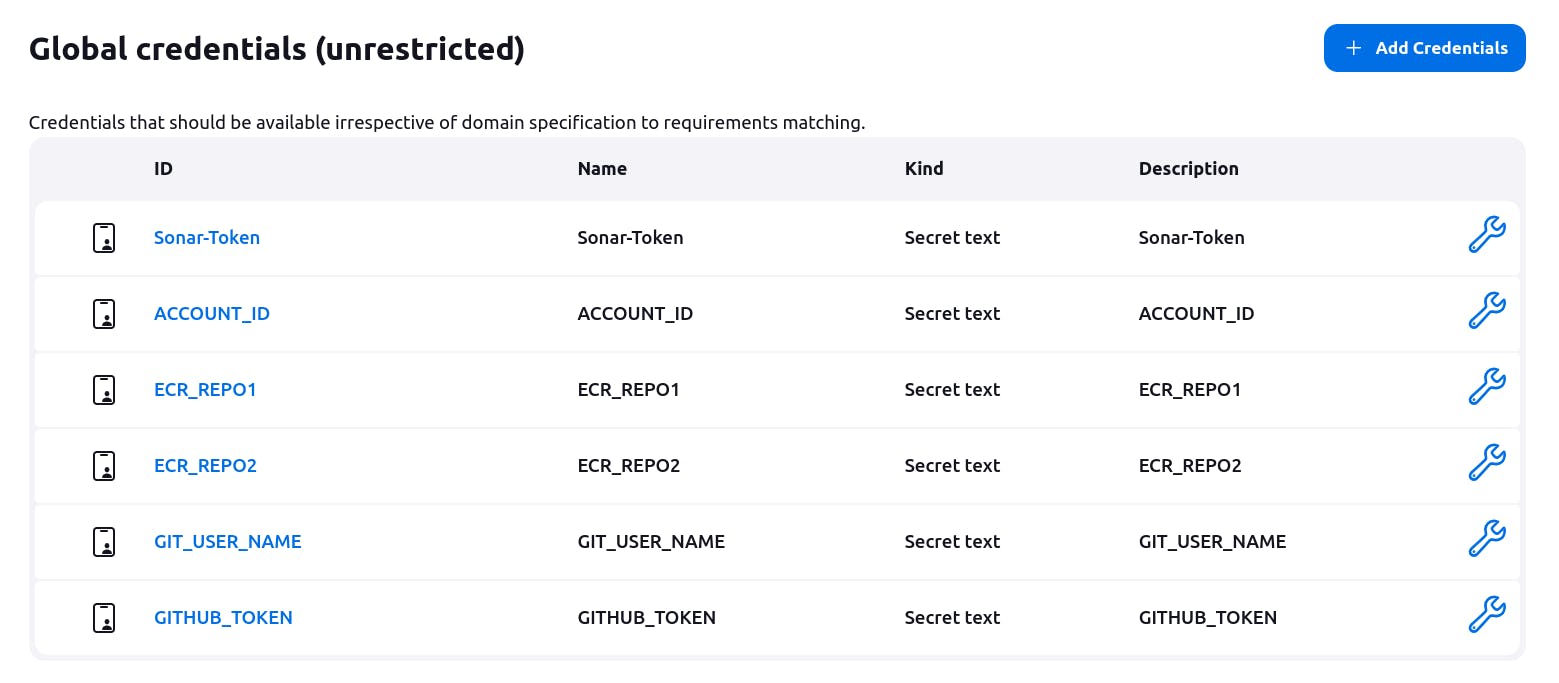
Step 7: Setting up secret for pipeline
Navigate to Jenkins Dashboard → Manage Jenkins → Credentials → Add Credentials → Secret Text
Add Your AWS Account ID Number. Click on "Create"

Follow the same instructions to set up the following secrets. Create two ECR repositories (either private or public).
ECR_REPO1: Your FrontEnd ECR Repository name.
ECR_REPO2: Your BackEND ECR Repository name.
GIT_USER_NAME: Your Git username.
GITHUB_TOKEN: Your Guthub personal Token
Your secret will appear as shown in the image below.
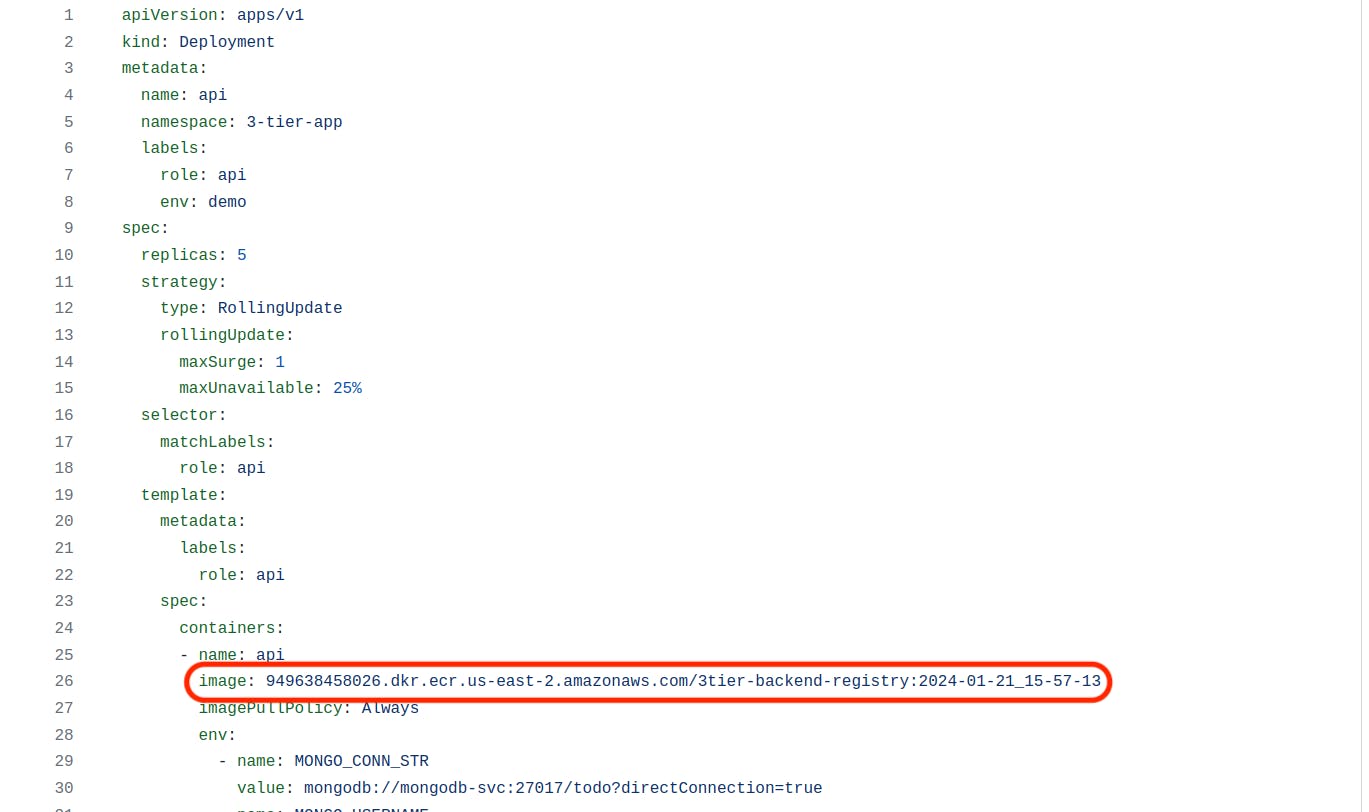
Before proceeding further, make sure you make changes to the ECR URL in the following files (of the forked repo):
k8s_files -> Backend -> deployment.yaml

The URL should be <your AWS account number>.dkr.ecr.<region>.amazonaws.com/<Backend ECR Repo Name>:latest
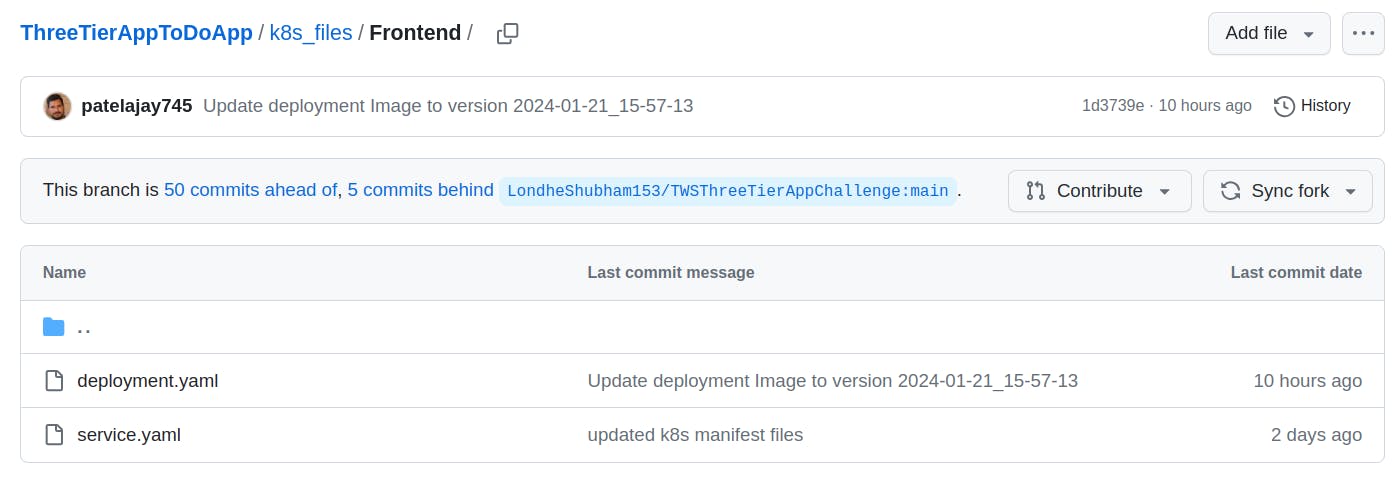
k8s_files -> Frontend -> deployment.yaml
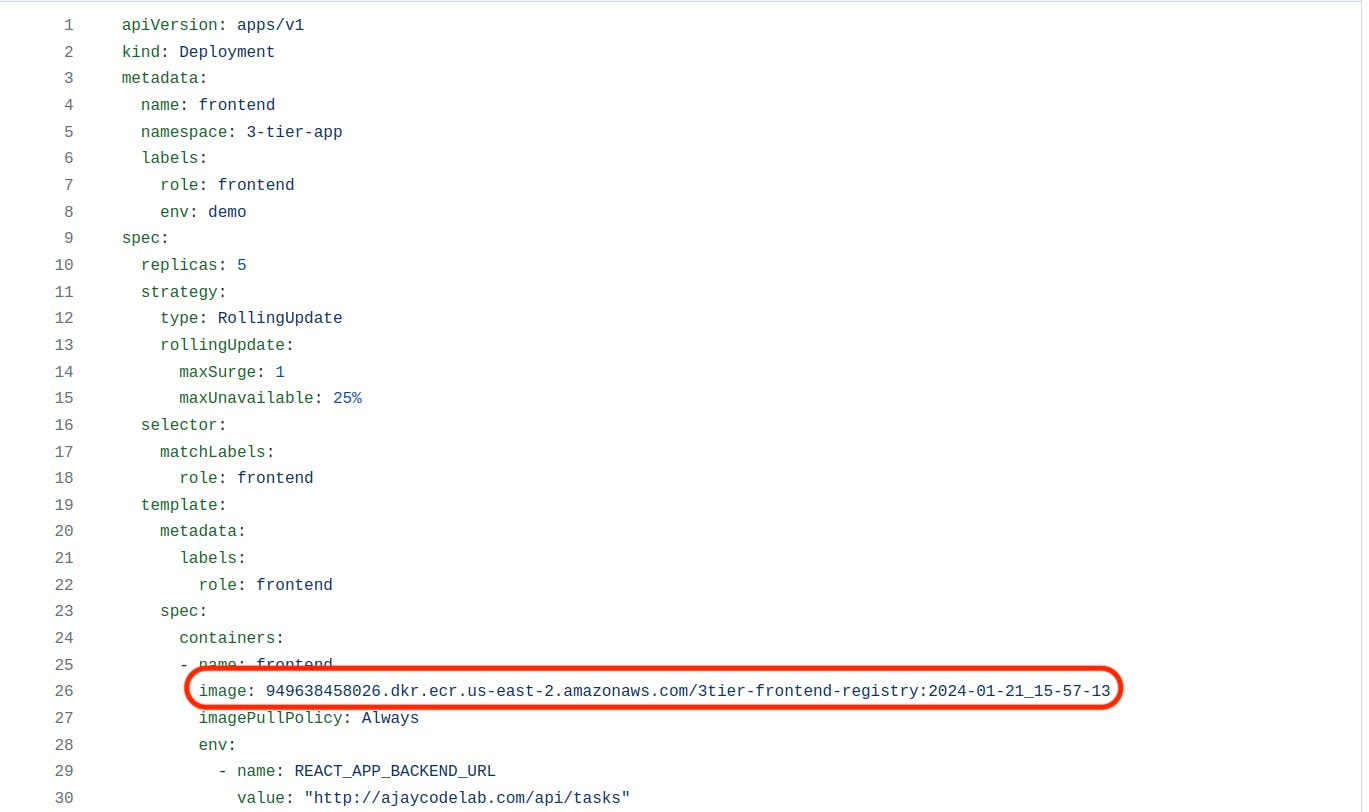
Most important: Review all Kubernetes manifest files to implement the necessary changes; otherwise, errors may occur.
Step 8: Pipeline up to Docker
Now, let's create a new job for our pipeline.
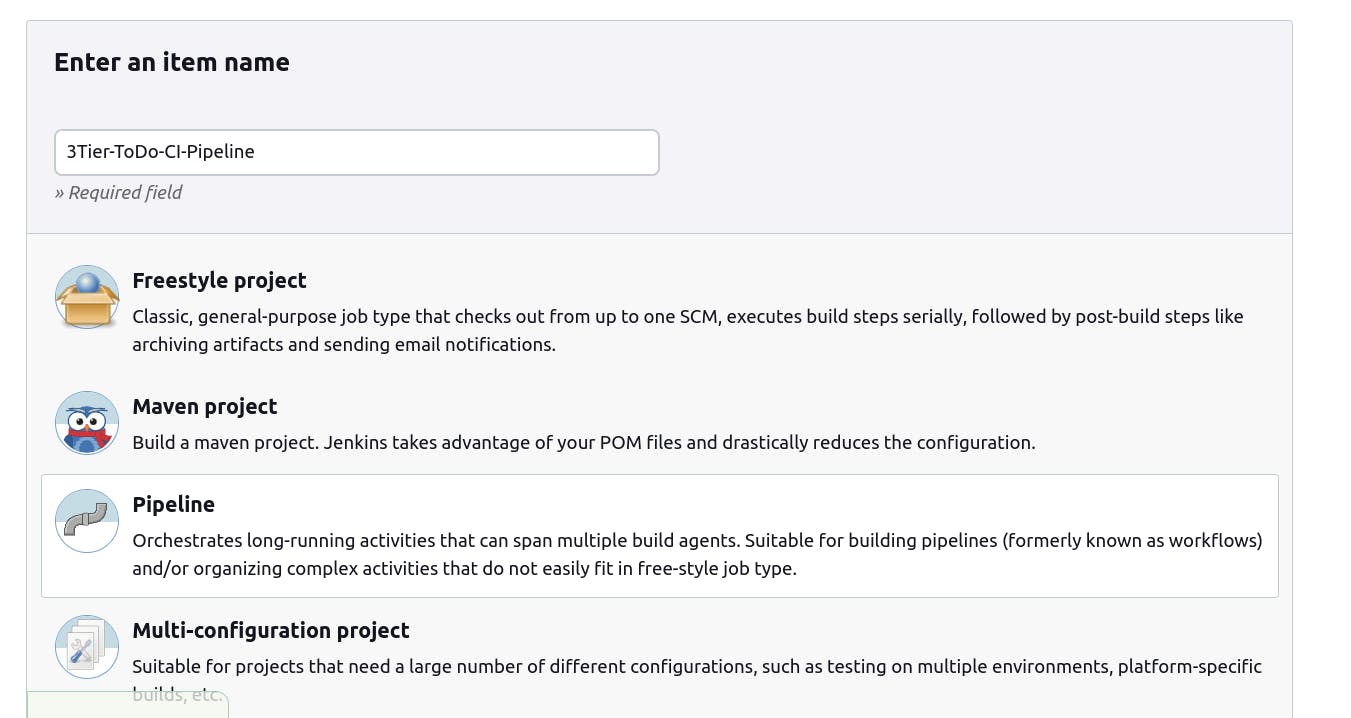
Add Following script in pipeline section.
pipeline {
    agent any

    environment {
        SCANNER_HOME=tool 'sonar-scanner'

        YOUR_EMAIL_ID = 'patel.ajay745@gmail.com'

        AWS_ACCOUNT_ID = credentials('ACCOUNT_ID')
        AWS_ECR_BACKEND_REPO_NAME = credentials('ECR_REPO2')
        AWS_ECR_FRONTFRONT_REPO_NAME = credentials('ECR_REPO1')
        AWS_DEFAULT_REGION = 'us-east-2' //your Region
        REPOSITORY_URI = "${AWS_ACCOUNT_ID}.dkr.ecr.${AWS_DEFAULT_REGION}.amazonaws.com/"

        GIT_REPO_NAME = "ThreeTierAppToDoApp"
        GIT_USER_NAME = credentials('GIT_USER_NAME')

        TIMESTAMP = sh(script: 'date "+%Y-%m-%d_%H-%M-%S"', returnStdout: true).trim()
    }


    stages {
        stage('Clean Workspace') {
            steps {
                cleanWs()
            }
        }

        stage('Checkout from Git') {
            steps {
                git branch: 'main', url: 'https://github.com/patelajay745/ThreeTierAppToDoApp.git'
            }
        }

        stage("Sonarqube Analysis "){
            steps{
                withSonarQubeEnv('sonar-server') {
                    sh ''' $SCANNER_HOME/bin/sonar-scanner -Dsonar.projectName=ToDo \
                    -Dsonar.projectKey=ToDO'''
                }
            }
        }
        stage("quality gate"){
           steps {
                script {
                    waitForQualityGate abortPipeline: false, credentialsId: 'Sonar-Token'
                }
            }
        }

        stage('OWASP FS SCAN') {
            steps {
                dependencyCheck additionalArguments: '--scan ./ --disableYarnAudit --disableNodeAudit', odcInstallation: 'DP-Check'
                dependencyCheckPublisher pattern: '**/dependency-check-report.xml'
            }
        }
         stage('TRIVY FS SCAN') {
            steps {
                sh "trivy fs . > trivyfs.txt"
            }
        }

        stage("Build and Push Frontend Image") {
            steps {
                script {
                    dir('frontend') {
                        sh "aws ecr get-login-password --region us-east-2 | docker login --username AWS --password-stdin ${REPOSITORY_URI}"
                        buildAndPushDockerImage(AWS_ECR_FRONTFRONT_REPO_NAME)
                    }
                }
            }
        }


        stage("Build BackEnd and Push Image") {
            steps {
                script {
                    dir('backend') {
                        buildAndPushDockerImage(AWS_ECR_BACKEND_REPO_NAME)
                    }
                }
            }
        }

        stage("Trivy Image Scan"){
            steps{
                sh "trivy image ${REPOSITORY_URI}${AWS_ECR_FRONTFRONT_REPO_NAME}:${TIMESTAMP} > trivyimage.txt"
                 sh "trivy image ${REPOSITORY_URI}${AWS_ECR_BACKEND_REPO_NAME}:${TIMESTAMP} > trivyimage1.txt"
            }
        }

        stage('Update Deployment file') {
            steps {
                script {
                    dir('k8s_files/Backend') {
                        withCredentials([string(credentialsId: 'GITHUB_TOKEN', variable: 'GITHUB_TOKEN')]) {
                            updateDeploymentFile(AWS_ECR_BACKEND_REPO_NAME)
                        }
                    }

                    echo "Updating frontend"

                    dir('k8s_files/Frontend') {
                        withCredentials([string(credentialsId: 'GITHUB_TOKEN', variable: 'GITHUB_TOKEN')]) {
                            updateDeploymentFile(AWS_ECR_FRONTFRONT_REPO_NAME)
                        }
                    }
                }
            }
        }
    }
}

// Function to build and push Docker image
def buildAndPushDockerImage(imageName) {
        sh "docker build -t ${imageName}:${TIMESTAMP} ."
        sh "docker tag ${imageName}:${TIMESTAMP} " + REPOSITORY_URI + "${imageName}:${TIMESTAMP}"
        sh "docker push ${REPOSITORY_URI}${imageName}:${TIMESTAMP}"
        sh "docker image prune -f"
    }

// Function to update deployment file
def updateDeploymentFile(repoName) {
        gitConfig()
        sh '''
            imageTag=$(grep -oP '(?<=registry:)[^ ]+' deployment.yaml)
            sed -i "s/${repoName}:${imageTag}/${repoName}:${TIMESTAMP}/" deployment.yaml
            git add deployment.yaml
            git commit -m "Update deployment Image to version \${TIMESTAMP}"
            git push https://${GITHUB_TOKEN}@github.com/${GIT_USER_NAME}/${GIT_REPO_NAME} HEAD:main
        '''
}

// Function for common Git configuration
def gitConfig() {
    sh "git config user.email $YOUR_EMAIL_ID"
    sh "git config user.name 'Ajay Patel'"
}
Click on "Apply and Save."
Click on "Build Now"
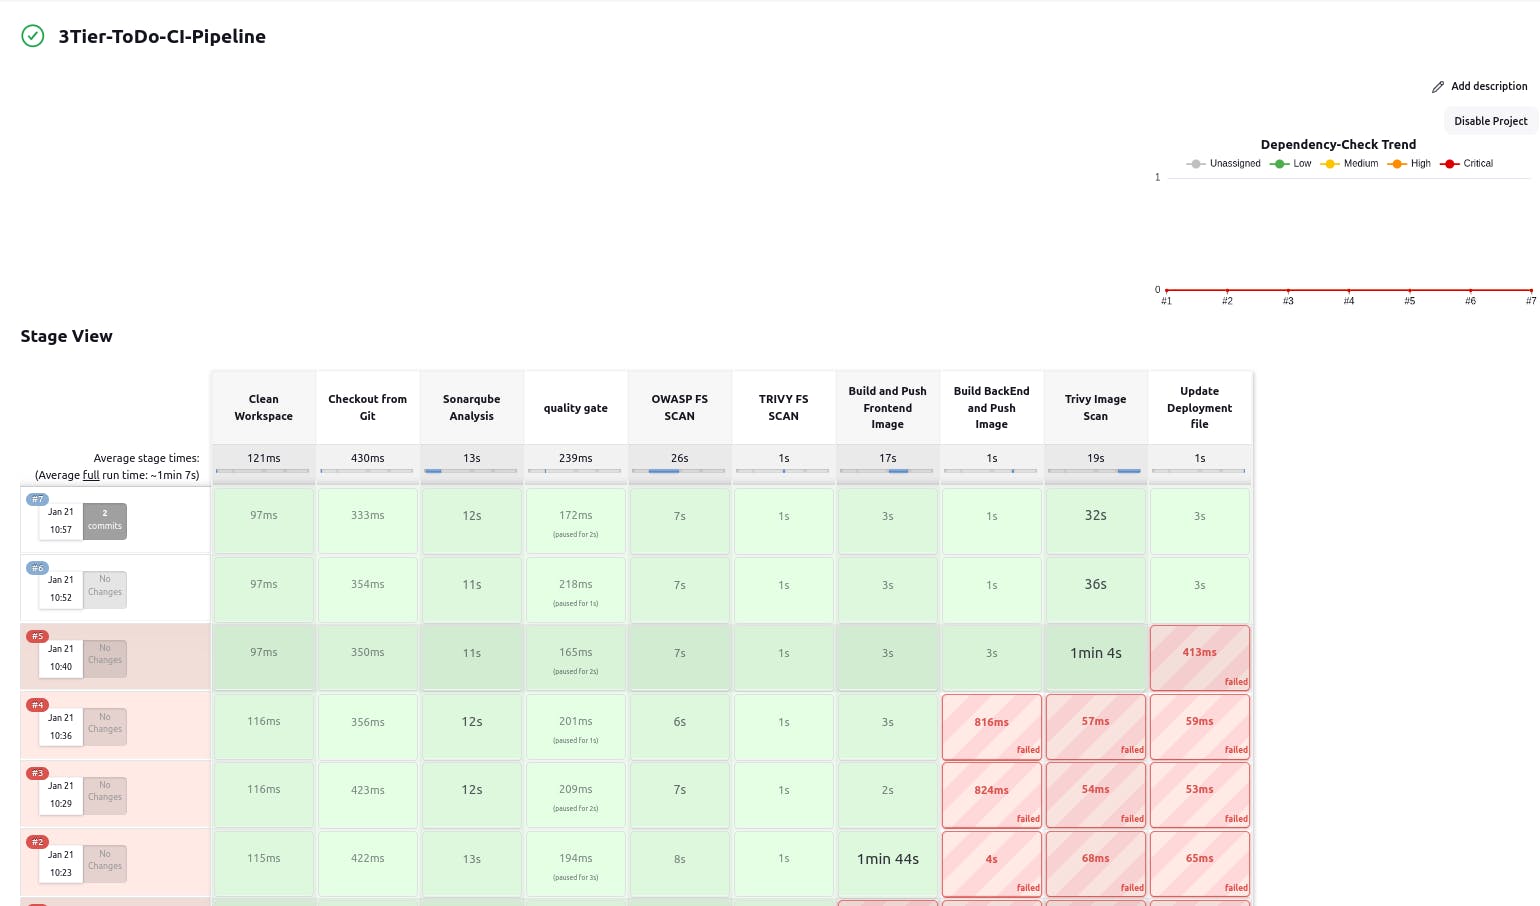
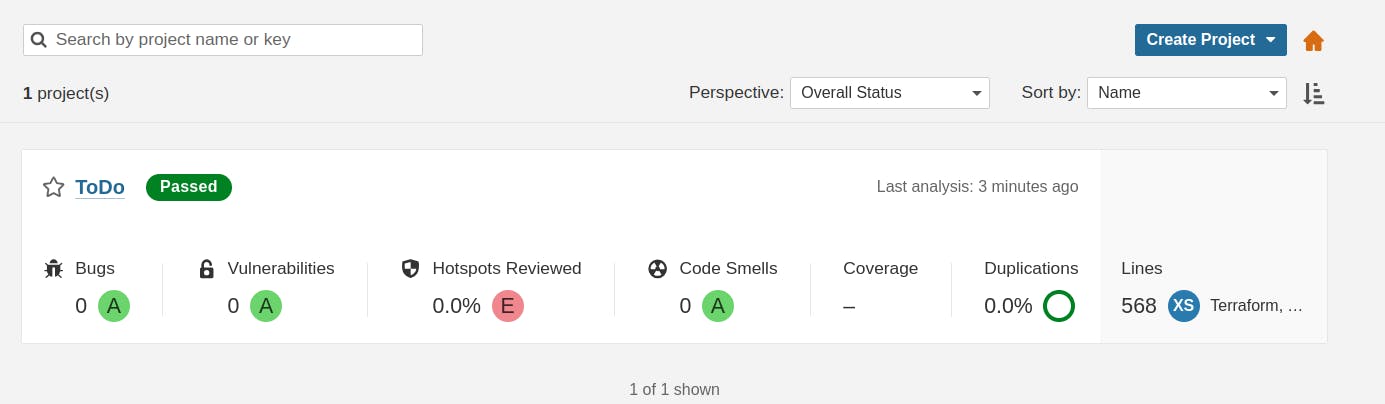
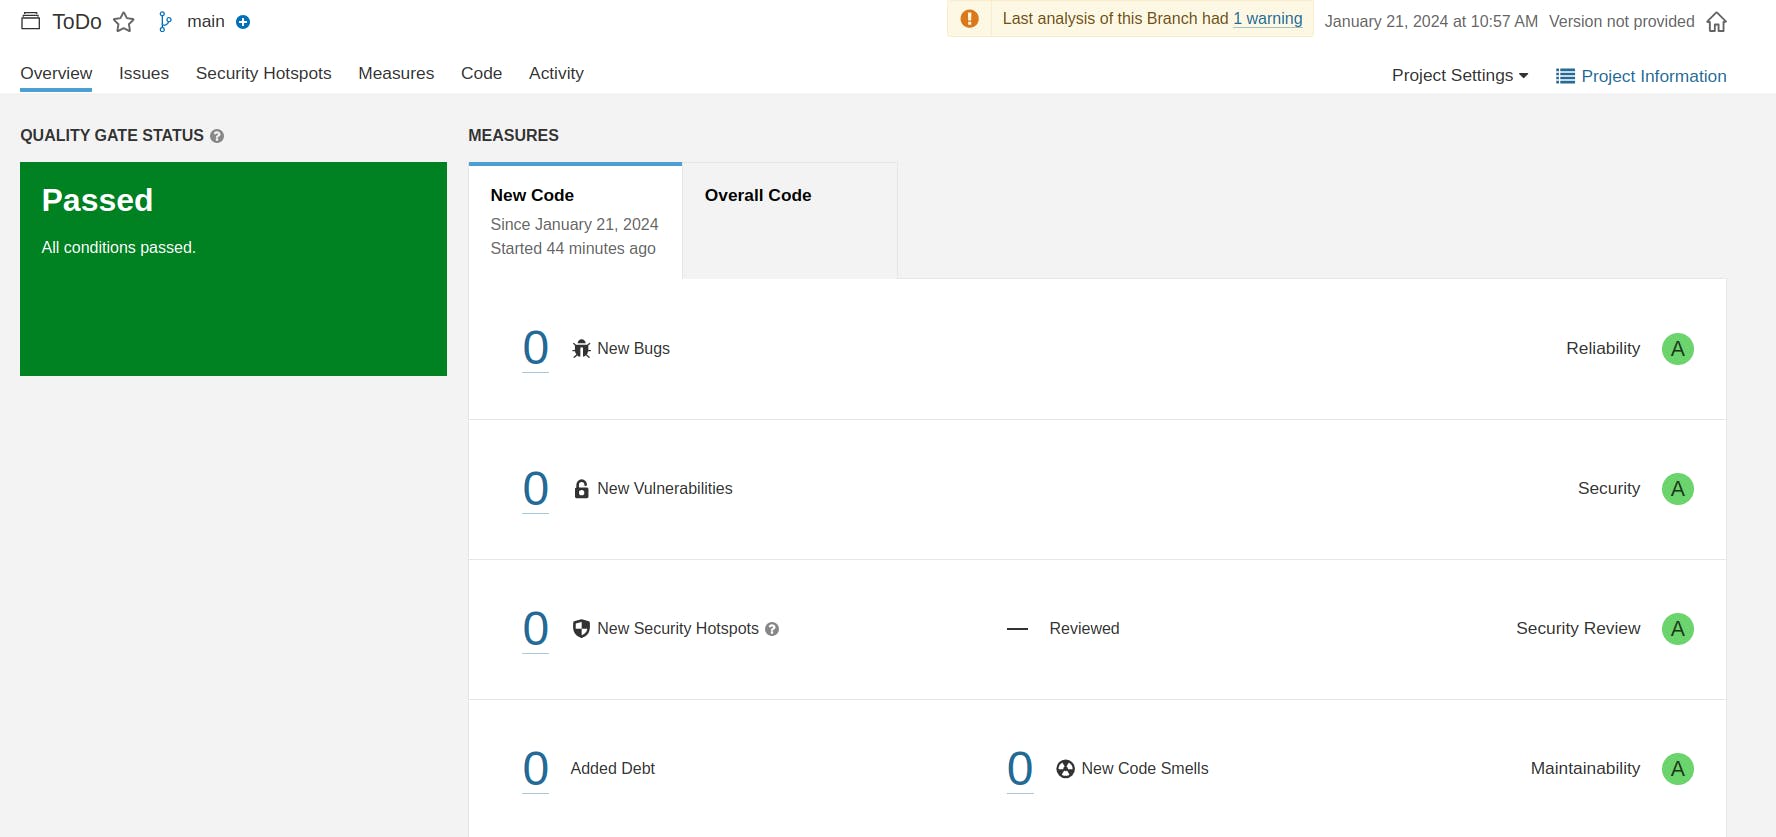
Now see the reports on SonarQube dashboard.
When you log in to ECR , you will see a new image is created
No CI part has been completed. Now it's time for CD. Let's proceed with the EKS and ArgoCD setup.
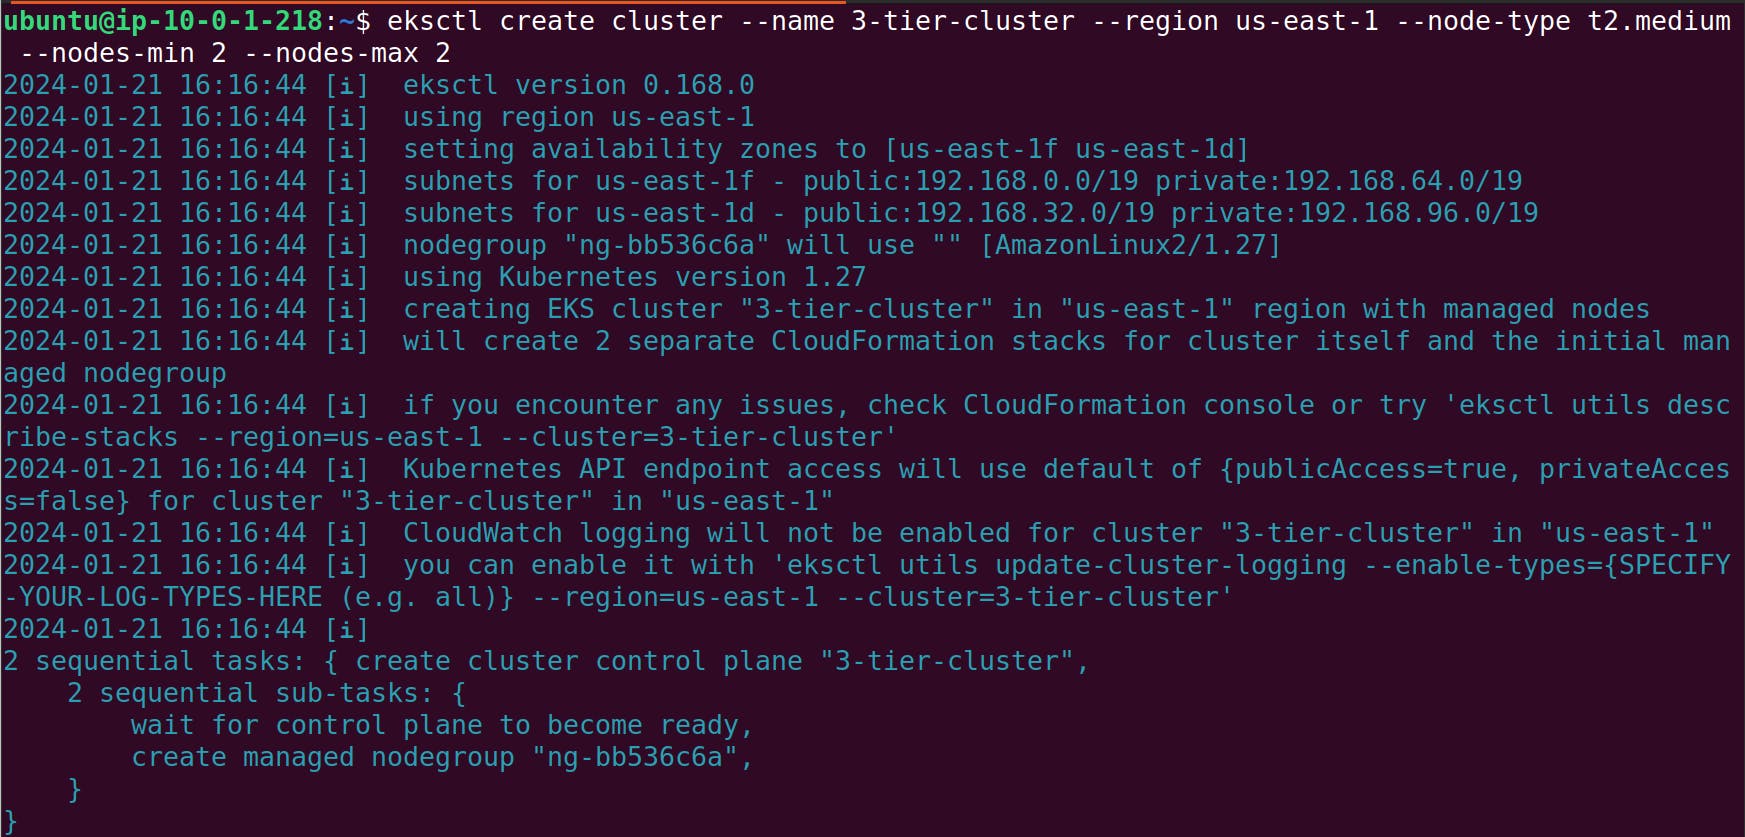
Step 9 : Setup EKS and ArgoCD, Application Load Balancer controller.
Execute the following command on the Jenkins server.
eksctl create cluster --name 3-tier-cluster --region us-east-1 --node-type t2.medium --nodes-min 2 --nodes-max 2
aws eks update-kubeconfig --region us-east-1 --name 3-tier-cluster


source <(kubectl completion bash) # set up autocomplete in bash into the current shell, bash-completion package should be installed first.
echo "source <(kubectl completion bash)" >> ~/.bashrc
alias k=kubectl
complete -o default -F __start_kubectl k

k get nodes


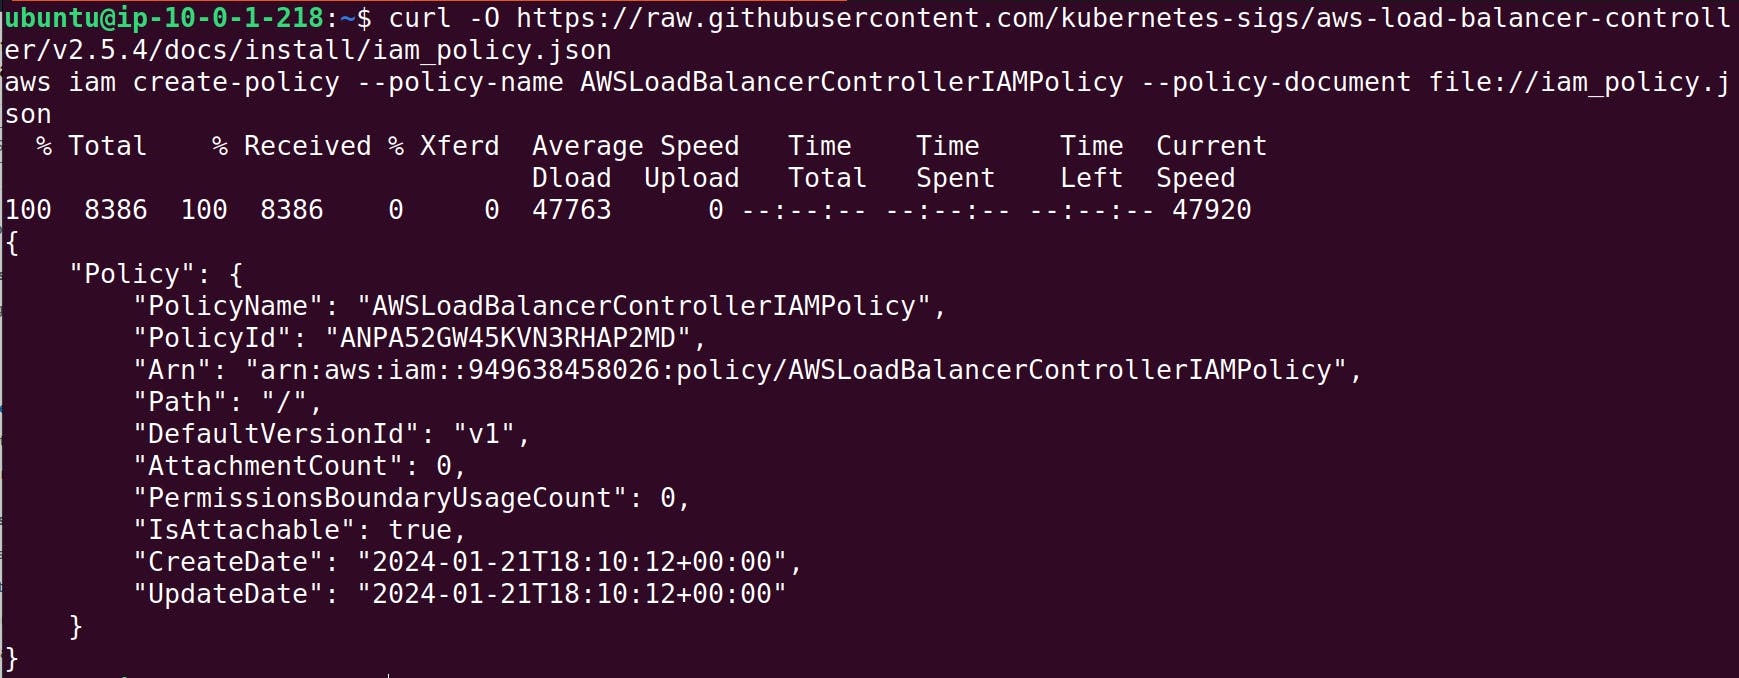
Next, install Application LoadBalancer controller. on the cluster:
Run Following command. Don't Forget to update name and region of EKS cluster in below commands.
curl -O https://raw.githubusercontent.com/kubernetes-sigs/aws-load-balancer-controller/v2.5.4/docs/install/iam_policy.json
aws iam create-policy --policy-name AWSLoadBalancerControllerIAMPolicy --policy-document file://iam_policy.json
eksctl utils associate-iam-oidc-provider --region=us-west-2 --cluster=three-tier-cluster --approve
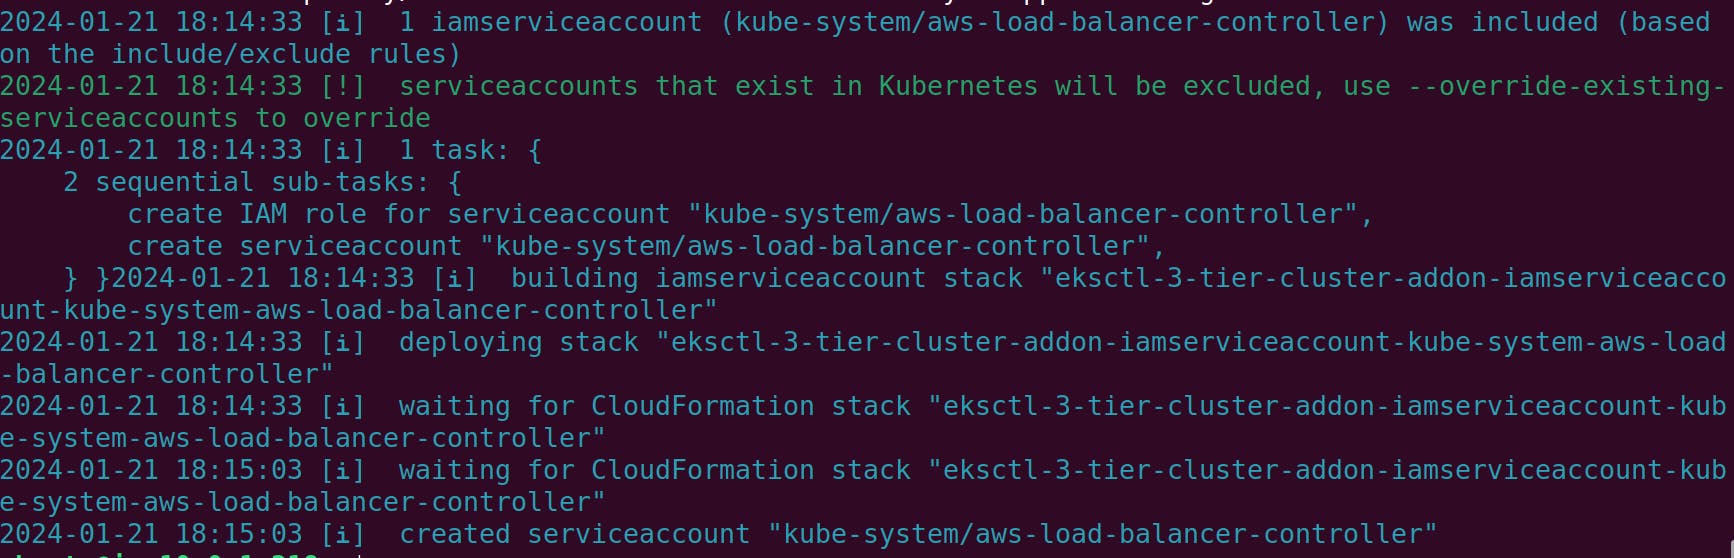
eksctl create iamserviceaccount --cluster=3-tier-cluster --namespace=kube-system --name=aws-load-balancer-controller --role-name AmazonEKSLoadBalancerControllerRole --attach-policy-arn=arn:aws:iam::<Your AWS Account NO>:policy/AWSLoadBalancerControllerIAMPolicy --approve --region=us-east-1

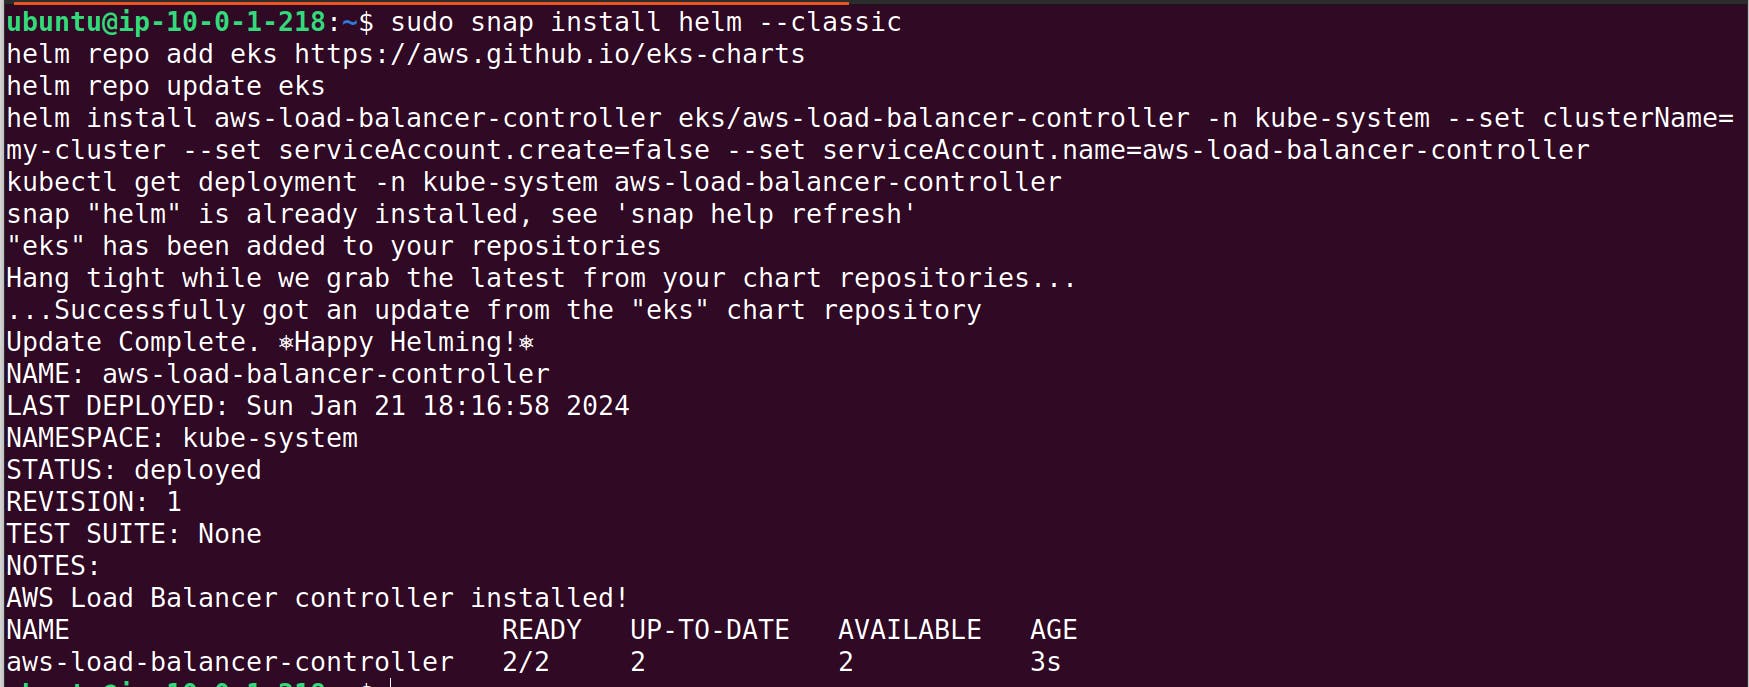
sudo snap install helm --classic
helm repo add eks https://aws.github.io/eks-charts
helm repo update eks
helm install aws-load-balancer-controller eks/aws-load-balancer-controller -n kube-system --set clusterName=my-cluster --set serviceAccount.create=false --set serviceAccount.name=aws-load-balancer-controller
kubectl get deployment -n kube-system aws-load-balancer-controller
If you observe that your aws-load-balancer-controller pod is running, then everything is set up perfectly.
Next, Install ArgoCD on the cluster:
k create namespace argocd
kubectl apply -n argocd -f https://raw.githubusercontent.com/argoproj/argo-cd/v2.4.7/manifests/install.yaml
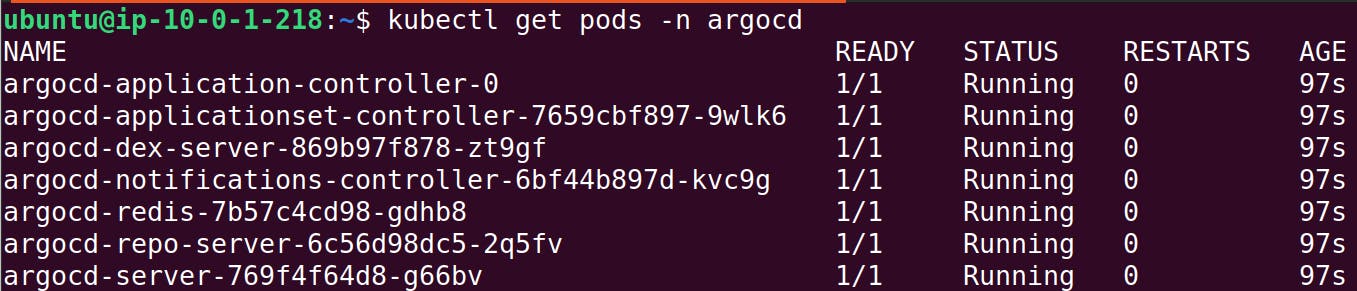
This will deploy the necessary resources. You can check running pods.
kubectl get pods -n argocd
To access ArgoCD in a web browser, we need to configure its service to use a LoadBalancer.
kubectl patch svc argocd-server -n argocd --type='json' -p='[{"op": "replace", "path": "/spec/type", "value":"LoadBalancer"}]'

Get URL of Loadbalancer by following command.
kubectl get svc argocd-server -n argocd -o jsonpath="{.status.loadBalancer.ingress[0].hostname}"
Open URL on web browser.
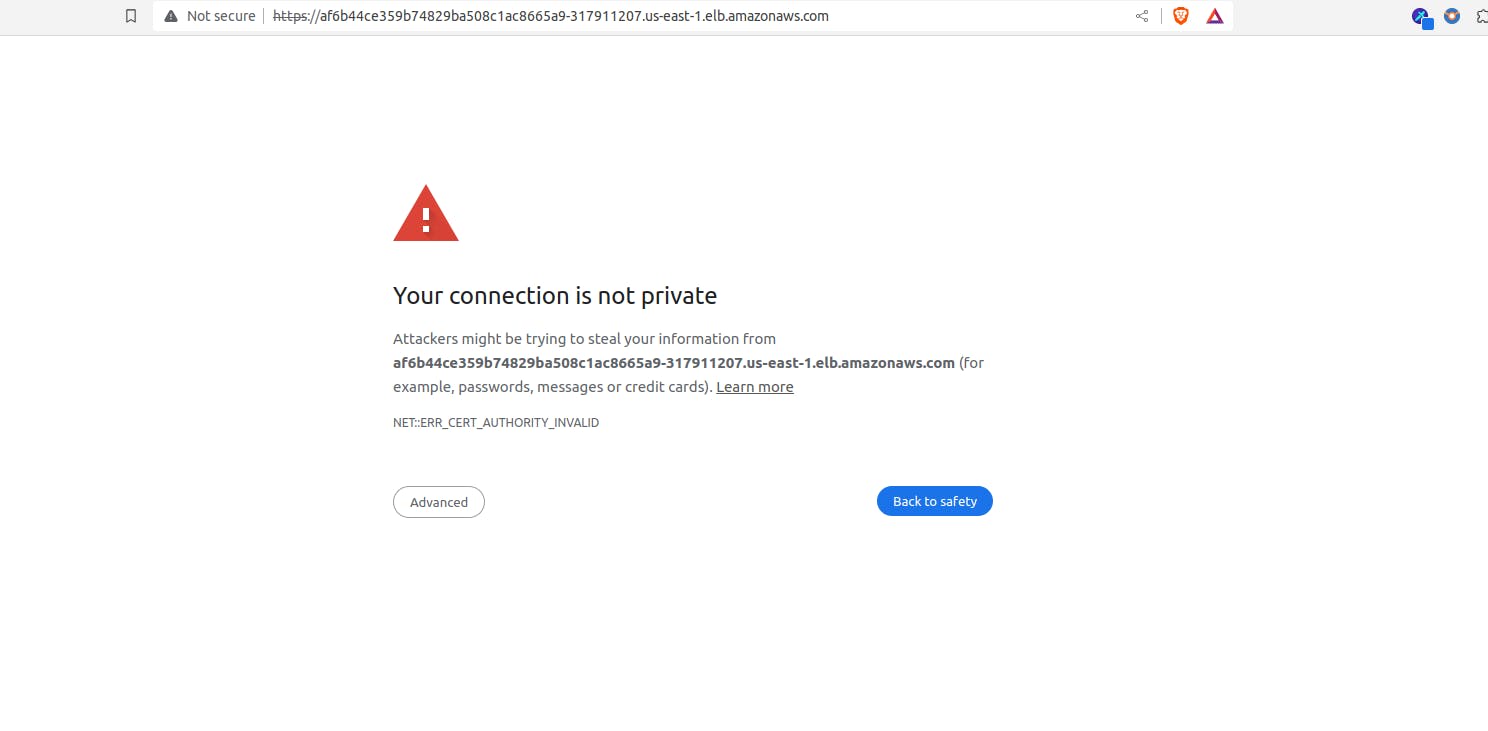
You may encounter a connection is not secure error, but you can click on Advanced and then proceed to open it.
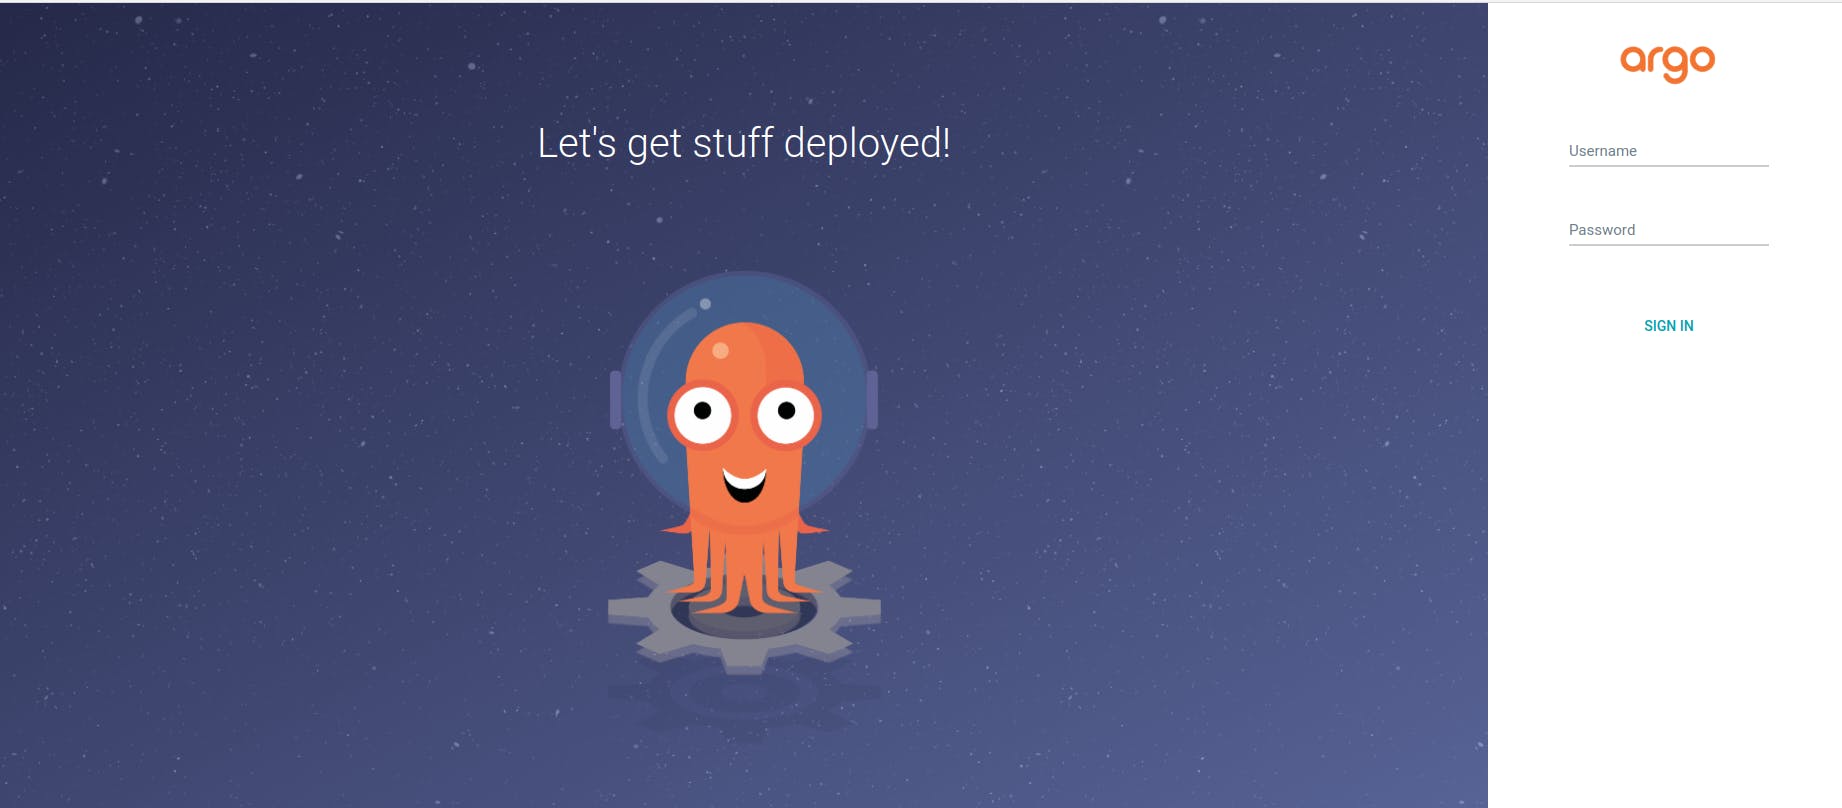
Username is admin and to get password run following command.
kubectl -n argocd get secret argocd-initial-admin-secret -o jsonpath="{.data.password}" | base64 -d
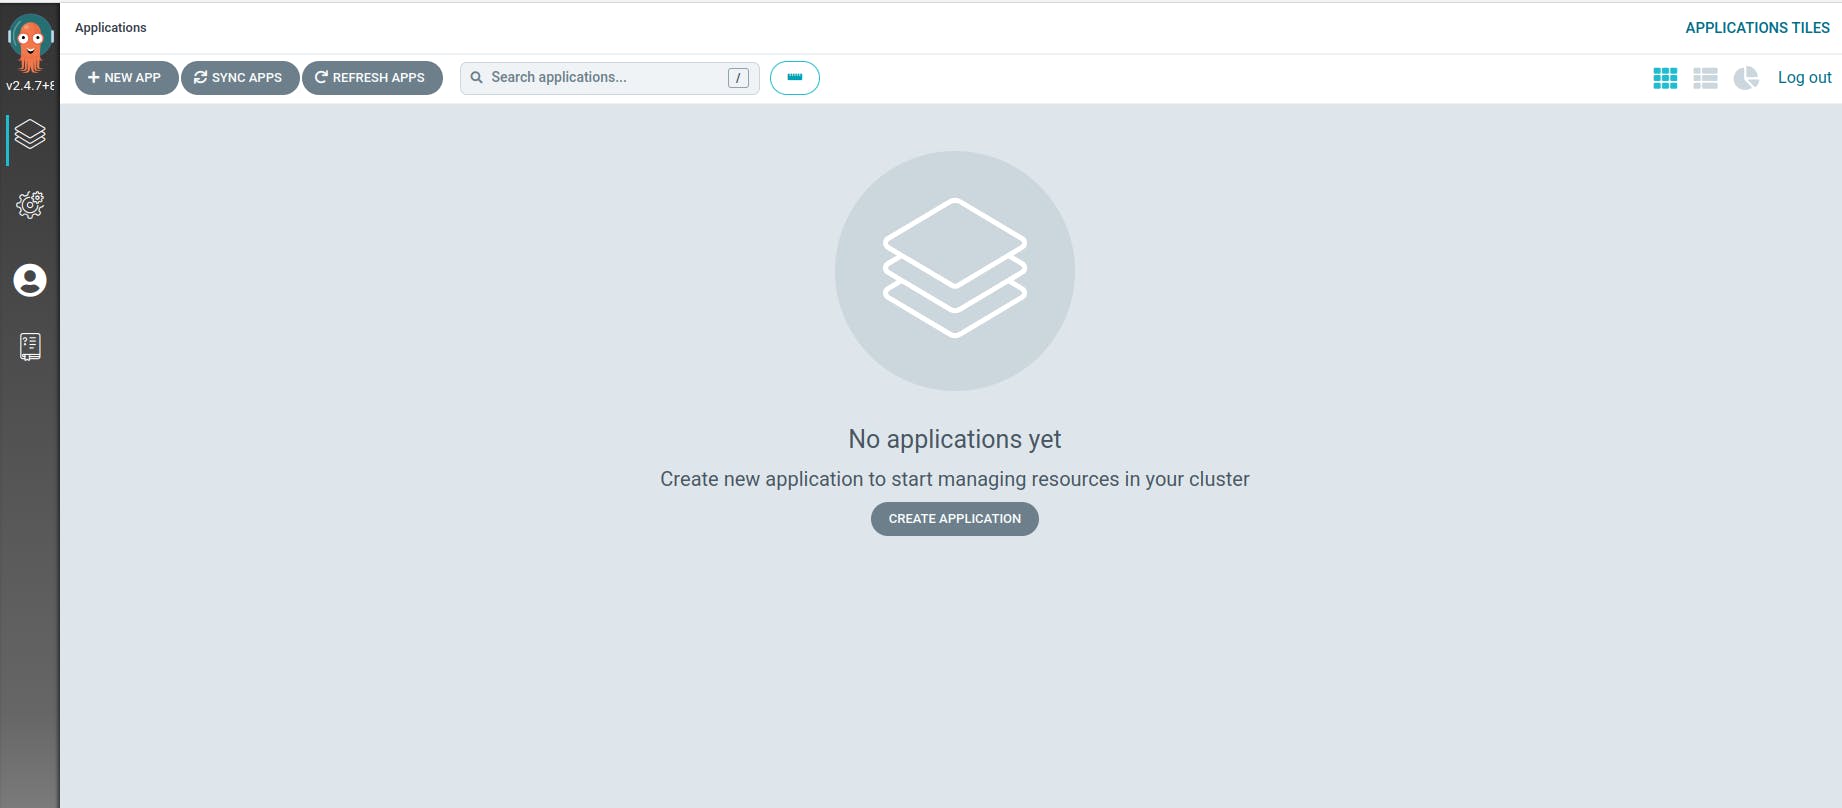
Step 10 : Deploy application on cluster using ArgoCD
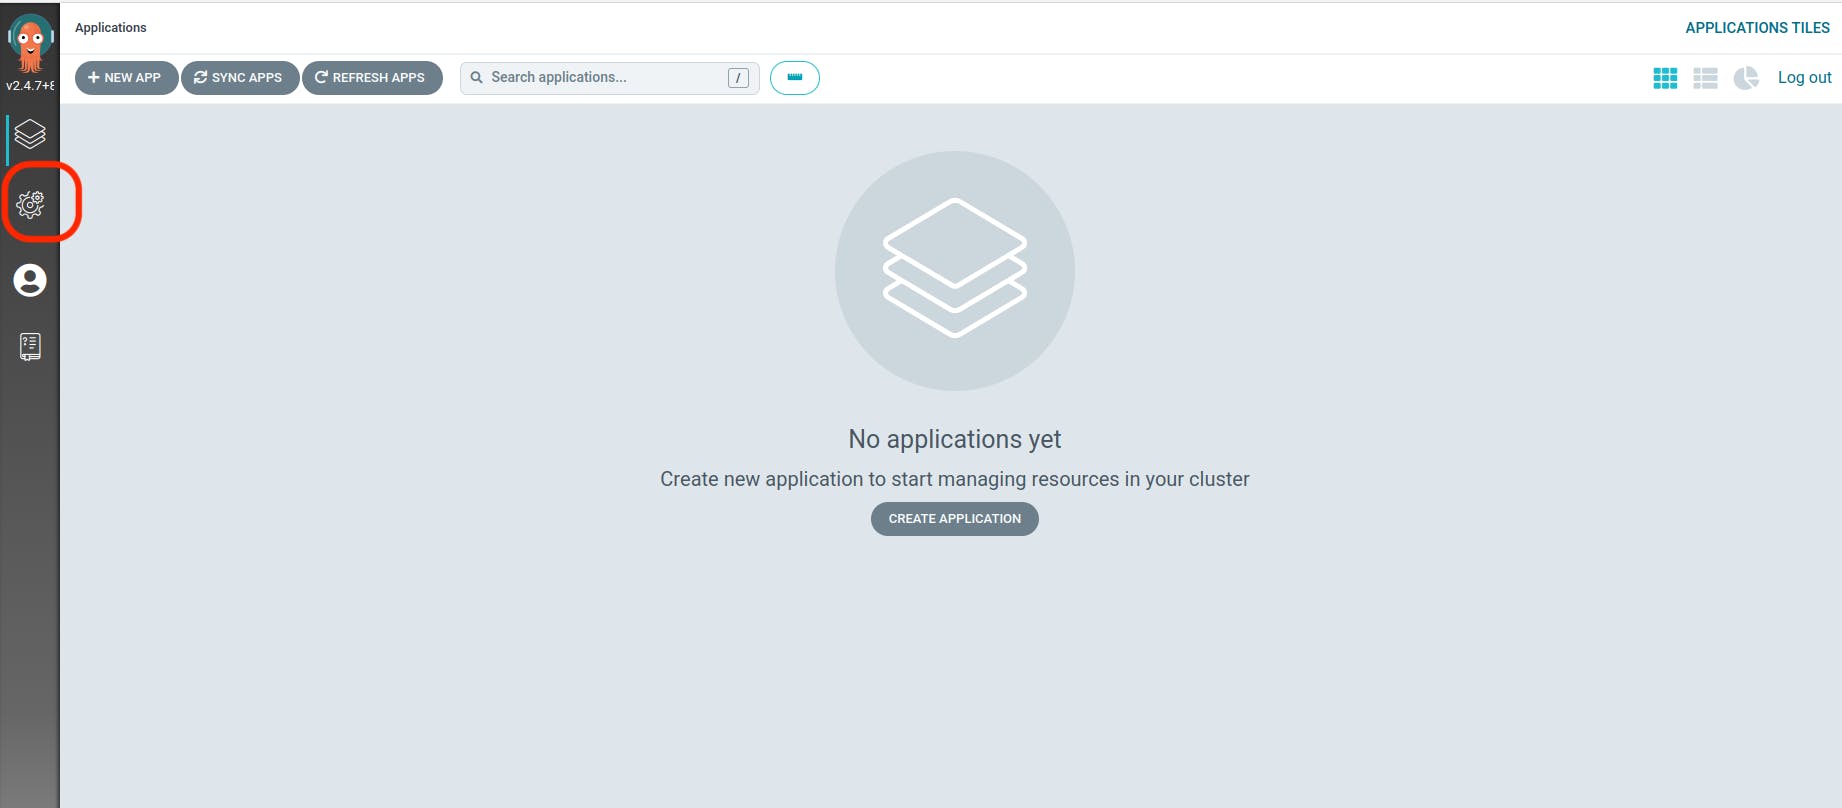
Navigate to the "Settings" in the left panel of the ArgoCD dashboard.
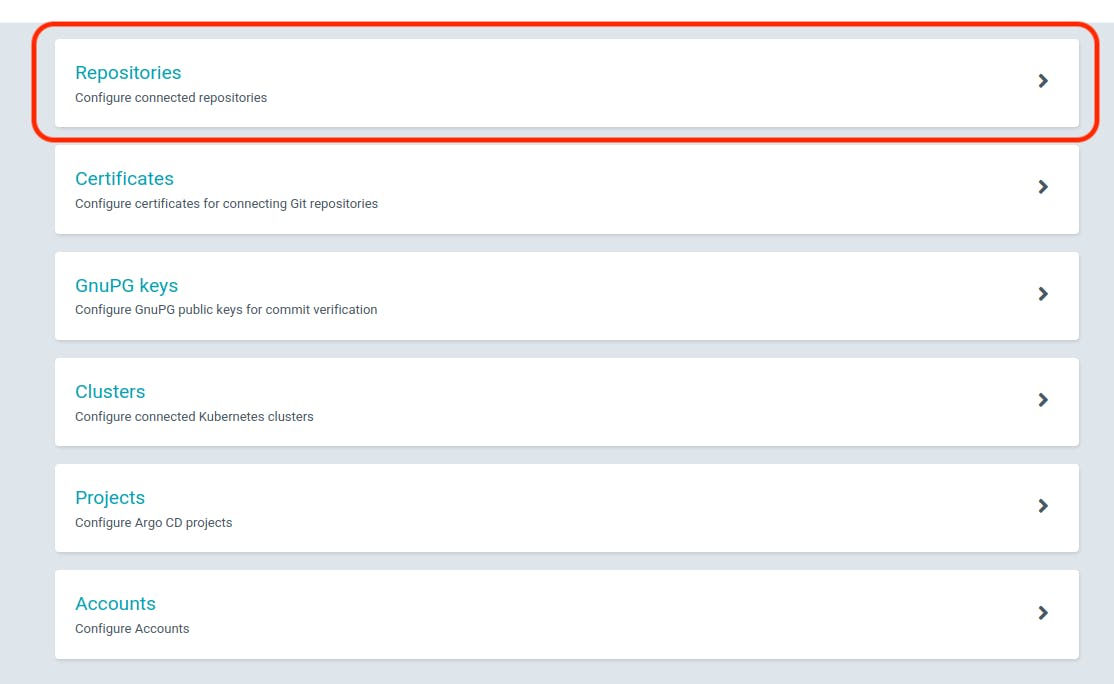
Click on "Repositories."
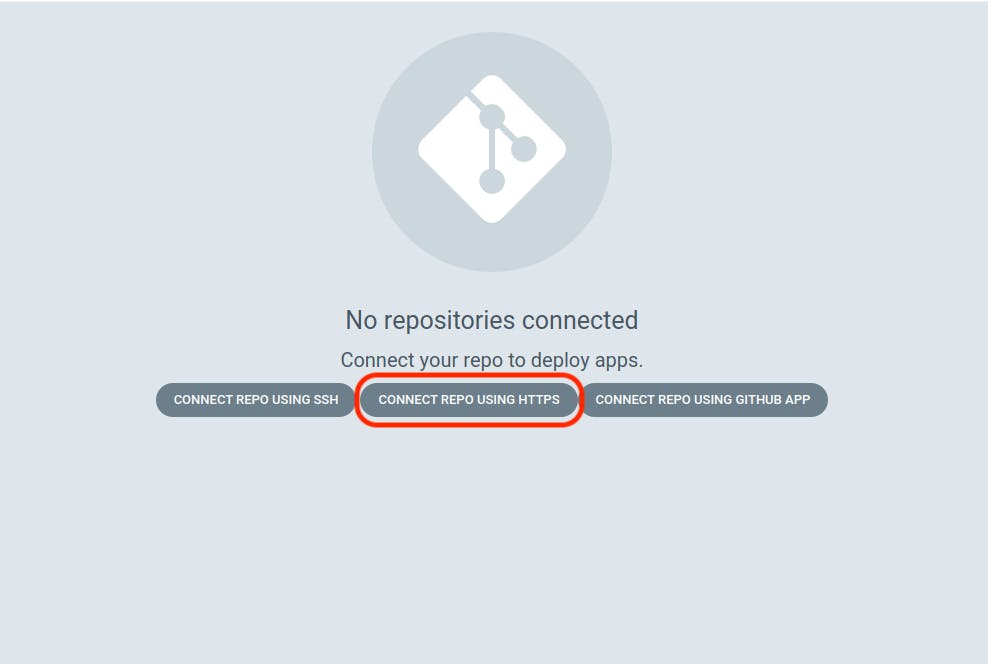
Select "CONNECT REPO USING HTTPS."
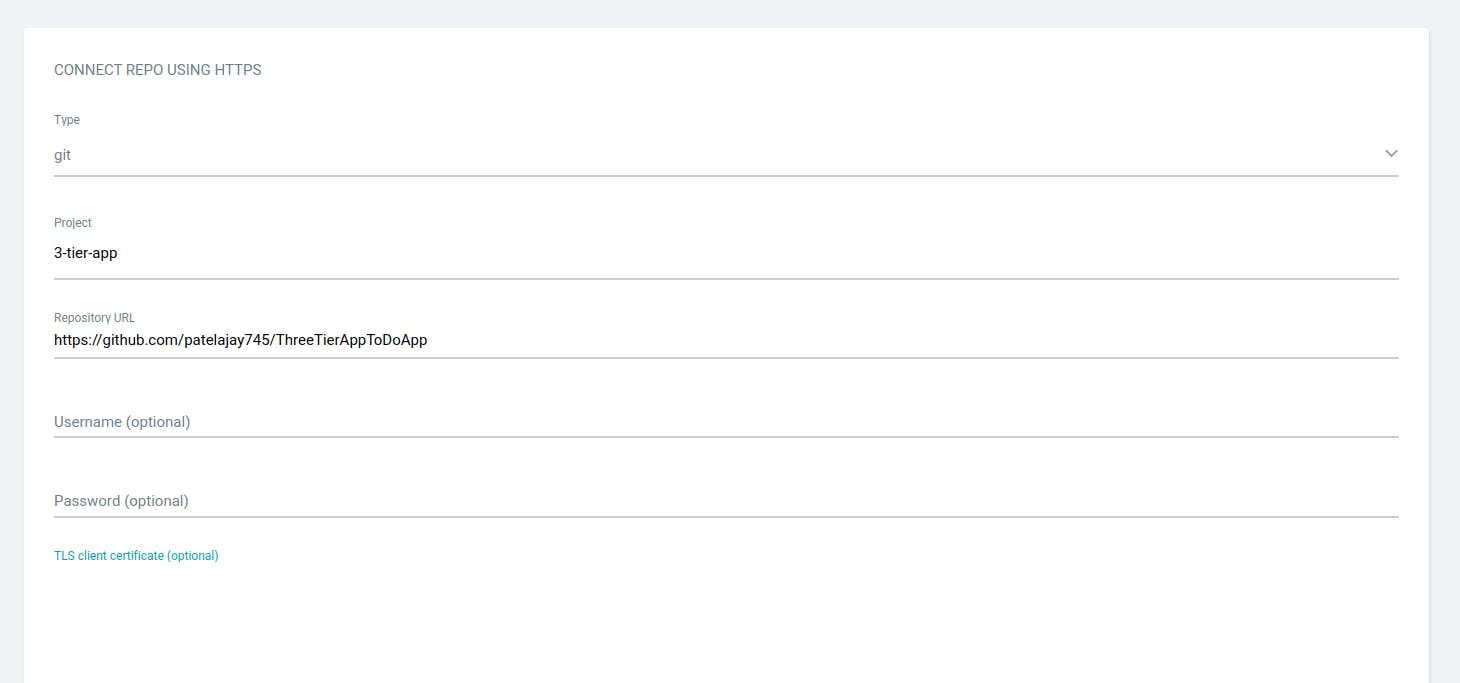
Provide the repository name where your Manifest files are located and click on "CONNECT."
Verify the connection status; a successful status indicates the repository connection was established.

Next, create your initial application, starting with a database.
Click on "CREATE APPLICATION."
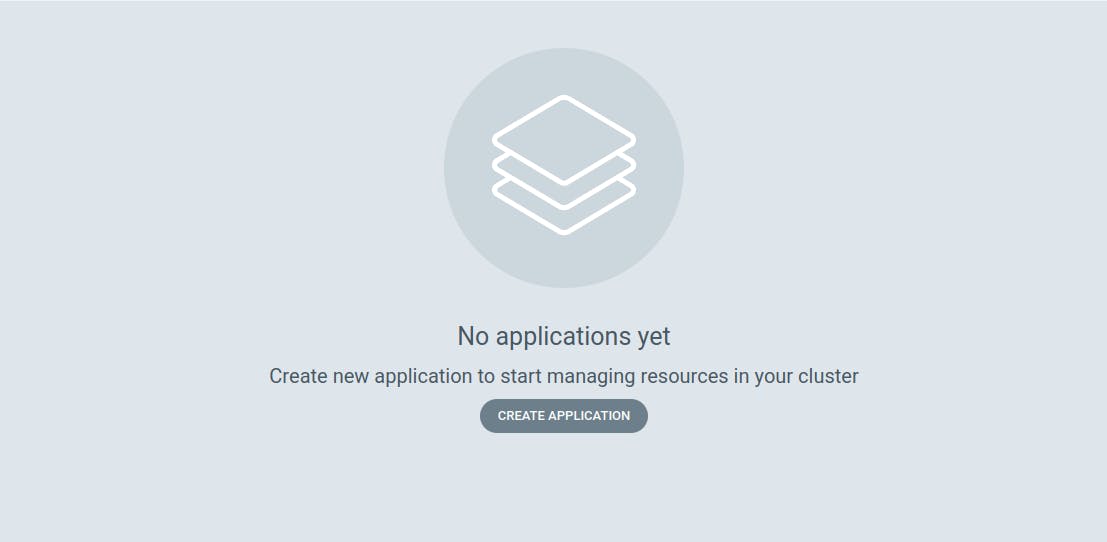
Provide the details as it is provided in the below snippet and scroll down.

Select the repository you configured in the earlier step.
In the "Path" field, specify the location where your manifest files are located, and provide the other necessary details as illustrated in the screenshot below.
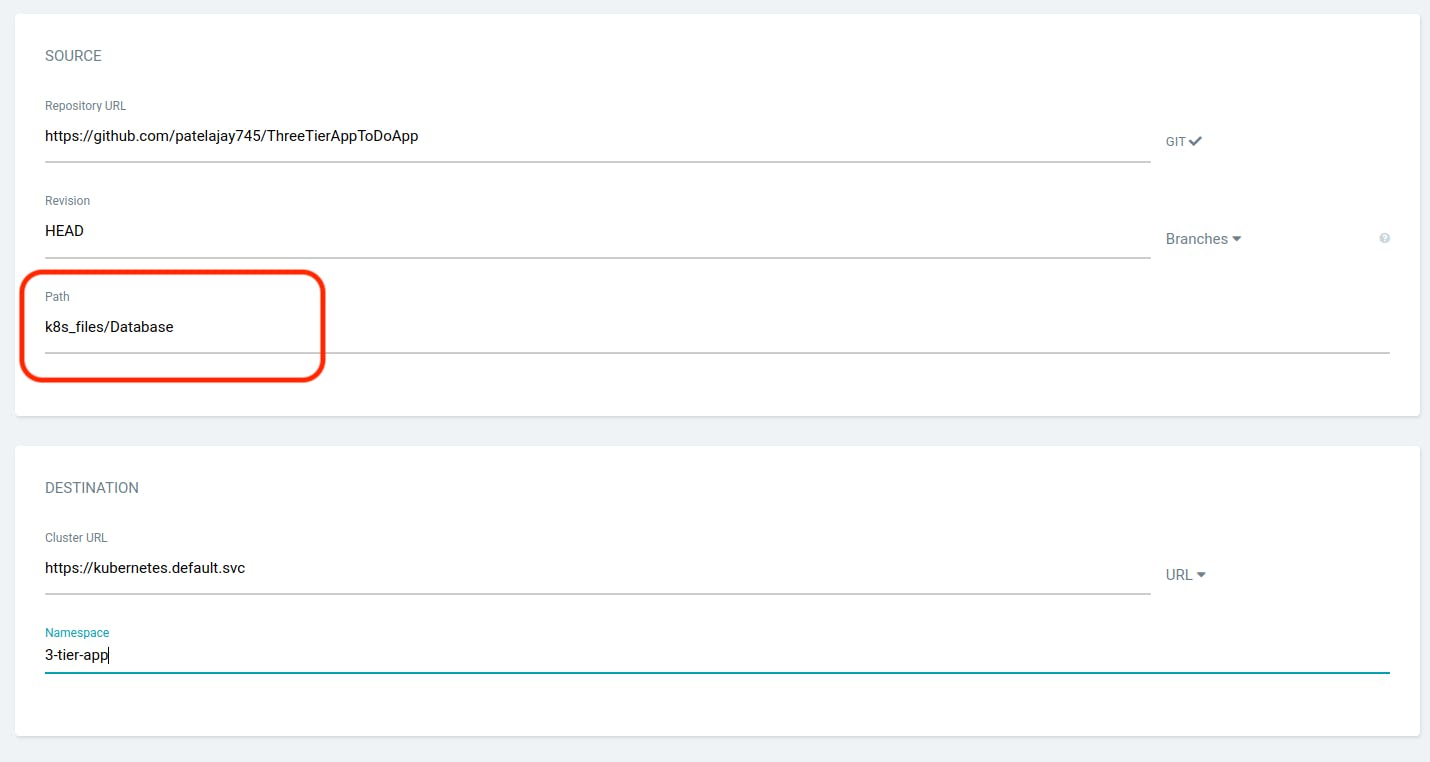
Click on CREATE.
While your database application is starting to deploy, we will create an application for the backend.
Click on "New App."

In the Path, provide the location where your backend manifest files are presented, and fill in other details as shown in the screenshot below.
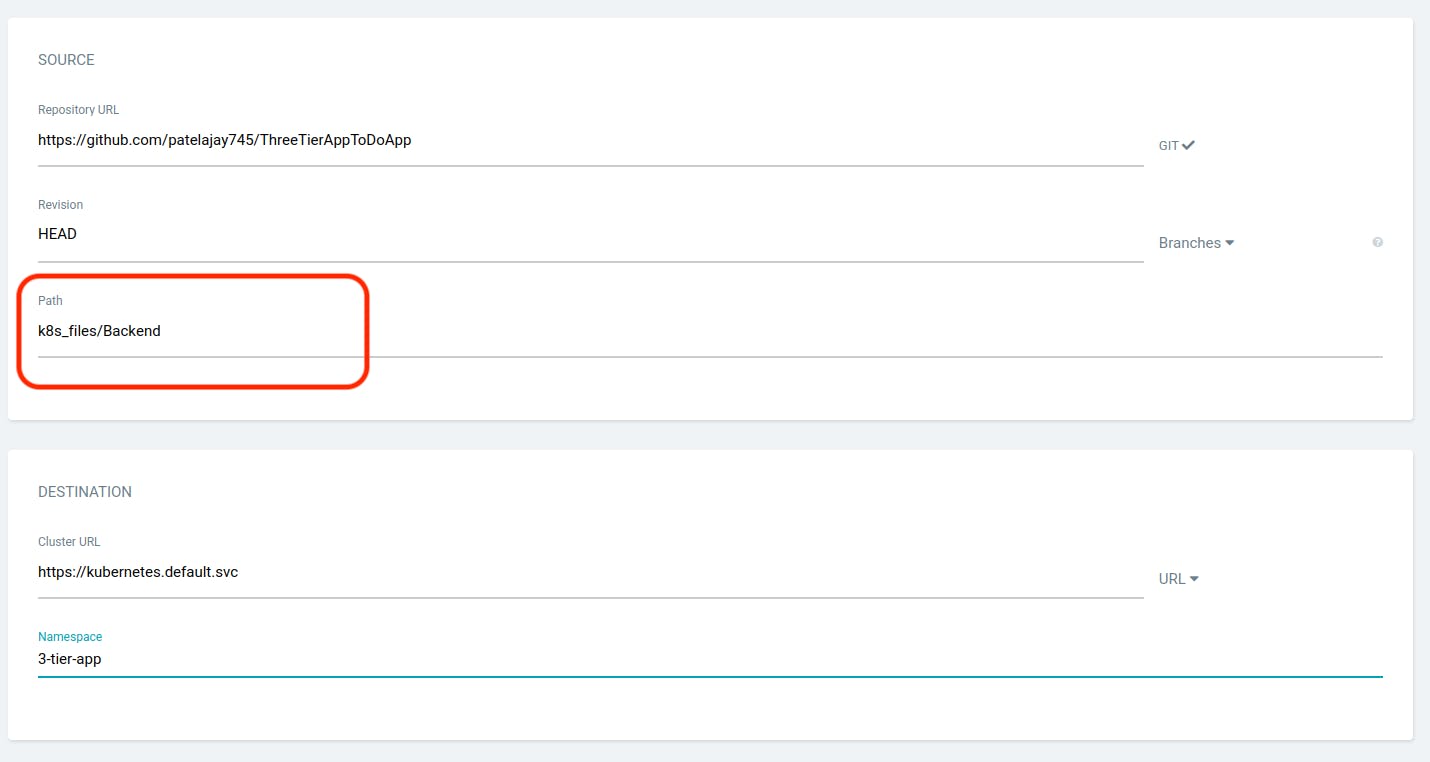
Click on "CREATE." While your backend application is starting to deploy, we will create an application for the frontend. Click on "New App."
Provide the details as provided in the snippet below and scroll down.
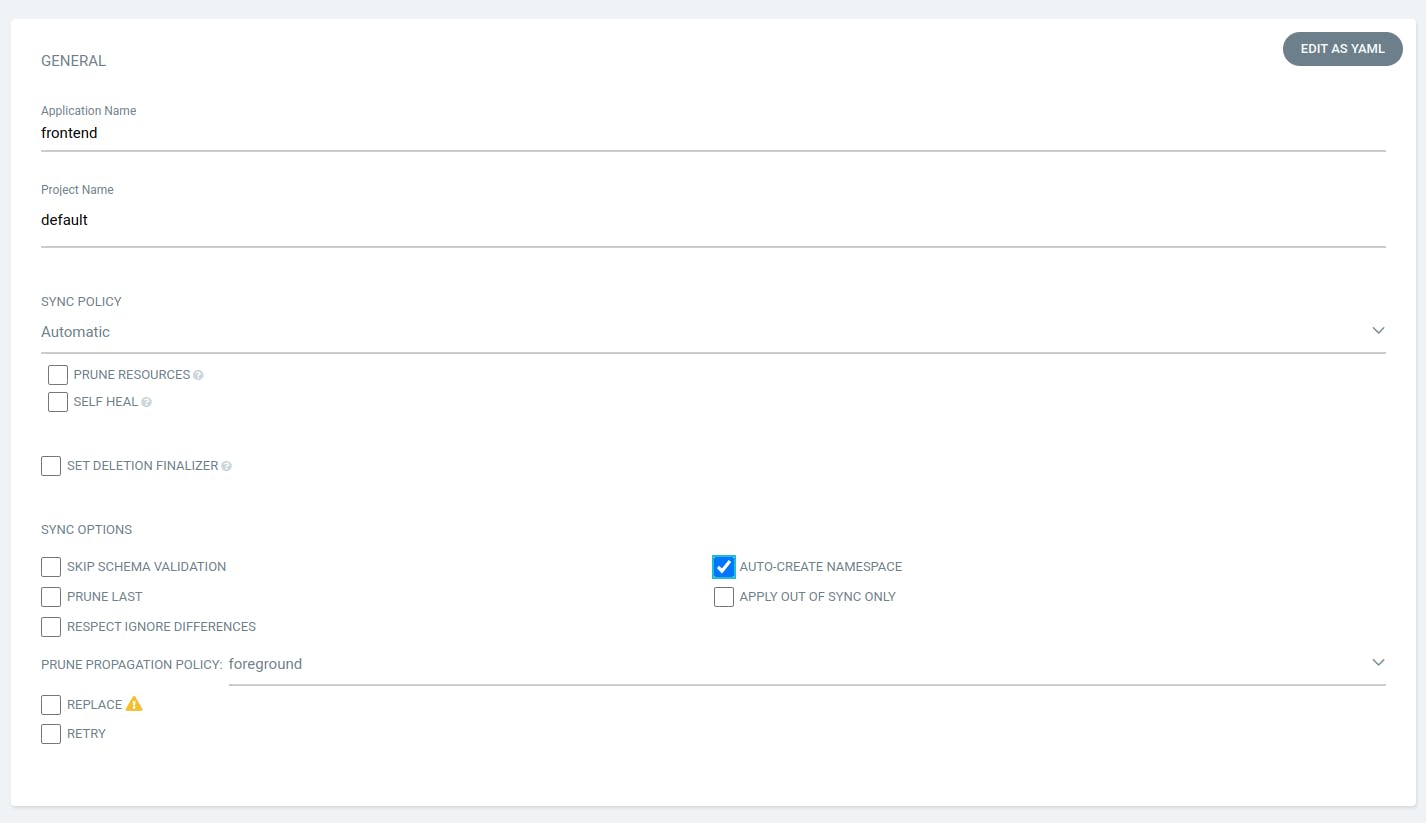
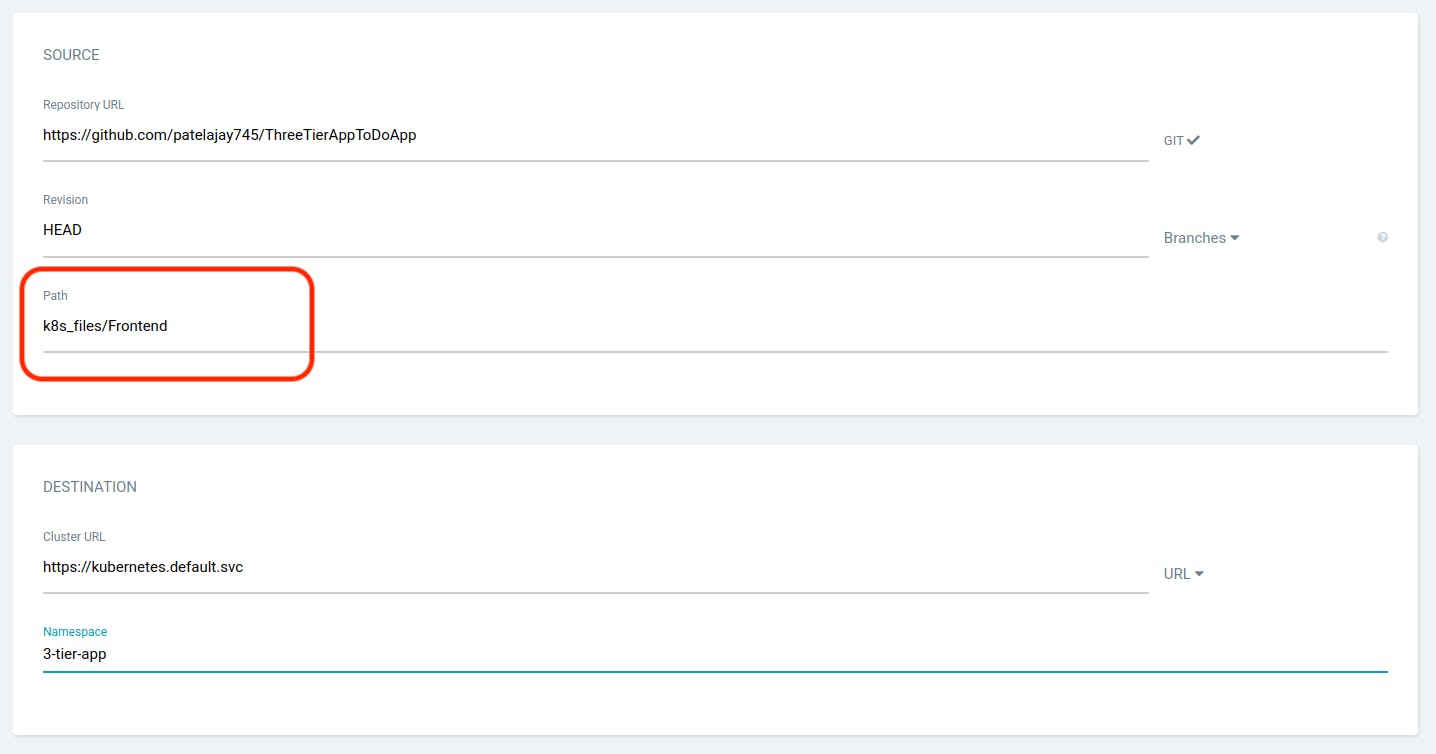
Click on "CREATE." While your frontend application is starting to deploy, we will create an application for the ingress.
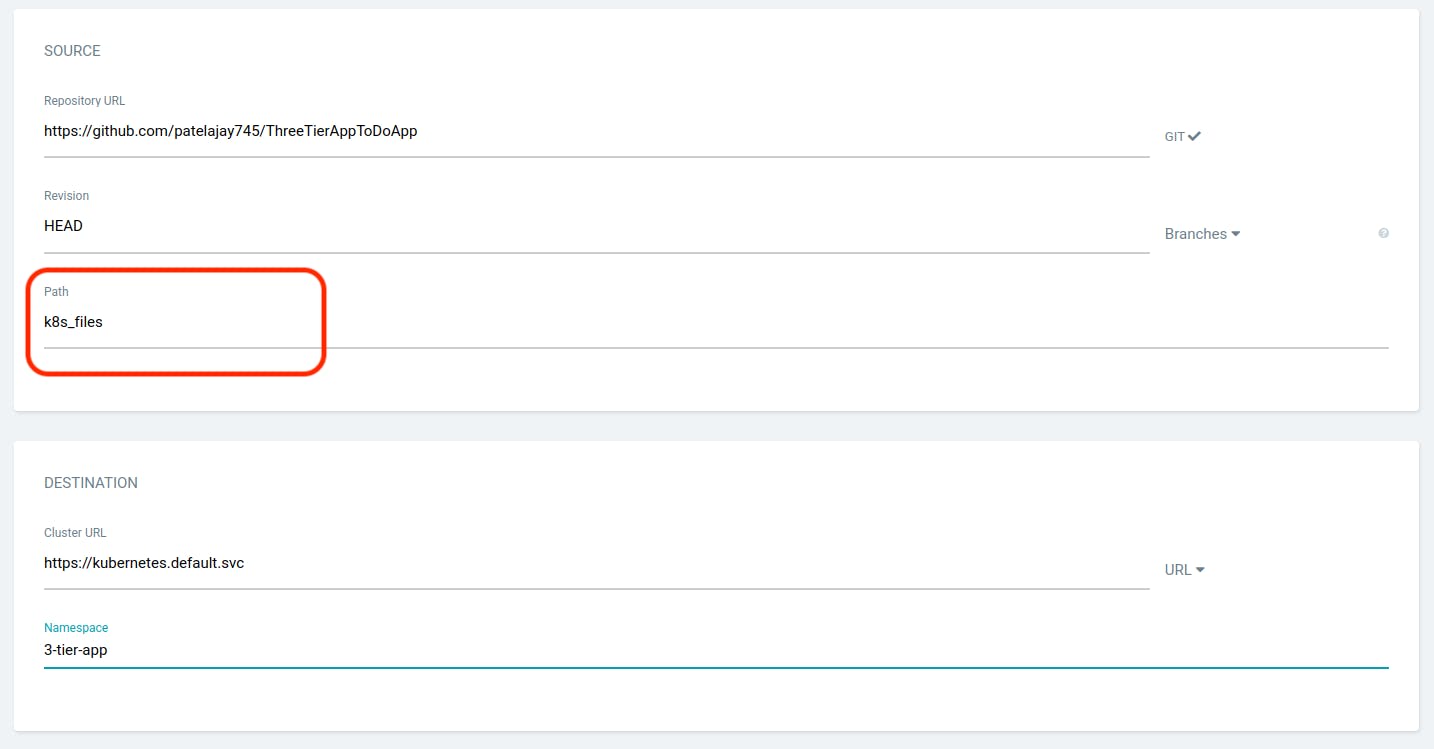
Provide the details as shown in the snippet below and scroll down.
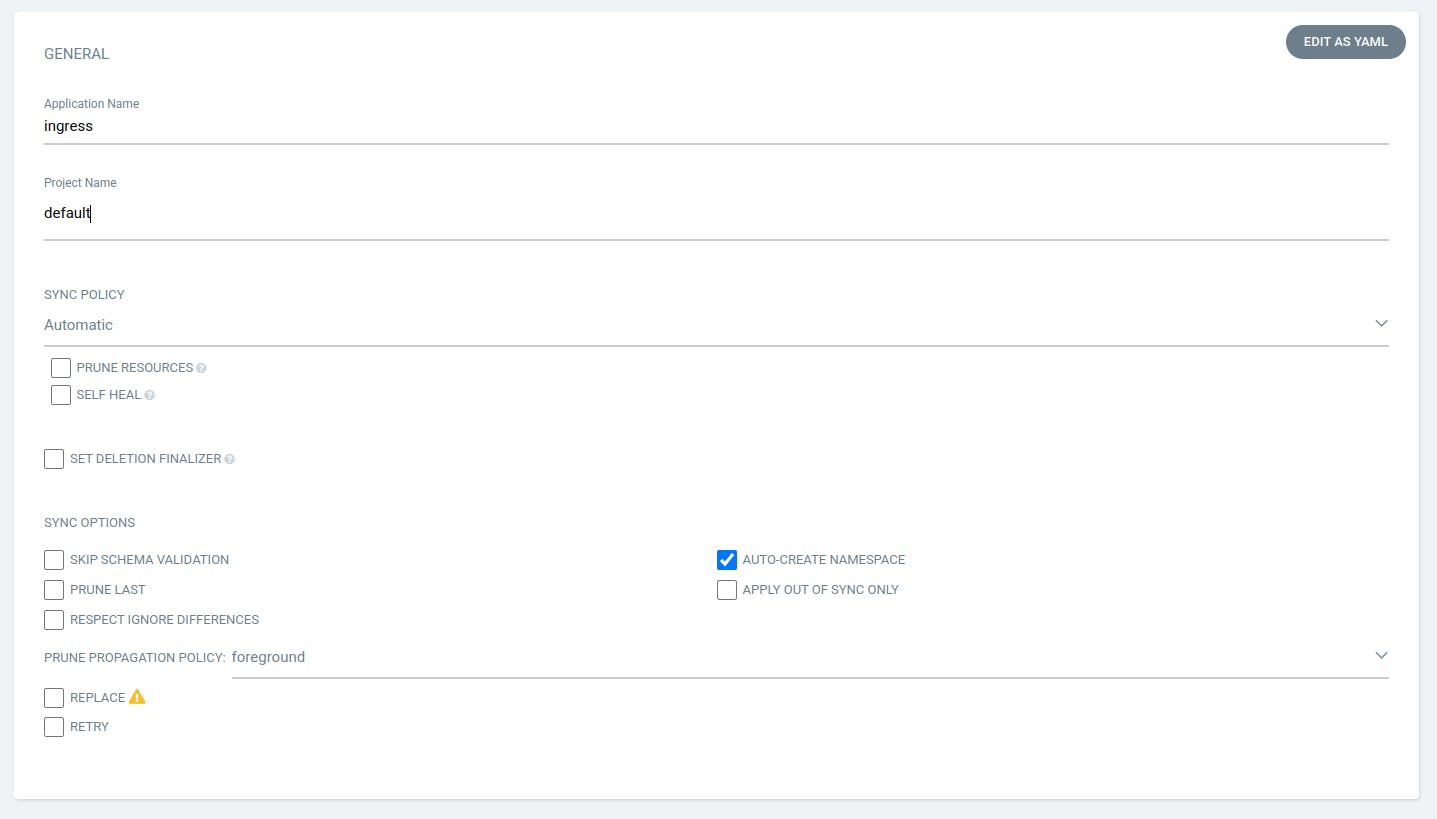
In the Path, provide the location where your Manifest file of ingress are presented and provide other things as shown in the below screenshot.
Now, check your deployment. Everything should look nice and green.
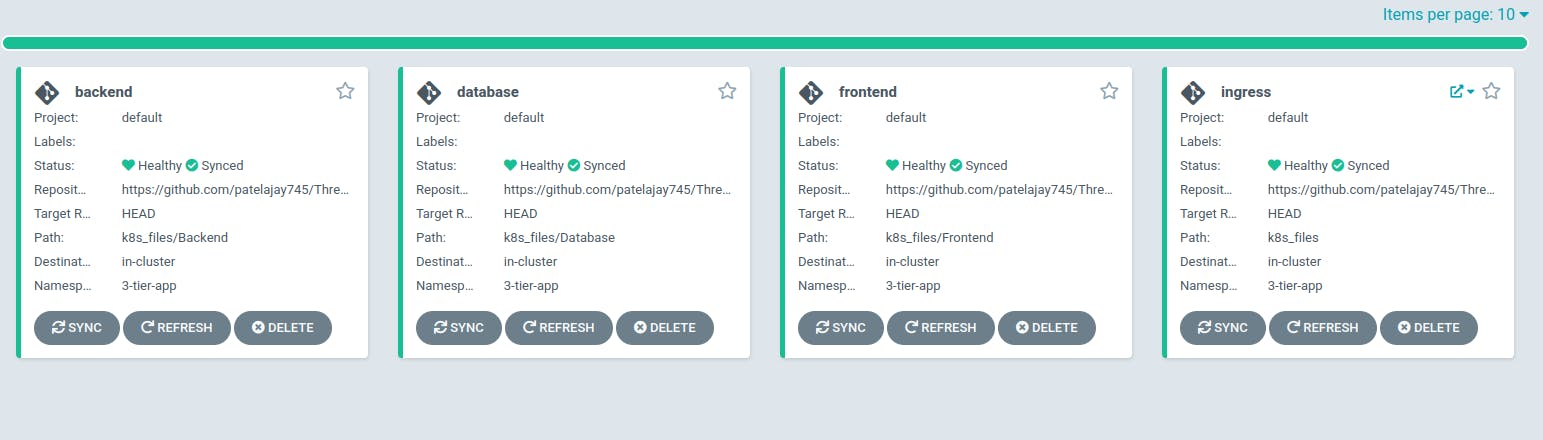
You can observe the deployment of your new Kubernetes 3-tier app's main load balancer and wait until it is fully provisioned.

Get URL of Loadbalancer by running following command.
k get ing mainlb -n 3-tier-app -o jsonpath="{.status.loadBalancer.ingress[0].hostname}"
If you attempt to use that URL in a web browser, it will not function because we have specified a domain name in the Ingress. Therefore, setting up the DNS for the domain is necessary to access our web application.
Step 11 : Setting up DNS on Route53.
Navigate to Route53 -> Hosted zones, select the domain name you want to configure. Remember to use the same domain or subdomain name as used in the Ingress manifest file.
Click on "Create Record."
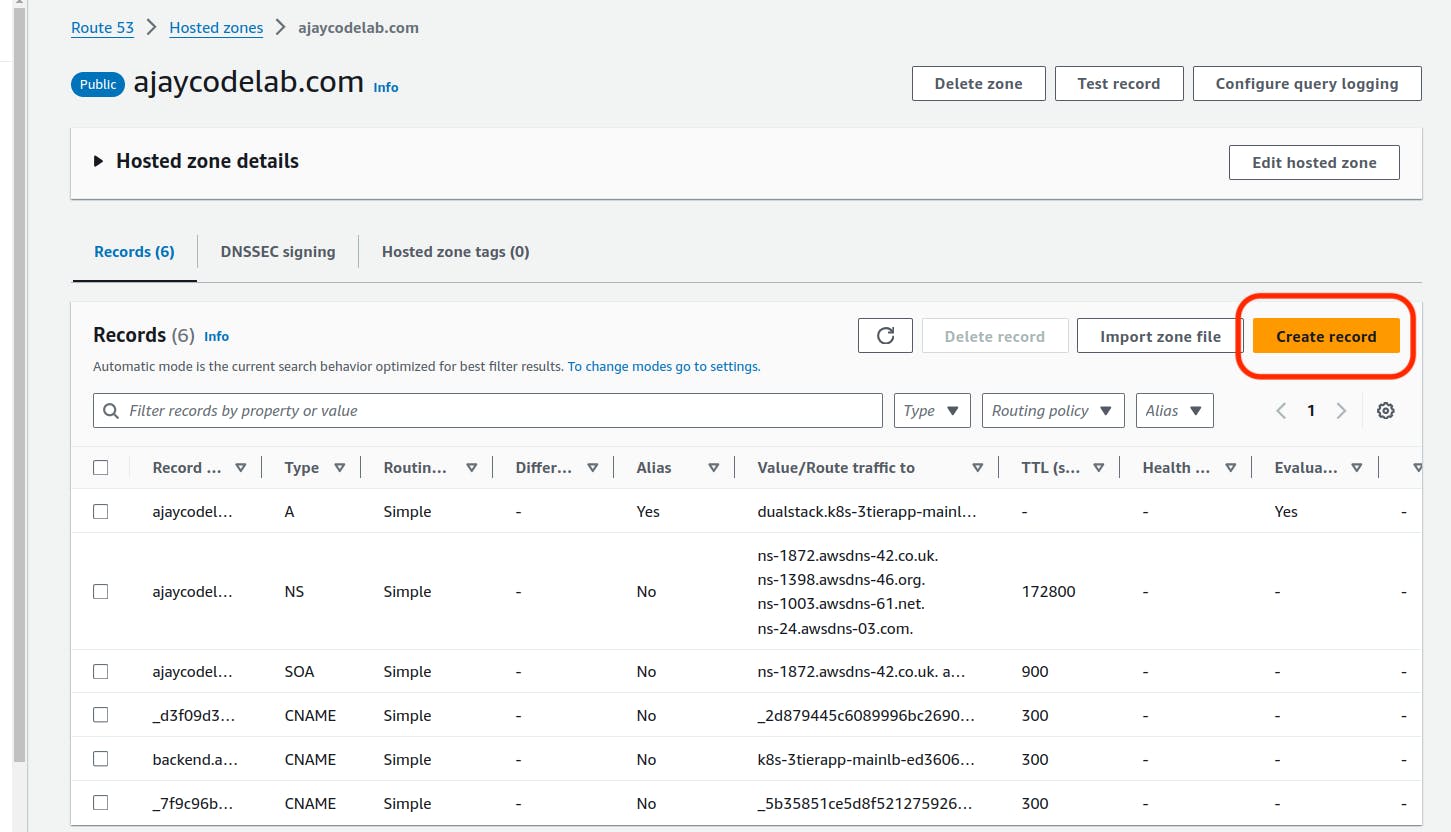
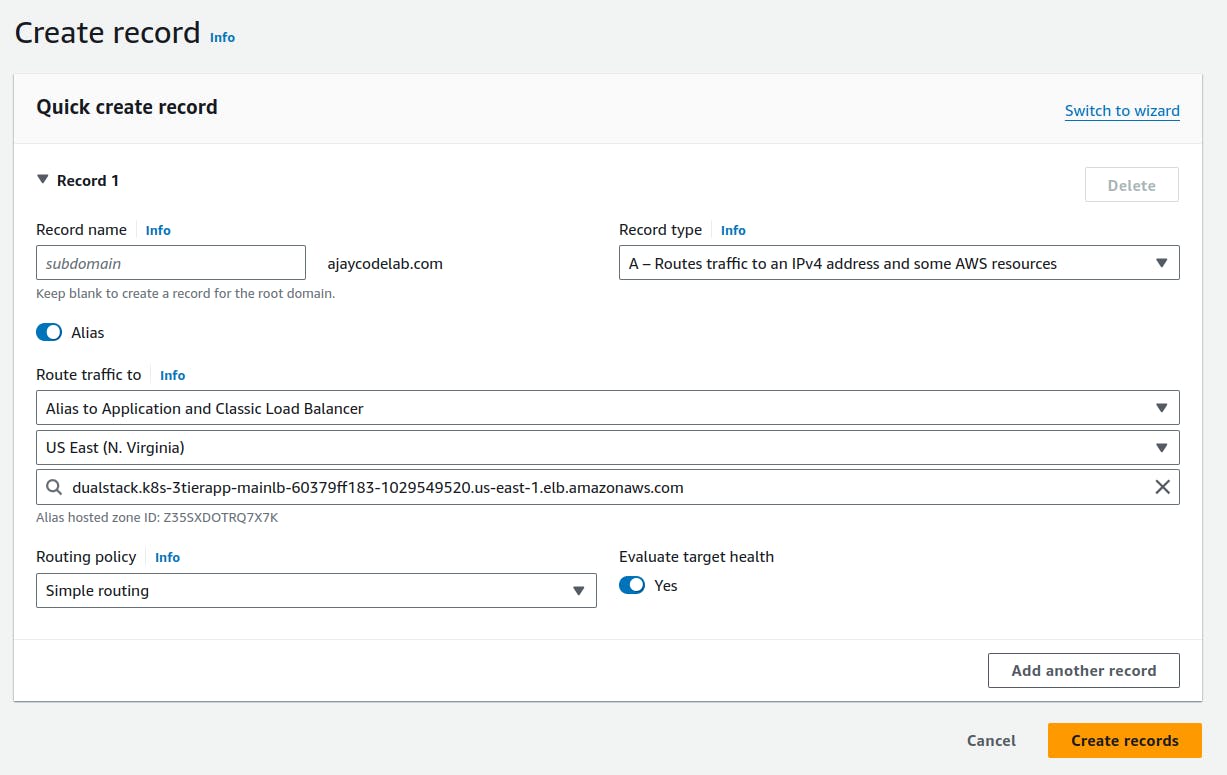
If you have utilised a subdomain in the Ingress file, please input it as the record name. Choose "A" as the record type and select "Alias." For the endpoint, choose "Application and Classic Load Balancer." Specify the region, locate your load balancer name, select it, and click on "Create Records."
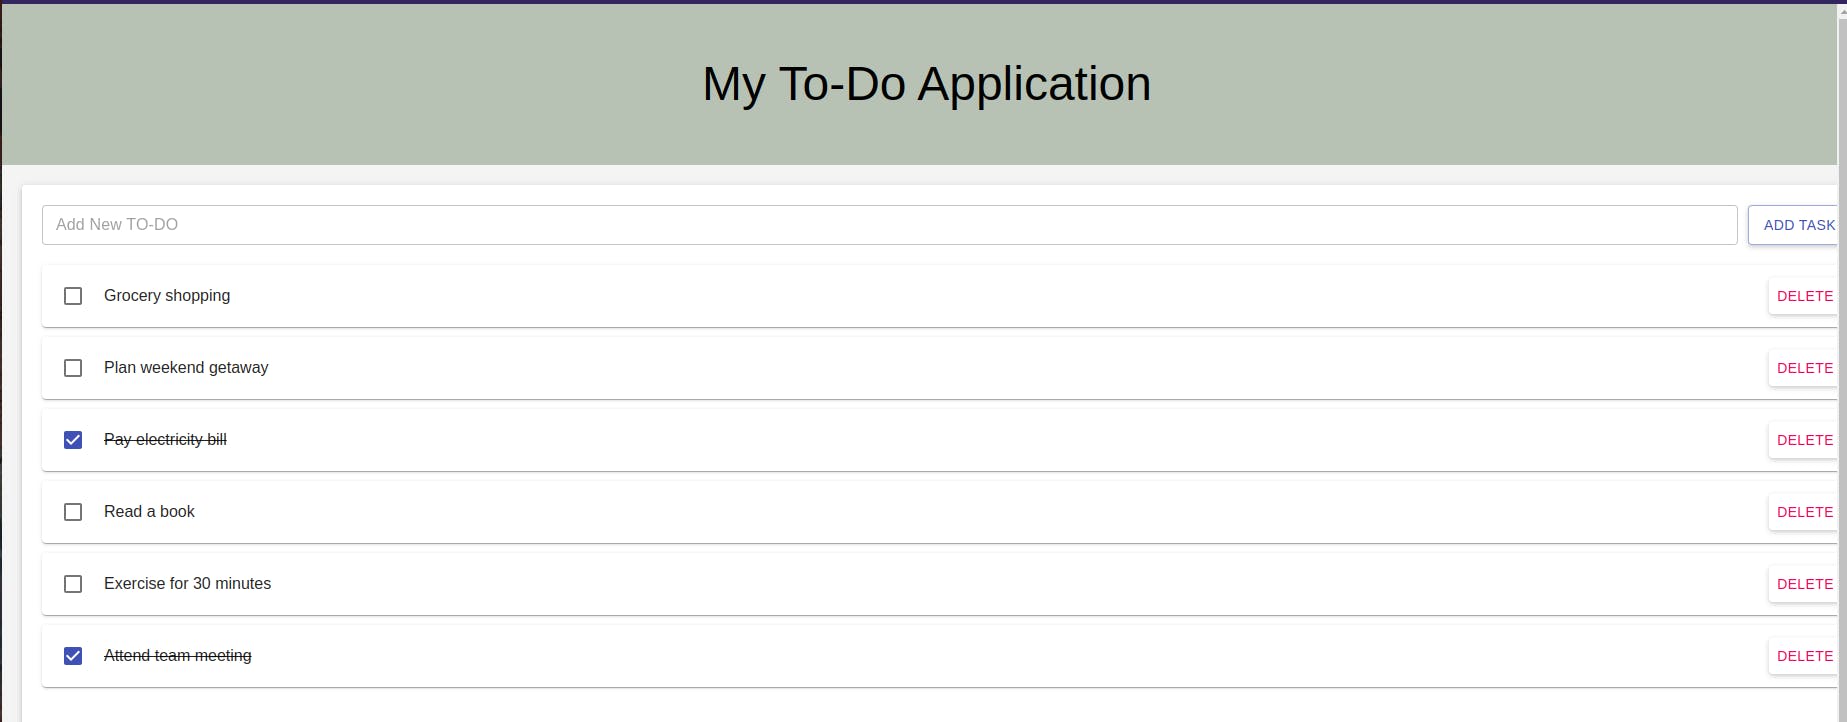
Awesome! Your ToDo Application is now live! 🚀 We've implemented Persistent Volumes (pv) and Persistent Volume Claims (pvc), ensuring your data stays intact even if the database pods are unexpectedly deleted. 🛡️📊
Step 12 : Setting up Monitoring.
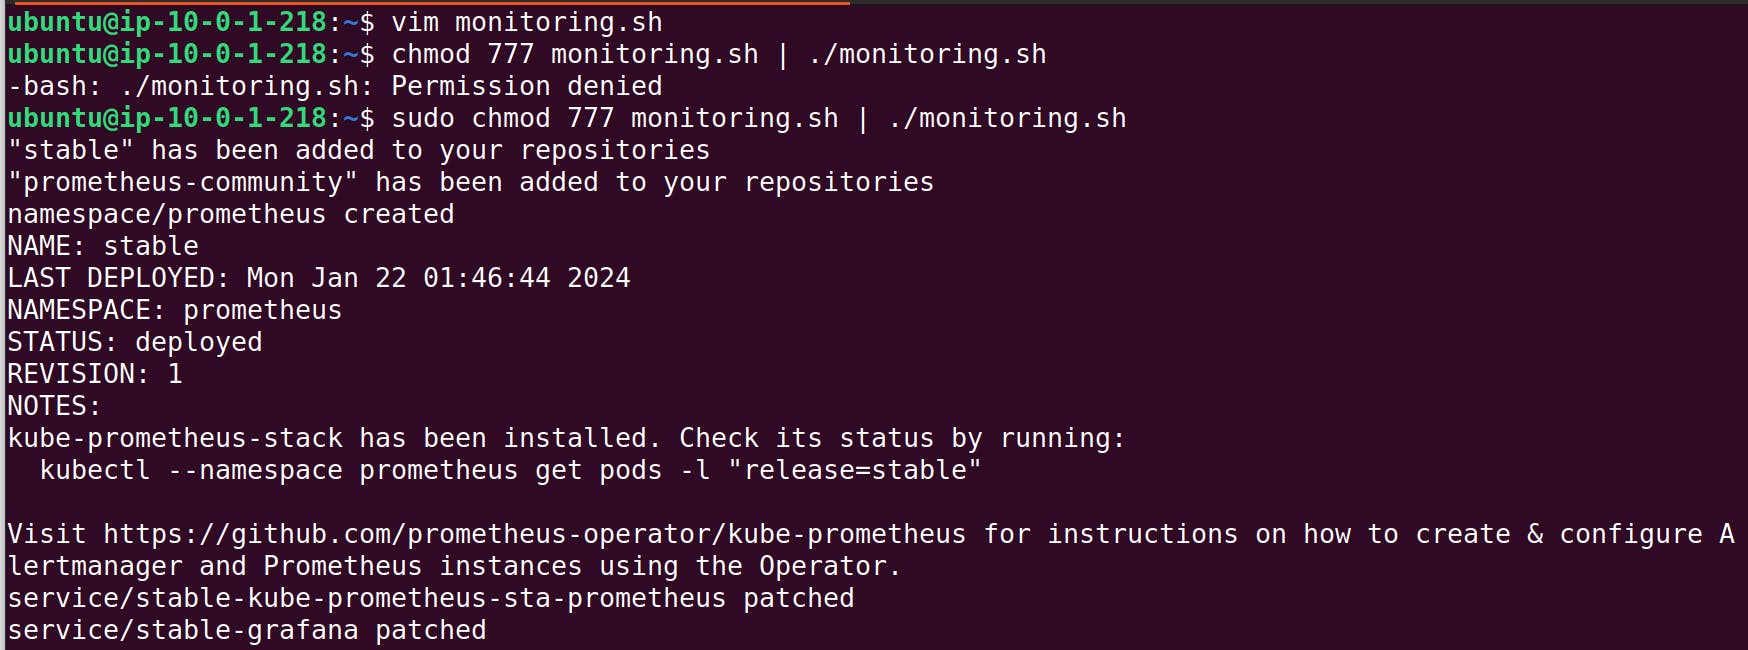
Use the following shell script to install Grafana and Prometheus using Helm charts. The provided script will also set up everything for monitoring. Run the script on the Jenkins server.
monitoring.sh
#!/bin/bash

# Add Helm repositories
helm repo add stable https://charts.helm.sh/stable
helm repo add prometheus-community https://prometheus-community.github.io/helm-charts

# Deploy Prometheus
kubectl get namespace prometheus >/dev/null 2>&1
if [ $? -ne 0 ]; then
    kubectl create namespace prometheus
    helm install stable prometheus-community/kube-prometheus-stack -n prometheus
else
    echo 'Namespace prometheus already exists.'
fi

# Patch Services
kubectl patch svc stable-kube-prometheus-sta-prometheus -n prometheus --type=json -p='[{"op":"replace","path":"/spec/type","value":"LoadBalancer"}]'
kubectl patch svc stable-grafana -n prometheus --type=json -p='[{"op":"replace","path":"/spec/type","value":"LoadBalancer"}]'

# Get Service URLs
prometheus=$(kubectl get svc stable-kube-prometheus-sta-prometheus -n prometheus -o jsonpath="{.status.loadBalancer.ingress[0].hostname}" | tr -d '\n')
grafana=$(kubectl get svc stable-grafana -n prometheus -o jsonpath="{.status.loadBalancer.ingress[0].hostname}" | tr -d '\n')
You can run following command on terminal to get URL of Grafana and Prometheus.
kubectl get svc stable-kube-prometheus-sta-prometheus -n prometheus -o jsonpath="{.status.loadBalancer.ingress[0].hostname}"

#for grafana url
kubectl get svc stable-grafana -n prometheus -o jsonpath="{.status.loadBalancer.ingress[0].hostname}"
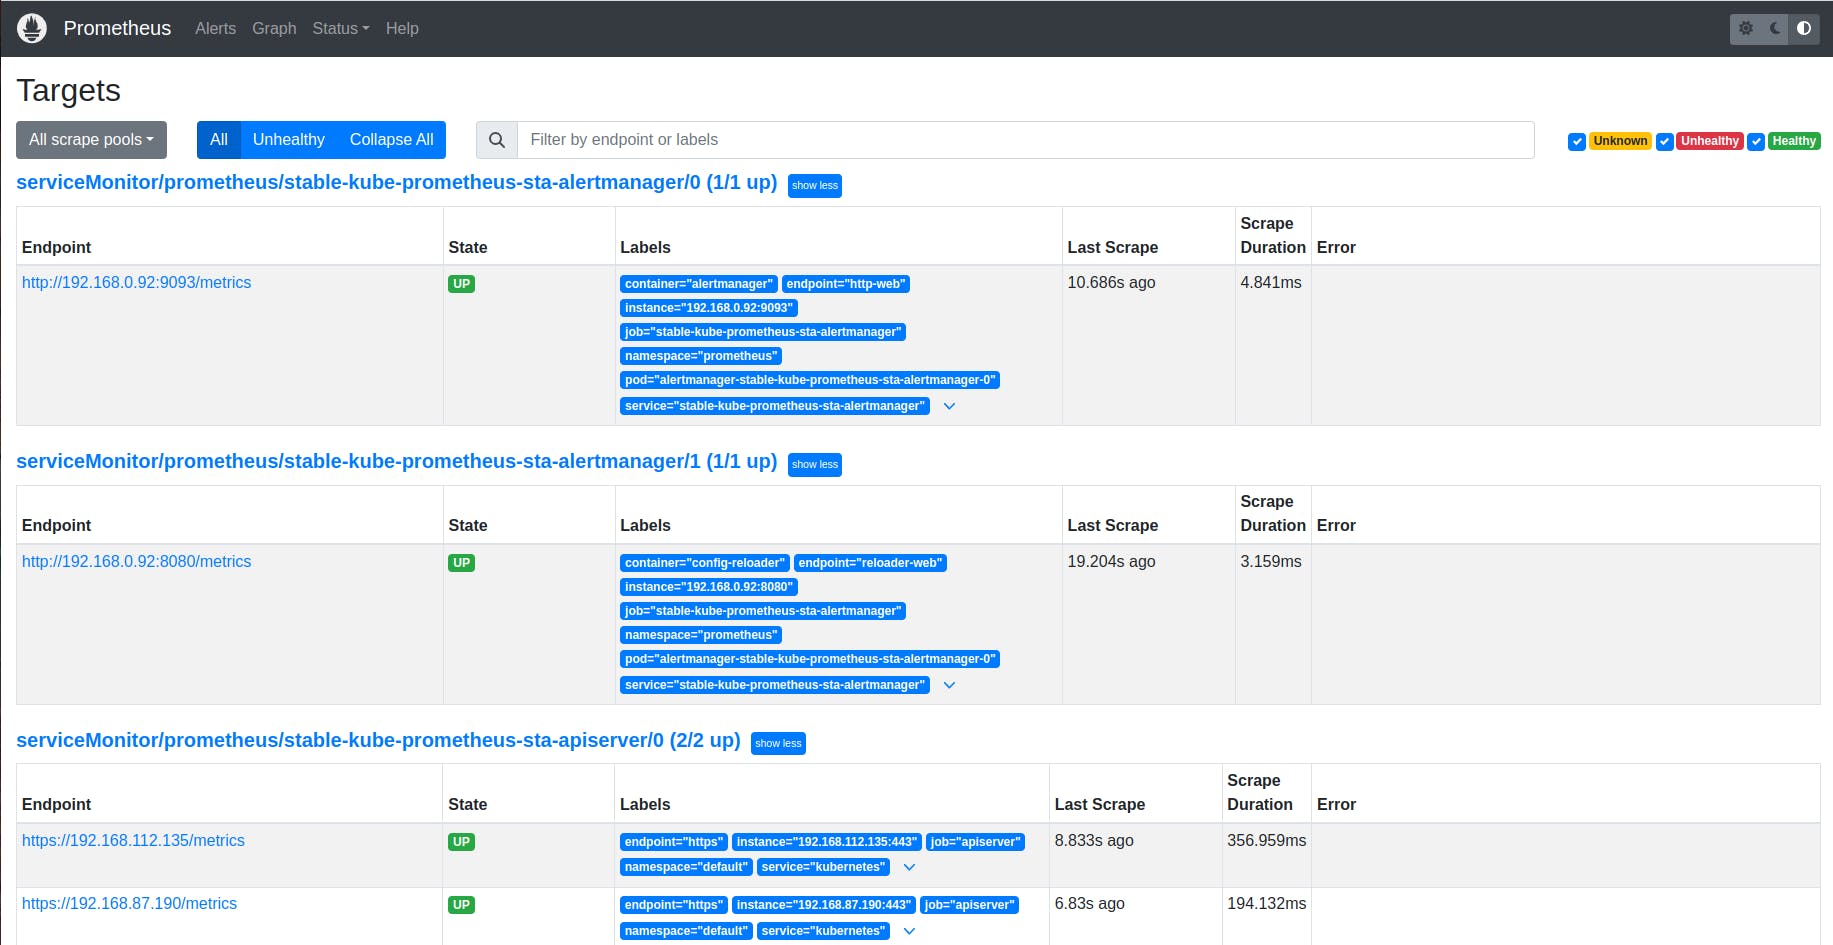
To open promethus url in browser you need to attach ":9090/targets" at end of URL.
To open grafana url you might need to wait for a while.
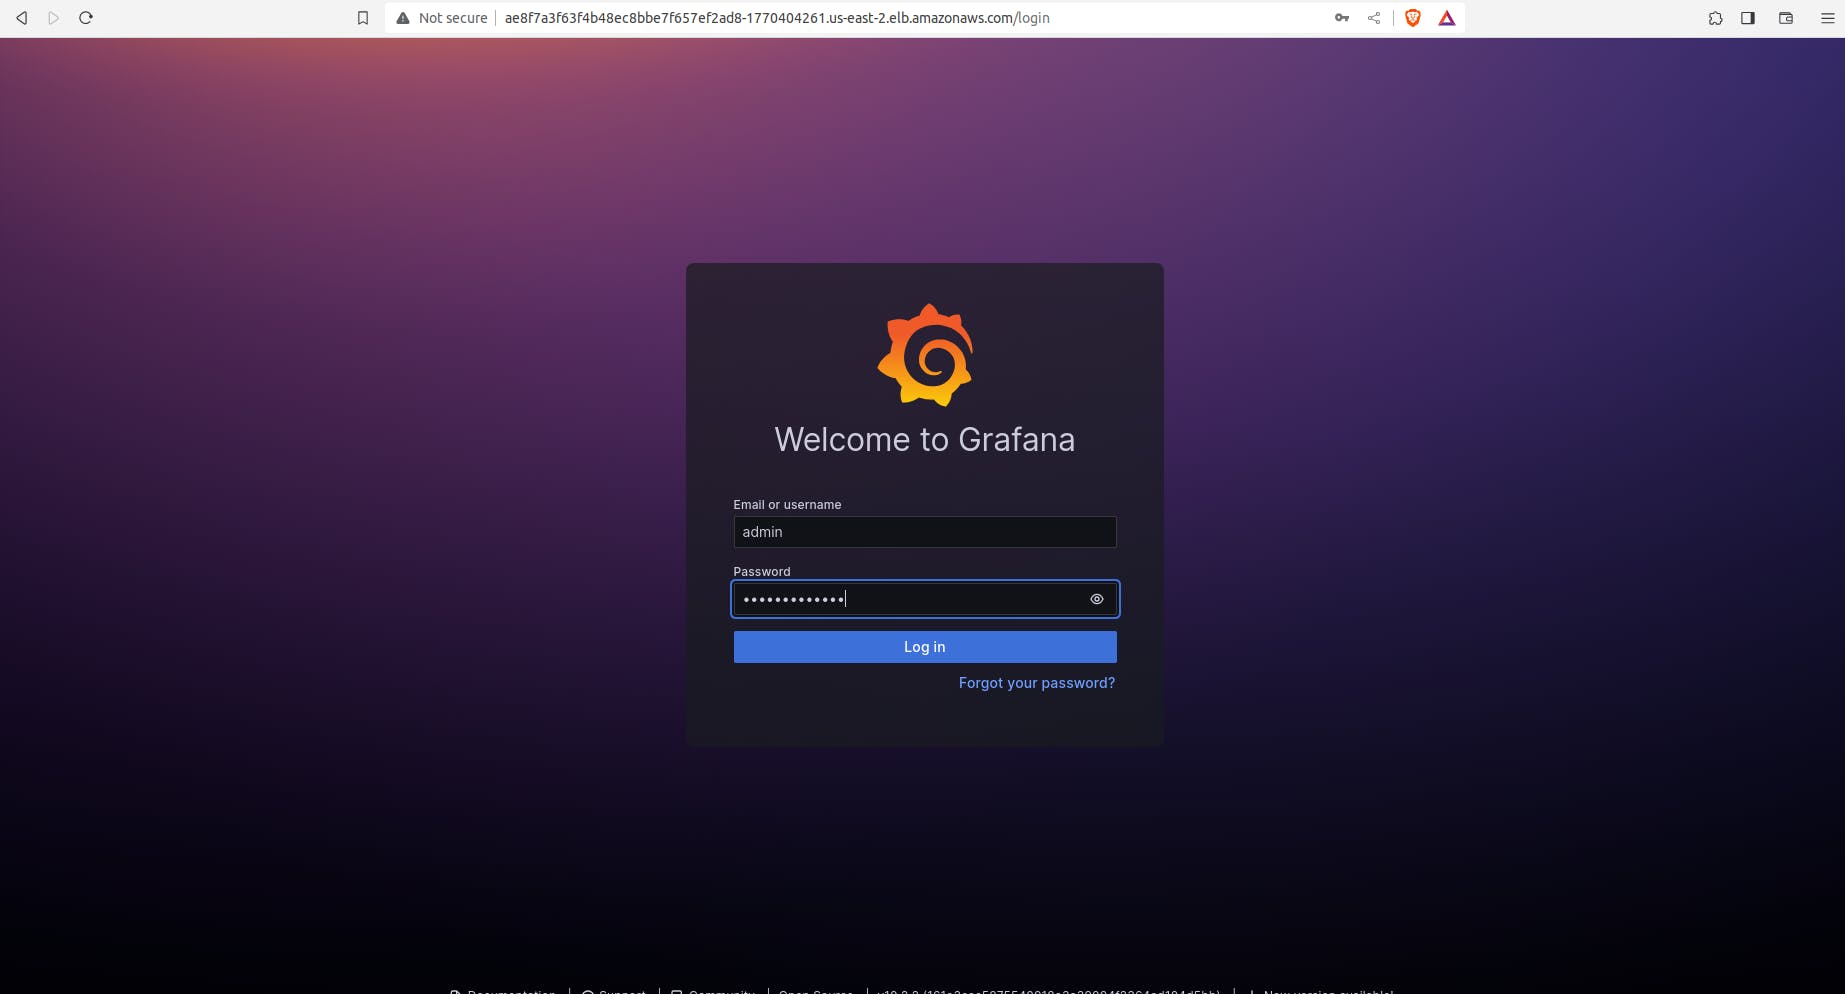
Enter user name "admin" and password "prom-operator"
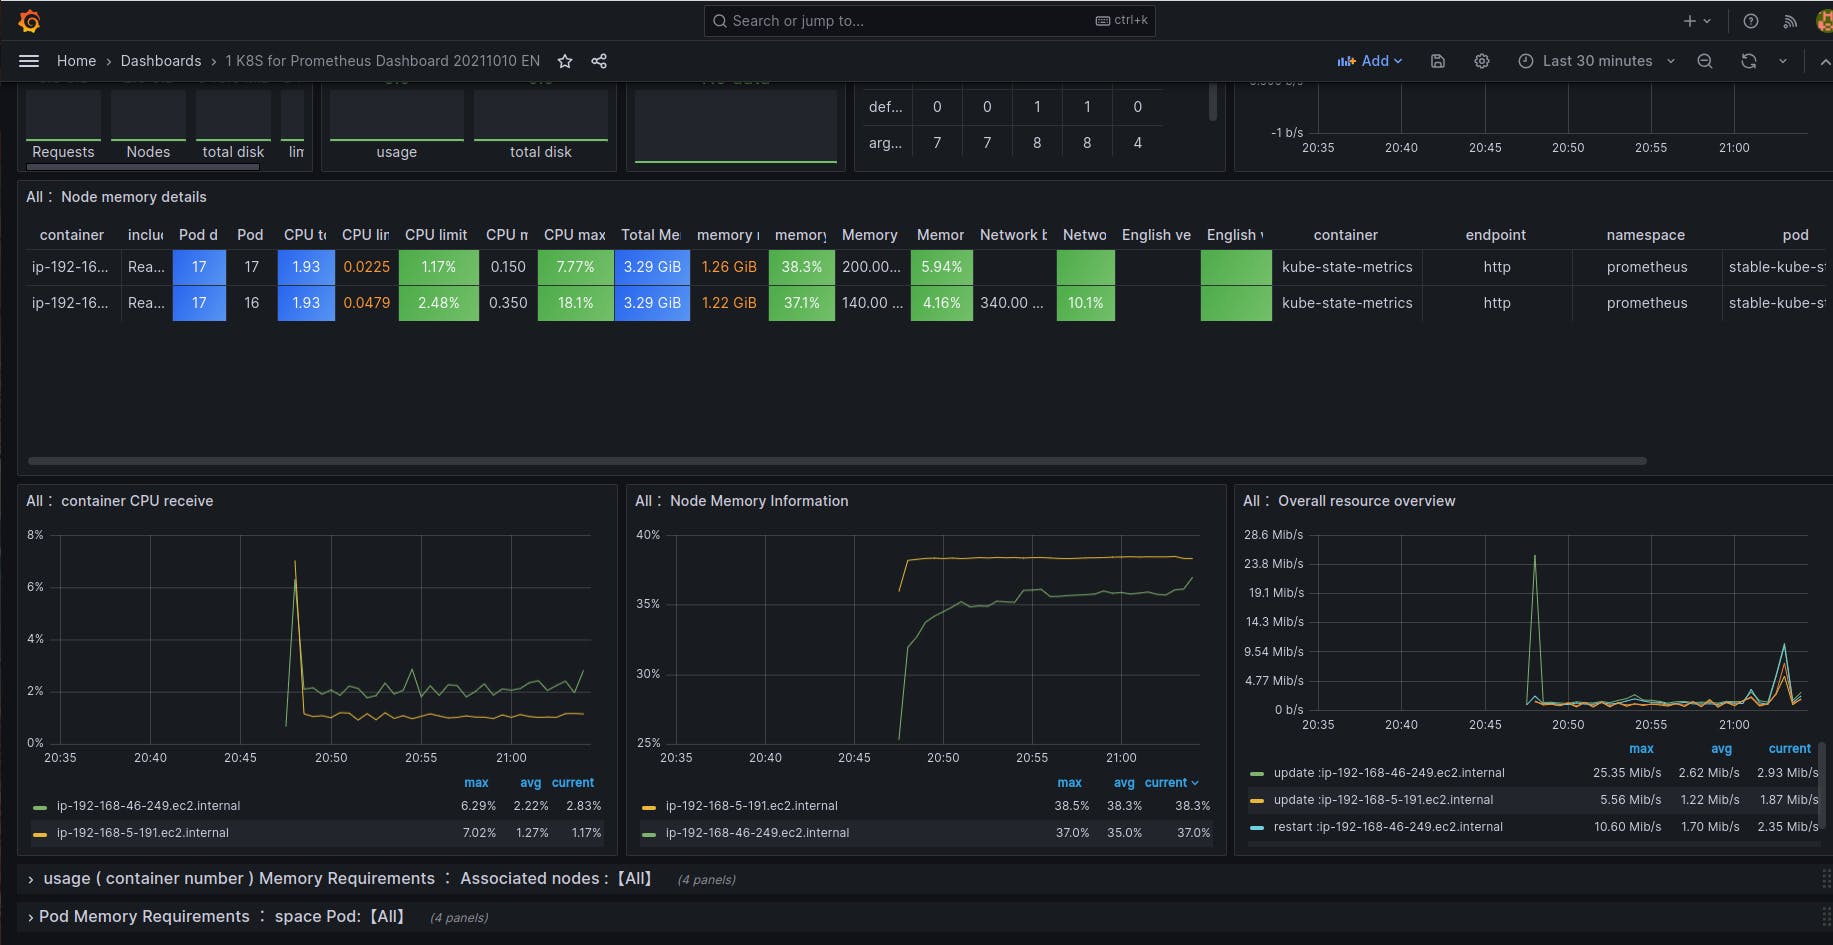
Click on "+" on right hand side and then click on import dashboard as shown in below screenshot.

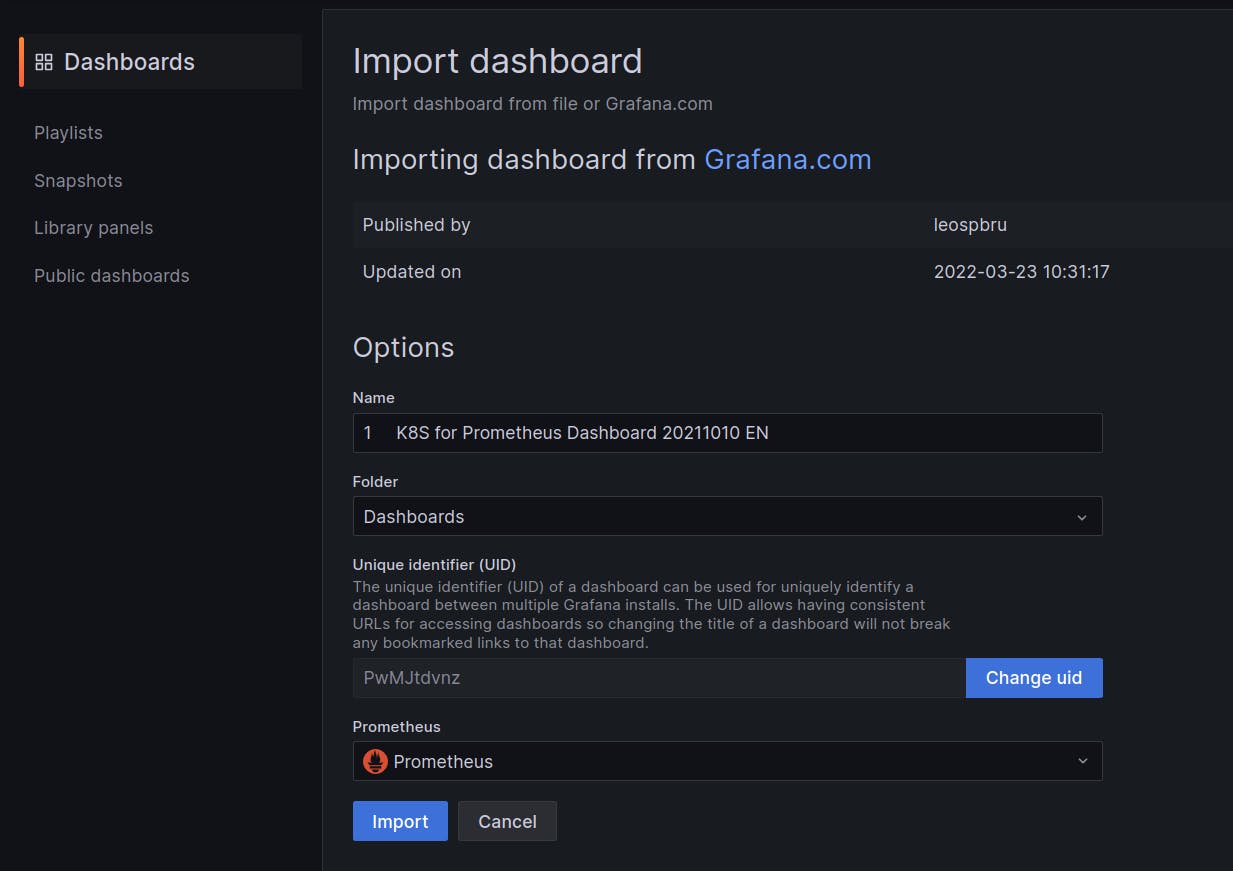
Enter "15661" and click on "Load"
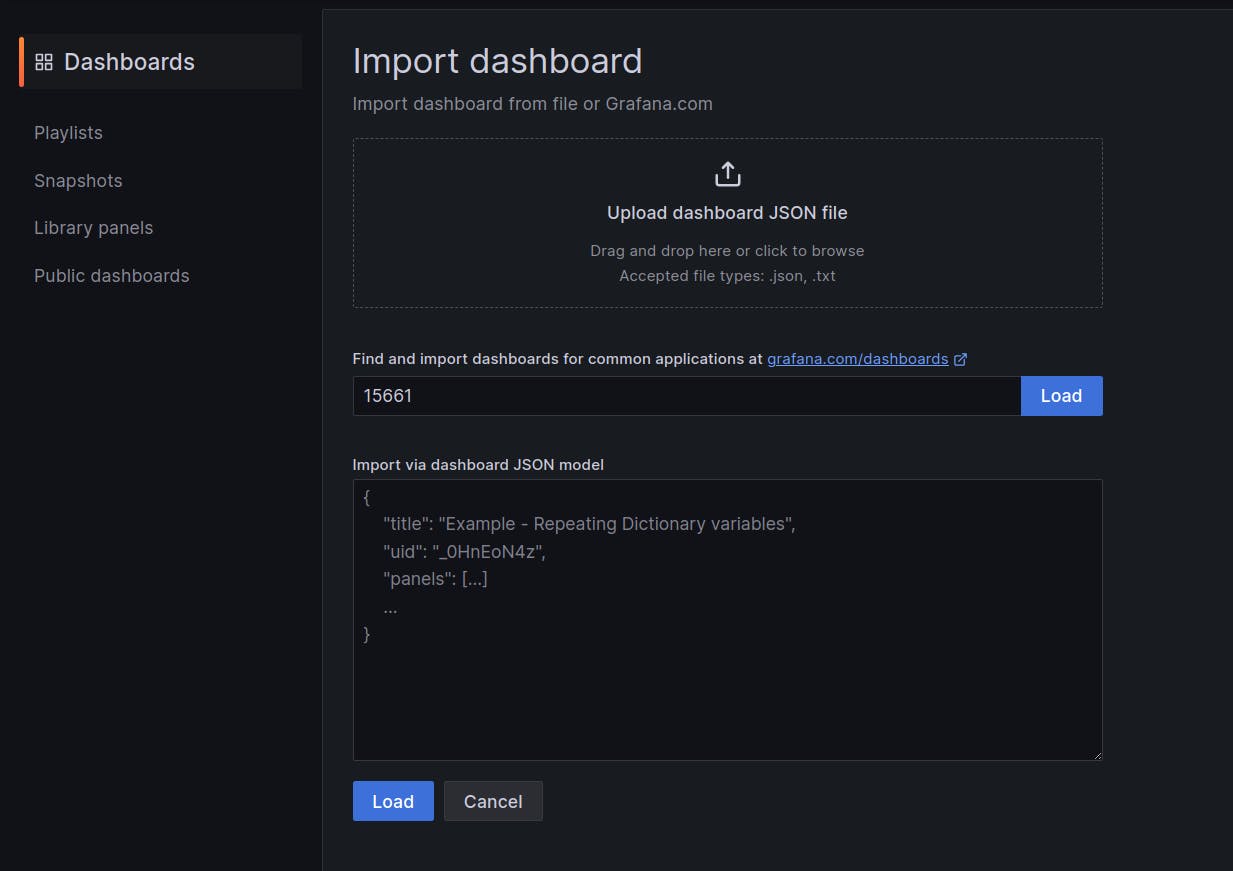
Then choose "prometheus" as source and Click on "Import"
Here you go. Your dashboard is ready.
You can import dashboard as per your requirement from this site. grafana.com/grafana/dashboards
Step 13: Destroy EKS cluster when your done with project.
eksctl delete cluster --name 3-tier-cluster --region us-east-1
Don't Forget to Destroy Terraform created Ec2 instance for Jenkins server.
Conclusion
🚀 In this project, we successfully implemented a robust CI/CD pipeline for a 3-tier ToDo application, leveraging AWS services, Kubernetes, ArgoCD, and Helm charts. 🌐 The pipeline ensures efficient code analysis, containerization, and seamless deployment. 🛠️ With comprehensive monitoring using Prometheus and Grafana, we guarantee the application's stability and performance. 📈 The use of infrastructure as code (Terraform) simplifies setup and teardown, enhancing project scalability. 💡 This solution addresses the challenges of continuous integration and delivery, empowering developers to focus on innovation and productivity.
Stay connected on LinkedIn: LinkedIn Profile
Stay up-to-date with GitHub: GitHub Profile