Download issue 12 - Total Amiga Magazine
Download issue 12 - Total Amiga Magazine
Download issue 12 - Total Amiga Magazine
- TAGS
- download
- amiga
- totalamiga.org

Create successful ePaper yourself
Turn your PDF publications into a flip-book with our unique Google optimized e-Paper software.
Contents<br />
Editorial<br />
Issue <strong>12</strong><br />
Autumn 2002<br />
Contents<br />
News<br />
Editorial ..............................2<br />
News Items ........................3<br />
Frogger NG Preview ..........7<br />
Alan Redhouse Column.....8<br />
Fleecy Moss Column .........9<br />
<strong>Amiga</strong>OS 4 Update......... 10<br />
INet Dial & SolarNavigator<br />
........................................ <strong>12</strong><br />
buzzword......................... 13<br />
Features<br />
ADSL Broadband............ 14<br />
NTL Broadband............... 17<br />
Reviews<br />
ADSL Router................... 18<br />
Highway USB.................. 22<br />
The Feeble Files ............. 28<br />
NEC TFT Monitor............ 31<br />
PD Paradise:<br />
Taskbar Roundup............ 34<br />
Jabberwocky ................... 38<br />
Support<br />
UK Usergroup Lisiting........8<br />
ADSL Router Tutorial ...... 19<br />
TFT Monitor Specifications<br />
Explained ........................ 33<br />
PageStream 4.1 Tables... 40<br />
Photo Panoramas ........... 44<br />
Back Issues..................... 47<br />
Subscription Form........... 47<br />
Colour Screenshots ........ 48<br />
Advertisers<br />
Index<br />
<strong>Amiga</strong> Super Bit.............. 30<br />
Eyetech ........................... 26<br />
Forematt Home Computing<br />
........................................ 21<br />
Kicksoft ................... 39 & 43<br />
North West Micro ............ 21<br />
We’re back with another<br />
<strong>issue</strong> of <strong>Total</strong> <strong>Amiga</strong>! The<br />
theme of this <strong>issue</strong> has turned<br />
out to be bringing new<br />
technologies to the <strong>Amiga</strong>. First<br />
off we have a feature on<br />
connecting to the Internet via<br />
ADSL. Although ADSL on the<br />
<strong>Amiga</strong> has always been possible<br />
the new wires only packages<br />
mean that at last you can buy<br />
and fit your own equipment so<br />
you don’t need a PC or to rent a<br />
modem you don’t need. Another<br />
technology which has been<br />
around for a while but which is<br />
new to the <strong>Amiga</strong> is USB. E3B<br />
have produced the first <strong>Amiga</strong><br />
USB card in the form of the<br />
Highway Zorro card, we put it<br />
through its paces on page 22.<br />
But before you read the rest of<br />
the mag (what do you mean you<br />
don’t read my editorial first!) here<br />
are some thoughts about the<br />
future of <strong>Total</strong> <strong>Amiga</strong>, please let<br />
me know your thoughts.<br />
If you read my editorial in a last<br />
<strong>issue</strong> you’ll know that we were<br />
aiming to get this <strong>issue</strong> out two<br />
weeks early as the first step in a<br />
move to bi-monthly publication.<br />
We haven’t been able to achieve<br />
that although this <strong>issue</strong> is on<br />
time (give or take a week)<br />
according to our current<br />
quarterly schedule. Rather than<br />
promise the next <strong>issue</strong> early and<br />
not make it again we’ve had a<br />
think about what would need to<br />
happen to enable us to publish<br />
bi-monthly. As we’ve said before<br />
the crux of the matter is getting<br />
more writers for the magazine.<br />
Since our last appeal for writers<br />
a couple of <strong>issue</strong>s ago we’ve<br />
<strong>Total</strong> <strong>Amiga</strong> is published quarterly<br />
by South Essex <strong>Amiga</strong> Link. For<br />
subscription details please contact<br />
us at the address below or visit our<br />
website.<br />
Editor: Robert Williams<br />
Design: Robert Williams<br />
Contributors: Elliott Bird<br />
Michael Carillo<br />
Philip Corner<br />
Geoff Milnes<br />
Fleecy Moss<br />
Alan Redhouse<br />
Mick Sutton<br />
Proof Reading: Mick Sutton<br />
Cover Art: Robert Williams<br />
had a number of people offer to<br />
write the occasional piece. While<br />
this is helpful and much<br />
appreciated what we really need<br />
is a number of writers (two or<br />
three would make a big<br />
difference) who are willing to<br />
write every <strong>issue</strong>, perhaps<br />
contributing a regular column<br />
and another article such as a<br />
review or tutorial related to their<br />
area of interest. While I think we<br />
cover some aspects of the<br />
<strong>Amiga</strong> scene well such as<br />
graphics and DTP we realise<br />
there are areas that currently get<br />
little coverage in <strong>Total</strong> <strong>Amiga</strong>.<br />
This is purely because no one in<br />
the current team has a great<br />
interest in them, off the top of my<br />
head I can think of music, 3D<br />
graphics and programming as<br />
cases in point. If we could recruit<br />
writers with an interest in those<br />
areas then it would be much<br />
easier to fill the mag each <strong>issue</strong><br />
and would also take some load<br />
off the current team.<br />
So what are we going to do to<br />
improve this situation? The first<br />
step is this editorial, if you think<br />
you could offer your services to<br />
the magazine as a regular writer<br />
please get in touch, also if you<br />
know someone who would be a<br />
good contributor please let them<br />
know we’re on the lookout for<br />
writers. As a non-profit<br />
publication we can’t pay writers<br />
but you will get a free copy of<br />
each <strong>issue</strong> you contribute to.<br />
Once this <strong>issue</strong> is out the door I<br />
will add these details to the <strong>Total</strong><br />
<strong>Amiga</strong> website and we will post a<br />
“wanted” advert to <strong>Amiga</strong><br />
websites and mailing lists to let<br />
the wider world know.<br />
We know from our experience so<br />
far that finding reliable writers<br />
who are willing to commit<br />
Contact Us<br />
If you have any queries<br />
suggestions or want to contact us<br />
for any reason please use one of<br />
the following:<br />
EMail: editor@totalamiga.org<br />
WWW: http://www.totalamiga.org/<br />
Post: <strong>Total</strong> <strong>Amiga</strong>,<br />
26 Wincoat Drive,<br />
BENFLEET,<br />
Essex, SS7 5AH,<br />
ENGLAND.<br />
Telephone: +44 (0) <strong>12</strong>68 569937<br />
(19:00 - 22:00<br />
UK time only please)<br />
themselves to the magazine is<br />
very difficult. Especially with the<br />
<strong>Amiga</strong> market as quiet as it<br />
currently is many people have<br />
lost their enthusiasm for the<br />
platform as it stands and are in a<br />
wait and see mode. There is also<br />
the fact that the number of new<br />
product releases is currently low<br />
which makes finding enough<br />
content to fill a magazine more<br />
regularly difficult at the moment.<br />
Taking all this into account I think<br />
that it is not realistic to move to<br />
bi-monthly publication until OS4<br />
and the <strong>Amiga</strong>One systems have<br />
been released. Although it’s hard<br />
to say exactly what effect this will<br />
have on the market it has to be<br />
positive and, at a minimum, we<br />
will have the new machines and<br />
OS to write about!<br />
Before you thank “oh that means<br />
sometime... never then” take a<br />
look at our <strong>Amiga</strong> OS4 update<br />
on page 10, it really does sound<br />
as if OS4 is getting close and will<br />
almost certainly be out by<br />
Christmas so we shouldn’t have<br />
too long to wait.<br />
I’ve had a few E-Mails asking if<br />
there will be a letters page this<br />
<strong>issue</strong> but... no letters to publish!<br />
So if you would like to see a<br />
letters page please write in,<br />
letters can be commenting on<br />
the magazine, <strong>Amiga</strong> products or<br />
the general <strong>Amiga</strong> situation.<br />
We’re also looking for questions<br />
for a Q&A section and to spur us<br />
on with ideas for tutorials and the<br />
Top Tips section. Please E-Mail<br />
your letters to me or write to the<br />
address in the grey bar below.<br />
Enjoy the magazine and I hope<br />
you’ll take the time to help us<br />
make it better,<br />
Robert Williams<br />
editor@totalamiga.org<br />
Only <strong>Amiga</strong> Made it<br />
Possible<br />
<strong>Total</strong> <strong>Amiga</strong> is designed and laid<br />
out using:<br />
Hardware:<br />
<strong>Amiga</strong> 3000<br />
CyberStorm PPC/060<br />
CyberVision PPC<br />
<strong>12</strong>8Mb RAM, about 13Gb HDD<br />
space.<br />
Software:<br />
<strong>Amiga</strong> OS 3.9 by <strong>Amiga</strong><br />
PageStream 4.1 by Softlogik<br />
TypeSmith 2.5 by Softlogik<br />
ImageFX 4.5 by Nova Design<br />
Photogenics 5 by Paul Nolan<br />
News<br />
Bytes...<br />
Eternity have announced<br />
that the <strong>Amiga</strong> version of<br />
their Tales of Tamar game<br />
will be released on the 1st<br />
of September. Tales of<br />
Tamar is a turn based<br />
strategy game set in time<br />
similar to the middle ages, it<br />
is designed for on-line<br />
Internet play via EMail and<br />
incorporates an on-line chat<br />
facility so players can talk in<br />
real time. ToT will be<br />
released for the <strong>Amiga</strong> first<br />
but Eternity are also working<br />
on versions for Linux,<br />
Windows, Mac and Java so<br />
the potential is there for a<br />
huge base of players.<br />
Tales of Tamar has been in<br />
development and testing for<br />
several years and by the<br />
look of the website and<br />
screenshots it will be a very<br />
professional and engrossing<br />
game. We’ll have more<br />
details and possibly a<br />
review in the next <strong>issue</strong> of<br />
<strong>Total</strong> <strong>Amiga</strong>. The Tales of<br />
Tamar website is at:<br />
http://www.tamar.net<br />
2 TOTAL AMIGA Autumn 2002<br />
You may have heard of<br />
Rainboot before as a program<br />
to create very fancy boot<br />
screens, complete with system<br />
information and other effects. A<br />
new version is now in the<br />
works that will extend its<br />
capabilities so it can be used to<br />
create presentations too. The<br />
really exciting thing is that<br />
Rainboot can work on chipset<br />
and graphics card screens so it<br />
may well be the first program<br />
that can be used to make<br />
presentations and multimedia<br />
applications which can be used<br />
on all <strong>Amiga</strong>s. Presentations<br />
The views expressed in this<br />
magazine are those of the author<br />
of each piece, they do not<br />
necessarily reflect the views of<br />
the editor, other contributors or<br />
SEAL.<br />
Please Note: <strong>Total</strong> <strong>Amiga</strong> is<br />
produced by SEAL members in<br />
their spare time, while we will<br />
always strive to produce the<br />
magazine on time and include all<br />
the advertised contents this is not<br />
always possible due to other<br />
commitments. The price you pay<br />
for <strong>Total</strong> <strong>Amiga</strong> covers our costs<br />
and nothing more, we don’t make<br />
a profit from it.<br />
Contents<br />
Rainboot 4<br />
Smarter than your average boot picture?<br />
About <strong>Total</strong> <strong>Amiga</strong> Legalese<br />
Final Writer 5 by Softwood<br />
Ghostscript 6.50 from Aladdin<br />
Enterprises<br />
There are also some essential<br />
utilities we couldn’t live without:<br />
Directory Opus 5, SGrab, MCP,<br />
Turbo Print 7, MakeCD.<br />
Our thanks to the creators of this<br />
and all the other great <strong>Amiga</strong><br />
software out there.<br />
<strong>Total</strong> <strong>Amiga</strong> is entirely created on<br />
the <strong>Amiga</strong>, no other machines are<br />
used at any stage of the design or<br />
layout process.<br />
Fonts<br />
The body text of <strong>Total</strong> <strong>Amiga</strong> is set<br />
in Triumvirate Normal as supplied<br />
with PageStream, the heading<br />
typeface is Forgotten Futurist by<br />
Ray Larabie. Take a look at Ray’s<br />
huge range of freeware fonts at<br />
http://www.larabiefonts.com and<br />
his commercial foundry at<br />
http://www.typodermic.com.<br />
created will not be tied to a<br />
particular screenmode and can<br />
even run in a window on a<br />
public screen, these can even<br />
have transparent sections.<br />
Rainboot presentations are<br />
controlled by a script file which<br />
is created in a text editor and<br />
calls separate sound and<br />
graphics files. The final<br />
presentation can then be<br />
compiled into an executable<br />
needed no special support<br />
files. Don’t expect a GUI for<br />
putting the presentation<br />
together but according to the<br />
author the process should be<br />
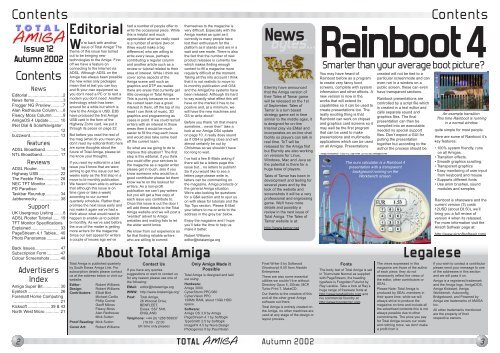
The euro calculator is a Rainboot 4<br />
presentation with a transparent<br />
background running on the<br />
Workbench screen.<br />
An example transition.<br />
This time Rainboot is running<br />
in a normal window.<br />
quite simple for most people.<br />
Here are some of Rainboot 4’s<br />
key features:<br />
• 100% system friendly, runs<br />
on all <strong>Amiga</strong>s.<br />
• Transition effects.<br />
• Smooth graphics scrolling.<br />
• Transparent graphics<br />
• Easy monitoring of user input<br />
from keyboard and mouse<br />
• Supports different fonts<br />
• Use anim brushes, sound<br />
modules and samples<br />
Rainboot is shareware and the<br />
current version (3) costs<br />
<strong>12</strong>USD (about £8.50), we’ll<br />
bring you a full review of<br />
version 4 when its released.<br />
For more information visit the<br />
Airsoft Softwair page at:<br />
http://www.airsoftsoftwair.com/<br />
If you wish to contact a contributor<br />
please send your message to one<br />
of the addresses in this section<br />
and we will pass it on.<br />
<strong>Amiga</strong> is a registered trademark<br />
and the <strong>Amiga</strong> logo, <strong>Amiga</strong>DOS,<br />
<strong>Amiga</strong> Kickstart, <strong>Amiga</strong><br />
Workbench, Autoconfig,<br />
Bridgeboard, and Powered by<br />
<strong>Amiga</strong> are trademarks of AMIGA<br />
Inc.<br />
All other trademarks mentioned<br />
are the property of their<br />
respective owners.<br />
3
News<br />
Bytes...<br />
Prometheus<br />
GoldEd<br />
AIX<br />
The final version of Dietmar<br />
Eilert’s well known text<br />
editor, GoldEd Studio, is<br />
about to be released. Some<br />
time ago Dietmar<br />
announced that the<br />
development of GoldEd had<br />
been cancelled even though<br />
he had said version 7 was in<br />
development. The new<br />
version is an update on<br />
version 6 and will include<br />
the work on version 7 that<br />
had been completed, which<br />
includes an overhaul over<br />
the user interface giving it a<br />
slicker look and new icons.<br />
The full version of GoldEd<br />
Studio costs 59.99 Euro<br />
(about £40), discounts are<br />
available for existing users.<br />
Anyone who preordered<br />
version 7 will get the<br />
upgrade free.<br />
For further details and to<br />
download a demo visit:<br />
golded.dietmar-eilert.de<br />
PageStream<br />
4.1.4<br />
A free upgrade to<br />
PageStream 4.1 (reviewed<br />
last <strong>issue</strong>) is now available<br />
from Grasshopper. This<br />
version fixes numerous<br />
minor bugs from the 4.1<br />
release, registered users<br />
can download it from a<br />
secure section on the<br />
Grasshopper website:<br />
www.grasshopperllc.com<br />
Development<br />
Resumes<br />
Over the last few months<br />
there has been little news of<br />
progress on drivers for the<br />
Prometheus PCI to Zorro<br />
card which looked so<br />
promising when it was first<br />
released. Filip Dab-Mirowski<br />
from the manufacturer,<br />
Matay, recently posted to<br />
the <strong>Amiga</strong>-Prometheus<br />
mailing list that development<br />
had been delayed due to<br />
some personal <strong>issue</strong>s not<br />
related to Matay but it was<br />
now in progress again. A<br />
firmware upgrade for the<br />
Prometheus has been<br />
developed which will allow<br />
DMA (Direct Memory<br />
Access) transfers between<br />
PCI cards and a<br />
programmer device will be<br />
available to allow users to<br />
upgrade their cards without<br />
returning them to Matay.<br />
The firmware upgrade will<br />
allow PCI cards which rely<br />
on DMA such as sound, TV<br />
and 100Mb/s Ethernet cards<br />
to be supported. Matay say<br />
they are currently working<br />
on drivers which will take<br />
advantage of the updated<br />
ROM and will release it<br />
when some drivers are<br />
ready.<br />
To keep up-to-date with<br />
Prometheus developments<br />
join the mailing list at:<br />
www.yahoogroups.com/<br />
group/<strong>Amiga</strong>-Prometheus<br />
You can also try the Matay<br />
website at:<br />
http://www.matay.pl<br />
Prototype of the<br />
programmer device.<br />
Another<br />
Elbox have announced another<br />
member of their growing family<br />
of <strong>Amiga</strong> tower kits, the Mirage<br />
3000 is a sleek but<br />
undoubtedly huge tower for the<br />
A3000 desktop. Unlike the<br />
A4000 model mentioned last<br />
<strong>issue</strong> the Mirage 3000 does<br />
not include a bus board or<br />
Mediator logic card however a<br />
Mediator 3000D bus board is<br />
required to use the tower so<br />
you will need to purchased one<br />
with the Mirage. The tower has<br />
three 5.25” drive bays, a bay<br />
for the A3000’s floppy drive<br />
and five internal 3.5” bays for<br />
hard disks. The whole shebang<br />
is powered by a 300W power<br />
supply. The Mirage 3000 costs<br />
179Euro excluding VAT<br />
(£159.95 including VAT from<br />
Power Computing) and the<br />
Mediator 3000D busboard and<br />
logic card is 289.95Euro<br />
(£244.95).<br />
Details on Elbox products can<br />
be found at:<br />
http://www.elbox.com<br />
Elbox products are available in<br />
the UK from Power Computing:<br />
http://www.powerc.com<br />
+44 (0) <strong>12</strong>34 851500<br />
WoASE Returns<br />
After last years successful<br />
show that was attended by<br />
over 350 people several UK<br />
usergroups are again working<br />
together to stage World of<br />
<strong>Amiga</strong> South East 2002 on<br />
Saturday the 2nd of November.<br />
The show will be at the same<br />
venue as last year, Poplars<br />
Hall, near Brentwood in Essex,<br />
just a few minutes drive from<br />
the M25 and walking distance<br />
from a main line railway<br />
station. The venue has free<br />
parking and a licensed bar,<br />
sandwiches and snacks will<br />
also be available on the day.<br />
The following exhibitors have<br />
already confirmed that they will<br />
be attending:<br />
• <strong>Amiga</strong> (in the form of Fleecy<br />
Moss)<br />
• Eyetech<br />
• Forematt Home Computing<br />
• Kicksoft<br />
• Weird Science<br />
Right: the 2001 show was packed.<br />
We are talking to other<br />
potential exhibitors including<br />
several European retailers and<br />
developers and hope to<br />
announce more exhibitors over<br />
the next few weeks.<br />
In addition to the exhibitors<br />
there will be many other<br />
attractions at the show. We’re<br />
planning to have more<br />
demonstrations and games<br />
and there will be a strong<br />
usergroup presence offering<br />
information and friendly advice.<br />
To keep up to date with news<br />
of the show please visit the<br />
website:<br />
http://www.worldofamiga.com<br />
IOSpirit (the new name for<br />
Innovative, the developers of<br />
fxPaint, and VHIStudio) have<br />
released a new version of their<br />
all-in-one scanning package<br />
fxSCAN. Version 4 has many<br />
new and enhanced features.<br />
One of the most interesting is<br />
the improved OCR (optical<br />
character recognition) engine<br />
which now had improved<br />
accuracy and can output the<br />
scanned document as an<br />
HTML file complete with<br />
pictures. Native modules are<br />
supplied for PPC (WarpUP and<br />
PowerUP), MorphOS and<br />
Amithlon so fxSCAN gets<br />
maximum performance on<br />
these systems, this should<br />
especially benefit the OCR<br />
function. As far as we are<br />
aware fxSCAN is the first<br />
commercial application to<br />
provide direct Amithlon<br />
support, this means the<br />
module is compiled as x86<br />
code so it does not have to run<br />
Thanks to emulators, keyboard<br />
adaptors and new systems<br />
such as the <strong>Amiga</strong>One more<br />
and more “<strong>Amiga</strong>” systems are<br />
being used with standard “PC”<br />
keyboards usually equipped<br />
with inappropriate “Windows”<br />
function keys. Netherlands<br />
based <strong>Amiga</strong> dealer Computer<br />
City are planning a solution to<br />
this blight, official <strong>Amiga</strong> key<br />
caps to replace the Windows<br />
keys. The key caps will be<br />
sourced from Cherry and will<br />
be available separately or fitted<br />
to one of Cherry’s CyBo@rd<br />
keyboards. To keep the cost<br />
4 TOTAL AMIGA Autumn 2002<br />
Keep on Scanin’<br />
through the 68k<br />
emulator. The<br />
author of fxSCAN<br />
says this doubles<br />
the speed on<br />
Amithlon.<br />
With the optional<br />
IO USB module<br />
fxSCAN 4 will<br />
support USB<br />
scanners, initially most of the<br />
Epson USB range except the<br />
<strong>12</strong>50 and <strong>12</strong>50 are expected to<br />
work with the driver.<br />
Here are some of the other<br />
interesting features:<br />
• PDF Support - scans can be<br />
exported as multi-page PDF<br />
files for cross platform<br />
compatibility, Ghostscript is<br />
not required.<br />
• Improved Photocopy<br />
Function - includes preview<br />
with brightness, contrast and<br />
gamma controls.<br />
• Direct support for TurboPrint -<br />
reasonable<br />
Computer City<br />
are looking for<br />
pre-orders so<br />
they can bulk<br />
order the keys<br />
caps, the preorders<br />
will not<br />
be charged<br />
until they are<br />
shipped.<br />
The key caps alone, for you to<br />
fit to your own Cybo@rd will<br />
cost 16Euro (about £10.50), a<br />
complete keyboard is available<br />
for 40Euro (£26) and a wireless<br />
The enhanced photocopy options.<br />
not via graphics publisher.<br />
• Support for automatic<br />
document feeders and<br />
transparency adaptors if they<br />
are enabled in the driver.<br />
• PNG Saver<br />
• New HTML and PDF<br />
documentation with<br />
illustrations.<br />
Plus many other<br />
improvements, look out for a<br />
full review of fxSCAN 4 in the<br />
next <strong>issue</strong> of <strong>Total</strong> <strong>Amiga</strong>.<br />
fxSCAN 4 is available now<br />
from the IOSpirit website, a<br />
downloadable version is<br />
39.99Euro (about £26) and the<br />
CD version is 44.99Euro<br />
(£29.25). Owners of version 3<br />
can download an upgrade for<br />
22.99Euro (£15) or buy a new<br />
CD for 24.99Euro (£16.25).<br />
The USB module is 10Euro<br />
(£6.50) extra.<br />
For further details and to order<br />
on-line visit:<br />
Using OCR (left) to convert a document into an HTML file http://www.iospirit.com<br />
complete with images, layout and font sizes.<br />
Windows Keys be Gone!<br />
keyboard and mouse is<br />
140Euro (£90).<br />
To place a pre-order visit:<br />
http://www.compcity.nl/<br />
amigakeyboard<br />
News<br />
Bytes...<br />
Radeon for<br />
CyberGraphX<br />
Vision Factory Development<br />
have revealed that they<br />
have a working driver for<br />
ATI’s Radeon range of<br />
graphics for their<br />
CyberGraphX version 5<br />
driver system. Version 5 is<br />
part of the MorphOS system<br />
which is under development<br />
for BPlan’s Pegasos PPC<br />
computer. VFD report that<br />
most of the driver work is<br />
finished and in time they<br />
expect to back port the<br />
driver for <strong>Amiga</strong> PCI<br />
busboards such as the<br />
GRex. Radeon VE and 7500<br />
cards have been tested and<br />
the driver supports the<br />
common PC BIOS variants<br />
(as opposed to the less<br />
common Mac cards).<br />
Further details on<br />
CyberGraphX can be found<br />
at:<br />
http://www.vgr.com/cybergfx<br />
Mediator<br />
USB<br />
With the excitement about<br />
USB support coming to the<br />
<strong>Amiga</strong> Elbox have<br />
announced that Mediator<br />
users will not have to wait<br />
long for drivers so they can<br />
use a USB PCI card in their<br />
Mediator. Elbox are<br />
developing their own USB<br />
stack (the software that<br />
drives the USB card) but<br />
have not yet announced<br />
what type of USB devices<br />
they will support, we also<br />
wait to hear which PCI<br />
cards can be used.<br />
According to a posting on<br />
the <strong>Amiga</strong>-Mediator mailing<br />
list from Elbox the drivers<br />
should be out by the time<br />
you read this.<br />
5
News<br />
Bytes...<br />
AWeb Now<br />
Open Source<br />
The bad news: Yvon Rozijn<br />
has stopped development of<br />
his well know web browser,<br />
AWeb. The good news: He<br />
has opened the source code<br />
so that other developers can<br />
continue his work and<br />
improve AWeb.<br />
A project has already been<br />
formed to continue work on<br />
AWeb and already they<br />
have released a new<br />
version which can be<br />
compiled with OS 3.5/3.9’s<br />
Reaction libraries rather<br />
than ClassAct which<br />
required a commercial<br />
developer kit and is fully<br />
functional without a keyfile.<br />
Some new JPEG and GIF<br />
plug-ins have also been<br />
released.<br />
The AWeb Open Source<br />
team are looking for more<br />
developers to help them<br />
improve AWeb, for more<br />
details and to download the<br />
latest version visit:<br />
http://aweb.sunsite.dk<br />
More Flickers<br />
Fixed<br />
Individual Computers have<br />
added a new product to<br />
their wide range of handy<br />
<strong>Amiga</strong> expansions. The<br />
Indivision is an external<br />
flickerfixer for all <strong>Amiga</strong>s, it<br />
boosts the horizontal<br />
frequency of <strong>Amiga</strong><br />
screenmodes to 31kHz so<br />
they can be displayed on a<br />
standard SVGA monitor and<br />
also removes flicker from<br />
interlaced screens. The<br />
unique feature of the<br />
Indivision is that it can be<br />
used with video mixing<br />
equipment such as a<br />
genlock. The Indivision is<br />
available now from<br />
Individual and their resellers<br />
and costs 99Euro (about<br />
£65). Further information<br />
should be available at:<br />
http://www.jschoenfeld.com/<br />
USB Market Hots Up<br />
Australian <strong>Amiga</strong> retailer and<br />
ISP Boing.net have announced<br />
a Zorro II USB card called the<br />
Thylacine, the card is slated to<br />
be available in August.<br />
Interestingly the card will be<br />
supplied with the <strong>Amiga</strong>OS 4<br />
USB stack but compiled for<br />
68k. Prototype Thylacine cards<br />
have been used as the<br />
hardware reference for the OS<br />
4 stack’s development. Initially<br />
drivers will be supplied for<br />
printers, keyboards and<br />
scanners. Printers are said to<br />
work with the exisitng version<br />
of Turbo Print without<br />
modification so we expect a<br />
USB device is provided for<br />
printers. Printers are supported<br />
by a human interface device<br />
class driver, at the moment this<br />
is basic and only supports<br />
simple keyboards and mice<br />
(we expect this means no<br />
scroll wheel or “multimedia”<br />
key support.<br />
Digital Almanac III, the latest<br />
release of this astronomy<br />
program, came out some time<br />
ago, since its release regular<br />
updates have appeared. The<br />
latest is version 4.8 which<br />
includes experimental access<br />
to the GSC-2 catalogue of<br />
nearly half a billion stars! A<br />
beta copy of version 4.9 can be<br />
downloaded from the<br />
program’s website and the list<br />
of changes and enhancements<br />
looks impressive:<br />
• Improved settings GUI<br />
• Automatic star booster for<br />
field angles smaller than 20<br />
degrees<br />
• Dynamic star data cache to<br />
improve responsiveness<br />
• Automatic low memory<br />
handling<br />
• Various improvements to star<br />
data included<br />
• Implementation of the<br />
Hertzsprung-Russel diagram<br />
with star ephemerides<br />
• Detailed graphics of solar<br />
eclipse circumstances from<br />
the years 1900 to 2100<br />
Scanners are supported by<br />
drivers for the freeware<br />
Betascan package. Several<br />
Epson USB scanners have<br />
been tested and most others<br />
(with the notable exception of<br />
the Perfection <strong>12</strong>50 and <strong>12</strong>50<br />
Photo) are expected to work.<br />
An Epson Stylus 740 printer<br />
has been tested and again<br />
USB printers which have a<br />
driver in Turbo Print are<br />
expected to work.<br />
Thylacine developer, Robert<br />
Tsien tells us that additional<br />
drivers are in the works.<br />
IOSpirit are working on digital<br />
cameras, another developer is<br />
working on mass storage<br />
• Improved textures for the sun<br />
and several satellites<br />
• Plus many more fixes and<br />
improvements (most of which<br />
I didn’t understand!)<br />
Users who want to try out<br />
Digital Almanac can now<br />
download a keyfile for the DA-II<br />
release from Aminet<br />
(misc/sci/DAlmanac_Key.lha)<br />
The Thylacine prototype.<br />
device support (which as we<br />
have seen with the Highway<br />
opens up support for some<br />
digital cameras directly and<br />
others via memory card<br />
readers) and Robert is working<br />
on Ethernet drivers.<br />
The Thylacine card should be<br />
available by the time you read<br />
this, it costs 134.95 Australian<br />
Dollars (about £47) plus<br />
shipping and VAT direct from<br />
Boing.net. We have been<br />
promised a board for review so<br />
you should be able to read all<br />
about it in the next <strong>issue</strong>.<br />
For now visit:<br />
http://thylacine.boing.net<br />
for further details.<br />
Stargazing from you Desktop<br />
so they can try the full program<br />
free of charge. The full version<br />
of DA-III on CD-ROM costs<br />
45Euro (about £30) including<br />
postage and can be ordered<br />
direct from the author. For<br />
more information and to<br />
download a demo of DA-III<br />
visit:<br />
www.soft-ware.de/dalmanac<br />
Apparently this is a Hertzsprung-Russel diagram used to<br />
determine star type!<br />
Audio<br />
Evolves<br />
A new version of Audio<br />
Evolution is set to be one of<br />
the first applications released<br />
exclusively for <strong>Amiga</strong> OS 4.<br />
The program allows audio to<br />
be recorded directly to hard<br />
disk while playing back a<br />
number of other tracks. It also<br />
offers real-time effects,<br />
automation, editing and<br />
synchronisation with other<br />
applications and MIDI<br />
sequencers.<br />
The new version is being<br />
developed on exisitng 68k<br />
hardware but with the power of<br />
the new PPC hardware in<br />
mind, the final application will<br />
be 100% PPC code. In a<br />
recent Interview on <strong>Amiga</strong><br />
Arena Audio Evolution’s<br />
developer revealed a few of<br />
the features which will be<br />
present in version 4:<br />
• Non-linear, non-destructive<br />
editing on the time line<br />
including cut, copy, paste,<br />
move, split, trim and<br />
crossfade actions.<br />
• Unlimited undo.<br />
• Real-time effects with realtime<br />
parameter control.<br />
Parameters can also be<br />
remotely controlled by MIDI<br />
controllers and can be fully<br />
automated.<br />
More information will be<br />
available closer to the final<br />
release of the new version.<br />
Audio Evolution is published by<br />
Computer City, pricing for the<br />
new version has not yet been<br />
confirmed but it is expected to<br />
be a bit more than the current<br />
version 3 but less than<br />
comparable PC and Mac<br />
products. For further details<br />
visit:<br />
www.compcity.nl and<br />
www.audio-evolution.com<br />
You can read the full interview<br />
at:<br />
www.online-club.de/~ARENA<br />
The mixer from AE 3.<br />
6 TOTAL AMIGA Autumn 2002<br />
News<br />
Frogger NG<br />
Preview<br />
The new version of Frogger promises to be one of the first multi-format media players on<br />
the <strong>Amiga</strong>, Michael Carrillo takes a first look.<br />
It’s not often I feel the urge to<br />
review a piece of software, I<br />
prefer to bore people with my<br />
pompous opinions, still, every<br />
now and then something comes<br />
along that just grabs me by the<br />
proverbials. So why has<br />
FroggerNG caught my attention<br />
you may be thinking to yourself?<br />
Well although it is in beta,<br />
FroggerNG now supports AVI,<br />
MOV and more interestingly,<br />
RealMedia files, including<br />
RealMedia audio. The list of<br />
video and audio formats Frogger<br />
play is very impressive with the<br />
supported audio formats list<br />
being as extensive as the video<br />
formats. As you would expect,<br />
FroggerNG still plays MPEG<br />
files, although in this release not<br />
as well as it’s earlier incarnation.<br />
Bear in mind though that it is still<br />
in beta and Sebastian<br />
Jedruszkiewic, the author of<br />
FroggerNG acknowledges that<br />
there are still some <strong>issue</strong>s to be<br />
addressed. Finally though,<br />
<strong>Amiga</strong> owners are able to<br />
access media formats that have<br />
been around on other platforms<br />
for ages with the obvious<br />
exception being Microsoft media<br />
files. This isn’t really a major<br />
pain since the since the amount<br />
of WM files is small by<br />
comparison to the other media<br />
formats.<br />
So how does it play you are no<br />
doubt wanting to know, well, the<br />
version being tested is the<br />
WarpOS version downloaded<br />
from the Frogger download area,<br />
running on an A<strong>12</strong>00 with a<br />
Blizzard PPC603@240mhz and<br />
a BVision.<br />
MPEG’s - Pretty poor, as<br />
previously mentioned, the code<br />
is un-optimised but should be<br />
fixed in the next release.<br />
AVI & MOV files - Pretty good,<br />
plays all pop videos found on a<br />
music CD single, with only a<br />
slight, barely noticeable jerk<br />
every few seconds. However, a<br />
few hiccups were noticed on the<br />
AVI side on an internet download<br />
of a Cinema movie, with the<br />
images and audio being a few<br />
seconds out of sync. Whether<br />
this is the fault of FroggerNG or<br />
my slow PPC603 is unclear at<br />
this time.<br />
Real Media - At the time of this<br />
mini preview, the real media side<br />
had not been tested however<br />
various reports on the Frogger<br />
mailing list and elsewhere have,<br />
overall given the RealMedia a<br />
thumbs up as well.<br />
VideoCD - Unsure, the files used<br />
to test this function were all all<br />
jerky and often would have large<br />
pixels all over the FroggerNG<br />
window but again this could be<br />
because of the <strong>Amiga</strong>’s IDE bus<br />
limitations.<br />
What’s Missing?<br />
This AVI file played back perfectly.<br />
This version is stripped down<br />
and by that I mean there is no<br />
menu options. CLI or Icon<br />
tooltype are the only means<br />
available at the moment, the<br />
menu option should be reenabled<br />
by the next update, also<br />
glaringly missing is the open<br />
FroggerNG on own screen<br />
function, which generally speeds<br />
up the display of a video file.<br />
Overall this is a very positive<br />
step in the right direction,<br />
Sebastian should be<br />
congratulated on the hard work<br />
he has put in to this. I eagerly<br />
look forward to the next release<br />
of FroggerNG and despite it’s<br />
beta limitations there is nothing<br />
better on the <strong>Amiga</strong> at the<br />
moment. Despite it’s beta<br />
limitations I cannot recommend it<br />
enough.<br />
Lastly, I hope Sebastian<br />
implements some form of play<br />
list so that I can play all 20 odd<br />
pop videos on my <strong>Amiga</strong> next<br />
time I have a party.<br />
Stop Press!<br />
Since writing this article,<br />
Frogger202 beta for WarpOS<br />
was released as well as versions<br />
for 68k, PowerUp and MOS.<br />
There have been some<br />
improvements since the last<br />
beta, amongst them support for<br />
.MP4 files produced in Quicktime<br />
6 as well as support for motion<br />
JPEG, MJPA and MPJP<br />
amongst many others, plus of<br />
course more bug fixes. Still not<br />
quite good enough for a full<br />
commercial release, but if the<br />
updates continue at this pace it<br />
won’t belong before the <strong>Amiga</strong><br />
community has a product that it<br />
can show off with the best.<br />
Check it out at<br />
http://www.frogger.rules.pl<br />
7
News<br />
<strong>Amiga</strong> One Update<br />
Eyetech’s MD, Alan Redhouse updates us on the most anticipated <strong>Amiga</strong> hardware for years.<br />
What a busy two months<br />
this has been! Whilst<br />
OS4 continues its development<br />
- now with most of the planned<br />
OS4.2 features built-in - we<br />
have shipped <strong>Amiga</strong>One G3-<br />
SE boards with (Linux/UAE-<br />
PPC) to developers, and the<br />
<strong>Amiga</strong>One has itself made<br />
several public appearances -<br />
including at the AmiWest show<br />
in Sacramento at the end of<br />
July.<br />
We initially shipped these<br />
boards to a group of<br />
development experts to<br />
thoroughly test out the<br />
hardware and to port modern<br />
Linux distributions - and UAE -<br />
to the <strong>Amiga</strong>One board. They<br />
did an outstanding job, porting<br />
five modern Linux-PPC<br />
distributions in a matter of<br />
weeks. However it soon<br />
became apparent that the<br />
BIOS that we had originally<br />
specified (i.e. the code in ROM<br />
London<br />
West London Computer Club<br />
Based in West London<br />
Contact: Alan Paynter<br />
Phone: 07951 909262<br />
ANT - <strong>Amiga</strong> North Thames<br />
Based in North East London<br />
Website:<br />
www.amiganorththames.co.uk<br />
Contact: Michael Carrillo<br />
Phone: 07956 867223<br />
South East England<br />
AmiSEK<br />
Based in Kent<br />
Website: http://uk.geocities.com/<br />
pagan_johnuk<br />
Contact: John Worthington<br />
EMail: pagan@amiga.ca<br />
which initialises the hardware<br />
and loads the OS) had several<br />
limitations. Accordingly, and in<br />
parallel with OS4 development,<br />
we and Hyperion have put<br />
together a team to port the<br />
PPCboot firmware to the<br />
<strong>Amiga</strong>One. This has actually<br />
proceeded much more quickly<br />
than we originally expected<br />
and so we now expect to ship<br />
the remaining developer<br />
boards - with the new firmware<br />
- at the beginning of<br />
September.<br />
Having brought the BIOS<br />
development ‘in-house’ means<br />
that we/Hyperion are able to<br />
add in some significant ‘<strong>Amiga</strong>like’<br />
features to the boot<br />
A prototype of the <strong>Amiga</strong>One XE motherboard.<br />
Notice the removeable CPU module above the two DIMM slots.<br />
UK Usergroup Listing<br />
Looking for some hands-on help with your <strong>Amiga</strong> or somewhere to meet other <strong>Amiga</strong>ns?<br />
Why not contact one of these fine usergroups and visit http: /www.amigroups.co.uk.<br />
<strong>Amiga</strong> Support Association<br />
www.amigasupport.org.uk<br />
Contact: Paul Qureshi<br />
EMail: paul@world3.net<br />
Kickstart <strong>Amiga</strong><br />
Based in Surrey<br />
www.kickstart-amiga.co.uk<br />
Only <strong>Amiga</strong> User Group<br />
This is a new group just starting.<br />
Based around the<br />
Berkshire/Hampshire border.<br />
Website: www.onlyamiga.all.at<br />
Contact: Kelvin<br />
EMail: jumpship@amiga.org<br />
Mobile: 07811 270792<br />
SEAL - (South Essex <strong>Amiga</strong><br />
Link)<br />
Based in Essex<br />
Website:<br />
www.seal-amiga.co.uk<br />
Contact: Mick Sutton.<br />
Phone: 07710 039664<br />
East England<br />
Felbrigg <strong>Amiga</strong> Group<br />
Based in East Anglia<br />
Contact: Andrew Beeson<br />
EMail:<br />
andrew.beeson@ukonline.co.uk<br />
South West England<br />
Gloucestershire <strong>Amiga</strong> Group<br />
Based in Cirencester<br />
Website:<br />
www.glosamigagroup.co.uk<br />
Contact: Nick Darley-Jones<br />
Phone: 07779 365155<br />
South West <strong>Amiga</strong> Group<br />
Meets in Bristol<br />
Website: http://www.swag.org.uk<br />
Contact: Andy Mills<br />
Phone: 0<strong>12</strong>75 830703<br />
process as well as maintaining<br />
full compatibility with Linuxonly<br />
and dual-boot systems. It<br />
also means that we should be<br />
able to ship end-user systems -<br />
initially with Linux, but with a<br />
free upgrade to OS4 - at the<br />
start of October. This will not<br />
suit everybody - for example<br />
those that want a load-and-go,<br />
ready built OS4/A1 system, but<br />
sufficient people have<br />
requested it to make it a<br />
worthwhile option. For those<br />
who want a complete ready-togo<br />
OS4/A1 system both us and<br />
Hyperion are on track to have<br />
these available in time for<br />
Christmas - i.e. by the end of<br />
November 2002.<br />
Of course this PPCboot<br />
development also benefits MAI<br />
Logic, the manufacturers of the<br />
Articia ‘S’ chipset used in the<br />
<strong>Amiga</strong>One, by allowing them to<br />
offer a compatible version of<br />
PPCboot to developers of settop<br />
boxes etc. who want to use<br />
their chipset. In fact one spinoff<br />
of this that I am particularly<br />
proud of is that MAI and<br />
Eyetech have formed a long<br />
term business partnership<br />
outside of the <strong>Amiga</strong>One<br />
project.<br />
Finally I would like to say a big<br />
thank you to all those who<br />
joined the ‘I am <strong>Amiga</strong>’ club in<br />
June/July. Although neither<br />
Eyetech nor Hyperion benefit<br />
financially from this scheme it<br />
does give us a much firmer<br />
basis to estimate initial<br />
production volumes, and may<br />
even allow us to make some<br />
small - but no doubt welcome -<br />
price reductions to end-user<br />
boards (subject, as always, to<br />
exchange rate variations).<br />
So - if you haven’t done so<br />
already - now is the time to<br />
start saving for your new<br />
<strong>Amiga</strong>One, and quickly!<br />
That’s all for now,<br />
Alan<br />
8 TOTAL AMIGA Autumn 2002<br />
Wales<br />
Cymru <strong>Amiga</strong> User Group<br />
Meet in Cardiff<br />
Website: www.caug.org.uk<br />
Contact: Simon Eastop<br />
Phone: 07788 137560<br />
Scotland<br />
AGNES (<strong>Amiga</strong> Group North<br />
East Scotland)<br />
Website: http://clix.to/agnes<br />
GAUG - Glasgow <strong>Amiga</strong> User<br />
Group<br />
Based in Glasgow<br />
Website: www.gaug.cjb.net<br />
or: http://web.ukonline.co.uk/<br />
donaldwm<br />
Mailing List:<br />
gaug-subscribe@yahoogroups.com<br />
Contact: Duncan Gow<br />
Phone: 01436 679226<br />
North England<br />
BAC - Blackpool <strong>Amiga</strong> Club<br />
Website:<br />
www.blackpoolamigaclub.co.uk<br />
Contact: Barry Riddiford<br />
Phone: 0<strong>12</strong>53 397339<br />
Huddersfield <strong>Amiga</strong> User Group<br />
Website: www.alt-woa.org<br />
Contact: Geoff Milnes<br />
Phone: 01484 322101<br />
SS<strong>Amiga</strong><br />
Based in Wigan and West<br />
Lancashire<br />
Website: www.ssamiga.co.uk<br />
Contact: Wesley Potter<br />
Phone: 01942 863798<br />
Mobile: 07775 747429<br />
There has been a lot of<br />
debate on various <strong>Amiga</strong><br />
forums relating to our announcement<br />
of both a certification<br />
program for hardware to run<br />
<strong>Amiga</strong>OS4.0 and the inclusion<br />
of authentication code in the<br />
boot ROMs that will ship in<br />
such hardware. Whilst much<br />
of the argument has been<br />
reasoned, much has been absolutely<br />
rot (the best one<br />
being the all existing <strong>Amiga</strong>s<br />
were open hardware platforms<br />
- hello, can anyone say<br />
custom chipset?), and a small<br />
amount has been pure mischief,<br />
its aim apparently to<br />
force us to drop this plan so<br />
that pirated copies of<br />
<strong>Amiga</strong>OS4.0 can then run on<br />
non certified hardware.<br />
The purpose of the hardware<br />
certification program is to<br />
ensure that consumers know<br />
when they are buying a<br />
machine that will run<br />
<strong>Amiga</strong>OS at its optimum efficiency.<br />
Many reputable<br />
dealers in the past have been<br />
tarnished with a brush made<br />
black by a few rogue dealers<br />
and companies that have singularly<br />
failed to provide the<br />
service they advertised,<br />
whether that be shoddy components,<br />
badly installed software<br />
or worse, just disappearing<br />
entirely with hard earned<br />
pre payment money.<br />
Whilst that is the primary aim<br />
of the certification program, it<br />
also has a wider agenda,<br />
namely to ensure that as we<br />
begin to move the <strong>Amiga</strong> platform<br />
back into the mainstream<br />
markets, existing and new<br />
consumers can be guaranteed<br />
a quality experience, from first<br />
contact with a developer all<br />
the way through to post purchase<br />
support, something that<br />
has been notoriously lacking<br />
in the past; and again with just<br />
one or two companies blighting<br />
the reputations of the rest<br />
of the community.<br />
The second <strong>issue</strong> raised is the<br />
inclusion of an authentication<br />
mechanism in <strong>Amiga</strong>OS4.0,<br />
namely the infamous `dongle<br />
code’. In short it is a section of<br />
code inserted into the boot<br />
ROM which the OS refers to<br />
at various times during an<br />
<strong>Amiga</strong>OS session to ensure<br />
that it is on a certified and<br />
authentic <strong>Amiga</strong>One machine.<br />
The single reason for this is to<br />
prevent piracy of <strong>Amiga</strong>OS.<br />
Whilst we have all heard the<br />
stories of piracy in the past,<br />
we have to ensure that from<br />
the start of the rebirth of the<br />
<strong>Amiga</strong>OS, we are actively<br />
promoting anti-piracy<br />
measures. Firstly, we will be<br />
glad if we can get 10k users of<br />
<strong>Amiga</strong>OS4.0 in the first <strong>12</strong><br />
months, not just from a user<br />
base perspective but also<br />
from the revenue that that will<br />
bring in, going directly to<br />
those who have worked on<br />
<strong>Amiga</strong>OS4.0. Secondly, if we<br />
are to attract developers back<br />
to such a small platform, they<br />
have to see evidence that<br />
<strong>Amiga</strong> is serious about<br />
protecting not just its property<br />
but also the property and<br />
potential sales of the developer<br />
itself. Nothing can demonstrate<br />
the curse of piracy on<br />
our platform so much as the<br />
Freespace situation, where<br />
Hyperion’s actual sales of the<br />
product were four times less<br />
than the number of product<br />
registrations for the updates.<br />
People such as Davy Wentzler<br />
(Audio Evolution), Ron of<br />
Computer City (Inga,<br />
Mediapoint) and Stefan<br />
Burstroem (Ibrowse) have not<br />
just stuck by our platform and<br />
created product that we all<br />
News<br />
FleecySpeaks<br />
<strong>Amiga</strong>’s Chief Technology Officer gives us a taste of what to expect in <strong>Amiga</strong>OS 4. .<br />
use, but they are at this very<br />
moment working hard on<br />
product for OS4.0. We as a<br />
community owe it to them to<br />
do everything possible to<br />
ensure that they are<br />
rewarded. Without that<br />
reward, there will be no new<br />
products, and the <strong>Amiga</strong><br />
rebirth will falter and die.<br />
I want to end on a high note<br />
though. The Amiwest show in<br />
Sacremento showed that<br />
there is still huge interest in<br />
<strong>Amiga</strong>, and Bill McEwen said<br />
that he could have sold an<br />
<strong>Amiga</strong>One and OS4.0 to<br />
everyone there if it had been<br />
ready. Sore point I know, but<br />
Bill also reiterated our policy<br />
of announcing only progress<br />
and not giving a final ship date<br />
until we have the product<br />
working in front of us, and<br />
most people seem to be<br />
happy with this method.<br />
Progress is being made.<br />
There are more screenshots<br />
of the new interface up on the<br />
<strong>Amiga</strong> website, almost all of<br />
the <strong>Amiga</strong>OS4.0 modules<br />
have been completed,<br />
ExecSG is booting on CSPPC<br />
boards, and the <strong>Amiga</strong>Ones<br />
are now running Linux and<br />
UAE - one was demonstrated<br />
by Randir of Compuquick.<br />
Slowly but surely the <strong>Amiga</strong><br />
rebirth is occurring.<br />
9
News<br />
4<br />
<strong>Amiga</strong>OS Update<br />
Loads more news and a bunch of new screenshots, Robert Williams gets his teeth into the latest OS 4 information.<br />
Iwould have liked to be able<br />
to start this article by saying<br />
that OS 4 is out there for all of<br />
us to buy, however although<br />
this isn’t the case things are far<br />
from gloomy, Hyperion have<br />
been keeping us up to date<br />
with their progress, most<br />
recently with a number of<br />
interviews held at the AmiWest<br />
show. So once again here are<br />
the nuggets of information I’ve<br />
been able to find from various<br />
sources.<br />
Although delays are never<br />
pleasant one of the reasons for<br />
OS 4’s longer than planned<br />
development period is that<br />
many more aspects of the OS<br />
are being ported to PPC than<br />
was originally intended for the<br />
first release. Thomas Freiden<br />
(one of the OS4 developers)<br />
said that they found that having<br />
large parts of the OS emulated<br />
meant that some of the<br />
<strong>Amiga</strong>’s legendary<br />
performance and quick<br />
interface response was lost.<br />
On a similar note Ben<br />
Hermans (Hyperion’s manager)<br />
pointed out that after waiting so<br />
long it would be silly to rush out<br />
the product with known bugs or<br />
inadequate testing, he said<br />
they would rather wait a little<br />
longer and release the best<br />
product they can.<br />
Development of the enhanced<br />
kernal, known as Exec SG, has<br />
been completed to the level<br />
Hyperion originally planned for<br />
Hot Links<br />
OS 4 however they have<br />
decided to implement a more<br />
complex memory system than<br />
was planned. This will include<br />
a full virtual addressing model,<br />
which means that rather than<br />
an application being allocated<br />
a particular area of physical<br />
memory it is given a virtual<br />
area which the OS then relates<br />
to physical memory. The<br />
advantage of this model is that<br />
the OS is in control of what<br />
memory is used, fragmentation<br />
is eliminated and it becomes<br />
possible to implement various<br />
schemes to protect the system<br />
from crashes. One direct<br />
benefit that Ben Hermans<br />
mentioned is that this system<br />
will allow program’s stack<br />
allocations to be dynamically<br />
increased, he estimated that<br />
30% of <strong>Amiga</strong> crashes are due<br />
to applications running out of<br />
stack space so this would be a<br />
major boon. When virtual<br />
memory has been mentioned<br />
in the past many<br />
knowledgeable <strong>Amiga</strong><br />
programmer have commented<br />
that it would not be possible to<br />
implement it without breaking<br />
existing applications, it remains<br />
to be seen how Hyperion will<br />
handle this, perhaps some<br />
features will only be available<br />
to new OS 4 applications. Ben<br />
stated that although this<br />
improved system would add<br />
about three weeks to the<br />
development it was justified by<br />
the extra functionality and<br />
improved stability.<br />
<strong>Download</strong> the announcements from the recent AmiWest show<br />
in mp3 format (Ben Hermans’ and Thomas Frieden’s<br />
interviews are particularly interesting from an OS 4 point of<br />
view:<br />
http://aurora.merseine.nu/amiga<br />
The latest screen grabs from OS 4 are linked from <strong>Amiga</strong>’s<br />
site at:<br />
http://os.amiga.com<br />
The new GUI preferences editor looks like it will take the<br />
configurability of both Intuition and Reaction to new levels.<br />
Most of the OS 4 modules<br />
have been developed on<br />
Classic <strong>Amiga</strong> systems with<br />
CyberStorm PPC accelerators<br />
so far. The new OS uses a<br />
hardware abstraction layer<br />
(HAL), this is the part of the OS<br />
code which is specific to a<br />
particular PPC hardware<br />
platform, currently this is being<br />
perfected on the CyberStorm<br />
PPC and once it is complete it<br />
can be quickly ported to<br />
another platform such as the<br />
<strong>Amiga</strong>One. Hyperion are<br />
making sure they have the HAL<br />
specification complete and<br />
debugged before they start on<br />
the HAL for the <strong>Amiga</strong>One<br />
hardware to prevent having two<br />
code bases in development.<br />
Once the HAL is complete it is<br />
expected to take about one<br />
and a half to two weeks to port<br />
it over to a new hardware<br />
platform. That said Ben<br />
Hermans and Bill McEwan<br />
have both confirmed that the<br />
new Exec kernal (the heart of<br />
the OS) is already booting on<br />
the <strong>Amiga</strong>One and that the<br />
boot sequence is finalised.<br />
Support for Blizzard PPC cards<br />
now seems to be confirmed but<br />
it will not be ready until after<br />
the CyberStorm because<br />
drivers have to be developed<br />
for the on-board SCSI (which<br />
uses a different chip to the<br />
CyberStorm) and the OS<br />
needs to support A<strong>12</strong>00<br />
specific ports (clock port etc.).<br />
Hyperion are now working on<br />
the BIOS (Basic Input Output<br />
System) for the <strong>Amiga</strong>One, this<br />
was to be provided by a third<br />
party who failed to deliver. The<br />
BIOS is stored in ROM and<br />
initialises the basic<br />
motherboard devices such as<br />
memory and the North and<br />
South bridges and gets the OS<br />
loading from disk. The<br />
Hyperion BIOS will be based<br />
on the open source PPCBoot<br />
BIOS. If the user desires it will<br />
be possible to dual boot<br />
<strong>Amiga</strong>OS 4 and another OS<br />
such as one of the Linux<br />
distributions which have<br />
already been prepared for the<br />
<strong>Amiga</strong>One. Note that the BIOS<br />
is not the same as the <strong>Amiga</strong>’s<br />
Kickstart ROM which performs<br />
BIOS tasks and much more.<br />
For OS 4 much more of the OS<br />
will be stored on disk including<br />
the early start-up screen. On<br />
that subject Hyperion expect<br />
the early start-up screen to be<br />
largely unchanged for OS 4,<br />
possibly some options specific<br />
to certain hardware will be<br />
added (memory timing options<br />
were mentioned so I think this<br />
may be similar to the<br />
Cyberstorm PPC’s early startup<br />
screen).<br />
Several options are being<br />
evaluated for how the new OS<br />
will be booted on existing<br />
<strong>Amiga</strong> hardware (with a PPC<br />
accelerator). A third party has<br />
suggested producing a plug-in<br />
card which would contain a<br />
ROM to boot the new OS, this<br />
would obviously add significant<br />
cost and several models might<br />
be needed to suit different<br />
<strong>Amiga</strong>s. Another option would<br />
be to have a program which<br />
ran in classic <strong>Amiga</strong> mode then<br />
re-booted the <strong>Amiga</strong> to load<br />
the new kernal, this is how<br />
current <strong>Amiga</strong> Linux<br />
distributions work. Obviously<br />
this method would require the<br />
existing <strong>Amiga</strong>OS to boot and<br />
then re-boot into OS 4 slowing<br />
the boot process. The final<br />
option and the one that seems<br />
to be favoured by Hyperion is a<br />
custom boot loader installed on<br />
the hard disk, this would still<br />
require a re-boot but it could<br />
happen very early in the startup<br />
process and so should only<br />
add a few seconds to boot<br />
time.<br />
Some more of the utility<br />
programs that will be included<br />
with OS 4 have been<br />
announced. The first being a<br />
new PPC native version of the<br />
media player Action, this will<br />
support more modern codecs<br />
including DivX and MPEG 4, in<br />
combination with the processor<br />
power offered by the<br />
<strong>Amiga</strong>One these should open<br />
up lots more Internet content to<br />
<strong>Amiga</strong> users. A new PDF<br />
document viewer will be<br />
included, again this will be<br />
PPC native and include print<br />
and search functions. The<br />
familiar Commodore Installer<br />
utility will be replaced by<br />
InstallerNG which adds<br />
features while remaining<br />
compatible with existing<br />
scripts.<br />
On a slightly less happy note<br />
fans of dragable screens (I<br />
know many people don’t really<br />
care) will be disappointed to<br />
hear that this feature will not be<br />
in OS4, the problem is that<br />
10 TOTAL AMIGA Autumn 2002<br />
modern graphics chip sets just<br />
don’t support this feature<br />
(before anyone says that<br />
CyberGraphX does support<br />
dragable screens note that it<br />
does not on Permedia based<br />
cards, the most recent type to<br />
have a driver). It is possible<br />
that a software emulation will<br />
be added in a future OS4<br />
version but it will require<br />
significant work to make it work<br />
smoothly. I will just point out<br />
that OS 4 will support multiple<br />
screens, just not dragging<br />
down one to reveal another.<br />
I’ve mentioned OS4’s USB<br />
stack before, now we know it is<br />
the same one that will be<br />
shipped with the forthcoming<br />
Thylacine Zorro card (see<br />
news) and it will have basic<br />
scanner, printer, mouse and<br />
keyboard support. The stack<br />
will also support the Highway<br />
Zorro (reviewed in this <strong>issue</strong>)<br />
and Subway clock port USB<br />
cards so CyberStorm and<br />
BlizzardPPC owners will have<br />
the option of USB in OS4.<br />
Since the last <strong>issue</strong> several<br />
batches of new screenshots of<br />
OS components have been<br />
released on the <strong>Amiga</strong> website.<br />
These have included a snap of<br />
the new Palette preferences<br />
editor which looks very similar<br />
to the Full Palette utility,<br />
offering the option to lock<br />
certain colours to make the<br />
most of low colour screens and<br />
to solve problems with palette<br />
mapped icons such as those<br />
supplied with Magic<br />
Workbench. The first grabs of<br />
the preferences for the new<br />
TCP/IP stack have been<br />
shown, this looks similar to<br />
Genesis or Miami as you would<br />
expect but it’s nice to see it will<br />
have easy configuration in<br />
addition to its claimed speed.<br />
Another interesting new<br />
preferences program is the<br />
GUI preferences which seems<br />
to include options for both<br />
Intuition (menus, window<br />
borders etc.) and Reaction<br />
applications. In the first release<br />
of OS4 the options for the look<br />
of windows is expected to be<br />
similar to Visual Prefs, the aim<br />
is to offer a fully skinable look<br />
similar to some Linux window<br />
managers. This looks much<br />
more comprehensive than the<br />
current preferences and it<br />
The New HDToolbox<br />
seems to be getting close to<br />
the options offered by MUI with<br />
many different border styles<br />
and independent control over<br />
different gadget types. It also<br />
News<br />
These screenshots show that <strong>Amiga</strong>OS’s venerable hard drive<br />
preparation tool has had a real make over.<br />
The main window is similar to the OS3.9 version but note the<br />
removeable media control and SCSI Utilities buttons.<br />
The install window allows many more RDB options to be<br />
changed directly. This is the expert version, a simplified<br />
interface is available if you just want to get a drive installed!<br />
The partitioning window now lists partitions with their details<br />
as well as showing them graphically. Note the options to load<br />
and save RDB’s for easier drive recovery.<br />
The SCSI utilities window looks powerful.<br />
has options labelled Controls<br />
and Menus which we assume<br />
will cover the menu and<br />
window configuration options<br />
shown in the first OS 4<br />
11
News<br />
screenshots that we printed<br />
last <strong>issue</strong>. The final<br />
screenshots are of the<br />
replacement for HDToolBox,<br />
this seems to be improved in<br />
every way and looks extremely<br />
comprehensive.<br />
Again real progress is being<br />
made, according to<br />
announcements most of the<br />
OS components are now<br />
complete and being separately<br />
tested. Apart from the<br />
additional work on Exec SG<br />
Sussex based company<br />
MDR Interfaces Ltd. have<br />
enhanced the functionality of<br />
their home server system Inet<br />
Dial (ID) with the addition of<br />
dynamic remote web access.<br />
Some ISPs, such as Demon,<br />
provide static IP addresses to<br />
their users as standard, but<br />
most ISPs use dynamic IP<br />
addresses, where users are<br />
allocated an IP address each<br />
time they dial in. This has<br />
traditionally presented a<br />
problem when connecting to a<br />
home server, but ID now<br />
resolves this problem by<br />
providing a dynamic link<br />
service.<br />
The new TCP/IP<br />
stack gets a nice<br />
preferences<br />
editor too.<br />
the Intuition and Reaction<br />
interfaces are still being<br />
improved but work on them is<br />
coming to an end. The big jobs<br />
that remain are to integrate the<br />
disparate parts and as this<br />
involves the new PPC parts,<br />
existing OS components and<br />
the 68k emulator there is<br />
certainly room for unexpected<br />
complications although<br />
Hyperion don’t expect too<br />
many (that sounds a bit like<br />
Yes Prime Minister but you<br />
know what I mean). Once the<br />
Richard de Rivaz is the director<br />
of MDR interfaces, and readers<br />
may recall ID from an article in<br />
<strong>Amiga</strong> Active some time ago,<br />
as well as appearances by<br />
Richard at a number of <strong>Amiga</strong><br />
shows, including World of<br />
<strong>Amiga</strong> South East as a visitor,<br />
and Kickstart 4 at which he<br />
exhibited an earlier version of<br />
ID. Originally designed solely<br />
for remote home automation,<br />
ID can be used to control lights<br />
and other attached devices<br />
from another computer, either<br />
through direct dial, e-mail<br />
command or a web based<br />
interface. It supports the X-10<br />
protocol, which allows devices<br />
to be sent control signals<br />
Keep your home under control from the comfort of your browser,<br />
anywhere in the world!<br />
integration and test are done<br />
the OS should be ready for<br />
release on the CyberStorm.<br />
For the <strong>Amiga</strong>One some<br />
additional work has to be done<br />
to remove chipset<br />
dependencies from the OS<br />
components.<br />
So now we come to the big<br />
question, when will it be<br />
released? Unsurprisingly after<br />
previous delays and missed<br />
deadlines no one from<br />
Hyperion was willing to give a<br />
firm date, they did say that<br />
there would have to be a real<br />
“cataclysm” (Ben Herman’s<br />
word) to push it past the end of<br />
the year and they seem to be<br />
hopeful that it will be much<br />
before that. Another clue is that<br />
the Italian Pianeta <strong>Amiga</strong> show<br />
is advertising that both the<br />
<strong>Amiga</strong>One and OS 4 will be on<br />
InetDial & SolarNavigator<br />
Not satisfied with providing the <strong>Amiga</strong>’s premier home automation system MDR Interfaces is about to set sail<br />
and they’re taking <strong>Amiga</strong>OS with them! Philip Corner finds out more.<br />
through the mains ring,<br />
removing the need for a radio<br />
or line-of sight IR system.<br />
When accessing an ID server<br />
remotely via its web based<br />
interface, it is possible to see<br />
the current status of devices,<br />
review and alter timed events<br />
and even give commands to<br />
turn devices on or off<br />
immediately. The system can<br />
also be configured to download<br />
e-mail at preset times, which<br />
are sorted into separate mail<br />
boxes and can be accessed<br />
remotely, and it can also be<br />
instructed to go on-line with an<br />
e-mail command.<br />
Its repetoir has recently been<br />
expanded to acting as a<br />
wireless server, allowing<br />
browser equipped PDAs or<br />
other devices to access the<br />
Web or download e-mail<br />
remotely when in range,<br />
without the user having to use<br />
the computer directly or use<br />
expensive cellular<br />
communication. The system<br />
can also support web cams,<br />
allowing you to verify the<br />
results of your remote<br />
controlling from wherever you<br />
may be in the world.<br />
show there on the 21st and<br />
22nd of September (whether<br />
OS 4 will be running on the<br />
<strong>Amiga</strong>One is not stated). The<br />
order in which the OS will be<br />
released is much clearer,<br />
everyone says the version for<br />
classic hardware with a<br />
CyberStorm PPC accelerator<br />
will be released first because<br />
development started on these<br />
boards so naturally they are<br />
ahead. Release on the Blizzard<br />
PPC and <strong>Amiga</strong>One is then<br />
expected at about the same<br />
time, both requiring some<br />
additional work for their unique<br />
hardware. Other PPC<br />
platforms like Elbox’s Shark<br />
PPC will come afterwards,<br />
although if Hyperion are right<br />
with their estimate of the time<br />
to port the HAL it needn’t be a<br />
long wait.<br />
Now this looks like a<br />
good place for a<br />
“Powered by <strong>Amiga</strong>” logo!<br />
MDR are also responsible for<br />
the control system of the<br />
record attempting boat<br />
SolarNavigator. SolarNavigator<br />
hopes to be the first solar<br />
powered boat to<br />
circumnavigate the globe, and<br />
would incorporate a wireless<br />
LAN to allow all the on-board<br />
crew to be kept constantly up<br />
to date with the ship’s status,<br />
as well as to interact with it<br />
remotely. The events of<br />
September the 11th caused the<br />
programme to be temporarily<br />
halted, but it is now underway<br />
again, and work is progressing<br />
well on a 1/10 scale solar<br />
powered model. The<br />
programme has been helped<br />
somewhat by features in local<br />
press and television. The<br />
current plans call for the onboard<br />
computer systems to be<br />
PCs running the Amithlon<br />
<strong>Amiga</strong> operating system,<br />
combining the advantages of<br />
cheap hardware with the stable<br />
operating system we all know<br />
and love. Anybody wishing to<br />
help fund the project can do so<br />
by joining the SolarNavigator<br />
club, allowing you to purchase<br />
merchandise such as<br />
SolarNavigator branded<br />
<strong>12</strong> TOTAL AMIGA Autumn 2002<br />
clothing, mugs and even ship<br />
hull space on which to display<br />
your own name or message.<br />
Corporate sponsorship is also,<br />
of course, possible. Perhaps<br />
most interestingly of all,<br />
SolarNavigator are doing a<br />
“Back for the Future” and<br />
creating an album of music,<br />
based on an environmental<br />
theme, which will raise money<br />
for the project. Anybody<br />
interested in getting a break<br />
and putting themselves forward<br />
for the album should check out<br />
the website. The site also<br />
features pictures showing the<br />
building and testing of the<br />
SolarNavigator scale models<br />
and early concepts, as well as<br />
News<br />
buzzword...<br />
On Saturday 27th of July<br />
2002, our last hope to<br />
buzzword... Bringing you the latest news and<br />
comment from the <strong>Amiga</strong> world.<br />
general links to other sites on<br />
solar vehicles and renewable<br />
energy sources and the<br />
technology used in the ship.<br />
MDR Interfaces:<br />
http://www.mdr.co.uk<br />
SolarNavigator:<br />
http://www.solarnavigator.org.uk<br />
another disappointment, and Shopping Malls once to day running on other<br />
happily Sharp have promised again.<br />
matters including the <strong>Amiga</strong><br />
end a world of Microsoft<br />
damnation, <strong>Amiga</strong> President<br />
Bill McEwen, attended a<br />
computer show at the Holiday<br />
Inn in Sacramento, California,<br />
USA.<br />
AmiWest 2002 may finally<br />
prove to be a turning point in<br />
<strong>Amiga</strong>`s fortunes after many<br />
years of poverty and belt<br />
tightening. It was very<br />
refreshing to hear Bill McEwen<br />
in his speech at AmiWest,<br />
owning up to mistakes made<br />
by the current <strong>Amiga</strong> owners<br />
that the Zaurus will start<br />
shipping Intent/<strong>Amiga</strong>DE<br />
sometime this year with<br />
upgrades for existing owners<br />
being made available too.<br />
Another major unknown deal<br />
that got canned was with MTV<br />
Europe for a set-top device<br />
being planned, a deal that<br />
would have given <strong>Amiga</strong> a<br />
wide exposure in Europe.<br />
On the plus side, <strong>Amiga</strong> have<br />
signed new deals with Sendo<br />
a mobile phone manufacturer<br />
in the UK as well as with 02,<br />
the fifth biggest mobile phone<br />
Buzzword has also learned<br />
that <strong>Amiga</strong> are currently in<br />
negotiations with a big name<br />
in portable/mobile devices, if<br />
they secure the deal will mean<br />
their financial future should be<br />
secured for some time. We<br />
know the name of the party<br />
but are at this time unable to<br />
release the name.<br />
Bill McEwen also revealed that<br />
the last 6 months he has spent<br />
concentrating mainly on<br />
securing finance for <strong>Amiga</strong><br />
from investors, leaving the day<br />
desktop/<strong>Amiga</strong> Anywhere to<br />
other parties.<br />
Buzzword has uncovered<br />
unconfirmed reports that<br />
<strong>Amiga</strong>OS4 is in separate near<br />
complete modules and is<br />
currently awaiting to be<br />
integrated or “bolted” together.<br />
If there are no complications,<br />
the first <strong>Amiga</strong>OS for the PPC<br />
platform could be released in<br />
September 2002 first to<br />
CSPPC owners followed<br />
thereafter by releases for the<br />
AmiaOne and Blizzard PPC<br />
owners.<br />
after acquiring <strong>Amiga</strong> from operator in the world. Deals<br />
Gateway in January 2000. like this are a must for <strong>Amiga</strong><br />
Bill Admitted that they were 18<br />
months behind schedule,<br />
effectively meaning that for<br />
most of their tenure as owners<br />
of the <strong>Amiga</strong> name, pretty<br />
much went down the toilet.<br />
Good also was that finally, Bill<br />
McEwen seems to have taken<br />
a leaf out of the Alan<br />
Redhouse school of press<br />
releases, and actually gave a<br />
because they need to bring in<br />
the revenue in order to keep<br />
themselves afloat. Whilst the<br />
<strong>Amiga</strong> desktop platform is<br />
what we really all care about,<br />
<strong>Amiga</strong> need to generate<br />
revenue to satisfy investors<br />
and most importantly, keep<br />
themselves afloat which is the<br />
single most important thing<br />
anyhow.<br />
speech that was straight and Bill McEwen also said that he<br />
to the point. Gone was the will no longer announce<br />
glossy, overhyped, rose tinted products or deals until they<br />
vision of the future, instead Bill are about to ship or shipping,<br />
shot straight from the hip and this is a good strategy<br />
laid the facts down, something because it will stop <strong>Amiga</strong><br />
many an <strong>Amiga</strong> user has been looking foolish in the broader<br />
wanting to see.<br />
IT world.<br />
Some of the biggest<br />
Dixons, one of the largest, if<br />
disappointments that Bill not the largest retailers of<br />
mentioned were the Nokia electronic goods in Europe<br />
media terminal, a project that and the UK will be selling<br />
Nokia were cancelling at the <strong>Amiga</strong>Anywhere products later<br />
same time they were signing a this year. This is a great coop<br />
contract with <strong>Amiga</strong>. The for <strong>Amiga</strong>, as they will finally Sendo’s Z100 smart phone, the<br />
Sharp Zaurus not shipping return to having a major latest host for <strong>Amiga</strong> Anywhere.<br />
with Intent/<strong>Amiga</strong> DE was presence in the High Street<br />
13
Features<br />
ADSL<br />
Broadband Internet<br />
Robert Williams and Mick Sutton find that Broadband Internet access is now within the reach of many more <strong>Amiga</strong><br />
Whatever it says on the<br />
box modems are slow,<br />
even 56k ones. Everybody<br />
wants faster internet access,<br />
but until recently there were no<br />
affordable options. A couple of<br />
years ago some of the cable<br />
TV companies introduced a<br />
broadband service (starting at<br />
around ten times faster than<br />
56k modems) for their<br />
customers, obviously this is<br />
limited to areas where cable<br />
networks have been installed<br />
and a PC or possibly Mac is<br />
required for installation. British<br />
Telecom at around the same<br />
time introduced ADSL<br />
(Asymmetric Digital Subscriber<br />
Line) which gives a broadband<br />
internet connection over<br />
existing telephone wires.<br />
Initially the only service aimed<br />
at home users included a USB<br />
ADSL modem that had to be<br />
installed by an engineer. This<br />
excluded <strong>Amiga</strong> users on<br />
several fronts the first being we<br />
didn’t have USB (and we still<br />
don’t have drivers for ADSL<br />
modems) and secondly the<br />
engineer would only install on<br />
a PC (or Mac if you were<br />
lucky). You could then buy an<br />
<strong>Amiga</strong> compatible modem and<br />
use the service but that is<br />
against the terms and<br />
conditions and you’re paying<br />
for a USB modem you can’t<br />
use.<br />
Earlier this year things<br />
changed for the better, BT<br />
introduced a wires only option.<br />
This means that you can have<br />
your telephone line ADSL<br />
enabled and then purchase<br />
your own hardware which of<br />
course you can make sure is<br />
<strong>Amiga</strong> compatible. Another<br />
significant advantage of the<br />
wires only option is that it is<br />
cheaper because you don’t<br />
users. But just what do you need to get into the fast lane?<br />
have to “rent” the hardware or<br />
have an engineer visit.<br />
What ADSL is and how it works<br />
ADSL uses frequencies above<br />
those used by normal voice<br />
telephone to give you high<br />
speed data transfers without<br />
interrupting the telephone<br />
service. A special splitter called<br />
a micro-filter is used to<br />
separate the two frequency<br />
bands and stop the two<br />
services interfering with each<br />
other. ADSL connects you<br />
permanently to the Internet so<br />
you don’t have to dial up a<br />
connection when you need it,<br />
ISPs charge a flat fee for your<br />
connection, there are no “call”<br />
charges. The standard home<br />
user services offer 576Kb/s<br />
(Kilo bits per second) download<br />
speed and 288Kb/s upload<br />
speed (that’s why it’s called<br />
asynchronous). This is more<br />
than 10 times the speed a 56k<br />
analogue modem typically<br />
achieves (on most telephone<br />
lines a connection speed on<br />
50k is typical). For example a<br />
20Mb compressed file (for<br />
instance an archive, movie or<br />
mp3) would take nearly an<br />
hour on a good 56k<br />
connection, on ADSL it would<br />
take about 5 minutes to<br />
download.<br />
What do you need for<br />
ADSL to work?<br />
To use ADSL in the UK you<br />
need a BT line (in other<br />
countries you’ll have to talk to<br />
your local telephone supplier)<br />
connected to an exchange<br />
which has ADSL equipment<br />
installed. The length of the line<br />
to your exchange (not the<br />
direct distance) must be less<br />
than 5.5km and the line must<br />
be of sufficient quality and not<br />
A typical microfilter with sockets<br />
for the ADSL modem (left) and<br />
telephones (right).<br />
contain any optical fibre. If you<br />
have an ISDN service such as<br />
Home Highway it must be<br />
removed before ADSL can be<br />
installed but we understand an<br />
upgrade option may be<br />
available in the future. ADSL<br />
services are sold by a number<br />
of Internet Service Providers<br />
(ISPs), when you place your<br />
order they will ask BT to<br />
activate your line, there is<br />
normally a fee for this setup<br />
and it takes about ten days.<br />
You can get a good idea of<br />
whether your line is suitable<br />
and if your exchange has been<br />
enabled using the availability<br />
checker at all ADSL ISPs and<br />
linked from the excellent<br />
http://www.adslguide.org.uk/.<br />
To use the checker you just<br />
need to enter your full<br />
telephone number. You can<br />
also find your local BT<br />
exchange using this handy web<br />
page Exchange Finder:<br />
http://www.nothingon.tv/adsl/std_query.html,<br />
if it<br />
hasn’t been enabled you can<br />
keep an eye on ADSL Guide to<br />
see if it appears on the lists of<br />
upgraded exchanges that BT<br />
publishes periodically. As we<br />
write this BT have just<br />
announced that they will be<br />
surveying interest in ADSL to<br />
see which exchanges should<br />
be upgraded next, this will<br />
probably mean<br />
registering your<br />
interest with an ISP.<br />
What happens when<br />
ADSL is installed?<br />
When your line has been<br />
ADSL enabled initially you<br />
should not notice any<br />
difference unless you have an<br />
ADSL modem installed, the<br />
telephone can still be used<br />
normally. If you connect an<br />
ADSL modem and configure it<br />
correctly you should see an<br />
ADSL connection light about<br />
30 seconds after it is switched<br />
on (this light is labelled<br />
“SHOWTIME” on the Conexant<br />
router reviewed in this <strong>issue</strong>).<br />
To use ADSL and your<br />
telephone at the same time<br />
you need at least one microfilter.<br />
This is a device that plugs<br />
into a telephone socket and<br />
has an RJ11 socket for the<br />
ADSL modem and a normal BT<br />
phone socket for your phone or<br />
any other equipment that uses<br />
a telephone line (fax machine,<br />
satellite TV boxes, burglar<br />
alarms or even a dial up<br />
modem should you need it). All<br />
telephone equipment has to be<br />
connected through the filter for<br />
it to work, this can be achieved<br />
in two ways, a separate microfilter<br />
on each phone socket or<br />
one filter on the master socket<br />
with all the extensions plugged<br />
into the filter. An advantage of<br />
having a filter on each socket<br />
is that you can use your ADSL<br />
modem on any socket and also<br />
it avoids changing any phone<br />
cabling.<br />
At the present date there are<br />
no drivers for USB ADSL<br />
modems (although we do now<br />
have a USB card for the<br />
<strong>Amiga</strong>) so the only option is to<br />
connect an ADSL modem via<br />
Ethernet. In the UK you need<br />
to get a combined ADSL<br />
modem and Ethernet router.<br />
These devices connect to your<br />
ISP via ADSL and allow<br />
computers connected to them<br />
via Ethernet to access the<br />
internet. The ADSL connection<br />
is taken care of by the firmware<br />
on the router which is usually<br />
configured using a web<br />
browser so you don’t need any<br />
proprietary software on your<br />
<strong>Amiga</strong>. What you do need is a<br />
TCP/IP stack such as Miami or<br />
Genesis and an Ethernet card.<br />
The other good thing about<br />
having an Ethernet router is<br />
that you can share your<br />
internet connection with<br />
several computers as long as<br />
they are on your Ethernet<br />
network (often called a LAN,<br />
Local Area Network)........neat!<br />
All each computer needs is<br />
Ethernet and a TCP/IP stack<br />
which most platforms have. For<br />
example Mick has his A<strong>12</strong>00<br />
and his wife’s iMac connected<br />
to his router and Robert has<br />
his A3000 and his family’s<br />
Windows PC . Of course if you<br />
decide to get a new computer<br />
say for example an <strong>Amiga</strong>ONE<br />
or Pegasos as long as it has<br />
Ethernet and a TCP/IP stack<br />
(and both of those machines<br />
will do) then you’re in business.<br />
“So how much will all this cost<br />
me?” I hear you ask. The exact<br />
answer to this will depend on<br />
what <strong>Amiga</strong> you have, which<br />
ISP you choose and what<br />
equipment you have already.<br />
Below we have tried to<br />
estimate the costs for different<br />
<strong>Amiga</strong> set-ups.<br />
Whatever system you have,<br />
you will need the ADSL router,<br />
an RJ11 cable to connect it to<br />
the micro-filter, an Ethernet<br />
cable to connect the <strong>Amiga</strong><br />
and at least one micro-filter.<br />
ADSL Router £80<br />
RJ11 line cable £5<br />
Ethernet cable £5<br />
Micro-filter £10<br />
<strong>Total</strong> £100<br />
On top of these costs you will<br />
have to add an Ethernet card<br />
to your <strong>Amiga</strong> :<br />
14 TOTAL AMIGA Autumn 2002<br />
An RJ 1 cable like this is used<br />
to connect the ADSL modem<br />
to the filter.<br />
A<strong>12</strong>00<br />
On an A<strong>12</strong>00 without a<br />
busboard (Zorro or PCI) you<br />
can add a PCMCIA Ethernet<br />
card designed for laptop PC’s.<br />
You can either buy a generic<br />
card that is compatible with the<br />
freeware cnet.device or buy a<br />
bundled card and driver from<br />
an <strong>Amiga</strong> dealer. However you<br />
get your card you will need to<br />
fix the CC_reset line on the<br />
A<strong>12</strong>00 motherboard, this can<br />
be easily achieved with a plug<br />
on fix that fits over the Gayle<br />
chip (easiest, no soldering<br />
required) or by soldering a<br />
couple of components onto the<br />
motherboard (you will need<br />
good soldering skills, the<br />
instructions are in the Cnet<br />
archive). If your A<strong>12</strong>00 is<br />
mounted in a tower where the<br />
PCMCIA slot is at the bottom<br />
you will require a PCMCIA right<br />
angle adapter so the card will<br />
fit.<br />
Ethernet Card £35<br />
Reset Fix £10<br />
Angle adaptor £20<br />
(if in non-Eyetech EZ Tower)<br />
<strong>Total</strong> £65<br />
Zorro Based <strong>Amiga</strong><br />
If your <strong>Amiga</strong> has Zorro slots<br />
(either as standard like the<br />
A4000 or on a bus board) you<br />
can buy a Zorro Ethernet card<br />
such as the X-Surf from<br />
Individual Computers. If you<br />
decide to buy a card second<br />
hand it will make life easier if it<br />
has an RJ45 socket (rather<br />
than a BNC or AUI connector)<br />
as this will allow direct<br />
connection to a router. Take a<br />
look at our networking feature<br />
in <strong>issue</strong> 8 for more information<br />
on different Ethernet types and<br />
the Zorro cards available.<br />
Zorro Ethernet card £80<br />
PCI based “<strong>Amiga</strong>”<br />
If you own either a PCI<br />
busboard (Mediator, GRex or<br />
Prometheus) or run Amithlon<br />
on X86 hardware you can<br />
purchase an inexpensive PCI<br />
Ethernet card. As with Zorro<br />
cards make sure it has an<br />
RJ45 connector and is based<br />
on a chipset supported by the<br />
Ethernet drivers supplied with<br />
your busboard or Amithlon.<br />
Currently boards based on the<br />
Realtek 8029 are supported by<br />
all the busboards and<br />
Amithlon, Mediator users can<br />
also use Realtek 8139 cards if<br />
they have the Mediator<br />
Multimedia CD.<br />
Compatible PCI Network Card<br />
£10<br />
ADSL Sharing Network<br />
This diagram shows a standalone ADSL Ethernet Router as<br />
part of a network installation. This single device performs the<br />
functions of the three components (switch, router and modem)<br />
in the dashed box.<br />
Computer<br />
Computer<br />
Computer<br />
Switch<br />
or hub.<br />
ADSL Ethernet Router<br />
Router<br />
ADSL<br />
Modem<br />
Internet<br />
Features<br />
Hardware Setup<br />
Each computer you want to be<br />
able to access the Internet<br />
needs to be on the same<br />
network as the router, usually<br />
this means connecting the<br />
computer directly to the router<br />
using a patch cable. A patch<br />
cable has RJ45 connectors<br />
that look a bit like telephone<br />
plugs on each end and is wired<br />
straight through, they are<br />
widely available from computer<br />
stores. You can buy a router<br />
with one Ethernet connection<br />
or one with a built-in hub or<br />
switch which provides several<br />
connections (usually 4). If your<br />
router only has one port you<br />
can add a separate hub or<br />
switch allowing more<br />
computers to be connected.<br />
The ADSL side of the router<br />
(usually referred to as WAN,<br />
Wide Area Network) is usually<br />
connected to a micro-filter<br />
using an RJ11 cable (these are<br />
American style telephone<br />
cables and in the UK are often<br />
used to connect the telephone<br />
handset to the base). If you are<br />
not using any telephones on<br />
the line (including on any<br />
extensions) you can connect<br />
most ADSL modems and<br />
routers directly to a telephone<br />
socket without a micro-filter<br />
using a suitable cable.<br />
What Software and<br />
Setup?<br />
On your <strong>Amiga</strong> you only need<br />
two pieces of software to<br />
connect to the Internet via the<br />
Ethernet router, a TCP/IP stack<br />
and a driver for your Ethernet<br />
card. Anyone who is already<br />
connected to the Internet via a<br />
dial-up modem will already<br />
have a TCP/IP stack such as<br />
Miami or Genesis which are<br />
also suitable for ADSL. You<br />
don’t need Miami Deluxe<br />
(although it will work just as<br />
well) because you only need<br />
one interface connected. Most<br />
<strong>Amiga</strong> specific Ethernet cards<br />
come with a SANA II (Standard<br />
<strong>Amiga</strong> Network Architecture)<br />
driver which works with all<br />
TCP/IP stacks and there are<br />
SANA II drivers available for<br />
generic Ethernet cards<br />
including some PCMCIA cards<br />
for the A<strong>12</strong>00 and PCI cards<br />
15
Features<br />
for the various PCI busboards<br />
and Amithlon.<br />
Once your <strong>Amiga</strong> and router<br />
are connected to the network<br />
you need to configure the<br />
router to make the ADSL<br />
connection. Most routers are<br />
configured using a web<br />
browser to access their built-in<br />
configuration pages. In the<br />
router manual it should tell you<br />
the default IP address and how<br />
to access the built in web<br />
pages. Before you can do this<br />
you need to setup your TCP/IP<br />
stack.<br />
Select SANA II Interface<br />
Choose appropriate device<br />
Set your IP address to the<br />
same subnet as the router e.g.<br />
if the router is 10.0.0.2 your<br />
<strong>Amiga</strong>’s IP address must be<br />
10.0.0.n where n is any<br />
number from 1 to 254 except 2<br />
(e.g. 10.0.0.1!). If your router<br />
uses a 10.n.n.n type address<br />
then set the netmask to<br />
255.0.0.0, if it uses<br />
192.168.n.n then the netmask<br />
should be 255.255.255.0. The<br />
gateway should be the address<br />
of the router, in this example<br />
10.0.0.2.<br />
With the setup done you<br />
should now be able to put the<br />
TCP/IP stack online, as a first<br />
test you can now ‘ping’ the<br />
router to check it can be<br />
accessed over the network. To<br />
do this enter the following<br />
command in a shell:<br />
Miami Users:<br />
Miami:miamiping <br />
Genesis:<br />
ping <br />
If the test is successful you<br />
should see lines ending with a<br />
time in milliseconds scrolling<br />
down the screen, to stop the<br />
test press Ctrl+C and you<br />
should see a report saying “x<br />
packets transmitted, y packets<br />
received, n% packet loss” at<br />
most one packet should not<br />
have been received and the<br />
percentage packet loss should<br />
be very low, normally 0%.<br />
If the ping test works you are<br />
now ready to access the<br />
configuration pages of the<br />
router, load up a web browser<br />
(any browser should do<br />
although it may depend on<br />
your router) and enter the IP<br />
address of the router into the<br />
location field. You will probably<br />
be prompted for a username<br />
and password, the defaults<br />
should be in the router<br />
documentation. Now you need<br />
to find the following settings in<br />
the routers configuration:<br />
VPI = 0<br />
VCI = 38<br />
ADSL Modulation = Auto, then<br />
try G.DMT, then try ANSI<br />
T1.413<br />
Encapsulation Mode = PPP<br />
http://www.adslguide.org.uk is an excelent source of information<br />
on ISPs and ADSL hardware. It also carries the latest news<br />
and has checks to find out if your line has been enabled.<br />
The end result... much faster downloads!<br />
over ATM (PPPoA - RFC2364)<br />
VC-MUX<br />
Authentication = CHAP<br />
Then you will need to enter the<br />
username and password<br />
provided by your ISP.<br />
Once you have made these<br />
settings they can be saved into<br />
the router’s flash ROM and it<br />
will usually need to be reset<br />
before they take effect. If ADSL<br />
has been activated on your line<br />
after around 30 seconds you<br />
should see a light confirming<br />
your ADSL connection. The<br />
router then automatically logs<br />
on to your ISP and you’re<br />
ready to rumble!<br />
So enter a web address<br />
(preferably a site with plenty of<br />
big graphics!) and watch in<br />
bewilderment as the page<br />
loads in a fraction of the time<br />
(in fact your browser probably<br />
won’t be able to decode the<br />
image quick enough!).<br />
Service Providers<br />
ADSL is available from a<br />
number of UK Internet Service<br />
Providers however in all cases<br />
the ADSL connection from the<br />
local exchange to your home is<br />
handled by BT. This doesn’t<br />
mean that the service provided<br />
by all ADSL ISPs is the same,<br />
because the speed of your<br />
Internet connection will rely, in<br />
part, on the quality of your<br />
ISP’s network. Different<br />
providers also give you<br />
different services included in<br />
the cost of the subscription, for<br />
example several e-mail<br />
addresses, free web space,<br />
free software (mostly of<br />
interest to Windows users), or<br />
a news server. Some ISPs can<br />
provide you with a static IP<br />
address (sometimes they<br />
charge an extra monthly fee),<br />
this means the address of your<br />
computer (or router) on the<br />
Internet remains the same<br />
allowing you to more easily run<br />
servers on your computer.<br />
Most ISPs give you a dynamic<br />
address that can change over<br />
time (although on ADSL you<br />
will often keep the same<br />
address for days at a time).<br />
Although a static IP can be<br />
useful ADSL is not ideal for<br />
servers as the upload speed is<br />
slower than download and the<br />
service has no guaranteed<br />
availability.<br />
When comparing the cost of<br />
ISPs it is worth taking note of<br />
the setup fees (to ADSL enable<br />
your telephone line) and the<br />
hardware cost (ADSL modem<br />
or router and micro-filters) in<br />
addition to the monthly charge<br />
(which varies from £23 to £30<br />
per month including VAT<br />
depending on ISP). Keep a<br />
look out for special offers<br />
because you may be able to<br />
get free setup (which usually<br />
costs about £50) and even free<br />
hardware.<br />
Comparing the quality of<br />
service and support provided<br />
by the ADSL ISPs is more<br />
difficult than comparing their<br />
prices and services. You can<br />
get a good feel for the level of<br />
satisfaction with each ISP from<br />
the “Rate Your ISP” and<br />
“forum” sections on the ADSL<br />
Guide website.<br />
All ADSL ISPs allow you to<br />
sign up using an on-line form<br />
on their website, the process<br />
includes a basic check on your<br />
line for ADSL availability. You<br />
may have problems filling in<br />
the on-line forms using <strong>Amiga</strong><br />
web browsers (although you<br />
should have no problems using<br />
the actual service!) if so you<br />
should be able to setup an<br />
account over the phone with<br />
the ISP. Once your order has<br />
been accepted BT perform a<br />
more complex set of tests to<br />
ensure your line is suitable for<br />
ADSL. Once the ISP receive<br />
confirmation from BT they will<br />
inform you of the date when<br />
your line should be activated.<br />
Before your activation date<br />
your ISP should send you the<br />
log-on details (username and<br />
password) you need to use the<br />
service, they will also supply<br />
information such as DNS, email<br />
and News server<br />
addresses.<br />
A word of warning first - NTL<br />
use dynamic IP addresses<br />
whereas some ISPs use static.<br />
This means that your IP address<br />
can change if you turn off the<br />
modem - apparently these<br />
addresses are assigned<br />
approximately every 6 hours -<br />
and, whereas your PC will pick<br />
up these settings when you boot,<br />
you would have to run MiamiInit<br />
every time on the <strong>Amiga</strong>. I’ve<br />
found it easier to just leave the<br />
modem on permanently - I’m<br />
renting it so if it goes wrong, it’s<br />
not my problem is it?<br />
My first connection through the<br />
cable modem was by way of a<br />
dual-boot Amithlon / PC and it<br />
was so simple to set up I couldn’t<br />
believe I had done it! The<br />
modem installation was carried<br />
out by an NTL engineer and had<br />
both USB and RJ45 Ethernet<br />
connectors (the modem NOT the<br />
engineer) but the accompanying<br />
book warns only to use one of<br />
them. Whether this is so you<br />
don’t use 2 computers on it or<br />
there is actually a valid reason I<br />
do not know but I’ve stuck with<br />
the recommendations.<br />
16 TOTAL AMIGA Autumn 2002<br />
NTL Broadband<br />
on Amithlon and <strong>Amiga</strong><br />
Most cable TV companies offer a broadband access package . Geoff<br />
Milnes share his experiences with NTL.<br />
System Info.<br />
The first thing to bear in mind<br />
is that I am running OS3.9 on<br />
both Amithlon and the <strong>Amiga</strong>.<br />
After that, the specs of my<br />
machines are:<br />
Amithlon<br />
Duron running at 350 mhz<br />
(slow I know but it works fine)<br />
<strong>12</strong>8 megs RAM<br />
Nvidia GeForce 2 MX<br />
Realtek RTL8029 Ethernet<br />
Soundblaster <strong>12</strong>8<br />
MiamiDx<br />
<strong>Amiga</strong><br />
Towered A<strong>12</strong>00 060 with<br />
SCSI<br />
44 megs RAM (total)<br />
PCMCIA Ethernet card with<br />
cnet driver<br />
Eyetech PCMCIA Reset<br />
corrector<br />
Miami<br />
Once the modem is powered up,<br />
NTL supply a CD for installation<br />
on the PC and Mac but<br />
obviously, nothing for our little<br />
machine so I went for the PC<br />
install first. I actually took around<br />
15 minutes to install all the<br />
software, check out the<br />
connection and leave me free to<br />
use the Net. Having checked out<br />
the connection and installed a<br />
firewall, I powered down and rebooted<br />
with Amithlon. I had<br />
already been using Amithlon on<br />
the ‘Net via a dial-up connection<br />
so I knew it worked. MiamiInit<br />
was launched and I selected the<br />
Ethernet, cable/ADSL modem<br />
option, on the next screen you<br />
only have ‘other’ - so select it<br />
and click next where you need to<br />
actually type in<br />
‘powerne2k.device’ and leave<br />
the unit number set to ‘0’. With<br />
an <strong>Amiga</strong>, you would need to<br />
enter ‘cnet.device’ or whatever<br />
device you are using. This is<br />
about the only difference<br />
between the <strong>Amiga</strong> and<br />
Amithlon.<br />
MiamiInit will then go through a<br />
series of checks where it obtains<br />
information from your ISP.<br />
Accept the defaults it asks you<br />
about and when you reach the<br />
final screen, enter your real and<br />
user names, give the details in<br />
the ‘Save Config’ text box a<br />
unique name to separate it from<br />
your dial-up in case you require<br />
it again (something like<br />
‘Miami:MiamiInit-<br />
CableModem.config’), do the<br />
same with the ‘Save information<br />
sheet’ and, if you don’t have a<br />
printer attached, un-tick the ‘Print<br />
Information Sheet’ box otherwise<br />
Miami will attempt to print out the<br />
config sheet. This gives the<br />
impression of everything having<br />
locked up - took me 3 attempts<br />
to find out this was why I couldn’t<br />
get any further!<br />
I now had a complete working<br />
PC/<strong>Amiga</strong> Internet setup which<br />
worked every time. Around this<br />
time I had given a PC<br />
motherboard and processor by a<br />
friend so I added a few quids<br />
worth of bits and pieces to build<br />
myself a stand-alone PC. This<br />
would leave me with a dedicated<br />
Amithlon<br />
computer too.<br />
Once built, the<br />
machine would<br />
only boot when<br />
it felt like it ( I<br />
used to have a wife like that...)<br />
so I did the same as I did with<br />
the wife - I got another one! Or at<br />
least a new motherboard and<br />
processor. Built it with the aid of<br />
another HAUG member, Paul<br />
Smith, and then my problems<br />
really started. You know how it is<br />
when everything is working fine<br />
and you think “I’ll just tweak so<br />
and so...” - then it all falls apart!<br />
My new PC wouldn’t pick up the<br />
settings so I e-mailed NTL and<br />
they suggested turning off both<br />
the modem and PC overnight, in<br />
the morning turn on the modem<br />
first and when the lights stopped<br />
flashing, turn on the PC. Worked<br />
beautifully! Until I turned on my<br />
Amithlon machine - nothing!<br />
MiamiInit couldn’t find a thing<br />
and asked me for every single<br />
setting so as a temporary<br />
measure, I was stuck with<br />
Outlook as a mailer and Internet<br />
Explorer as a browser! It’s just<br />
not the same is it? I missed YAM<br />
particularly ( can’t stand Outlook<br />
) so I tried Pegasus and although<br />
that was slightly better, it still<br />
wasn’t YAM!<br />
I remembered then that Chris<br />
Morris had mentioned he was on<br />
broadband with an <strong>Amiga</strong> so I<br />
mailed him for some advice.<br />
Chris, it turned out, had a<br />
broadband router so connecting<br />
8 mixed computers to the single<br />
modem wasn’t a problem. I<br />
made enquiries and found out<br />
that an 8 port router was in the<br />
region of about £150 which was<br />
out of the question so I called at<br />
my local PC shop who quoted<br />
me £90 for a 4 port one ( the<br />
make is Mentor if anyone is<br />
interested ). I tried selling my<br />
body to medical science and in<br />
the local red light district - got<br />
turned down on both so I saved<br />
up!<br />
The instructions for installation<br />
are straight forward - connect the<br />
router to the modem - connect<br />
the computers to the router! OK -<br />
in what order then? A bit of<br />
Features<br />
Router (left) and cable modem (right).<br />
thought using the information I<br />
already had plus what little made<br />
sense to me from the router<br />
handbook led me to believe that<br />
I turn everything off, connect the<br />
router’s WAN connector to the<br />
modem, connect the computers<br />
to the router, take a couple of<br />
aspirin and go to bed! The<br />
following morning, I turned on<br />
the modem first and waited while<br />
the lights stopped flashing which<br />
meant it had the necessary<br />
information from the ISP. Then I<br />
turned on the router which<br />
performed a ‘power on self-test’<br />
and obtained the info it required<br />
from the modem. So far so good!<br />
All the lights flash just as they<br />
are supposed - you don’t<br />
suppose that’s it do you?<br />
Well, it was. I turned on the PC<br />
and Win98 did its stuff - TCP/IP<br />
is built in! I turned on Amithlon<br />
and ran MiamiInit - straight<br />
through and out the other side in<br />
a matter of minutes. It couldn’t<br />
find the DNS servers but there<br />
again, it didn’t need to as the<br />
router had those. Then for the<br />
acid test - my A<strong>12</strong>00! MiamiInit -<br />
straight through and working<br />
inside 3 or 4 minutes again! I<br />
was gobsmacked that everything<br />
went so smoothly so I am now<br />
on-line permanently with three<br />
computers, <strong>Amiga</strong> - Amithlon<br />
and PC, and back using YAM. I<br />
come home of an evening, turn<br />
on Amithlon which boots up,<br />
runs Miami, launches YAM and<br />
collects my mail whilst the PC<br />
plays itself little tunes and takes<br />
ages!<br />
So, that’s about it. With help<br />
from Paul Smith and Chris<br />
Morris, I’m a happy little bunny<br />
who can edit video on a PC,<br />
browse the Web with Aweb /<br />
Voyager and write e-mails with<br />
YAM on Amithlon. All I need now<br />
are 2 more brains and 2 more<br />
pairs of hands!<br />
17
Reviews<br />
Conexant AMX-CA64E<br />
ADSL Ethernet Router<br />
Robert Williams and Mick Sutton find out if one of the lowest priced<br />
ADSL routers is cheap and cheerful or cheap and nasty!<br />
To connect your <strong>Amiga</strong> to<br />
ADSL in the UK you need<br />
an ADSL modem with a built-in<br />
Ethernet router, in a device like<br />
this the router handles the<br />
ADSL connection and your<br />
<strong>Amiga</strong> just needs an Ethernet<br />
card and TCP/IP stack.<br />
Typically Ethernet routers are<br />
considerably more expensive<br />
than USB ADSL modems (that<br />
cannot currently be used on<br />
the <strong>Amiga</strong>) but Dabs (a large<br />
computer equipment retailer)<br />
sell this 4 port Ethernet router<br />
as part of their Value range for<br />
just over eighty pounds,<br />
around the same price as a<br />
USB modem. As this is so<br />
much less than other ADSL<br />
Ethernet routers, can it be any<br />
good... lets find out.<br />
The router comes in a printed<br />
box with no manufacturers<br />
name, inside is the router itself,<br />
a plug-in power supply,<br />
telephone cable and brief man-<br />
.info<br />
Developer<br />
Amigo<br />
http://www.amigo.com.tw<br />
Distributor<br />
Dabs<br />
http://www.dabs.com<br />
Price<br />
£80 incl. VAT<br />
Compatibility<br />
Any <strong>Amiga</strong> with a 10BaseT<br />
Ethernet connection.<br />
Requirements<br />
ADSL enabled phone line<br />
and contract with an ADSL<br />
ISP.<br />
ual. The telephone cable<br />
supplied has a RJ11 plug on<br />
the router end and a BT phone<br />
plug on the other. This is fine if<br />
you intend to connect only the<br />
router to your telephone line<br />
but if you are going to use<br />
other telephone equipment with<br />
micro-filters (as most people<br />
will) you will need to get a RJ11<br />
to RJ11 lead (these are a standard<br />
item and should be available<br />
from DIY and electrical<br />
shops for a few pounds). The<br />
router is about the size of two<br />
conventional dial-up modems<br />
side by side at 20cm wide by<br />
13cm deep by about 3cm high.<br />
The case is all plastic and is<br />
painted metallic blue with a<br />
slightly “swooping” design, at<br />
one end is a foot that seems to<br />
be to allow the router to be<br />
stood on end if required. It is<br />
quite light and flimsy compared<br />
to some networking gear but<br />
no worse than the average 56K<br />
modem. On the front are<br />
several LEDs showing the current<br />
status of the ADSL and<br />
Ethernet connections but we’re<br />
more interested in what’s round<br />
the back!<br />
On the back there are several<br />
connectors, starting with the<br />
RJ11 socket marked WAN<br />
(Wide Area Network) which is<br />
connected to the telephone<br />
socket (via a micro-filter if<br />
required). Then there are four<br />
RJ45 sockets (marked LAN) for<br />
Ethernet connections to the<br />
built-in 10/100Base T switch.<br />
This router also has a USB port<br />
so it can be connected to a<br />
computer with USB (even if it<br />
does not have an Ethernet<br />
card), no drivers are included<br />
for the USB port but you can<br />
download them, only Windows<br />
drivers are currently available<br />
for the USB port. Finally there<br />
is the power connection and<br />
on/off button.<br />
Connecting up the router is<br />
straight forward, you can connect<br />
up to four computers<br />
directly using RJ45 patch<br />
cables, because the router<br />
contains a 10/100Mb/s switch<br />
you can connect computers<br />
using both 10 megabits per<br />
second (all <strong>Amiga</strong> Ethernet<br />
cards I’m aware of are 10Mb/s<br />
as are older PC and Mac<br />
cards) and 100Mb/s Ethernet<br />
cards and each connection will<br />
run at full speed. Note that<br />
even 10Mb/s is nearly twenty<br />
times faster than ADSL so the<br />
<strong>Amiga</strong> Ethernet card won’t<br />
cause a bottleneck.<br />
The router is configured using<br />
built-in web pages which can<br />
be accessed from a computer<br />
connected to it. Before setup<br />
can be started the computer<br />
must be configured to use the<br />
same sub domain as the router<br />
(see tutorial for details). Once<br />
this is done a web browser can<br />
be used to access 10.0.0.2,<br />
which prompt for a username<br />
and password which are<br />
supplied in the manual. The<br />
web pages provide a list of<br />
options to configure and we<br />
found they worked well in the<br />
“big three” <strong>Amiga</strong> web browsers.<br />
When you make changes<br />
to the configuration the router<br />
often has to be rebooted (via<br />
an option in the web pages)<br />
before the changes take effect,<br />
this takes about thirty seconds<br />
and causes the ADSL connection<br />
to drop and reconnect. See<br />
the boxout for detailed configuration<br />
instructions for UK<br />
ADSL.<br />
Once<br />
the configuration<br />
is complete<br />
switching on the router or<br />
rebooting it causes it to start<br />
searching for an ADSL signal<br />
on the line, when one is<br />
detected the “SHOWTIME”<br />
light stays on solidly (it flashes<br />
up to this point) and the router<br />
automatically logs in to your<br />
ISP using the PPP details<br />
you’ve specified. By default the<br />
router is in NAT (Network<br />
Address Translation) mode<br />
which allows several computers<br />
to share an Internet<br />
connection with only one IP<br />
address (all UK home user<br />
ADSL accounts supply one IP).<br />
In NAT mode the computers on<br />
your network can access the<br />
Internet by setting the router’s<br />
IP address as the default<br />
gateway and entering your<br />
ISP’s DNS servers into their<br />
TCP/IP stacks.<br />
In addition to the basics<br />
needed to get connected to<br />
ADSL and share your Internet<br />
connection the CA64E also<br />
offers some more advanced<br />
network options. It can act as a<br />
DHCP server allowing the<br />
machines on your network to<br />
pick up their TCP/IP settings<br />
(for example IP address,<br />
gateway and DNS servers)<br />
automatically. It can also be set<br />
to automatically find the DNS<br />
servers used by your ISP,<br />
these features can make<br />
adding a new computer to your<br />
network completely automatic.<br />
If you are using NAT to share<br />
your Internet connection<br />
normally you cannot run a<br />
server on one of the connected<br />
machines because they do not<br />
have an IP address on the<br />
Internet. The router’s Virtual<br />
Server option allows you to<br />
map a port on the router to one<br />
on a local machine where a<br />
server is being run. When a<br />
client on the Internet tries to<br />
access the mapped port on the<br />
router the request is transparently<br />
forwarded on to the local<br />
machine. Multiple virtual<br />
servers can be defined but you<br />
can only specify a single port<br />
for each entry, not a range.<br />
If your ISP assigns you multiple<br />
IP addresses (this is only<br />
available on more expensive<br />
business ADSL accounts in the<br />
UK) for the machines on your<br />
network you can disable NAT,<br />
the router then acts as a bridge<br />
connecting your network<br />
directly to the ISPs.<br />
One feature the CA64E lacks<br />
is a firewall, this is a feature of<br />
some routers which can block<br />
certain types of Internet traffic<br />
from entering and leaving the<br />
local network. With computers<br />
connected directly to the<br />
Internet, especially with a permanent<br />
connection like ADSL,<br />
a firewall is an important<br />
protection. However if you<br />
leave the CA64E set to use<br />
NAT then your local computer(s)<br />
are not connected<br />
directly to the Internet, only the<br />
ADSL modem is connected.<br />
Unless you configure the virtual<br />
server options to allow<br />
connections to the computers<br />
on the LAN from the WAN<br />
(Internet) your machines will be<br />
protected. Not having a firewall<br />
does mean you cannot block<br />
machines on the LAN from<br />
18 TOTAL AMIGA Autumn 2002<br />
The router’s connections are all on the back panel.<br />
From left to right they are: Power switch and input connector,<br />
USB, four RJ45 Ethernet (LAN) connections,<br />
ADSL (WAN) RJ 1 connector.<br />
Results<br />
Pros<br />
+ Easy to setup<br />
+ Plenty of features<br />
+ Cheap<br />
Cons<br />
- No UK specific setup<br />
documention<br />
accessing particular services<br />
on the Internet, on a small network<br />
this is not normally a<br />
requirement although on<br />
machines susceptible to Trojan<br />
horse attacks (it has to be said<br />
Windows is the prime example<br />
here) you may also want to run<br />
personal firewall software.<br />
Although the CA64E does not<br />
come configured for UK ADSL<br />
and no UK specific instructions<br />
are supplied we found the information<br />
easily enough on the<br />
Internet. Then it was simple to<br />
setup and worked first time as<br />
soon as ADSL was activated.<br />
The web based configuration is<br />
easy to use and works well<br />
with <strong>Amiga</strong> browsers. For a<br />
single computer or small home<br />
network this router offers all<br />
the features you need and<br />
some additional options for future<br />
expansion. Although it<br />
lacks a firewall this is not really<br />
required if you’re using NAT to<br />
share the connection. Once the<br />
router is installed and configured<br />
you can pretty much<br />
forget about it, the Internet<br />
connection is always there so<br />
you just need to turn on the<br />
<strong>Amiga</strong> and run a TCP/IP stack<br />
to get online. The CA64E<br />
offers far more for the money<br />
than any other comparable<br />
ADSL router we’ve seen, it’s<br />
an ideal way for an <strong>Amiga</strong>n to<br />
get connected!<br />
Top<br />
Notch!<br />
Features<br />
Router Setup Tutorial<br />
Before you can configure the router you must setup your TCP/IP<br />
stack to access it via Ethernet. Here we will go through the steps<br />
to configure Miami, other TCP/IP stacks will be similar.<br />
Open your Miami: drawer and double click on the MiamiInit icon.<br />
On the first page of Miami Init click “Continue”, if you want to<br />
learn more about the setup you are making read through the<br />
information at the top of each page.<br />
On the connection type page select “Ethernet, cable/ADSL<br />
modem” from the list and click “Continue” (from now on I’ll<br />
assume you’ll click “Continue” after each page of settings).<br />
Choose your Ethernet card from<br />
the list if multiple units are listed<br />
and you only have one Ethernet<br />
card pick unit 0.<br />
When prompted enter the IP address for your <strong>Amiga</strong>. By default<br />
the router has the IP address 10.0.0.2 so the computer must be<br />
set to an IP address of 10.0.0.x where x is between 1 and 255<br />
but not 2. In this example we set the <strong>Amiga</strong> to 10.0.0.1.<br />
Accept the default subnet mask (255.0.0.0).<br />
Set the gateway to the IP address of the Router, “10.0.0.2”.<br />
If you know the DNS server addresses used by you ISP select<br />
“Enter now” in the next requester, if not you will need to find out<br />
and enter them later.<br />
Enter the address of each DNS server.<br />
Enter a host name for your <strong>Amiga</strong> on your local network, this is<br />
the name for your computer and can be anything you choose.<br />
Enter your real name and a user name in the final screen, note<br />
that this does not have to match the username give to you by<br />
your ISP because the router will log on to their network.<br />
Select to save a config file and to save and/or print an<br />
information sheet if you wish then click “Continue”.<br />
MiamiInit should now have closed, our next job is to load the<br />
settings into Miami. Load Miami by clicking on its icon.<br />
Select “Import from MiamiInit V3...” from the “Settings” menu, in<br />
the file requester choose the config file saved earlier, it’s called<br />
MiamiInit.config by default.<br />
If you need to set the DNS servers select the “Database” page<br />
from list on the left of the Miami window and then “DNS Servers”<br />
from the top cycle gadget. Then click “Add” and enter the server<br />
“IP address” for each server.<br />
With Ethernet you will probably<br />
want Miami to go on-line as<br />
soon as it is loaded, to do this<br />
go to the “Events” page and<br />
select the “auto-online” check<br />
box in the “Start” section. You may also want to choose “Hide<br />
GUI” from the cycle gadget so Miami is iconified as soon as it<br />
connects.<br />
When your settings are complete choose “Save as default” form<br />
the “Settings” menu if you want the Ethernet settings to be<br />
loaded each time you run Miami. Choose “Save as...” if you wish<br />
to keep your current default settings (for example a dial-up<br />
account).<br />
If all has gone to plan clicking “Online” will now connect your<br />
<strong>Amiga</strong> to the Ethernet network allowing it to communicate with<br />
19
Features<br />
the router.<br />
To check this try pinging the router, to do this open a shell<br />
window and enter the following command:<br />
Miami:MiamiPing 10.0.0.2<br />
When you press return you should see lines similar to the<br />
following repeated every second or so:<br />
64 bytes from 10.0.0.2: icmp_seq=2 ttl=64 time=2.344 ms<br />
WAN Configuration Page<br />
This is the WAN page of the router’s web interface grabbed<br />
from a browser. This grab shows the settings for a typical UK<br />
ADSL ISP (only the PPP section is ISP specific).<br />
20<br />
If there is a problem you will see:<br />
ping: wrote 10.0.0.2 64 chars, ret=-1<br />
In either case press Ctrl and C to stop the ping. If there is a<br />
problem check your settings in Miami, check the router is<br />
switched on and all cables are correctly connected (you don’t<br />
need the WAN (ADSL) cable connected for this test to work).<br />
With Miami online you are ready to configure the router, to do this<br />
launch a web browser and enter the URL “10.0.0.2”, when you<br />
press return the browser should prompt you for a username and<br />
password, by default these are “admin” and “password”. The web<br />
based configuration interface is then displayed in the browser.<br />
You need to make several changes for the router to work with UK<br />
ADSL:<br />
Select the “WAN” page from the “Configuration” section in the left<br />
hand frame, then in the page on the right change the following<br />
settings:<br />
VPI: 0<br />
VCI: 38<br />
ENCAPSULATION: “PPPoA VC-Mux”<br />
Username: The username supplied by your ISP.<br />
Password: The password supplied by your ISP.<br />
Click the “Submit” button at the bottom of the page.<br />
On the “LAN” page you can change the “IP Address” of the router<br />
to fit into an existing network, click “Submit” after you make the<br />
change. If you do this remember to change the IP address,<br />
Subnet mask and Gateway in Miami to suit.<br />
That’s all there is to it! Now click “Save Settings” and then<br />
“Submit” to save the setting to flash memory and reboot the<br />
router. If your “WAN” cable is connected and your line has been<br />
enabled after about 30 seconds the “SHOWTIME” light on the<br />
front of the router should stop flashing and light solidly indicating<br />
an ADSL connection. Then the “RxD” light should flicker as the<br />
router logs in to you ISP.<br />
To check all is well go to the “Diagnostic Test” page under “Admin<br />
Privilege” on the router this runs a number of tests on your<br />
connection, if the ADSL connection has been mode “Testing<br />
ADSL Synchronization” should “PASS” and if the connection to<br />
your provider has worked “Test PPP Layer connection” and “Test<br />
IP connect to PPP” should “PASS”. If you have problems with the<br />
ADSL connection check your cabling, micro-filters and other<br />
phones on the same line, then check with your ISP that your line<br />
has been successfully enabled (it is possible that your activation<br />
has been delayed). If there is a problem with the PPP connection<br />
check you have your login and password exactly as supplied by<br />
your ISP. If there is still a problem contact them to check your<br />
account has been properly set up.<br />
The web configuration interface as it appears in a browser. In this<br />
case showing the Diagostic Test section which tests certain<br />
aspects of the ADSL and LAN connections.<br />
TOTAL AMIGA<br />
HARD-DRIVES<br />
2.5" 540 Meg 19.95<br />
2.5" 1.0 Gig 39.00<br />
2.5" 8.0 Gig 59.00<br />
Drives are fully set up for A<strong>12</strong>00<br />
with Pre-WB3.1 installed + Utils<br />
please add £4 UK delivery<br />
CD-ROM DRIVES<br />
52x CD-Rom Drive for tower<br />
fitting.no cables,sw. 24.95<br />
4 way B/Int c/w cables24.95<br />
EDO SIMMS<br />
8 Meg EDO Simms 4.00<br />
16 Mg EDO Simms 10.00<br />
MODEMS<br />
56k/V90 External 34.95<br />
please add £4 UK delivery<br />
SPEAKERS<br />
200w mains powered 7.99<br />
<strong>12</strong>00w sub woofer sys21.95<br />
<strong>Amiga</strong> convertor lead 2.99<br />
please add £5 UK delivery<br />
ACCESSORIES<br />
<strong>Amiga</strong> 7" wallclock 4.99<br />
<strong>Amiga</strong> Tech mouse 7.99<br />
<strong>Amiga</strong> Action Pad 7.50<br />
<strong>Amiga</strong> Attack Stick 7.50<br />
3.1 Rom Chips 25.00<br />
3.1 WB Disks 9.95<br />
2.05 WB Disks 4.99<br />
1.3 WB Disks 3.99<br />
Squirrel/Zip Adaptor 8.95<br />
Scart Lead 6.25<br />
<strong>Amiga</strong> to TV lead 1.99<br />
Network PC<br />
<strong>12</strong>.99<br />
Keyboard cleaning Kit 3.99<br />
Pay by credit card and<br />
get a free CD-ROM.<br />
(call for details)<br />
State <strong>Amiga</strong> model<br />
when ordering.<br />
CDROM GAMES<br />
Adventurers Lair.......................... £20<br />
<strong>Amiga</strong> Classix.............................. £10<br />
<strong>Amiga</strong> Classix 2........................... £10<br />
<strong>Amiga</strong> Classix 3........................... £20<br />
Aminet Games............................. £15<br />
Aqua ............................................£15<br />
Arcade Classix Mk 2 ................... £10<br />
Blade............................................£10<br />
Bubble Heroes............................. £10<br />
C64 Classix ................................. £10<br />
CDS Collection ............................ £15<br />
Cedric .........................................£15<br />
Chess 2k .....................................£15<br />
Civilization AGA/ECS.................. £10<br />
E2140 Mission Pack.................... £15<br />
Eat The Whistle ........................... £10<br />
European Superleague ............... £10<br />
Fields of Glory ............................. £15<br />
Final Odyssey ............................. £10<br />
Foundation Gold.......................... £25<br />
Foundation Und.Land.................. £15<br />
Genetic Species .......................... £10<br />
Gremlin Classix ........................... £10<br />
CDROM GAMES<br />
Hell Squad ................................... £30<br />
FORE-MATT Home Computing<br />
(08700) 1<strong>12</strong>234 • Dept. TA, PO Box 835, Wootton Bassett, Swindon, SN4 8RX<br />
Heretic 2 £40 Quake £10<br />
Napalm £15 Freespace £35<br />
Simon Sorcerer 2 £30<br />
CD Drive cleaning Kit 4.99<br />
FloppyDrive cleaner 1.99<br />
Syquest EZ135 cart 9.99<br />
Int.Floppy Drive a<strong>12</strong>0014.99<br />
GAMES<br />
add £1per game UK pp<br />
Atomino puzzler 2.99<br />
Banshee A<strong>12</strong>00 4.99<br />
Base Jumpers 4.99<br />
Blade Warrior 2.00<br />
Blinkeys Scary School 1.25<br />
Captain Dynamo 2.99<br />
Chaos Engine A<strong>12</strong>00 4.99<br />
Chaos Engine 2 4.99<br />
Classic Arcadia: Invaders,<br />
Muncher, Galaxy 4.99<br />
Cosmic Spacehead 4.99<br />
Dangerous Streets 2.00<br />
Death Mask 4.99<br />
Desert Strike 5.99<br />
Dinosaur Detective 4.99<br />
Dizzy Panic 2.00<br />
Fantastic Dizzy 4.99<br />
F29 - Retalliator 4.99<br />
FIFA Soccer 4.99<br />
Firehawk 3.99<br />
Gloom AGA 4.99<br />
Grand Prix 6.00<br />
Heimdall 2 RPG 4.99<br />
Huckleberry Hound 2.99<br />
International Soccer 2.00<br />
Jurassic Park 4.99<br />
Legends AGA 4.99<br />
Lion King A<strong>12</strong>00 6.99<br />
Marvins Adventure 4.99<br />
Microprose Golf A5/600 3.99<br />
Microprose Soccer 2.99<br />
Minskies. puzzler 4.99<br />
Mortal Kombat 4.99<br />
Nick Faldo A<strong>12</strong>00 4.99<br />
Nigel Mansell GP 4.99<br />
Ninja Warriors 2.00<br />
North and South 4.99<br />
Pinball Mania A<strong>12</strong> 4.99<br />
Imperator CD ...............................£15<br />
Islona Collection ..........................£20<br />
Labyrinth Of Time ........................£10<br />
Land of Genesis...........................£20<br />
Mad About Mahjong.....................£10<br />
Megaball Deluxe ..........................£15<br />
Moonbases...................................£10<br />
Myst..............................................£25<br />
Nightlong ......................................£45<br />
Pacman Attack.............................£10<br />
Payback........................................£35<br />
Phoenix Fighters..........................£10<br />
Pure Doom ...................................£10<br />
PuzzleBobs ..................................£15<br />
Red Mars .....................................£10<br />
Retro Gold ...................................£10<br />
Seaside .......................................£20<br />
Shadow of 3rd Moon...................£20<br />
Simon the Sorcerer......................£10<br />
Sixth Sense Invest’ns ..................£15<br />
Skeleton Krew CD32 ...................£10<br />
Speccy Classix .................£10<br />
Spherical Worlds..........................£10<br />
Star Fighter ..................................£15<br />
Street Racer CD...........................£10<br />
Superfrog ....................................£10<br />
NORTH WEST MICRO<br />
31, Catterick Drive, BOLTON, Lancashire Tel: 07884-162899 <strong>12</strong>-9pm 7 Days<br />
Road Rash 6.99<br />
Ruffian jungle adv 4.99<br />
Rugby World Cup 4.99<br />
Sci Fi Collection 4.99<br />
Second Samurai 6.99<br />
Simon The Sorcerer 6.99<br />
Skeleton Krew A<strong>12</strong> 4.99<br />
Sports Masters: PGA Tour Golf,<br />
Tennis, Indy 500, Euro Soccer<br />
Champs 4.99<br />
Street Racer A<strong>12</strong>00 4.99<br />
Striker soccer 4.99<br />
Suburban Commando 4.99<br />
Super Methane Bros 4.99<br />
Super Streetfighter 2 4.99<br />
Super Tennis Champs 3.99<br />
Sword of Excalibur 4.99<br />
Tactical Manager 2 4.99<br />
Team Yankee 2.00<br />
Tennis Cup 2 2.99<br />
Theme Park 5.99<br />
Thunderblade Sega 2.99<br />
Timekeepers 2.99<br />
<strong>Total</strong> Carnage war 4.99<br />
Treasure Island Dizzy 2.99<br />
Trolls Platformer 4.99<br />
Turbo Trax racing 4.99<br />
Valhalla - Before TheWar 4.99<br />
Wembley Rugby League 2.99<br />
White Death Strategy 2.00<br />
Whizz 4.99<br />
Winter Olympics 4.99<br />
Worms DC 7.99<br />
Zeewolf 2 3D copter 4.99<br />
Zool A<strong>12</strong>00 2.99<br />
CD<br />
5,000 Colour Images 4.99<br />
Adult Sensations 3D "18" 9.99<br />
AGA Toolkit 97 4.99<br />
<strong>Amiga</strong> Classix Mk 2 <strong>12</strong>.99<br />
<strong>Amiga</strong> OS 3.9 CD 29.95<br />
Aminet 37 inc.Zombie Mass <strong>12</strong>.99<br />
CDROM GAMES<br />
Super Methane Bros. .................. £10<br />
Theme Park CD........................... £10<br />
The Games Room....................... £15<br />
The Prophet................................. £10<br />
Trivial Pursuit .............................. £10<br />
Ultimate Gloom ........................... £10<br />
Ult. Super Skidmarks .................. £10<br />
Uropa 2........................................ £10<br />
Virtual Grand Prix........................ £20<br />
Virtual Karting 2 .......................... £10<br />
Vital Light .................................... £10<br />
Wasted Dreams........................... £20<br />
Whales Voyage 2 ........................ £15<br />
Wipeout 2097 PPC...................... £30<br />
Word Games ............................... £10<br />
Zombie Massacre{18} ................. £10<br />
EPSON COMPATIBLE INK<br />
Black 440/460/640/660 ................. £7<br />
Col 440/460/640/660 .................. £10<br />
Black 670/720/750/<strong>12</strong>00 ............... £7<br />
Col 740/760/860/1160 ................. £10<br />
Black 400/500/600/700 ................. £7<br />
Col 400/600/800/850/1520 ......... £10<br />
Black C20/C40/480/580................ £7<br />
Col. C20/C40/480/580 ................ £10<br />
UTILITIES<br />
17 Bit Level 6 ...............................£10<br />
100% <strong>Amiga</strong> <strong>Magazine</strong>.................. £5<br />
100% <strong>Amiga</strong> Annual UK..............£48<br />
A-Z of <strong>Amiga</strong> Games ...................£20<br />
<strong>Amiga</strong> Desktop Video2................£10<br />
<strong>Amiga</strong> Developer 2.1...................£20<br />
<strong>Amiga</strong> Forever 5 ..................£40<br />
<strong>Amiga</strong> Forever upg >5.................£25<br />
<strong>Amiga</strong> Repair Kit..........................£35<br />
Aminet Set 4, 5, 7 - <strong>12</strong> ................£25<br />
Aminet Set Subscribe..................£20<br />
Aminet Singles.............................£<strong>12</strong><br />
Aminet Subscription.....................£10<br />
Amos PDCD2...............................£20<br />
Animatic ........................................ £5<br />
Art Studio Pro ..............................£35<br />
Asim CDFS v3.x ..........................£30<br />
Aweb II v3.3 ................................£40<br />
Aweb II v3.3 OS3.5/3.9upg .........£30<br />
Best of Airsoft ..............................£10<br />
Best of Mecomp v1........................ £5<br />
Blitz Basic 2.1 (ult.)......................£10<br />
Burn It DAO..................................£60<br />
Candy Factory Pro.......................£35<br />
CD32 Network Kit ........................£25<br />
Aminet 38 inc P. Paint 7.1b <strong>12</strong>.99<br />
Aminet 46 inc. Virt Karting 2 <strong>12</strong>.99<br />
Aminet Set 5 4 CD's 17.95<br />
Assassins 3 4.99<br />
Award Maker 4.99<br />
Babes Adult CD 9.95<br />
Battle Chess 4.99<br />
Battle Chess 1+2 used 8.99<br />
Bubble Heroes 9.99<br />
Cannon Fodder 4.99<br />
Classic Collection 2 CD Set 19.95<br />
Desktop Video Vault 9.99<br />
Epic Encyclopedia 97 4.99<br />
Fighting Spirit 14.99<br />
Final Oddysey 4.99<br />
Games Room <strong>12</strong>.99<br />
Genetic Species 030+ 14.99<br />
Great Giana Sisters 9.99<br />
Guardian 3D flying 2.99<br />
Guinness Disk of Records 4.99<br />
Hidden Truth. UFO's, cover<br />
ups, etc 4.95<br />
Insight Dinosaurs 9.95<br />
Islona Collection 19.95<br />
Kang Fu Platformer 2.99<br />
Last Will & Testament CD 4.99<br />
MarryamPic 4.99<br />
Midinet 4.99<br />
Napalm 24.95<br />
Octamed 6 4.99<br />
Octamed Sound Studio 6.99<br />
Pacman Attack 9.95<br />
Pandoras CD MM 3.99<br />
Personal Paint 7.1 9.99<br />
Phoenix Fighters 7.99<br />
Pictris NEW 9.99<br />
Prophet RPG 9.99<br />
Retro Gold C64/Speccy 4.99<br />
Rune Magic. 4.99<br />
Sounds Teriffic 2 CD set. 4.99<br />
Draw Studio 2 £45 <strong>Amiga</strong> Writer 2 £35<br />
T-Zero £20 Feeble Files £35 Earth 2140 £30 STFax 4.5 £40<br />
Art Effect 4 £40<br />
UTILITIES<br />
CybergraphX ................................£25<br />
Cross Dos 7 Gold.........................£40<br />
Darkage Developer......................£10<br />
Diavolo 2000 ................................£50<br />
Digibooster Pro ............................£20<br />
Digital Makeup .............................£15<br />
EASys! Enhancer.........................£20<br />
Emulators Unlimited.....................£10<br />
Extreme CD....................................£6<br />
Faces of Mars 2001 .....................£15<br />
fxPaint v1.5 ..................................£60<br />
fxScan v3.0 ..................................£25<br />
Gateway v1 (netBSD) ..................£10<br />
Giga Graphics ..............................£10<br />
Giga PD v3 (3Cdset)......................£5<br />
GlowIcons ...................................£10<br />
GlowIcons 2 .................................£15<br />
Graphic Sensations .....................£10<br />
Guinness Records v2 ..................£10<br />
HD Patchez ..................................£10<br />
Hidden Truth.................................£10<br />
Ibrowse 2.x...................................£35<br />
Learning Curve ............................£20<br />
Lightrom 8 or 9 ea........................£30<br />
LSD 1 or 2 ea...............................£15<br />
Speccy 98 Emu+Games 4.99<br />
Spherical Worlds 9.99<br />
Strangers.street fighting 2.99<br />
Street Racer 4.99<br />
Theme Park 7.95<br />
Time Of Reckoning.<br />
Doom/Quake add-ons 2.99<br />
T-Zero 030+HD+8m 24.95<br />
Ultimate Gloom 6.99<br />
Ultimate S Skidmarks 4.99<br />
Under Construction 4.99<br />
Uropa 2 4.99<br />
Virtual GP Special 14.99<br />
Virtual Karting 2 4.99<br />
Vulcanology 4.99<br />
Wasted Dreams 14.99<br />
WB Enhancers CD 7.99<br />
Whales Voyage 2 14.95<br />
World of Clipart. 2 CDs 7.99<br />
Visit our webpage...<br />
www.northwestmicro.co.uk<br />
for latest prices/specials.<br />
e-mail:<br />
derek@northwestmicro.co.uk<br />
FREE JOYSTICK<br />
with all orders over £15<br />
Please add £1.99 for pp<br />
UTILITIES<br />
Make CD DAO............................. £50<br />
MediaPoint................................... £30<br />
Meeting Pearls 4 ......................... £10<br />
Midi Files ..................................... £10<br />
Moovid Pro 2 ............................... £20<br />
Multimedia Backdrop .................. £15<br />
Multimedia Toolkit........................ £10<br />
NcodeR ................................... £25<br />
Network CD ................................. £10<br />
Network CD 2 .............................. £15<br />
OS 3.9.......................................... £30<br />
PFS3............................................ £35<br />
Photo CD Manager ..................... £15<br />
Photofolio v2................................ £25<br />
Photogenics 5.............................. £70<br />
Red Hat Linux.............................. £20<br />
Screen Savers 2.......................... £10<br />
Sounds Terrific 2.......................... £10<br />
System Booster........................... £10<br />
Texture Heaven 1&2.................... £10<br />
Turbo Calc 5 ................................ £60<br />
Turbo Print 7.x ............................. £40<br />
VHI Studio 5.2 ............................. £30<br />
Workbench 3.0 Set...................... £10<br />
Workbench Addon CD................. £10<br />
“The <strong>Amiga</strong> Online Superstore” - Visit our new <strong>12</strong>8 bit secure online shop at www.forematt.co.uk<br />
<strong>Amiga</strong> Retro Classics Site: www.forematt.free-online.co.uk EMail: sales@forematt.co.uk
Reviews<br />
U S B<br />
.info Highway<br />
Developer<br />
E3B<br />
www.e3b.de<br />
Distributor<br />
KDH Datentechnik<br />
www.kdh-datentechnik.com<br />
Forematt Home Computing<br />
www.forematt.co.uk<br />
(08700) 1<strong>12</strong>234<br />
Price<br />
99.90 Euro (approx. £65).<br />
Compatibility<br />
Any <strong>Amiga</strong> with Zorro slots.<br />
68020+ processor<br />
Uses about 100KB of RAM<br />
<strong>Amiga</strong>OS 3.0 or above<br />
MUI (for preferences GUI)<br />
Test System<br />
A3000 Desktop<br />
Cyberstorm PPC/060<br />
CyberVision PPC<br />
Other Zorro cards:<br />
Ariadne II Ethernet<br />
Wavetools Sound Card<br />
Hypercom III fast I/O<br />
<strong>Amiga</strong>OS 3.9<br />
The Highway is about as small<br />
as a Zorro card can be!<br />
It’s taken a long time but at last USB for the <strong>Amiga</strong> is here!<br />
Robert Williams takes his <strong>Amiga</strong> into uncharted waters.<br />
The Universal Serial Bus<br />
was developed as a<br />
method of connecting relatively<br />
low speed peripherals<br />
replacing the RS232 serial and<br />
Centronics parallel ports that<br />
have been standard on most<br />
computer platforms for well<br />
over a decade. USB has a<br />
number of advantages over the<br />
existing ports. Multiple devices<br />
to be connected to one USB<br />
port using hubs. USB is faster<br />
than both serial and parallel<br />
ports so it can be used for<br />
devices which require little data<br />
transfer such as mice and<br />
keyboards and those that<br />
transfer more data such as<br />
printers and scanners. USB<br />
devices can draw their power<br />
from the bus so many do not<br />
require a separate power<br />
supply. From a manufacturer’s<br />
point of view USB is relatively<br />
simple to implement using a<br />
connector with just four pins,<br />
the connectors are also<br />
physically smaller than a<br />
typical parallel or serial port.<br />
With the popularity of USB on<br />
the two major consumer<br />
computing platforms,<br />
Windows and<br />
Macintosh,<br />
over the last few years it has<br />
become increasingly difficult to<br />
find peripherals compatible<br />
with the <strong>Amiga</strong>’s standard<br />
serial and parallel ports. For<br />
example digital cameras and<br />
scanners now use USB almost<br />
exclusively and some printers<br />
no longer have a parallel port.<br />
Several efforts to bring USB to<br />
the <strong>Amiga</strong> have been mooted<br />
but none of them came to<br />
anything until now! E3B, a<br />
small German developer are<br />
the first to actually bring a USB<br />
solution to market in the form<br />
of the Highway Zorro II card.<br />
The Highway is a small card<br />
just long enough to fill a Zorro<br />
slot. Its size means it can be<br />
fitted behind another card in a<br />
bus board which shares Zorro<br />
slots with PCI, video or ISA<br />
slots. Installing the card in a<br />
Zorro slot is easy, you just<br />
have to be careful to get it the<br />
right way up. Two blanking<br />
plates are supplied each<br />
holding two USB connectors<br />
which connect to a header on<br />
the Highway via short cables.<br />
These will only really reach to<br />
the brackets immediately<br />
behind the Highway so if you<br />
wanted to install them<br />
elsewhere in a tower you would<br />
need to get longer cables. With<br />
both plates installed you have<br />
four USB connections on the<br />
back of your <strong>Amiga</strong>,<br />
more can be<br />
added using a<br />
hub if required.<br />
In my A3000<br />
desktop I only had<br />
room for one plate,<br />
this posed no problem<br />
for the Highway. The<br />
printed manual explains<br />
the installation in detail<br />
with a section on installing<br />
the card in various <strong>Amiga</strong><br />
systems. On the E3B website<br />
there is a list of third party<br />
Zorro bus boards with which<br />
the Highway has been tested.<br />
At the time of writing the RBM<br />
OnBoard 4000 bus board is the<br />
only one said to cause<br />
problems.<br />
In addition to the USB<br />
connectors the Highway also<br />
has a clock port header so<br />
devices intended for the A<strong>12</strong>00<br />
clock port can be connected,<br />
for these devices to work<br />
updated driver software is<br />
required from their<br />
manufacturer. The Highway<br />
also has a 38pin expansion<br />
port, E3B are developing an<br />
10Mb/s Ethernet card called<br />
the Norway for this port, in fact<br />
a driver for the Norway is<br />
included on my Highway disk<br />
but the hardware is not yet<br />
available as I write this. Full<br />
pin-outs for these connectors<br />
are in the manual which also<br />
states that developer<br />
information for the expansion<br />
ports is available on request<br />
from E3B. One final connector<br />
on the Highway allows for the<br />
bus interface logic to be<br />
upgraded, if such an upgrade<br />
were ever available (and there<br />
is no sign one is required) it<br />
would have to be carried out by<br />
an authorised service centre.<br />
Getting working hardware on<br />
the <strong>Amiga</strong> is only part of the<br />
battle to a USB solution (after<br />
all you could plug a PCI USB<br />
card into one of the existing<br />
PCI bus boards but it wouldn’t<br />
do you any good without a<br />
driver), software referred to as<br />
a USB stack is needed to add<br />
USB support to the OS and<br />
then drivers for USB<br />
peripherals are also required.<br />
As you might guess from the<br />
name a USB stack is very like<br />
a TCP/IP stack in concept, it<br />
provides a standard way for<br />
the USB drivers to access the<br />
USB hardware and deals with<br />
the low level device access.<br />
The Highway is supplied with a<br />
USB stack called Poseidon,<br />
developed by Chris Hodges.<br />
Although Chris has developed<br />
Poseidon using a Highway<br />
card the stack accesses the<br />
hardware using a driver and<br />
has been designed so that<br />
other types USB card can be<br />
supported.<br />
Poseidon needs to be installed<br />
before the Highway and any<br />
attached USB devices are<br />
recognised. The program is<br />
supplied on a single floppy disk<br />
and is installed using the<br />
standard installer. Only two<br />
options are given during<br />
installation, the first is whether<br />
Poseidon should be started<br />
automatically at start-up. If you<br />
select this option a command<br />
is added to the end of your<br />
user-startup file to load the<br />
USB stack, USB devices are<br />
then ready to use as soon as<br />
your <strong>Amiga</strong> boots. The second<br />
option is to install an updated<br />
input.device, the input.device<br />
is the part of the OS which<br />
handles the keyboard and<br />
mouse. Replacing it allows<br />
USB devices to seamlessly<br />
replace the standard mouse<br />
and keyboard without patching<br />
the OS. The updated device<br />
also supports multiple<br />
keyboards and mice (should<br />
you need them for any reason).<br />
Also on the Poseidon disk is an<br />
Extras drawer which contains,<br />
amongst other things, the<br />
Fat95 file system which is<br />
useful for many mass storage<br />
devices and some nice Glow<br />
Icons for the stack’s utilities.<br />
USB peripherals are grouped<br />
into various classes based on<br />
their function, for example<br />
keyboards and mice generally<br />
belong to the Human Interface<br />
Device (HID) class and storage<br />
devices such as disk drives<br />
come under the Mass Storage<br />
Device (MSD) class. Poseidon<br />
allows class drivers to be<br />
written supporting different<br />
classes of device. A number of<br />
drivers are supplied so the<br />
Highway card can be used with<br />
several types of device straight<br />
away, the currently supported<br />
classes are:<br />
22 TOTAL AMIGA Autumn 2002<br />
The Highway installed in an A3000 desktop. The card is<br />
connected to the USB ports by the two light coloured cables.<br />
Hubs<br />
A hub allows you to connect<br />
several devices to one USB<br />
port, usually they are a small<br />
box with one USB “input”<br />
known as an upstream<br />
connection and several<br />
“outputs” or downstream<br />
connections. The number of<br />
downstream connections<br />
provided by a hub varies and<br />
they can sometimes be found<br />
built into other devices such as<br />
keyboards allowing another<br />
device (for example a mouse)<br />
to be “daisy chained”. A hub<br />
can pick up its power from the<br />
bus (meaning that in total the<br />
devices connected must not<br />
draw more than 500 milliamps)<br />
or it can have its own power<br />
supply (self powered), in that<br />
case each device can draw up<br />
to the 500mA maximum<br />
allowed in the USB standard.<br />
The Highway can only supply a<br />
limited current because the<br />
whole Zorro bus is limited to 2A<br />
(2000mA) so the manual<br />
recommends that high drain<br />
devices (in particular anything<br />
with a motor such as a ZIP<br />
drive or bus powered scanner)<br />
are connected to a self<br />
powered hub. Poseidon<br />
supports both bus and self<br />
powered hubs and most are<br />
expected to work. I tried a<br />
Belkin four port hub that is<br />
readily available locally and all<br />
devices except an Epson<br />
printer (see printers section<br />
below) worked equally well<br />
connected to the hub or directly<br />
to the Highway.<br />
Keyboards and Mice<br />
As I mentioned above USB<br />
keyboards and mice generally<br />
belong to the HID class, at the<br />
moment this is not supported<br />
by the Highway however it<br />
does support the bootmouse<br />
and bootkeyboard classes.<br />
These classes were designed<br />
for simple keyboard and mouse<br />
support in system configuration<br />
screens (such as a PC’s<br />
BIOS). The Supplied drivers<br />
work with most keyboards and<br />
mice and provide fairly basic<br />
functionality. Mice act as a<br />
simple three button mouse, any<br />
additional buttons or scroll<br />
wheels are ignored. That said<br />
modern optical mice such as<br />
my Logitech Wheel Mouse<br />
Optical and a Microsoft<br />
Intellimouse Explorer work well<br />
(with the exception of their<br />
scroll wheels). I also noticed<br />
that the same mouse<br />
connected through USB seems<br />
to track more smoothly than<br />
through my PS/2 to <strong>Amiga</strong><br />
adaptor. On the keyboard front<br />
the basic keys (102 if I<br />
remember correctly) on a PC<br />
style keyboard are supported<br />
but not any additional<br />
“multimedia” buttons. The<br />
author of Poseidon has said he<br />
is working on a full HID class<br />
driver for Poseidon which<br />
should enable support for scroll<br />
wheels and additional buttons<br />
on mice and “multimedia”<br />
keyboards.<br />
Since I got my Highway I’ve<br />
had my mouse connected by<br />
USB, it has worked well and<br />
my system seems to be as<br />
stable as ever. I was also<br />
pleased to see that the mouse<br />
continues to work smoothly<br />
even when there is intense<br />
activity on the USB bus such<br />
as printing or copying large<br />
amounts of data, I think this is<br />
because USB can prioritise<br />
“interactive” devices. Anyway it<br />
works very smoothly, pretty<br />
impressive for the first release<br />
of an entirely new product to<br />
the <strong>Amiga</strong>.<br />
Reviews<br />
Printers and Parallel<br />
Devices<br />
When a USB printer is<br />
connected to the Highway the<br />
Poseidon USB stack<br />
automatically creates a device<br />
driver called usbparallel.device<br />
which can be used to access<br />
the printer, if multiple printers<br />
are attached they are assigned<br />
different unit numbers. Being<br />
able to access the printer via<br />
USB doesn’t suddenly make<br />
printer drivers available<br />
however if the printer has both<br />
USB and Parallel ports or their<br />
is a similar model with a<br />
parallel connection someone<br />
may already have written a<br />
driver, for example in the<br />
Turboprint package. If this is<br />
the case then you just need to<br />
set the driver to print to the<br />
usbparallel.device and the<br />
appropriate unit and print as<br />
normal. We tested USB<br />
printing with a Canon S450<br />
and an Epson Stylus Photo<br />
790 both printers worked on<br />
the USB connection. We did<br />
have some problems with the<br />
Epson when connected<br />
through a hub but this <strong>issue</strong> is<br />
also reported on other<br />
platforms, it worked perfectly<br />
when connected directly to the<br />
Highway. We also compared<br />
printing speed between USB<br />
and the standard parallel port<br />
using Turboprints “Turbo par”<br />
mode. In cases where the<br />
standard parallel port wasn’t<br />
able to keep the printer fed<br />
with data all the time (we could<br />
hear the head pausing<br />
between passes) the Canon<br />
was between 20 and 30<br />
percent faster on USB, the<br />
Epson was up to 20 percent<br />
faster with similar tests. As we<br />
have proven with the mass<br />
storage devices (400 -<br />
500KB/s) that USB is much<br />
faster than the standard<br />
parallel port (about 50KB/s)<br />
this seems to suggest that the<br />
main bottleneck in <strong>Amiga</strong><br />
printing is actually processing<br />
the data ready to print.<br />
Given that the speed<br />
advantages of USB printing are<br />
not huge (although a 20%<br />
speed up on a 15 minute print<br />
job is not to be sniffed at) and<br />
currently most printers have<br />
parallel and USB support<br />
23
Reviews<br />
printing might seem to be one<br />
of the less interesting aspects<br />
of the Highway. However E3B<br />
report that the authors of<br />
TurboPrint are working on more<br />
USB printer drivers for the<br />
package and some interesting<br />
printers are now being<br />
introduced which only have<br />
USB ports (for example the<br />
acclaimed Canon S900 and<br />
9000 photo printers) so in the<br />
future USB printing will<br />
become more important.<br />
Storage Devices<br />
There are many storage<br />
devices that connect by USB,<br />
the most common being flash<br />
memory card readers and disk<br />
based devices such as ZIP<br />
drives. Poseidon supports<br />
devices that comply with the<br />
massstorage class. Several<br />
memory card reader have<br />
been tested as compatible, I<br />
purchased a LaCie Hexadrive<br />
which reads all the common<br />
Flash memory formats<br />
(Compact Flash, MicroDrive,<br />
Smart Media, Memory Stick,<br />
Secure Digital and Multimedia<br />
Card). When you plug in a<br />
storage device Poseidon<br />
creates the usbscsi.device<br />
which is used to access the<br />
device. If you connect more<br />
than one device or your device<br />
has several slots (like my<br />
reader) multiple units of the<br />
device are created. Disks or<br />
cards inserted in the device are<br />
not automatically mounted, you<br />
have to create a suitable<br />
DosDriver. Most USB storage<br />
devices will use DOS/Windows<br />
style FAT file systems so you<br />
will probably want to install the<br />
FAT95 file system included on<br />
the Poseidon disk in the Extras<br />
drawer. A sample DosDriver<br />
using FAT95 is installed with<br />
Poseidon into your<br />
Some digital cameras like this<br />
Olympus E20 can be directly<br />
connected.<br />
Sys:Storage/DosDrivers/UMSD<br />
drawer. You can edit this<br />
DosDriver to point to the<br />
correct unit of the<br />
usbscsi.devce for your device.<br />
With my card reader when you<br />
mount the device by double<br />
clicking on the DOSDriver a<br />
bad disk icon appears until you<br />
insert a valid memory card.<br />
Then you can access the<br />
contents like any normal <strong>Amiga</strong><br />
drive, with Workbench, a file<br />
manager or direct from<br />
programs whatever you prefer.<br />
As well as reading files from<br />
the drive you can also save<br />
back to it and perform other<br />
operations like renaming and<br />
deleting files. One slight oddity<br />
I did notice is that when you<br />
remove a card it’s icon does<br />
not disappear from Workbench<br />
unless you <strong>issue</strong> a manual<br />
diskchange command,<br />
however a new card is<br />
recognised automatically when<br />
inserted. I did some tests<br />
reading and writing to Compact<br />
Flash and Smart Media<br />
memory cards and achieved<br />
around 460 Kilobytes per<br />
second transferring a 24Mb file<br />
to and from Compact Flash.<br />
Smart Media came in at about<br />
400KB/s for the same<br />
operations. Compared to<br />
connecting a camera via the<br />
serial port this is hugely faster,<br />
as the best you’ll get on serial<br />
is about 14KB/s.<br />
According to the E3B website<br />
USB ZIP100 and 250 drives<br />
work with the Highway<br />
(although you may need a self<br />
powered hub). Currently the<br />
massstorage.class does not<br />
support auto mounting devices<br />
with RDBs so you have to<br />
create a DOSDriver or use a<br />
mounting utility such as<br />
AutoMounter (supplied in the<br />
Extras drawer). Some digital<br />
cameras conform to the<br />
massstorage class themselves<br />
meaning they can be<br />
connected directly. For me the<br />
storage device support is the<br />
most useful part of the<br />
Highway, now I can get<br />
pictures off my digital camera<br />
in a fraction of the time making<br />
it much more enjoyable. When<br />
I’m ready to upgrade I can<br />
consider any camera with a<br />
removable memory card<br />
(almost all of them).<br />
USB Device Compatibility<br />
The Highway should be able<br />
to operate with any USB<br />
device however to<br />
make use of a device it<br />
must conform to one of<br />
the classes with a<br />
Poseidon class driver.<br />
The E3B site warns that<br />
there are also devices<br />
which supposedly belong to a<br />
particular class but do not<br />
properly implement the<br />
standard and thus cause<br />
problems. From my limited<br />
testing mice, keyboards and<br />
printers seem a fairly safe bet,<br />
with storage devices you need<br />
to be more careful, make sure<br />
you can return it if it doesn’t<br />
work. The E3B website<br />
mentions that the source code<br />
to the Linux USB stack if full of<br />
work arounds for devices that<br />
don’t quite stick to the<br />
specifications. For example the<br />
first flash card reader I bought<br />
would work without problems<br />
until I also connected a USB<br />
mouse, then it kept reporting<br />
errors in the Poseidon error log<br />
and I could no longer access<br />
the device. When I reported<br />
this to Chris Hodges he looked<br />
at the Linux sources and found<br />
the particular device was<br />
marked as non-standard. The<br />
E3B site also has a useful list<br />
of USB devices that have been<br />
tested as working, I returned<br />
my card reader and got the<br />
Hexadrive which was<br />
confirmed to work properly.<br />
There are also devices which<br />
do not belong to any class,<br />
instead they use a vendor<br />
specific driver, usually these<br />
are only available for Windows<br />
and MacOS (if you’re lucky).<br />
For these devices a specific<br />
driver is needed to provide<br />
support. Scanners and some<br />
digital cameras are commonly<br />
vendor specific devices.<br />
IOSpirit have announced that<br />
they are working on Poseidon<br />
compatible scanner and digital<br />
camera drivers for their fxScan<br />
and VHIStudio packages<br />
respectively. Poseidon is also<br />
supplied with a simple<br />
command line program to<br />
download pictures from<br />
webcams based on the<br />
STV680 chip, for example the<br />
Aiptek Pencam series.<br />
Trident<br />
Most of the time the Poseidon<br />
USB stack just sits in the<br />
background doing its job, never<br />
the less it comes with a handy<br />
MUI based preferences<br />
program called Trident and a<br />
few command line utilities. The<br />
main Trident window has<br />
several pages selected from a<br />
list on the left hand side, Miami<br />
style. The Hardware page<br />
shows the USB cards installed<br />
in your system, normally one<br />
Highway card is shown but<br />
additional hardware drivers can<br />
be added if they become<br />
available. Devices lists all the<br />
USB devices connected to the<br />
Highway, this includes hubs<br />
and any USB devices<br />
connected to them. On the<br />
Devices page you can check<br />
which class driver has been<br />
Poseidon’s preferences program, Trident, shows all the USB<br />
devices connected and which class driver they use.<br />
The bottom section gives easy access to the log file.<br />
bound to each device and if<br />
necessary release the binding<br />
(I guess this might be useful in<br />
the future if there was more<br />
than one driver for a device).<br />
There is also a button which<br />
displays more information<br />
about the selected device. The<br />
classes page shows the USB<br />
class drivers available with a<br />
brief description and how many<br />
devices are currently using<br />
each driver. When new class<br />
drivers are developed an Add<br />
button allows them to be<br />
registered with Poseidon.<br />
There is a Configure button on<br />
the Classes page but none of<br />
the currently supplied classes<br />
have any configuration options.<br />
The last page is called Config<br />
but as yet there are no<br />
configuration options available.<br />
At the bottom of the Trident<br />
window is a list which shows a<br />
log of events since the<br />
Poseidon was started. This is<br />
handy because you can look<br />
back and see exactly in what<br />
order devices were recognised,<br />
Front<br />
Computer cases are<br />
designed to look good on<br />
a shelf in a shop, so all the<br />
messy stuff like input/output<br />
ports is hidden at the back.<br />
This is fine for things like<br />
keyboards, printers, modems<br />
and many other devices. You<br />
want their cables out of sight,<br />
24 TOTAL AMIGA Autumn 2002<br />
it also shows when any device<br />
was added or removed from<br />
the bus and what class driver it<br />
was bound to. I should mention<br />
here that the log is particularly<br />
humorous, here are a few<br />
examples:<br />
New hardware<br />
DEVS:USBHardware/<br />
highwayusb.device/0 added.<br />
Plug in, baby!<br />
0-bootmouse.class: I’m<br />
pleased to introduce a mouse<br />
alliance to ‘USB Mouse’!<br />
0-hub.class: Device ‘Hub:<br />
Vdr=0451/PID=2046’ at port 2<br />
is gone!<br />
0-hub.class: Oh no! I’ve been<br />
shot! Arrggghh...<br />
Well I enjoyed them anyway,<br />
more seriously the log can be<br />
handy for trouble shooting, if<br />
you want to save the log to a<br />
file you can use the shell<br />
command “psderrorlog<br />
>device:file”.<br />
X<br />
Dealing with the rat’s nest of cables behind your <strong>Amiga</strong> is<br />
always a problem , Neil Bothwick seems to have found an<br />
interesting solution to this perenial problem.<br />
and you don’t need easy<br />
access to them very often.<br />
There are some things you<br />
may want more frequent<br />
access to. Digital camera users<br />
will want access to serial and<br />
(hopefully) USB ports. Gamers<br />
may want to use different<br />
controllers for different games.<br />
Anyone who likes to listen to<br />
MP3s late at night, or play<br />
noisy games, may want to<br />
replace the speakers with<br />
headphones. All of these are a<br />
pain in the neck (or wherever)<br />
with a standard tower case.<br />
FrontX provides a solution. It<br />
extends selected ports form the<br />
back of your computer to the<br />
front, housing them in a 5”<br />
drive bay. There are two<br />
elements to the kit, the first is a<br />
chassis that fits in a drive bay.<br />
Pressing the Help key within<br />
Trident brings up Poseidon’s<br />
extensive <strong>Amiga</strong>Guide<br />
documentation, this provides<br />
information on using Trident,<br />
the class and hardware drivers.<br />
I found it to be comprehensive<br />
and well written. The Highway<br />
package also comes with a<br />
printed manual which covers<br />
the hardware installation.<br />
Conclusion<br />
From the very start the<br />
Highway has impressed me,<br />
the board itself is high quality<br />
and it is accompanied with well<br />
written installation<br />
documentation. Having used<br />
Results<br />
Pros<br />
+ High quality<br />
hardware.<br />
+ Reliable software.<br />
+ Useful set of drivers.<br />
Cons<br />
- Keyboard and mouse<br />
drivers currently<br />
simple.<br />
This has a flap to cover the<br />
ports when not in use and a<br />
number of slots in which to<br />
place the ports. It also has a<br />
special cover plate for one of<br />
your PCI access slots to allow<br />
cables to pass through.<br />
The second element consists<br />
of the port extenders. These<br />
can be bought individually, or<br />
as a kit of commonly used<br />
ones. You choose which ports<br />
you move to the front, from<br />
serial, USB, game, audio,<br />
video, microphone and firewire.<br />
There’s also a headphone port<br />
that leaves the speakers<br />
connected to the back of the<br />
computer, but cuts them off<br />
when headphone are plugged<br />
into the front socket. The<br />
chassis hold six of the smaller<br />
Reviews<br />
the board for about a month<br />
now both it and the software<br />
have been very reliable, even<br />
though this is the first release it<br />
feels like a mature product. A<br />
useful combination of drivers<br />
are provided, for many<br />
<strong>Amiga</strong>ns just having the ability<br />
to use a modern digital camera<br />
will justify the purchase of the<br />
Highway and a flash card<br />
reader. It seems likely that in<br />
the next few months more and<br />
improved class drivers will<br />
appear making the Highway an<br />
even more attractive<br />
proposition.<br />
Pretty<br />
Good!<br />
Just slot in the ports you need,<br />
FrontX is compatible with any computer including <strong>Amiga</strong>s.<br />
extenders, the ones that use<br />
jack or phono plugs, and two of<br />
the larger ones for serial, USB<br />
etc.<br />
Some ideas are so simple you<br />
wonder why no one has<br />
thought of them before. FrontX<br />
is one of those ideas. FrontX is<br />
totally hardware independent.<br />
It will work on any computer<br />
that has a spare 5” bay and<br />
standard connectors. All the<br />
parts are sold separately, so<br />
you can tailor it to fit your<br />
needs exactly. The multimedia<br />
kit costs $28.90 (about £20),<br />
the chassis alone is $10.90<br />
(£7.50) and most port<br />
extenders are $5-$10 (£4-£7).<br />
FrontX can be ordered from<br />
http://www.frontx.com and<br />
prices include shipping.<br />
25
Reviews<br />
The Feeble Files<br />
It’s about time we had a new point and click adventure on the <strong>Amiga</strong>. Sam Byford thinks EPIC Interactive’s latest port<br />
will keep fans of the genre quiet for a while.<br />
.info<br />
Developer<br />
EPIC Interactive<br />
www.epic-interactive.com<br />
Price<br />
£35<br />
Available from<br />
Forematt Home Computing<br />
www.forematt.co.uk<br />
Kicksoft<br />
www.kicksoft.co.uk<br />
Requirements<br />
68060<br />
32Mb RAM<br />
4Mb graphics card<br />
600MB hard drive space<br />
AHI<br />
<strong>Amiga</strong>OS 3.0+<br />
PPC accelerator<br />
recommneded.<br />
Test System<br />
A4000<br />
CyberStorm Mk III 060/50<br />
65MB RAM<br />
Mediator 4000<br />
Voodoo 3000 (16MB)<br />
<strong>Amiga</strong>OS 3.5 BB2<br />
Picasso 96<br />
The Feeble Files is the latest<br />
game conversion from the<br />
company Adventure Soft<br />
(published by EPIC), and is in<br />
the age-old format of a Pointand-Click<br />
adventure. Anyone<br />
that has played Monkey Island I<br />
or II, Simon the Sorcerer or<br />
Nightlong will feel immediately at<br />
home with the environment of<br />
Feeble Files and except for a<br />
few differences the basic<br />
concept is the same also. You<br />
control an alien called Feeble. A<br />
member of the Omnisociety<br />
(ruled over and controlled by the<br />
Omnibrain) who, through some<br />
rather reckless (but fun!) space<br />
piloting manages to collide with<br />
an Earth satellite and thereby<br />
ruins a company installation<br />
base.<br />
According to the printed<br />
introduction in the manual the<br />
“..Omnibrain considers all life<br />
forms to be his citizens who he<br />
loves and cares for in the way<br />
that is best for them..... He<br />
watches over you constantly to<br />
protect you from any possible<br />
rebellious influences and<br />
dangerous emotions you may<br />
find yourself experiencing.<br />
Praise be to the Omnibrain!” This<br />
is the first hint that the Omnibrain<br />
may not be the all-wonderful<br />
‘God-like figure’ he is believed to<br />
be and as you progress in the<br />
game you find this out for<br />
yourself and, well - the rest is<br />
obvious! Uncover the truth you<br />
must; give the members of the<br />
Omnisociety back their freedom<br />
and make all right in the<br />
(Omni)Universe again.<br />
Becoming a member of the<br />
Omnisociety.<br />
The Feeble Files comes in a<br />
DVD case and consists of two<br />
CDs and a manual in English,<br />
Dutch and French. Unfortunately<br />
it is not a double leaf case which<br />
would have kept things nice and<br />
neat, instead the second CD is in<br />
a paper wallet tucked under the<br />
manual. CD1 consists of the<br />
main executables, a readme file<br />
and a Spoilers directory. This<br />
contains a complete Solution text<br />
file and another directory with ten<br />
save files in it taken from various<br />
progressions through the game.<br />
These are here to help you in<br />
case you become completely<br />
stuck at some point in the game,<br />
but as with any cheat would spoil<br />
the fun of the game if you use<br />
them.<br />
Installation of Feeble Files could<br />
not be easier - open up the CD<br />
contents and double click the<br />
“Feebleinstall” icon, it will then<br />
copy the needed contents to the<br />
hard drive in a place of your<br />
choosing which will take up<br />
about 700mb of space. To run<br />
the game just click on Feeble’s<br />
head (a rather large icon). You<br />
will need CD2 in the drive to play<br />
the game. Personally I find this<br />
kind of dependence on CDs a<br />
real pain so if you have a big<br />
enough hard drive I would<br />
recommend that you copy the<br />
contents of the 2nd CD to a<br />
directory of your choosing and<br />
then make an assign “ Assign<br />
Feeble2: Movies:Feeble2 “<br />
where Movies: is the directory of<br />
your choice.<br />
As with any program you should<br />
always read the readme file first,<br />
and in this case it tells of a few<br />
changes to the <strong>Amiga</strong> version<br />
from the Mac version. It also tells<br />
you that Feeble Files uses AHI<br />
for its sound output and that it<br />
uses Unit 0 only - which is a bit<br />
naughty as it should use<br />
whatever channel you tell it to. It<br />
also says to set the channel<br />
number to between 4 and 6,<br />
though I had it running on 1<br />
channel for ages and didn’t<br />
notice much difference except<br />
that with 6 channels I had to turn<br />
the volume up louder than with it<br />
set to 1 channel!<br />
Stepping into the Shoes of<br />
an Alien.<br />
When you first start Feeble Files<br />
it will ask you for a screenmode<br />
to use. Most people should<br />
select 640x480 8bit because this<br />
is the ideal mode for the game. It<br />
will run in a higher res but on my<br />
060 it went really slow<br />
(slideshow speed in fact).<br />
Anything smaller and all I got<br />
was a blank screen. For an 8bit<br />
game the graphics are<br />
remarkably good but its a shame<br />
there isn’t a 16bit version as<br />
well, especially as a lot of <strong>Amiga</strong><br />
users now have graphics cards<br />
which can handle this standard<br />
very nicely now. You can then sit<br />
back and enjoy the introductory<br />
animation that is presented to<br />
you. It shows feeble and the<br />
already mentioned joy-ride that<br />
causes the destruction of the<br />
installation. You then take control<br />
of Feeble on this base and are<br />
introduced to the first set of<br />
puzzles in the game. (A hint -<br />
pick up the Doll and use it in the<br />
transporter. This isn’t the only<br />
thing to do at this stage but it<br />
gets you started!)<br />
You will notice that there is a<br />
gold coloured icon at the top left<br />
of the screen. This is Feeble’s<br />
Database system - Oracle. It<br />
holds the rules of the Omniverse,<br />
the items Feeble has picked up<br />
(the inventory) and has basic<br />
prefs and info items. Use the<br />
mouse to click on this icon and it<br />
will bring up the Oracle screen,<br />
where you should read through<br />
the “Ency” (Encyclopedia) items,<br />
and change your preferences to<br />
suit you. It should be noted that<br />
turning “Hitbox” names on will<br />
often help you in the game. With<br />
this on whenever your mouse<br />
passes over an item that Feeble<br />
can interact with it will throw up<br />
on screen the name of the<br />
object. This can be very valuable<br />
for finding those hidden items<br />
not easily seen. Not far into the<br />
game you help to get a member<br />
Turning on “Hitbox” names<br />
helps you find vital items.<br />
of the Omniverse killed and he<br />
leaves behind a boarding pass<br />
that you need to get your<br />
hands(!?) on, but it was only with<br />
the Hitbox names turned on,<br />
and a bit of patience, that I found<br />
the pass sitting on the table in<br />
deep shadow (see the<br />
screenshot for the exact<br />
position!). Understandably<br />
though, some players will prefer<br />
to have this turned off for exactly<br />
the reverse reason, they like to<br />
make life that little bit harder for<br />
themselves!<br />
Time to get interactive.<br />
The mouse pointer is actually a<br />
multi-tasking item, which with a<br />
right click of the mouse turns<br />
from a “walk-to” icon (the default<br />
setting) to a “look-at” “pick-up”<br />
“action” and “double-action” icon.<br />
All of these are pretty obvious in<br />
their uses but I’ll clarify the use<br />
of the double-action icon,<br />
throughout the game Feeble will<br />
need to use certain objects with<br />
other objects or people (such as<br />
the doll with the transporter at<br />
the start of the game), that is<br />
where the double-action mouse<br />
comes into use. You first click<br />
on one of the two items to use,<br />
then on the other and Feeble will<br />
try to use them together with<br />
either a positive or negative<br />
result.<br />
28 TOTAL AMIGA Autumn 2002<br />
The graphics are detailed and humerous and look great<br />
even though they are only 8bit.<br />
The Oracle system contains<br />
rules, prefs and inventory.<br />
Now call me picky, but this is<br />
actually where the game falls<br />
down in my estimation! The<br />
inventory of items you see, as<br />
previously mentioned, is stored<br />
within Oracle. To get an item for<br />
interaction you have to move the<br />
mouse up to the Oracle icon,<br />
click it, move the mouse back<br />
down and to the required object,<br />
then click “OFF” to return to the<br />
playing screen and then click on<br />
the item or person you want to<br />
try to get that object to interact<br />
with. A lengthy process at the<br />
best of times. However, when<br />
you’re in a situation where you<br />
Know something should interact<br />
with an item but your not sure<br />
exactly what then you have to<br />
repeat this process over and<br />
over till you (maybe) find the<br />
correct combination! Not clever,<br />
a much better solution is the way<br />
the Clickboom game Nightlong<br />
works, in Nightlong you move the<br />
mouse pointer to the bottom of<br />
the screen and a bar pops up<br />
with the inventory items in that<br />
making the whole process quick,<br />
efficient and painless. If Feeble<br />
Files did things this way then you<br />
could still have all the other<br />
Oracle processes inside that icon<br />
but the item handling would be<br />
made much easier.<br />
Look and Feel of Alienism.<br />
So other than the ‘interesting’<br />
user interface how does the<br />
game look and feel? The Box<br />
cover says that Feeble Files<br />
requires a minimum spec of an<br />
68060 with 32mb Ram and a<br />
4mb graphics card (as well as<br />
600mb of hard drive space, AHI<br />
and AOS3.X) with the<br />
recommended specs being a<br />
PPC <strong>Amiga</strong> with a 8mb graphics<br />
card. On my Cyberstorm 060<br />
system with Mediator and<br />
Voodoo 3000 (which puts it<br />
somewhere between the<br />
minimum and recommended<br />
specs) the game is more than<br />
playable. However it is still<br />
somewhat jerky which,<br />
considering this is only an 8bit<br />
game in 640x480 is quite<br />
surprising! I would have<br />
expected much more fluid screen<br />
scrolling and animation playing<br />
from a game of this calibre. As<br />
an example look at T-Zer0<br />
(another game from Clickboom)<br />
this is of similar graphics and<br />
size but the scrolling in it is<br />
perfect, no stuttering like in<br />
Feeble Files. That said it is not<br />
too bad and I have seen plenty<br />
worse which were still playable.<br />
No doubt on a PPC system the<br />
screens and animations will fly<br />
and run perfectly. Talking of the<br />
animations, it may have just<br />
been a quirk of my system but on<br />
a fair few of the cut-scenes I had<br />
graphics glitches in the form of<br />
swapped colours and also, once,<br />
the animation itself froze. The<br />
sound kept going so all I actually<br />
missed was a lot of head turning<br />
and hand waving but still,<br />
perfection would have been nice!<br />
The sound in the game is fine, if<br />
overused at times. While<br />
walking through the main town<br />
you get the voice of the<br />
Omnibrain coming over the<br />
tannoy system at regular<br />
intervals, highly annoying when<br />
you have heard the same<br />
distracting sing-song voice<br />
several times already.<br />
Thankfully that is confined to that<br />
one area out of all those I have<br />
encountered so far.<br />
All in all then the sound and<br />
pictures are very sharp, well<br />
drawn and in the case of the<br />
voices, well performed (in this<br />
case by Robert Llewellyn of Red<br />
Dwarf and Scrapheap Challenge<br />
fame).<br />
The End of the Omniverse?<br />
I couldn’t possibly tell you<br />
whether the game has a<br />
satisfactory conclusion or not,<br />
Results<br />
Pros<br />
+ WGood use of graphics<br />
and sound.<br />
+ Easy to use gameplay.<br />
+ PPC supported.<br />
Cons<br />
- Slightly jerky graphics at<br />
times.<br />
- Inventory can be tedious<br />
to use.<br />
Reviews<br />
The cut scenes are<br />
worth watching.<br />
mainly because I’m nowhere<br />
near finishing the game! Some of<br />
the puzzles in the Feeble Files<br />
may well keep you frustrated for<br />
hours (I haven’t yet figured out<br />
how to get past the secretary to<br />
see the person I’ve been told to<br />
go see!) but from what I have<br />
played there is more than<br />
enough to keep all point-andclick<br />
fans interested for ages.<br />
I’m just hoping the end isn’t as<br />
quick to happen or as easy as it<br />
was in Code Name: Hell Squad<br />
(the only Point-and-click game<br />
I’ve ever finished!). While I may<br />
have some slight hang-ups<br />
about the graphics smoothness it<br />
is not something that would stop<br />
me buying the game and though<br />
the inventory system may be<br />
somewhat cumbersome it is still<br />
very workable and, I suppose,<br />
neat (in that everything you<br />
could possibly need is in the<br />
same place).<br />
So, Feeble, whatever his (my)<br />
task may be in the game, will<br />
have to plod along (saving<br />
regularly of course!) and I’m sure<br />
eventually I will discover if I can<br />
truly unmask the Omnibrain and<br />
return the (Omni)Universe to its<br />
inhabitants. The graphics and<br />
sound along the way will not let<br />
you down and the cut-scenes<br />
are definitely worth watching<br />
and, for a 256 based piece of<br />
work, really quite impressive.<br />
All in all a worthy addition to the<br />
converted <strong>Amiga</strong> Games market.<br />
I would recommend all fans of<br />
point-and-click games to buy the<br />
Feeble Files as soon as<br />
possible.<br />
Pretty<br />
Good!<br />
29
.info<br />
Developer<br />
NEC-Mitsubishi<br />
www.nec-monitors.com<br />
Supplier<br />
Micro Warehouse<br />
www.microwarehouse.co.uk<br />
Price<br />
£411 Incl. VAT<br />
Compatibility<br />
Graphics card with 15pin<br />
VGA connection.<br />
Specification<br />
Screen Size: 15.1”<br />
Max. Resolution: 1024x768<br />
Brightness: 300 cd/m2<br />
Contrast Ratio: 450:1<br />
Response time: 25ms<br />
Colour: 24bit (16 million)<br />
Viewing Angles<br />
Vertical: 110°<br />
Horizontal: 150<br />
Input Signal<br />
Scan rates: 31.5-60 kHz<br />
Refresh rates: 56.2-75.1 Hz<br />
Features<br />
Built-in stereo speakers.<br />
Headphone socket.<br />
Powered 4 port USB hub.<br />
Autumn 2002<br />
Reviews<br />
TFT<br />
NEC Multi-Sync LCD 1550M<br />
to the traditional CRT monitors which currently dominate most people’s desks?<br />
Monitor<br />
Mick Sutton has taken a step up to the latest monitor technology but how does it compare<br />
It was only in <strong>issue</strong> 6 that I<br />
reviewed my then new Sony<br />
17” CRT monitor, so why only<br />
18 months later or so am I<br />
reviewing another monitor I<br />
hear you saying?<br />
Size Matters<br />
The answer is space, or in fact<br />
the sheer lack of it to be<br />
precise. On my desk at home I<br />
had a 17” CRT monitor, a<br />
printer, a flatbed scanner and<br />
my wife’s iMac and keyboard<br />
(my keyboard is on a separate<br />
pull out shelf luckily) which<br />
made it very tight for room to<br />
work but just about enough to<br />
get away with it. Then my<br />
audio setup died, the<br />
significance is that it was a unit<br />
that sat beneath my monitor<br />
and therefore took no extra<br />
space. Looking around I<br />
couldn’t find anything like it and<br />
the alternative speakers would<br />
not remotely fit on my desk, so<br />
what should I do?<br />
15.1”<br />
I had been very interested in<br />
the latest TFT monitors<br />
available and had noticed the<br />
prices dropping quite<br />
considerably. On further<br />
investigation I found out that<br />
specs of such monitors can<br />
vary quite a bit according to<br />
price, I also was informed that<br />
playing games on such<br />
monitors was unbearable<br />
unless response times were<br />
very quick (see boxout). When<br />
I spotted the NEC 1550M with<br />
good specifications (see panel)<br />
and built in multi-media<br />
speakers I thought to myself<br />
that would meet all my<br />
demands in one swoop, so<br />
here we are!<br />
Big is Small!<br />
The NEC 1550M (Multi-media)<br />
is a 15” TFT monitor which has<br />
a diagonal visible screen<br />
measurement of 15.1 inches.<br />
Although it is a 15” monitor the<br />
actual viewable area is about<br />
the same as a 17” CRT<br />
As you can see from the photo the 15.1” TFT display (right) gives<br />
almost the same screen area as a 17” CRT monitor (left).<br />
(Cathode Ray Tube) monitor,<br />
the reason for this is that CRT<br />
monitors sizes quoted is the<br />
actual size of the physical tube<br />
which is partially surrounded<br />
by the monitor casing. On most<br />
17” CRT monitors you end up<br />
with about 15.9 inches of<br />
viewable screen, so you can<br />
see it is not much difference in<br />
size. One other thing to note is<br />
that 15” TFT’s have a<br />
maximum screen resolution of<br />
1024 x 768 so if you like to use<br />
resolutions above this you will<br />
need a 17” TFT monitor and<br />
they cost around £550 or so.<br />
The entire flat panel area of the<br />
monitor measures 34.5cm<br />
horizontally by 30cm vertically<br />
and that includes a 2cm border<br />
down each side, a 2.5cm<br />
border at the top and a 5cm<br />
border at the bottom that has<br />
the control buttons and<br />
speakers within it. The entire<br />
footprint including the screen<br />
panel and base of the monitor<br />
is 34.5cm width by 16.5cm<br />
depth which is much less<br />
15.1”<br />
31
Reviews<br />
space than my 17” CRT<br />
required I can tell you.<br />
Feature Packed<br />
This particular monitor has<br />
several features that I have not<br />
mentioned yet, it has a stereo<br />
headphone socket in the front<br />
as well as the in-built speakers<br />
which is useful for playing<br />
games in the early hours of the<br />
morning (mustn’t wake the kids<br />
or my life would be hell) and it<br />
has a four port USB hub<br />
(powered) built into the base<br />
which should be very handy in<br />
the near future with the release<br />
of USB on the <strong>Amiga</strong> both in<br />
the “Classic” form and the new<br />
<strong>Amiga</strong>ONE. I can even make<br />
good use of it at present with<br />
my wife’s iMac which only has<br />
two USB ports that are free to<br />
use once the keyboard and<br />
mouse is plugged in!<br />
Looks Good<br />
The monitor has a very neat<br />
entry panel at the back that<br />
has the cables coming into it,<br />
these are the power cable, the<br />
monitor input cable and a pair<br />
of audio cables if you want to<br />
use the in-built 2w speakers.<br />
Where the cables enter there<br />
are clips to secure them and a<br />
cover that clips over that area<br />
to conceal the whole<br />
thing....very neat indeed! At the<br />
front of the monitor under the<br />
Size Matters!<br />
screen are eight buttons that<br />
perform all the functions, the<br />
one on the far right is a power<br />
button which is only in fact<br />
used to put the monitor in<br />
stand-by mode (the proper<br />
power off switch is at the rear<br />
of the TFT panel on the left<br />
hand side). The other seven<br />
buttons are used to access the<br />
various on screen menus that<br />
used to set up speaker volume,<br />
brightness, alignment,<br />
languages and the like found<br />
on almost every monitor.<br />
Feels Good<br />
The first time I connected this<br />
little gem to my <strong>Amiga</strong> and<br />
powered it up I was rather<br />
pleased by the image quality<br />
displayed on screen as it was<br />
excellent, it’s pin sharp and the<br />
colours vibrant even more so<br />
than on my previous monitor,<br />
which was to my mind very<br />
good quality also (as stated in<br />
my review in <strong>issue</strong> 6). One<br />
other thing that I noticed when<br />
my Workbench screen<br />
appeared is that the monitor<br />
performed an auto adjust to set<br />
the screen perfectly... mega<br />
cool! This meant that I didn’t<br />
have to sit and fiddle with the<br />
controls to get it perfect like I<br />
did with my CRT monitor and in<br />
fact the first time I loaded every<br />
“standard” (ie 1024x768,<br />
800x600 and 640x480) screen<br />
resolution it did this auto adjust<br />
The cables connect behind a cover (removed here).<br />
Left to right: USB hub power, mains, VGA cable, audio cable.<br />
which it then saves to it’s<br />
settings. If you load something<br />
that uses a non “standard”<br />
screen resolution you have to<br />
perform the adjustments to<br />
screen position and size<br />
manually via the on screen<br />
menus. One of my concerns<br />
with buying a TFT monitor was<br />
that I was not totally certain it<br />
could cope with <strong>Amiga</strong> games<br />
screens, I had seen one at<br />
World of <strong>Amiga</strong> in 1999 (owned<br />
by Kickstart member Chris<br />
Green if my memory serves me<br />
correctly) that refused to show<br />
PAL screens despite them<br />
being put through a scandoubler<br />
on his A3000, maybe<br />
they are less tolerant than CRT<br />
monitors when the lowest scan<br />
rates are used. But in the end it<br />
worked fine with all the<br />
screenmodes I could throw at<br />
it, and in fact the game screens<br />
did not suffer much at all with<br />
the stated response rate<br />
problems I mentioned earlier.<br />
The only game that showed<br />
any slight effects of response<br />
rate blurring was Freespace<br />
and this is probably due to the<br />
high contrast within the game<br />
(from the darkness of space to<br />
the bright light coloured craft)<br />
but it was not bad enough to<br />
+ Compact size.<br />
+ Sharp and vivid<br />
display.<br />
+ Built-in speakers and<br />
USB hub.<br />
Cons<br />
- Expensive compared<br />
to a CRT monitor.<br />
distract you from the game.<br />
Another concern of mine was<br />
what the viewing angles would<br />
be limited to, and I can tell you<br />
they are very good with a<br />
vertical angle of 110° and a<br />
horizontal one of 150°. This<br />
means that you would have to<br />
be some way off the centre of<br />
the screen before the image<br />
fades an unacceptable<br />
amount, so unless you’re one<br />
of these strange people who<br />
uses their monitor at awkward<br />
angles it won’t be a problem!<br />
and by Golly it is Good<br />
All in all I am very impressed<br />
with this monitor, it is sharp<br />
and clear, it uses about a<br />
quarter of the space of my<br />
previous monitor (and weighs a<br />
lot less) and therefore makes it<br />
more practical for carting down<br />
to SEAL (http://www.sealamiga.co.uk)<br />
meetings every<br />
fortnight. The only negative<br />
thing I can really think of is the<br />
price (£411), but you can pick<br />
up TFT monitors now from<br />
about £270 so things are better<br />
than say a year ago when a<br />
price tag of around £700 was<br />
very common.<br />
TFT LCD monitors work in a<br />
quite different way to a<br />
traditional CRT (Cathode Ray<br />
Tube) monitor. Therefore<br />
when you’re looking to buy<br />
one you need to learn a<br />
whole new set of<br />
specifications and jargon!<br />
Here’s a quick primer on the<br />
basics of the technology and<br />
what to look for in a new LCD<br />
monitor.<br />
CRT Monitors<br />
A CRT monitor is based on<br />
the same technology as a<br />
television that has been<br />
available for around 70 years.<br />
The display consists of a<br />
glass tube coated with<br />
phosphor on the inside of the<br />
screen. At the back of the<br />
tube are three “guns” (in a<br />
colour monitor) that fire<br />
electron beams at the back of<br />
the screen making the<br />
phosphors illuminate,<br />
producing the picture you<br />
see. The electron beams from<br />
the guns scan across each<br />
line of the display working<br />
their way down the screen<br />
until a complete picture is<br />
built up, persistence in the<br />
phosphor keeps it glowing for<br />
a fraction of a second and the<br />
display is redrawn many<br />
times per second giving the<br />
illusion of a stable picture.<br />
The number of times per<br />
second the screen is redrawn<br />
is called the refresh rate<br />
(typically 60-100Hz (times per<br />
second)), a low refresh rate<br />
gives a flickery screen<br />
because the phosphors have<br />
started to dim before they are<br />
redrawn.<br />
TFT Native Resolutions<br />
A TFT monitor is based on a<br />
completely different<br />
technology. It uses a type of<br />
Liquid Crystal Display (LCD)<br />
called a TFT (Thin Film<br />
Transistor) this is in the form<br />
32 TOTAL AMIGA Autumn 2002<br />
Results Pros<br />
Top<br />
Notch!<br />
How it Works<br />
of a thin glass or plastic panel<br />
which is illuminated from<br />
behind by fluorescent tubes<br />
(although you couldn’t tell<br />
they were tubes from looking<br />
at the display). The display is<br />
constructed from discrete<br />
pixels making up the “native”<br />
resolution of the display. For<br />
example a typical 15” display<br />
like mine has 1024x768<br />
pixels, unlike a CRT monitor it<br />
is not possible to exceed this<br />
resolution because the pixels<br />
are set. Lower resolutions can<br />
be displayed by scaling them<br />
to fill the whole screen. Some<br />
TFT monitors applied a<br />
simple scaling method which<br />
could lead to ugly doubled<br />
pixels when displaying a<br />
lower resolution, recent<br />
models use a smoothing<br />
system that just makes these<br />
resolutions look softer than<br />
the native mode. With an LCD<br />
monitor it is advisable to run<br />
in the native resolution most<br />
of the time.<br />
Wht’s Important<br />
Each pixel in a TFT display<br />
can be individually controlled<br />
to show the colour required,<br />
unlike a CRT monitor the<br />
display does not have to be<br />
regularly refreshed. This<br />
means that the refresh rate<br />
that is so important to prevent<br />
flicker on a CRT monitor is<br />
not relevant to a TFT. You<br />
might see refresh rates<br />
quoted on TFT monitor<br />
specifications but this is<br />
purely the signal the display<br />
can accept from your<br />
graphics card. The key<br />
measure of the quality of a<br />
TFT display is how quickly it<br />
can change the state (colour<br />
and brightness displayed) of<br />
an individual pixel, this is<br />
called the response time. On<br />
displays with a slow response<br />
time moving objects on the<br />
screen, for example scrolling<br />
windows, games and even<br />
the mouse pointer can blur as<br />
the display tries to keep up.<br />
This effect is particularly<br />
noticeable in areas of high<br />
contrast where the pixels<br />
have to change from one<br />
extreme to the other (dark to<br />
light or vice versa). The<br />
response time is usually<br />
quoted in milliseconds, you<br />
probably won’t find many<br />
displays with higher than<br />
40ms response, my monitor<br />
has a 25ms response time<br />
and the lower the time the<br />
better the monitor will display<br />
moving graphics. You might<br />
see the response time<br />
measured in two parts, build<br />
and collapse, these are the<br />
times for the element to go<br />
from black to white and back<br />
again. Generally the overall<br />
response time is the sum of<br />
these two. If you see a spec.<br />
with an unusually small<br />
response time check they are<br />
not just quoting the expand or<br />
collapse time alone.<br />
The Angle of the Dangle<br />
LCD displays have a limited<br />
viewing angle, when you look<br />
at the display from the side,<br />
from above or below the<br />
display appears dimmer and<br />
the colours begin to change.<br />
Manufacturers specify the<br />
viewing angle of their displays<br />
and it is good to look for one<br />
with as wide angles as you<br />
can find. Again on modern<br />
displays you can find viewing<br />
angles of 150° or more which<br />
in my experience is fine for<br />
normal usage.<br />
Do you <strong>Amiga</strong>?<br />
Most LCD monitors will run<br />
with no problems on any<br />
<strong>Amiga</strong> with a graphics card,<br />
you may need to tweak your<br />
screenmode settings in the<br />
graphics driver software<br />
(CgXMode or<br />
Picasso96Mode) to meet the<br />
Reviews<br />
A short guide to TFT monitor specifications.<br />
input specifications of the<br />
monitor. As I mentioned<br />
before you will also want to<br />
use the native resolution of<br />
the monitor for most of your<br />
screens. I don’t know of an<br />
LCD display that will sync to<br />
the standard 15KHz <strong>Amiga</strong><br />
screenmodes (PAL, NTSC)<br />
however if you have a<br />
scandoubler or flicker fixer<br />
there is a good chance it will<br />
work (my monitor does, I<br />
would advise you check<br />
compatibility before you buy if<br />
15kHz compatibility is<br />
important to you). Another<br />
option is that some LCD<br />
monitors have a composite<br />
video input in addition to the<br />
graphics card input which is<br />
intended for video equipment<br />
(video cameras, VCRs etc.) if<br />
you can get a screen like this<br />
you could hook it up to the<br />
<strong>Amiga</strong>’s composite video out<br />
for 15kHz screenmodes.<br />
Some TFTs have a DVI<br />
(Digital Video Interface)<br />
connector in addition to or<br />
instead of a standard 15pin<br />
SVGA connector. DVI can<br />
send digital signals direct to<br />
the monitor but it requires a<br />
graphics card with a DVI<br />
connection. No <strong>Amiga</strong><br />
graphics card to date have<br />
DVI so make sure any<br />
monitor you buy has at least<br />
one standard VGA connector.<br />
33
Reviews<br />
PD Paradise:<br />
Task Bar Roundup<br />
Like it or loath it a Windows style task bar and “Start” menu has become standard on most desktop operating systems.<br />
Robert Williams looks at four utilities designed to bring similar features to <strong>Amiga</strong>OS... and add some ideas of their own.!<br />
<strong>Amiga</strong>OS has never really<br />
offered an easy method of<br />
dealing with lots of windows on<br />
screen, for example finding a<br />
window that is completely<br />
obscured by another. In the<br />
past small screen resolutions<br />
and multiple screens meant<br />
that most people ran all their<br />
programs on separate screens<br />
and seldom had too many<br />
windows to worry about. In<br />
these days of high resolution<br />
graphics card displays it is<br />
becoming more common to run<br />
many programs on a single<br />
screen (often the Workbench<br />
screen) and this means it is<br />
handy to have a way to easily<br />
reveal a particular window. In<br />
Windows 95 Microsoft’s<br />
solution to this problem was<br />
the taskbar which lists all the<br />
running applications and allows<br />
them to be easily brought to<br />
the front. Many <strong>Amiga</strong><br />
programmers have written<br />
programs to bring similar<br />
functions to the <strong>Amiga</strong>. In this<br />
roundup we look at four of the<br />
best examples and see what<br />
they have to offer.<br />
StartMenu<br />
Developer:Martin Elsner<br />
License: Freeware<br />
WWW:<br />
http://www.martin-elsner.de<br />
StartMenu offers pretty<br />
much a direct clone of the<br />
Windows start menu and task<br />
bar on the <strong>Amiga</strong> right down to<br />
a (rather ugly in my opinion)<br />
Windows XP default look. The<br />
program is configured by a<br />
neat Reaction based<br />
preferences program which is<br />
installed in your Prefs drawer<br />
by default.<br />
Using the preferences program<br />
you can add items and sub<br />
menus to the start menu. Shell,<br />
Workbench and AREXX<br />
commands are supported. The<br />
program name and icon shown<br />
in the menu can be set<br />
independently of the filename<br />
and icon. Programs can be<br />
easily added by dragging their<br />
icons from Workbench. You<br />
can make additional submenus<br />
to organise your<br />
programs as you wish. Internal<br />
StartMenu commands can be<br />
added to the menu too. Only<br />
two commands are supplied,<br />
quit adds an item which quits<br />
StartMenu (without warning or<br />
any other options) and<br />
commodities creates a new<br />
sub-menu showing the<br />
currently running commodities.<br />
Each commodity in the menu<br />
has a sub-menu with Show,<br />
Hide, Deactivate/Activate and<br />
Kill options. One feature that<br />
StartMenu lacks is the facility<br />
to explore drives within the<br />
menu, personally I don’t find<br />
this feature very useful so it’s<br />
no great loss, of course your<br />
opinion may differ.<br />
For quicker access commonly<br />
used program icons can be<br />
added to the left hand side of<br />
the task bar where they load<br />
with a single click. At the<br />
opposite end of the task bar a<br />
clock is shown,<br />
moving the<br />
mouse over the<br />
StartMenu’s Reaction based preferences program.<br />
clock shows the date and<br />
clicking it opens a pop-up<br />
menu where you can load the<br />
prefs program or quit<br />
StartMenu. Between the two is<br />
the taskbar area, here a button<br />
is displayed for each window<br />
on the current screen, clicking<br />
on a button brings its window<br />
to the front. With many<br />
windows open the task bar can<br />
get crowded and the window<br />
titles truncated, as far as I can<br />
see there is no way to see the<br />
complete window title.<br />
StartMenu can be configured to<br />
open on all public screens, an<br />
other option allows open<br />
screens to be listed along with<br />
windows on the task bar.<br />
These options can be very<br />
handy, you can easily open<br />
programs or switch windows<br />
and screens to screens other<br />
than Workbench. A<br />
preferences option lets you<br />
exclude Windows and Screens<br />
from the task bar.<br />
The appearance and operation<br />
of StartMenu is quite<br />
configurable, colours, fonts and<br />
background images can all be<br />
changed but there is no option<br />
to change settings for<br />
individual menus. I was also<br />
disappointed to see that the<br />
icons for the start button,<br />
folders in the menu and those<br />
used on the task bar buttons<br />
are hard coded so you have to<br />
replace the defaults to change<br />
the look (I think it would be<br />
nicer to pick your own choices<br />
in prefs). On the plus side the<br />
bar can be hidden until your<br />
mouse pointer reaches the<br />
edge of the screen and you<br />
can also choose to have the<br />
bar at the top if you wish.<br />
If you’re after a taskbar that<br />
sticks fairly closely to the<br />
Windows design, offering<br />
mostly cosmetic options then<br />
StartMenu is a good choice. If<br />
you share my opinions on the<br />
Windows XP look set aside<br />
some time to re-configure the<br />
default look though!<br />
Screen Tab<br />
Developer:Michael Link<br />
License: Freeware<br />
<strong>Download</strong>: Aminet,<br />
util/cdity/ScreenTab_3_2.lha<br />
and ScreenTab_Ext.lha<br />
Screentab’s main purpose<br />
in life is to let you easily<br />
swap between open screens<br />
and windows using two<br />
different key combinations. By<br />
default Left <strong>Amiga</strong> and Tab<br />
switches between screens,<br />
pressing the key combination<br />
brings up the name of the next<br />
StartMenu in its “Windows XP” default look. Note that is shows windows and screens.<br />
screen in a window in the<br />
centre of the current screen,<br />
pressing Tab again cycles to<br />
the next screen and releasing<br />
the <strong>Amiga</strong> key brings the<br />
selected screen to the front.<br />
Bringing a window on the<br />
current screen to the front<br />
works in a similar way except<br />
the hotkey is different (Left<br />
<strong>Amiga</strong> and ‘ by default).<br />
These features work well but<br />
they’re not all that ScreenTab<br />
has to offer, move your mouse<br />
to the bottom edge of the<br />
screen and a task bar with start<br />
button appears. The taskbar<br />
cannot be set to appear<br />
permanently and must be at<br />
the bottom of the screen.<br />
However it does appear on<br />
every screen for easy screen<br />
swapping and launching of<br />
programs away from the<br />
Workbench screen. The<br />
taskbar only displays buttons<br />
for the currently open screens,<br />
there is no facility to list the<br />
open windows on the taskbar.<br />
However a plug-in is provided<br />
to add a window list to the start<br />
menu. At the right hand side of<br />
the task bar the time is shown,<br />
the format can be altered from<br />
the prefs program.<br />
The start menu can contain<br />
three types of object, programs<br />
for quick launching, plug-ins<br />
that add additional features<br />
and sub menus. This is all<br />
configured from a neat MUI<br />
34 TOTAL AMIGA Autumn 2002<br />
ScreenTab’s task bar only shows screens, not windows. However<br />
it does let you select windows with a keypress.<br />
In the MUI prefs program you<br />
can add programs and plug-ins<br />
to the Start menu.<br />
based preferences program<br />
(ScreenTab itself doesn’t use<br />
MUI). You can add programs<br />
and plug-ins anywhere on the<br />
top level of the start menu or<br />
on a sub-menu. The menu can<br />
be reorganised using drag and<br />
drop. Programs can be added<br />
to the menu by dropping their<br />
Workbench icons on the<br />
preferences editor, if you want<br />
an item to have an<br />
accompanying image you must<br />
select it separately as<br />
ScreenTab does not use the<br />
program’s icon. A selection of<br />
suitable icons are included in<br />
the ScreenTab distribution.<br />
Plug-ins are used to add<br />
powerful features to the<br />
ScreenTab start menu, several<br />
are supplied with Screen Tab.<br />
When the program was<br />
Shareware the author held<br />
back several plug-ins as an<br />
incentive to register, he has<br />
now uploaded these plug-ins to<br />
Aminet in the<br />
ScreenTab_Ext.lha archive.<br />
The Commodities plug-in adds<br />
a sub-menu containing all the<br />
currently running commodities,<br />
each commodity has a sub<br />
menu containing the control<br />
options found in the OS<br />
Commodities Exchange<br />
program. The previously<br />
mentioned Windows plug-in<br />
lists the windows on the current<br />
screen and brings a window to<br />
the front when you select it. A<br />
unique plug-in to ScreenTab is<br />
Bookmarks, this displays your<br />
web browser’s hotlist in a sub<br />
menu and then loads the URL<br />
in your browser when you<br />
select an item. The docs for<br />
this plug-in show how to set it<br />
up for IBrowse but as it uses<br />
AREXX you should be able to<br />
make it work with any browser.<br />
Other plug-ins offer options to<br />
reset the <strong>Amiga</strong> (with optional<br />
confirmation), flush used<br />
libraries etc from memory and<br />
paste the current clipboard into<br />
the keyboard buffer (adding<br />
simple clipboard paste support<br />
to most programs).<br />
Probably the most complex<br />
plug-in is the Directory Walker,<br />
this allows you to explore a<br />
volume or drawer from an item<br />
on the start menu. ScreenTab<br />
uses the FileID.library to<br />
identify the type of each file<br />
displayed, there is then a<br />
configuration file where you<br />
can define which actions will be<br />
available in a sub-menu for that<br />
type of file. For example you<br />
could define Show and Edit<br />
options for a graphics file<br />
format and link them to your<br />
favourite viewer and graphics<br />
editor. A default set of actions<br />
can be defined for files which<br />
are not recognised and these<br />
can be appended to any file<br />
specific actions so you don’t<br />
have to define common actions<br />
for every filetype. The actions<br />
configuration file is plain text<br />
and has to be changed in an<br />
editor, however the format is<br />
simple and a good example file<br />
is supplied.<br />
The look of ScreenTab is fairly<br />
fixed, you can change the fonts<br />
and icon images used but not<br />
colours. There are no facilities<br />
for background patterns or<br />
changing borders. If you want a<br />
light weight solution with a<br />
surprising amount of power<br />
then ScreenTab works very<br />
well. Personally I would have<br />
liked windows shown on the<br />
task bar and it’s probably not<br />
ideal for those who like<br />
customising the look of their<br />
system.<br />
Reviews<br />
Workbench 2000<br />
Developer:Emmanuel Dausse<br />
License: Freeware<br />
WWW:<br />
www.memory-overdrive.com<br />
Workbench 2000 is<br />
unique among the other<br />
taskbar/start menu clones<br />
mentioned here in two ways, it<br />
is a stand alone program rather<br />
than using plug-ins to add its<br />
functionality and it uses MUI<br />
for its task bar and preferences<br />
program (the others that use<br />
MUI only do so for their<br />
preferences program). Being a<br />
stand alone program has some<br />
advantages, installation is<br />
easier and all the options are<br />
immediately available.,<br />
however any future expansion<br />
is up to the program author.<br />
Using MUI for the task bar is<br />
also a double edged sword, it<br />
allows the user to access all of<br />
MUIs settings (assuming MUI<br />
is registered) but also means<br />
the MUI system and the<br />
classes used by Workbench<br />
2000 are loaded all the time it<br />
is running.<br />
At the top of the start menu<br />
you can add items to launch<br />
programs, these can be split<br />
into sub-menus. Programs can<br />
be added by drag and drop<br />
and it is also possible to run<br />
AREXX commands, CLI<br />
commands and script files from<br />
menu items. If you have an<br />
icon datatype installed<br />
Workbench 2000 can display<br />
the program icon next to its<br />
entry, you can also choose any<br />
other datatypes supported<br />
image. One minor quibble I<br />
Workbench 2000 offers many options (controled from this<br />
prefs window) largely making up for its lack of plug-ins.<br />
35
Reviews<br />
Workbench 2000 shows the windows of all screens on its task bar, that can be a lot of buttons...<br />
have with the Start menu is<br />
that you have to click to open it<br />
and then click on the item you<br />
want when I prefer the click<br />
drag approach used by <strong>Amiga</strong><br />
menus.<br />
The lower section of the start<br />
menu contains Workbench<br />
2000’s built in functions, all of<br />
these can be disabled in the<br />
preferences if required.<br />
Commodities offers easy<br />
control over the running<br />
commodiities. Workstation<br />
contains sub-menus for all the<br />
drives mounted on your system<br />
allowing you to explore them in<br />
the menu. Right clicking on a<br />
file icon in the Workstation<br />
menus brings up a pop-up<br />
menu where you can perform<br />
file operations (Copy, Move,<br />
Rename and Delete) and also<br />
add user defined operations.<br />
You can define the default<br />
action for different file types<br />
using the MIME Types section<br />
of the preferences program,<br />
this is limited to recognising file<br />
types based on their<br />
extension.<br />
The final entries on the start<br />
menu are Execute which<br />
allows you to execute a shell<br />
command, this includes a<br />
history function of recently<br />
<strong>issue</strong>d commands. A<br />
Shutdown option at the bottom<br />
of the menu opens a window<br />
with options to quit Workbench<br />
2000 or reboot the <strong>Amiga</strong>.<br />
Workbench 2000 shows all the<br />
windows on all open screens<br />
on its task bar this means it<br />
can quickly to get very<br />
crowded. A useful option in this<br />
case is to limit the maximum<br />
number of window/screen<br />
buttons on the task bar. When<br />
this limit is reached Workbench<br />
2000 starts a new row of<br />
buttons above the task bar.<br />
Another way to reduce clutter<br />
on the task bar is to exclude<br />
certain applications or<br />
particular windows from the<br />
task bar. The bar can be visible<br />
all the time or only when the<br />
pointer is at the edge of the<br />
screen, it can also be<br />
positioned at the top of the<br />
screen if you wish. At the right<br />
of the task bar you can opt to<br />
have several useful monitors.<br />
In addition to the usual clock<br />
there is are memory, CPU<br />
activity, printer, on-line and<br />
freespace monitors. Hovering<br />
the pointer over most of the<br />
monitors brings up additional<br />
information, for example the<br />
freespace monitor shows a<br />
graphical display of the usage<br />
of all your disks. You can<br />
assign a program that will be<br />
run when you click on one of<br />
the monitor icons too. On the<br />
left hand side of the task bar<br />
next to the Start button is an<br />
area where you can add<br />
program icons for quick<br />
launching.<br />
In its default setup I thought<br />
Workbench 2000 looked rather<br />
ugly with an odd mixture of<br />
Magic Workbench, Glow and<br />
Windows icons. I also had a<br />
problem where the<br />
backgrounds of icons weren’t<br />
removed but that may be<br />
related to my datatypes. With a<br />
new set of images and some<br />
work in MUI prefs I’m sure it<br />
could be made to look good.<br />
So if Workbench 2000 offers<br />
the feature set you want and<br />
you like MUI it is a powerful<br />
choice.<br />
AmiStart<br />
Developer:Darius Brewka<br />
License: Freeware (Author<br />
requests an EMail from users)<br />
EMail:<br />
d.brewka@freenet.de<br />
<strong>Download</strong>:<br />
Aminet, util/wb/AmiStart.lha<br />
AmiStart started life as a<br />
“Start” button clone for<br />
program launching but as<br />
subsequent versions have<br />
been released it has grown a<br />
host of new features. Clicking<br />
on the button at the left hand of<br />
the bar opens the familiar<br />
menu, unfortunately the menu<br />
is “sticky”, you have to click on<br />
the start button, move the<br />
mouse over the menu items to<br />
open sub menus and then click<br />
on your choice. You can’t drag<br />
like standard <strong>Amiga</strong> menus or<br />
click on sub menus to open<br />
them. At the top menu level<br />
there are several items by<br />
default. The programs submenu<br />
has several pre-defined<br />
categories into which you can<br />
add your own favourite<br />
programs for easy launching.<br />
To add a new program to this<br />
menu you simply open the submenu<br />
where you want to add it<br />
then drag the programs icon<br />
from Workbench. Options for<br />
individual menu items and for<br />
whole menu sections are<br />
accessed by right clicking on<br />
the item which brings up a popup<br />
menu using the<br />
popupmenu.library. Programs<br />
can have their name and icon<br />
changed (so it is different from<br />
their file name and icon), a<br />
separator bar can be placed<br />
beneath their icon (to split the<br />
sub-menu into sections) and<br />
you can choose to scale down<br />
the program icon to a size set<br />
in AmiStart’s tooltypes.<br />
The next sub-menu contains<br />
filesystem items for the Ram<br />
Disk and your System partition.<br />
Pointing to one of these items<br />
opens a sub-menu showing the<br />
top level directories and files of<br />
the device and allows you to<br />
explore the volume. If you wish<br />
you can add other volumes by<br />
dragging them onto the menu.<br />
There are various options you<br />
can set for the Filesystem<br />
items. You can set how the<br />
entries will be sorted in the<br />
menu and whether AmiStart<br />
will show the original icons.<br />
Although this slows things<br />
down a bit I would recommend<br />
it as it allows files to be<br />
launched using their existing<br />
default tool and tooltypes. The<br />
right click menu for a file has<br />
options to bring up the<br />
information window, “Open<br />
with” which opens the file in a<br />
choice of programs (that are<br />
defined in the “Commands<br />
setup” window and “Select<br />
application” where you can<br />
choose a program using a file<br />
requester. Also on the file popup<br />
menu are Copy, Move,<br />
Paste and Delete items that<br />
are used for file system<br />
operations, a “Properties” item<br />
opens a window where the files<br />
protection bits can be changed.<br />
Be warned that these items<br />
change the actual files on disk<br />
not just how they are displayed<br />
in the menu! While AmiStart’s<br />
filesystem items are very<br />
powerful I found manipulating<br />
files in a menu rather<br />
cumbersome, it would probably<br />
be my least used feature.<br />
The “Commodities” sub-menu<br />
lists all the commodities you<br />
have running on your system,<br />
for each commodity a sub<br />
menu offers Remove, Show,<br />
Hide, Activate and Deactivate<br />
options making commodity<br />
control much quicker than<br />
using the Exchange program.<br />
Next up is a filesystem item<br />
that is a short-cut to the<br />
preferences directory, a useful<br />
example of how a directory of<br />
commonly used items can be<br />
easily added to AmiStart. A<br />
search item is provided at the<br />
top level but it is simply an<br />
application item and you must<br />
use its settings pop-up menu<br />
item so it launches your<br />
favourite search tool (such as<br />
the Find utility provided with<br />
OS3.9). Similarly the Help submenu<br />
is initially empty allowing<br />
you to add your own help files<br />
such as <strong>Amiga</strong> Guide<br />
documentation. The last<br />
default “Start” menu item is<br />
“Quit”, selecting this opens a<br />
...by contrast AmiStart shows no windows or screens on its bar<br />
but you can add a neat pop-up window list.<br />
requester where you can quit<br />
AmiStart, save preferences or<br />
reboot the <strong>Amiga</strong>.<br />
AmiStart has an optional<br />
(activated by a tooltype) bar<br />
which runs along the bottom of<br />
the screen, this isn’t really a<br />
task bar because it doesn’t<br />
display current windows,<br />
screens or applications.<br />
Instead it is more an extension<br />
of the menu, any of the items<br />
allowed on the menu can also<br />
be added to the task bar. For<br />
example you can add favourite<br />
applications to the bar for easy<br />
launching. Equally you an add<br />
application or filesystem<br />
directories which then pop-up<br />
from the bar when clicked. The<br />
facility is included for external<br />
tools to display on the taskbar,<br />
two examples are supplied<br />
which show the current time<br />
and free memory on the right<br />
hand side of the bar. A second<br />
type of external module is<br />
supported which adds a new<br />
type of sub menu to the start<br />
menu or task bar, an example<br />
module is supplied that shows<br />
all the windows open on the<br />
Workbench screen. It can be<br />
configured to bring the<br />
selected window to the front<br />
when you roll the mouse over it<br />
or when you click. Adding this<br />
module to the bar gives you<br />
similar functionality to a task<br />
bar except you have to click<br />
the icon to see it, on the plus<br />
side the menu does give plenty<br />
of room for menu titles that<br />
often have to be truncated on a<br />
traditional task bar.<br />
AmiStart is very configurable,<br />
you can change the look of<br />
every part individually. There<br />
are also transparency and<br />
anti-aliased font options.<br />
36 TOTAL AMIGA Autumn 2002<br />
AmiStart’s default look is slick.<br />
The look of AmiStart is very<br />
configurable, all the icons can<br />
be changed as can the<br />
background image and colours<br />
of each menu, sub-menu and<br />
the bar. Fonts are configurable<br />
too and the latest version even<br />
supports antialiasing with<br />
truetype fonts. If that wasn’t<br />
flash enough you can also add<br />
a configurable level of<br />
transparency to the menus and<br />
bar! That said a few aspects<br />
are fixed, the bar must be at<br />
the bottom of the screen and<br />
there is no option for hiding the<br />
bar until the pointer reaches<br />
the edge of the screen.<br />
Overall AmiStart is extremely<br />
powerful and comprehensive, I<br />
hope in the future the author<br />
will add drag support in the<br />
menu (for those like me who<br />
can’t abide “sticky” menus) and<br />
perhaps a proper task bar. With<br />
the excellent external tool and<br />
module support perhaps some<br />
third party programmers will<br />
come up with some new plugins<br />
too (an SDK is included in<br />
the archive).<br />
Other Options<br />
If you don’t like the idea of a<br />
full task bar and start menu<br />
there are other utilities which<br />
make screen and window<br />
handling more comfortable. In<br />
general these don’t offer<br />
program launching or other<br />
more advanced features but<br />
these can often easily be<br />
handled by separate utilities.<br />
For example many people will<br />
be happy to stick to AmiDock<br />
(supplied with OS3.9) or<br />
Directory Opus button bars to<br />
launch their programs.<br />
Depth Menu<br />
Developer:Arkadiusz Wahlig<br />
License: Freeware<br />
(assumed)<br />
WWW:<br />
http://www.depthmenu.prv.pl<br />
Requires: popupmenu.library<br />
available on Aminet, directory<br />
util/libs/pmuser.lha<br />
Depthmenu adds a list of all<br />
the open windows on the<br />
current screen to the depth<br />
gadget of each window. Right<br />
clicking on a window’s depth<br />
gadget brings up the list and<br />
selecting a window pops it to<br />
the front. Depthmenu adds a<br />
similar menu to the screen<br />
depth gadget except it lists the<br />
current screens. One limitation<br />
is that windows without a title<br />
bar (for example Opus and<br />
AmiDock button bars) do not<br />
get listed in the window menu<br />
(because they have no title)<br />
and cannot be used to call up<br />
the menu (because they have<br />
no depth gadget). This problem<br />
is partially solved because the<br />
window menu can be called up<br />
at any time by pressing Alt and<br />
Tab even if the active window<br />
doesn’t have a title bar.<br />
Although essentially a simple<br />
utility with few options Depth<br />
Menu does support add-on<br />
modules which can change the<br />
way certain windows are<br />
presented in the menu and add<br />
new menu items. A number of<br />
modules are available for<br />
download from the author’s<br />
website. The DOpus5 module<br />
shows Opus windows in a<br />
consistent manner for example<br />
listers are shown as DOpus<br />
Lister [path] this means all the<br />
opus related windows are<br />
grouped together in the<br />
Window list. This module also<br />
adds a new item to the menu to<br />
close all Opus lister windows.<br />
The MinMax module adds<br />
three new items to each<br />
window menu. “Minimize”<br />
reduces the window to the<br />
DepthMenu adds a simple<br />
window list to each window’s<br />
depth gadget...<br />
Reviews<br />
...and a list of screens to the<br />
screen depth gadget.<br />
smallest possible size,<br />
“Maximize” enlarges it to fill the<br />
screen and “Normalize” sets it<br />
back to the original size. On<br />
my <strong>Amiga</strong> I found these menu<br />
items had a tendency to lock<br />
the machine with some<br />
programs, though the other<br />
functions of Depthmenu<br />
worked reliably.<br />
Depth Menu uses the<br />
popupmenu.library (which you<br />
need to install separately)<br />
which has a preferences<br />
program giving plenty of<br />
control over the look of the<br />
pop-up menus. For example<br />
you can change the colours,<br />
border style and even add drop<br />
shadows (both dithered and<br />
true translucent types are<br />
available). You can also<br />
change the way menus<br />
operate so you can have<br />
“sticky” menus if you prefer.<br />
I found DepthMenu worked<br />
well and placed the window<br />
selection menu in a very logical<br />
yet unobtrusive place. If you<br />
want easy window and screen<br />
selection without clutter it’s a<br />
good choice.<br />
37
Support<br />
Jabberwocky<br />
Elliott Bird finds yet another way to meet and chat<br />
with friends online whatever utility they use.<br />
On the <strong>Amiga</strong>, there were<br />
only two ways to<br />
communicate with friends in<br />
real-time, ICQ and IRC (as<br />
detailed in <strong>issue</strong> 9 of Clubbed).<br />
Now there are five ways to<br />
communicate on your <strong>Amiga</strong>,<br />
but with just one chat client,<br />
and that’s Jabberwocky!<br />
Jabberwocky allows you to<br />
communicate with your friends,<br />
not just on ICQ and IRC, but<br />
also Yahoo, MSN, and through<br />
Jabber itself.<br />
Setting Jabberwocky up is<br />
relatively simple. Each time<br />
you fire it up, a window will<br />
come up asking you for your<br />
Jabber ID and your password.<br />
Because this is your first time<br />
you will need to come up with<br />
an ID of your choice, for<br />
example:<br />
“JohnSmith@jabber.at”. You<br />
can also have<br />
“JohnSmith@jabber.org”,<br />
although jabber.at tends to be<br />
more reliable. Once you’ve<br />
chosen your ID, you will need<br />
to enter in a password. You’ll<br />
need to do this carefully, as<br />
you cannot see what your<br />
typing for this, it is so that<br />
annoying brothers or sisters<br />
can’t see what your password<br />
is! Once you’ve done this, click<br />
on Register and you should be<br />
in! Each time you fire up<br />
Jabberwocky from now on, you<br />
should already have your ID<br />
entered in for you, and all you<br />
need to do is enter in your<br />
38<br />
A chat session.<br />
password and click on connect.<br />
In order to make use of the<br />
various chat protocols<br />
(otherwise known as<br />
transports), you’ll need to<br />
register for each of them. This<br />
can be done by going to<br />
“Windows” in the menu, then<br />
go down to “Agents list”, which<br />
will bring up a window with the<br />
available transports, and what<br />
you are able to do (i.e.<br />
Register, conferencing, and<br />
group chat). Fill in the required<br />
details, and bearing in mind<br />
that you may already have to<br />
be registered, so it may require<br />
access to a PC (cough!). Once<br />
your account has registered<br />
with Jabberwocky, a<br />
subscription window will<br />
appear, click on “accept” to<br />
accept it (it does help!). It<br />
should now appear in your<br />
contact list with a light bulb<br />
next to it, telling you that it’s<br />
working and you’re online with<br />
it. If it’s ICQ you’ve subscribed<br />
to then it should appear as<br />
“icq.jabber.at/registered”, or<br />
“yahoo.jabber.at/registered” if<br />
you’ve registered with Yahoo<br />
Messenger.<br />
To add a contact to your list,<br />
you eed to go to “Roster” in the<br />
menu, and select “Add<br />
Contact”. Where it says<br />
“Jabber ID” enter the address<br />
of the user you want to add, for<br />
example if you wanted to add<br />
someone who’s on ICQ, their<br />
ID would be something like<br />
“<strong>12</strong>3456789@icq.jabber.at”, or<br />
if they’re on MSN it would be<br />
something like<br />
“johnsmith%hotmail.com@<br />
msn.jabber.at”. Then the<br />
contact should be added, along<br />
with a light bulb telling you if<br />
they are online or not. You will<br />
be able to tell when they are<br />
away or not available with<br />
either a small “N/A” or “DND”<br />
symbol in place of the light<br />
bulb. You can change your<br />
Jabberwocky brings together all your instant messaging<br />
contacts even if they use different networks.<br />
status by going to the<br />
“Presence” tab in the main<br />
Jabberwocky window. To chat<br />
to someone, click once on the<br />
user you want to speak to, go<br />
to “Roster” in the menu, and go<br />
down to “Chat”, and a chat<br />
window will open up. What you<br />
say is in italics, and what the<br />
person at the other end says is<br />
in normal style text. With ICQ, I<br />
recommend you make a note<br />
of ICQ UIN’s, and who is what<br />
number, to save yourself from<br />
embarrassment! If you suspect<br />
that anything isn’t working<br />
properly on Jabberwocky, go to<br />
“Windows” in the menu, and go<br />
down to “Console”, then make<br />
sure “Watch XML Traffic” is<br />
ticked. This way, all activity<br />
This windows shows the<br />
various messaging systems<br />
(transports) supported by<br />
Jabberwocky.<br />
from Jabberwocky, as well as<br />
the presence of other users<br />
and traffic of messages<br />
between users show up in this<br />
window. Any errors usually<br />
show up in this window too.<br />
Unfortunately there are some<br />
features of Jabberwocky that<br />
are yet to be implemented,<br />
such as the ability to have<br />
conferencing, and save<br />
messages. But “Flush” does<br />
actually work as I found out<br />
(Wipes conversations in chat<br />
windows).<br />
Overall I am quite impressed<br />
with what Jabberwocky is<br />
capable of, and it brings the<br />
ability to be able to chat to your<br />
friends on Yahoo, MSN, ICQ,<br />
as well as Jabber itself, on<br />
your <strong>Amiga</strong>! Well worth a try!<br />
It’s free, and now open source<br />
too!<br />
jabberwocky.amigaworld.de/<br />
TOTAL AMIGA<br />
Kicksoft<br />
Graphics<br />
Drawstudio<br />
This excellent Graphics package avaliable one again!! Comes on CD and<br />
includes Texture Studio & Image Studio.<br />
£35.00<br />
Photogenics 5<br />
This excellent Graphics package by Paul Nolan. Comes on CD.<br />
£70.00<br />
Image Engineer<br />
Great Image manipulation program. Add effects to images such as Jigsaw.<br />
£25.00<br />
Candy Factory Pro<br />
Create 3D Text from any standard font and use them on web pages etc.<br />
£35.00<br />
Art Effect 4<br />
Billed as “Photoshop® on the <strong>Amiga</strong>”. Excellent graphic package. Comes on<br />
CD.<br />
£39.99<br />
FxPaint NEW<br />
With over 70 effects this is a superb addition to any software collection.<br />
£60.00<br />
Image FX4 NEW<br />
THE image manipulation package !! 100s of effects.<br />
£99.00<br />
Games<br />
Misc<br />
NEW<br />
PayBack £35.00<br />
Freespace £35.00<br />
The Feeble Files £35.00<br />
TaskiSMS<br />
Send Text Messages to mobile phones from your <strong>Amiga</strong>! Comes on CD.<br />
£<strong>12</strong>.00<br />
FxScan<br />
The only Scanner software that offers OCR on the <strong>Amiga</strong> today!!<br />
£30.00<br />
NEW<br />
OS 3.9<br />
Latest operating system for the <strong>Amiga</strong>. Comes on CD.<br />
£30.00<br />
NEW<br />
Aminet NEW<br />
Latest Aminet disk or the latest series. Gigabytes of <strong>Amiga</strong> Software.<br />
Single £14.99 Series £29.99<br />
VHI STUDIO<br />
Connect digital Cameras to your <strong>Amiga</strong> and so much more<br />
!£30.00<br />
<strong>Amiga</strong> Forever 5<br />
Emulate a AGA based amiga on your PC.<br />
NEW<br />
Full Version £40.00 Upgrade £25.00<br />
If you don’t see what you want, just ask!<br />
Our range is always growing!<br />
Players<br />
Moovid PPC<br />
PPC version with both WARPUP and POWERUP versions. Comes on CD<br />
£18.00<br />
Moovid<br />
Play AVI, Mov and QT files on your <strong>Amiga</strong>©. Comes on CD.<br />
£<strong>12</strong>.00<br />
Frogger PPC<br />
PPC MPEG player. Comes on CDwith example MPEGs.<br />
£18.00<br />
Frogger<br />
68k MPEG player. Comes on CD with example MPEGs.<br />
£<strong>12</strong>.00<br />
Riva<br />
The fastest 68k MPEG player on the <strong>Amiga</strong>! Comes on CD with MPEGs.<br />
£9.00<br />
SoftCinema<br />
PPC AVI, QT and Mov player. On CD with example Movies.<br />
£9.00<br />
AMP 2 NEW<br />
PPC Mpeg, CD-i and DVD player. The only way to play DVDs on the AMIGA.<br />
£18.00<br />
Internet Inet Dial<br />
Home server on your <strong>Amiga</strong>©., includes Apache and Geek Gadgets.<br />
£40.00<br />
AWeb Upgrade<br />
Excellent web Browser. Upgrade from OS 3.5 or OS 3.9. Comes on Floppy.<br />
£30.00<br />
Utilities PFS 3<br />
The fastest and safest file system avaliable, up to 300 times faster than FFS.<br />
£35.00<br />
Metaview<br />
The best Clipart viewer on the <strong>Amiga</strong>©. Comes on CD with clip art images.<br />
£18.00<br />
Diavolo<br />
The best backup program on the <strong>Amiga</strong>©. Comes on Floppy disk.<br />
£50.00<br />
PhotoFolio V2 NEW<br />
The professional way to view, catolouge and manipulate your images.<br />
£30.00<br />
GoldEd<br />
The best Editor, Program Editor, HTML Generator on the <strong>Amiga</strong>.<br />
£30.00<br />
Turboprint 7.21<br />
Use modern printers with 24 bit output!! The quality is astounding.<br />
NEW<br />
Full £40.00 Upgrade £25.00<br />
Make CD (DAO version) NEW<br />
CD writing software.Compatibale with most CD writers/rewriters.<br />
£50.00<br />
Spitfire 2<br />
If you have a 3com Palm© or compatible then you need this program! Comes<br />
on CD.<br />
£25.00<br />
Mediapoint NEW<br />
multimedia presentation tool on your <strong>Amiga</strong>.<br />
£40.00<br />
www.kicksoft.co.uk<br />
Add £1.00 UK postage per item. Make cheques payable to Kicksoft Ltd.<br />
We accept Solo, Switch, Mastercard & Visa<br />
Kicksoft Ltd.,<br />
30 Whitegate Way,<br />
Tadworth,<br />
Surrey, KT20 5NS<br />
Tel/Fax (01737) 219280<br />
sales@kicksoft.co.uk
Support<br />
PageStream 4.1<br />
Tables<br />
Tutorial<br />
By Robert Williams<br />
One of the major new<br />
features of PageStream<br />
4.1 is the tables tool which<br />
allows you to create complex<br />
tables of data and text in a<br />
PageStream document and<br />
even has some basic<br />
spreadsheet features. The<br />
table feature is currently only<br />
documented by a few notes in<br />
the 4.1 readme file so I thought<br />
it would be useful to<br />
demonstrate creating a table in<br />
this tutorial.<br />
Load PageStream and start a<br />
new document by choosing<br />
“New” from the “File” menu. In<br />
the “New Document” window<br />
select a page size, I chose to<br />
use standard A4 letter, also<br />
enter 1 under the “Column<br />
Guides” section.<br />
To start with we need to draw<br />
out a basic table. First select<br />
the table tool from the tool box,<br />
it is the 11th icon from the top<br />
and looks like a small white<br />
irregular grid. If you see the<br />
grid icon (a grey regular grid<br />
icon) click and hold the left<br />
Table Cell Edit Palette<br />
Cell value (used in calculations).<br />
mouse button on it to select the<br />
table tool from the pop out.<br />
With the table tool selected<br />
click on the page to locate one<br />
corner of the table then drag it<br />
out to the size you want. I<br />
made mine fill about a third of<br />
the sheet height and the width<br />
inside the margin guides.<br />
Editing<br />
Initially the table has four<br />
columns and four rows so<br />
probably the first thing you’ll<br />
want to do is customise it to<br />
have the right number for the<br />
layout you want. For this<br />
example I want five columns<br />
and eleven rows. To modify the<br />
table we need to be in modify<br />
mode, to select this click and<br />
hold on the pointer<br />
tool and select the<br />
modify tool (a pointer<br />
Creating a new table is as easy as drawing a rectangle.<br />
Del. Col.<br />
with a square at its tip) from<br />
the toolbox. Now click on the<br />
cell in the table where you want<br />
the row of column to be added<br />
(as we don’t yet have any data<br />
in our table you can choose<br />
any cell) it should be<br />
highlighted in black to show it’s<br />
selected. Now take a look at<br />
the Edit palette (normally at the<br />
bottom of the screen) it now<br />
shows controls that effect the<br />
table and the current cell. To<br />
add a column click the insert<br />
column icon. A new column of<br />
four cells is added at the cursor<br />
position, notice how the table<br />
becomes wider the<br />
accommodates the new cells<br />
rather than squashing up the<br />
existing ones.<br />
Now we’ll add some rows,<br />
before we do so it’s a good<br />
idea to adjust the height of the<br />
rows already in the table<br />
otherwise it will grow bigger<br />
than the page when the rows<br />
are added. Make sure you’re in<br />
modify mode then click on a<br />
cell in the top row, now hold<br />
down shift and click once in a<br />
cell in each of the lower rows.<br />
Change the height (H) gadget<br />
in the edit palette to 7.5mm (or<br />
equivalent in your preferred<br />
measurement system) and<br />
press Return twice (this is<br />
necessary to activate any<br />
change you make in the edit<br />
palette), the table then<br />
changes to show the new<br />
height. Now we can add the<br />
new rows, you can only add<br />
rows or columns one at a time<br />
Del. Row<br />
Accept Cell Reference Width Height Add Col. Add Row Merge<br />
Un-merge Fill<br />
so click in any cell then click<br />
the insert row icon seven times<br />
to get a total of eleven rows.<br />
It would be nice if the width of<br />
the table fitted the margins of<br />
the page, we could do this by<br />
setting each cell’s width to one<br />
fifth of the pages width but it is<br />
easier just to re-size the whole<br />
table. This is achieved using<br />
the standard pointer tool,<br />
select it from the tool box then<br />
click on the table. Now drag<br />
the middle right hand editing<br />
handle to the right hand margin<br />
guide. Notice that the table<br />
cells scale down evenly to fit<br />
the new width.<br />
Before you do any formatting<br />
it’s a good idea to put the data<br />
into the table so you can see<br />
the effect of the formats. Data<br />
can be entered into a<br />
PageStream table in two ways,<br />
with the text tool or into the<br />
Value box on the edit palette, if<br />
you don’t intend to use any<br />
formulas the easiest way is<br />
with the text tool. Select the<br />
text tool then click in the top<br />
left cell, the flashing text cursor<br />
should appear there. Now type<br />
“Media Price List”. In the<br />
second row click in the first cell<br />
and type “Product Information”<br />
then select the third cell in the<br />
second row and type “Price (£,<br />
per pack)”, don’t worry if either<br />
of these phrases don’t fit in the<br />
cell. Select the first cell in the<br />
third row and enter<br />
“Description”, moving along the<br />
third row enter the following<br />
into the cells: “Pack Qty.”,<br />
“RRP”, “Our Price” and “Saving<br />
(%)”. On the bottom row enter<br />
“Average Saving (%)” in the left<br />
hand cell.<br />
Now we’ll use a feature unique<br />
on the <strong>Amiga</strong> to PageStream’s<br />
tables implementation, merging<br />
cells. Select the modify tool<br />
and click in the top left cell then<br />
hold down shift and click all the<br />
cells in the top row in turn.<br />
Click the merge icon in the Edit<br />
palette to join the cells. Next up<br />
is to merge the first two and<br />
then the last three cells in the<br />
second row. Finally merge the<br />
first four cells on the bottom<br />
row (leaving one cell at the<br />
right). The merged cells can<br />
now be treated as one, for<br />
example try centering the<br />
“Media Price List” text in the<br />
top row (drag select it with the<br />
text tool then choose<br />
Alignment/Center from the<br />
Type menu) notice that it<br />
centres to the middle of the<br />
table not its original cell.<br />
Fill in the Description and Pack<br />
Qty, columns, if you want to<br />
use the same data as me you<br />
can copy it from the<br />
screenshots. To fit the<br />
descriptions in we need to<br />
make the Description column<br />
wider, select modify mode and<br />
click in one of the cells in the<br />
first column.<br />
TIP: When changing the<br />
width of cells choose a single<br />
cell not a merged one, when<br />
changing the width of a<br />
merged cell PageStream sizes<br />
the first column contained in<br />
the merged cell the size you<br />
specify and then adds the<br />
width of any other cells making<br />
the merged cell wider than you<br />
specified.<br />
40 TOTAL AMIGA Autumn 2002<br />
Line<br />
Enter the new width in the Edit<br />
palette’s “W” box, make the cell<br />
slightly wider than it needs to<br />
be to hold the text (I found<br />
55mm about right), and hit<br />
Return twice. Now the table is<br />
too wide for the page again,<br />
instead of changing the size of<br />
the other cells individually we’ll<br />
reduce the size of the whole<br />
table. Select the pointer tool<br />
and drag the edge of the table<br />
to the right margin guide as we<br />
did before. Again all the cells<br />
are scaled evenly keeping their<br />
relative proportions (the<br />
description column is still<br />
bigger than the others.<br />
Now its time to enter the<br />
prices, however because I<br />
want to use them in a formula<br />
later we need to enter them in<br />
a different way. Using the<br />
modify tool select the cell<br />
immediately under “RRP”, in<br />
the Edit palette click in the<br />
“Value” box and type “3.50”<br />
then press return twice.<br />
NOTE: Formulas only work<br />
on values entered in the value<br />
box, not on numbers entered<br />
with the text tool.<br />
Using the same method fill in<br />
all the values in the “RRP” and<br />
“Our Price” columns, be careful<br />
that there isn’t a space before<br />
the number you enter.<br />
Now we’ll add a formula to<br />
automatically calculate the<br />
percentage saving for buying in<br />
bulk. To do this we can enter a<br />
formula in the “Saving (%)”<br />
column, PageStream uses<br />
formulas that will be familiar to<br />
anyone who has used a<br />
spreadsheet program. A<br />
formula can use standard<br />
mathematical operators such<br />
as +, -, / (divide), * (multiply)<br />
and brackets. A formula can<br />
include the value of other cells,<br />
these are referenced using a<br />
letter for their column and a<br />
number for their row. For<br />
example cell C4 would be the<br />
fourth down in the third column.<br />
TIP: If you’re unsure of a<br />
cell’s reference click on it with<br />
the modify pointer and check<br />
the “Cell” box in the Edit<br />
palette.<br />
A formula must be entered in<br />
the Edit palette “Value” box for<br />
the cell where you want the<br />
answer displayed. To tell<br />
PageStream the text you enter<br />
is a formula you must start with<br />
an “=” symbol. Enter the<br />
following formula in the “Value”<br />
box for the cell below “Saving<br />
(%)”, this should be cell E4:<br />
“=(1-D4/C4)*100”. Now press<br />
return twice and you should<br />
see the result of the formula<br />
displayed in the cell.<br />
NOTE: If the formula does<br />
not calculate correctly (shows 0<br />
or the wrong value for<br />
example) check that you have<br />
typed it exactly as shown and<br />
check none of the cells holding<br />
the numbers or formula have a<br />
preceding space in the value<br />
box.<br />
The next job is to copy the<br />
formula down to the product<br />
rows in the “Saving (%)”<br />
column. Unfortunately<br />
PageStream doesn’t have an<br />
easy copy down method as<br />
found in most spreadsheets<br />
that automatically updates the<br />
formula to calculate the<br />
appropriate row so you have to<br />
copy the formula manually. To<br />
do this select the formula cell<br />
(E4) with the modify tool and<br />
click in the “Value” box on the<br />
Edit palette. Now press Right<br />
<strong>Amiga</strong> + C to copy the formula<br />
to the clipboard. Click in the<br />
next cell down (E5) and paste<br />
the formula into its value box<br />
using Right <strong>Amiga</strong> + V. Edit the<br />
cell references in the formula<br />
so it calculates using the value<br />
on the current row, the formula<br />
should now read “=(1-<br />
D5/C5)*100”, press return<br />
twice to apply the change. Now<br />
Support<br />
repeat this to copy the formula<br />
to all the rows except the<br />
“Average Saving” row.<br />
In addition to simple<br />
calculations PageStream also<br />
has a few functions which help<br />
you perform more complex<br />
mathematics in one step<br />
(check the Functions box out<br />
for a complete list). We’ll use<br />
one of these to calculate the<br />
average saving in the bottom<br />
row. The function we’ll use is<br />
called “average”, select the<br />
bottom right cell (E11) with the<br />
modify tool and enter the<br />
following formula in the “Value”<br />
box: “=average(E4:E10)”. Two<br />
things to notice here are how<br />
the function is supplied with the<br />
information it needs inside the<br />
brackets and how we’ve<br />
specified a range of cells for it<br />
to work on. E4:E10 tells it to<br />
find the average value of all the<br />
cells from E4 to E10 inclusive.<br />
Press return twice and the<br />
average should be calculated.<br />
Now our formulas are all setup<br />
we can see how useful they<br />
really are. For example lets say<br />
we had a special offer on 5.25”<br />
disks and decided to sell them<br />
at £1 a box, modify the Value<br />
of cell D6 to “1” instead of “4”<br />
and press return twice<br />
(remember you must make the<br />
change in the Edit palette).<br />
Immediately the saving is<br />
recalculated to 80% and the<br />
average saving is recalculated<br />
too!<br />
Limitations<br />
Currently the implementation of<br />
formulas in PageStream tables<br />
has a number of limitations, the<br />
most obvious one form our<br />
example is that you can’t set<br />
Editing a value (in the edit palette) causes the calculated cells<br />
which use the value to automatically update.<br />
41
Support<br />
Nearly finished... the table with just the text formatting to add.<br />
the formatting of the displayed<br />
numbers. By default they are<br />
displayed at four decimal<br />
places and any zeros after the<br />
decimal point are hidden. This<br />
can make the results look a bit<br />
messy. Also there is no option<br />
to have a leading or trailing<br />
symbol for currency or<br />
percentage values.<br />
42<br />
Formatting<br />
Next up is some formatting to<br />
make the table look a bit more<br />
interesting. In a PageStream<br />
table you can set the<br />
background fill and outline of<br />
each cell individually and also<br />
set the fill and line style of the<br />
table as a whole. By default<br />
each cell has a solid white<br />
background and a thin black<br />
border. To edit the style of a<br />
cell choose the modify tool and<br />
click on the cell, you can shift<br />
click on multiple cells to edit<br />
them all at once. The first thing<br />
Functionality<br />
Here is the complete list of<br />
mathematical functions<br />
currently available in<br />
PageStream tables:<br />
ABS<br />
ARCSIN<br />
ARCCOS<br />
ARCTAN<br />
AVERAGE, AVG<br />
COS<br />
EXP<br />
INT<br />
LN<br />
LOG<br />
MAX<br />
MIN<br />
SIN<br />
SUM<br />
TAN<br />
I usually do is to remove all the<br />
cell borders, to do this click on<br />
one cell with the modify tool<br />
and then shift click on all the<br />
others. At the right hand side of<br />
the Edit<br />
palette click<br />
on one of the<br />
line buttons surrounding the<br />
box (fill) button. In the Line and<br />
Fill window that appears you<br />
can change the line style and<br />
colour, in this case we want to<br />
turn the line off so click on the<br />
“Stroked” check box until it is<br />
cleared (not a tick or a cross).<br />
Click OK and follow the same<br />
procedure for the other three<br />
line buttons. Click on one of<br />
the cells to clear the selection,<br />
now you should have a bare<br />
table with an outline around the<br />
outside.<br />
I’m going to make the heading<br />
lines and Average Saving lines<br />
red, using the modify tool click<br />
on one of the cells in the top<br />
three rows and then shift click<br />
on all the other cells in those<br />
rows and the two cells in the<br />
bottom row. Click the fill button<br />
on the edit palette and choose<br />
“Red” from the “Color” drop<br />
down menu, click OK. Now<br />
we’ll give these cells a yellow<br />
vertical border, click on the left<br />
border button and set the<br />
“Weight” to “1 pt” and the<br />
“Color” to “Yellow”.<br />
For the information rows we’ll<br />
use alternate yellow and white<br />
backgrounds to make then<br />
easier to read. Use the modify<br />
tool to select all the cells in<br />
every other data row (4, 6, 8<br />
and 10). Use the fill button to<br />
set the fill “Color” to “yellow”<br />
and the intensity value (to the<br />
right of it) to “50%”, this will<br />
give a light yellow which is<br />
easy on the eye. Click OK and<br />
select another cell to see the<br />
effect. Next we’ll add some<br />
vertical lines to the data<br />
section, select all the cells in<br />
this area, click the left border<br />
button and set the line “Color”<br />
to “Red” and the “Weight” to “1<br />
pts”.<br />
To finish the table off we’ll add<br />
a border to the whole table, to<br />
do this select it with the pointer<br />
tool. Choose “Line & Fill” from<br />
the “Object” menu or press the<br />
“L” key, in the window choose<br />
the “line” tab, set the “Weight”<br />
to “4 pts” and the “Color” to<br />
“Red”.<br />
Text Formatting<br />
The last job is to format the<br />
text, this works exactly like any<br />
text formatting in PageStream.<br />
Use the text tool to select the<br />
text you want to format then<br />
change the options using the<br />
edit palette, type Line & Fill<br />
requester and other options on<br />
the Type menu. I selected<br />
“Product Information” with the<br />
text tool and set the fill colour<br />
to “White” in the Line & Fill<br />
requester (accessed from the<br />
“Type” menu or by pressing<br />
Ctrl+L), then I set the style to<br />
Bold by clicking the “B” button<br />
on the “Edit” palette.<br />
TIP: You can select text in<br />
several cells at once by holding<br />
the “Alt” key while you select<br />
each block. Then you can<br />
apply formatting to several<br />
blocks at once. You may find it<br />
easier to apply the format you<br />
want to the text in once cell<br />
and then use the Eye-dropper<br />
tool to copy it to other cells. To<br />
do this click the eye dropper<br />
tool then Shift-Click on the text<br />
with the format you want to<br />
copy and click (without shift) on<br />
the text you want to give this<br />
format.<br />
I used the eye dropper<br />
technique to apply the white<br />
and bold text format to all the<br />
heading cells (with the red<br />
backgrounds).<br />
NOTE: If you increase the<br />
font size of the text if can spill<br />
over the bottom edge of the<br />
cell, to avoid this you need to<br />
make the cell height larger. On<br />
merged cells this will cause the<br />
problem I mentioned before<br />
where the table suddenly<br />
becomes very wide (the first<br />
column is set to the width of<br />
the merged cell). To cure this<br />
you will have to re-size the<br />
cells manually (either by sizing<br />
the whole table or individual<br />
cells) remember to set the size<br />
in non-merged cells, if you size<br />
another merged cell the<br />
problem will re-occur.<br />
Bearing the above in mind<br />
select the “Media Price List”<br />
text in the top cell and use the<br />
Edit palette to set the text size<br />
to “24pt”. Then, in modify<br />
mode, change the height (H) of<br />
the top cell to “<strong>12</strong>mm”, when<br />
you press return twice the<br />
height should change as<br />
expected but the width of the<br />
table will now be much too<br />
wide, I found that the text in the<br />
cell also disappeared (this<br />
didn’t happen when I changed<br />
the size of an ordinary cell). To<br />
correct the size problem select<br />
one of the single cells in the<br />
left hand column (the<br />
“Description cell for example”)<br />
and set the width to “55mm”.<br />
You will then probably need to<br />
adjust the width of the table<br />
slightly using the pointer tool.<br />
Now choose the text tool and<br />
re-enter the title, it should<br />
remember the text formatting<br />
you set.<br />
I hope this tutorial is helpful to<br />
people who have PageStream<br />
4.1 and wondered how the<br />
table tool works and also<br />
shows most of the possible<br />
options to people thinking<br />
about buying the program or<br />
upgrades. As you can see<br />
there are currently some<br />
limitations and bugs in the<br />
table feature but it does work<br />
well for the most part and is far<br />
more powerful than tables in<br />
any other <strong>Amiga</strong> program.<br />
TOTAL AMIGA<br />
Kicksoft<br />
PageStream 4.1<br />
The Premier DTP program on the <strong>Amiga</strong>.<br />
Mac & PC version also avaliable.<br />
£199.00<br />
PageStream Upgrade<br />
From pagestream 2.xx to 4.1 £95<br />
From pagestream 3.xx to 4.1 £79<br />
From Pagestream 4 to 4.1 £39<br />
Cross upgrade<br />
Upgrade from <strong>Amiga</strong> version 4.0. to PC or Mac<br />
version.<br />
£89.00<br />
If you don’t see what you want, just ask!<br />
Our range is always growing!<br />
Special offer!!!<br />
Still avaliable , fully boxed with manual<br />
£150.00<br />
PageStream Extras<br />
Warp and bend any text into any shape you want !!<br />
Text effect 2 £50.00<br />
Complete collection of <strong>12</strong>0 scalable borders<br />
Basic & Geo Borders £55.00<br />
www.kicksoft.co.uk<br />
Add £1.00 UK postage per item. Make cheques payable to Kicksoft Ltd.<br />
We accept Solo, Switch, Mastercard & Visa<br />
Kicksoft Ltd.,<br />
30 Whitegate Way,<br />
Tadworth,<br />
Surrey, KT20 5NS<br />
Tel/Fax (01737) 219280<br />
sales@kicksoft.co.uk
Support<br />
As we’re in the middle of the<br />
holiday season I thought it<br />
would be good to have a<br />
tutorial that could be applied to<br />
holiday photos. One of the<br />
utilities commonly supplied<br />
with digital cameras is to stitch<br />
together several photos to form<br />
a panorama. While there isn’t a<br />
dedicated application to do this<br />
on the <strong>Amiga</strong> there’s no reason<br />
you can’t get similar results<br />
using a standard image<br />
processor, particularly if it has<br />
layers. In this case I’m going to<br />
be using ImageFX but there’s<br />
no reason you couldn’t apply<br />
the same technique in<br />
Photogenics or ArtEffect.<br />
Before you can begin of course<br />
you must have a set of photos<br />
you want to assemble into a<br />
panorama. As you can<br />
probably tell from my photos<br />
I’m no expert photographer, to<br />
be honest I’m just your<br />
average snapper! So I’m not<br />
going to pretend to offer any<br />
advice on the actual<br />
photography. All I will say is<br />
that your job in assembling the<br />
panorama will be made much<br />
easier if you keep the camera<br />
settings constant as you take<br />
each photo so they are all<br />
evenly exposed. To avoid the<br />
Step by Step Merge<br />
1. Find a landmark.<br />
Creating a Photo<br />
in ImageFX<br />
Robert Williams helps you do something a bit more interesting with those holiday photos.<br />
You must zoom out the display so you can see the whole<br />
image before cropping.<br />
large steps I have in the<br />
positions of my photos you<br />
need to pan the camera on an<br />
even path, a tripod would help<br />
in many situations I’m sure.<br />
As my source material I have a<br />
four photo panorama of St.<br />
Ives bay taken while I was on<br />
holiday in July. If you want to<br />
try this tutorial with the same<br />
photos as I used you can<br />
download them from the Issue<br />
<strong>12</strong> page of the <strong>Total</strong> <strong>Amiga</strong><br />
website.<br />
Let’s get Started<br />
So without further ado load up<br />
ImageFX (I’m using 4.5 here<br />
but I think everything here<br />
should apply to any 4.x<br />
version) and lets get started.<br />
Open the photograph that will<br />
go at the left side of your<br />
panorama in ImageFX by<br />
2. Position the image roughly<br />
and turn on transparency<br />
clicking on the “Open” button in<br />
the main tool bar and choosing<br />
the file in the file requester.<br />
Next we need to add sufficient<br />
space to this image to give us<br />
room to add the other images.<br />
ImageFX doesn’t have an add<br />
space command so you have<br />
to use the “Scale” command in<br />
border mode. The border mode<br />
adds a border to both sides of<br />
the image so one side then<br />
needs to be cropped.<br />
TIP: In this tutorial I assume<br />
you have ImageFX set to leave<br />
palette windows open. By<br />
default when you choose an<br />
option from a palette window<br />
(such as “Size” mentioned<br />
above) ImageFX closes the<br />
palette. To change this<br />
behaviour open the “Prefs”<br />
window and click the<br />
3. Nudge the image to get<br />
an exact match.<br />
“Interface” button, in the<br />
window clear the “Close Child<br />
Windows Immediately” check<br />
box. To save this preference<br />
click “Save” in the preferences<br />
window and save the prefs file<br />
as “Default.prf”.<br />
Click on the “Size” button in the<br />
toolbar and then in the “Size”<br />
palette that opens click “Scale”.<br />
In the “Scale Image” window<br />
set “Mode” to “Border” and<br />
make sure “Aspect” is set to<br />
“Ignore Aspect”. Now we need<br />
to add a border equal to the<br />
width of the additional images<br />
we are going to add. I have a<br />
total of four images, as the<br />
border command applies to<br />
both sides of the image I will<br />
need to make the border on<br />
each side wide enough for<br />
three images, so that’s six<br />
images in total. As the first<br />
image is already included we<br />
must add that so we want the<br />
buffer to be seven times the<br />
current width. To do this easily<br />
just type 700 into the first<br />
“Percent” box and press return,<br />
then click “Okay”.<br />
To crop off the unwanted space<br />
on the left hand side you need<br />
to zoom out to see the whole<br />
image, to do this click on the “-”<br />
icon in the image window’s<br />
4. Remove transparency.<br />
bottom border or on the toolbar<br />
until you can see a border to<br />
the left and right. Make sure<br />
you can see the whole image<br />
including the borders on both<br />
sides because the crop<br />
function only works on the<br />
visible area. Click “Crop” in the<br />
size palette then, on the image,<br />
drag the middle left handle to<br />
the right until it just reaches the<br />
left of the photo, don’t worry<br />
about being too accurate as<br />
we’ll have to crop the image<br />
again later. Click the “Crop”<br />
button in the “Crop” requester.<br />
44 TOTAL AMIGA Autumn 2002<br />
Merge<br />
Zoom in on the image until it is<br />
about half the screen width,<br />
stretch out the window to cover<br />
most of the screen so you have<br />
a good view when composing<br />
the other photos. Now open<br />
the “Layer Manager” by<br />
clicking on the icon to the left<br />
of the R, G and B buttons on to<br />
toolbar. From the Layer<br />
Manager’s pop-up menu<br />
choose “Load Layer”, select<br />
the next photo along in your<br />
panorama in the file requester.<br />
The photo will be loaded into<br />
the middle of the buffer so<br />
depending on how wide it is<br />
you may need to scroll the<br />
buffer right to see the photo.<br />
When the image has loaded<br />
select “Move Layer” from the<br />
pop-up then drag the photo to<br />
the left so it’s left edge is close<br />
to the first photo.<br />
Look at the joining ends of the<br />
photos and try to identify a<br />
common landmark or object.<br />
As ImageFX shows a bounding<br />
box rather than showing the<br />
content of a layer as it is<br />
dragged I found the easiest<br />
way to line up the photos was<br />
to click the mouse on a<br />
landmark I had found in the<br />
second and then drag the<br />
pointer to the landmark on the<br />
first photo to get a rough<br />
match. At this stage it’s<br />
probably wise to take a look at<br />
the overall join and check<br />
obvious things (for example<br />
make sure that the horizon (if<br />
there is one) lines up! To<br />
improve the match try reducing<br />
the “Blend %” in the “Layer<br />
Manager” to about the half way<br />
point. This allows the first<br />
image to show through the<br />
second. Although you won’t get<br />
a perfect match you should be<br />
able to see if objects on one<br />
layer are misaligned with those<br />
on the other by a few pixels. It<br />
will probably help to zoom in<br />
again to at least actual size<br />
(indicated by 1:1 after the<br />
filename in the Image window<br />
title bar) for this operation. To<br />
nudge the layer a pixel at a<br />
time with the arrow keys<br />
position the pointer over the<br />
layer and then hold Left <strong>Amiga</strong><br />
+ Alt (the standard left mouse<br />
button key combination). When<br />
you think you have a good<br />
match I would suggest nudging<br />
the layer a couple of pixels in<br />
each direction in turn from your<br />
good position just to check<br />
there isn’t an even better<br />
match.<br />
Slide the “Blend %” back up to<br />
the far right and check out your<br />
handy work (at this point don’t<br />
worry if the colour balance of<br />
the two photos doesn’t match),<br />
unless you have done a<br />
fantastic job of shooting the<br />
panorama there will probably<br />
still be some mismatches. I<br />
found the best way to deal with<br />
this was to blend the two<br />
images slightly into each other.<br />
For this we use the layer’s<br />
alpha channel which allows us<br />
to control the translucency of<br />
the image. The first job is to<br />
give the layer an Alpha<br />
channel, click on the “Alpha”<br />
button in the tool bar then on<br />
“Create” in the palette and<br />
finally on “Matte”. Next take a<br />
look at the Alpha by clicking on<br />
“Swap”. You should see a plain<br />
white image, if you need to<br />
zoom out so you can see it all.<br />
Notice that the Alpha channel<br />
is the size of the photo layer<br />
not the whole buffer. Now white<br />
areas of the alpha channel<br />
relate to solid parts of the<br />
image and black parts to<br />
transparent areas, grey areas<br />
are more transparent the<br />
darker they are.<br />
Blend<br />
What we want to do is to add a<br />
gradient to the left side of the<br />
image making it gradually<br />
transparent. First we’ll make<br />
the gradient we’re going to use,<br />
take a look at your palette<br />
window and see if you have a<br />
black and white colour next to<br />
each other. If there aren’t<br />
choose the “Palette” button in<br />
the toolbar then click on any<br />
colour in the palette window so<br />
it is selected. Now in the tool<br />
bar drag the R, G and B sliders<br />
down to “0” the palette entry is<br />
now black. Click the next<br />
colour along the row in the<br />
palette and set all its RGB<br />
values to “255”. In the toolbar<br />
set the cycle gadget above the<br />
“Range” button to “R1”.<br />
Click on the Black colour then<br />
click the “Range” button, finally<br />
click the white colour, the new<br />
range you have created (from<br />
black to white) is shown by<br />
dots on the colours in the<br />
palette.<br />
Click on the “Toolbox” button in<br />
the toolbar and double click the<br />
filled box tool (click the bottom<br />
right hand corner of the box<br />
tool), the “Drawing Options”<br />
palette should open. In the<br />
palette set “Fill” to “Horizontal”<br />
and “Range” to “R1”. Now size<br />
the image window so you can<br />
see the whole alpha channel<br />
with a small border at the<br />
bottom and right edges. In the<br />
bottom border position the<br />
mouse pointer along the image<br />
at the point you want the fade<br />
to start. Exactly where you<br />
start will depend on how much<br />
your images overlap, I was<br />
able to have about 100 pixels.<br />
Now click and drag the box up<br />
and to the left until you cover<br />
the whole left hand edge of the<br />
alpha channel, don’t worry if<br />
you move over the window<br />
border, then release the mouse<br />
Support<br />
Blending the photos together using an alpha channel (below)<br />
smooths out imperfectly matched sections.<br />
button. Your alpha channel<br />
should now have a smooth<br />
fade on the left edge. To see<br />
the effect this has click the<br />
“Swap” button in the “Alpha”<br />
palette again.<br />
Carry on and follow the steps<br />
above to load each of your<br />
other images as a layer and<br />
merge them together. Once<br />
they’re all loaded we’ll have a<br />
go at correcting the differences<br />
in colour balance. If you’re<br />
short on memory or using<br />
particularly large images it will<br />
help if you flatten the layer<br />
you’ve just merged before<br />
adding the next image. To do<br />
this select the “Flatten Layers”<br />
command from the “Layer<br />
Manager” pop-up menu.<br />
However if you have to do this<br />
you will need to perform colour<br />
corrections on your layer<br />
before it is flattened.<br />
Match<br />
No matter how careful you<br />
have been in keeping your<br />
camera settings consistent you<br />
will probably find that the<br />
colour balance of the photos<br />
which make up your panorama<br />
needs some adjustment to get<br />
them to match up and look like<br />
45
Support<br />
The “Color Balance” window is<br />
ImageFX’s main colour<br />
adjustment tool.<br />
one image. If you have been<br />
able to keep each photo as a<br />
separate layer then you can<br />
work on each photo in turn<br />
tuning its colours to the others.<br />
If you’ve had to flatten layers<br />
as you added each photo then<br />
you will need to match each<br />
photo in turn which can be<br />
more difficult as you won’t see<br />
all the images together to<br />
decide which balance you are<br />
trying to match. I’m going to<br />
assume here you have each<br />
photo loaded as a separate<br />
layer.<br />
The first job is to look at each<br />
of the photos in turn and<br />
decide which one has the best<br />
colour balance, the aim will<br />
then be to match the others to<br />
this photo.<br />
With my photos I hadn’t<br />
followed my own advice and<br />
left the camera in automatic<br />
mode, this gives me four<br />
photos with noticeably different<br />
colour balances. It doesn’t help<br />
that the right side of the scene<br />
is overcast and the left side in<br />
bright sunshine. In my<br />
selection the left hand photo is<br />
pretty over exposed and looks<br />
quite washed out where as the<br />
right one is rather grey and<br />
dull. So I picked the second<br />
photo as the one I wanted to<br />
try and match, it is nice and<br />
bright without being over<br />
exposed.<br />
Starting with the first image<br />
you want to balance select its<br />
layer in the “Layer Manager”,<br />
I’m working on the left hand<br />
image so in my case it’s the<br />
“Background” layer. Then we<br />
can use ImageFX’s colour<br />
tools, the basic adjustments<br />
are in the “Balance” window<br />
accessed from the toolbar. In<br />
the “Color Balance” window<br />
zoom out the preview<br />
thumbnail by clicking the “-”<br />
button until you can see a top<br />
and bottom border (about 1:9<br />
for me) then click on the top<br />
thumbnail and drag it until you<br />
can see the photo (you may<br />
need to drag a few times). Now<br />
click the “Realtime Update?”<br />
check box so you can see the<br />
difference your changes make<br />
in the lower thumbnail. In this<br />
window the R, G, and B sliders<br />
adjust the intensity of the<br />
primary colours, “V” is<br />
brightness, “Co” contrast and<br />
“Ga” gamma. The gamma is<br />
often a useful tool because it<br />
adjusts the brightness of the<br />
middle tones without effecting<br />
the very light and dark colours<br />
which would normally be<br />
washed out or merged together<br />
respectively. In this case I have<br />
some light areas that are very<br />
washed out so after some<br />
experimentation I settled on<br />
reducing the brightness by “-<br />
30” and increasing the contrast<br />
by “10” to pep the colours up a<br />
bit. This worked well on most<br />
areas, especially the sea and<br />
town. But the sky was still too<br />
light and grey because it had<br />
been over exposed in the<br />
photo losing its true brightness<br />
and colour.<br />
The only option seemed to be<br />
to treat the sky on its own and<br />
make the blue more intense. To<br />
select the sky I used<br />
ImageFX’s flood region tool, on<br />
the main toolbar click the cycle<br />
gadget at the left hand side<br />
(which is on “Full” by default)<br />
until it says “Flood”. Now click<br />
in the sky of the photo you’re<br />
editing, the area selected is<br />
shown by “marching ants”. If<br />
the area selected is too small<br />
you can increase it by<br />
changing the “Flood” tolerance<br />
slider in the “Drawing Options”<br />
palette (I found I needed to<br />
increase this to “50” to get the<br />
whole sky) and click in the sky<br />
area to perform the flood again.<br />
If you want to add an area to<br />
the selection (for example<br />
among the tree branches) hold<br />
down Alt while clicking, to<br />
remove an area hold Ctrl. Now<br />
any processing operations you<br />
apply will only effect the<br />
selected region.<br />
TIP: If you want to apply<br />
effects to the other parts of the<br />
image and protect the currently<br />
selected region open the<br />
“Buffer” palette from the tool<br />
box, click “Region” and then<br />
click “Invert Region”. This<br />
requester also has options to<br />
load and save regions for later<br />
use.<br />
I then used the “Balance” effect<br />
to increase the blue level by 20<br />
and reduced the brightness (V)<br />
by 10 to get a good colour<br />
match on the sky. When you’re<br />
finished with the region<br />
remember to set the cycle<br />
gadget back to “Full” otherwise<br />
you may be surprised when<br />
your next effect only changes<br />
the region.<br />
And Finally...<br />
When you’re happy with the<br />
first photo choose the layer of<br />
the next one you want to<br />
adjust. On the third photo I<br />
thought the bushes at the front<br />
of the shot already looked quite<br />
a good match so I decided to<br />
work on just the sky and sea.<br />
Using a “Flood” tolerance of 50<br />
at the top of the sea, this<br />
should select most of the sea<br />
and sky area with just a few<br />
Cropping the flattened composition to give the final panorama, see it in colour on the back page.<br />
exceptions. Then switch the<br />
region mode cycle gadget to<br />
“Box”, hold down the Alt key<br />
and draw a box over any areas<br />
in the sea and sky that didn’t<br />
get automatically selected.<br />
Now open the “Balance”<br />
window, I found a contrast<br />
setting of 20 combined with a<br />
brightness of 10 gave a good<br />
match.<br />
Set the region control to “Full”<br />
and then choose the final<br />
photo’s layer, this one is<br />
considerably darker than the<br />
rest and in this case I found I<br />
could adjust the whole thing<br />
without the bushes getting too<br />
bright. So it’s just a case of<br />
opening the “Balance” window<br />
and setting brightness to “27”<br />
and contrast to “25”.<br />
When you’re happy with the<br />
overall look of the panorama<br />
you can flatten it into a single<br />
image. If you wish to keep the<br />
layered image make sure you<br />
save it as an INGF file before<br />
flattening. Then choose<br />
“Flatten Layers” from the<br />
“Layer Manager” pop-up menu.<br />
Once the image is flattened<br />
you can apply any effects you<br />
want to the whole image. If you<br />
wish you can also crop it to<br />
remove the uneven borders<br />
making the finished panorama<br />
look as much as possible like<br />
one photo.<br />
When you crop remember to<br />
zoom the image so you can<br />
see the whole area you want to<br />
crop out without scrolling.<br />
Overall I’m quite pleased with<br />
the way this panorama turned<br />
out, especially as I hadn’t given<br />
much thought to keeping the<br />
camera settings consistent<br />
between shots and I didn’t use<br />
a tripod. There are a couple of<br />
areas where the colour<br />
balancing could probably be<br />
improved if I had spent a bit<br />
more time on it, especially in<br />
the bushes on the first and last<br />
photos. You can also still make<br />
out the joins in the sea and sky<br />
again those transitions could<br />
be lost with a bit more work. So<br />
get out that digital camera and<br />
find some interesting<br />
panoramas to photograph!<br />
Keep up to date with our progress with new<br />
<strong>issue</strong>s of <strong>Total</strong> <strong>Amiga</strong> and get news of<br />
website updates and previews of the content of<br />
new <strong>issue</strong>s by joining the <strong>Total</strong> <strong>Amiga</strong><br />
announcements mailing list. This list is only<br />
posted to the editor so your mail box won’t be<br />
flooded. Expect a maximum of 4 or 5 messages<br />
a month, as a minimum we post a monthly<br />
update.<br />
The following back <strong>issue</strong>s of<br />
<strong>Total</strong> <strong>Amiga</strong> and Clubbed are<br />
available from stock, you can<br />
purchase them directly from us<br />
for the princely sum of £2.50<br />
<strong>Total</strong> <strong>Amiga</strong> Issue 11<br />
• x86 <strong>Amiga</strong> emulators feature<br />
and reviews.<br />
• PageStream 4.1 Review<br />
• <strong>Amiga</strong>Writer 2.2 Review<br />
• Perefect Paint Tutorial<br />
• Introduction to MIDI<br />
Full Name:<br />
Street<br />
Address:<br />
Post Code:<br />
46 TOTAL AMIGA Autumn 2002<br />
Country:<br />
EMail:<br />
<strong>Total</strong> <strong>Amiga</strong> Mailing List<br />
Back Issues<br />
each including UK postage or<br />
£4.00 elsewhere. All other<br />
<strong>issue</strong>s are sold out but you can<br />
download copies from our<br />
website in PDF format. These<br />
<strong>Total</strong> <strong>Amiga</strong> Issue 10<br />
• Column from Fleecy Moss<br />
• Descent: Freespace Review<br />
• Mediator 4000 Review<br />
• ImageFX 4.5 Review<br />
• Directory Opus Tutorial<br />
• Mode Promotion Tutorial<br />
To join just send a blank EMail (no subject or<br />
body text is required) to:<br />
totalamiga-announce-subscribe<br />
@yahoogroups.com<br />
You can visit the group page on the<br />
YahooGroups website to read the messages on<br />
the web or to change your group setting if you<br />
are a subscriber:<br />
http://www.yahoogroups.com/group/<br />
totalamiga-announce<br />
retain the layout and images of<br />
the original magazines and can<br />
be viewed on the <strong>Amiga</strong> using<br />
APDF.<br />
Clubbed Issue 3<br />
• Getting on the ‘net feature.<br />
• Blizzard Vision PPC review.<br />
• Internet software reviews.<br />
• Turbo Print 7<br />
• Candy Factory Pro<br />
Review/Tutorial.<br />
Tel.:<br />
User<br />
Group:<br />
Please tick what you require,<br />
A four <strong>issue</strong> subscription to:<br />
United Kingdom (£14)<br />
Support<br />
Europe (£17)<br />
Rest of the World (£20)<br />
Next Issue<br />
Coming up in <strong>Total</strong> <strong>Amiga</strong><br />
<strong>issue</strong> 13:<br />
News<br />
• The latest on OS4,<br />
<strong>Amiga</strong>One and other<br />
developments.<br />
Features<br />
• Digital Cameras - USB<br />
opens up the range of<br />
cameras available to<br />
<strong>Amiga</strong>ns. We take a look<br />
using them on the <strong>Amiga</strong>.<br />
Reviews<br />
• Thylacine USB card<br />
• fxSCAN 4.0 with USB<br />
scanner support.<br />
Support<br />
• Introduction to Wordworth<br />
Regulars<br />
• PD Paradise<br />
• Top Tips<br />
• Letters<br />
Please let us know what<br />
features and articles you<br />
would like to see in the next<br />
<strong>issue</strong>!<br />
The new <strong>issue</strong> is due in:<br />
November 2002<br />
Note: <strong>Total</strong> <strong>Amiga</strong> is produced by<br />
volunteers and this means<br />
sometimes <strong>issue</strong>s run late. If you’re<br />
concerned about the status of the<br />
next <strong>issue</strong> please take a look at<br />
http://www.totalamiga.org or contact<br />
us by EMail or phone (details inside<br />
the front cover).<br />
Subscribe to <strong>Total</strong> <strong>Amiga</strong><br />
To subscribe to <strong>Total</strong> <strong>Amiga</strong> please complete this order form and send it with the appropriate payment to:<br />
(If you don’t want to cut your magazine a photocopy is acceptable or just include the details below on a piece of paper)<br />
<strong>Total</strong> <strong>Amiga</strong>, 26 Wincoat Drive, Benfleet, Essex, SS7 5AH. Payment can be by cheque or postal order (in pounds sterling made<br />
payable to South Essex <strong>Amiga</strong> Link) or in sterling cash (at your own risk).<br />
Start subscription from <strong>issue</strong> no.<br />
(Leave blank to receive the next <strong>issue</strong>)<br />
I<strong>12</strong><br />
47