WaveLAN/PCMCIA User's guide - web server
WaveLAN/PCMCIA User's guide - web server
WaveLAN/PCMCIA User's guide - web server

Create successful ePaper yourself
Turn your PDF publications into a flip-book with our unique Google optimized e-Paper software.
������� � ������������<br />
������������
The product described in this book is a licensed product of Lucent<br />
Technologies Inc. --formerly the communications systems and technology<br />
units of AT&T.<br />
<strong>WaveLAN</strong>, WavePOINT and WaveMANAGER and WaveMONITOR are<br />
registered trademarks, or trademarks of Lucent Technologies.<br />
IBM and AT are registered trademarks of International Business Machines<br />
Corporation.<br />
Microsoft, Windows 95, Windows NT, MS-Word, and MS-DOS are<br />
registered trademarks or trademarks of Microsoft Corporation.<br />
Novell and Netware are registered trademarks of Novell, Inc.<br />
Velcro is a registered trademark of Velcro, Inc.<br />
Adobe and Adobe Acrobat is a registered trademark of Adobe Systems Inc.<br />
All other brand and product names are trademarks or registered trademarks<br />
of their respective holders.<br />
April, 1998<br />
It is the policy of Lucent Technologies to improve products as new<br />
technology, components, software, and firmware become available. Lucent<br />
Technologies, therefore, reserves the right to change specifications without<br />
prior notice.<br />
All features, functions, and operations described herein may not be marketed<br />
by Lucent Technologies in all parts of the world. In some instances, drawings<br />
are of equipment prototypes. Therefore, before using this document, consult<br />
your Lucent Technologies representative or Lucent Technologies office for<br />
information that is applicable and current.<br />
Copyright ©1998 Lucent Technologies<br />
All Rights Reserved
Chapter 1 Introduction<br />
Chapter 2 Hardware Installation<br />
Table of Contents<br />
About <strong>WaveLAN</strong>/<strong>PCMCIA</strong> . . . . . . . . . . . . . . . . 1-1<br />
Kit Contents . . . . . . . . . . . . . . . . . . . . . . . . . . . . . . 1-2<br />
Network Configurations . . . . . . . . . . . . . . . . . . . 1-5<br />
Connecting to Ad-Hoc Workgroups . . . . . 1-5<br />
Connecting to an Infrastructure . . . . . . . . 1-5<br />
Roaming Operation . . . . . . . . . . . . . . . . . . . 1-6<br />
<strong>WaveLAN</strong>/<strong>PCMCIA</strong> Features . . . . . . . . . . . . . . 1-8<br />
Power Management . . . . . . . . . . . . . . . . . . . 1-8<br />
Installing your <strong>WaveLAN</strong> Kit. . . . . . . . . . . . . . . 2-1<br />
Inserting the PC Card. . . . . . . . . . . . . . . . . . 2-1<br />
Mounting the Antenna Module . . . . . . . . . 2-2<br />
Proceeding with the Installation. . . . . . . . . 2-2<br />
Card Removal and Re-insertion . . . . . . . . . . . . . 2-3<br />
Windows 95 and Windows NT Systems. . 2-3<br />
MS-DOS Systems . . . . . . . . . . . . . . . . . . . . . 2-5<br />
Apple Powerbook Systems . . . . . . . . . . . . . 2-6<br />
Chapter 3 Installation for Windows 95 & Windows NT<br />
Introduction . . . . . . . . . . . . . . . . . . . . . . . . . . . . . . 3-1<br />
What You Need to Know . . . . . . . . . . . . . . 3-1<br />
Plug & Play Support. . . . . . . . . . . . . . . . . . . 3-1<br />
User Profiles . . . . . . . . . . . . . . . . . . . . . . . . . 3-2<br />
Preparing Driver Installation . . . . . . . . . . . . . . . 3-4<br />
i
Table of Contents<br />
ii<br />
Getting Started . . . . . . . . . . . . . . . . . . . . . . . . 3-4<br />
Preparation for Windows NT Systems. . . . 3-5<br />
Installing the Miniport Driver . . . . . . . . . . . . . . 3-11<br />
Network Installation . . . . . . . . . . . . . . . . . . 3-14<br />
Setting the <strong>WaveLAN</strong> Parameters . . . . . . 3-15<br />
Finishing your <strong>WaveLAN</strong> Installation. . . 3-21<br />
Working with <strong>WaveLAN</strong> & Windows . . . . . . . 3-24<br />
View other <strong>WaveLAN</strong> stations . . . . . . . . . 3-24<br />
Checking the Network Protocol Settings. 3-26<br />
Display <strong>WaveLAN</strong> Parameters . . . . . . . . . 3-28<br />
Installing WaveMANAGER/CLIENT . . . . . . . 3-30<br />
About this Utility. . . . . . . . . . . . . . . . . . . . . 3-30<br />
Installing this Utility . . . . . . . . . . . . . . . . . . 3-30<br />
Chapter 4 Diagnostics for Windows 95 & Windows NT<br />
WaveMANAGER/CLIENT . . . . . . . . . . . . . . . . . 4-1<br />
Monitoring Options. . . . . . . . . . . . . . . . . . . . 4-1<br />
Running WaveMANAGER/CLIENT. . . . . . . . . 4-3<br />
Using Link Test . . . . . . . . . . . . . . . . . . . . . . . 4-5<br />
Using Site Monitor . . . . . . . . . . . . . . . . . . . . 4-9<br />
Logging Measurement Data . . . . . . . . . . . 4-14<br />
Other Options. . . . . . . . . . . . . . . . . . . . . . . . . . . . 4-17<br />
Frequency Select Option. . . . . . . . . . . . . . . 4-17<br />
Access Control Table Manager . . . . . . . . . 4-18<br />
Chapter 5 Installation for MS-DOS<br />
Introduction . . . . . . . . . . . . . . . . . . . . . . . . . . . . . . 5-1<br />
Installation for Card & Socket Services . . . . . . . 5-2
Table of Contents<br />
Collecting the Information . . . . . . . . . . . . . 5-3<br />
Installing the Network Operating System 5-3<br />
Running the INSTALL Program . . . . . . . . 5-4<br />
Verifying the Installation. . . . . . . . . . . . . . . 5-7<br />
Frequency Selection (2.4 GHz) . . . . . . . . . . 5-7<br />
Swapping Cards . . . . . . . . . . . . . . . . . . . . . . 5-8<br />
Enabler-based Installation . . . . . . . . . . . . . . . . . . 5-9<br />
Overview . . . . . . . . . . . . . . . . . . . . . . . . . . . . 5-9<br />
Installing the Network Operating System 5-9<br />
Copying the <strong>WaveLAN</strong> Software. . . . . . . . 5-9<br />
Set up the Enabler. . . . . . . . . . . . . . . . . . . . 5-10<br />
Driver Configuration . . . . . . . . . . . . . . . . . 5-11<br />
Finishing Installation . . . . . . . . . . . . . . . . . 5-15<br />
Verify the Installation. . . . . . . . . . . . . . . . . 5-15<br />
Creating a Utilities Diskette . . . . . . . . . . . 5-16<br />
Frequency Selection (2.4 GHz) . . . . . . . . . 5-17<br />
Chapter 6 Diagnostics for MS-DOS<br />
Point-to-Point Diagnostics. . . . . . . . . . . . . . . . . . 6-1<br />
About the Point-to-Point Diagnostics . . . . 6-1<br />
Running Point-to-Point Diagnostics . . . . . . . . . 6-2<br />
Selecting the Local <strong>WaveLAN</strong> Card . . . . . 6-3<br />
Selecting a Link Test Partner. . . . . . . . . . . . 6-3<br />
Changing Local Identifiers . . . . . . . . . . . . . 6-4<br />
Search for Other Stations . . . . . . . . . . . . . . . 6-4<br />
Changing the Test Partner. . . . . . . . . . . . . . 6-5<br />
The Measurement Data Display . . . . . . . . . 6-6<br />
Positioning your <strong>WaveLAN</strong> Computer . . 6-7<br />
Logging Measurement Data . . . . . . . . . . . . 6-7<br />
Command Line Parameters. . . . . . . . . . . . . 6-8<br />
iii
Table of Contents<br />
Chapter 7 Frequency Select Utility<br />
iv<br />
About the Frequency Select Utility . . . . . . . . . . . 7-1<br />
Do I Need to Use This Utility?. . . . . . . . . . . 7-1<br />
Running the Frequency Select Utility. . . . . . . . . 7-3<br />
Select a New Frequency . . . . . . . . . . . . . . . . 7-4<br />
Command line parameter . . . . . . . . . . . . . . 7-4<br />
Chapter 8 Installation for Apple Powerbook Systems<br />
Appendix A <strong>WaveLAN</strong>/<strong>PCMCIA</strong><br />
Introduction . . . . . . . . . . . . . . . . . . . . . . . . . . . . . . 8-1<br />
What You Need to Know . . . . . . . . . . . . . . . 8-1<br />
Removing and Re-inserting your Card . . . 8-2<br />
Installing in Ethertalk TCP/IP Environments. . 8-3<br />
Installing the AppleTalk Software . . . . . . . 8-3<br />
Configuring your <strong>WaveLAN</strong> Card. . . . . . . 8-5<br />
Classic and Open Transport Environments. . . . 8-8<br />
Which one to Choose?. . . . . . . . . . . . . . . . . . 8-8<br />
Installing the Classic Networking Software8-9<br />
Installing the Open Transport Software. . 8-10<br />
Configuring your <strong>WaveLAN</strong> Card. . . . . . 8-11<br />
Enabling AppleTalk for Classic. . . . . . . . . 8-12<br />
Enabling Apple Talk for Open Transport 8-13<br />
Enabling TCP/IP for Classic . . . . . . . . . . . 8-14<br />
Enabling TCP/IP for Open Transport . . . 8-15<br />
Specifications . . . . . . . . . . . . . . . . . . . . . . . . . . . . A-1
Table of Contents<br />
Environment Definitions: . . . . . . . . . . . . . .A-2<br />
Appendix B Driver Installation Examples<br />
NetWare Examples . . . . . . . . . . . . . . . . . . . . . . . . B-1<br />
Installing a Driver for Personal NetWare . B-1<br />
Installing a DOS/ODI Workstation DriverB-1<br />
NDIS Examples . . . . . . . . . . . . . . . . . . . . . . . . . . . B-3<br />
LAN Manager Installation. . . . . . . . . . . . . . B-3<br />
Windows v.3.11 Installation . . . . . . . . . . . . B-4<br />
Appendix C <strong>WaveLAN</strong> Power Management<br />
Appendix D Troubleshooting<br />
About <strong>WaveLAN</strong> Power Management . . . . . . . C-1<br />
Considering Power Management. . . . . . . . C-1<br />
The NetWare Watchdog Mechanism. . . . . C-2<br />
Connecting to a Single Server . . . . . . . . . . . C-3<br />
Connecting to Multiple Servers . . . . . . . . . C-4<br />
Power Management Examples . . . . . . . . . . . . . . C-6<br />
Restrictions on Using Power ManagementC-8<br />
Windows 95 & Windows NT . . . . . . . . . . . . . . .D-1<br />
Verify Card Operation . . . . . . . . . . . . . . . . .D-1<br />
Windows does not detect my Card . . . . . .D-2<br />
Windows NT does not detect my card . . .D-3<br />
WaveMANAGER/ CLIENT does not start . .<br />
D-3<br />
Wrong Driver Version . . . . . . . . . . . . . . . . .D-3<br />
Upgrading from earlier Driver Versions. .D-4<br />
v
Table of Contents<br />
vi<br />
Error Messages (MS-DOS) . . . . . . . . . . . . . . . . . D-6<br />
Radio-frequency Network Characteristics. . . D-13<br />
Signal Interference. . . . . . . . . . . . . . . . . . . D-13<br />
Signal Attenuation. . . . . . . . . . . . . . . . . . . D-14<br />
Problem Determination . . . . . . . . . . . . . . . . . . D-14<br />
Using the Diagnostics Utility. . . . . . . . . . D-15<br />
Troubleshooting List . . . . . . . . . . . . . . . . . D-15
<strong>WaveLAN</strong> Technical Support<br />
You can find the most recent software and user documentation<br />
for all <strong>WaveLAN</strong> products on our World Wide Web Site.<br />
<strong>WaveLAN</strong> Software and Documentation<br />
FTP Server FTP://FTP.WAVELAN.COM/PUB<br />
World Wide Web HTTP://WWW.WAVELAN.COM<br />
If you encounter problems when installing or using this<br />
product, or would like information about our other <strong>WaveLAN</strong><br />
products, please contact your Authorized <strong>WaveLAN</strong> Reseller,<br />
or local Lucent Technologies Sales Office.<br />
In emergency, or when no local support is available, you can<br />
reach us at the addresses or telephone numbers listed below.<br />
<strong>WaveLAN</strong> Regional Support<br />
USA usasupport@wavelan.com<br />
Carribean/Latin America/ Canada calasupport@wavelan.com<br />
Europe/ Middle-East/ Africa emeasupport@wavelan.com<br />
Asia/Pacific<br />
<strong>WaveLAN</strong> Global Support<br />
apasupport@wavelan.com<br />
U.S.A. Voice: +1 800 WAVELAN<br />
Fax: +1 937 445 5552<br />
If applicable, please complete the <strong>WaveLAN</strong> Driver Problem<br />
Report form and Fax or E-Mail it to us. This form is available<br />
on <strong>WaveLAN</strong> software diskette 1 as WVLANPRF.TXT<br />
vii
Radio Frequency Interference Statement<br />
Canada:<br />
This device complies with RSS-210 of Industry and Science Canada.<br />
USA - Federal Communications Commission (FCC):<br />
This device complies with Part 15 of FCC Rules.<br />
Operation of this device is subject to the following two conditions:<br />
This device may not cause harmful interference.<br />
This device must accept any interference that may cause undesired<br />
operation.<br />
Information to User:<br />
This device must be installed and used in strict accordance with the<br />
manufacturer’s instructions. However, there is no guarantee that<br />
interference to radio communications will not occur in a particular<br />
commercial installation. If this device does cause interference, which<br />
can be determined by turning the host equipment off and on, the user<br />
is encouraged to consult the instruction manual of the host<br />
equipment or the local device supplier. In case the device does cause<br />
harmful interference with an authorized radio service, the<br />
user/operator shall promptly stop operating the device until harmful<br />
interference has been eliminated.<br />
Lucent Technologies is not responsible for any radio or television<br />
interference caused by unauthorized modification of this device or<br />
the substitution or attachment of connecting cables and equipment<br />
other than specified by Lucent Technologies.<br />
The correction of interference caused by such unauthorized<br />
modification, substitution or attachment will be the responsibility of<br />
the user.<br />
viii
Who Should Read this<br />
Manual<br />
Overview of the Manual<br />
About This Manual<br />
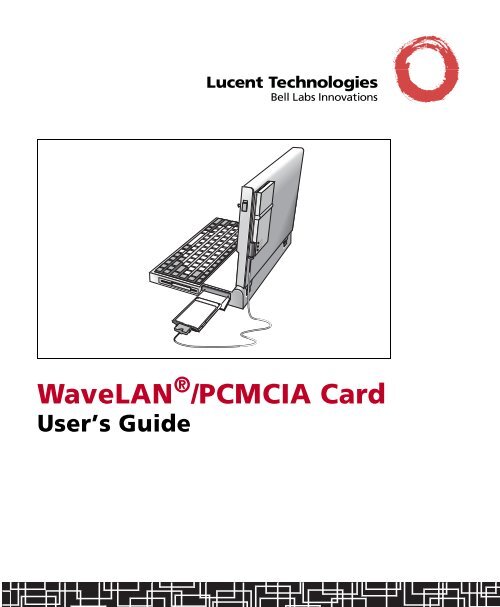
<strong>WaveLAN</strong>/<strong>PCMCIA</strong> User’s Guide<br />
Preface<br />
About This Manual<br />
The <strong>WaveLAN</strong>/<strong>PCMCIA</strong> card provides wireless<br />
communications capability to users of notebook and notepad<br />
computers in a personal computer based Local Area Network<br />
(LAN). This manual is a user’s <strong>guide</strong> to installing and using the<br />
card.<br />
This manual should be read by anyone intending to install or<br />
use the <strong>WaveLAN</strong>/<strong>PCMCIA</strong> card. The manual assumes that<br />
you have a working knowledge of basic PC operations and are<br />
familiar with driver installation procedures for the Network<br />
Operating System to be used.<br />
Note: When you intend to use the <strong>WaveLAN</strong>/<strong>PCMCIA</strong> Card as the<br />
<strong>WaveLAN</strong> interface for your WavePOINT-II access point,<br />
please refer to the ‘Getting Started Guide that was shipped<br />
with your WavePOINT-II device.<br />
Chapter 1, Introduction<br />
Describes the functions and features of <strong>WaveLAN</strong>/<strong>PCMCIA</strong><br />
and the contents of the <strong>PCMCIA</strong> kit.<br />
Chapter 2, Hardware Installation<br />
Describes how to connect the <strong>WaveLAN</strong>/<strong>PCMCIA</strong> hardware<br />
to your computer.<br />
Chapter 3, Installation for Windows 95 & Windows NT<br />
Describes how to install the <strong>WaveLAN</strong> software in a computer<br />
that runs the Windows 95 or Windows NT operating system.<br />
ix
Preface<br />
About This Manual<br />
Chapter 4, Diagnostics for Windows 95 & Windows NT<br />
Describes how to use the WaveMANAGER/CLIENT to:<br />
● Run wireless diagnostics in your <strong>WaveLAN</strong> network<br />
● Check or change the frequency of your <strong>WaveLAN</strong> Card.<br />
Chapter 5, Installation for MS-DOS<br />
Describes how to install the <strong>WaveLAN</strong> software in a MS-DOS<br />
based computer using:<br />
● Card and Socket Services, or<br />
● The Enabler program<br />
Chapter 6, Diagnostics for MS-DOS<br />
Describes how to use the Point-to-Point Diagnostics utility to<br />
run wireless diagnostics in your <strong>WaveLAN</strong> in your network.<br />
Chapter 7, Frequency Select Utility<br />
Describes how you can verify the operating frequency of<br />
<strong>WaveLAN</strong> 915 MHz or 2.4 GHz cards, and how to select an<br />
alternative frequency for 2.4 GHz cards.<br />
Chapter 8, Installation for Apple Powerbook Systems<br />
Describes how to install the <strong>WaveLAN</strong> software in an Apple<br />
Powerbook computer that supports the:<br />
● Apple Ethertalk Networking software<br />
● Apple Classic Networking software<br />
● Apple Open Transport Networking software<br />
Appendices A, <strong>WaveLAN</strong>/<strong>PCMCIA</strong><br />
B, Driver Installation Examples<br />
C, <strong>WaveLAN</strong> Power Management<br />
D, Troubleshooting<br />
x <strong>WaveLAN</strong>/<strong>PCMCIA</strong> User’s Guide
Conventions for this<br />
Document<br />
Preface<br />
About This Manual<br />
Throughout this <strong>WaveLAN</strong> document we use the following<br />
icons to picture various computing and/or networking devices.<br />
These icons are used consistently throughout all <strong>WaveLAN</strong><br />
End-User Information Products.<br />
Icon Description<br />
Wireless (mobile) Client Station<br />
equipped with <strong>WaveLAN</strong>/<strong>PCMCIA</strong><br />
Wired Client Station<br />
typically equipped with standard Ethernet card.<br />
Wireless Client Station<br />
equipped with <strong>WaveLAN</strong>/ISA<br />
WavePOINT-II access point<br />
optionally equipped with <strong>WaveLAN</strong>/<strong>PCMCIA</strong> or<br />
<strong>WaveLAN</strong>/EAM<br />
Server Station<br />
Wired Ethernet Cable/Backbone<br />
Wireless <strong>WaveLAN</strong> Coverage Area (Cell)<br />
Note:<br />
You may also encounter one of the following conventions:<br />
Provides general information<br />
Hint: Provides information that may be of interest to specific users<br />
Caution: Provides information to prevent damage to equipment, or to<br />
prevent configuration errors of the devices.<br />
Warning: Provides information to prevent personal Injury<br />
<strong>WaveLAN</strong>/<strong>PCMCIA</strong> User’s Guide xi
Further Information<br />
All software diskettes that are shipped with your <strong>WaveLAN</strong><br />
products, include a file called ‘readme.txt’. These files contain<br />
information about the software and/or drivers on the diskette.<br />
You are advised to print and read these files prior to installing<br />
your <strong>WaveLAN</strong> products, as they may contain information that<br />
was not available when this document was printed.<br />
Alternatively you can also access the readme.txt files on the<br />
internet at the Documents Library of our <strong>WaveLAN</strong> <strong>web</strong>site.<br />
http://www.wavelan.com<br />
On the <strong>WaveLAN</strong> <strong>web</strong>site you will also find <strong>WaveLAN</strong> news<br />
and information about software updates.<br />
The <strong>WaveLAN</strong> software for Windows or Apple Powerbook<br />
systems also includes online help information. Click the help<br />
button on your screen or press the F1<br />
function key to access<br />
the online help files.<br />
For <strong>WaveLAN</strong> Technical Support, please consult the<br />
information printed on page vii of this document.
Chapter 1<br />
Introduction<br />
Table of Contents<br />
Introduction<br />
About <strong>WaveLAN</strong>/<strong>PCMCIA</strong> 1-1<br />
Kit Contents 1-2<br />
Network Configurations 1-5<br />
Connecting to Ad-Hoc Workgroups 1-5<br />
Connecting to an Infrastructure 1-5<br />
Roaming Operation 1-6<br />
<strong>WaveLAN</strong>/<strong>PCMCIA</strong> Features 1-8<br />
Power Management 1-8
Introduction1<br />
About <strong>WaveLAN</strong>/<strong>PCMCIA</strong><br />
About <strong>WaveLAN</strong>/<strong>PCMCIA</strong> 1<br />
The <strong>WaveLAN</strong>/<strong>PCMCIA</strong> card is a wireless network interface<br />
card for notebooks, notepads and other computing devices<br />
equipped with a <strong>PCMCIA</strong> (Personal Computer Memory Card<br />
International Association) Type II card socket.<br />
<strong>WaveLAN</strong> is a set of wireless networking products that enable<br />
you to setup your computer for:<br />
● “Connecting to Ad-Hoc Workgroups”<br />
● “Connecting to an Infrastructure”<br />
<strong>WaveLAN</strong> adapters function like any standard wired Ethernet<br />
card, but: <strong>WaveLAN</strong> has cut the wires!<br />
Where an ethernet card requires a cable connection to a hub<br />
and/or patch panel, the cable physically ties you to the location<br />
where you installed the wired connection.<br />
<strong>WaveLAN</strong> allows you to connect to a Local Area Network<br />
(LAN) anywhere within the network environment.<br />
Unlike Ethernet, <strong>WaveLAN</strong> will enable you to roam<br />
throughout the network environment while remaining<br />
connected to the LAN.<br />
Like Ethernet cards, you will need to install the<br />
<strong>WaveLAN</strong>/<strong>PCMCIA</strong> card, using network client drivers, and<br />
network protocols. <strong>WaveLAN</strong> is transparent to your network<br />
operating system, and uses the same frametypes as Ethernet<br />
networks: Your computer and network operating system will<br />
not notice the difference between an Ethernet or <strong>WaveLAN</strong><br />
Card, however the flexibility of <strong>WaveLAN</strong> will make sure you<br />
will!<br />
<strong>WaveLAN</strong>/<strong>PCMCIA</strong> User’s Guide 1-1
Introduction<br />
Kit Contents<br />
Figure 1-1<br />
1<strong>WaveLAN</strong>/<strong>PCMCIA</strong> Kit<br />
Kit Contents 1<br />
The <strong>WaveLAN</strong>/<strong>PCMCIA</strong> adapter kit (Figure 1-1 on page 1-2)<br />
includes the following items:<br />
1 <strong>WaveLAN</strong>/<strong>PCMCIA</strong> PC card.<br />
2 Antenna Module (with mounting bracket).<br />
3 <strong>WaveLAN</strong> software.<br />
4 User’s Guide (this book).<br />
The kit comes in two versions - with or without the built-in<br />
encryption feature.<br />
1-2 <strong>WaveLAN</strong>/<strong>PCMCIA</strong> User’s Guide
<strong>WaveLAN</strong>/<strong>PCMCIA</strong> Card 1<br />
Antenna Module 1<br />
<strong>WaveLAN</strong> Software 1<br />
The<br />
The<br />
Your<br />
Introduction<br />
Kit Contents<br />
<strong>WaveLAN</strong>/<strong>PCMCIA</strong> card (PC card) is a credit card size<br />
network adapter which fits in a <strong>PCMCIA</strong> Type II card socket<br />
in a personal computer.<br />
compact antenna module connects to the PC card with a<br />
450 mm (18 in.) cable, allowing the module to rest on the<br />
desktop or other work surface. The antenna module may also<br />
be mounted on the computer body using the bracket provided<br />
for that purpose.<br />
LED indicators on the antenna module provide status<br />
information (Power On/Off, Transmit, Receive).<br />
<strong>WaveLAN</strong>/<strong>PCMCIA</strong> adapter card is shipped with three<br />
software diskettes:<br />
1 Driver and diagnostic software for Microsoft Windows 95<br />
or Windows NT operating systems:<br />
● Miniport Driver and ‘INF’ file for card installation<br />
● WaveMANAGER/CLIENT program to monitor<br />
wireless performance.<br />
2 Driver and diagnostic software for Microsoft MS-DOS<br />
operating systems:<br />
● An install program for computers that support Card<br />
and Socket Services (CS&SS), or<br />
● The Enabler program, for computers that do not have<br />
Card and Socket Services installed.<br />
● Network drivers for NetWare (ODI)- or NDIScompatible<br />
networking environment.<br />
● The Point-to-Point Diagnostics and WaveMONITOR<br />
tools to diagnose the wireless link with other<br />
<strong>WaveLAN</strong> stations or WavePOINT access points.<br />
● Frequency Select Utility, that enables you to modify<br />
the factory-set operating frequency (limited to specific<br />
2.4 GHz units only).<br />
3 Driver software for Apple/Macintosh Powerbook<br />
computers.<br />
<strong>WaveLAN</strong>/<strong>PCMCIA</strong> User’s Guide 1-3
Introduction<br />
Kit Contents<br />
<strong>WaveLAN</strong> User’s Guide 1<br />
An<br />
● Apple Classic environments<br />
● Apple Open Transport environments<br />
overview of the User’s Guide is described in the Preface on<br />
page -ix of this document.<br />
You can download this document in electronic format (Adobe<br />
Acrobat PDF) form the <strong>WaveLAN</strong> <strong>web</strong>site:<br />
http://www.wavelan.com<br />
1-4 <strong>WaveLAN</strong>/<strong>PCMCIA</strong> User’s Guide
Connecting to Ad-Hoc<br />
Workgroups 1<br />
Figure 1-2<br />
1Ad-Hoc Wireless Workgroup<br />
Connecting to an<br />
Infrastructure 1<br />
Introduction<br />
Network Configurations<br />
Network Configurations 1<br />
Your <strong>WaveLAN</strong>/<strong>PCMCIA</strong> station can participate in group<br />
workplace computing along with other portable or desktop<br />
computers equipped with <strong>WaveLAN</strong> adapter cards. The<br />
wireless workgroup (or ‘cell’) is identified by a Network<br />
Identification Designator (NWID). To connect to the wireless<br />
workgroup, all stations must be configured with the same<br />
NWID. In ad-hoc workgroups, this NWID is usually an NWID<br />
code agreed upon by the participants of the workgroup.<br />
Where cable physically connects wired stations in an Ethernet<br />
network, the NWID logically connects the wireless stations in<br />
a <strong>WaveLAN</strong> cell as pictured in Figure 1-2.<br />
When you would like to connect your <strong>WaveLAN</strong>/<strong>PCMCIA</strong><br />
station into an existing wired LAN infrastructure, your<br />
wireless cell can be extended with a WavePOINT access point;<br />
a transparent bridge between the <strong>WaveLAN</strong> and Ethernet<br />
stations. Figure 1-3 on page 1-6 illustrates the <strong>WaveLAN</strong><br />
Infrastructure concept.<br />
All members of the <strong>WaveLAN</strong> cell must be configured with<br />
the same <strong>WaveLAN</strong> Network ID (NWID). In this case, the<br />
NWID value is determined by the NWID value that is<br />
programmed into the WavePOINT unit.<br />
<strong>WaveLAN</strong>/<strong>PCMCIA</strong> User’s Guide 1-5
Introduction<br />
Network Configurations<br />
Figure 1-3<br />
1<strong>WaveLAN</strong> Infrastructure<br />
Roaming Operation 1<br />
Mobile stations have access to the wired LAN when within<br />
range of the WavePOINT, and using the correct NWID value.<br />
In multi-cell environments, where multiple WavePOINTs have<br />
been placed at selected locations within the facility, a mobile<br />
station would need to use different NWID values, each time it<br />
enters another wireless cell.<br />
For proper wireless operation, each cell must be identified by a<br />
unique NWID, that the LAN Administrator can program into<br />
the WavePOINT unit (as described in the documentation that is<br />
shipped with the WavePOINT unit).<br />
To allow a mobile station to remain seamlessly connected to<br />
the network, you can setup the <strong>WaveLAN</strong> devices for roaming<br />
operation.<br />
For roaming operation (as pictured in Figure 1-4 on page 1-7,<br />
you can group all <strong>WaveLAN</strong> devices that belong to the same<br />
LAN into a logical group, called the ‘The Domain’.<br />
The Domain is identified by a unique Domain ID.<br />
1-6 <strong>WaveLAN</strong>/<strong>PCMCIA</strong> User’s Guide
Figure 1-4<br />
1<strong>WaveLAN</strong> Roaming Domain<br />
Introduction<br />
Network Configurations<br />
To connect your station to a <strong>WaveLAN</strong> Domain, your<br />
<strong>WaveLAN</strong>/<strong>PCMCIA</strong> station must use the same Domain ID as<br />
the Domain ID value that your LAN Administrator<br />
programmed into the WavePOINT access points.<br />
To allow your <strong>WaveLAN</strong>/<strong>PCMCIA</strong> station to roam at will<br />
throughout the Domain while remaining connected to the<br />
network:<br />
1 Enable the roaming feature, and<br />
2 Configure your <strong>WaveLAN</strong>/<strong>PCMCIA</strong> station to use the<br />
same Domain ID as the WavePOINT access points<br />
Once properly configured, your wireless station will be able to<br />
automatically retrieve the NWID value that is required to<br />
communicate within a specific cell. Active communication<br />
remains possible as long as the station remains within range of<br />
the WavePOINT access points of your Domain.<br />
Note: To support roaming <strong>WaveLAN</strong> stations, make sure the<br />
WavePOINTs have the roaming feature enabled as well, and<br />
that both stations and WavePOINTs use an identical Domain<br />
ID value.<br />
<strong>WaveLAN</strong>/<strong>PCMCIA</strong> User’s Guide 1-7
Introduction<br />
<strong>WaveLAN</strong>/<strong>PCMCIA</strong> Features<br />
Power Management 1<br />
<strong>WaveLAN</strong>/<strong>PCMCIA</strong> Features 1<br />
Using spread-spectrum radio communications technology,<br />
<strong>WaveLAN</strong>/<strong>PCMCIA</strong> brings the benefits of wireless<br />
connectivity to the mobile computer user.<br />
<strong>WaveLAN</strong>/<strong>PCMCIA</strong> conforms to the <strong>PCMCIA</strong> PC Card<br />
standard and supports industry-standard network operating<br />
systems.<br />
In addition, <strong>WaveLAN</strong>/<strong>PCMCIA</strong> provides:<br />
● Station mobility (up to pedestrian speed).<br />
● Roaming (when used with WavePOINT or compatible<br />
access points).<br />
● “Hot Card Swap” and “Phantom Binding” (when installed<br />
in Windows 95/NT environments and on MS-DOS<br />
systems that have <strong>PCMCIA</strong> Card and Socket Services<br />
installed).<br />
<strong>WaveLAN</strong>/<strong>PCMCIA</strong> is fully interoperable with other members<br />
of the <strong>WaveLAN</strong> family of wireless LAN products.<br />
<strong>WaveLAN</strong> provides a power management feature which<br />
allows the card to be put into a low power consuming state<br />
when no active communication is taking place. The card will<br />
become active at regular intervals to respond to network<br />
Watchdog messages, thereby maintaining the network<br />
connection. Using this feature can result in better battery<br />
performance for mobile users. The feature is configurable to<br />
take account of the specific Watchdog parameter settings used<br />
by the network operating system. Power Management is<br />
currently available for the <strong>WaveLAN</strong> ODI driver only.<br />
1-8 <strong>WaveLAN</strong>/<strong>PCMCIA</strong> User’s Guide
Power Management &<br />
Network Time-outs 1<br />
Introduction<br />
<strong>WaveLAN</strong>/<strong>PCMCIA</strong> Features<br />
Note: You may need to disable other power management schemes<br />
active in your computer for <strong>WaveLAN</strong> power management to<br />
operate correctly.<br />
Some network operating systems log users off automatically<br />
after a period of inactivity. This can happen as a result of the<br />
card being removed, the station being out of range of a<br />
WavePOINT or <strong>WaveLAN</strong> cell, or through using a (non-<br />
<strong>WaveLAN</strong>) power management scheme. If this is likely to<br />
cause problems you should consult your Network Supervisor<br />
about modifying the network’s timer values, and/or disable the<br />
power management function.<br />
<strong>WaveLAN</strong>/<strong>PCMCIA</strong> User’s Guide 1-9
Chapter 2<br />
Hardware Installation<br />
Table of Contents<br />
Hardware Installation<br />
Installing your <strong>WaveLAN</strong> Kit 2-1<br />
Inserting the PC Card 2-1<br />
Mounting the Antenna Module 2-2<br />
Proceeding with the Installation 2-2<br />
Card Removal and Re-insertion 2-3<br />
Windows 95 and Windows NT Systems 2-3<br />
Removing the Card from Windows 95 2-4<br />
Reinserting the Card in Windows 95 2-5<br />
Removing the Card from Windows NT 2-5<br />
Reinserting the Card in Windows NT 2-5<br />
MS-DOS Systems 2-5<br />
CS&SS-Based Installations 2-5<br />
Enabler-Based Installations 2-6<br />
Apple Powerbook Systems 2-6
Inserting the PC Card 2<br />
Figure 2-1<br />
2Inserting the card (side slot)<br />
Hardware Installation2<br />
Installing your <strong>WaveLAN</strong> Kit<br />
Installing your <strong>WaveLAN</strong> Kit 2<br />
The <strong>WaveLAN</strong>/<strong>PCMCIA</strong> Card will fit into any PC Card Type<br />
II slot. To insert the <strong>WaveLAN</strong>/<strong>PCMCIA</strong> Card:<br />
1 Connect the antenna module to the <strong>WaveLAN</strong> PC Card.<br />
2 Slide the card into a <strong>PCMCIA</strong> slot in the computer (see<br />
Figure 2-1).<br />
<strong>WaveLAN</strong>/<strong>PCMCIA</strong> User’s Guide 2-1
Hardware Installation<br />
Installing your <strong>WaveLAN</strong> Kit<br />
Mounting the Antenna<br />
Module 2<br />
Proceeding with the<br />
Installation 2<br />
If desired, you can use the antenna mounting bracket to fix the<br />
<strong>WaveLAN</strong>/<strong>PCMCIA</strong> antenna module to your computer as<br />
shown in Figure 2-1.<br />
1 Slide the antenna module onto the mounting bracket.<br />
2 Determine where you would like to place the antenna<br />
module<br />
Caution: Mind that the position of the antenna module allows the cable<br />
to bend naturally around corners and that no excessive force is<br />
applied to the cable connector, for example when opening or<br />
closing the display panel of your laptop computer.<br />
3 When you have determined where you want to affix the<br />
bracket, remove the protective strip from the adhesive pad<br />
4 With the Antenna Module attached, press the bracket<br />
firmly in position.<br />
You can now remove and remount the antenna module<br />
whenever you wish.<br />
Once you have the <strong>WaveLAN</strong>/<strong>PCMCIA</strong> hardware installed,<br />
you can proceed with the <strong>WaveLAN</strong> driver installation. Turn<br />
to the chapter that applies to the operating system installed on<br />
your computer:<br />
● Chapter 3, “Installation for Windows 95 & Windows NT”<br />
● Chapter 5, “Installation for MS-DOS” This chapter also<br />
applies to computers that run the Windows 3.11 user<br />
interface.<br />
● Chapter 8, “Installation for Apple Powerbook Systems”.<br />
2-2 <strong>WaveLAN</strong>/<strong>PCMCIA</strong> User’s Guide
Windows 95 and<br />
Windows NT Systems 2<br />
Removing the Card from<br />
Windows 95 2<br />
Hardware Installation<br />
Card Removal and Re-insertion<br />
Card Removal and Re-insertion 2<br />
Depending on the type of operating system installed on your<br />
computer, you can remove and re-insert your<br />
<strong>WaveLAN</strong>/<strong>PCMCIA</strong> Card whenever you like.<br />
This feature, also referred to as ‘Hot Swapping’ for PC Cards<br />
is supported by the following installation types:<br />
● Windows 95 Systems<br />
● “CS&SS-Based Installations” for “MS-DOS Systems”<br />
(see page 2-5)<br />
Note: When re-inserting the card, the <strong>WaveLAN</strong>/<strong>PCMCIA</strong> Card will<br />
become operational again. However your network operating<br />
system may not be able to restore the network connection. For<br />
certain network operating systems, you may need to restart<br />
your computer to rerun the network login procedures, before<br />
you can reconnect to the network.<br />
Although Windows 95 and Windows NT (version 4.0) are<br />
similar in appearance, there is a major difference between the<br />
two operating systems, affecting the support for removal and<br />
re-insertion of PC Cards (‘Hot Swapping’) and ‘plug & play’<br />
support.<br />
You can remove the <strong>WaveLAN</strong> card at any time from a<br />
computer that runs on the Windows 95 or Windows NT<br />
Operating System. You are advised however to follow the<br />
procedure as described for each of the operating systems.<br />
You are advised to disable the PC Card prior to removing the<br />
card. This will allow the operating system to disable the<br />
<strong>WaveLAN</strong> drivers. To disable your PC card:<br />
<strong>WaveLAN</strong>/<strong>PCMCIA</strong> User’s Guide 2-3
Hardware Installation<br />
Card Removal and Re-insertion<br />
Figure 2-2<br />
2PC Card Properties Window<br />
Reinserting the Card in<br />
Windows 95 2<br />
1 Click the Start button on the Windows Taskbar.<br />
2 Point to ‘Settings’ and click the ‘Control Panel’ item<br />
3 On the Control Panel double-click the PC Card icon to<br />
open the ‘PC Card (<strong>PCMCIA</strong>) Properties’ window.<br />
4 Select the PC Card slot that contains the<br />
<strong>WaveLAN</strong>/<strong>PCMCIA</strong> Card, and click the Stop button.<br />
5 Wait for the Operating System to acknowledge the drivers<br />
have been disabled and remove the <strong>WaveLAN</strong>/<strong>PCMCIA</strong><br />
Card from the PC Card slot.<br />
Hint: When the ‘Show control on taskbar’ item on the ‘PC Card<br />
(<strong>PCMCIA</strong>) Properties’ window is selected as pictured in<br />
Figure 2-2, you can skip steps 1 to 3 by double-clicking the PC<br />
Card icon on the right-bottom side of your screen on the<br />
Windows task bar.<br />
Windows 95 systems support ‘plug & play’, i.e. you can easily<br />
re-insert the card. Windows 95 will detect the ‘new hardware<br />
and enable the drivers again.<br />
2-4 <strong>WaveLAN</strong>/<strong>PCMCIA</strong> User’s Guide
Removing the Card from<br />
Windows NT 2<br />
Reinserting the Card in<br />
Windows NT 2<br />
MS-DOS Systems 2<br />
2 CS&SS-Based Installations When<br />
Hardware Installation<br />
Card Removal and Re-insertion<br />
To remove your <strong>WaveLAN</strong>/<strong>PCMCIA</strong> Card from a Windows<br />
NT system you are advised to power off your computer and<br />
remove the card. Optionally restart your computer if you<br />
would like to proceed working with your computer without the<br />
<strong>WaveLAN</strong>/<strong>PCMCIA</strong> card.<br />
Windows NT systems (version 3.51 and v.4.0) do not support<br />
‘plug & play’. When you would like to re-insert the<br />
<strong>WaveLAN</strong>/<strong>PCMCIA</strong> card into a computer that runs the<br />
Windows NT operating system, you are advised to:<br />
1 Power off the computer<br />
2 (Re-)Insert the <strong>WaveLAN</strong>/<strong>PCMCIA</strong> Card, and<br />
3 Power-up the computer again.<br />
The Windows NT system will now detect the<br />
<strong>WaveLAN</strong>/<strong>PCMCIA</strong> card again and install the required<br />
<strong>WaveLAN</strong> drivers.<br />
In MS-DOS environments, you can install the<br />
<strong>WaveLAN</strong>/<strong>PCMCIA</strong> cards using either Card Services and<br />
Socket Services (CS&SS), or the Enabler program (described<br />
in Chapter 5, “Installation for MS-DOS”.)<br />
you install the <strong>WaveLAN</strong>/<strong>PCMCIA</strong> card into a MS-<br />
DOS based system that supports Card and Socket Services, the<br />
<strong>WaveLAN</strong> drivers will support “Hot Swapping” and “Phantom<br />
Binding”.<br />
Phantom Binding is the feature where the Card Services and<br />
Socket Services will load the <strong>WaveLAN</strong> software without the<br />
card being present.<br />
Hot Swapping refers to the feature where you can insert or<br />
remove the card at any time when the computer is running.<br />
Communications will cease when the card is removed and will<br />
recommence when the card is replaced in the computer.<br />
Same network restrictions apply as described in the note on<br />
page 2-3.<br />
<strong>WaveLAN</strong>/<strong>PCMCIA</strong> User’s Guide 2-5
Hardware Installation<br />
Card Removal and Re-insertion<br />
2 Enabler-Based Installations In<br />
Apple Powerbook<br />
Systems 2<br />
MS-DOS based computers that do not support Card<br />
Services and Socket Services (CS&SS) you would typically<br />
install <strong>WaveLAN</strong>/<strong>PCMCIA</strong> with the Enabler program.<br />
In Enabler based installations, you will still be able to remove<br />
the <strong>WaveLAN</strong> card and re-insert it later. However, if you<br />
would insert another PC Card into your computer in the<br />
meantime, this might adversely affect the ability of the<br />
<strong>WaveLAN</strong>/<strong>PCMCIA</strong> card to resume operation.<br />
Inserting another card while the <strong>WaveLAN</strong> card is removed is<br />
not recommended for Enabler-based installations.<br />
Once your <strong>WaveLAN</strong>/<strong>PCMCIA</strong> card has been configured (as<br />
described in Chapter 8, “Installation for Apple Powerbook<br />
Systems”), you can insert your <strong>WaveLAN</strong>/<strong>PCMCIA</strong> card<br />
either before or after you boot your Powerbook System.<br />
2-6 <strong>WaveLAN</strong>/<strong>PCMCIA</strong> User’s Guide
Table of Contents<br />
Installation for Windows 95 & Windows NT<br />
Chapter 3<br />
Installation for Windows 95 &<br />
Windows NT<br />
Introduction 3-1<br />
What You Need to Know 3-1<br />
Plug & Play Support 3-1<br />
User Profiles 3-2<br />
Preparing Driver Installation 3-4<br />
Getting Started 3-4<br />
Preparation for Windows NT Systems 3-5<br />
Installing the Miniport Driver 3-11<br />
Network Installation 3-14<br />
Setting the <strong>WaveLAN</strong> Parameters 3-15<br />
Finishing your <strong>WaveLAN</strong> Installation 3-21<br />
Working with <strong>WaveLAN</strong> & Windows 3-24<br />
View other <strong>WaveLAN</strong> stations 3-24<br />
Checking the Network Protocol Settings 3-26<br />
Display <strong>WaveLAN</strong> Parameters 3-28<br />
Installing WaveMANAGER/CLIENT 3-30<br />
About this Utility 3-30<br />
Installing this Utility 3-30
What You Need to Know3<br />
Plug & Play Support 3<br />
Installation for Windows 95 & Windows NT3<br />
Introduction<br />
Introduction 3<br />
Installing a <strong>WaveLAN</strong>/<strong>PCMCIA</strong> card requires the same level<br />
of expertise that you would need to install any other type of<br />
standard Ethernet network adapter card. It is assumed that you<br />
have a working knowledge of standard Window 95 and<br />
Windows NT operations and an average knowledge of<br />
installing network adapter cards.<br />
Although similar in appearance Windows 95 and Windows NT<br />
are operating systems that show different behavior when<br />
installing new hardware for your computer. Major differences<br />
are:<br />
● Plug & Play Support<br />
● User Profiles<br />
Windows 95 systems support ‘Plug & Play’ for PC Cards.<br />
Once a card is inserted into the computer, the Windows 95<br />
system will automatically detect the card, and enable the<br />
<strong>WaveLAN</strong> Miniport Driver. When Windows 95 can not find<br />
the required driver, for example when this is the very first time<br />
that you insert the <strong>WaveLAN</strong>/<strong>PCMCIA</strong> card into your<br />
computer, the Windows 95 operating system will prompt you<br />
to install the driver.<br />
Once the <strong>WaveLAN</strong> Miniport Driver is installed, you can<br />
remove and re-insert the card whenever you like. This is also<br />
referred to as ‘Hot Swapping’.<br />
Windows NT operating systems (version 3.51 and v. 4.0) do<br />
not support ‘plug and play’. This means that you will need to<br />
‘introduce’ the hardware to your computer, in order to install<br />
the <strong>WaveLAN</strong>/<strong>PCMCIA</strong> card.<br />
<strong>WaveLAN</strong>/<strong>PCMCIA</strong> User’s Guide 3-1
Installation for Windows 95 & Windows NT<br />
Introduction<br />
User Profiles 3<br />
Second drawback is that your Windows NT system will not<br />
support ‘Hot Swapping’ of PC Cards.<br />
When you would like to remove or re-insert PC Cards from a<br />
computer that runs the Windows NT operating system, you<br />
will always need to:<br />
1 Power off your computer<br />
2 Remove or re-insert the <strong>WaveLAN</strong>/<strong>PCMCIA</strong> card<br />
3 Restart your computer again.<br />
Note: ‘Plug and Play’ support for Windows NT Operating systems<br />
will be available for Windows NT version 5.0, which is<br />
expected to be released by Microsoft Corporation later in<br />
1998.<br />
Both Windows 95 and Windows NT operating systems work<br />
with user profiles that enable users to specify user-specific<br />
settings in computer environments where multiple persons<br />
share the same computer terminal.<br />
For Windows 95 systems the user profiles only concern the<br />
visual appearance of the Windows 95 desktop and user-defined<br />
preferences. The Windows 95 user profiles do not have any<br />
impact on <strong>WaveLAN</strong> Installation.<br />
On Windows NT systems however, user profiles (accounts) are<br />
associated with dedicated levels of authority (privileges), for<br />
example:<br />
● Users, who are allowed to change the visual appearance of<br />
the Windows NT desktop and user-defined preferences.<br />
● Power Users, who can create User accounts or User<br />
Groups<br />
● Administrators, who can manage and control the overall<br />
configuration of the workstation.<br />
3-2 <strong>WaveLAN</strong>/<strong>PCMCIA</strong> User’s Guide
Installation for Windows 95 & Windows NT<br />
Introduction<br />
Note: To install (or uninstall) the <strong>WaveLAN</strong>/<strong>PCMCIA</strong> Card in a<br />
Windows NT environment, you will need to login as the<br />
‘Administrator’ or ensure that your login profile provides the<br />
same level of privileges.<br />
The privilege settings for each user (account) are set in the<br />
Microsoft Windows NT ‘User Manager’ program. Please<br />
consult the documentation that was shipped with your<br />
Microsoft Windows NT Operating System or station for more<br />
information.<br />
<strong>WaveLAN</strong>/<strong>PCMCIA</strong> User’s Guide 3-3
Installation for Windows 95 & Windows NT<br />
Preparing Driver Installation<br />
Getting Started 3<br />
Preparing Driver Installation 3<br />
When installing a <strong>WaveLAN</strong>/<strong>PCMCIA</strong> Card you will typically<br />
install:<br />
● The <strong>WaveLAN</strong> Miniport Driver<br />
● Network (client) Operating Software and protocols<br />
● (optionally) The WaveMANAGER/CLIENT diagnostics<br />
program (described on page 3-30).<br />
Network Client software is included with the Windows 95 and<br />
Windows NT installation software. Before you start the<br />
installation you are advised to keep the Windows CD-ROM or<br />
software diskettes at hand.<br />
Note: If you are upgrading from an earlier version of the <strong>WaveLAN</strong><br />
Miniport driver, please read “Upgrading from earlier Driver<br />
Versions” on page D-4 first.<br />
As the Windows operating systems differ slightly (see “What<br />
You Need to Know” on page 3-1) some of the screens pictured<br />
in this chapter may look different from the actual display on<br />
your screen. The parameter settings for your <strong>WaveLAN</strong> card<br />
however will be similar for both Windows 95 and Windows<br />
NT systems.<br />
To install the <strong>WaveLAN</strong>/<strong>PCMCIA</strong> Card, proceed as follows:<br />
1 Insert the <strong>WaveLAN</strong>/<strong>PCMCIA</strong> card into your computer.<br />
2 Make sure the cable from the antenna module is properly<br />
connected to the <strong>WaveLAN</strong>/<strong>PCMCIA</strong> Card.<br />
3 Power up your computer.<br />
When your computer system runs the Windows 95 Operating<br />
System, the ‘Plug & Play’ functionality will detect your<br />
<strong>WaveLAN</strong>/<strong>PCMCIA</strong> Card and pop-pup with a message<br />
3-4 <strong>WaveLAN</strong>/<strong>PCMCIA</strong> User’s Guide
Preparation for Windows<br />
NT Systems 3<br />
Enabling the PC Card<br />
Controller 3<br />
Installation for Windows 95 & Windows NT<br />
Preparing Driver Installation<br />
identifying it is installing the <strong>WaveLAN</strong> drivers. Skip to<br />
“Installing the Miniport Driver” on page 3-11 to proceed with<br />
the installation.<br />
When installing <strong>WaveLAN</strong>/<strong>PCMCIA</strong> on a Windows NT<br />
operating system (version 3.51 or v.4.0) you will need to<br />
perform the Preparation for Windows NT Systems as<br />
described below, prior to Installing the Miniport Driver.<br />
When your computer runs the Windows NT Operating system,<br />
you will need to perform a few additional steps to introduce<br />
the card to your computer. These steps include:<br />
● Enabling the PC Card Controller of your computer<br />
● Running Windows NT Diagnostics, to verify the<br />
availability of the default I/O Port Address and IRQ value<br />
for the <strong>WaveLAN</strong>/<strong>PCMCIA</strong> card.<br />
● Enabling Network Support for your (client) station.<br />
When this is the first time you install a PC Card into your<br />
computer, you may probably need to enable the PC Card<br />
Controller. This is to ‘instruct’ the Windows NT System to<br />
actively look for cards in the PC Card sockets at start-up.<br />
1 Click the ‘Start’ button on the Windows Taskbar.<br />
2 Point to Settings and click the ‘Control Panel’ item.<br />
3 In the Control Panel window, double-click the PC Card’<br />
icon to open the PC Card Properties window (see Figure<br />
3-1 on page 3-6).<br />
4 In the PC Card Properties window, double-click one of the<br />
PC Card Sockets.<br />
5 Click the OK button to confirm and close the PC Card<br />
Properties window.<br />
<strong>WaveLAN</strong>/<strong>PCMCIA</strong> User’s Guide 3-5
Installation for Windows 95 & Windows NT<br />
Preparing Driver Installation<br />
Figure 3-1<br />
3Enabling the PC Card<br />
Controller<br />
Running Windows NT<br />
Diagnostics 3<br />
When installing the <strong>WaveLAN</strong>/<strong>PCMCIA</strong> Card to your<br />
Windows NT operating system, you will be prompted to<br />
confirm or modify the <strong>WaveLAN</strong> factory-set values for I/O<br />
Port and Interrupt Request vector (IRQ):<br />
● I/O Port 0320<br />
● IRQ 11<br />
Unlike the Windows 95 operating system, Windows NT is not<br />
able to check automatically whether the proposed values are<br />
already used by another device.<br />
To avoid the possibility of a hardware conflict with another<br />
device, you are advised to use the Windows NT Diagnostic<br />
program, to determine whether the default I/O port and IRQ<br />
for your <strong>WaveLAN</strong> card are available, and if not to select an<br />
alternative value.<br />
To run the Windows NT Diagnostics:<br />
3-6 <strong>WaveLAN</strong>/<strong>PCMCIA</strong> User’s Guide
Figure 3-2<br />
3Verifying IRQ vector<br />
Availability<br />
Installation for Windows 95 & Windows NT<br />
Preparing Driver Installation<br />
1 Click the ‘Start’ button on the Windows NT Taskbar.<br />
2 Point to Programs and select the item ‘Administrative<br />
Tools’.<br />
3 From the list of ‘Administrative Tools’ click the item<br />
‘Windows NT Diagnostics’.<br />
4 From the Windows NT Diagnostics screen, click the tab<br />
‘Resources’ to display the window pictured in Figure 3-2<br />
below.<br />
.<br />
The ‘Resources’ tab (see Figure 3-2) enables you to verify<br />
a number of configuration settings for the hardware<br />
devices installed into your computer.<br />
5 Click the button ‘IRQ’ to display the Interrupt Request<br />
Vectors (IRQ) currently in use by other devices in your<br />
computer.<br />
The default IRQ for <strong>WaveLAN</strong>/<strong>PCMCIA</strong> is 11.<br />
Is the value 11 already listed?<br />
<strong>WaveLAN</strong>/<strong>PCMCIA</strong> User’s Guide 3-7
Installation for Windows 95 & Windows NT<br />
Preparing Driver Installation<br />
3-8 <strong>WaveLAN</strong>/<strong>PCMCIA</strong> User’s Guide<br />
● If No, you can use the <strong>WaveLAN</strong> default. Write down<br />
IRQ 11 and proceed with the next step.<br />
● If Yes, this means that another device is already using<br />
the IRQ, i.e. you will need to select another value for<br />
your <strong>WaveLAN</strong>/<strong>PCMCIA</strong> card.<br />
See whether one of the following values is available<br />
(i.e. not listed in the Windows NT Diagnostics<br />
window): IRQ 03, 04, 05, 07, 12, 15<br />
Select one non-listed value and write it down before<br />
you proceed with the next step.<br />
6 Click the button I/O Port to display the ‘I/O Base<br />
Addresses’ currently in use by other devices in your<br />
computer (see Figure 3-3 on page 3-9).<br />
The default I/O Port for <strong>WaveLAN</strong>/<strong>PCMCIA</strong> is 0320-<br />
0327. Is this value already listed?<br />
● If No, you can use the <strong>WaveLAN</strong> default. Write down<br />
I/O Base 0320 and proceed with the next step.<br />
● If Yes, this means that another device is already using<br />
this port address, i.e. you will need to select another<br />
value for your <strong>WaveLAN</strong>/<strong>PCMCIA</strong> card.
Figure 3-3<br />
3Verifying I/O Port Availability<br />
Installation for Windows 95 & Windows NT<br />
Preparing Driver Installation<br />
When the default <strong>WaveLAN</strong> I/O Port has already been<br />
assigned to another device:<br />
1 Select one of the alternative values from the table<br />
below<br />
<strong>WaveLAN</strong>/<strong>PCMCIA</strong> Supported I/O Base Addresses<br />
0320 (Default) 0350 0380 03B0 03E0<br />
0328 0358 0388 03B8 03E8<br />
0330 0360 0390 03C0 03F0<br />
0338 0368 0398 03C8<br />
0340 0370 03A0 03D0<br />
0348 0378 03A8 03D8<br />
2 Verify if this alternative value is available (i.e. not<br />
listed in the Windows NT Diagnostics window).<br />
<strong>WaveLAN</strong>/<strong>PCMCIA</strong> User’s Guide 3-9
Installation for Windows 95 & Windows NT<br />
Preparing Driver Installation<br />
Enabling Network Support 3<br />
To<br />
3 Write down the alternative I/O Port value and proceed<br />
with the next step.<br />
Having finished these steps, you should now have a note that<br />
identifies the I/O Port Address and IRQ value that you can use<br />
to install the <strong>WaveLAN</strong> Miniport Driver.<br />
introduce your <strong>WaveLAN</strong> network adapter card to the<br />
Windows NT Operating System, you will need to enable<br />
Network support for your <strong>WaveLAN</strong> station.<br />
1 From the Windows NT Taskbar click the ‘Start’ button.<br />
2 Point to Settings and click the ‘Control Panel’ item.<br />
3 In the Control Panel window, double-click the ‘Network’<br />
icon to open the ‘Network Settings’ window.<br />
If no network has been installed yet, you will be prompted<br />
to install it now.<br />
4 Click “Yes” to install Windows NT Networking<br />
Windows NT Networking Setup will start to determine the<br />
type of network adapter card that you would like to use to<br />
connect to the network.<br />
5 When prompted to start the automatic “Network Adapter<br />
Card Detection”, select “Do Not Detect”.<br />
The automatic card detection does not work with<br />
<strong>WaveLAN</strong> cards.<br />
Windows NT will display a new window to confirm it did<br />
not detect a network card.<br />
6 Click ‘Continue’ to select the card manually and proceed<br />
with “Installing the Miniport Driver” on page 3-11.<br />
3-10 <strong>WaveLAN</strong>/<strong>PCMCIA</strong> User’s Guide
Figure 3-4<br />
3Select your Network Adapter<br />
Installation for Windows 95 & Windows NT<br />
Installing the Miniport Driver<br />
Installing the Miniport Driver 3<br />
When Windows 95 automatically detected your hardware, it<br />
will prompt you to select a driver from a list or to install the<br />
driver from a ‘Disk provided by Hardware Manufacturer’.<br />
Some Windows operating systems may prompt you to select<br />
the type of network adapter first, to select the appropriate<br />
driver (see Figure 3-4).<br />
This is usually the case when:<br />
● Your computer came with a factory-installed version of<br />
Windows 95 (usually referred to as Windows 95 OSR2).<br />
● Your computer runs Windows NT (v.4.0), and you used the<br />
‘Select Card Manually’ option as described under<br />
“Enabling Network Support” on page 3-10.<br />
Hint: To make sure you install the latest available driver, always<br />
select the ‘Disk provided by Hardware Manufacturer’ or the<br />
‘Have Disk’ option, to install the driver from the diskette that<br />
<strong>WaveLAN</strong>/<strong>PCMCIA</strong> User’s Guide 3-11
Installation for Windows 95 & Windows NT<br />
Installing the Miniport Driver<br />
Figure 3-5<br />
3Select <strong>WaveLAN</strong> Adapter<br />
Type<br />
came with your <strong>WaveLAN</strong> card, or from the set of files you<br />
downloaded from our <strong>WaveLAN</strong> <strong>web</strong>site.<br />
1 In the ‘Select Network Adapter’ window (see Figure 3-4)<br />
click the ‘Have Disk’ button.<br />
2 Insert the <strong>WaveLAN</strong> software disk for Windows 95 & NT<br />
environments into floppy drive A: of your computer and<br />
click the ‘OK’ button to proceed.<br />
Alternatively use the ‘Browse’ option to open the folder<br />
where you saved the driver files that you downloaded form<br />
the <strong>WaveLAN</strong> <strong>web</strong>site. Click ‘OK’ to proceed.<br />
Windows NT systems may prompt you to select the type of<br />
<strong>WaveLAN</strong> card (see Figure 3-5). Select the type and brand<br />
name that matches your hardware and click OK to confirm.<br />
Windows will start copying files from the Windows<br />
installation disks or CD-ROM and the <strong>WaveLAN</strong> installation<br />
diskette.<br />
If the system prompts you to identify the location of files (see<br />
Figure 3-6), enter the correct drive and directory.<br />
3-12 <strong>WaveLAN</strong>/<strong>PCMCIA</strong> User’s Guide
Figure 3-6<br />
3Identify the location of files<br />
Installation for Windows 95 & Windows NT<br />
Installing the Miniport Driver<br />
● For Windows System files (typically *.dll) this is<br />
usually the Windows CD-ROM. e.g. D:\win95.<br />
● When your computer came with the Windows<br />
Operating System factory-installed, point to the<br />
directory that contains the Windows Setup files<br />
(*.cab): e.g. c:\windows\options\cabs<br />
● When the system prompts you to identify the<br />
<strong>WaveLAN</strong> Driver files (typically file names starting<br />
with the characters ‘wv’), specify the drive and<br />
directory that contains your <strong>WaveLAN</strong> software (e.g.<br />
the floppy disk drive or directory where you saved<br />
downloaded files).<br />
Hint: When you had a network adapter installed on your computer<br />
before, most Windows System files associated with<br />
networking (*.dll) are already available on your hard disk<br />
drive. If you do not have the Windows CD-ROM available,<br />
you may try replacing the proposed path in the ‘Copy files<br />
from’ dialog box with:<br />
C:\windows\system or<br />
C:\windows\<br />
If the Operating System continues the installation<br />
procedure without the repeated error message, the<br />
requested files were already on the hard-disk drive.<br />
3 Click the “OK” button to proceed.<br />
<strong>WaveLAN</strong>/<strong>PCMCIA</strong> User’s Guide 3-13
Installation for Windows 95 & Windows NT<br />
Installing the Miniport Driver<br />
Network Installation 3<br />
Figure 3-7<br />
3Windows Network Properties<br />
When this is the very first time that Networking support is<br />
installed onto your computer, the Windows operating system<br />
will prompt you to enter a computer and workgroup name.<br />
These names will be used to identify your computer on the<br />
Microsoft Network Neighborhood.<br />
Click the “OK” button to display the window as pictured in<br />
Figure 3-7.<br />
1 Select the “Workgroup” Field.<br />
2 Specify a unique name for your computer.<br />
3 Enter the name of your workgroup.<br />
4 (Optional) Provide a description of the computer.<br />
Note: All computers that should be able to share files or printers<br />
must use the same workgroup name. For more information<br />
about setting your network, consult your Windows<br />
documentation or the Windows on-line help information.<br />
3-14 <strong>WaveLAN</strong>/<strong>PCMCIA</strong> User’s Guide
Setting the <strong>WaveLAN</strong><br />
Parameters 3<br />
Figure 3-8<br />
3<strong>WaveLAN</strong> Parameters<br />
(Win95)<br />
Figure 3-9<br />
3Confirm I/O Port and IRQ<br />
(Windows NT only)<br />
Installation for Windows 95 & Windows NT<br />
Installing the Miniport Driver<br />
When you confirm the Windows workgroup parameters by<br />
clicking the OK button, Windows will open the parameter<br />
window for your <strong>WaveLAN</strong>/<strong>PCMCIA</strong> Adapter.<br />
When you run the Windows 95 operating system, the window<br />
will look as pictured in Figure 3-8.<br />
When you are running the Windows NT operating system, you<br />
will be prompted to confirm or modify the settings of the I/O<br />
Port address of your <strong>WaveLAN</strong> Adapter, and its IRQ value<br />
(see Figure 3-9).<br />
<strong>WaveLAN</strong>/<strong>PCMCIA</strong> User’s Guide 3-15
Installation for Windows 95 & Windows NT<br />
Installing the Miniport Driver<br />
Which Parameters do You<br />
Need? 3<br />
Enter the values that you wrote down when running the<br />
Windows NT Diagnostics as described on page 3-6. When you<br />
click the ‘Continue’ button, Windows NT will display the<br />
parameter window for your <strong>WaveLAN</strong>/<strong>PCMCIA</strong> Adapter as<br />
pictured in Figure 3-10 on page 3-20.<br />
This window enables you to specify the <strong>WaveLAN</strong> specific<br />
parameters, required to connect your computer to the network.<br />
When you are connecting your station to an ad-hoc network<br />
(see page 1-5), you will need to set the following parameters:<br />
● Network Identification Designator (NWID)<br />
● Station Name<br />
● (Optional) Encryption Enable and Encryption Key<br />
When connecting your station to a <strong>WaveLAN</strong> network<br />
infrastructure, you will need to set the following parameters:<br />
● Roaming Enable<br />
● Domain ID<br />
● (Optional) Beacon Key<br />
● Station Name<br />
● (Optional) Enable Encryption and enter the Encryption<br />
Key<br />
When you purchased a <strong>WaveLAN</strong> adapter with factoryinstalled<br />
security feature, you can optionally enable<br />
Encryption and set the Encryption key.<br />
Note: When connecting to an existing network, you may need to<br />
consult your network administrator for the parameter settings<br />
that apply to your network environment.<br />
To set the <strong>WaveLAN</strong> parameters:<br />
1 Select the parameter item in the Property list.<br />
2 Use the mouse to click the Value field.<br />
3 Enter the parameter value that applies to your network<br />
environment.<br />
3-16 <strong>WaveLAN</strong>/<strong>PCMCIA</strong> User’s Guide
NWID 3<br />
Roaming 3<br />
The<br />
When<br />
Installation for Windows 95 & Windows NT<br />
Installing the Miniport Driver<br />
4 Use the mouse again to go back to select the next<br />
parameter item.<br />
5 When finished click the “O.K.” button.<br />
Network Identification Designator (NWID) is a unique<br />
code, that logically connects stations in a single <strong>WaveLAN</strong><br />
network group (like cabling physically connects wired stations<br />
in a cabled network).<br />
Valid values are any four digit hexadecimal values in the range<br />
0100 H through FFFF H.<br />
All stations in a wireless workgroup must use the same NWID.<br />
When you would like to connect your station to an ad-hoc<br />
network (see “Connecting to Ad-Hoc Workgroups” on page<br />
1-5) you must enter the NWID value that is used by the other<br />
workgroup participants. This is usually a value agreed upon by<br />
the workgroup participants.<br />
When connecting to a <strong>WaveLAN</strong> Roaming Infrastructure (i.e.<br />
a <strong>WaveLAN</strong> network that includes WavePOINT access<br />
points), you may ignore the setting of the NWID field, as your<br />
station will retrieve the NWID automatically (see “Connecting<br />
to an Infrastructure” on page 1-5).<br />
you would like to connect your station to a <strong>WaveLAN</strong><br />
Roaming Infrastructure use this option to ‘Enable Roaming.’<br />
A Roaming Infrastructure is a <strong>WaveLAN</strong> network<br />
environment that includes WavePOINT access points (see<br />
“Connecting to an Infrastructure” on page 1-5).<br />
Roaming allows your station to connect automatically to any<br />
<strong>WaveLAN</strong> workgroup in the network environment, despite the<br />
fact that each wireless workgroup is using a different NWID.<br />
The station will listen for Beacon messages transmitted by<br />
WavePOINT access points to automatically retrieve the NWID<br />
code of a <strong>WaveLAN</strong> workgroup.<br />
<strong>WaveLAN</strong>/<strong>PCMCIA</strong> User’s Guide 3-17
Installation for Windows 95 & Windows NT<br />
Installing the Miniport Driver<br />
Domain ID 3<br />
Beacon Key 3<br />
The<br />
(Optional)<br />
If Roaming Enable is set to “ON”, you must also specify the:<br />
● Domain ID and<br />
● (optionally) the Beacon Key.<br />
If your wireless network environment does not include<br />
WavePOINT access points, set “Roaming Enable” to “OFF”.<br />
and set the NWID code to a value that matches the one used by<br />
the other wireless stations in the vicinity of your <strong>WaveLAN</strong><br />
station.<br />
Domain ID is a unique code, that connects multiple<br />
<strong>WaveLAN</strong> workgroups into one wireless network environment<br />
(the Domain).<br />
Valid Domain ID values are any four digit hexadecimal value<br />
in the range 0001 H through FFFF H.<br />
In <strong>WaveLAN</strong> Roaming Infrastructure networks, all <strong>WaveLAN</strong><br />
stations and WavePOINT access points must use the same<br />
Domain ID value.<br />
When connecting your station to an Ad-hoc network you may<br />
ignore this parameter.<br />
When you enable the Roaming Option, your mobile<br />
station will try to retrieve the NWID information from Beacon<br />
messages transmitted by the WavePOINT access point in the<br />
wireless domain.<br />
Your LAN Administrator however, may have configured your<br />
WavePOINT access points to use a Beacon Key that will<br />
encode the NWID information.<br />
When trying to connect your <strong>WaveLAN</strong> station to a <strong>WaveLAN</strong><br />
Infrastructure, consult your LAN Administrator for the correct<br />
Beacon Key value.<br />
Valid Beacon Key values are any four digit hexadecimal value<br />
in the range 0001 H through FFFF H.<br />
3-18 <strong>WaveLAN</strong>/<strong>PCMCIA</strong> User’s Guide
Encryption Enable 3<br />
Encryption Key 3<br />
(Optional)<br />
Installation for Windows 95 & Windows NT<br />
Installing the Miniport Driver<br />
Ad-hoc networks do not use Beacon messages, so when<br />
connecting to an ad-hoc network, you may ignore the Beacon<br />
Key parameter.<br />
This option can only be used when you are using a<br />
<strong>WaveLAN</strong> card has been equipped with a factory-installed<br />
security feature. If you want to encrypt wireless data<br />
transmissions, set encryption to “ON” and set the Encryption<br />
key.<br />
Note: When you decide to enable encryption for this station, please<br />
mind that communication will only be possible with<br />
<strong>WaveLAN</strong> stations and WavePOINT devices that:<br />
● Have a factory-installed security feature as well.<br />
● Have enabled their encryption feature.<br />
● Use exactly the same encryption key.<br />
Consult your LAN Administrator for information that applies<br />
to your network environment.<br />
Only<br />
needed if Encryption Enable is “ON”.<br />
A valid Encryption Key value is any 16 digit hexadecimal<br />
value, where the16 digits must be entered as 8 digit pairs.<br />
Each digit can be any hexadecimal value in the range of 0-9<br />
and A-F. The second digit of each pair however, must be an<br />
even hexadecimal value (i.e. 0,2,4,6,8,A,C or E).<br />
<strong>WaveLAN</strong>/<strong>PCMCIA</strong> User’s Guide 3-19
Installation for Windows 95 & Windows NT<br />
Installing the Miniport Driver<br />
Figure 3-10<br />
3<strong>WaveLAN</strong> Parameters<br />
(Windows NT)<br />
Station Name 3<br />
Station Address 3<br />
The<br />
When<br />
<strong>WaveLAN</strong> Station Name will be used to identify your<br />
<strong>WaveLAN</strong> station in the <strong>WaveLAN</strong> diagnostic tools like the<br />
WaveMANAGER/CLIENT described in Chapter 4.<br />
You are advised to enter the same name as the one you entered<br />
for the ‘Computer Name’ in the Windows Network<br />
Neighborhood (see page 3-14).<br />
installing the <strong>WaveLAN</strong> card into a system that runs the<br />
Windows NT system, you can also enter an alternative to the<br />
factory-set MAC Address value, using the Station Address<br />
field. You are advised to leave this field blank, unless you are<br />
familiar with local MAC Addressing schemes, and you do<br />
intend to use a user-defined Local MAC Address.<br />
On Windows 95 systems, this Station Address field is not<br />
displayed upon initial configuration. However when you<br />
intend to use Local Mac Addressing for this station:<br />
1 Finish the <strong>WaveLAN</strong> Installation first.<br />
2 Reboot your computer<br />
3 Display the <strong>WaveLAN</strong> properties again (as described on<br />
page 3-28).<br />
Now the Windows 95 system will display the Station<br />
Address field.<br />
4 Enter the Local MAC Address in the Station Address field.<br />
5 Click the ‘OK’ button to confirm the modification and<br />
reboot your computer.<br />
3-20 <strong>WaveLAN</strong>/<strong>PCMCIA</strong> User’s Guide
Finishing your<br />
<strong>WaveLAN</strong> Installation 3<br />
Figure 3-11<br />
3Finished Setting up the<br />
Hardware<br />
After the Reboot... 3<br />
When<br />
Installation for Windows 95 & Windows NT<br />
Installing the Miniport Driver<br />
When you have finished “Setting the <strong>WaveLAN</strong> Parameters”,<br />
click “OK” to proceed with the installation process. Windows<br />
will finish ‘building the driver configuration database’ and<br />
copy some files from your CD-ROM or diskette to your<br />
harddisk.<br />
When the Windows operating system prompts you to identify<br />
the location of the Windows files, specify the drive and<br />
directories of the Windows Installation CD-ROM or diskettes<br />
(see also page 3-13).<br />
When Windows has finished the copying of files, it will<br />
prompt you to restart your computer.<br />
1 Remove the <strong>WaveLAN</strong> software diskette from drive a:\<br />
2 Click the “OK” button to restart your computer.<br />
you have rebooted your computer, your Windows<br />
operating system should detect the <strong>WaveLAN</strong>/<strong>PCMCIA</strong> card<br />
(usually you can hear this by the sound effect of the PC Card<br />
Socket Controller).<br />
Windows will load the driver and will open with a dialog box<br />
that enables you to enter a user name and a user password. The<br />
password you enter here will be the one used to log into the<br />
Windows Network Neighborhood.<br />
Windows may display multiple password dialog boxes<br />
according to the number of network clients you installed,<br />
<strong>WaveLAN</strong>/<strong>PCMCIA</strong> User’s Guide 3-21
Installation for Windows 95 & Windows NT<br />
Installing the Miniport Driver<br />
Figure 3-12<br />
3Windows Network Properties<br />
where each dialog box prompts you for the password of a<br />
specific network operating system, for example:<br />
● Microsoft Network logon<br />
● Novell Netware logon<br />
Hint: When you do not like to enter up to 3 passwords or more every<br />
time you start-up your computer, you can configure Windows<br />
Networking to use Windows Logon as your ‘primary logon’.<br />
You may consider using the same user name and password for<br />
the Windows logon as for your the logon procedure to the<br />
network operating systems.<br />
Doing so, the username and corresponding password for the<br />
other network systems will be stored in a personal password<br />
list (username.pwl).<br />
3-22 <strong>WaveLAN</strong>/<strong>PCMCIA</strong> User’s Guide
Installation for Windows 95 & Windows NT<br />
Installing the Miniport Driver<br />
Upon future reboots, the Windows Operating system will only<br />
prompt you to enter the Windows username and password to<br />
unlock the personal password list.<br />
From there, the Windows operating system will automatically<br />
logon to the other operating systems, using the logon names<br />
and passwords in the personal password list.<br />
This personal password list (username.pwl) can only be used<br />
by the person that knows the correct username and<br />
corresponding password for the Windows logon. It is not<br />
possible to open or read a password list file using standard text<br />
file viewers, such as ASCII editors or notepad.<br />
<strong>WaveLAN</strong>/<strong>PCMCIA</strong> User’s Guide 3-23
Installation for Windows 95 & Windows NT<br />
Working with <strong>WaveLAN</strong> & Windows<br />
View other <strong>WaveLAN</strong><br />
stations 3<br />
Working with <strong>WaveLAN</strong> &<br />
Windows 3<br />
To view other computers in your wireless network, start the<br />
Windows Explorer program (‘the File Manager’). Scroll down<br />
the list of files and folders to look for the item “Network<br />
Neighborhood”.<br />
Double-click the “Network Neighborhood” item to display all<br />
stations in your Microsoft Networking Group.<br />
To display other workgroups in the network environment,<br />
double-click the “Entire Network” icon.<br />
If there is a second Network Operating System running in your<br />
network environment (for example a Novell Netware<br />
network), the “Entire Network” window, will also display<br />
available <strong>server</strong>s running under the second Network Operating<br />
System.<br />
If you click on these <strong>server</strong>s, you may be asked to enter your<br />
user name and password that apply to the other Network<br />
Operating System<br />
If you cannot find other (<strong>WaveLAN</strong>) networked computers<br />
verify whether the other <strong>WaveLAN</strong> computers are:<br />
● Powered up and logged on to the network.<br />
● Configured to operate with an identical:<br />
● Networking Protocol.<br />
● NWID or Domain ID<br />
● <strong>WaveLAN</strong> Operating Frequency.<br />
To verify the radio connection with other stations, you can also<br />
run the WaveMANAGER/CLIENT as described in Chapter 4.<br />
3-24 <strong>WaveLAN</strong>/<strong>PCMCIA</strong> User’s Guide
About Workgroups and<br />
Domains 3<br />
Installation for Windows 95 & Windows NT<br />
Working with <strong>WaveLAN</strong> & Windows<br />
So far you have learned about <strong>WaveLAN</strong> Workgroups and<br />
Domains.<br />
● A <strong>WaveLAN</strong> Workgroup being the wireless coverage area<br />
of a number of <strong>WaveLAN</strong> stations. This could be an adhoc<br />
wireless workgroup of wireless stations as pictured in<br />
Figure 1-2 on page 1-5), or the wireless cell that is<br />
serviced by a single WavePOINT access point (Figure 1-3<br />
on page 1-6). Each Workgroup is identified by a unique<br />
NWID.<br />
● The <strong>WaveLAN</strong> Domain is group of multiple <strong>WaveLAN</strong><br />
workgroups, that have been united into one wireless<br />
networking environment. This group of <strong>WaveLAN</strong><br />
workgroups is identified by a shared Domain ID.<br />
When you are using Windows Networking, you will encounter<br />
the definitions ‘Workgroup and Domain’ in a different context,<br />
where<br />
● Windows Workgroups identify a group of networked<br />
computers that are logically united into a specific group of<br />
stations. The Windows workgroup may include both wired<br />
and wireless stations, and is identified by a Workgroup<br />
name.<br />
● In larger networking topologies that include Microsoft<br />
Windows NT <strong>server</strong>s, the LAN Administrators may have<br />
setup multiple ‘families’ of workgroups, where each<br />
family is identified by a Domain Name.<br />
<strong>WaveLAN</strong> Workgroups may, but do not necessarily need to<br />
correspond with the Windows Workgroups. <strong>WaveLAN</strong> stations<br />
can roam between different physical locations and, if radio<br />
connectivity requires switching, may connect dynamically to<br />
any other another WavePOINT access point.<br />
Doing so, the <strong>WaveLAN</strong> station may connect to another<br />
<strong>WaveLAN</strong> Workgroup, but will always remain in the same<br />
logical Windows Workgroup.<br />
<strong>WaveLAN</strong>/<strong>PCMCIA</strong> User’s Guide 3-25
Installation for Windows 95 & Windows NT<br />
Working with <strong>WaveLAN</strong> & Windows<br />
Checking the Network<br />
Protocol Settings 3<br />
Ad-hoc networks 3<br />
For<br />
Upon initial installation, your Windows Operating system will<br />
typically install a basic set of networking protocols.<br />
You may need to check whether the installation process truly<br />
added the protocols and configured the protocol settings as<br />
required for your network environment.<br />
networking in ad-hoc workgroups, you will typically use<br />
Microsoft Networking for Windows Workgroups (Network<br />
Neighborhood).<br />
To use Microsoft Networking for Windows Workgroups, all<br />
stations must:<br />
● Use the NetBEUI protocol<br />
● Enable File and Print sharing<br />
The NetBEUI protocol can operate simultaneously with any<br />
other networking protocol.<br />
To add a protocol, or change the settings for ‘file and print’<br />
sharing:<br />
1 Click the Start button from the Windows Taskbar.<br />
2 Point to ‘Settings’ and click the Control Panel item.<br />
3 In the Control Panel, double-click the ‘Network<br />
Neighborhood’ icon.<br />
4 Verify if the list of network components includes the<br />
following item:<br />
● Client for Microsoft Networks<br />
When this item is listed, skip to the next step.<br />
When the item is not listed, click the ‘Add’ button, and<br />
select Add Client to install this networking component.<br />
5 Next verify if the NetBEUI protocol is installed.<br />
3-26 <strong>WaveLAN</strong>/<strong>PCMCIA</strong> User’s Guide<br />
● For Windows 95, scroll down the list of network<br />
components to look for the item ‘NetBEUI -><br />
<strong>WaveLAN</strong>/<strong>PCMCIA</strong> Adapter’<br />
● For Windows NT, click the tab ‘Protocols and look for<br />
the item ‘NetBEUI Protocol’
Infrastructure Networks 3<br />
When<br />
Installation for Windows 95 & Windows NT<br />
Working with <strong>WaveLAN</strong> & Windows<br />
If the NetBEUI protocol is not listed, click the ‘Add’<br />
button, and follow the instructions of the Windows<br />
Operating system as they appear on your screen.<br />
connecting your station to an network infrastructure,<br />
you will usually need additional networking protocols<br />
according to the Network Operating system.<br />
● IPX/SPX compatible protocols when your networking<br />
environment is using the Novell Netware network<br />
operating system.<br />
● TCP/IP when you would like to connect your computer to<br />
a network that uses IP addressing, and/or you would like to<br />
connect to the internet.<br />
These networking protocols can operate simultaneously with<br />
any other networking protocol.<br />
To verify whether your station has been configured for the<br />
correct type of networking and networking protocols:<br />
1 Click the Start button from the Windows Taskbar.<br />
2 Point to ‘Settings’ and click the Control Panel item.<br />
3 In the Control Panel, double-click the ‘Network<br />
Neighborhood’ icon.<br />
4 Verify if the list of network components includes the<br />
following items:<br />
● Client for Microsoft Networks<br />
● (optional) Client for Netware Networks If the protocol<br />
is already available, click the ‘Cancel’ button to exit<br />
this configuration screen.<br />
● If the items are already available, skip to the next step.<br />
● If the items you require are missing, click the ‘Add’<br />
button and select ‘Add Client’ to add the client<br />
software of the networking software that you would<br />
like to install.<br />
<strong>WaveLAN</strong>/<strong>PCMCIA</strong> User’s Guide 3-27
Installation for Windows 95 & Windows NT<br />
Working with <strong>WaveLAN</strong> & Windows<br />
Display <strong>WaveLAN</strong><br />
Parameters 3<br />
Verifying the <strong>WaveLAN</strong><br />
Operating Frequency 3<br />
5 When the proper Client software is installed, but you do<br />
not see the required protocols, click the ‘Add’ button, and<br />
follow the instructions of the Windows Operating system<br />
as they appear on your screen.<br />
Consult your LAN Administrator for more help or information<br />
about configuring the IPX/SPX and/or TCP/IP properties.<br />
When you would like to view or modify <strong>WaveLAN</strong><br />
parameters, for example because you would like to connect to<br />
another (type of) network, proceed as follows:<br />
1 Click the Start button from the Windows Taskbar.<br />
2 Point to ‘Settings’ and click the Control Panel item.<br />
3 On the Windows Desktop, use the right mouse button to<br />
click the ‘Network Neighborhood’ icon.<br />
4 From the pop-up menu, select ‘Properties.<br />
5 In the Network Properties Window, select the<br />
<strong>WaveLAN</strong>/<strong>PCMCIA</strong> Adapter and click the ‘Properties’<br />
button.<br />
On Windows NT systems you will be prompted to confirm<br />
the I/O port address and IRQ value. If your <strong>WaveLAN</strong><br />
adapter is working OK, just click ‘Continue’.<br />
6 (Optional) Change the parameters you would like to<br />
modify, and click<br />
● Ok to confirm your changes, or<br />
● Cancel to ignore your modifications.<br />
Hint: When displaying <strong>WaveLAN</strong> parameters without intent to<br />
change the settings, you are advised always to use the ‘Cancel’<br />
button to close the parameter windows.<br />
.To verify or modify the operating frequency of your<br />
<strong>WaveLAN</strong> radio, you can use the “Frequency Select Option”<br />
3-28 <strong>WaveLAN</strong>/<strong>PCMCIA</strong> User’s Guide
Installation for Windows 95 & Windows NT<br />
Working with <strong>WaveLAN</strong> & Windows<br />
of the “WaveMANAGER/CLIENT” utility that is described in<br />
Chapter 4.<br />
See also “Installing WaveMANAGER/CLIENT” on page 3-30<br />
If you changed parameters in the “Network” window,<br />
Windows may prompt you to re-boot your computer.<br />
<strong>WaveLAN</strong>/<strong>PCMCIA</strong> User’s Guide 3-29
Installation for Windows 95 & Windows NT<br />
Installing WaveMANAGER/CLIENT<br />
About this Utility 3<br />
Installing this Utility 3<br />
Installing<br />
WaveMANAGER/CLIENT 3<br />
The WaveMANAGER/CLIENT is a diagnostics tool to verify<br />
the wireless communications quality between your <strong>WaveLAN</strong><br />
station and other <strong>WaveLAN</strong> stations or WavePOINT access<br />
points.<br />
The WaveMANAGER/CLIENT was designed to run on the<br />
Windows 95 and Windows NT (version 4.0) operating<br />
systems.<br />
● When your computer runs the Windows NT operating<br />
system version 3.51 you may AT YOUR OWN RISK, try<br />
to install and run the program. Although the major<br />
functions of the program will be accessible, it is not<br />
guaranteed that the program will function stable.<br />
● When your computer runs Windows for workgroups<br />
(windows 3.x) you can not use the WaveMANAGER<br />
/CLIENT program. Restart your computer in MS-DOS<br />
mode and use the Diagnostics for MS-DOS for MS-DOS<br />
systems as described in Chapter 6.<br />
The installation of the WaveMANAGER/CLIENT utility is<br />
controlled via a so-called Installshield wizard. To install<br />
WaveMANAGER/CLIENT:<br />
1 Insert the <strong>WaveLAN</strong> diskette for Windows 95 and<br />
Windows NT environments<br />
2 Click the ‘Start’ button on the on the Windows Taskbar.<br />
3 Click ‘Run’ and type the path to the install program.<br />
● At the prompt type ‘A:\setup.exe’<br />
3-30 <strong>WaveLAN</strong>/<strong>PCMCIA</strong> User’s Guide
Installation for Windows 95 & Windows NT<br />
Installing WaveMANAGER/CLIENT<br />
● Alternatively click the Browse button, and navigate to<br />
the disk drive and directory that contains the<br />
<strong>WaveLAN</strong> software. and double-click the ‘setup.exe’<br />
program.<br />
4 Click OK to confirm and start the WaveMANAGER/<br />
CLIENT installation.<br />
5 Follow the instructions as they appear on your screen.<br />
The Installation program will copy the<br />
WaveMANAGER/CLIENT program with the associated online<br />
help files to your harddisk drive, and create an icon on the<br />
‘Programs’ menu.<br />
When the installation program has finished, skip to Chapter 4,<br />
“Diagnostics for Windows 95 & Windows NT”<br />
<strong>WaveLAN</strong>/<strong>PCMCIA</strong> User’s Guide 3-31
Table of Contents<br />
Diagnostics for Windows 95 & Windows NT<br />
Chapter 4<br />
Diagnostics for Windows 95 &<br />
Windows NT<br />
WaveMANAGER/CLIENT 4-1<br />
Monitoring Options 4-1<br />
Running WaveMANAGER/CLIENT 4-3<br />
Using Link Test 4-5<br />
Using Site Monitor 4-9<br />
Logging Measurement Data 4-14<br />
Other Options 4-17<br />
Frequency Select Option 4-17<br />
Access Control Table Manager 4-18
Monitoring Options 4<br />
Diagnostics for Windows 95 & Windows NT4<br />
WaveMANAGER/CLIENT<br />
WaveMANAGER/CLIENT 4<br />
Once your network has been configured and installed, you can<br />
use WaveMANAGER/CLIENT to:<br />
● Monitor the performance of your network;<br />
● Verify optimal placement of your WavePOINT-II access<br />
points and wireless stations.<br />
WaveMANAGER/CLIENT is a ‘mobile’ wireless utility that<br />
can only run on a <strong>WaveLAN</strong> equipped station, typically a<br />
portable device such as a notebook computer.<br />
WaveMANAGER/CLIENT includes:<br />
● Monitoring Options<br />
● Logging Measurement Data<br />
● Frequency Select Option<br />
● Access Control Table Manager<br />
WaveMANAGER/CLIENT offers two monitoring methods:<br />
● Link Test, and<br />
● Site Monitor<br />
For on-line help, press the F1<br />
Function Key on your keyboard<br />
or click the ‘Help’ button on the WaveMANAGER window.<br />
Both the Link Test option and Site Monitor allow you to store<br />
Measurement data, as described under “Logging Measurement<br />
Data” on page 4-14.<br />
<strong>WaveLAN</strong>/<strong>PCMCIA</strong> User’s Guide 4-1
Diagnostics for Windows 95 & Windows NT<br />
WaveMANAGER/CLIENT<br />
Link Test 4<br />
Site Monitor 4<br />
You<br />
The<br />
can use the Link Test option to investigate a specific link<br />
between two wireless stations.<br />
In Link Test mode, the Link Test partners exchange data<br />
packets to determine the link quality.<br />
You can use the measurement results to analyze the radio<br />
frequency path between the two partners in more detail.<br />
monitors a specific link between two stations and can therefore<br />
be used to analyze the Link Test quality of the communications<br />
path with the Link Test Partner.<br />
Site Monitor option enables you to display the<br />
communications quality of multiple WavePOINT-II units<br />
simultaneously. You can use the Site Monitor to:<br />
● Determine the overall wireless coverage of your<br />
<strong>WaveLAN</strong> network.<br />
● Determine or optimize the placement of your WavePOINT<br />
access points, in order to provide seamless connectivity to<br />
mobile stations.<br />
In Site Monitor mode, the WaveMANAGER/CLIENT station<br />
will listen for beacons transmitted by all WavePOINT access<br />
points to determine the communications quality for each<br />
WavePOINT.<br />
Roaming throughout the wireless network environment with<br />
your WaveMANAGER/CLIENT station, you will be able to<br />
identify areas that may not have adequate coverage, or that<br />
suffer from in-band interference by other (wireless) equipment<br />
such as security gates, microwave ovens or photo copiers.<br />
This will help you to verify and optimize the placement of<br />
your WavePOINT-II units.<br />
Every location where wireless stations will be used must be<br />
covered by at least one WavePOINT that provides a<br />
communications quality that is acceptable or better.<br />
4-2 <strong>WaveLAN</strong>/<strong>PCMCIA</strong> User’s Guide
Figure 4-1<br />
4WaveMANAGER/CLIENT<br />
Main Window<br />
Main Window 4<br />
This<br />
Diagnostics for Windows 95 & Windows NT<br />
Running WaveMANAGER/CLIENT<br />
Running<br />
WaveMANAGER/CLIENT 4<br />
To start WaveMANAGER/CLIENT:<br />
1 Click the Start button in the Windows Task bar<br />
2 Point to ‘Programs’ and select the item ‘<strong>WaveLAN</strong>’<br />
3 In the list of <strong>WaveLAN</strong> program files select<br />
‘WaveMANAGER CLIENT’ to open the window pictured<br />
in Figure 4-1.<br />
opening window of WaveMANAGER/CLIENT first will<br />
give an indication of the connection from your<br />
WaveMANAGER/CLIENT station to the network surrounding<br />
the nearest WavePOINT-II unit.<br />
The Communications Quality indicator displays the quality of<br />
the link between the management station and the WavePOINT-<br />
II unit identified in the ‘Network Connection’ field.<br />
<strong>WaveLAN</strong>/<strong>PCMCIA</strong> User’s Guide 4-3
Diagnostics for Windows 95 & Windows NT<br />
Running WaveMANAGER/CLIENT<br />
The Communications Quality is displayed as one of the<br />
following colors and descriptions:<br />
Color Description<br />
● Green Communication Quality is good, no intervention<br />
is required<br />
● Yellow Communication Quality is acceptable, no<br />
intervention ia required.<br />
● Red Communication Quality is poor, intervention is<br />
required (see Appendix D, “Troubleshooting”)<br />
● Blank No connection<br />
If the Communications Quality indicator is fully red and<br />
displays ‘No connection, no access point found’, your<br />
WaveMANAGER Station has been configured for operation in<br />
a wireless infrastructure as described in Chapter 1,<br />
“Introduction”.<br />
When the ‘Network Connection’ field does not list a<br />
WavePOINT name, your WaveMANAGER/CLIENT Station<br />
may be:<br />
● Out of range of the WavePOINT units or,<br />
● Use a Domain ID value that does not match the value of<br />
the network (see “Selecting other Domain IDs” on page<br />
4-12)<br />
For information on possible solutions, please refer to<br />
Appendix D, “Troubleshooting”.<br />
When the communications quality indicator is blank and<br />
displays “Not available”, your WaveMANAGER Station is<br />
configured for operation in an ad-hoc wireless workgroup; i.e.<br />
roaming is disabled (see “Selecting another Link Test Partner”<br />
on page 4-8 for more detailed information).<br />
4-4 <strong>WaveLAN</strong>/<strong>PCMCIA</strong> User’s Guide
Using Link Test 4<br />
Diagnostics for Windows 95 & Windows NT<br />
Running WaveMANAGER/CLIENT<br />
You can use the Link Test to monitor one specific link<br />
between:<br />
● two stations in a point-to-point link<br />
● two <strong>WaveLAN</strong> computers in an ad-hoc wireless<br />
workgroup (see Figure 1-2 on page 1-5)<br />
● A <strong>WaveLAN</strong> computer and a WavePOINT-II unit in a<br />
<strong>WaveLAN</strong> Infrastructure environment (see Figure 1-3 on<br />
page 1-6).<br />
The communications quality of the link is expressed in terms<br />
of a general quality indication, the SNR value of the link and<br />
the number of packets received and lost. Each of the values<br />
shown is the result of several measurements carried out during<br />
a certain interval.<br />
The Link Test can be performed from stations with either a<br />
<strong>WaveLAN</strong>/<strong>PCMCIA</strong> card or an ISA card. This station could<br />
be a WaveMANAGER Station or an ordinary workstation.<br />
In Link Test mode, your WaveMANAGER Station will stick to<br />
the Link Test partner, i.e., roaming between WavePOINTs will<br />
be disabled for the run-time session of the Link Test.<br />
To start the Link Test, click the ‘Link Test’ button in the<br />
opening window of WaveMANAGER/CLIENT. This will<br />
display the window as show in Figure 4-2:<br />
<strong>WaveLAN</strong>/<strong>PCMCIA</strong> User’s Guide 4-5
Diagnostics for Windows 95 & Windows NT<br />
Running WaveMANAGER/CLIENT<br />
Figure 4-2<br />
4WaveMANAGER Link Test<br />
The Link Quality indicator shown in the top section of the<br />
window gives a first impression of the communications quality<br />
of the current link, which is the link between the local and the<br />
remote stations shown below the link quality indicator.<br />
The link quality is displayed as one of the following colors and<br />
descriptions:<br />
Color Description<br />
● Green Good, communication quality is good, no<br />
intervention required<br />
● Yellow Acceptable, the communications quality is<br />
acceptable, no intervention required<br />
● Red Poor, the communications quality is poor,<br />
intervention is required (refer to Appendix D,<br />
“Troubleshooting”)<br />
● Blank No connection, select a Link Test partner<br />
The ‘Advice’ button will provide more information about the<br />
Link Quality qualification and, if applicable, provide<br />
suggestions to improve the Link Quality.<br />
4-6 <strong>WaveLAN</strong>/<strong>PCMCIA</strong> User’s Guide
Analyzing Link Quality 4<br />
Resetting the diagnostic<br />
counters 4<br />
When<br />
Diagnostics for Windows 95 & Windows NT<br />
Running WaveMANAGER/CLIENT<br />
you want to investigate the Link Quality in more detail,<br />
the fields in the middle of the window show the<br />
communications quality in terms of the SNR value of the link.<br />
The bottom field shows the percentage of packets received<br />
compared to the number of packets sent.<br />
To investigate Link Quality results in more detail, you can use<br />
one of the following options:<br />
● Freeze the display by clicking the ‘Freeze’ button<br />
● Display details by clicking the ‘Details’ button<br />
For example, when the Signal to Noise (SNR) indicator<br />
displays a value that is less than expected, the Details view will<br />
show whether this is due to a low signal level (stations are too<br />
far apart) or a high noise level (a source of interference that is<br />
located in the communications path between the two Link Test<br />
partners).<br />
You can use the Local/Remote indicators to identify whether<br />
the cause of reduced performance is in the area of the Link Test<br />
partner (Remote) or in the vicinity of the WaveMANAGER<br />
Station (Local).<br />
Signal Quality is a measure of the “clarity” of the signal. This<br />
indicator needs special attention only when performing Link<br />
Tests to diagnose the impact of signal reflections caused by<br />
high ceilings or reflecting surfaces such as steel structural<br />
components.<br />
You may wish to reset the diagnostic counters in order to<br />
restart the Link Test measurements.<br />
An example of a situation in which this may be useful is when<br />
you have traced and remedied a case of poor performance; e.g.<br />
you switched off a photocopier, which was causing<br />
interference. Clicking the ‘Reset’ button will analyze the Link<br />
Quality once again, ignoring negative results that were<br />
possibly influenced by the source of interference.<br />
<strong>WaveLAN</strong>/<strong>PCMCIA</strong> User’s Guide 4-7
Diagnostics for Windows 95 & Windows NT<br />
Running WaveMANAGER/CLIENT<br />
Selecting another Link Test<br />
Partner 4<br />
Figure 4-3<br />
4Selecting another Link Test<br />
Partner or NWID<br />
To investigate the link with another station or access point,<br />
click the ‘Other’ button. This will display the window shown<br />
in Figure 4-3:<br />
● To select another Link Test partner, select a station from<br />
the remote station list in the right half of the window.<br />
● To scan for other stations within the same wireless cell,<br />
click the ‘Scan for Stations’ button. This will display all<br />
stations within range of your WaveMANAGER Station<br />
that use the same NWID, as shown in the NWID field in<br />
the left half of the window.<br />
Click OK to start the Link Test with the selected station.<br />
To set up a Link Test with a station in another wireless cell:<br />
1 Enter the correct NWID value in the NWID field.<br />
2 Click the ‘Apply’ button.<br />
3 Click the ‘Scan for Stations’ button to display a list of<br />
stations within range of your WaveMANAGER Stations<br />
that use the new NWID value.<br />
4 Select a remote station.<br />
4-8 <strong>WaveLAN</strong>/<strong>PCMCIA</strong> User’s Guide
Using Site Monitor 4<br />
Diagnostics for Windows 95 & Windows NT<br />
Running WaveMANAGER/CLIENT<br />
5 Click the ‘OK’ button to start the Link Test with the<br />
selected station.<br />
When you are connected to a <strong>WaveLAN</strong> Infrastructure, but<br />
you do not know the NWID values of other workgroups in the<br />
Domain, you can also click the ‘Scan for NWIDs in this<br />
Domain’ button. This will allow you to retrieve a list of<br />
NWIDs from other workgroups within in your infrastructure,<br />
that are within range of your station.<br />
6 Click the ‘Scan for NWIDs in current domain’ button.<br />
7 Select a NWID from the displayed list.<br />
8 Click the ‘Apply’ button.<br />
You can use the Site Monitor to display the quality of<br />
communications with multiple WavePOINT units<br />
simultaneously. It shows which WavePOINT units are<br />
available, and of the available WavePOINT units, it shows the<br />
communications quality.<br />
The Site Monitor option is available only to<br />
WaveMANAGER/CLIENT Stations equipped with a<br />
<strong>WaveLAN</strong> <strong>PCMCIA</strong> card. To use the Site Monitor, the<br />
WaveMANAGER/CLIENT Station must have the roaming<br />
options enabled.<br />
To start the Site Monitor, click the ‘Site Monitor’ button in the<br />
main window of WaveMANAGER/CLIENT. This will display<br />
the following window:<br />
<strong>WaveLAN</strong>/<strong>PCMCIA</strong> User’s Guide 4-9
Diagnostics for Windows 95 & Windows NT<br />
Running WaveMANAGER/CLIENT<br />
Figure 4-4<br />
4Site Monitor Window<br />
Each row displays the communications quality with the<br />
WavePOINT units identified in the first column. When this<br />
column does not display all WavePOINTs, some of the units<br />
may be out of range of your WaveMANAGER Station.<br />
You can use the pull-down menus of the other columns to<br />
display a variety of diagnostic tallies in the format and<br />
arrangement that you prefer. The recommended set of tallies<br />
for most monitoring tests is as follows:<br />
● SNR (Signal to Noise Ratio)<br />
● Signal level<br />
● Local Noise level<br />
● Remote Noise level<br />
The Signal to Noise (SNR) ratio is calculated as the sum of<br />
Signal Level minus Noise Level, where Noise Level represents<br />
the highest value of either Local or Remote Noise at the time<br />
of measurement.<br />
You will need the Signal Quality indicator only in exceptional<br />
circumstances, for example when you are performing a site<br />
survey in environments with high ceilings or where reflecting<br />
surfaces, such as steel structural components might cause<br />
excessive signal reflections.<br />
4-10 <strong>WaveLAN</strong>/<strong>PCMCIA</strong> User’s Guide
Diagnostics for Windows 95 & Windows NT<br />
Running WaveMANAGER/CLIENT<br />
The colors used to express the various parameters are the same<br />
as those used on WaveMANAGER/CLIENT’s opening<br />
window.<br />
When walking through your wireless LAN environment, each<br />
location should be covered by at least one WavePOINT that<br />
provides an SNR that is acceptable (yellow) or better (green).<br />
If the Signal to Noise Ratio is of poor quality, use the<br />
information in the other columns to obtain additional<br />
information. If this does not sufficiently clarify the reasons for<br />
the poor quality, please refer to the chapter Troubleshooting.<br />
If the first column does not display all WavePOINT units you<br />
may have expected, you may be out of range or your<br />
<strong>WaveLAN</strong> card has been configured with a Domain ID that is<br />
different from that of the subnet you are trying to diagnose.<br />
To change the list of WavePOINT units for which information<br />
is displayed, or to log the measurement data, perform one of<br />
the following actions, activated by the buttons along the<br />
bottom of the window:<br />
● To detect other wireless domains, click the ‘Detect’ button<br />
● To select another Domain ID or other WavePOINT units,<br />
click the ‘Domain/Other’ button<br />
● To reset the diagnostic counters, click the ‘Display/Reset’<br />
button<br />
● To sort the list of WavePOINT units, click the ‘Display/AP<br />
Sort’ button<br />
● To set parameters for the logging function, click the<br />
‘Logging/Setup’ button<br />
● To start or stop the logging function, click the<br />
‘Logging/Once, Start or Stop’ button<br />
<strong>WaveLAN</strong>/<strong>PCMCIA</strong> User’s Guide 4-11
Diagnostics for Windows 95 & Windows NT<br />
Running WaveMANAGER/CLIENT<br />
4 Selecting other Domain IDs If<br />
Figure 4-5<br />
4Domain Selection Dialog Box<br />
the Site Monitor did not list the WavePOINT units you<br />
expected, you may need to select another Domain ID.<br />
This may happen in situations where your<br />
WaveMANAGER/CLIENT station has been configured with a<br />
Domain ID which is different from the Domain ID used by the<br />
network under investigation.<br />
The ‘Select another Domain ID’ option enables you to:<br />
● temporarily change the Domain ID used by your<br />
WaveMANAGER/CLIENT station, or<br />
● scan for the presence of other wireless domains in the<br />
vicinity.<br />
To do so, click the ‘Other’ button in the domain section at the<br />
bottom of the window. This will display the following dialog<br />
box:<br />
To change the Domain ID of your WaveMANAGER/CLIENT<br />
station, enter a new Domain ID in the ‘Domain ID’ field. In<br />
addition to the Domain ID, you may need to enter a correct<br />
beacon key value in order to decode the network IDs of the<br />
WavePOINT units shown. Click OK to confirm the new<br />
Domain ID.<br />
4-12 <strong>WaveLAN</strong>/<strong>PCMCIA</strong> User’s Guide
Resetting the diagnostic<br />
counters 4<br />
Sorting the list of<br />
WavePOINT units 4<br />
Diagnostics for Windows 95 & Windows NT<br />
Running WaveMANAGER/CLIENT<br />
The new Domain ID value will be valid only for the run-time<br />
session of the WaveMANAGER/CLIENT program. When you<br />
exit the program, your wireless station will revert to its usual<br />
Domain ID value, as identified for the <strong>WaveLAN</strong> adapter in<br />
the “Network Neighborhood” properties of your station.<br />
To scan for the presence of other wireless domains, click the<br />
‘Detect’ button. If there are other wireless domains in the<br />
vicinity of your <strong>WaveLAN</strong> network, the ‘Detect’ option will<br />
show all other Domains with the number of access points that<br />
belong to it.<br />
You cannot retrieve the Domain ID or NWIDs of the<br />
neighboring <strong>WaveLAN</strong> networks.<br />
You may wish to reset the diagnostic counters in order to<br />
return all values of the parameters to their initial values and to<br />
restart all measurements. To do so, click the ‘Reset’ button in<br />
the ‘Display’ field of the Site Monitor window. A reset will<br />
also clear the WavePOINTs that are no longer within range.<br />
The list of WavePOINT units is sorted in descending order of<br />
the SNR values as they were registered when you opened the<br />
Site Monitor screen.<br />
When you have moved along through the area covered by the<br />
network, you may wish to sort the list of WavePOINT units in<br />
order to show the WavePOINT units with the best<br />
communications quality at the top of the list.<br />
To sort the list of access points again in its new order of SNR<br />
values, click the ‘AP Sort’ button.<br />
When you use the logging option (see “Logging Measurement<br />
Data” on page 4-14), please note that sorting the list of access<br />
points may affect the listings in your logfiles as well.<br />
<strong>WaveLAN</strong>/<strong>PCMCIA</strong> User’s Guide 4-13
Diagnostics for Windows 95 & Windows NT<br />
Running WaveMANAGER/CLIENT<br />
Logging Measurement<br />
Data 4<br />
Manual Logging 4<br />
The<br />
The WaveMANAGER/CLIENT logging option enables you to<br />
save measurement data for later evaluation or comparison with<br />
previous measurements. You can view saved logfiles with any<br />
ASCII editor, or import the data into standard spreadsheet or<br />
database applications. The logfiles are saved in Comma<br />
Separated Value (CSV) file format.<br />
Both Site Monitor and Link Test enable you to log<br />
measurement results, for later evaluation. The measurement<br />
data can be logged automatically at regular intervals or<br />
manually.<br />
WaveMANAGER/CLIENT saves the data to Comma<br />
Separated Value (CSV) logfiles that can be imported into<br />
standard spreadsheet or database applications for further<br />
analysis.<br />
Comparison of measurement data with previous measurements<br />
may help you investigate the performance of your wireless<br />
LAN over a period of time, for example to analyze the<br />
consequences of relocated network equipment. To perform the<br />
comparison, use the functionality of your spreadsheet or<br />
database applications into which you import the data from the<br />
logfiles.<br />
manual logging function allows you to log the<br />
measurement data at specific locations and moments, e.g.,<br />
when you are running Site Monitor to perform a site survey or<br />
when you are investigating a particular source of interference.<br />
When you choose the manual mode, you may wish to enable<br />
the ‘Add extra info’ option to allow you to add comments to<br />
your logging information, e.g. a description of the location or<br />
event. If you enable this option, a dialog box will appear each<br />
time you press the Log ‘Once’ button.<br />
The Manual Logging option is typically used on<br />
WaveMANAGER/CLIENT stations that roam throughout the<br />
network environment running Site Monitor.<br />
4-14 <strong>WaveLAN</strong>/<strong>PCMCIA</strong> User’s Guide
Automatic Logging 4<br />
Setting the Logging<br />
Options 4<br />
Figure 4-6<br />
4Logging Setup Dialog Box<br />
Starting or Stopping the<br />
Logging Function 4<br />
The<br />
Diagnostics for Windows 95 & Windows NT<br />
Running WaveMANAGER/CLIENT<br />
automatic logging function allows you to log the network<br />
performance over a longer period of time. This may be useful<br />
if you wish to monitor recurring events or variation in values.<br />
When you choose the automatic mode, you need to set the<br />
measurement interval to the required number of seconds.<br />
Automatic logging is typically used when the<br />
WaveMANAGER/CLIENT station is running a Link Test at a<br />
particular location.<br />
To set the logging options, click the ‘Setup’ button in the<br />
‘Logging’ field. This will display the following window.<br />
In both modes, the measurement data is saved in the file<br />
entered in the ‘Path and file name’ field. Each time new data is<br />
saved, this information is added to the existing file. If you wish<br />
to save the data in a new file, use this field to enter a new file<br />
name.<br />
Depending on your choice of logging option, the button to the<br />
right of the ‘Setup’ button on the WaveMANAGER/CLIENT<br />
diagnostics windows will be labeled ‘Once’ (manual option) or<br />
‘Start’ (automatic option).<br />
If you chose the manual option, click the ‘Once’ button each<br />
time you wish to log data.<br />
<strong>WaveLAN</strong>/<strong>PCMCIA</strong> User’s Guide 4-15
Diagnostics for Windows 95 & Windows NT<br />
Running WaveMANAGER/CLIENT<br />
For the automatic option, click the ‘Start’ button. Click this<br />
button again to stop the logging function.<br />
To change the logging option, proceed as described in “Setting<br />
the Logging Options” on page 4-15.<br />
4-16 <strong>WaveLAN</strong>/<strong>PCMCIA</strong> User’s Guide
Frequency Select Option 4<br />
Diagnostics for Windows 95 & Windows NT<br />
Other Options<br />
Other Options 4<br />
The WaveMANAGER/CLIENT is primary a diagnostics tool.<br />
It includes however also two other options that enable you to<br />
control your <strong>WaveLAN</strong> network:<br />
● Frequency Select Option<br />
● Access Control Table Manager<br />
The Frequency Select option enables you to verify or modify<br />
the operating frequency of your <strong>WaveLAN</strong> Card. The number<br />
of selectable channels is subject to local regulations.<br />
The WaveMANAGER/CLIENT Frequency Select option<br />
enables you to:<br />
● Check the operating frequency of any <strong>WaveLAN</strong> card.<br />
● Change the operating frequency of a <strong>WaveLAN</strong> 2.4 GHz<br />
card.<br />
Note: When you are running an MS-DOS based system, you can<br />
check or change the frequency of your <strong>WaveLAN</strong> Card using<br />
the Frequency Select Utility described in Chapter 7.<br />
The factory installed operating frequency of a 2.4 GHz card is<br />
2.422 GHz. Use Frequency Select to select a different<br />
frequency when:<br />
● Your existing <strong>WaveLAN</strong> network (e.g. with WavePOINTs<br />
and <strong>WaveLAN</strong> cards) operates at another radio frequency.<br />
● Your wireless network suffers from interference by other<br />
wireless devices.<br />
Earlier versions of <strong>WaveLAN</strong>/ISA and Micro Channel cards<br />
and WavePOINT access points can operate at one fixed<br />
frequency only. To comply with local regulations these<br />
<strong>WaveLAN</strong>/<strong>PCMCIA</strong> User’s Guide 4-17
Diagnostics for Windows 95 & Windows NT<br />
Other Options<br />
Access Control Table<br />
Manager 4<br />
products have been set to operate at one of the following<br />
frequencies:<br />
● 2.425 GHz (<strong>WaveLAN</strong> Channel Type_A)<br />
● 2.460 GHz (<strong>WaveLAN</strong> Channel Type_B)<br />
● 2.4305 GHz (<strong>WaveLAN</strong> Channel Type_D)<br />
You can determine the frequency used by already-installed<br />
<strong>WaveLAN</strong> cards by running this utility.<br />
The frequency of a WavePOINT can be determined from the<br />
last 4 digits of the model number, printed on a label on the<br />
back of the unit. Use the following list to convert the model<br />
number to the associated frequency channel:<br />
● 3105-0111 (<strong>WaveLAN</strong> Channel Type_A)<br />
● 3105-0112 (<strong>WaveLAN</strong> Channel Type_B)<br />
● 3105-0114 (<strong>WaveLAN</strong> Channel Type_D)<br />
If you are not certain about the frequency used by your<br />
<strong>WaveLAN</strong> products, contact your local supplier.<br />
The Access Control Manager is an advanced option for<br />
network administrators that would like to implement the<br />
Access Control security feature for WavePOINT access points.<br />
This feature enables the network administrator to restrict<br />
access to WavePOINT access points to a limited number of<br />
authorized <strong>WaveLAN</strong> stations. These authorized stations are<br />
identified by the unique MAC Address of their <strong>WaveLAN</strong><br />
Card.<br />
When Access Control for the WavePOINT is enabled, the<br />
WavePOINT will only forward messages from/to stations that<br />
are listed in a so-called Access Control Table.<br />
4-18 <strong>WaveLAN</strong>/<strong>PCMCIA</strong> User’s Guide
Create the Access Control<br />
Table 4<br />
Edit an existing table 4<br />
To<br />
Diagnostics for Windows 95 & Windows NT<br />
Other Options<br />
You can use the Access Control Manager to:<br />
● Create, or edit the Access Control Table<br />
● Add this station’s MAC Address to the table<br />
● Remove stations from the Access Control Table.<br />
To create an Access Control Table:<br />
1 Start the WaveMANAGER/CLIENT program<br />
2 Click the button ‘Access Control’ from the<br />
WaveMANAGER/CLIENT Main window.<br />
3 In the top field of the window, enter the path and file name<br />
that you would like to assign to the Access Control Table<br />
file (*.tbl).<br />
4 Click the Save button to save the Access Control Table<br />
file.<br />
When you do not specify a path or name, the Access<br />
Control Table Manager will save the file with the default<br />
name in the WaveMANAGER/CLIENT program<br />
directory:<br />
c:\program files\wavelan\wavemanager\client\wpaccess.tbl<br />
You can now edit the Access Control Table file, or add this<br />
station’s MAC address to the Access Control Table file.<br />
5 When finished, click the button ‘Save’ again to save your<br />
modifications to the Access Control Table file.<br />
edit the Access Control Table file, you will first need to<br />
open an existing file, or create a file as described above.<br />
To open a file:<br />
1 Start the WaveMANAGER/CLIENT program<br />
2 In the Main window, click the button ‘Access Control’, to<br />
start the Access Control Table Manager.<br />
3 Click the button ‘Open’ to open the default file, or enter<br />
the path and file name that identifies the Access Control<br />
Table file of your choice.<br />
4 You can now:<br />
● Add stations to the Table<br />
<strong>WaveLAN</strong>/<strong>PCMCIA</strong> User’s Guide 4-19
Diagnostics for Windows 95 & Windows NT<br />
Other Options<br />
Add stations to the Table 4<br />
You<br />
● Remove stations from the Table.<br />
● Modify a station’s Description<br />
5 When finished, click the button ‘Save’ to save your<br />
modifications to the Access Control Table file.<br />
can add stations to the Access Control Table manually or<br />
automatically.<br />
To add stations manually, you will need to know the Universal<br />
MAC Address of the <strong>WaveLAN</strong> cards that have been inserted<br />
into your wireless stations:<br />
1 Enter the Universal MAC Address of the station’s<br />
<strong>WaveLAN</strong> Card<br />
2 (Optional) Enter a description of the station associated<br />
with the MAC Address (e.g. Harry’s Notebook)<br />
3 Click the ‘Add’ button to add the address to the ‘Access<br />
Control Table Contents’ field.<br />
4 Repeat steps 1 to 3 for any other <strong>WaveLAN</strong> station that<br />
you would like to include to the Access Control Table file.<br />
5 When finished, click the button ‘Save’ to save your<br />
modifications to the Access Control Table file.<br />
When you do not know the MAC Addresses of all the<br />
<strong>WaveLAN</strong> cards in your network, you can use the retrieve the<br />
Universal MAC Address of your <strong>WaveLAN</strong> stations<br />
automatically.<br />
1 Create an Access Control Table file and save it to a floppy<br />
disk.<br />
2 Take this disk to each of your <strong>WaveLAN</strong> stations<br />
3 At each station, start the WaveMANAGER/CLIENT<br />
program and click the button ‘Access Control’ to start the<br />
Access control Table Manager.<br />
4 Insert the diskette into the floppy disk drive of the<br />
<strong>WaveLAN</strong> station.<br />
5 Open your Access Control Table file from the diskette<br />
6 Click the button ‘Read MAC from card’ to read this<br />
station’s Universal MAC Address.<br />
4-20 <strong>WaveLAN</strong>/<strong>PCMCIA</strong> User’s Guide
Remove stations from the<br />
Table 4<br />
Loading the Access Control<br />
Table into your WavePOINT 4<br />
Diagnostics for Windows 95 & Windows NT<br />
Other Options<br />
7 (Optional) Enter a description of the station associated<br />
with the MAC Address (e.g. John’s Desktop)<br />
8 Click the ‘Add’ button to add the address to the ‘Access<br />
Control Table Contents’ field.<br />
9 Save the Access Control Table file back to the diskette<br />
10 Exit the WaveMANAGER/CLIENT program<br />
11 Take out the floppy disk and move on to the next<br />
<strong>WaveLAN</strong> station.<br />
12 Repeat steps 3 to 11 for any other <strong>WaveLAN</strong> station that<br />
you would like to include to the Access Control Table file.<br />
Note: For <strong>WaveLAN</strong> stations that do not support the Miniport Driver<br />
(typically MS-DOS and Windows 3.x platforms) you can use<br />
the MS-DOS utility wpaccess.exe that is described in the<br />
installation and operation <strong>guide</strong> for WavePOINT. This<br />
document can be downloaded from the <strong>WaveLAN</strong> <strong>web</strong>site.<br />
To remove stations from the Access Control Table file:<br />
1 Start the WaveMANAGER/CLIENT program<br />
2 In the Main window, click the button ‘Access Control’, to<br />
start the Access Control Table Manager.<br />
3 Enter the path and file name that identifies the Access<br />
Control Table file of your choice, and click the button<br />
‘Open’ to open the file.<br />
4 From the ‘Access Control Table Contents’ filed select the<br />
MAC Address that you would like to deny access to the<br />
WavePOINT access point.<br />
5 Click the button ‘Delete’ to remove the station from the<br />
list of authorized stations.<br />
6 Repeat steps 4 and 5 for each other station that you would<br />
like to remove.<br />
7 When finished, click the button ‘Save’ to save your<br />
modifications to the Access Control Table file.<br />
The Access Control Table Manager is only a processing tool to<br />
collect and maintain the list of MAC Addresses for <strong>WaveLAN</strong><br />
<strong>WaveLAN</strong>/<strong>PCMCIA</strong> User’s Guide 4-21
Diagnostics for Windows 95 & Windows NT<br />
Other Options<br />
stations that are authorized to send/receive traffic via the<br />
WavePOINT access points.<br />
To activate Access Control for your WavePOINT devices, or to<br />
update the Access Control data, you will need to upload the<br />
Access Control Table file into the WavePOINT access points,<br />
using the:<br />
● WaveMANAGER/AP program to upload the file to<br />
WavePOINT-II access points.<br />
● WavePOINT Configurator to upload the file to previous<br />
generation WavePOINT access points.<br />
WaveMANAGER/AP requires the Windows 95 or Windows<br />
NT (v4.0) Operating system.<br />
The WavePOINT Configurator requires the MS-DOS<br />
operating system.<br />
You are advised to load the same Access Control Table file<br />
into all WavePOINTs in your network.<br />
Please refer to the user documentation that was shipped with<br />
your WavePOINT devices for more detailed information<br />
Note: You can not use the WaveMANAGER/CLIENT to activate or<br />
update the Access Control data into your WavePOINT access<br />
points.<br />
4-22 <strong>WaveLAN</strong>/<strong>PCMCIA</strong> User’s Guide
Chapter 5<br />
Installation for MS-DOS<br />
Table of Contents<br />
Installation for MS-DOS<br />
Introduction 5-1<br />
Installation for Card & Socket Services 5-2<br />
Collecting the Information 5-2<br />
Installing the Network Operating System 5-3<br />
Running the INSTALL Program 5-3<br />
Verifying the Installation 5-6<br />
Frequency Selection (2.4 GHz) 5-7<br />
Swapping Cards 5-7<br />
Enabler-based Installation 5-8<br />
Overview 5-8<br />
Installing the Network Operating System 5-8<br />
Copying the <strong>WaveLAN</strong> Software 5-8<br />
Set up the Enabler 5-9<br />
Driver Configuration 5-11<br />
Finishing Installation 5-13<br />
Verify the Installation 5-13<br />
Creating a Utilities Diskette 5-14<br />
Frequency Selection (2.4 GHz) 5-15
Card and Socket Services 5<br />
Enabler Based Installation 5<br />
Card<br />
If<br />
Installation for MS-DOS5<br />
Introduction<br />
Introduction 5<br />
Under MS-DOS there are two options to install your<br />
<strong>WaveLAN</strong>/<strong>PCMCIA</strong> software:<br />
● Card and Socket Services based installation<br />
● Enabler Based Installation<br />
Services & Socket Services (CS&SS) is commercial<br />
software that is usually included when you buy a new<br />
computer. CS&SS software is not included with the<br />
<strong>WaveLAN</strong>/<strong>PCMCIA</strong> Kit.<br />
The <strong>WaveLAN</strong> drivers and utilities have been developed to<br />
take advantage of <strong>PCMCIA</strong> Card and Socket Services. If your<br />
computer does not already have Card and Socket Services<br />
installed, you are advised to contact your computer’s supplier<br />
to determine if Card and Socket Services software is available<br />
for your computer, and install it if possible.<br />
Turn to page 5-2 for installation instructions.<br />
you cannot obtain suitable Card and Socket Services<br />
software you can install the <strong>WaveLAN</strong>/<strong>PCMCIA</strong> card using a<br />
program called the Enabler.<br />
Using the Enabler program, you will need to install the<br />
<strong>WaveLAN</strong> software manually, and edit the system files to set<br />
<strong>WaveLAN</strong> configuration parameters.<br />
Another situation where you might consider installing the<br />
Enabler is when there are constraints on conventional memory<br />
usage and there are no other <strong>PCMCIA</strong> cards in the system.<br />
For installation instructions using the Enabler program, turn to<br />
page 5-9.<br />
<strong>WaveLAN</strong>/<strong>PCMCIA</strong> User’s Guide 5-1
Installation for MS-DOS<br />
Installation for Card & Socket Services<br />
Installation for Card & Socket<br />
Services 5<br />
If Card Services and Socket Services (CS&SS) are installed on<br />
your computer you can quickly and easily install <strong>WaveLAN</strong><br />
using the INSTALL program on the <strong>WaveLAN</strong> diskette.<br />
The INSTALL program will ensure that:<br />
● the correct versions of the <strong>WaveLAN</strong> driver, support files<br />
and utilities are installed and<br />
● all system files are updated with the correct initialization<br />
parameters.<br />
<strong>WaveLAN</strong> installation in a computer with Card and Socket<br />
Services is a 4-step procedure:<br />
1 Contact your network Administrator to collect the<br />
information required to connect your computer to the<br />
network.<br />
2 Install the network (client) software as supplied with your<br />
network operating system software.<br />
3 Run the <strong>WaveLAN</strong> INSTALL program from the<br />
<strong>WaveLAN</strong> diskette for MS-DOS<br />
4 Reboot the computer to verify that the drivers load<br />
successfully.<br />
5 (2.4 GHz cards only) Optionally verify and/or change the<br />
operating frequency of your 2.4 GHz card.<br />
5-2 <strong>WaveLAN</strong>/<strong>PCMCIA</strong> User’s Guide
Collecting the<br />
Information 5<br />
Installing the Network<br />
Operating System 5<br />
Installation for MS-DOS<br />
Installation for Card & Socket Services<br />
Before you begin the <strong>WaveLAN</strong> installation, you should<br />
collect the following information from your network<br />
administrator. The INSTALL program will ask you to supply<br />
this information.<br />
● The type of network driver required for your network<br />
(ODI or NDIS).<br />
● Whether or not the network requires your transmissions to<br />
be encrypted (cards with the Security Feature).<br />
● Whether or not the network allows you to roam with your<br />
<strong>WaveLAN</strong>.<br />
— If roaming is allowed, you will need your network's<br />
four digit Domain ID. Also, you should determine<br />
whether or not a beacon key is required and, if so, its<br />
four digit value.<br />
— If roaming is not allowed, you will need your<br />
network's four digit Network ID.<br />
The following items only apply to ODI-based networks (e.g.<br />
Novell NetWare):<br />
● The network's frame type.<br />
● Whether or not the network is configured to allow<br />
<strong>WaveLAN</strong> Power Management and, if so, the proper<br />
settings. Appendix C contains more information about<br />
Power Management.<br />
Use the documentation that comes with the network operating<br />
system to do the installation. If asked to insert a diskette<br />
containing an “updated”, “OEM”, or “other vendor” -<br />
supplied driver, insert the <strong>WaveLAN</strong> diskette in drive A:.<br />
Appendix B contains examples of installing a <strong>WaveLAN</strong><br />
workstation driver in various network operating environments.<br />
<strong>WaveLAN</strong>/<strong>PCMCIA</strong> User’s Guide 5-3
Installation for MS-DOS<br />
Installation for Card & Socket Services<br />
Running the INSTALL<br />
Program 5<br />
5 Starting the Install Program To<br />
Controlling the Install<br />
Program 5<br />
The INSTALL program will check your system for <strong>PCMCIA</strong><br />
Card and Socket Services software. (If no <strong>PCMCIA</strong> software<br />
is found, you will not be able to continue with the installation).<br />
The program will also:<br />
● Customize the installation to suit your system.<br />
● Modify your system files.<br />
The program will create a WAVELAN directory on your hard<br />
drive, copy the software components into that directory and<br />
various WAVELAN subdirectories, and modify network<br />
configuration details.<br />
start the program, slide the <strong>WaveLAN</strong> diskette into your<br />
floppy disk drive. From your DOS prompt, change to your<br />
floppy drive by typing: a: and pressing the ENTER key.<br />
(If your floppy drive responds to a different letter, substitute<br />
that letter for “a”)<br />
Now begin the installation program by typing install and<br />
pressing the ENTER key.<br />
Here are a few basic points to keep in mind as you progress<br />
through the INSTALL program:<br />
● Use the cursor (arrow) keys Up/Down to move up and<br />
down in presented lists<br />
● Use the cursor (arrow) keys Right/Left and the<br />
Backspace/Delete keys to change the value in parameter<br />
text fields.<br />
● Press the ENTER key to accepted highligthed values or to<br />
move to the next step of the Install program.<br />
● Press the F1<br />
function key at any time during the program<br />
to get a help dialog that provides information about the<br />
screen you are currently viewing. When you are finished<br />
with a help screen, press any key to return to the program.<br />
5-4 <strong>WaveLAN</strong>/<strong>PCMCIA</strong> User’s Guide
Working with the Install<br />
Program 5<br />
Controlling System File<br />
Updates 5<br />
Installation for MS-DOS<br />
Installation for Card & Socket Services<br />
● Press the F10 function key to return to the screen you were<br />
previously viewing. This is especially helpful if you<br />
accidentally press the ENTER function key before you are<br />
finished with a screen.<br />
● Press ESC<br />
twice in a row to exit the installation program.<br />
Note: If the INSTALL program asks you to insert your <strong>WaveLAN</strong><br />
card even though you already have, eject the card and try reinserting<br />
it. If the card is properly inserted, then it should be<br />
recognized and the program should continue.<br />
The INSTALL program is designed to be as automated as<br />
possible. When required, the program will prompt you to enter<br />
or acknowledge user-configurable parameters.<br />
In most cases, the program will present you a text field,<br />
containing highlighted default values, or a series of options in<br />
the form of a list. The field or form will include a description<br />
about the type of information requested:<br />
For example, one of the first decisions you must make is the<br />
type of Network Operating System (NOS) you are going to<br />
use.<br />
The INSTALL program will automatically update your system<br />
files. It will, however, give you the option to rename and save<br />
your original files.<br />
● If you ignore this request, the INSTALL program will<br />
simply overwrite the old files.<br />
● If you choose to save your old files, you can always copy<br />
them over the new files created by the installation if you<br />
are having a problem getting your <strong>WaveLAN</strong> configured.<br />
Hint: You are advised to use the ‘Rename original files’ option.<br />
Doing so will enable you to restore the original configuration<br />
of your computer, allowing the computer to work the way it<br />
did before you tried to install the <strong>WaveLAN</strong> drivers.<br />
<strong>WaveLAN</strong>/<strong>PCMCIA</strong> User’s Guide 5-5
Installation for MS-DOS<br />
Installation for Card & Socket Services<br />
Finishing the Installation 5<br />
If<br />
Before the software files are copied onto your system, you will<br />
be given the opportunity to view, accept or modify the<br />
configuration settings you selected during the program.<br />
● If you accept the settings, the files will be copied without<br />
letting you review the choices you made.<br />
● If you choose to view the configuration settings, the<br />
program will display:<br />
— The names of the directories into which the <strong>WaveLAN</strong><br />
and network software drivers will be copied.<br />
— Your <strong>WaveLAN</strong> card's configuration details, including<br />
IRQ, I/O Port and network frame type.<br />
If you catch any errors made during the installation, you can<br />
correct them using the modify option.<br />
you accept the settings, the system files will be copied to<br />
your computer.<br />
1 Insert your <strong>WaveLAN</strong>/<strong>PCMCIA</strong> Card into your computer<br />
2 Verify the Antenna Module is properly connected<br />
3 Reboot your computer in order to have the computer load<br />
the new settings.<br />
When the system has rebooted properly, you will be able to use<br />
your <strong>WaveLAN</strong> card.<br />
Caution! Novell NetWare install utilities will create a network<br />
configuration file NET.CFG. The <strong>WaveLAN</strong> INSTALL<br />
program also stores a set of <strong>WaveLAN</strong> parameter settings in<br />
this NET.CFG files.<br />
Some Novell NetWare install utilities always recreate the<br />
NET.CFG file overwriting existing parameters. When, for any<br />
reason, you would need to re-install the NetWare operating<br />
system software, always make sure to re-run the <strong>WaveLAN</strong><br />
INSTALL program afterwards.<br />
5-6 <strong>WaveLAN</strong>/<strong>PCMCIA</strong> User’s Guide
Verifying the Installation 5<br />
Frequency Selection (2.4<br />
GHz) 5<br />
Installation for MS-DOS<br />
Installation for Card & Socket Services<br />
When the <strong>WaveLAN</strong> driver loads, a message similar to one of<br />
the following will be displayed:<br />
DOS/ODI driver:<br />
WLAN DOS ODI vX.xx (YYMMDD)<br />
<strong>PCMCIA</strong> XXXX MHz Roaming enabled Domain ID = xxxx Default<br />
NWID = xxxx<br />
Power Management disabled Security Feature Disabled<br />
NDIS-2 driver:<br />
<strong>WaveLAN</strong> DOS NDIS 2 Driver vXX.xx<br />
<strong>PCMCIA</strong> XXXX MHz Roaming enabled Domain ID = xxxx Default<br />
NWID = xxxx<br />
Power Management disabled Security Feature Disabled<br />
These messages indicate that your driver loaded successfully,<br />
with the configuration parameters displayed.<br />
To verify wireless performance, run the Point-to-Point<br />
Diagnostics Utility (described in Chapter 6).<br />
The factory-set operating frequency of 2.4 GHz cards is<br />
subject to local regulations. For most units that support<br />
frequency selection, the factory-set operating frequency is<br />
2.422 GHz.<br />
All <strong>WaveLAN</strong> devices within a <strong>WaveLAN</strong> network should<br />
operate at the same operating frequency, to allow flawless<br />
communication.<br />
If you have installed a 2.4 GHz card and intend to use it in<br />
networks with older <strong>WaveLAN</strong> 2.4 GHz ISA cards, Micro<br />
Channel cards or WavePOINTs you may need to verify and/or<br />
change the operating frequency of your <strong>WaveLAN</strong>/<strong>PCMCIA</strong><br />
card, in order to connect it to the network that includes the<br />
previously installed <strong>WaveLAN</strong> products.<br />
Appendix D describes how to use the WFREQSEL utility to<br />
change the operating frequency.<br />
<strong>WaveLAN</strong>/<strong>PCMCIA</strong> User’s Guide 5-7
Installation for MS-DOS<br />
Installation for Card & Socket Services<br />
Swapping Cards 5<br />
The INSTALL program upgrades an internal area of the<br />
<strong>WaveLAN</strong> card called the Card Information Structure (CIS).<br />
If you replace the card by one configured with an earlier<br />
software release, or replace it with a new card, you should<br />
run the INSTALL program on the replacement card to<br />
ensure compatibility with the <strong>WaveLAN</strong> software installed on<br />
the computer.<br />
5-8 <strong>WaveLAN</strong>/<strong>PCMCIA</strong> User’s Guide
Overview 5<br />
Installing the Network<br />
Operating System 5<br />
Copying the <strong>WaveLAN</strong><br />
Software 5<br />
Installation for MS-DOS<br />
Enabler-based Installation<br />
Enabler-based Installation 5<br />
Using the Enabler program, you will need to install the<br />
<strong>WaveLAN</strong> software manually, and edit the system files to set<br />
<strong>WaveLAN</strong> configuration parameters.<br />
The recommended installation procedure is as follows:<br />
1 Install the network operating system software on your<br />
computer.<br />
2 Copy the <strong>WaveLAN</strong> software to the computer’s hard disk.<br />
3 Edit the following system files:<br />
● CONFIG.SYS file<br />
● Network Configuration File<br />
(to include <strong>WaveLAN</strong>-specific parameters).<br />
4 Reboot the computer to verify that the Enabler executes<br />
successfully and the network driver is loaded.<br />
5 (Optionally) Create a <strong>WaveLAN</strong> Utilities Diskette.<br />
6 (2.4 GHz cards only) Optionally verify and/or change the<br />
operating frequency of your 2.4 GHz card.<br />
Use the documentation that comes with the network operating<br />
system to do the installation. If asked to insert a diskette<br />
containing an “updated”, “OEM”, or “other vendor” -<br />
supplied driver, insert the <strong>WaveLAN</strong> diskette in drive A:.<br />
Appendix B contains examples of installing a <strong>WaveLAN</strong><br />
workstation driver in various network operating environments.<br />
The <strong>WaveLAN</strong>/<strong>PCMCIA</strong> disk includes a small batch file<br />
(cpy2hdsk.bat) that will help you to copy the<br />
<strong>WaveLAN</strong>/<strong>PCMCIA</strong> software to the harddisk of your<br />
<strong>WaveLAN</strong>/<strong>PCMCIA</strong> User’s Guide 5-9
Installation for MS-DOS<br />
Enabler-based Installation<br />
Set up the Enabler 5<br />
computer. To copy the <strong>WaveLAN</strong> software, proceed as<br />
follows:<br />
1 Choose a name for the hard disk directory where the<br />
software will be kept, e.g. c:\wavelan<br />
2 Place the <strong>WaveLAN</strong> software diskette in drive A:<br />
3 Make drive A: the current drive<br />
4 Run the batch file CPY2HDSK.BAT with the chosen<br />
harddisk directory name as parameter.<br />
Example DOS commands:<br />
a:\<br />
a: cpy2hdsk c:\wavelan<br />
The Enabler program must be run before any program<br />
(network driver or utility) can access the <strong>WaveLAN</strong> card. To<br />
ensure the Enabler is always run at start-up time, it should be<br />
executed as a “DEVICE” statement in the CONFIG.SYS file.<br />
Use a DOS line editor to add a DEVICE line in CONFIG.SYS.<br />
The DEVICE line must contain parameters for:<br />
● Memory space address (of a 4096-byte space).<br />
● I/O Base address.<br />
● Interrupt Request Line number (IRQ).<br />
Format:<br />
where:<br />
= device = []enabler.sys /m=xxxx /b=xxx /i=nn<br />
“[...]” Enclose optional parameters (do not type brackets).<br />
Disk drive and directory containing ENABLER.SYS<br />
5-10 <strong>WaveLAN</strong>/<strong>PCMCIA</strong> User’s Guide
Driver Configuration 5<br />
Installation for MS-DOS<br />
Enabler-based Installation<br />
/m=xxxx Memory space address (4-digit hexadecimal)<br />
Valid range: ‘C000 - EF00’ in increments of ‘100’ (‘C000’,, ‘C100’,,<br />
‘C200’,, etc.)<br />
/b=xxx, I/O Base address (3-digit hexadecimal)<br />
Valid range: ‘300 - 370’ in increments of ‘8’ (‘300’,, ‘308’,, ‘310’,, 318’,,<br />
etc.)<br />
/i=nn IRQ (1- or 2-digit decimal)<br />
Valid values: ‘3’,, ‘4’,, ‘5’,, ‘7’,, ‘9’,, ‘10’,, ‘11’,, ‘12’,, ‘14’,, ‘15’<br />
The DEVICE statement must contain parameter values for<br />
each card, and the values must be different for each card.<br />
Example statement:<br />
device = c:\wavelan\enabler\enabler.sys /m=d100 /b=300 /i=11<br />
The Enabler uses memory addresses ‘0d1000’H - ‘0d1fff’H,<br />
I/O base address ‘0300’H and IRQ 11.<br />
Note 1: Remove any other <strong>PCMCIA</strong>-related DEVICE statements from<br />
CONFIG.SYS. If Socket Services or Card Services are<br />
present, remove these also. The documentation that came with<br />
your computer or other <strong>PCMCIA</strong> device should help you to<br />
identify these statements.<br />
Note 2: If you are using a memory manager such as EMM386.EXE,<br />
the memory space required by the Enabler should be<br />
“excluded”. For the example above, add a line like the<br />
following:<br />
= device=c:\dos\emm386.exe noems x=d100-d1ff<br />
Note 3: If Microsoft Windows is installed, add a statement to<br />
SYSTEM.INI to protect the Enabler’s memory space. The<br />
statement should be added to the “386Enh” section of<br />
SYSTEM.INI. Example:<br />
= [386Enh] ... EMMExclude=D100-D1FF ...<br />
The following network drivers are supplied with<br />
<strong>WaveLAN</strong>/<strong>PCMCIA</strong> for installation on MS-DOS Systems:<br />
<strong>WaveLAN</strong>/<strong>PCMCIA</strong> User’s Guide 5-11
Installation for MS-DOS<br />
Enabler-based Installation<br />
DOS/ODI Driver<br />
Configuration 5<br />
● A DOS/ODI driver to use in Novell NetWare<br />
environments (NetWare, Personal NetWare). The<br />
DOS/ODI driver uses a configuration file called NET.CFG<br />
● A DOS/NDIS-2 driver for NDIS-compatible environments<br />
such as LAN Manager and Windows for Workgroups. The<br />
NDIS driver uses a configuration file called<br />
PROTOCOL.INI<br />
You can place some <strong>WaveLAN</strong>-specific parameters in the<br />
network configuration file.<br />
The <strong>WaveLAN</strong> configuration parameters for the DOS/ODI<br />
driver are set in the file NET.CFG. A sample NET.CFG file is<br />
provided in the root directory of the <strong>WaveLAN</strong> software<br />
diskette.<br />
Note: When editing, be sure to place the <strong>WaveLAN</strong> parameters,<br />
indented, directly after the link driver statement.<br />
The following table on the next page lists <strong>WaveLAN</strong>-specific<br />
parameters with their value ranges and usage:<br />
Parameter Range Usage<br />
Socket x ‘x’ in the range [A - H,ah,x]<br />
NWID xxx ‘xxxx’ hexadecimal<br />
value in the range 0100H<br />
through FFFFH<br />
Domain ID xxxx ‘xxxx’ hexadecimal<br />
value in the range 0000H<br />
through FFFFH<br />
5-12 <strong>WaveLAN</strong>/<strong>PCMCIA</strong> User’s Guide<br />
Identifies the <strong>PCMCIA</strong> card<br />
socket. (“X,x” - use first found).<br />
Identifies the <strong>WaveLAN</strong> Network<br />
ID. Required if no roaming. If used,<br />
must be same for all <strong>WaveLAN</strong><br />
cards in the network. The default<br />
value is ‘0100’. Using this value<br />
may result in unintentional overlap<br />
with adjacent <strong>WaveLAN</strong> cells.<br />
This parameter controls roaming.<br />
If set to ‘0000’, Roaming is<br />
disabled, i.e. station does not<br />
connect automatically. If set to any<br />
other value, Roaming is enabled.<br />
All stations in the Domain must<br />
have the same Domain ID.
DOS/NDIS-2 Driver<br />
Configuration 5<br />
Beacon Key xxxx ‘xxxx’ hexadecimal<br />
value in the range 0000H<br />
through FFFFH<br />
Station Address<br />
xx.....xx<br />
Station Name x...........x Any alpha-numeric string<br />
(max. 31 characters - no<br />
spaces allowed)<br />
Encryption Key xx.....xx 0xnn, 8 groups of 2<br />
hexadecimal digits (‘nn’)<br />
separated by commas or<br />
‘0’<br />
Power Up x...x Decimal value in the<br />
range 0- 65535<br />
Power Down x...x Decimal value in the<br />
range 0- 65535<br />
Installation for MS-DOS<br />
Enabler-based Installation<br />
Used to encode the NWID<br />
transmitted by a Roaming access<br />
point. Must be same for all stations<br />
in the Domain. ‘0000’ = no<br />
encoding.<br />
12 hexadecimal digits Overrides the card’s factory<br />
installed Universal MAC<br />
address.The 2nd digit of the first<br />
digit-pair must be 2,6,A, or E<br />
Can be used by the Point-to-Point<br />
diagnostics utility.<br />
A 16 hexadecimal digit value<br />
enables encryption. The value ‘0’<br />
disables encryption.<br />
If Power Management used, time<br />
in seconds that the card is in<br />
normal power-consuming mode.<br />
See Appendix C for discussion<br />
Time in seconds that the card is in<br />
low power-consuming<br />
‘Sleep”mode. If not used (or set to<br />
‘0’) Power Management will be<br />
disabled.<br />
Required Parameters:<br />
If the card is installed in a roaming workstation,a Domain ID is required. All other<br />
parameters are optional.<br />
If the card is not going to be used in a roaming environment a NWID is required.<br />
The <strong>WaveLAN</strong> configuration parameters for the DOS/NDIS-2<br />
driver are set in the file PROTOCOL.INI. A sample<br />
PROTOCOL.INI file is provided in directory<br />
\MSLANMAN.DOS\DRIVERS\WAVELAN of the <strong>WaveLAN</strong><br />
software diskette.<br />
The table below lists <strong>WaveLAN</strong>-specific parameters with their<br />
value ranges and usage:<br />
<strong>WaveLAN</strong>/<strong>PCMCIA</strong> User’s Guide 5-13
Installation for MS-DOS<br />
Enabler-based Installation<br />
Parameter Range Usage<br />
<strong>PCMCIA</strong>_Socket<br />
= x<br />
‘x’ in the range [A - H,ah,x<br />
NWID = 0xnnnn ‘nnnn’ hexadecimal value<br />
in the range 0100 through<br />
FFFF<br />
Domain_ID =<br />
0xnnnn<br />
Beacon_Key =<br />
0xnnnn<br />
Station_Address<br />
0xnn<br />
Station_Name =<br />
x..................x<br />
Encryption_Key<br />
0xnn<br />
‘nnnn’ hexadecimal value<br />
in the range 0000 through<br />
FFFF<br />
‘nnnn’ hexadecimal value<br />
in the range 0000 through<br />
FFFF<br />
0xnn, 6 groups of 2<br />
hexadecimal digits (‘nn’)<br />
separated by commas<br />
Any alpha-numeric string<br />
(max. 31 characters - no<br />
spaces allowed)<br />
0xnn, 8 groups of 2<br />
hexadecimal digits (‘nn’)<br />
separated by commas or<br />
‘0’<br />
5-14 <strong>WaveLAN</strong>/<strong>PCMCIA</strong> User’s Guide<br />
Identifies the <strong>PCMCIA</strong> card<br />
socket. (“X,x” - use first found).<br />
Optional parameter, defaults to<br />
“‘X”.<br />
Identifies the <strong>WaveLAN</strong> Network<br />
ID. Required if no roaming. If used,<br />
must be same for all <strong>WaveLAN</strong><br />
cards in the network. The default<br />
value is ‘0100’. Using this value<br />
may result in unintentional overlap<br />
with adjacent <strong>WaveLAN</strong> cells.<br />
This parameter turns on roaming.<br />
If not used, or if set to ‘0x0000’,<br />
station cannot roam. All stations in<br />
the Domain must have the same<br />
Domain ID.<br />
Used to encode the NWID<br />
transmitted by a Roaming access<br />
point. Must be same for all stations<br />
in the Domain. ‘0x0000’ = no<br />
encoding.<br />
Overrides the card’s factory<br />
installed Universal MAC<br />
address.The 2nd digit of the first<br />
digit-pair must be 2,6,A, or E<br />
Can be used by the Point-to-Point<br />
diagnostics utility.<br />
A 16 hexadecimal digit value<br />
enables encryption. The value ‘0’<br />
disables encryption.<br />
Required Parameters:<br />
If the card is installed in a roaming workstation,a Domain ID is required. All other<br />
parameters are optional.<br />
If the card is not going to be used in a roaming environment a NWID is required.
Finishing Installation 5<br />
Verify the Installation 5<br />
Installation for MS-DOS<br />
Enabler-based Installation<br />
To finish the installation Insert your <strong>WaveLAN</strong>/<strong>PCMCIA</strong><br />
Card into your computer and verify the Antenna<br />
Module is properly connected<br />
Reboot your computer in order to have the computer load the<br />
new settings.<br />
After installing the PC card you should reboot your computer<br />
to verify that the Enabler executes correctly. Correct execution<br />
of the Enabler is confirmed with the message (example):<br />
<strong>WaveLAN</strong>/<strong>PCMCIA</strong> (DOS) Enabler vx.x<br />
Enabler Installed:<br />
1. Memory: D100, IO Base: 300, IRQ: 11<br />
The message that indicates that the driver was loaded<br />
succesfully differs slightly dependent on the type of driver:<br />
For ODI drivers this message is similar to:<br />
WLAN DOS ODI vX.xx (YYMMDD) <strong>PCMCIA</strong> XXXX MHz Roaming<br />
enabled Domain ID = xxxx Default NWID=xxxx<br />
Power Management disabled Security Feature disabled<br />
For NDIS drivers this message is similar to:<br />
<strong>WaveLAN</strong> DOS NDIS 2 Driver vXX.xx <strong>PCMCIA</strong> XXXX MHz Roaming<br />
enabled Domain ID = xxxx Default NWID=xxxx<br />
Power Management disabled Security Feature Disabled<br />
To verify wireless performance, run the Point-to-Point<br />
Diagnostics Utility (described in Chapter 6, “Diagnostics for<br />
MS-DOS”).<br />
Note: For Enabler-Based installations, you will need a Utilities<br />
Diskette to run the Point-to-Point Diagnostics program.<br />
See Creating a Utilities Diskette for more information.<br />
<strong>WaveLAN</strong>/<strong>PCMCIA</strong> User’s Guide 5-15
Installation for MS-DOS<br />
Enabler-based Installation<br />
Creating a Utilities<br />
Diskette 5<br />
The Utilities diskette is a bootable diskette which enables you<br />
to run the Point-to-Point Diagnostics utility or Frequency<br />
Select Utility (described in Chapter 6, “Diagnostics for MS-<br />
DOS” and Chapter 7, “Frequency Select Utility”).<br />
The reason why you need to create this diskette, is that these<br />
<strong>WaveLAN</strong> Utilities do not run when the <strong>WaveLAN</strong> driver is<br />
enabled via the Enabler program.<br />
Restarting your computer from the Utilities Diskette, will<br />
provide an alternative boot sequence, enabling you to run the<br />
<strong>WaveLAN</strong> Utilities on Enabler-based <strong>WaveLAN</strong> systems as<br />
well.<br />
The <strong>WaveLAN</strong>/<strong>PCMCIA</strong> software includes a small batch file<br />
(utl2boot.bat) that will help you to create the Utilities Diskette:<br />
1 Change to the hard disk directory where the <strong>WaveLAN</strong><br />
software was installed.<br />
2 Insert a DOS-formatted diskette in drive A:<br />
3 Run the batch file UTL2BOOT.BAT.<br />
Example DOS commands:<br />
c:\<br />
c: cd \wavelan utl2boot<br />
In order to allow the <strong>WaveLAN</strong> utilities to find configuration<br />
information relating to the <strong>WaveLAN</strong> card,you will also need<br />
to create a WAVELAN.INI file.<br />
4 Use an ASCII text editor, such as the MS-DOS EDIT<br />
program to create a file called WAVELAN.INI:<br />
5-16 <strong>WaveLAN</strong>/<strong>PCMCIA</strong> User’s Guide<br />
cd\<br />
cd wavelan<br />
edit wavelan.ini<br />
The <strong>WaveLAN</strong>.INI file should contain two lines that<br />
idenitfy the full path filename of the configuration file, and<br />
the type of driver installed (ODI or NDIS-2).<br />
Example (ODI):<br />
FileName=c:\nwclient\net.cfg<br />
FileType=netc
Frequency Selection (2.4<br />
GHz) 5<br />
Example (NDIS):<br />
Installation for MS-DOS<br />
Enabler-based Installation<br />
FileName=c:\windows\protocol.ini<br />
FileType=prot<br />
5 Finally, copy the file <strong>WaveLAN</strong>.INI you created under the<br />
step called “Finishing Installation” on page 5-15 to your<br />
utilities diskette.<br />
c:\<br />
c: cd\wavelan<br />
copy wavelan.ini a:<br />
The factory-set operating frequency of 2.4 GHz cards is now<br />
2.422 GHz. If you have installed a 2.4 GHz card and intend to<br />
use it in networks with older <strong>WaveLAN</strong> 2.4 GHz ISA cards,<br />
Micro Channel cards or WavePOINTs you need to change the<br />
PC card’s operating frequency to the one currently used by the<br />
older products.<br />
Chapter 7, “Frequency Select Utility” describes how to use the<br />
WFREQSEL utility to change the operating frequency.<br />
Note: For Enabler-Based installations, you will need a Utilities<br />
Diskette to run the Frequency Select program.<br />
See “Creating a Utilities Diskette” on page 16. for more<br />
information.<br />
<strong>WaveLAN</strong>/<strong>PCMCIA</strong> User’s Guide 5-17
Chapter 6<br />
Diagnostics for MS-DOS<br />
Table of Contents<br />
Diagnostics for MS-DOS<br />
Point-to-Point Diagnostics 6-1<br />
About the Point-to-Point Diagnostics 6-1<br />
Running Point-to-Point Diagnostics 6-2<br />
Selecting the Local <strong>WaveLAN</strong> Card 6-3<br />
Selecting a Link Test Partner 6-3<br />
Changing Local Identifiers 6-4<br />
Search for Other Stations 6-4<br />
Changing the Test Partner 6-5<br />
The Measurement Data Display 6-6<br />
Positioning your <strong>WaveLAN</strong> Computer 6-7<br />
Logging Measurement Data 6-7<br />
Command Line Parameters 6-8
About the Point-to-Point<br />
Diagnostics 6<br />
Diagnostics for MS-DOS6<br />
Point-to-Point Diagnostics<br />
Point-to-Point Diagnostics 6<br />
The Point-to-Point Diagnostic Utility is a MS-DOS based<br />
utility that allows you to verify the communications path<br />
between two <strong>WaveLAN</strong> stations, or between a <strong>WaveLAN</strong><br />
station and WavePOINT access point.<br />
You can use this utility to:<br />
● Check that cards and antennas function correctly to allow<br />
exchange of messages<br />
● Optimize antenna positioning<br />
● Verify whether stations are within operating range of each<br />
other<br />
● Diagnose the occurrence of local RF noise and<br />
environmental suitability.<br />
The Point-to-Point Diagnostics Utility has a log-file option, to<br />
save measurement data to a disk file.<br />
Note: The Point-to-Point Diagnostic is a MS-DOS based utility.<br />
If you would like to run this utility on a Windows 95/NT<br />
computer, the computer must have MS-DOS installed. Restart<br />
the computer in MS-DOS mode, as you can not run the utility<br />
from an MS-DOS box under Windows.<br />
<strong>WaveLAN</strong>/<strong>PCMCIA</strong> User’s Guide 6-1
Diagnostics for MS-DOS<br />
Running Point-to-Point Diagnostics<br />
Running Point-to-Point<br />
Diagnostics 6<br />
If you have installed the <strong>WaveLAN</strong> client driver for Card and<br />
Socket Services, you can run the program from the <strong>WaveLAN</strong><br />
Utilities subdirectory of the hard disk while the <strong>WaveLAN</strong><br />
network driver is running (the driver becomes temporarily<br />
inactive). Type:<br />
cd \wavelan\util<br />
ptpdiag [Enter]<br />
To run the utility when the Enabler is installed, place the<br />
Utilities diskette in drive A: of the workstation or <strong>server</strong> and<br />
reboot. Type:<br />
ptpdiag [Enter]<br />
Note: The Point-to-Point diagnostic utility includes a "remote<br />
diagnostics" feature that allows a link test with a remote station<br />
without operator intervention at the remote station. Some older<br />
versions of the <strong>WaveLAN</strong> network drivers installed on desktop<br />
computers do not support remote diagnostics. For these<br />
<strong>WaveLAN</strong> stations you must start up Point-to-Point<br />
diagnostics in each station for which the communications path<br />
is to be tested. Check the documentation supplied withthe<br />
older software versions.<br />
6-2 <strong>WaveLAN</strong>/<strong>PCMCIA</strong> User’s Guide
Selecting the Local<br />
<strong>WaveLAN</strong> Card 6<br />
Figure 6-1<br />
6Main Selection Screen<br />
Selecting a Link Test<br />
Partner 6<br />
Diagnostics for MS-DOS<br />
Running Point-to-Point Diagnostics<br />
The opening screen allows you to select the card to use for the<br />
test, in case more than one <strong>WaveLAN</strong> card is present.<br />
The main selection screen of the utility (Figure 6-1) enables<br />
you to change the Network ID of the monitoring (local) station<br />
temporarily for this Link Test Session. You will also use this<br />
screen to:<br />
● Search for other stations running Point-to-Point<br />
diagnostics<br />
● Start a link test with a selected station.<br />
Note: Stations with <strong>WaveLAN</strong> power management enabled are not<br />
displayed, because these stations can "go to sleep" at<br />
unpredictable moments, thereby giving unreliable link test<br />
results.<br />
<strong>WaveLAN</strong>/<strong>PCMCIA</strong> User’s Guide 6-3
Diagnostics for MS-DOS<br />
Running Point-to-Point Diagnostics<br />
Changing Local<br />
Identifiers 6<br />
NWID 6<br />
Name 6<br />
Search for Other Stations6<br />
Defaults<br />
Defaults<br />
The local station’s <strong>WaveLAN</strong> Network ID (NWID) and name<br />
(initially the MAC address) are displayed and may be modified<br />
if required. The modifications are in force only for the duration<br />
of the test. When you exit the utility the original values are<br />
restored.<br />
to the <strong>WaveLAN</strong> Network ID set in the network<br />
configuration file or when the card was configured. If the card<br />
is not configured the default value is "0100"H. Change the<br />
Network ID to investigate path conditions in other <strong>WaveLAN</strong><br />
cells.<br />
to the <strong>WaveLAN</strong> card’s MAC Address. This name<br />
will be displayed in the "Other Stations" box on any other<br />
stations in this network that are running the Point-to-Point<br />
Diagnostics program. Change it if a more meaningful name is<br />
required.<br />
Selecting this option causes a search to be made for all stations<br />
able to participate in Point-to-Point diagnostics with this<br />
station. The following conditions must be satisfied:<br />
● Same frequency band (915 MHz or 2.4 GHz).<br />
● Same NWID.<br />
● Within range.<br />
● Point-to-Point diagnostics running (in stations with older<br />
network drivers installed).<br />
The responding stations’ names or MAC addresses are<br />
displayed in the "Other Stations" box. (see Figure 6-1 on page<br />
6-3).<br />
Note: If no stations, or fewer than expected, are listed the problem<br />
could be:<br />
● Wrong NWID<br />
● Utility not started at one or more stations where older<br />
network drivers are installed.<br />
6-4 <strong>WaveLAN</strong>/<strong>PCMCIA</strong> User’s Guide
Changing the Test<br />
Partner 6<br />
● Antenna not properly connected.<br />
● WavePOINT not powered on.<br />
Diagnostics for MS-DOS<br />
Running Point-to-Point Diagnostics<br />
● Signal too weak. The antenna is completely shielded by a<br />
radio-frequency barrier or the stations are too far apart.<br />
● Noise level too high for signal measurement. The antenna<br />
of the local or remote station is too close to a noise source.<br />
● <strong>WaveLAN</strong> card or antenna defective.<br />
● Security Feature mismatch. If the security feature option<br />
has been installed, it is possible that one of the stations<br />
does not have encryption enabled or that the encryption<br />
key values are different (The "local" display indicates<br />
whether or not encryption is enabled for that station).<br />
● Frequency band mismatch; 2.4 GHz <strong>WaveLAN</strong> cards will<br />
not communicate with 915 MHz cards, nor will 2.4 GHz<br />
cards of different frequencies communicate with each<br />
other.<br />
● Can’t find encryption key. If the network is using the<br />
security feature, the Enabler is installed, and the<br />
encryption key is present as a parameter in the network<br />
configuration file, the utility needs to be able to locate the<br />
network configuration file to access the encryption key.<br />
The location of the network configuration file is given by<br />
the WAVELAN.INI file which must be present on the<br />
utilities diskette. Chapter 3 describes how to create a<br />
WAVELAN.INI file.<br />
Use the ‘Up’ and ‘Down’ arrow keys with the Enter key to<br />
select from the displayed list which remote station is to<br />
participate in the diagnostic test. After the selection is made<br />
the program executing at each participating station begins to<br />
measure signal reception conditions. Based on these<br />
measurements the utility displays an assessment of the Link<br />
quality. Link quality can be "Good", "Acceptable" or "Poor".<br />
<strong>WaveLAN</strong>/<strong>PCMCIA</strong> User’s Guide 6-5
Diagnostics for MS-DOS<br />
Running Point-to-Point Diagnostics<br />
The Measurement Data<br />
Display 6<br />
Figure 6-2<br />
6Measurement Data Display<br />
You can investigate the Link Quality in more detail by pressing<br />
[Enter] or the Cursor key to display the Measurement Data<br />
screen (Figure 6-2 on page 6-6).<br />
The utility displaysmeasurement data for both the local and<br />
remote stations. For each station six measurements are<br />
displayed:<br />
● Packets received - actual and expected.<br />
● Packets lost<br />
● Percentage successful packets received<br />
● Signal Level<br />
● Signal-to-Noise Ratio (SNR)<br />
● Signal Quality (SQ)<br />
The Link Quality assessment (Good, Acceptable, Poor) is<br />
based on the Percentage successful packets received<br />
(Successful RX), the SNR, and the Signal Quality (SQ)<br />
measurements.<br />
6-6 <strong>WaveLAN</strong>/<strong>PCMCIA</strong> User’s Guide
SNR 6<br />
Signal Quality 6<br />
Positioning your<br />
<strong>WaveLAN</strong> Computer 6<br />
Logging Measurement<br />
Data 6<br />
Signal-to-noise<br />
Signal<br />
Diagnostics for MS-DOS<br />
Running Point-to-Point Diagnostics<br />
Ratio is based on the strength of the received<br />
signal relative to the local noise. The received Signal Level is<br />
displayed as well as the SNR measurement.<br />
Quality is an indication of the "clarity" of signals<br />
received. This can be affected by the number and position of<br />
radio-frequency reflecting surfaces (such as exposed steel<br />
structural components of some buildings) in the environment<br />
of the signal path.<br />
Some environments can cause pockets of reduced Signal<br />
Quality to occur in an unpredictable way. A small relocation of<br />
the computer or antenna is often enough to give a significant<br />
improvement.<br />
If SNR is low (
Diagnostics for MS-DOS<br />
Running Point-to-Point Diagnostics<br />
Figure 6-3<br />
6Measurements Log File<br />
Example<br />
Command Line<br />
Parameters 6<br />
-Sx 6<br />
This<br />
You can append data to an existing file or save to a new file,<br />
and you can choose to save the data once only or at regular<br />
intervals during the test.<br />
If you are a skilled computer technician, you may wish to use<br />
one of the following parameter options on the MS-DOS<br />
command line to:<br />
● Specify a Socket address<br />
● Specify a <strong>WaveLAN</strong> Network ID<br />
● Specify a station name<br />
● Select monochrome display mode<br />
The following parameters are shown in uppercase for clarity.<br />
You can also use lowercase characters.<br />
parameter identifies the <strong>WaveLAN</strong>/<strong>PCMCIA</strong> card’s<br />
socket position. Valid values are<br />
6-8 <strong>WaveLAN</strong>/<strong>PCMCIA</strong> User’s Guide
-Ixxxx 6<br />
-Nxxxxxx........xx 6<br />
-M 6<br />
Parameter Usage Example: 6<br />
Sets<br />
Sets<br />
Sets<br />
:<br />
Table 6-1<br />
Diagnostics for MS-DOS<br />
Running Point-to-Point Diagnostics<br />
A B C D E F G H X (Select first card detected)<br />
The-S parameters suppress display of the diagnostic utility’s<br />
initial screen<br />
the <strong>WaveLAN</strong> Network ID (xxxx is a hexadecimal value<br />
in the range’0100’H - ’FFFF’H). This value overrides the<br />
configured Network ID for the duration of the test. You can use<br />
this parameter to allow the station to run Point-to-Point tests in<br />
different networks.<br />
the Station Name. Any Alphanumeric combination up to<br />
20 characters long is allowed.<br />
the video mode to monochrome. Used for some<br />
monochrome monitors and non-standard video adapters. Try<br />
using this parameter if you have difficulty viewing the display.<br />
ptpdiag -sa -i2402<br />
This command will run Point-to-Point diagnostics on a<br />
<strong>WaveLAN</strong> card installed in the first <strong>PCMCIA</strong> socket.<br />
The <strong>WaveLAN</strong> Network ID is set to’2402’ for the duration of<br />
program execution or until changed to another value. The links<br />
can be tested between this station and other stations or<br />
WavePOINTs that use this Network ID.<br />
<strong>WaveLAN</strong>/<strong>PCMCIA</strong> User’s Guide 6-9
Chapter 7<br />
Frequency Select Utility<br />
Table of Contents<br />
Frequency Select Utility<br />
About the Frequency Select Utility 7-1<br />
Do I Need to Use This Utility? 7-1<br />
Running the Frequency Select Utility 7-3<br />
Select a New Frequency 7-4<br />
Command line parameter 7-4
Table of Contents<br />
Frequency Select Utility
Do I Need to Use This<br />
Utility? 7<br />
Frequency Select Utility7<br />
About the Frequency Select Utility<br />
About the Frequency Select<br />
Utility 7<br />
The Frequency Select Utility is a MS-DOS based utility that<br />
allows you to:<br />
● Check the operating frequency of any <strong>WaveLAN</strong> card.<br />
● Change the operating frequency of a <strong>WaveLAN</strong> 2.4 GHz<br />
card.<br />
Note: When you are running a Windows 95 or Windows NT system,<br />
you can check or change the frequency of your <strong>WaveLAN</strong><br />
Card using the WaveMANAGER/CLIENT utility described in<br />
Chapter 4.<br />
The factory installed operating frequency of a 2.4 GHz card is<br />
2.422 GHz. You can use the Frequency Select Utility in any of<br />
the following situations:<br />
● Your existing <strong>WaveLAN</strong> network (e.g. with WavePOINTs<br />
and <strong>WaveLAN</strong> cards) operates at another radio frequency.<br />
● Your wireless network suffers from interference by other<br />
wireless devices.<br />
Earlier versions of <strong>WaveLAN</strong> ISA and Micro Channel cards<br />
and WavePOINT access points can operate at one fixed<br />
frequency only. To comply with local regulations these<br />
products have been set to operate at one of the following<br />
frequencies:<br />
<strong>WaveLAN</strong>/<strong>PCMCIA</strong> User’s Guide 7-1
Frequency Select Utility<br />
About the Frequency Select Utility<br />
2.425 GHz (<strong>WaveLAN</strong> Channel Type_A)<br />
2.460 GHz (<strong>WaveLAN</strong> Channel Type_B)<br />
2.4305 GHz (<strong>WaveLAN</strong> Channel Type_D)<br />
You can determine the frequency used by already-installed<br />
<strong>WaveLAN</strong> cards by running this utility.<br />
The frequency of a WavePOINT can be determined from the<br />
last 4 digits of the model number, printed on a label on the<br />
back of the unit. Use the following list to convert the model<br />
number to the associated frequency channel:<br />
3105-0111 (<strong>WaveLAN</strong> Channel Type_A)<br />
3105-0112 (<strong>WaveLAN</strong> Channel Type_B)<br />
3105-0114 (<strong>WaveLAN</strong> Channel Type_D)<br />
If you are not certain about the frequency used by your<br />
<strong>WaveLAN</strong> products, contact your local supplier.<br />
Note: The Frequency Select Utility is a MS-DOS based utility.<br />
If you would like to run the utility on a Windows 95/NT<br />
computer, the computer must have MS-DOS installed. Restart<br />
the computer in MS-DOS mode, as you can not run the utility<br />
from an MS-DOS box under Windows.<br />
7-2 <strong>WaveLAN</strong>/<strong>PCMCIA</strong> User’s Guide
Figure 7-1<br />
7Frequency Select screen<br />
Frequency Select Utility<br />
Running the Frequency Select Utility<br />
Running the Frequency Select<br />
Utility 7<br />
If you have installed the <strong>WaveLAN</strong> client driver for Card and<br />
Socket Services, you can run the program from the <strong>WaveLAN</strong><br />
Utilities subdirectory of the hard disk while the <strong>WaveLAN</strong><br />
network driver is running (the driver becomes temporarily<br />
inactive). Type:<br />
cd \wavelan\util<br />
wfreqsel [Enter]<br />
To run the utility when the Enabler is installed, place the<br />
Utilities diskette in drive A: of the workstation or <strong>server</strong> and<br />
reboot. Type:<br />
Type: wfreqsel and press [Enter]<br />
The program will ask you to select the <strong>WaveLAN</strong> <strong>PCMCIA</strong><br />
card socket. Use the cursor control keys to select the socket,<br />
and press [Enter].<br />
<strong>WaveLAN</strong>/<strong>PCMCIA</strong> User’s Guide 7-3
Frequency Select Utility<br />
Running the Frequency Select Utility<br />
Select a New Frequency 7<br />
Command line parameter7<br />
Use the cursor control keys to select another frequency from<br />
the displayed list.<br />
Press [Enter] to program this operating frequency into your<br />
card. The <strong>WaveLAN</strong> card will use the new frequency until the<br />
Frequency Select Utility is run again.<br />
Press the [F10] key to quit the utility.<br />
You can use the parameter option -M on the MS-DOS<br />
command line to select a "Monochrome Display" mode. Try<br />
this parameter if you have difficulty viewing the display in<br />
normal colour mode.<br />
Example:<br />
wfreqsel -m<br />
7-4 <strong>WaveLAN</strong>/<strong>PCMCIA</strong> User’s Guide
Chapter 8<br />
Installation for Apple<br />
Powerbook Systems<br />
Table of Contents<br />
Installation for Apple Powerbook Systems<br />
Introduction 8-1<br />
What You Need to Know 8-1<br />
Removing and Re-inserting your Card 8-2<br />
Installing in Ethertalk TCP/IP Environments 8-3<br />
Installing the AppleTalk Software 8-3<br />
Configuring your <strong>WaveLAN</strong> Card 8-5<br />
Classic and Open Transport Environments 8-8<br />
Which one to Choose? 8-8<br />
Installing the Classic Networking Software 8-9<br />
Installing the Open Transport Software 8-10<br />
Configuring your <strong>WaveLAN</strong> Card 8-11<br />
Enabling AppleTalk for Classic 8-12<br />
Enabling Apple Talk for Open Transport 8-13<br />
Enabling TCP/IP for Classic 8-14<br />
Enabling TCP/IP for Open Transport 8-15
Table of Contents<br />
Installation for Apple Powerbook Systems
What You Need to Know8<br />
Installation for Apple Powerbook Systems8<br />
Introduction<br />
Introduction 8<br />
The Macintosh <strong>WaveLAN</strong> software has been developed to take<br />
advantage of Apple’s PC Card Manager and the Apple<br />
networking software extensions. The <strong>WaveLAN</strong> drivers for<br />
Apple Powerbook computers are available in two versions:<br />
● <strong>WaveLAN</strong> drivers for Macintosh computers that use the<br />
networking software for Installing in Ethertalk TCP/IP<br />
Environments, or<br />
● <strong>WaveLAN</strong> drivers for Macintosh computers that use the<br />
networking software for Classic and Open Transport<br />
Environments.<br />
Both type of drivers are available on the <strong>WaveLAN</strong> software<br />
diskette that came with your <strong>WaveLAN</strong> product. You can also<br />
download these drivers from the <strong>WaveLAN</strong> <strong>web</strong>site at<br />
http://www.wavelan.com.<br />
To decide which driver you will need, please consult the User<br />
Documentation that came with your Apple Powerbook<br />
computer to determine what type of networking software<br />
extensions are supported by your Apple Powerbook Computer.<br />
When installing and configuring your <strong>WaveLAN</strong>/<strong>PCMCIA</strong><br />
Card for the very first time, please be aware that to enable your<br />
system to read the card’s settings, you must power up your<br />
system first, prior to ‘introducing the card to your Apple<br />
Powerbook system.<br />
When you would insert the card, prior to powering up the<br />
system, the driver software will not be able to read the settings<br />
of the card, and will display the card's MAC address as all<br />
zeros.<br />
When configuring your <strong>WaveLAN</strong>/<strong>PCMCIA</strong> card for the very<br />
first time, proceed as follows:<br />
<strong>WaveLAN</strong>/<strong>PCMCIA</strong> User’s Guide 8-1
Installation for Apple Powerbook Systems<br />
Introduction<br />
Removing and Reinserting<br />
your Card 8<br />
1 Power up your computer.<br />
2 Install the Networking Software<br />
3 Insert the <strong>WaveLAN</strong>/<strong>PCMCIA</strong> card.<br />
4 Select AppleTalk to enable the card.<br />
5 Use the <strong>WaveLAN</strong> Setup Control Panel to configure the<br />
card.<br />
Once your <strong>WaveLAN</strong>/<strong>PCMCIA</strong> card has been configured, you<br />
can insert your <strong>WaveLAN</strong> card either before or after you boot<br />
your Powerbook System.<br />
When ‘introducing’ another <strong>WaveLAN</strong>/<strong>PCMCIA</strong> card to the<br />
same system, for example when replacing a defect card, you<br />
will need to repeat this procedure.<br />
8-2 <strong>WaveLAN</strong>/<strong>PCMCIA</strong> User’s Guide
Installing the AppleTalk<br />
Software 8<br />
Installation for Apple Powerbook Systems<br />
Installing in Ethertalk TCP/IP Environments<br />
Installing in Ethertalk TCP/IP<br />
Environments 8<br />
The networking software components for EtherTalk and<br />
TCP/IP environments are included with the System Software<br />
Installer provided with the Macintosh 5300 and 190<br />
PowerBook computers. Apple will also make a version of the<br />
PC Card Manager available for the PowerBook 500 PC Card<br />
extension module.<br />
When your Powerbook system does not support the Ethertalk<br />
networking extensions skip to “Classic and Open Transport<br />
Environments” on page 8-8.<br />
Before you can install the <strong>WaveLAN</strong> networking software,<br />
you must have Apple's EtherTalk and AppleTalk networking<br />
software installed. For your convenience, we have included<br />
version 1.5.1 of Apple's “Network Software Installer” on the<br />
<strong>WaveLAN</strong> disk for Apple Powerbook environments.<br />
You can run this installer to make sure you have the proper<br />
version installed on your computer. This version of the<br />
installer has been modified to install “EtherTalk for PC Cards”<br />
as an option. This will install the required EtherTalk and<br />
AppleTalk networking software needed to support the<br />
<strong>WaveLAN</strong> driver. You will be forced to restart your system if<br />
you are installing onto your current system disk<br />
<strong>WaveLAN</strong>/<strong>PCMCIA</strong> User’s Guide 8-3
Installation for Apple Powerbook Systems<br />
Installing in Ethertalk TCP/IP Environments<br />
Figure 8-1<br />
8<br />
Installing TCP/IP 8<br />
Figure 8-2<br />
8<br />
Installing <strong>WaveLAN</strong> 8<br />
The<br />
To<br />
TCP/IP networking software is not installed by default, so<br />
you will need to use the System Software Installer that came<br />
with your computer to add TCP/IP. Use the Custom Install<br />
option, and select TCP/IP from the Networking Software<br />
option list. You will be forced to restart your system if you are<br />
installing onto your current system disk.<br />
install the <strong>WaveLAN</strong> networking software:<br />
1 Double-click the “<strong>WaveLAN</strong>® Installer” icon.<br />
The <strong>WaveLAN</strong> Installer will:<br />
● remove earlier versions of the driver, and<br />
● install this latest version into your system.<br />
2 When finished, restart your computer.<br />
8-4 <strong>WaveLAN</strong>/<strong>PCMCIA</strong> User’s Guide
Figure 8-3<br />
8<br />
Configuring your<br />
<strong>WaveLAN</strong> Card 8<br />
Installation for Apple Powerbook Systems<br />
Installing in Ethertalk TCP/IP Environments<br />
After you restart, you can insert a <strong>WaveLAN</strong> PC Card into<br />
either card slot and use the <strong>WaveLAN</strong> Setup control panel to<br />
(re-)configure the <strong>WaveLAN</strong> parameter settings. Balloon help<br />
is available for each of the items shown in the <strong>WaveLAN</strong><br />
Setup control panel dialog.<br />
Note: If you are trying to install your <strong>WaveLAN</strong> PC Card, in some<br />
cases the configuration software may not work. This is<br />
typically the case when it concerns a (previously purchased)<br />
older type <strong>WaveLAN</strong>/<strong>PCMCIA</strong> card.<br />
When the <strong>WaveLAN</strong> configuration software detects this type<br />
of card, it will:<br />
● Display an Alert dialog, and<br />
● Create a button on the <strong>WaveLAN</strong> Setup control panel,<br />
labelled “Update CIS...”<br />
Use this button to update the Card Information Structure (CIS)<br />
of your <strong>WaveLAN</strong> card. This update will allow your<br />
<strong>WaveLAN</strong>/<strong>PCMCIA</strong> card to work with the Macintosh<br />
software, but should not effect your ability to use the updated<br />
card in other operating system environments.<br />
<strong>WaveLAN</strong>/<strong>PCMCIA</strong> User’s Guide 8-5
Installation for Apple Powerbook Systems<br />
Installing in Ethertalk TCP/IP Environments<br />
Figure 8-4<br />
8<br />
Enabling AppleTalk 8<br />
Figure 8-5<br />
8<br />
You<br />
can select AppleTalk to use the <strong>WaveLAN</strong> card by starting<br />
the Network Control Panel from under the Apple Menu, or by<br />
double-clicking the “<strong>WaveLAN</strong> PC Card” icon on the desktop<br />
when the card is inserted. Then select the “EtherTalk<br />
Alternative” icon to enable AppleTalk to use the <strong>WaveLAN</strong><br />
card as its network interface.<br />
8-6 <strong>WaveLAN</strong>/<strong>PCMCIA</strong> User’s Guide
Enabling TCP/IP 8<br />
Figure 8-6<br />
8<br />
You<br />
Installation for Apple Powerbook Systems<br />
Installing in Ethertalk TCP/IP Environments<br />
can select MacTCP to use the <strong>WaveLAN</strong> card by starting<br />
the MacTCP Control Panel from under the Apple Menu when<br />
the card is inserted. Then select the “Ethernet Built-In” icon to<br />
enable TCP/IP to use the <strong>WaveLAN</strong> card as its network<br />
interface. You will need to restart your computer for these<br />
changes to take effect.<br />
<strong>WaveLAN</strong>/<strong>PCMCIA</strong> User’s Guide 8-7
Installation for Apple Powerbook Systems<br />
Classic and Open Transport Environments<br />
Which one to Choose? 8<br />
Classic and Open Transport<br />
Environments 8<br />
The networking software components for Apple Classic or<br />
Apple Open Transport environments are included with the<br />
MacOS System Software Installer provided with the Apple<br />
PowerBook 1400, 5300, and 190 computers.<br />
When your Powerbook system does not support the Classic<br />
and/or Open Transport networking extensions return to<br />
“Installing in Ethertalk TCP/IP Environments” on page 8-3.<br />
The installation described in this section covers two types of<br />
networking software for Apple Powerbooks:<br />
● Apple Classic, for Apple Powerbook devices based on the<br />
Motorola 680x0 processor, and<br />
● Apple Open Transport, for Apple Powerbook devices<br />
based on the PowerPC processor.<br />
Before you can install the <strong>WaveLAN</strong> networking software,<br />
you must have either the Apple Classic or the Apple Open<br />
Transport networking software installed. The installer included<br />
with this release will detect and install the appropriate version<br />
of the <strong>WaveLAN</strong> software.<br />
Note: The 2400 Apple PowerBook does NOT support a Classical<br />
Driver.<br />
● Turn to page 8-9 for Installing the Classic Networking<br />
Software<br />
● Turn to page 8-10 for Installing the Open Transport<br />
Software<br />
8-8 <strong>WaveLAN</strong>/<strong>PCMCIA</strong> User’s Guide
Installing the Classic<br />
Networking Software 8<br />
Figure 8-7<br />
8<br />
Minimum Installation 8<br />
For<br />
Installation for Apple Powerbook Systems<br />
Classic and Open Transport Environments<br />
The Classic TCP/IP networking software is not installed by<br />
default, so you will need to use the System Software Installer<br />
that came with your computer to add TCP/IP. Use the Custom<br />
Install option, and select TCP/IP from the Networking<br />
Software option list. When finished, restart your computer.<br />
your convenience, we have included version 1.5.1 of<br />
Apple's Classic “Network Software Installer” on the<br />
<strong>WaveLAN</strong> disk for Apple Powerbook environments. You can<br />
run this Installer to install the basic networking software on<br />
your 680x0 computer.<br />
Network Software Installer version 1.5.1 has been modified to<br />
install “EtherTalk for PC Cards” as an option. It will install the<br />
required EtherTalk and AppleTalk networking software needed<br />
to support the <strong>WaveLAN</strong> driver<br />
Note: The Network Software Installer version 1.5.1 does not include<br />
TCP/IP.<br />
When finished running Network Software Installer, restart<br />
your computer.<br />
<strong>WaveLAN</strong>/<strong>PCMCIA</strong> User’s Guide 8-9
Installation for Apple Powerbook Systems<br />
Classic and Open Transport Environments<br />
Figure 8-8<br />
8<br />
Installing the Open<br />
Transport Software 8<br />
Figure 8-9<br />
8<br />
Apple now installs the Open Transport networking software by<br />
default with all versions of the MacOS. If your computer does<br />
not have Open Transport installed, you will need to use the<br />
System Software Installer that came with your computer, or<br />
obtain a copy of the latest Open Transport software from<br />
Apple.<br />
8-10 <strong>WaveLAN</strong>/<strong>PCMCIA</strong> User’s Guide
Installing <strong>WaveLAN</strong> 8<br />
Figure 8-10<br />
8<br />
Figure 8-11<br />
8<br />
Configuring your<br />
<strong>WaveLAN</strong> Card 8<br />
To<br />
Installation for Apple Powerbook Systems<br />
Classic and Open Transport Environments<br />
install the <strong>WaveLAN</strong> networking software:<br />
1 Double-click the “<strong>WaveLAN</strong>® Installer” icon.<br />
The <strong>WaveLAN</strong> Installer will:<br />
● remove earlier versions of the driver, and<br />
● install this latest version into your system.<br />
2 When finished, restart your computer.<br />
After you restart your computer, you can insert your<br />
<strong>WaveLAN</strong>/<strong>PCMCIA</strong> Card into either PC Card slot. Use the<br />
<strong>WaveLAN</strong> Setup control panel to (re-)configure your settings.<br />
<strong>WaveLAN</strong>/<strong>PCMCIA</strong> User’s Guide 8-11
Installation for Apple Powerbook Systems<br />
Classic and Open Transport Environments<br />
Figure 8-12<br />
8<br />
Enabling AppleTalk for<br />
Classic 8<br />
Balloon help is available for each of the items shown in the<br />
<strong>WaveLAN</strong> Setup control panel dialog.<br />
Note: If you are trying to install your <strong>WaveLAN</strong> PC Card, in some<br />
cases the configuration software may not work. This is<br />
typically the case when it concerns a (previously purchased)<br />
older type <strong>WaveLAN</strong>/<strong>PCMCIA</strong> card.<br />
When the <strong>WaveLAN</strong> configuration software detects this type<br />
of card, it will:<br />
● Display an Alert dialog, and<br />
● Create a button on the <strong>WaveLAN</strong> Setup control panel,<br />
labelled “Update CIS...”<br />
Use this button to update the Card Information Structure (CIS)<br />
of your <strong>WaveLAN</strong> card. This update will allow your<br />
<strong>WaveLAN</strong>/<strong>PCMCIA</strong> card to work with the Macintosh<br />
software, but should not effect your ability to use the updated<br />
card in other operating system environments.<br />
You can select AppleTalk to use the <strong>WaveLAN</strong> card by starting<br />
the Network Control Panel from under the Apple Menu, or by<br />
double-clicking the “<strong>WaveLAN</strong> PC Card” icon on the desktop<br />
8-12 <strong>WaveLAN</strong>/<strong>PCMCIA</strong> User’s Guide
Figure 8-13<br />
8<br />
Enabling Apple Talk for<br />
Open Transport 8<br />
Installation for Apple Powerbook Systems<br />
Classic and Open Transport Environments<br />
when the card is inserted. Then select the “EtherTalk<br />
Alternative” icon to enable AppleTalk to use the <strong>WaveLAN</strong><br />
card as its network interface.<br />
You can select AppleTalk to use the <strong>WaveLAN</strong> card by starting<br />
the AppleTalk Control Panel from under the Apple Menu, or<br />
by double-clicking the “<strong>WaveLAN</strong> PC Card” icon on the<br />
desktop when the card is inserted. Then select the “Ethernet”<br />
item from the “Connect via:” menu to enable AppleTalk to use<br />
the <strong>WaveLAN</strong> card as its network interface.<br />
<strong>WaveLAN</strong>/<strong>PCMCIA</strong> User’s Guide 8-13
Installation for Apple Powerbook Systems<br />
Classic and Open Transport Environments<br />
Figure 8-14<br />
8<br />
Enabling TCP/IP for<br />
Classic 8<br />
Figure 8-15<br />
8<br />
You can select MacTCP to use the <strong>WaveLAN</strong> card by starting<br />
the MacTCP Control Panel from under the Apple Menu when<br />
the card is inserted. Then select the “Ethernet Built-In” icon<br />
to enable TCP/IP to use the <strong>WaveLAN</strong> card as its network<br />
interface. You will need to restart your computer for these<br />
changes to take effect.<br />
8-14 <strong>WaveLAN</strong>/<strong>PCMCIA</strong> User’s Guide
Enabling TCP/IP for<br />
Open Transport 8<br />
Figure 8-16<br />
8<br />
Installation for Apple Powerbook Systems<br />
Classic and Open Transport Environments<br />
You can select TCP/IP to use the <strong>WaveLAN</strong> card by starting<br />
the TCP/IP Control Panel from under the Apple Menu when<br />
the card is inserted.<br />
In the TCP/IP (DHCP) window, select the “Ethernet” item<br />
from the “Connect via:” menu to enable TCP/IP to use the<br />
<strong>WaveLAN</strong> card as its network interface.<br />
You will need to restart your computer for these changes to<br />
take effect.<br />
<strong>WaveLAN</strong>/<strong>PCMCIA</strong> User’s Guide 8-15
Appendix A<br />
<strong>WaveLAN</strong>/<strong>PCMCIA</strong><br />
Table of Contents<br />
<strong>WaveLAN</strong>/<strong>PCMCIA</strong><br />
Specifications A-1<br />
Environment Definitions: A-2
Table of Contents<br />
<strong>WaveLAN</strong>/<strong>PCMCIA</strong>
<strong>WaveLAN</strong>/<strong>PCMCIA</strong>A<br />
Specifications<br />
Specifications A<br />
Physical Specifications<br />
Dimensions PC card: 8.5 cm x 5.4 cm x 0.5 cm (3.4 in. x 2.1 in. x 0.2 in.)<br />
Dimensions Antenna: 11.8 cm x 6.5 cm x 1.6 cm (4.7 in. x 2.6 in. x 0.6 in.)<br />
Total Weight: 179 gr (0.39 lb)<br />
Cable length: 45 cm (18 in.)<br />
Temperature Range Host Equipment<br />
Data Communication<br />
0° to +40° C<br />
Data Rate: 2Mb/sec.<br />
Media Access Protocol: Ethernet variety (CSMA/CA)<br />
Bit Error Rate: Better than 10 -8<br />
Power Consumption 915 MHz 2.4 GHz<br />
Sleep Mode: 0.18 W 0.175 W<br />
Receive Mode 1.48 W 1.575 W<br />
Transmit Mode 3.00 W 1.825 W<br />
R-F Specification 915 MHz 2.4 GHz<br />
Frequency: Fixed Frequency Sub-Band Frequency Selection<br />
(subject to local radio regulations)<br />
Modulation Technique: Spread Spectrum - DQPSK<br />
Output Power: 24.5 dBm 15 dBm<br />
Receiver Sensitivity -80 dBm -82 dBm<br />
FCC Regulations: No site license required No site license required<br />
Range (approximate, depending on environment)<br />
Open Office: 250 m (800 ft) 200 m( (600 ft)<br />
Semi-open Office: 60 m (200 ft) 50 m (160 ft)<br />
Closed Office: 30 m (100 ft) 25 m (80 ft)<br />
(Office environments are described on next page)<br />
<strong>WaveLAN</strong>/<strong>PCMCIA</strong> User’s Guide A-1
<strong>WaveLAN</strong>/<strong>PCMCIA</strong><br />
Specifications<br />
Environment<br />
Definitions: A<br />
Open office: A<br />
Semi-open office: A<br />
Closed Office: A<br />
Antennas<br />
Work<br />
Completely<br />
A-2 <strong>WaveLAN</strong>/<strong>PCMCIA</strong> User’s Guide<br />
The range of <strong>WaveLAN</strong> may vary according to the physical<br />
environment where the product will be used. Signal strength<br />
can be affected by closeness to metal surfaces and solid highdensity<br />
materials. The ranges listed on the previous page may<br />
provide a rule of thumb to the range that might be expected in<br />
a typical environment.<br />
can "see" each other, i.e. there are no physical<br />
obstructions between them.<br />
space is divided by shoulder-height, hollow wall<br />
elements; antennas are at desktop level.<br />
enclosed work space with non-metallic, nonconcrete<br />
walls from floor to ceiling.
Table of Contents<br />
Driver Installation Examples<br />
Appendix B<br />
Driver Installation Examples<br />
NetWare Examples B-1<br />
Installing a Driver for Personal NetWare B-1<br />
Installing a DOS/ODI Workstation Driver 2-1<br />
NDIS Examples B-3<br />
LAN Manager Installation B-3<br />
Windows v.3.11 Installation B-4
Table of Contents<br />
Driver Installation Examples
Installing a Driver for<br />
Personal NetWare B<br />
Installing a DOS/ODI<br />
Workstation Driver 2<br />
Driver Installation ExamplesB<br />
NetWare Examples<br />
NetWare Examples B<br />
This section describes installation in the following<br />
environments:<br />
● Personal NetWare<br />
● NetWare (workstation)<br />
Run the Personal NetWare INSTALL program as described in<br />
the Personal NetWare documentation. From the list of Primary<br />
Network Interface Cards, select the OEM supplied driver files<br />
option.<br />
Place the <strong>WaveLAN</strong> diskette in drive A: and enter a: when<br />
asked for a path name for the driver.<br />
Continue with steps 2 and 3 of the Personal NetWare<br />
installation procedure.<br />
If you have installed the <strong>WaveLAN</strong> Enabler, modify the<br />
NET.CFG file as described in Chapter 5, “Installation for MS-<br />
DOS”.<br />
For NetWare versions 3.12 and 4 the procedure for installing<br />
the workstation driver is similar to that for Personal NetWare<br />
(above).<br />
For earlier versions, proceed as follows<br />
:Insert the NetWare WSGEN diskette in drive A:. Copy<br />
NetWare DOS/ODI from the WSGEN diskette support files to<br />
the root directory of the workstation. Example commands:<br />
copy a:\netx.com c:\wavelan\<br />
copy a:\lsl.com c:\wavelan\<br />
copy a:\ipxodi.com c:\wavelan\<br />
<strong>WaveLAN</strong>/<strong>PCMCIA</strong> User’s Guide B-1
Driver Installation Examples<br />
NetWare Examples<br />
Note: For some NetWare versions, these files are provided on a<br />
separate “DOS ODI WORKSTATION SERVICES” diskette.<br />
Edit the workstation's AUTOEXEC.BAT file to include the<br />
following lines in the order shown here (example):<br />
C:\WAVELAN\LSL<br />
C:\WAVELAN\WVLAN05<br />
C:\WAVELAN\IPXODI<br />
C:\WAVELAN\NETX or C:\WAVELAN\VLM<br />
B-2 <strong>WaveLAN</strong>/<strong>PCMCIA</strong> User’s Guide<br />
If you have installed the <strong>WaveLAN</strong> Enabler, edit the NET.CFG<br />
file to include <strong>WaveLAN</strong> configuration parameters as<br />
described inChapter 5, “Installation for MS-DOS”.
LAN Manager<br />
Installation B<br />
Driver Installation Examples<br />
NDIS Examples<br />
NDIS Examples B<br />
This section provides examples for the following NDIS<br />
environments:<br />
● LAN Manager (Microsoft)<br />
● Windows for Workgroups<br />
If your NDIS environment is not listed here, please check the<br />
README.TXT file on the <strong>WaveLAN</strong> software diskette.<br />
Use the LAN Manager SETUP utility to install the <strong>WaveLAN</strong><br />
NDIS driver in a LAN Manager environment. The general<br />
installation procedure is described in the Microsoft LAN<br />
Manager Installation Guide. This section provides additional<br />
information specific to <strong>WaveLAN</strong> driver installation.<br />
1 Start the LAN Manager SETUP program, and select the<br />
Actions menu.<br />
2 Insert your working copy of the <strong>WaveLAN</strong> diskette in a<br />
disk drive.<br />
3 Choose “Import” from the Actions menu, and specify the<br />
<strong>WaveLAN</strong> diskette's drive letter when asked. The “Import<br />
Network Drivers” dialog box is displayed:<br />
4 Select the <strong>WaveLAN</strong> driver (use the [Space] key) and exit.<br />
The driver is copied to directory<br />
\LANMAN\DRIVERS\WAVELAN (or<br />
\LANMAN.DOS\DRIVERS\WAVELAN on an MSDOS<br />
workstation).<br />
5 Choose View/Modify from the Actions menu, and use the<br />
Network Drivers dialog box to install the driver.<br />
6 Choose Save from the Actions menu, to save the new<br />
driver installation.<br />
<strong>WaveLAN</strong>/<strong>PCMCIA</strong> User’s Guide B-3
Driver Installation Examples<br />
NDIS Examples<br />
Windows v.3.11<br />
Installation B<br />
B-4 <strong>WaveLAN</strong>/<strong>PCMCIA</strong> User’s Guide<br />
7 Edit PROTOCOL.INI (see below, “Changing Installation<br />
Parameters”).<br />
Changing Installation Parameters B<br />
During <strong>WaveLAN</strong> driver installation parameters are added to<br />
the file PROTOCOL.INI in directory \LANMAN. Example:<br />
[WVLAN09_NIF]<br />
; Protocol.ini entry for <strong>WaveLAN</strong> Communications Adapter.<br />
; etc. (can be deleted)<br />
;<br />
DriverName = WVLN09$<br />
Domain_ID= 0x0000<br />
Beacon_Key= 0x0000<br />
Encryption_Key = 0<br />
If you have installed the <strong>WaveLAN</strong> Enabler, edit the NET.CFG<br />
file to include <strong>WaveLAN</strong> configuration parameter values as<br />
described in Chapter 5, “Installation for MS-DOS”<br />
The <strong>WaveLAN</strong> INSTALL program for Card/Socket Services<br />
based computers will do this automatically.<br />
The installation of <strong>WaveLAN</strong> under Windows for Workgroups<br />
(Windows version 3.11) can be done from the Windows<br />
Program Manager screen.<br />
1 In the Windows for Workgroups Program Manager<br />
window, Locate the Network group.<br />
2 Select the Network Setup icon.<br />
3 From the Network Setup menu, select Drivers....<br />
4 From the Network Drivers menu, select Add Adapter....<br />
5 From the Add Network Adapter menu, select 'Unlisted or<br />
Updated Network Adapter'.<br />
6 Insert the <strong>WaveLAN</strong> diskette in drive A: and hit Enter (or<br />
click on the OK button). The<br />
'<strong>WaveLAN</strong> (<strong>PCMCIA</strong>) NDIS 2 Driver' name is displayed.
Driver Installation Examples<br />
NDIS Examples<br />
7 Hit Enter again to install the <strong>WaveLAN</strong> driver.<br />
The file PROTOCOL.INI in directory C:\WINDOWS will<br />
include the following parameters:<br />
[WVLAN09_PC]<br />
DriverName = WVLN09$<br />
NWID = 0x0100<br />
Domain_ID= 0x0000<br />
Beacon_Key= 0x0000<br />
If you have installed the <strong>WaveLAN</strong> Enabler, add <strong>WaveLAN</strong><br />
card configuration parameters as described in Chapter 5,<br />
“Installation for MS-DOS”. The <strong>WaveLAN</strong> INSTALL<br />
program for Card/Socket Services based computers will do<br />
this automatically.<br />
<strong>WaveLAN</strong>/<strong>PCMCIA</strong> User’s Guide B-5
Driver Installation Examples<br />
NDIS Examples<br />
B-6 <strong>WaveLAN</strong>/<strong>PCMCIA</strong> User’s Guide
Appendix C<br />
<strong>WaveLAN</strong> Power<br />
Management<br />
Table of Contents<br />
<strong>WaveLAN</strong> Power Management<br />
About <strong>WaveLAN</strong> Power Management C-1<br />
Considerations in Using Power Management C-1<br />
The NetWare Watchdog Mechanism C-2<br />
Connecting to a Single Server C-3<br />
Connecting to Multiple Servers C-4<br />
Power Management Examples C-6<br />
Restrictions on Using Power Management C-8
Table of Contents<br />
<strong>WaveLAN</strong> Power Management
Table C-1<br />
Power Management parameter<br />
Considering Power<br />
Management C<br />
<strong>WaveLAN</strong> Power ManagementC<br />
About <strong>WaveLAN</strong> Power Management<br />
About <strong>WaveLAN</strong> Power<br />
Management C<br />
<strong>WaveLAN</strong> Power Management allows the <strong>WaveLAN</strong> PC card<br />
to be put in a low power-consuming “Sleep” state during<br />
periods when no active communication is taking place. In this<br />
state power consumption is about 15% of that used in active<br />
Receive mode, which can result in significantly improved<br />
battery life in mobile workstations.<br />
<strong>WaveLAN</strong> Power Management is intended to be used in<br />
Novell NetWare environments in conjunction with the<br />
NetWare Watchdog mechanism, to reduce power consumption<br />
while remaining connected to the network. It is controlled by<br />
two parameters (POWER UP and POWER DOWN) set in the<br />
NET.CFG file used by the DOS/ODI driver. Format:<br />
Parameter Range Default Normal**<br />
POWER DOWN 0 - 65535 sec 0 (= No power mgmt) 420<br />
POWER UP 0 - 65535 sec 120 (2 minutes) 120<br />
Normal** - Recommended settings for NetWare running default Watchdog timers<br />
You can set the values by running the INSTALL program, or by<br />
editing the NET.CFG file (Chapter 5, “Installation for MS-<br />
DOS”).<br />
The Normal Power Management parameter values in the above<br />
table have been chosen to provide near-optimum power<br />
management performance in all NetWare environments where<br />
the default Watchdog timer values are used.<br />
Before enabling power management you should first check<br />
with your network administrator that the default Watchdog<br />
<strong>WaveLAN</strong>/<strong>PCMCIA</strong> User’s Guide C-1
<strong>WaveLAN</strong> Power Management<br />
About <strong>WaveLAN</strong> Power Management<br />
The NetWare Watchdog<br />
Mechanism C<br />
Figure C-1<br />
C-2 <strong>WaveLAN</strong>/<strong>PCMCIA</strong> User’s Guide<br />
timer settings are in use. If that is not the case then an<br />
understanding of the Watchdog mechanism and its relationship<br />
to <strong>WaveLAN</strong> power management will be required in order to<br />
proceed.<br />
It is hoped that the rest of this appendix will help you and your<br />
network administrator to understand this relationship and to<br />
determine the most effective power management settings for<br />
your environment.<br />
The Watchdog mechanism in a NetWare <strong>server</strong> monitors the<br />
connections with workstations logged on to that <strong>server</strong> by<br />
sending a “watchdog” message at regular intervals to each<br />
workstation. If no response is received from a workstation<br />
after a specified number of messages, the workstation is<br />
logged off. This can happen typically as a result of the<br />
workstation being powered off, or being out of range for a<br />
sufficiently long period. Figure C-1 shows the Watchdog<br />
mechanism in action for a station that is powered off after a<br />
short period of active communication.<br />
Three <strong>server</strong> parameters, configurable by a network<br />
administrator, are shown:
Figure C-2<br />
Connecting to a Single<br />
Server C<br />
<strong>WaveLAN</strong> Power Management<br />
About <strong>WaveLAN</strong> Power Management<br />
Td Delay time before the first Watchdog message is sent.<br />
Ti Interval between Watchdog messages.<br />
Nr Number of Watchdog messages (before log off).<br />
The values shown correspond (in minutes) to the defaults for<br />
NetWare version 2.2. The default values for other NetWare<br />
versions are similar.<br />
For the purposes of this discussion, Tw is the Watchdog time<br />
and is the result of (Nr-1)*Ti.<br />
Figure C-2 shows how the connection is maintained when the<br />
station remains powered on and within range.<br />
To ensure a station will not miss the critical number of<br />
watchdog messages, the Power Management parameters are<br />
set to ensure that:<br />
● The <strong>WaveLAN</strong> PC card becomes active during the<br />
Watchdog time (Tw)<br />
● The card is active long enough to receive 2 consecutive<br />
Watchdog messages<br />
<strong>WaveLAN</strong>/<strong>PCMCIA</strong> User’s Guide C-3
<strong>WaveLAN</strong> Power Management<br />
About <strong>WaveLAN</strong> Power Management<br />
Figure C-3<br />
Connecting to Multiple<br />
Servers C<br />
Calculation:<br />
Power Up = 2*Ti<br />
Power Down = Tw - Power Up<br />
C-4 <strong>WaveLAN</strong>/<strong>PCMCIA</strong> User’s Guide<br />
Using the default values for NetWare 2.2 (Ti = 60, Nr = 10), the<br />
following Power Management values are obtained<br />
Power Up = 120 (2 min.)<br />
Power Down = 420 (7 min.)<br />
Figure C-3 illustrates the effect on power consumption of<br />
using these settings:<br />
You can reduce power consumption by increasing Tw (by<br />
increasing Nr). Td does not affect the Power Management<br />
settings and thus can be decreased to compensate for an<br />
increase in Tw, if required.<br />
Each <strong>server</strong> in the network runs its own Watchdog mechanism<br />
and there is no synchronisation between <strong>server</strong>s. If the<br />
workstation is logged on to more than one <strong>server</strong> then the<br />
following rules apply:
<strong>WaveLAN</strong> Power Management<br />
About <strong>WaveLAN</strong> Power Management<br />
● The PC card must become active during the shortest<br />
Watchdog time (Minimum Tw)<br />
● The card active period is long enough to receive 2<br />
Watchdog messages from the <strong>server</strong> with the longest time<br />
between Watchdog messages (Maximum Ti)<br />
To determine Minimum Tw, calculate (Nr-1)*Ti for every<br />
<strong>server</strong>. The lowest value is Minimum Tw.<br />
Power Management settings:<br />
Power Up = 2*Maximum Ti<br />
Power Down = Minimum Tw - Power Up<br />
If the calculation results in a negative value for Power Down,<br />
some <strong>server</strong> settings will have to be adjusted, either to make<br />
Maximum Ti shorter or Minimum Tw longer (i.e. Nr greater).<br />
<strong>WaveLAN</strong>/<strong>PCMCIA</strong> User’s Guide C-5
<strong>WaveLAN</strong> Power Management<br />
Power Management Examples<br />
Example1 C<br />
This<br />
C-6 <strong>WaveLAN</strong>/<strong>PCMCIA</strong> User’s Guide<br />
Power Management Examples C<br />
The following examples describe the power management<br />
calculation for single and multiple <strong>server</strong> scenarios, and how to<br />
estimate the resulting power consumption. Note that the<br />
NetWare parameters discussed are part of the network<br />
operating system, and may be modified only by the Network<br />
Administrator.<br />
example shows the Power Management configuration for<br />
one or more <strong>server</strong>s running NetWare 3.xx or 4.xx if the <strong>server</strong><br />
uses default Watchdog settings. The NetWare “SET /<br />
Communications” console command provides the following<br />
information:<br />
Number Of Watchdog Packets: 10<br />
Delay Between Watchdog Packets: 59.3 seconds<br />
Delay Before First Watchdog Packet: 4 minutes 56.6 seconds<br />
If a station connects to one <strong>server</strong> only, or if all <strong>server</strong>s have<br />
the same default Watchdog settings, then:<br />
Power Up = 2 * Maximum Ti<br />
= 2 * 59.3= 118.6 seconds<br />
Power Down = Minimum Tw - Power Up<br />
= (Nr-1)*Ti - Power Up<br />
= 9 * 59.3 - 118.6 = 415.1 seconds<br />
NET.CFG file should include the following lines:<br />
LINK DRIVER WVLAN05<br />
(other options)<br />
POWER DOWN415<br />
POWER UP119<br />
(other options)
Example 2 C<br />
<strong>WaveLAN</strong> Power Management<br />
Power Management Examples<br />
Note: The default Power Up value of 120 seconds is acceptable in<br />
this case, and therefore the POWER UP parameter can be<br />
omitted.<br />
During Power Down the power consumption is about 15 % of<br />
the power consumption during Power Up. In this example the<br />
average power consumption as a percentage of normal power<br />
consumption can be estimated as:<br />
This<br />
(119 * 100 + 415 * 15) / (119 + 415) = 18125 / 534 = 34 %<br />
The percentage given is an estimation of reduced power<br />
consumption for the <strong>WaveLAN</strong> PC card only. The real effect<br />
on the battery lifetime will be less because other system<br />
components such as the screen and hard disk, etc. use power<br />
also.<br />
example shows the Power Management configuration for<br />
multiple <strong>server</strong>s with different Watchdog settings.<br />
Server Settings Calculation Results<br />
Nr Ti 2*Ti Tw<br />
Server A: 10 120 240 1080<br />
Server B: 40 60 120 2340<br />
Server C: 20 180 360 3420<br />
If <strong>server</strong> A has Minimum Tw and <strong>server</strong> C has the Maximum<br />
Ti, the configuration values become:<br />
Power Up =2 * Maximum Ti = 360 seconds<br />
Power Down = Minimum Tw - Power Up = 1080 - 360 = 720 seconds<br />
In this example the average power consumption as a<br />
percentage of normal power consumption can be estimated as:<br />
(360 * 100 + 720 * 15) / (360 + 720) = 46800 / 1080 = 43 %<br />
<strong>WaveLAN</strong>/<strong>PCMCIA</strong> User’s Guide C-7
<strong>WaveLAN</strong> Power Management<br />
Power Management Examples<br />
Example 3 C<br />
Restrictions on Using<br />
Power Management C<br />
This<br />
C-8 <strong>WaveLAN</strong>/<strong>PCMCIA</strong> User’s Guide<br />
example shows that a near-to-optimum effectiveness can<br />
be reached if the same Ti value is used on all <strong>server</strong>s, while the<br />
lowest Nr value is at least 50.<br />
Power Management is to be configured for a station that may<br />
be connected the following NetWare <strong>server</strong>s:<br />
Server Settings Calculation Results<br />
Nr Ti 2*Ti Tw<br />
Server A: 50 30 60 1470<br />
Server B: 80 30 60 2370<br />
Server C: 100 30 60 2970<br />
Minimum Tw is determined by the Server A settings, while<br />
the “Maximum” Ti is determined by all <strong>server</strong>s. The<br />
configuration values become:<br />
Power Up = 2 * Maximum Ti = 60 seconds<br />
Power Down = Minimum Tw - Power Up = 1470 - 60 = 1410 seconds<br />
In this example the percentage power consumption relative to<br />
power consumption without Power Management can be<br />
estimated to be:<br />
(60 * 100 + 1410 * 15) / (60 + 1410) = 27150/1470 = 18 %<br />
Note that a station which needs only to log on to Server C<br />
(with the maximum Nr value, and hence the optimum setting<br />
for Power Management) has only a minor advantage:<br />
(60 * 100 + 2910 * 15) / (60 + 2910) = 49650 / 2970 = 17 %<br />
There are a number of situations where <strong>WaveLAN</strong> Power<br />
Management should be used with caution, or not at all.<br />
If the <strong>WaveLAN</strong> DOS/ODI driver is used in peer-to-peer<br />
communication, e.g. for Personal NetWare, Windows for<br />
Workgroups, communication problems may occur. These can
<strong>WaveLAN</strong> Power Management<br />
Power Management Examples<br />
be resolved by disabling Power Management (POWER DOWN<br />
= 0).<br />
The Point-to-Point Diagnostics Utility, when run from a<br />
remote station, will not "see" stations using Power<br />
Management. To run Point-to-Point diagnostics you will<br />
either have to disable Power Management or boot from a<br />
Utilities Diskette (described in Chapter 5, “Installation for MS-<br />
DOS” ).<br />
If other Power Management schemes are installed on your<br />
computer you will normally have to disable these to run<br />
<strong>WaveLAN</strong> power management. However some selective<br />
Power Management schemes, which operate only on hard<br />
disks or displays may work in combination with <strong>WaveLAN</strong><br />
Power Management. Use these with caution.<br />
<strong>WaveLAN</strong>/<strong>PCMCIA</strong> User’s Guide C-9
Appendix D<br />
Troubleshooting<br />
Table of Contents<br />
Troubleshooting<br />
Windows 95 & Windows NT D-1<br />
Verify Card Operation D-1<br />
Windows does not detect my Card D-2<br />
Windows NT does not detect my card D-3<br />
WaveMANAGER/ CLIENT does not start D-3<br />
Wrong Driver Version D-3<br />
Upgrading from earlier Driver Versions D-4<br />
Error Messages (MS-DOS) D-6<br />
Radio-frequency Network Characteristics D-13<br />
Signal Interference D-13<br />
Signal Attenuation D-14<br />
Problem Determination D-14<br />
Using the Diagnostics Utility D-15<br />
Troubleshooting List D-15
Table of Contents<br />
Troubleshooting
Verify Card Operation D<br />
TroubleshootingD<br />
Windows 95 & Windows NT<br />
Windows 95 & Windows NT D<br />
There are several ways to check proper operation of your<br />
<strong>WaveLAN</strong> card.<br />
● Verify the status of the LEDs on the antenna module.<br />
When the <strong>WaveLAN</strong> Power LED turns green, the<br />
operating system has detected the card, and your card is<br />
functioning properly.<br />
You may not see the LED activity for the Transmit and<br />
Receive LED, as these LEDs will only flicker green when<br />
the <strong>WaveLAN</strong>/<strong>PCMCIA</strong> card senses <strong>WaveLAN</strong> activity in<br />
the wireless environment.<br />
● Run the WaveMANAGER/CLIENT program to test the<br />
wireless connection with another <strong>WaveLAN</strong> station or<br />
WavePOINT access point.<br />
To run the WaveMANAGER/CLIENT you will need to<br />
install the program as described on page 3-30.<br />
● When your computer runs the Windows NT operating<br />
system, you can also use the ‘Event Viewer’ to verfiy<br />
whether Windows NT loaded your <strong>WaveLAN</strong> driver<br />
successfully or not. For more information about the<br />
Windows NT Event Viewer, please consult the user<br />
documentation that was shipped with your operating<br />
system.<br />
<strong>WaveLAN</strong>/<strong>PCMCIA</strong> User’s Guide D-1
Troubleshooting<br />
Windows 95 & Windows NT<br />
Windows does not detect<br />
my Card D<br />
Enabling the PC Card<br />
Controller: D<br />
Figure D-1<br />
D<br />
D-2 <strong>WaveLAN</strong>/<strong>PCMCIA</strong> User’s Guide<br />
When the Windows operating system does not automatically<br />
detect your <strong>WaveLAN</strong>/<strong>PCMCIA</strong> card, you may need to enable<br />
the PC Card Controller first, to instruct your operating system<br />
to actively look for PC Cards at startup.<br />
This is typically the case when you are installing <strong>WaveLAN</strong> on<br />
a new computer that was shipped with the Windows 95<br />
operating system factory-installed.<br />
1 Click the ‘Start’ button on the Windows Taskbar.<br />
2 Point to Settings and click the ‘Control Panel’ item.<br />
3 In the Control Panel window, double-click the PC Card ’<br />
icon to open the PC Card Properties window.<br />
4 In the PC Card Properties window (pictured in Figure D-1<br />
on page -2), double-click one of the PC Card Socket to<br />
enable the PC Card Controller.<br />
5 Click the OK button to confirm and close the PC Card<br />
Properties window.
Windows NT does not<br />
detect my card D<br />
WaveMANAGER/<br />
CLIENT does not start D<br />
Wrong Driver Version D<br />
Troubleshooting<br />
Windows 95 & Windows NT<br />
6 Reboot your computer and turn to Chapter 3, “Installation<br />
for Windows 95 & Windows NT” to proceed with the<br />
<strong>WaveLAN</strong> installation.<br />
When your computer runs the Windows NT operating system<br />
(version 3.51 or 4.0) please mind that these versions of the<br />
Windows NT operating system do not support ‘plug & play’.<br />
Please read the instructions as described in “What You Need to<br />
Know” on page 3-1.<br />
WaveMANAGER/CLIENT can only run on <strong>WaveLAN</strong><br />
equipped computers that use the Windows 95 or Windows NT<br />
(version 4.0) Operating system.<br />
When your computer does have a <strong>WaveLAN</strong> card installed,<br />
this failure may occur when you used the<br />
WaveMANAGER/CLIENT installation program to install the<br />
<strong>WaveLAN</strong> software, but you did not install the <strong>WaveLAN</strong><br />
driver.<br />
The Setup.exe file on your diskette, does not install the<br />
<strong>WaveLAN</strong> driver. Installing the waveLAN driver is a seperate<br />
process that is described in Chapter 3, “Installation for<br />
Windows 95 & Windows NT”.<br />
When you installed new WaveMANAGER/CLIENT software,<br />
but you did not upgrade the driver, in some caes you may get<br />
this error message when trying to launch the<br />
WaveMANAGER/CLIENT program.<br />
Older versions of the driver do not always include all<br />
fiunctionalities required by the WaveMANAGER/CLIENT<br />
program.<br />
You are advised when installing the latest version of the<br />
WaveMANAGER/CLIENT program, to upgrade your<br />
<strong>WaveLAN</strong>/<strong>PCMCIA</strong> User’s Guide D-3
Troubleshooting<br />
Windows 95 & Windows NT<br />
Upgrading from earlier<br />
Driver Versions D<br />
Upgrading <strong>WaveLAN</strong> under<br />
Windows NT 4<br />
Upgrading <strong>WaveLAN</strong> under<br />
Windows 95 4<br />
D-4 <strong>WaveLAN</strong>/<strong>PCMCIA</strong> User’s Guide<br />
<strong>WaveLAN</strong> driver as well, as described in “Upgrading from<br />
earlier Driver Versions”<br />
The procedure to upgrading a previous installed driver differs<br />
according to the Windows Operating Systems installed on your<br />
computer.<br />
● Windows NT systems include an ‘Update’ Feature that<br />
enables you to select another driver for your <strong>WaveLAN</strong><br />
network adapter (see “Upgrading <strong>WaveLAN</strong> under<br />
Windows NT” on page -4).<br />
● Windows 95 systems would require you to un-install the<br />
old driver prior to installing the new driver, but in most<br />
cases you will be easier of when you overwrite the old<br />
driver files with the new ones as described in “Upgrading<br />
<strong>WaveLAN</strong> under Windows 95” on page -4<br />
Windows NT Systems allow easy upgrades of previously<br />
installed drivers using your new<br />
To upgrade from a beta version to the official Windows 95<br />
driver, you need to remove two files from the Windows<br />
directory:<br />
The drawback of Windows 95 ‘plug & play’ support is that it<br />
will keep all driver files stored on the harddisk of your<br />
computer even though you might not need them anymore.<br />
Using the ‘Remove’ option from the Network Adapter<br />
Properties panel will only disable the association between the<br />
adapter and the referenced driver.<br />
When trying to install the new driver, Windows 95 woul<br />
‘realize’ it already has a file with the same name installed, and<br />
simply re-use the old version file; i.e When Windows 95<br />
displays the message ‘installing driver’ this would simply<br />
mean ‘re-installing the old driver’.
Figure D-2<br />
DView hidden files<br />
Troubleshooting<br />
Windows 95 & Windows NT<br />
1 Remove the <strong>WaveLAN</strong> PC card from your computer<br />
2 Click the “Start” button on the Windows 95 Taskbar<br />
3 Point to “Programs”, and then click Windows explorer<br />
4 From the “Explorer” menubar select View, Options<br />
5 Click the “Show all files” button and click ”OK”<br />
6 Move to the drive where you have installed Windows 95<br />
7 Double-click the “Windows” folder to open it<br />
8 Move to the Windows sub-directory \inf, to locate the file<br />
wvlan22.inf<br />
9 Select this file and delete it<br />
10 Move to the Windows sub-directory \system, to locate the<br />
file wvlan22.sys<br />
11 Select this file and delete it<br />
12 Follow the standard installation procedure as described in<br />
this document to re-install the <strong>WaveLAN</strong> hardware and<br />
software, using the files provided on the official<br />
<strong>WaveLAN</strong> software diskette for Windows 95 and<br />
Windows NT.<br />
<strong>WaveLAN</strong>/<strong>PCMCIA</strong> User’s Guide D-5
Troubleshooting<br />
Error Messages (MS-DOS)<br />
Antenna is not connected D<br />
Bad initialization parameter<br />
(type for keyword<br />
<strong>PCMCIA</strong>_Socket) D<br />
Call code not available D<br />
Card not connected D<br />
Card in use by another<br />
program D<br />
Cause:<br />
Cause:<br />
Cause:<br />
D-6 <strong>WaveLAN</strong>/<strong>PCMCIA</strong> User’s Guide<br />
Error Messages (MS-DOS) D<br />
This section contains the text of error and warning messages<br />
displayed by the Enabler, driver and configuration utilities.<br />
Messages appear here sorted in alphabetical order of the text in<br />
the message body. However, some messages may be displayed<br />
with the prefix "<strong>WaveLAN</strong>:"<br />
The antenna is not connected to the <strong>WaveLAN</strong> card.<br />
Action: Connect the antenna<br />
Cause: The driver has detected an invalid <strong>PCMCIA</strong> Socket<br />
parameter value in the PROTOCOL.INI file.<br />
Action: Correct the <strong>PCMCIA</strong> Socket parameter and reload<br />
the driver. Valid values are: A, B, C, D, E, F, G, H, X,<br />
a, b, c, d, e, f, g, h, x.<br />
The <strong>WaveLAN</strong> card has no call code (required in<br />
Japan).<br />
Action: Contact your local supplier<br />
No card inserted in the expected slot, or the card was<br />
not properly inserted (Note: The driver will still<br />
load.).<br />
Action: (Re-)insert the card.<br />
Cause: Another program was using the <strong>WaveLAN</strong> card when<br />
this program attempted to access it. The most likely<br />
occurrence of this message is when an attempt is<br />
made to start a diagnostic program while the network<br />
driver is running (Enabler-based installations).<br />
Action: Disable automatic start-up of the driver and reboot<br />
the computer, or boot from a floppy disk. Run this<br />
program again.
Card not found D<br />
Card not functioning<br />
correctly D<br />
Client Driver Failure nn D<br />
Cause:<br />
Cause:<br />
Troubleshooting<br />
Error Messages (MS-DOS)<br />
The Enabler, driver or utility could not detect a<br />
<strong>WaveLAN</strong> card, or the driver could not find a card at<br />
the specified socket.<br />
Action: Make sure the <strong>WaveLAN</strong> card is inserted in a<br />
<strong>PCMCIA</strong> slot and that the Socket parameter in<br />
NET.CFG or PROTOCOL.INI correctly identifies the<br />
slot being used (Enabler based systems). Run the<br />
INSTALL program (CS/SS based systems).<br />
Cause: Start-up diagnostics detected a malfunctioning<br />
component and has determined that the card cannot<br />
be used.<br />
Action: This may be a transient or permanent problem. Try<br />
the program reporting the error again. If the message<br />
persists, replace the card. If possible, try the card in<br />
another PC to verify that the problem is in the card<br />
and not its environment.<br />
This message is generated by the <strong>WaveLAN</strong> Client<br />
Driver usually as a result of a problem with the Card<br />
and Socket Services interface. ’nn’ is an error code.<br />
The table on the next page lists the error codes and<br />
suggests actions to resolve the problem. Your Card<br />
and Socket Services documentation may contain<br />
more clues. If you cannot resolve the problem contact<br />
your support service or Lucent Technologies. In the<br />
meantime you could try the alternative installation<br />
procedure using the Enabler<br />
<strong>WaveLAN</strong>/<strong>PCMCIA</strong> User’s Guide D-7
Troubleshooting<br />
Error Messages (MS-DOS)<br />
Code Possible Cause Action to Take<br />
02 The Client Driver was unable to reserve I/O ports for the<br />
<strong>WaveLAN</strong> card when the <strong>WaveLAN</strong> driver was started<br />
with the card not present.<br />
Try rebooting with the card in a <strong>PCMCIA</strong> socket.<br />
03 An request for I/O ports for the <strong>WaveLAN</strong> card failed. Review the resources used by your PC that may be using<br />
I/O ports. If possible try to temporarily remove a resource<br />
and try the <strong>WaveLAN</strong> card again.<br />
04 The Client Driver was unable to reserve an IRQ line for<br />
the <strong>WaveLAN</strong> card when the <strong>WaveLAN</strong> driver was<br />
started with the card not present.<br />
Try rebooting with the card in a <strong>PCMCIA</strong> socket.<br />
05 An request for IRQ lines for the <strong>WaveLAN</strong> card failed. Review the resources used by your PC that may be using<br />
an IRQ line. If possible try to temporarily remove a<br />
resource and try the <strong>WaveLAN</strong> card again.<br />
07 Attempt to start a <strong>WaveLAN</strong> driver when a <strong>WaveLAN</strong> Check the network configuration file NET.CFG or<br />
driver is already active.<br />
PROTOCOL.INI for multiple occurrences of the <strong>WaveLAN</strong><br />
driver.<br />
08 Older version of Card Services driver doesn’t support<br />
starting the <strong>WaveLAN</strong> driver with the card out.<br />
Try rebooting with the card in a <strong>PCMCIA</strong> socket.<br />
09 Internal failure of card or PCIC Controller. Try the card in another machine, or another <strong>WaveLAN</strong> card<br />
in this machine, to determine where the problem lies.<br />
0A Unable to use a previously reserved I/O port. Inform the local support organization or Lucent<br />
Technologies.<br />
0B Unable to use a previously reserved IRQ line. Inform the local support organization or Lucent<br />
Technologies.<br />
Client driver not available D<br />
Configuration Install utility<br />
should be run D<br />
Cause:<br />
D-8 <strong>WaveLAN</strong>/<strong>PCMCIA</strong> User’s Guide<br />
No client driver or Enabler has been loaded<br />
Action: Verify that the config.sys file contains one of the<br />
following statements :<br />
Device=Enabler.sys<br />
wavecli.exe<br />
Cause: The card has not been properly configured, or the<br />
configuration data has become corrupted.<br />
Action: Run the utilities SETCONF.EXE and<br />
INSTCONF.EXE. These utilities ar in directory<br />
\UTIL on the <strong>WaveLAN</strong> software diskette.
Could not find driver named<br />
WVLN09$ D<br />
Enabler has not been run<br />
successfully D<br />
Error opening<br />
WAVELAN.INI file D<br />
Troubleshooting<br />
Error Messages (MS-DOS)<br />
Cause: The <strong>WaveLAN</strong> NDIS driver could not find the device<br />
name in the PROTOCOL.INI file. This is most likely<br />
caused by an invalid device name in the<br />
DRIVERNAME= statement in PROTOCOL.INI<br />
Action: Correct the DRIVERNAME= statement and reload the<br />
driver.<br />
Duplicate or out of range IOBase parameter [0300-03f8], check /B=<br />
options<br />
Duplicate or out of range IRQ parameter [3,4,5,7,9,10,11,12,14,15],<br />
check /I= options<br />
Duplicate or out of range memory parameter [0xC000-0xEF00], check<br />
/M= options<br />
Cause: The Enabler "DEVICE" statement in CONFIG.SYS<br />
contains an invalid parameter value or the same value<br />
occurs more than once. The error message shows<br />
which parameter is at fault, and the permitted range of<br />
values.<br />
Action: Edit CONFIG.SYS to correct the Enabler "DEVICE"<br />
line, and reboot.<br />
Cause: The Enabler was not run, or the computer’s power<br />
management scheme caused Enabler information to<br />
be lost.<br />
Action: Ensure the Enabler is specified correctly in<br />
CONFIG.SYS. Disable the PC’s power management<br />
scheme, if used. Reboot<br />
Cause: In a Card/Socket Services based system, an attempt<br />
was made to start a utility and the utility could not<br />
find the WAVELAN.INI file created by the INSTALL<br />
program.<br />
Action: Run the INSTALL program again. If you need to run<br />
the utility from a floppy disk, ensure that<br />
WAVELAN.INI and the network configuration file<br />
are also on the disk and that WAVELAN.INI contains<br />
<strong>WaveLAN</strong>/<strong>PCMCIA</strong> User’s Guide D-9
Troubleshooting<br />
Error Messages (MS-DOS)<br />
Error writing new<br />
configuration to the card D<br />
Invalid Combination of<br />
keywords D<br />
IRQ Conflict or Card not<br />
functioning correctly D<br />
D-10 <strong>WaveLAN</strong>/<strong>PCMCIA</strong> User’s Guide<br />
the correct path to the network configuration file<br />
(NET.CFG or PROTOCOL.INI).<br />
Cause: A hardware malfunction prevented the card<br />
configuration from being updated.<br />
Action: This may be a transient or permanent problem. Try to<br />
install the new configuration again. If the message<br />
persists, replace the card. If possible, try the card in<br />
another PC to verify that the problem is in the card<br />
and not its environment.<br />
Cause: More than one card location keyword (port, socket or<br />
slot) is present in the configuration file (NET.CFG or<br />
PROTOCOL.INI).<br />
Action: Select one card location keyword to specify the<br />
correct card location: port (ISA), socket (Micro<br />
Channel) or slot (<strong>PCMCIA</strong>). If no location is<br />
specified, the driver will automatically select the first<br />
card found.<br />
Invalid <br />
= FRAME<br />
STATION ADDRESS, STATION_ADDRESS<br />
NWID<br />
Cause: An invalid parameter value was passed to the driver<br />
in the NET.CFG or PROTOCOL.INI file.<br />
Action: Edit NET.CFG or PROTOCOL.INI to correct the<br />
parameter value, and reload the driver.<br />
Cause: Card malfunction, or IRQ number is used by another<br />
program<br />
Action: Check if the IRQ is already in use by another<br />
program. If so specify another IRQ for the <strong>WaveLAN</strong><br />
card. If possible try the card in another PC to verify<br />
that the problem is in the card and not its<br />
environment.
Memory window not<br />
available, check /M=<br />
options D<br />
Parameter group not<br />
complete, check command<br />
line options D<br />
<strong>PCMCIA</strong> Access module not<br />
available D<br />
<strong>PCMCIA</strong> Enabler module<br />
not compatible D<br />
<strong>PCMCIA</strong> Interface not<br />
supported or missing D<br />
Troubleshooting<br />
Error Messages (MS-DOS)<br />
Cause: The memory window specified in the Enabler<br />
"DEVICE" line in CONFIG.SYS is in use by another<br />
device (or has not been "excluded" from use by MS<br />
Windows).<br />
Action: Select another value for the /M parameter in the<br />
Enabler "DEVICE" line. Check CONFIG.SYS (and<br />
SYSTEM.INI) to verify that the memory window<br />
used is excluded.<br />
Cause: A parameter is missing from the Enabler "DEVICE"<br />
line in CONFIG.SYS. All 3 parameters (/B,/M, /I) are<br />
required.<br />
Action: Edit CONFIG.SYS to include the missing parameter<br />
in the Enabler "DEVICE" line, and reboot.<br />
Cause:No client driver or Enabler has been loaded<br />
Action: Verify that the config.sys file contains one of the<br />
following statements :<br />
Device=Enabler.sys<br />
wavecli.exe<br />
Cause: The Enabler that was loaded is not compatible with<br />
the network driver.<br />
Action: Make sure that the Enabler and driver are installed<br />
from the same <strong>WaveLAN</strong> software diskette.<br />
Cause: The Enabler was unable to detect a compatible PC<br />
Card Interface Controller (PCIC) in this computer.<br />
Action: The <strong>WaveLAN</strong> Enabler currently supports the Intel<br />
82365 PCIC only. If your computer has another type<br />
of PCIC, call one of the support numbers found in the<br />
README.TXT file on the <strong>WaveLAN</strong> software<br />
diskette. Otherwise check your computer’s system<br />
setup to ensure the <strong>PCMCIA</strong> interface has been<br />
enabled.<br />
<strong>WaveLAN</strong>/<strong>PCMCIA</strong> User’s Guide D-11
Troubleshooting<br />
Error Messages (MS-DOS)<br />
Security Feature not<br />
functioning correctly D<br />
Security Feature not<br />
available D<br />
Software incompatible with<br />
Card D<br />
Too many drivers loaded D<br />
Unrecognized NET.CFG<br />
keyword on line D<br />
Unrecognized parameter on<br />
Command Line D<br />
Cause:<br />
D-12 <strong>WaveLAN</strong>/<strong>PCMCIA</strong> User’s Guide<br />
Cause: Start-up diagnostics have determined that the<br />
Security Feature is defective<br />
Action: Replace the card, or run with Security disabled (see<br />
next message action).<br />
Cause: The configuration installed on the card indicates that<br />
Datalink Security is enabled, but the card is not<br />
equipped with the Security Feature.<br />
Action: Replace the card by one that includes the security<br />
feature, or reconfigure to disable Datalink Security.<br />
Note: If you decide to disable Datalink Security you<br />
will have to do it for all <strong>WaveLAN</strong> stations and<br />
access points.<br />
Cause: The program version you are using does not match<br />
the version of the card installed.<br />
Action: Use only software from the diskettes that were<br />
supplied with the installed <strong>WaveLAN</strong>/<strong>PCMCIA</strong> card,<br />
or later releases.<br />
An attempt was made to load more copies of one<br />
driver than could be handled by the the driver<br />
software.<br />
Action: Edit the autoexec.bat file to remove excessive load<br />
commands of the same driver.<br />
Cause: Invalid keyword in NET.CFG or spacing wrong on<br />
parameter line.<br />
Action: Check the parameters in NET.CFG. Words that are<br />
part of a keyword should be separated by a single<br />
space.<br />
Cause: The command line contained a string that did not<br />
match the MS-DOS conventions for program<br />
filenames or was not a valid command line parameter.<br />
Action: Correct the command line (see this book).
Utility not compatible with<br />
Enabler D<br />
WARNING: possible<br />
memory window conflict,<br />
verify /M= option D<br />
Signal Interference D<br />
Troubleshooting<br />
Radio-frequency Network Characteristics<br />
Cause: The Enabler that was loaded is not compatible with<br />
the Configuration Install utility.<br />
Action: Make sure all the programs you use are from the same<br />
<strong>WaveLAN</strong> software diskette.<br />
Cause: The Enabler has detected that the specified memory<br />
window contains data.<br />
Action: On some PCs this may be due to memory not<br />
resetting at boot time. You may want to try another /M<br />
setting. In any case, check CONFIG.SYS (and<br />
SYSTEM.INI) to verify that the memory window you<br />
have specified is not in use by another device (or by<br />
MS Windows).<br />
Radio-frequency Network<br />
Characteristics D<br />
In general, a radio-frequency Local Area Network behaves in<br />
much the same way as other types of LAN. However, due to<br />
the nature of the transmission medium, radio-frequency<br />
networks are more sensitive to:<br />
● Signal interference (Noise).<br />
● Signal attenuation.<br />
Signal interference (or noise) is radio-frequency signals<br />
detected by a receiving antenna, that were not transmitted by<br />
any station in the receiving station’s network. The source of the<br />
interfering signal may be:<br />
● Adjacent <strong>WaveLAN</strong> network with a different Network ID.<br />
● Another (not <strong>WaveLAN</strong>) radio-frequency network.<br />
● Non-network sources such as:<br />
<strong>WaveLAN</strong>/<strong>PCMCIA</strong> User’s Guide D-13
Troubleshooting<br />
Problem Determination<br />
Signal Attenuation D<br />
D-14 <strong>WaveLAN</strong>/<strong>PCMCIA</strong> User’s Guide<br />
● Security gates (like those often placed near<br />
the entrances of shops and department<br />
stores).<br />
● Elevator motors.<br />
● Photocopiers.<br />
● Microwave ovens.<br />
For most non-network noise sources the effect is local and can<br />
be eliminated by relocating the PC.<br />
Signal attenuation is a loss of signal strength, which occurs<br />
naturally over distance, but which also can be caused by radiofrequency<br />
barriers in the signal path. Examples of barriers are:<br />
● Metal surfaces surrounding an antenna.<br />
● Enclosed locations with concrete walls, floor and ceiling.<br />
Nearly every object (partitions, furniture, people) in the path of<br />
the signal will cause some slight degree of attenuation. In most<br />
cases this does not have a significant effect on network<br />
performance.<br />
D<br />
Problem Determination<br />
Problems in a <strong>WaveLAN</strong> network can be related to:<br />
● Component failure (of card or antenna).<br />
● Environment and operation.<br />
Component Failure D<br />
Component failure is normally detected by a startup<br />
diagnostics routine built into programs which use the<br />
<strong>WaveLAN</strong> card.
Using the Diagnostics<br />
Utility D<br />
Troubleshooting List D<br />
Troubleshooting<br />
Problem Determination<br />
Environment and Operation D<br />
Environment and operation-related problems can be caused by<br />
one or more of the following:<br />
● Placing the computer in a "noisy" area.<br />
● Path defects (antenna connection, barriers, distance).<br />
● Competition from adjacent networks.<br />
● Network loading.<br />
You can use the Point-to-Point diagnostic utility to diagnose<br />
and resolve some environment and operational problems<br />
The Point-to-Point Diagnostics utility lets you test the<br />
communications path between two stations. You can use it to<br />
verify that your <strong>WaveLAN</strong> PC card is installed and<br />
operational, and to measure local noise conditions.<br />
Installing and using the Point-to-Point Diagnostics utility is<br />
described in Chapter 5.<br />
The following tables identify some common symptoms of<br />
environment or operational problems, and suggests the<br />
direction to take to find a solution.<br />
Problem Possible Cause Action to Take<br />
<strong>WaveLAN</strong>/<strong>PCMCIA</strong> User’s Guide D-15
Troubleshooting<br />
Problem Determination<br />
Unable to log on to network Antenna not connected Check antenna connected<br />
Enabler or Client Driver (WAVECLI.EXE)<br />
not run<br />
D-16 <strong>WaveLAN</strong>/<strong>PCMCIA</strong> User’s Guide<br />
Reboot - check Enabler runs O.K., or check<br />
WAVECLI.EXE DEVICE line in CONFIG.SYS<br />
Different <strong>WaveLAN</strong> Network ID Check NWID parameter in driver initialisation<br />
(NET.CFG or PROTOCOL.INI)<br />
Security mismatch Check: (All stations) Security feature present and<br />
security enabled and all have same Encryption<br />
key, or<br />
Security disabled on all stations.<br />
Card or antenna defective, or station out<br />
of range.<br />
1. Run Point-to-Point diagnostics between this<br />
station and one known to work.<br />
2. Run Point-to-Point diagnostics between this<br />
station and a WavePOINT (or wireless <strong>server</strong>).<br />
Operating frequency mismatch Run the WFREQSEL utility to check the<br />
frequency of this and other cards in the network,<br />
and correct as necessary.<br />
Performance less than expected Local noise level high or<br />
Local traffic (bandwidth nearly full) or<br />
Station out of range<br />
Roaming station doesn’t connect<br />
automatically when powered on.<br />
Roaming station no longer<br />
logged on<br />
Run Point-to-Point diagnostics to establish cause,<br />
then take appropriate action<br />
Roaming not enabled at WavePOINTs. Check Installation records. Ask the Network<br />
Administrator to run WaveMONITOR to check<br />
that all WavePOINTs are sending Beacons.<br />
<strong>WaveLAN</strong>/<strong>PCMCIA</strong> station and<br />
WavePOINT have different Domain ID or<br />
Beacon Key.<br />
Station’s MAC address not in<br />
WavePOINTs Access Control Table (if<br />
Access Control enabled).<br />
Security feature or encryption key<br />
mismatch between <strong>WaveLAN</strong> station and<br />
WavePOINT.<br />
Network time-out while station out of<br />
range.<br />
Ensure all WavePOINTs and Roaming <strong>WaveLAN</strong><br />
stations are using the same Domain ID and<br />
Beacon Key.<br />
Check Access Control Table data or reload<br />
configuration with Access Control disabled.<br />
Check security enabled or disabled on all<br />
<strong>WaveLAN</strong> stations and WavePOINTs in the<br />
Roaming Domain. Check that all are using same<br />
Encryption key.<br />
Ensure workstation is within range and reboot.<br />
Extend disconnect timer values in network <strong>server</strong>.<br />
PC’s power management scheme in use. Disable the PC’s power management scheme<br />
<strong>WaveLAN</strong> power management values not<br />
compatible with Network timer values.<br />
Adjust Power Up, Power Down values in Net.CFG<br />
or PROTOCOL.INI file
Performance loss or<br />
"Out-of-range" condition<br />
(e.g. when moving away from<br />
WavePOINT)<br />
Windows PC beeps for unusually<br />
long time when PC card is<br />
removed or re-inserted<br />
Windows for Workgroups hangs<br />
when <strong>WaveLAN</strong> driver is loaded.<br />
Computer no longer "beeps"<br />
when card removed or reinserted<br />
(Card/Socket Services based<br />
system).<br />
Utility unable to detect other<br />
stations (Enabler-based<br />
installation with encryption).<br />
Troubleshooting<br />
Problem Determination<br />
No closer WavePOINT to hand over to. Install another WavePOINT to extend the<br />
Roaming area.<br />
Roaming not enabled at the new, closer<br />
WavePOINT<br />
Domain ID or Beacon Key mismatch with<br />
new WavePOINT<br />
Station’s MAC address not in new<br />
WavePOINT’s Access Control Table<br />
Encryption Key mismatch on new<br />
WavePOINT<br />
Exact cause unknown but related to<br />
’TimerCriticalSection=’ statement in<br />
SYSTEM.INI file<br />
This is a known problem related to<br />
’Phantom Binding’ i.e. driver started when<br />
card not present.<br />
Card and Socket Services may be using<br />
an IRQ number which is not available for<br />
the required function on the specific<br />
computer.<br />
The encryption key is given as a<br />
parameter in the network configuration<br />
file (NET.CFG or CONFIG.SYS). Another<br />
file (WAVELAN.INI) points to the location<br />
of the network configuration file. The utiity<br />
cannot find WAVELAN.INI and therefore<br />
the encryption key.<br />
Check Installation records. Ask the Network<br />
Administrator to run WaveMONITOR to check<br />
that WavePOINT is sending Beacons, Signal<br />
Quality is O.K. and Domain ID correct.<br />
Check Access Control Table data or reload<br />
configuration with Access Control disabled.<br />
Check Security feature status and Encryption key<br />
of new WavePOINT corresponds to that of other<br />
WavePOINTs and <strong>WaveLAN</strong> stations in the<br />
Domain.<br />
Use SYSEDIT or NOTEPAD to edit the Windows<br />
SYSTEM.INI file Change the parameter to:<br />
’TimerCriticalSection=100’<br />
The problem is under investigation. For the time<br />
being, Windows for Workgroups users should<br />
ensure that the <strong>WaveLAN</strong> card is inserted when<br />
starting Windows.<br />
Check the Card/Socket Services documentation<br />
supplied with the computer. Use the CS/SS<br />
supplied utility to modify the list of available IRQ’s<br />
Create a WAVELAN.INI file on the Utilities<br />
diskette (See Chapter 5, “Installation for MS-<br />
DOS”).<br />
<strong>WaveLAN</strong>/<strong>PCMCIA</strong> User’s Guide D-17
Troubleshooting<br />
Problem Determination<br />
D-18 <strong>WaveLAN</strong>/<strong>PCMCIA</strong> User’s Guide
A<br />
Antenna Module 1-3<br />
B<br />
Beacon Key 3-18<br />
C<br />
Communications Quality 4-3,<br />
4-10<br />
Configurations, Non-roaming<br />
Operation 1-5<br />
Configurations, Roaming<br />
Operation 1-6<br />
D<br />
Diagnostic Counters 4-13<br />
Domain 1-6<br />
Domain ID 3-18<br />
select another 4-12<br />
Drivers, DOS/ODI 5-12<br />
E<br />
Encryption<br />
enable 3-19<br />
Encryption Key 3-19<br />
F<br />
FCC viii<br />
Features 1-8<br />
Figure D-5<br />
Frequency Selection 5-7, 5-17<br />
H<br />
Hot Card Swap 2-3, 2-5<br />
I<br />
Information<br />
FTP Server vii<br />
Internet World Wide Web vii<br />
Installation, Card and Socket<br />
Services 5-2<br />
Installation, enabler-based<br />
systems 5-9<br />
Installation, network operating<br />
system 5-3, 5-9<br />
Installation, the enabler 5-10<br />
Installation, the INSTALL<br />
program 5-3–5-4<br />
Installation, verifying the 5-7,<br />
5-15<br />
K<br />
Kit Contents 1-2<br />
Index<br />
Index0<br />
L<br />
Link Quality Indicator 4-6<br />
Link Test 4-2, 4-5<br />
link quality indicator 4-6<br />
logging measurement<br />
data 4-14<br />
resetting diagnostic<br />
counters 4-7<br />
selecting another link test<br />
partner 4-8<br />
Local Noise Level 4-10<br />
Logging 4-14<br />
Logging Measurement Data<br />
stop 4-16<br />
M<br />
Manual Logging 4-14<br />
Measurement Data<br />
automatic logging 4-15<br />
logging 4-14<br />
logging options 4-15<br />
manual logging 4-14<br />
Monitoring Methods 4-1<br />
Link Test 4-2<br />
Site Monitor 4-1<br />
N<br />
Network<br />
managing 4-1<br />
<strong>WaveLAN</strong>/<strong>PCMCIA</strong> User’s Guide Index-1
Index<br />
Network ID 1-5<br />
NWID 1-5, 3-17<br />
O<br />
Other Button 4-12<br />
P<br />
Phantom Binding 2-5<br />
Power Management 1-8<br />
Power Management, Network<br />
Timeouts 1-9<br />
R<br />
Radio Frequency<br />
Interference Statement viii<br />
Remote Noise 4-10<br />
Roaming 3-17<br />
S<br />
Select Another Domain ID 4-12<br />
Signal Level 4-10<br />
Signal Quality 6-7<br />
Site Monitor 4-2, 4-9<br />
logging measurement<br />
data 4-14<br />
selecting another domain<br />
ID 4-12<br />
sorting list WavePOINTs 4-13<br />
SNR 6-7<br />
SNR (Signal to Noise Ratio) 4-10<br />
link test 4-7<br />
Software 1-3<br />
Station Address 3-20<br />
Station Name 3-20, 6-4<br />
Support<br />
Global vii<br />
Regional vii<br />
Swapping PC Cards 2-3<br />
Index-2 <strong>WaveLAN</strong>/<strong>PCMCIA</strong> User’s Guide<br />
T<br />
Technical Support vii<br />
U<br />
Utilities Diskette 5-16<br />
W<br />
<strong>WaveLAN</strong> Antenna Module 1-3<br />
<strong>WaveLAN</strong> Software 1-3<br />
<strong>WaveLAN</strong> Technical Support vii<br />
WaveMANAGER/CLIENT 4-3,<br />
4-14<br />
Link Test 4-2<br />
Site Monitor 4-2<br />
World Wide Web vii
This book was created by:<br />
Authors: Hugh Davison and William van der Moolen<br />
Graphic Design: Hugh Davison and Jek Mistry<br />
Typesetting: William van der Moolen<br />
Lucent Technologies Nederland B.V.<br />
Wireless Communications and Networking Division<br />
Zadelstede 1-10<br />
3431 JZ Nieuwegein<br />
The Netherlands<br />
An electronic copy of this document can be downloaded from our Library on<br />
the World Wide Web: http://www.wavelan.com.<br />
To view or print the electronic document, in Adobe’s Portable Document<br />
Format (PDF), you will need the freeware ‘Acrobat’ viewer from Adobe Inc.<br />
(available at http://www.adobe.com).<br />
Dear reader,<br />
We value your feedback. If you find errors or omissions in this book, or if<br />
you can suggest ways to improve its usefulness, I would like to hear from<br />
you. Please contact me at:<br />
Telephone: +31 30 609 7471<br />
Fax: +31 30 609 7556<br />
E-Mail: moolen@lucent.com<br />
Sincerely,<br />
William van der Moolen
008 - 0127326/C<br />
April 1998<br />
Copyright © 1998 Lucent Technologies Inc.<br />
All Rights Reserved