GEA CAIRfricostar - CS Klimateknik
GEA CAIRfricostar - CS Klimateknik
GEA CAIRfricostar - CS Klimateknik

You also want an ePaper? Increase the reach of your titles
YUMPU automatically turns print PDFs into web optimized ePapers that Google loves.
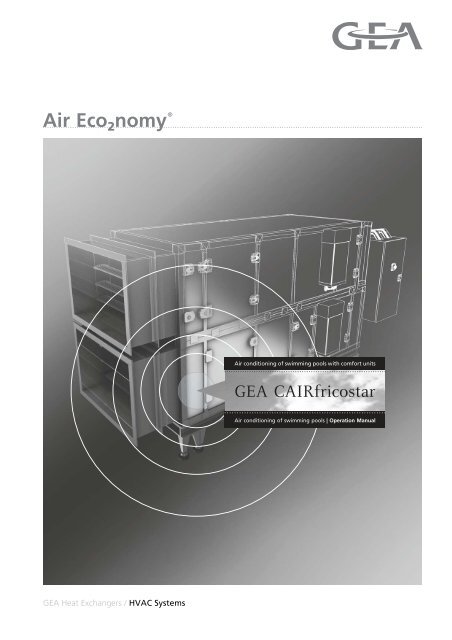
Air conditioning of swimming pools with comfort units<strong>GEA</strong> <strong>CAIRfricostar</strong>Air conditioning of swimming pools | Operation Manual<strong>GEA</strong> Heat Exchangers / HVAC Systems
Table of ContentsTable of Contents<strong>GEA</strong> <strong>CAIRfricostar</strong>Unit Type Code .................................................................................. 4Safety and User Information ............................................................ 5Availability of the operation manual ................................................ 5Scope of the operation manual ....................................................... 5Used symbols ................................................................................. 5Labelling of safety information ........................................................ 8Safety-conscious working ............................................................... 9Proper use ...................................................................................... 9Safety devices .............................................................................. 10Changes and modifications .......................................................... 10Spare parts ................................................................................... 10Disposal ........................................................................................ 10Selection of personnel and qualification ....................................... 10Technical Description ..................................................................... 11Scope of performance .................................................................. 11Unit configuration and operation <strong>GEA</strong> <strong>CAIRfricostar</strong>modular units ................................................................................ 11Unit configuration and operation <strong>GEA</strong> CAIR Fricostar Microcompact units................................................................................. 15Technical data .............................................................................. 16Transportation and Storage ........................................................... 18Delivery ......................................................................................... 18Transportation ............................................................................... 18Storage ......................................................................................... 21Assembly ......................................................................................... 22Setting up ...................................................................................... 22Assembling the unit ...................................................................... 25Installation ....................................................................................... 31Requirements ............................................................................... 31Installing air control and air flow components ............................... 31Installing handling components with coil connection .................... 31Installing accessories .................................................................... 37Electrical Connection ..................................................................... 38Requirements ............................................................................... 38Connecting the unit ....................................................................... 392 PR-2006-0019-GB • Subject to modifications • Status 05/2009
<strong>GEA</strong> <strong>CAIRfricostar</strong>Table of ContentsCommissioning ............................................................................... 44Requirements ............................................................................... 44General unit-related instructions ................................................... 45Fan unit and drives ....................................................................... 45Direct-driven fan units ................................................................... 46Filter units ..................................................................................... 46Heater unit .................................................................................... 46Cooler unit .................................................................................... 47Evaporator/condenser .................................................................. 48Heat pipe ...................................................................................... 48Liquid-coupled heat exchanger (LCHE) ........................................ 49Plate-type heat exchanger ............................................................ 49Dampers and shut-off dampers .................................................... 49Maintenance .................................................................................... 50Basic cleaning and maintenance tasks.......................................... 51Maintenance intervals (check list) ................................................. 52General unit-related instructions ................................................... 54Fan unit and drives ....................................................................... 55Filter units ..................................................................................... 58Heater unit .................................................................................... 60Cooler unit .................................................................................... 60Evaporator/condenser .................................................................. 61Heat pipe ...................................................................................... 61Liquid-coupled heat exchanger (LCHE) ........................................ 61Plate-type heat exchanger ............................................................ 61Dampers and shut-off dampers .................................................... 62Sound attenuator .......................................................................... 62Disassembly and Disposal ............................................................. 63Disassembly ................................................................................. 63Disposal ........................................................................................ 63Troubleshooting .............................................................................. 64Appendix .......................................................................................... 65Maintenance log book for your <strong>CAIRfricostar</strong> –Swimming pool dehumidifiers ....................................................... 65- Genuine Operation Manual -Copyright noteDisclosing, copying, distributing or taking any action in reliance on the contents of this document isstrictly prohibited without express prior consent. Violations entail liability for any damages or otherliability arising. All rights in relation to patents, utility patents or design patents are reserved.PR-2006-0019-GB • Subject to modifications • Status 05/2009 3
<strong>GEA</strong> <strong>CAIRfricostar</strong>Safety and User Information2 Safety and User Information2.1 Availability of the operation manualThe <strong>GEA</strong> <strong>CAIRfricostar</strong> units are constructed in accordance with state-of-the-arttechnological standards and established technical safety regulations.Use the units as intended by the manufacturer and only when they are in perfect workingorder. Observe the operation manual and be aware of the dangers and safety precautions,otherwise there may be risk of death or injury to the user or third persons.Adverse affects to the unit, connected units or other equipment may also occur.Have all faults repaired by an authorized tradesman without delay!Also observe the (safety) notes provided by the manufacturers of individualcomponents!The accompanying operation manual includes important information about the safeand proper operation of the <strong>GEA</strong> unit.The current operation manual is intended for use by fitting and installation companies,building services engineers, technical personnel or instructed staff as well as electricaland air-conditioning engineering specialists.This manual must always be available at the site where unit is in operation. Every personworking with or around the unit must read and apply the information contained inthe manual, paying particular attention to the safety instructions.2.2 Scope of the operation manualThis operation manual provides you with the necessary information about the followingsubjects:– Transport and storage– Assembly of the unit– Installation and electrical connection– Commissioning and maintenance– Disassembly and disposal2.3 Used symbolsThe following symbols are used to draw your attention to particular text sections in thecurrent operation manual:– This symbol is used to indicate a normal lists.• This symbol indicates instructions to follow. This symbol denotes the results of an action.NOTEThis symbol denotes additional information about the application of the <strong>GEA</strong> units.RECYCLING!This symbol indicates proper procedure for recycling of package material and unitcomponents that can no longer be used. These components need to be separatedaccording to material type.USE PROTECTIVE SHOES!This symbol indicates that you must wear protective shoes.USE PROTECTIVE GLOVES!This symbol indicates that you have to put on protective gloves.PR-2006-0019-GB • Subject to modifications • Status 05/2009 5
Safety and User Information<strong>GEA</strong> <strong>CAIRfricostar</strong>You will find the danger symbols in section „Labelling of safety information“ on page 8.2.3.1 Special warning/information signsThe following warning/information signs can be attached to the unit:When connecting, apply counter pressure with pipe wrench.Caution: risk of fire. Dirty (dust-laden) filters are inflammable.Switch off main switch before opening.Danger of injury. Only open when at a standstill.Data sheet and assembly instructions on the inside.These documents must be removed prior to commissioning.Do not start up the fan when dampers are closed.Potential equalisation.The unit must be connected to an external protective conductor at the points on thebase frame marked by this symbol to achieve potential equalisation.6 PR-2006-0019-GB • Subject to modifications • Status 05/2009
<strong>GEA</strong> <strong>CAIRfricostar</strong>Safety and User Information2.3.2 Function signsGeneral symbol for fan or compressorshowing airflow directionAir cooling coil, air/refrigerantSound attenuator in unitAir heating/cooling coil for heatrecovery system, air/waterECOFLOWGeneral symbol for air filtershowing airflow directionAir heating/cooling coil for heatrecovery system, air/ECOSTATDamper opposed operationAir heating/cooling coil for heatrecovery system, air/air ECOPLATAir heating coil, air/waterGeneral symbol for controllerElectric air heaterDroplet eliminatorAir cooling coil, air/waterPR-2006-0019-GB • Subject to modifications • Status 05/2009 7
Safety and User Information<strong>GEA</strong> <strong>CAIRfricostar</strong>2.4 Labelling of safety informationThe following designations and symbols have been used in this manual to designatesafety information:ELECTRICAL HAZARD!This symbol indicates that there is a risk of electrical shock when carrying out certaintask(s).PERSONAL INJURY!Here you will find special information as well as requirements and restrictions for theprevention of personal injury.DANGER FROM ROTATING UNIT PARTS!Here you will find special information as well as rules and restrictions for theprevention of personal injury due to rotating parts of the unit.DANGER DUE TO OVERHEAD LOADS!Here you can find special information as well as rules and restrictions for theprevention of personal injury and damage to units due to falling parts.DANGER DUE TO HOT SURFACES!Here you can find special information as well as rules and restrictions for theprevention of personal injury due to hot surfaces.DANGER OF SCALDING!Here you can find special information as well as rules and restrictions for theprevention of personal injury due to scalding, e.g. by steam.DANGER DUE TO COMBUSTIBLE SUBSTANCES!Here you will find special information as well as requirements and regulations for theprevention of personal injury due to fire.DANGER FROM SHARP EDGES!Here you can find special information as well as rules and restrictions for theprevention of personal injury due to cutting by thin sheet metal.ENVIRONMENTAL DAMAGE!Here you will find special information, rules and restrictions for the prevention ofdamage to the environment including information on any national environmentalprotection regulations in force.DAMAGE TO THE UNIT!Here you will find special information, rules and restrictions regarding the preventionof damage to the unit.8 PR-2006-0019-GB • Subject to modifications • Status 05/2009
<strong>GEA</strong> <strong>CAIRfricostar</strong>Safety and User Information2.5 Safety-conscious workingPlease observe the following notes during installation, maintenance and repair work:When working on or around the mains power supplyELECTRICAL HAZARD!All power supply connections must be switched off and checked to see if theyare voltage-free and then secured against unintentional switching on.Earth and short-circuit them and cover any neighbouring electrical conductingparts or isolate them. Failure to do so may lead to serious injury or death.When carrying out any kind of work in general:PERSONAL INJURY!There is a danger of injury when the units are in operation:– Danger of impacts – doors on the discharge side may be flung open– Danger of crushing due to underpressure at doors on suction side– Danger due to rotating parts such as fans etc.DAMAGE TO THE UNIT!If dampers are closed when the system is in operation, the unit componentsmay be critically damaged by under- or overpressure, particularly if thedampers are closed abruptly.DANGER FROM SHARP EDGES!When working on the unit in general there is a danger of cuts being inflicted bythin sheet metal and fins. This applies in particular when carrying out maintenanceand cleaning work on the surfaces of heating and cooling coil fins.Work may only be carried out on the unit if– all poles of the power supply have been disconnected,– the unit is secured to prevent it from being switched back on (also see “Electricalhazard”),– all moving parts – particularly the fan impeller, motor, rotary heat exchanger, controland shut-off dampers – have come to a standstill: wait at least 5 minutes afterswitching off the unit,– the heat exchangers have cooled down to ambient temperature.Once the work on the unit has been carried out, it must be ensured that– all protective devices are functioning effectively – for example, fan protectivedevices (door protection grille, contact protection) must be locked– no persons are present in danger areas.2.6 Proper useThe <strong>GEA</strong> <strong>CAIRfricostar</strong> units are exclusively intended for dehumidification, ventilation,air heating and filtering and are primarily applied in private and public swimmingpools.Improper useProper use also includes the observance of the operation manual as well as theinspection and maintenance intervals specified by <strong>GEA</strong>.Any use other than that described above is considered improper. The manufacturer/supplier is not liable for any damages arising from improper use. The user alone bearsthe risk.PR-2006-0019-GB • Subject to modifications • Status 05/2009 9
Safety and User Information<strong>GEA</strong> <strong>CAIRfricostar</strong>PERSONAL INJURY AND UNIT DAMAGE!It is prohibited to use the unit in the following ares:– in explosion risk areas,– in places where conductive dusts are present,– in places where strong electromagnetic fields are present,– in places with aggressive environments that may attack plastic parts or causecorrosion (especially in environments with zinc-corrosive atmospheres) or in areasthat do not meet the requirements established by VDI 2089.The installation may be carried out only inside.2.7 Safety devicesDepending on type of equipment supplied with the unit, the following components aresecured with following devices:– Doors and flaps with switch cabinet locks/lockable handles– Fan sections with door protection grilles– V-belt drives with belt guards.2.8 Changes and modifications2.9 Spare partsYou are not allowed to modify, add components, or convert the unit in any way. Anyconversions or modifications to the unit will render the CE conformity and all warrantyclaims as null and void.You may only use genuine <strong>GEA</strong> spare parts as <strong>GEA</strong> can not be held liable for claimsarising from the use of third party spare parts.2.10 Disposal2.11 Selection of personnel and qualificationMain and operating supply materials, components and filters must be disposed ofaccording to the material type in a safe and environmentally friendly manner. Also see„Disassembly and Disposal“ on page 63.Every person authorized to work on or around the unit must have read the entireoperation manual and understood it completely.All work must only be carried out by tradespeople with sufficient knowledge based ontheir professional training and experience in the following areas:– Regulations concerning health and safety in the workplace– Accident prevention regulations– Guidelines and recognised codes for technical practiceAll tradespeople must be able to assess the work assigned to them, recognise andavoid all assosiated dangers.10 PR-2006-0019-GB • Subject to modifications • Status 05/2009
<strong>GEA</strong> <strong>CAIRfricostar</strong>Technical Description3 Technical Description3.1 Scope of performanceOne of the main purposes of <strong>GEA</strong> <strong>CAIRfricostar</strong> units is to facilitate energry-efficientair dehumidification in swimming pools and on premises with high humidity. Thanks totheir modular construction the units can be configured individually to meet specificrequirements for air handling. Depending on particular application, the conveyed aircan be filtered, heated, cooled and dehumidified. The aim is to ensure that the volumeand condition of the treated air meets the customer's requirements.The <strong>GEA</strong> <strong>CAIRfricostar</strong> units are central plant air handling units which are primarilyused for conveying and treating of „normal“ air (according to VDI 2089) in commercialand industrial sectors.In order to save energy and enable heat recovery, a range of components is availablesuch as plate heat exchangers, heat pipes and liquid-coupled heat exchangers as wellas heat pumps.Units of different sizes and capacities are available. Depending on the concrete application,the <strong>GEA</strong> <strong>CAIRfricostar</strong> unit can be configured with horizontal airflow in a doubledeck or side by side arrangement. Units are available for only indoor installation. Unitsfor outside installation require special configuration.The modular design of the <strong>GEA</strong> <strong>CAIRfricostar</strong> makes it possible to split up units intosuitable delivery packages that will pass through available on-site openings duringinstallation. <strong>GEA</strong> <strong>CAIRfricostar</strong> units are also suitable for the refurbishment of existingbuildings due to the available range of unit sizes and the option of ordering the units insmall delivery packages.3.2 Unit configuration and operation of <strong>GEA</strong> <strong>CAIRfricostar</strong> modular unitsA variety of configurations is possible due to the modular design of the units and theirvarious applicational areas.The basic design of the unit and its operating principle is illustrated using examplesbelow.3.2.1 CAU unitsThe <strong>GEA</strong> <strong>CAIRfricostar</strong> CAU unit has been developed for private swimming pools andcan be delivered in 4 different sizes. The unit dehumidifies and heats the air of a swimmingpool in a circulating air mode. It is supplied with a fully electronic control systemwhich automatically operates all unit functions.Fig. 3-1:<strong>GEA</strong> <strong>CAIRfricostar</strong> CAUWhen in circulating air mode without dehumidification the air is moved around theswimming pool. A multifunctional humidistat which is installed in the swimming poolswitches the unit into dehumidification mode in case the humidity setpoint has beenPR-2006-0019-GB • Subject to modifications • Status 05/2009 11
Technical Description<strong>GEA</strong> <strong>CAIRfricostar</strong>exceeded. At this point the fan is switched into speed 2, and the refrigeration cycle isactivated to start the dehumidification process. The dehumidification stage continuesuntil the humidity setpoint has been reached. After that the fan is switched back intospeed 1, and the compressor within the refrigeration cycle is stopped. Using an optionalpool water condenser a certain share of excess energy produced by the refrigerationcycle can be fed back into swimming pool water.3.2.2 CMU unitsThe <strong>GEA</strong> <strong>CAIRfricostar</strong> CMU unit has been developed for private swimming pools andis not intended for public ones. The series is available in 6 different sizes. The unitdehumidifies and heats the air of a swimming pool in a circulating air mode. It is suppliedwith the DDC control system which enables full automatic operation of all unitfunctions.Fig. 3-2:<strong>GEA</strong> <strong>CAIRfricostar</strong> CMUWhen in idle mode without dehumidification the air is moved around the swimmingpool. When the humidity setpoint has been exceeded the unit switches into dehumidificationmode. At this point the supply air fan is switched into speed 2 with the exhaustair fan supporting the air circulation and continuing to run at speed 1. The refrigerationcycle is activated to start the dehumidification process. Using the bypass damper a certainpart of return air is mixed without further treatment with dehumidified air that haspassed through the refrigeration cycle. The dehumidification stage continues until theactual humidity value lies below that of the humidity setpoint. After that the fan is switchedback into previous speed and the refrigeration cycle is stopped.When in active hours swimming pool mode the fresh and exhaust air dampers are opened,the bypass damper is closed. The dehumidification takes place via the activationof the refrigeration cycle with both fans switched into speed 2.Using an optional pool water condenser a certain share of excess energy produced bythe refrigeration cycle can be fed back into swimming pool water.3.2.3 CAM unitsThe <strong>GEA</strong> <strong>CAIRfricostar</strong> CAM unit has been developed for all types of private or publicswimming pools. The series is available for air volume flow ranging from 750 up to45.000 m³/h. The unit dehumidifies and heats the air of a swimming pool in a mixed airmode. Together with a refrigeration unit (heat pump) the CAM unit is equipped with anefficient heat recovery system. It is supplied with the DDC control system which enablesfull automatic operation of all unit functions.12 PR-2006-0019-GB • Subject to modifications • Status 05/2009
<strong>GEA</strong> <strong>CAIRfricostar</strong>Technical DescriptionFig. 3-3:<strong>GEA</strong> <strong>CAIRfricostar</strong> CAMWhen in idle mode without dehumidification the air is moved around the swimmingpool. When the humidity setpoint has been exceeded the unit switches into dehumidificationmode. At this point the supply air fan is switched into speed 2 with the exhaustair fan supporting the air circulation and continuing to run at speed 1. The refrigerationcycle is activated to start the dehumidification process. Using the bypass damper a certainpart of return air is mixed without further treatment with dehumidified air that haspassed through the refrigeration cycle. The dehumidification stage continues until theactual humidity value lies below that of the humidity setpoint. After that the fan is switchedback into previous speed and the refrigeration cycle is stopped.When in active hours swimming pool mode the fresh and exhaust air dampers are opened,the bypass damper is closed. The dehumidification takes place via the activationof the refrigeration cycle with both fans switched into Speed 2.Using an optional pool water condenser a certain share of excess energy produced bythe refrigeration cycle can be fed back into swimming pool water.3.2.4 CWR unitsThe <strong>GEA</strong> <strong>CAIRfricostar</strong> CWR unit has been developed for all types of private or publicswimming pools. The series is available for air volume flow ranging from 750 up to45.000 m³/h. The unit dehumidifies and heats the air of a swimming pool in a mixed airmode. This unit is equipped with an efficient heat recovery system. It is supplied withthe DDC control system which enables full automatic operation of all unit functions.Fig. 3-4:<strong>GEA</strong> <strong>CAIRfricostar</strong> CWRWhen in idle mode without dehumidification the air is moved around the swimmingpool. When the humidity setpoint has been exceeded the unit switches into dehumidificationmode. At this point fresh air is continuously forwarded and mixed with circulatingair in supply and exhaust air fans which are switched into speed 2. Thedehumidification stage continues until the actual humidity value lies below that of thehumidity setpoint. After that the fans are switched back into previous speed.PR-2006-0019-GB • Subject to modifications • Status 05/2009 13
Technical Description<strong>GEA</strong> <strong>CAIRfricostar</strong>3.2.5 CMP unitsThe <strong>GEA</strong> <strong>CAIRfricostar</strong> CMP unit has been developed for all types of private or publichigh-performance swimming pools. This series is available for air volume flow rangingfrom 750 up to 37.500 m³/h. The unit dehumidifies and heats the air of a swimming poolin a mixed air mode. Together with the heat pump the CMP unit is also equipped withan efficient heat recovery system presented by the double plate heat exchanger. It issupplied with the DDC control system which enables full automatic operation of all unitfunctions.Fig. 3-5:<strong>GEA</strong> <strong>CAIRfricostar</strong> CMPWhen in idle mode without dehumidification the air is moved around the swimmingpool. When the humidity setpoint has been exceeded the unit switches into dehumidificationmode. At this point the supply air fan is switched into high speed with theexhaust air fan only supporting the air circulation. The refrigeration cycle is activatedto start the dehumidification process. The dehumidification stage continues until theactual humidity value lies below that of the humidity setpoint. After that the fans areswitched back into low speed, and the refrigeration cycle is stopped.When in active hours swimming pool mode the fresh and exhaust air dampers are opened,whereas the refrigeration unit is started with both fans switched into high speed.Using an optional pool water condenser a certain share of excess energy produced bythe refrigeration cycle can be fed back into swimming pool water. If a swimming poolis overheated the refrigeration unit is blocked with bypass dampers which are continuouslyopened, so that air could divert the heat recovery system.3.2.6 CWP unitsThe <strong>GEA</strong> <strong>CAIRfricostar</strong> CWP unit has been developed for all types of private or publichigh-performance swimming pools. This series is available for air volume flow rangingfrom 750 up to 37.500 m³/h. The unit dehumidifies and heats the air of a swimming poolin a mixed air mode. This unit is equipped with an efficient heat recovery system. It issupplied with the DDC control system which enables full automatic operation of all unitfunctions.Fig. 3-6:<strong>GEA</strong> <strong>CAIRfricostar</strong> CWP14 PR-2006-0019-GB • Subject to modifications • Status 05/2009
<strong>GEA</strong> <strong>CAIRfricostar</strong>Technical DescriptionWhen in idle mode without dehumidification the air is moved around the swimmingpool. When the humidity setpoint has been exceeded the unit switches into dehumidificationmode. At this point supply and exhaust air fans are switched into high speedwith fresh air continuously mixed with circulating air. The dehumidification stage continuesuntil the actual humidity value lies below that of the humidity setpoint. After thatthe fans are switched back into low speed.If a swimming pool is overheated, bypass dampers are continuously opened, so thatair could divert the heat recovery system.3.3 Unit configuration and operation of <strong>GEA</strong> Fricostar Micro compact unitsBecause of the modular construction and different application possiblities of the unitsthere is a number of various unit configurations.The following sections use examples to demonstrate basic unit design features andoperation cases.3.3.1 CAC unitsThe <strong>GEA</strong> <strong>CAIRfricostar</strong> CAC is a single-part compact unit designed for private,therapeutical and hotel swimming pools. This unit series is suited to operate and canbe delivered with air flow volume between 750-3700m³/h.The scope of supply comprises 2 model sizes and 3 capacity sizes. Units candehumidify and heat swimming pool environment in a mixed air mode. Units are fittedwith DDC controls which regulates all functions in a fully automatic mode.Fig. 3-7:<strong>GEA</strong> <strong>CAIRfricostar</strong> CACWhen in idle mode without dehumidification the air is recirculated in the swimming pool.When the humidity setpoint has been exceeded the unit switches into dehumidificationmode. At this point supply air fan is switched into second speed with exhaust air fanoperating at first speed. The refrigeration unit is activated to provide dehumidification.Part of exhaust air is not processed and mixed with humidified air through a bypassdamper. The dehumidification stage continues until the actual humidity value liesbelow that of the humidity setpoint. After that the fans are switched off and therefrigeration unit deactivated.In active hours mode the fresh and exhaust air damper are opened, the bypass damperis closed. The refrogeration unit is activated to provide dehumidification and the fansare started at second speed. Using an optional pool water condenser a certain sharePR-2006-0019-GB • Subject to modifications • Status 05/2009 15
Technical Description<strong>GEA</strong> <strong>CAIRfricostar</strong>of excess energy produced by the refrigeration cycle can be fed back into swimmingpool water.3.3.2 CWC unitsThe <strong>GEA</strong> <strong>CAIRfricostar</strong> CWC is a single-part compact unit is designed for private,therapeutical and hotel swimming pools. This unit series is suited to operate and canbe delivered with air flow volume between 750-3700m³/h.The scope of supply comprises 2 model sizes and 2 capacity sizes. Units candehumidify and heat swimming pool environment in a mixed air mode. This unit seriesis equipped with an efficient energy recovery system. Units are fitted with DDC controlswhich regulates all functions in a fully automatic mode. FigFig. 3-8:<strong>GEA</strong> <strong>CAIRfricostar</strong> CWCWhen in idle mode without dehumidification the air is recirculated in the swimming pool.When the humidity setpoint has been exceeded the unit switches into dehumidificationmode. At this point supply and exhaust air fans are switched into second speed andfresh air is continuously mixed. The dehumidification stage continues until the actualhumidity value lies below that of the humidity setpoint. After that the fans are switchedoff.3.4 Technical dataRefer to the relevant order documentation for the specific configuration of your <strong>GEA</strong><strong>CAIRfricostar</strong> unit (unit drawing with dimensions and technical data).3.4.1 Operating limits and range of applicationNOTES!Please pay attention to the unit type plate and carefully observe the operationmanuals for all supplied accessories.Please refer to the accompanying documentation for the range of application relatingto special built-in components.If there is a risk of frost always use frost protection and antifreeze means for heatingand cooling media.The range of application for the <strong>GEA</strong> <strong>CAIRfricostar</strong> special units is available onrequest.16 PR-2006-0019-GB • Subject to modifications • Status 05/2009
<strong>GEA</strong> <strong>CAIRfricostar</strong>Technical Description3.4.2 Ambient conditionsNOTE ABOUT EXTREME CONDITIONS!In addition to air temperature and air humidity of the medium, it is also necessary toconsider temperature and humidity of ambient air. Observe the condensation limits.DAMAGE TO THE UNIT!The terminal box with control display, frequency converter with control display aswell as all other temperature sensitive display tools are only suitable for inside installationin frost-free ambient conditions.Fresh air from -25 °C up to +60 °CAir humidity depending on the temperature max. 18 g/kg of dry airMax. operating pressure and Heating and cooling coil 16 bar/90 °CtemperatureMin. operating temperature Heating and cooling coil 6 °C3.4.3 Permitted storage conditions / permitted air conditions for non-installed units.Air temperature from 5 °C up to 50 °CAit humidity Store units in a dry, non-condensing environment3.4.4 Supply voltageThe required voltage is stated in the order-specific documentation,e.g. 3 x 400 V (50 Hz) + N + PE.PR-2006-0019-GB • Subject to modifications • Status 05/2009 17
Transportation and Storage<strong>GEA</strong> <strong>CAIRfricostar</strong>4 Transportation and Storage4.1 DeliveryThe unit can be delivered as a complete system or as individual delivery units on transportpallets.• When the unit is delivered, check that the delivery is correct according to thedelivery note, and also check for completeness.NOTE!Observe the information regarding transit damage on the packaging or in thedelivery documentation!What steps should you takein the event of transitdamage?External damage of packaging1 Unpack the equipment in the presence of the lorry driver and have the damageacknowledged in the shipping order.2 Inform the <strong>GEA</strong> sales subsidiary immediately.No signs of external damage to packaging, content is damaged1 Once you have established the extent of the damage, notify the <strong>GEA</strong> salessubsidiary in writing.2 Document the situation by taking photographs.3 Any transit damage must be reported no later than 4 days following the delivery.Processing of claims will not be possible unless the above steps have been taken.In both cases consult the <strong>GEA</strong> sales subsidiary before installing the units.4.2 TransportationNOTE!Transport the unit only in its original packaging.Remove the original packaging only before the installation starts.• Use only manufacturer-provided transport lugs/devices when transporting the unit!• Wear safety footwear and gloves when transporting the unit to ensure your safety.DANGER OF OVERHEAD LOADS!Never enter the area beneath freely suspended loads as there is always a riskthat hoisting devices, lifting accessories or ropes/cords may be damaged,which may lead to serious injury or death.18 PR-2006-0019-GB • Subject to modifications • Status 05/2009
<strong>GEA</strong> <strong>CAIRfricostar</strong>Transportation and Storage• Before transporting the unit, make sure that all doors, panels with sash fastenersand panels are closed and secured.• Use only hoisting devices with sufficient load-carrying capacity.• Never use damaged hoisting devices.• Ropes/cords may not be knotted or come into contact with sharp edges.• Use only ropes/cords of the same length.• Move the unit carefully without sudden or jerky movements.• Do not set the unit down abruptly or bump it.• Do not tilt or position sidewards units with a built-in refrigeration unit (compressor).4.2.1 Lifting the unit – transport lugs on roof (for delivery units weighing up to 2000 kg)PERSONAL INJURY!Use only the transport lugs provided by <strong>GEA</strong>! Make sure that these are firmlyseated before lifting the equipment.• Transport lugs may only be used once.• They may not be used to suspend the unit on a permanentbasis.• No other loads may be lifted together with the delivery unit.• When installing units outdoors, particular care should be takento ensure that the roof sheeting is not damaged by thehoisting devices.Fig. 4-1:Transport lugs for delivery units weighing upto 2000 kgPR-2006-0019-GB • Subject to modifications • Status 05/2009 19
Transportation and Storage<strong>GEA</strong> <strong>CAIRfricostar</strong>4.2.2 Lifting the unit – transport device on base frame (for delivery units weighing up to 4000 kg)PERSONAL INJURY!Use only the transport devices provided by <strong>GEA</strong>! Make sure that these arefirmly seated before lifting the equipment.Fig. 4-2:max. 60°Transport devices for delivery units weighingup to 4000kg• The units may only be lifted using the transport devicesattached to the base frame.• Use the hoisting device (not included in scope of <strong>GEA</strong>delivery) as shown.• Use the supplied timber spacers to provide protection atthe edges.• The suspension angle may not exceed 60°.• To make sure that the load does not slip or tilt, payattention to its centre of gravity when lifting it.• Transport devices may only be used once.• They may not be used to suspend the unit on apermanent basis.• No other loads may be lifted together with the deliveryunit.• When installing units outdoors, particular care shouldbetaken to ensure that the roof sheeting is not damagedby the hoisting devices.4.2.3Transportation with pallet truck or forklift truck• Always use the unit base frame or the supplied pallet as the supporting surfaceduring transportation.• Units must not be lifted without the base frame unless the unit profiles aresufficiently protected.• When transporting the unit using a forklift, both base frame profiles must be restingon the forks.• The centre of gravity and load distribution must be taken into account.DAMAGE TO THE UNIT!Never stack units on top of one another for transportation.Always transport units separately.The stacking of units and other components that are not part of the unit is notpermitted.Such stacking is only allowed when the necessary load-bearing capacity hasbeen specially incorporated into the units which are only delivered by the <strong>GEA</strong>factories.20 PR-2006-0019-GB • Subject to modifications • Status 05/2009
<strong>GEA</strong> <strong>CAIRfricostar</strong>4.3 StorageTransportation and StorageNOTE!Observe the permissible storage conditions when storing the unit. Remove theoriginal packaging only before the installation starts.Protect the unit before commissioning against dust and dirt built up as well asdamage.Prior to commissioning, suitable measures must be taken to protect deliveredunits without packaging against dust and dirt built-up. Care must be taken toensure that condensation can not form below packaging supplied by others (byensuring the correct distance between the packaging and the casing).• Always place units on an even surface during long-term storage or intermediatestorage.• Protect units from bumps and knocks which may damage the casing and projectingcomponents.• If commissioning is not carried out within three months after the delivery, the beltdrive must be slackened.• Turn the motor axle and fan through at least 2 revolutions every 3 months.Permitted storage conditions / air conditions for non-installed units.Air temperature 5 °C up to 50 °CAir humidity Store units in a dry, non-condensing environmentPR-2006-0019-GB • Subject to modifications • Status 05/2009 21
Assembly<strong>GEA</strong> <strong>CAIRfricostar</strong>5 AssemblyHere you will find information regarding the assembly and installation of the unit.This may only be carried out by tradesmen who have appropriate training, experienceand necessary knowledge about relevant accident prevention regulations andother established regulations relating to health and safety in the workplace.The unit should be installed in such a way that it is accessible only to technicalpersonnel with the appropriate authorization and training.The unit may only be assembled in accordance with the configuration shown in thetechnical documentation supplied with the unit.The units must not be stacked with other components that are not part of the unit.This is only allowed when the necessary load-bearing capacity has been speciallyincorporated into the units delivered only by the <strong>GEA</strong> factories.When connecting the duct it must be ensured that no foreign matter can enter the unit.If necessary, a suitable protection grille or guard must be installed by the customer ondischarge/intake openings of the unit.DAMAGE TO THE UNIT!When entering <strong>GEA</strong> <strong>CAIRfricostar</strong> units, care must be taken to ensure that no loadsare applied to the floor panels. During assembly work suitable measures should betaken to ensure that all loads are evenly distributed across the bottom profiles (e.g.using grid walkways). It is not allowed to scratch or in any other way damageunit surfaces!5.1 Setting up5.1.1 Set up locationThe unit must be set up at a location that fulfils the following requirements:– The substructure must be level and stable.– The maximum deflection of the substructure may not exceed 1 mm per metre.– In units where a condensate drain is installed, the height of the substructure mustbe at least as high as the required siphon height (see siphon).– Make sure that no damage to the installation location or the environment is causedby escaping media.Fig. 5-1:Set up location22 PR-2006-0019-GB • Subject to modifications • Status 05/2009
<strong>GEA</strong> <strong>CAIRfricostar</strong>Assembly5.1.2 Minimum clearances• In order to be able to remove fans, heat exchangers, dropleteliminators, etc. and also perform servicing and maintenance,a minimum clearance of one unit width must be maintainedon the operating side.• A minimum clearance of 600 mm between the unit rear sideand the wall must be provided to enable servicing.Fig. 5-2:Minimum clearance5.1.3 Configuration of foundation for indoor installation• The subconstruction may project a maximum of 20 mmbeyond the outer edge of the unit to enable the installation ofcover panel sheets or accessories, such as siphons.• The bearing points for the subconstruction must be locatedat every unit break point and the maximum distance betweenbearing points in the unit longitudinal direction must notexceed 1600 mm.• Units arranged side by side must be supported centrally(see illustration).Fig. 5-3:Foundation - side by side arrangement5.1.4 Configuration of foundation for outdoor installation (weatherproof, roof frame)PERSONAL DAMAGE!The <strong>GEA</strong> units for outdoor installation and roof frames are not a roof replacement.The roof frame may not be walked on!NOTE!In accordance with prEN 13053 and VDI 3803, weatherproof units and their componentsmust not be used to support parts of the building or substitute a roof.• The unit instructions for the configuration of foundations for indoor installationsimilarly apply in this case.• Choose an installation location where the fresh air intake will not be facing the wind.• In areas where there is a heavy amount of snowfall, the unit must be installed in alocation where its operation will not be affected by snow. A suitable height for thesubconstruction must be selected.• If the unit is to be mounted on a roof, then the load-bearing capability of the roof andits supporting structure must be checked. Consult a structural engineer ifnecessary.• The roof frame must be insulated to prevent condensation. For information onmounting, see „Assembling roof frame“ on page 30.PR-2006-0019-GB • Subject to modifications • Status 05/2009 23
Assembly<strong>GEA</strong> <strong>CAIRfricostar</strong>Fig. 5-4:Foundation with <strong>GEA</strong> roof frameFig. 5-5: Foundation on concrete base Fig. 5-6: Foundation on steel beam providedon-siteFig. 5-7:Foundation on steel support provided on-siteNOTE!Particular care must be taken to ensure compliance with the precise dimensions ofroof bushings and to ensure that the foundation is level!24 PR-2006-0019-GB • Subject to modifications • Status 05/2009
<strong>GEA</strong> <strong>CAIRfricostar</strong>Assembly5.1.5 Structure-borne sound attenuationIn order to reduce the transfer of vibrations from the unit to the supporting structure, itis necessary to install anti-vibration mounts and structure-borne sound attenuatingmats:– We recommend that the foundation is insulated from the unit using rubber plates,for example, where the unit is installed on level ground and no specialstructure-borne sound insulation requirements exist.– For very special acoustic requirements please consult an acoustics engineer to selectthe most suitable structure-borne sound attenuation solution.5.2 Assembling the unitNOTE!For detailed information, please refer to the documentation enclosed with the unit.Data sheet, installation instructions, small parts and accessories supplied loose canbe found in the supplied parts list.DAMAGE TO THE UNIT!Fittings/attachments etc. not provided by the manufacturer that could cause a leakmust not be mounted on the walls or frame of the unit. The unit’s serviceability mustbe maintained.Required tools: – Electric screwdriver, drill– Holder for bits/sockets– Sockets, sizes 8, 10– Slotted head screw bits, sizes 2, 3– Open-ended spanners sizes 8, 13, 17– Screw drivers 4.5-6.5– Hexagon socket size 6– Tensioning belts or suitable hoisting device5.2.1 Removing transportation lugs/safety devices• All yellow marked transportation lugs/safety devices on and in the unit must beremoved prior to assembly.• Remove the transportation safety devices on the fan.• The transportation lugs on the roof must be removed.Slacken the screws on the end walls. The lug can beremoved through the opening.• The screw can then be completely tightened again.• Remove the lug, screw and sleeve at the break point.• Screw in the M8 x 30 screw supplied (see Fig. 5-8).Fig. 5-8:Transport lugs – roof, end wall and break pointPR-2006-0019-GB • Subject to modifications • Status 05/2009 25
Assembly<strong>GEA</strong> <strong>CAIRfricostar</strong>• Remove the transportation device on the base frame.Fig. 5-9:Transportation device on base frameNOTE!Transportation lugs/safety device must not be used to suspend the units on apermanent basis.Transportation lugs/device may be used only once.5.2.2 Assembling individual modulesTo assemble the individual modules (break point), proceed as follows:• Affix the seals provided to the break point (special assemblyinstructions provided with the seals).Fig. 5-10: Assembling individual modulesDAMAGE TO THE UNIT!Do not attach tensioning belts/hoisting devices to heat exchanger connections, condensatedrains and door handles or use these to pull or push the equipment!26 PR-2006-0019-GB • Subject to modifications • Status 05/2009
<strong>GEA</strong> <strong>CAIRfricostar</strong>Assembly• Position the unit parts as close to one another as possible prior to assembly. Useonly the unit base frame to pull the individual components together. Units that donot have a base frame must be pulled together with tensioning belts. These mustbe positioned round the profiles in the base or roof area.max. 100 mmFig. 5-11: Unit with base frameFig. 5-12: Unit without base frame• First of all, screw the exterior break-point connectors together.• Mount caps.Fig. 5-13: Outside view• If the rear of the unit is not accessible, screw the interior break point connectors incorners together.Fig. 5-14: Inside viewNOTE!Starting from internal unit width or height of 1280 mm or more there is an additionalbreak point connector in the middle of the profile (internal) which must also bescrewed tight.• Seal pipe and cable ducts to prevent air leakage and condensation using forexample PU foam, (not included in <strong>GEA</strong> delivery scope).Fig. 5-15: Pipe ductPR-2006-0019-GB • Subject to modifications • Status 05/2009 27
Assembly<strong>GEA</strong> <strong>CAIRfricostar</strong>Additional connection for double deck/side by side units• Connect both unit parts at the pre-drilled positions using provided plates.Fig. 5-16: Connectingunit partsParticulars for hygiene units• Clean and seal all internal break point grooves.The sealant is included in the scope of delivery for hygiene units.Fig. 5-17: Break point grooveParticulars for units for outside installationDAMAGE TO THE UNIT!Defective sealing provided on site may result in the ingress of water and subsequentdamage! Seal all parts carefully.Assembly of roofcomponents supplied looseThe roof sheeting above the break point is supplied loose with separated units.• Remove protective film prior to installation.• Install the roof sheeting on site.• The roof sheeting is joined together using clamping strips and supplied metricscrews (M6x16, plastic washers and nuts on both sides)orwith roof hat channel profiles using self-drilling screws (6.3 x 25 with sealingwasher). The joints formed during the above process must be sealed using thesupplied transparent sealing material.Fig. 5-18: Roof sheet28 PR-2006-0019-GB • Subject to modifications • Status 05/2009
<strong>GEA</strong> <strong>CAIRfricostar</strong>AssemblyThe roof end-sheet is supplied loose with units which are transported via roof usingtransportation lugs.• Remove transportation lugs.• Install the roof sheeting on site.• The same connections and sealing method for the breakpoint are also applied here.Fig. 5-19: Roof end-sheet with sealing points5.2.3 Assembling base frame cover (supplied loose)DAMAGE TO THE UNIT!Defective sealing may result in the ingress of water and subsequent damage! Sealall parts carefully.As an option, covers that conceal the base frame can be supplied loose. Correspondingretaining plates are pre-installed with this option.• Remove protective film prior to installation.• The covers are numbered and must be inserted in thecorresponding locations (also numbered) and screwed onusing self-drilling screws (6.3 x 25 with sealing washer).• Connecting plates and corners are provided to cover jointsand corners formed during the above process. Apply sealantbefore screwing these parts using self-drilling screws(6.3 x 25 with sealing washer).• Affix the supplied self-adhesive rubber sleeve before mountingthe siphon (supplied loose).Fig. 5-20: Base frame - covers• Seal the joint between base frame and unit frame.Fig. 5-21: SealingPR-2006-0019-GB • Subject to modifications • Status 05/2009 29
Assembly<strong>GEA</strong> <strong>CAIRfricostar</strong>5.2.4 Assembling roof frameDAMAGE TO THE UNIT!The roof frame may not be walked on and may not be used as a substitute roof!NOTE!The installation sequence is demonstrated by adhesive labels on the supplied roofframe parts. All installation materials are supplied loose with the roof frame.• Screw the roof frame elements supplied at the break pointusing the hexagon head screws (M8 x 30), nuts and serratedlock washers provided.Fig. 5-22: Screwing the roof frame• Seal the roof frame cover plates with sealing material andstick together with aluminium sealing tape.Fig. 5-23: Sealing of roof frame jointThe method used to integrate the roof frame depends on the roof or ceiling construction.• Insulate the roof frame within the thickness of the walls to prevent cold bridging.• To prevent the ingress of water in flat roof constructions, lift the roof membrane overthe roof frame and insert it under the base frame cover.30 PR-2006-0019-GB • Subject to modifications • Status 05/2009
<strong>GEA</strong> <strong>CAIRfricostar</strong>Installation6 InstallationThe medium connection like coils, heat exchangers, humidifiers etc. may only becarried out by tradesmen with the appropriate training, experience and knowledge ofrelevant accident prevention regulations and other established regulations relatingto health and safety in the workplace.DAMAGE TO THE UNIT!When entering <strong>GEA</strong> <strong>CAIRfricostar</strong> units, care must be taken to ensure that no loadsare applied to the floor panels. During installation suitable measures should be takento ensure that all loads are evenly distributed across the bottom profiles (e.g. usinggrid walkways). It is not allowed to scratch or in any other way damage unit surfaces!6.1 Requirements• Check the unit for external damage and check whether it has been properlyassembled and anchored.• Check whether anti-vibration and structure-borne sound attenuating mats havebeen provided. This means that either:– the foundation has been insulated from the unit using rubber plates (forexample) with the unit being installed on level ground and no special structurebornesound insulation requirements exist;– or, where very special acoustic requirements exist, an acoustics engineer hasbeen consulted when selecting the most suitable structure-borne soundattenuation method.• Before you start with the coil connection, check the following:– Drain valves must be installed at all low points in the water system to ensure thatthe water circuit can be fully drained in order to carry out maintenance or repairs.– A water drain with a shut-off valve must be installed in order to drain the unit’swater system.– Air vents must be installed at all the high points of the water system at easilyaccessible locations.• Ensure that the on-site provided piping system is flushed through until it is clean anda cleaning report is generated.6.2 Installing air control and air flow componentsIn order to prevent the transmission of structure-borne sound, a connection betweenair ducts and the unit must be provided using elastic connectors or structure-bornesound attenuators (also compare „Structure-borne sound attenuation“ on page 25).If you are connecting air ducts to the units via flexible connectors, the installation lengthof the connectors must be smaller than their extended length.6.3 Installing air handling components with coil connectionRecommendations on water quality for heat exchangers that operate using low pressurehot water (L.P.H.W.) and chilled water:A good water quality – e.g. salt and lime-free drinking water – increases the lifetimeand efficiency of the heat exchanger.• Perform an annual check of limit values shown in the table to prevent damage tothe hydraulic system and its components. If necessary inhibitors must be added.PR-2006-0019-GB • Subject to modifications • Status 05/2009 31
Installation<strong>GEA</strong> <strong>CAIRfricostar</strong>NoteThese limit values provideonly basic informationabout the water qualityand do not present anybasis for a guarantee!Description Symbol ValuesHydrogen ion concentration pH 7.5 − 9 < 7> 9Calcium and magnesiumcontentHardness(Ca/Mg)Effects in event ofdeviationCorrosionFouling4 − 8.5 °D > 8.5 FoulingChloride ions Cl – < 50 ppm CorrosionIron ions Fe³ + < 0.5 ppm CorrosionMagnesium ions Mg² + < 0.05 ppm CorrosionCarbon dioxide CO 2 < 10 ppm CorrosionHydrogen sulphate H 2 S < 50 ppb CorrosionOxygen O 2 < 0.1 ppm CorrosionChlorine Cl 2 < 0.5 ppm CorrosionAmmonia NH 3 < 0.5 ppm CorrosionRatio of carbons/sulphates HCO 3 ² - /SO 4 ² - > 1 < 1 Corrosion1/1.78 °D = 1 °Fr with 1 °Fr = 10 g CaCO 3 /m³ppm = parts per million (mg/l)ppb = parts per billion (μg/l)NOTE!The air side corrosion protection of buil-in unit components is provided if the chemicalvalues of pool water do not exceed limit values as defined by VDI 2089 Page 2„Water treatment in swimming pools“ and VDI 19643.6.3.1 Installing air handling components for cooling/heatingDAMAGE TO THE UNIT!When connecting the heat exchanger, counter force must be applied using pliers toprevent damage.The connections to the heat exchanger provided on site must always be tensionfree.Mechanical and static loads must not be applied to the connecting spigots.The heat exchanger must be connected in accordance with the counter flow principle(air and water heat exchanger flow in opposite directions).• Protect the surfaces of the fins in the heat exchanger from damage.• Connect on-site pipe system to the water inlet and outlet. The inlet and outlet coilconnections are marked using adhesive labels.• Insulate pipes on site.Additional information about air handling components with cooling function:• Insulate coil connections and pipes once the installation has been carried out toprevent the formation of condensation water. Condensate water that is formed accumulates in the stainless steel condensate trayand is drained via a drain spigot mounted on the condensate tray.• Install a siphon (See „Connecting siphon and water drains“ on page 37).32 PR-2006-0019-GB • Subject to modifications • Status 05/2009
<strong>GEA</strong> <strong>CAIRfricostar</strong>InstallationAdditional information about units with fresh-air or mixed-air operation:DAMAGE TO THE UNIT!The heat exchanger in the unit must be protected from the formation of ice andfreezing at ambient temperatures below the freezing point.Use antifreeze in the water circuit if necessary.NOTEGlycol may be used provided that it does not exceed 50 % of the overall volume.A higher quantity can cause operational faults.Installing 3-way vavle at heating coilsHeat distributionA 3-way valve can be used in two ways:A) Planning example: Three way mixing control:To use with units with e. g. an air heater operated in a mixed airmode or air heaters with extremely large dimensions.Advantage: Good water circulation within unit cycle, low inlettemperature at low load.ABBM ~VLABoilerdistributoretc.RLFig. 6-1:Three way mixing controlB) Possible alternative: Three way distribution control:To be used only with air heaters in the circulation mode.Heat distributionAB~MABBoilerdistributoretc.VLRLFig. 6-2:Three way distribution control6.3.2 Installing evaporator/condenser componentsENVIRONMENTAL DAMAGE!Dispose of any liquid (refrigerant) in an environmentally friendly manner in accordancewith the locally applicable laws and regulations.• Open and use the service connections using only special tools and fittings. Only with opened refrigeration cycles: the units are filled with nitrogen charge thataudibly discharges when the connection caps are removed.PR-2006-0019-GB • Subject to modifications • Status 05/2009 33
Installation<strong>GEA</strong> <strong>CAIRfricostar</strong>6.3.3 Installing pool water condenser (optional accessory)DAMAGE TO THE UNIT!The water side flow rate in the pool water condenser may not be too high. Pleasepay attention to technical data during planning and design stage. If the water flowrate is too high, it may permanently damage the pool water condenser and in sucha way will render any warranty as null and void!The drain connectors of the pool water condenser are positioned directly at the poolwater condenser.• Install an air vent device at pool water outlet on-site.• Install connecting pipes in such a way that a trouble-free access to sections andcomponents on service panels is provided.Examples for hydraulic connection of pool water condenserExample 1DAMAGE TO THE UNIT!Pool water condenser lines must be resistant to heat (at least +80 °C) and deformation.Use appropriate materials.4213Fig. 6-3: Pool water condenser as a separate cycle1: Pump 2: Filter3: Pool water condenser 4: Temperature sensorExample 24213Fig. 6-4:Separate pool water condenser via splash water receiver.1: Pump 2: Filter3: Pool water condenser 4: Temperature sensor34 PR-2006-0019-GB • Subject to modifications • Status 05/2009
<strong>GEA</strong> <strong>CAIRfricostar</strong>InstallationExample 3651426In the configuration as demonstrated by example 3please take the following steps:• The electrical interlock of the filter pump withthe pool water condenser pump must becompleted on-site by others.• Besides, nonreturn flaps or nonreturn valvesmust be mounted.3Fig. 6-5:Pool water condenser cycle together with filter cyclewith only one pool water intake and discharge operation.1: Pump 2: Filter3: Pool water condenser 4: Temperature sensor5: Filter cycle pump 6: Nonreturn flapExample 4617542In the configuration as demonstrated by Example3 please take the following steps:• The pump must be controlled not only by thefilter unit but also by the <strong>CAIRfricostar</strong>.• Besides, a solenoid valve must be installed withappropriate control system (instead of controloutput PWC pump). If necessary more contactsmust be provided on-site by others.• To contol water amount a choke valve must beinstalled.3Fig. 6-6:Pool water condenser cycle connected to the filter cycle bypass1: Solenoid valve 2: Pre-filter3: Pool water condenser 4: Temperature sensor5: Filter cycle pump 6: Throttle valve7: Flow meterNOTE!Please pay attention to maximum possible water flow rate in pool water condensercycle.The technical data is available with specific order-related unit documentation.PR-2006-0019-GB • Subject to modifications • Status 05/2009 35
Installation<strong>GEA</strong> <strong>CAIRfricostar</strong>6.3.4 Installing heat exchangers for liquid-coupled system (L<strong>CS</strong>)Check with „Installing air handling components for cooling/heating“ on page 32.Piping unit for energy recovery system ECOFLOWStandard:– Circulating pump, safety vavle, pressure gauge, expansion tank, two shut-off valves,charging and draining valves, pipe line for connection, connection bushings.– Supplied as a separate unit, connecting lines between the piping unit and heatexchangers are provided by others on-site.– During selection and planning stage a maximum pipe line length of max. 20 m to beinstalled by others on-site has been taken into account.Wheatherproof:– For double mixing units ECOFLOW– The same configuration as with standard, however it is fully integrated and piped inthe unit.DAMAGE TO THE UNIT!When performing on-site piping connections, keep in mind the counter flow principleof air to the heating medium. (Water/water-glycol mix).4 5 678Heating elementCooling elementSupply airExtract airFrost protectionProvidedroplet tray1 2 32 1Fig. 6-7: Piping example: Counter flow of air to heat exchanger1: Valve for charging and draining2: Gate valve3: Circulating pump4: Overpressure valve5: Membrane expansion tank6: Pressure gauge7: Charging connector8: Air vent valve36 PR-2006-0019-GB • Subject to modifications • Status 05/2009
<strong>GEA</strong> <strong>CAIRfricostar</strong>Installation6.3.5 Connecting siphon and water drainsNOTEThe equipment must not be connected directly to the waste water system!Fill the siphon with water before commissioning and also following longer periodswhen the unit has not been in use.The hydraulic seal in the siphon H must be greater than themaximum overpressure or underpressure (mm WC) in the unit(1 mm WC = 10 Pa).The dimensioning is performed using the equation below:H( mmWS)=unit over/under pressure( Pa)-----------------------------------------------------------------------------10Fig. 6-8:Siphon: Overpressure in unitThe height difference between the water drain and hydraulicseal must also correspond to the dimensionH (mm WC).• Connect the siphon to the waste water/sewage system asshown in the illustration.2,5 HH1,5 HNOTE ON RISK OF FROST.If there is a risk of frost, the discharge pipe must beinsulated and kept warm using a heating cable, forexample.Fig. 6-9:Siphon: Underpressure in unitFig. 6-10:A siphon must be connected to each condensate drain or overflow pipe.Several discharge pipes must not be routed to one shared siphon (* drainblocked).NOTE!Underpressure and overpressure siphons must be connected to separate collectingpipes (See Fig. 6-10).6.4 Installing accessoriesRefer to the relevant documentation providing description of the assembly and installationof accessories or accessory parts by others.PR-2006-0019-GB • Subject to modifications • Status 05/2009 37
Electrical Connection<strong>GEA</strong> <strong>CAIRfricostar</strong>7 Electrical ConnectionThe electrical connection may only be carried out by tradesmen with theappropriate training, experience and knowledge of relevant accident preventionregulations and other established regulations relating to health and safety in theworkplaceTake protective measures!During installation and connection of the unit, additional protective measures inaccordance with the EU guideline and local utility provider regulations must betaken when setting up low voltage equipment.Ensure earthing and potential equalisation is provided for the unit and all connectedcomponents.ELECTRICAL HAZARD!All power supply connections must be switched off and be voltage-free andsecured against unintentional switching on. Earth and short-circuit them andcover over any neighbouring electrically conducting components or block themoff. Failure to do so may lead to serious injury or death.NOTEThe cable installation must be carried out in accordance with the enclosedwiring diagram of the unit and nationally applicable standards and guidelines.Only one separate mains power cable should be used. Never connect otherunits to this mains power cable.7.1 RequirementsVisual inspection ofmechanical parts• Carry out a full visual inspection of the entire unit and installed components.• Before you start with the electrical connection, check the following:– The characteristics of the mains power supply must satisfyEN 60204-1 regulations and the power requirements of the unit.– The size of the backup fuse size must be determined on the basis of the unitrated current with consideration to the maximum fuse size (see wiring diagram)by the competent electrical tradesman.– The motors must be able to operate at their nominal capacity if their input voltagewith nominal frequency is between 95 % and 105 % of nominal voltage.7.1.1 Cable routing and grommets by others• The installation of cable grommets and the running of cables near doors, panelswith sash fasteners, panel connections and cover strips is to be be avoided.• Screw connections and grommets must not cause any leaks.• The connecting cables within the fan components must be long enough to allow themotor to be moved without difficulty (in order to tension the V-belt, for example).38 PR-2006-0019-GB • Subject to modifications • Status 05/2009
<strong>GEA</strong> <strong>CAIRfricostar</strong>Electrical Connection7.2 Connecting the unitEach separate assembly with an electrical connection must be earthed separately.7.2.1 Motor protectionMotor protection with PTC resistor sensorsThe AC motors contain between two and six PTC resistor sensors connected in series,depending on the motor size and type. The PTC resistor sensors are embedded in thewindings of the motors in a way that optimises recording of the winding temperature.PTC resistor sensors are temperature-dependent semiconductor resistors.When the maximum permissible winding temperature of 135 °C is reached, the resistancevalue increases rapidly. This response, combined with full motor protection electronics,causes the motors to switch off.NOTEUnlike thermal contacts, PTC resistor sensors are not subjected to wear and tear.They provide a high degree of operating safety as they are shock-resistant, vacuumresistantand not sensitive to pressure.DAMAGE TO THE UNIT!The separate sensor with external leads must not be connected to voltage as thiswould damage it beyond repair. Measuring voltages greater than 5 V are notpermitted.Connect the sensor only to full motor protection tripping devices (such as<strong>GEA</strong> 912.MVS 1.0).INDUCTION EFFECTSWe recommend the use of shielded cables (such as JY (st) Y, 2 x 2 x 0.5) to preventthe effects of induction on the PTC resistor measuring circuit. Connect the shieldingon one side with the potential equalisation (PE).Full motor protection electronicsRisistance ROperating pointof tripping deviceTemperature T+135 CExtended motor protectionFault based shutdownFor motor protection we recommend our <strong>GEA</strong> 912.MVS 1.0 full motor protectiontripping devices. They have been specially harmonised with the PTC resistor sensorsused in the motors. As operation of the full motor protection electronics is based on theclosed-circuit current principle they are intrinsically safe. A locking shutdown after afault and restart following power failure generally occur in conjunction with <strong>GEA</strong>912.MVS 1.0 full motor protection tripping devices.The electronic full motor protection tripping devices switch the motors off where thefollowing occur:– Overloading– Ambient temperatures exceed permissible limits– The rotor is locked– Insufficient cooling– Short circuit in winding– Wire breakage and loose contacts in measuring linesIn case of frequent start-ups, intermittent operation and switching rate, and to provideoptimum protection against 2-phase running, we recommend that motors are protectedby thermal overcurrent relays/motor circuit breakers, in addition to PTC resistors.In the event of a shutdown after a fault, check whether this is due to one of the aforementionedcauses.PR-2006-0019-GB • Subject to modifications • Status 05/2009 39
Electrical Connection<strong>GEA</strong> <strong>CAIRfricostar</strong>Motor protection with thermal contactThermal contacts are temperature-dependent switching elements that automaticallymonitor the winding temperature of a motor. Compared to thermal tripping devices andmotor circuit breakers, these devices provide more effective protection under the followingcircumstances when installed in the motor winding:– Insufficient cooling– Increased ambient temperature– Extreme speed reduction during control and regulation operations– Shutdown of the motor in the event of control voltage failure on the line side– Faulty contacts and cable breakages in the control circuit.A thermal contact opens when the permissible temperature of the winding is exceeded.This interrupts the control signal loop of a control unit, for example. The fan protectiondrops out and disconnects the motor from the mains.The motor protection is intrinsically safe.7.2.2 Connecting electric motorsSingle-speed electric motorswith direct on-line startingSingle-speed electric motorswith Y/Δ startingIn order for the unit to operate properly it is important to connect it with a right-handrotating field.• Check the rotating field if necessary with a rotating field meter.DAMAGE TO THE UNIT!Correct assignment of the phase sequence to the specified rotational direction mustbe checked before the motor is connected. If the wrong connection is made themotor/fan may be damaged.The terminals of AC motors are labelled in such a way that the alphabetical sequenceof the terminal designation U1, V1, W1 corresponds with the temporal sequence of thephases L1, L2, L3 (with clockwise rotation).The rotational direction can be reversed by exchanging two connecting cables:– Exchange the connecting cables, e.g. U1 and V1– Y connection: Exchange the connecting cables, e.g. U1 and V1– Δ connection: Exchange the connecting cables, e.g. U2 and V2Multi-speed electric motors: – Speed 1: Exchange the connecting cables, e.g. 1U and 1V– Speed 2: Exchange the connecting cables, e.g. 2U and 2VVoltage fluctuations • Make sure that the supply voltage with mains frequency is between 95 % and105 % of the rated voltage. Only then can the motors operate at their rated output,otherwise they may be damaged.To make the connection, proceed as follows:• Connect the unit according to the wiring diagrams.One speed motorOne speed 3-phase-motors with frequency converters for plug fansTwo speed motorTwo speed 3-phase-motors for belt-driven fans40 PR-2006-0019-GB • Subject to modifications • Status 05/2009
<strong>GEA</strong> <strong>CAIRfricostar</strong>Electrical Connection7.2.3 Service switchIf a switch cabinet was installed remotedly from the unit, a lockable service switch mustbe installed near the fan section access door.The wiring of a service switch installed by the factory is run to the motor or strip terminal/cabinetswitch.7.2.4 Installation and connection of the servo actuator12The <strong>GEA</strong> servo actuators for flow control of extract and fresh airare mounted on the mixing air section but are not wired.The wiring for supply voltage is only possible after the unitcomponents have been installed.(does not apply to CAC and CWC)• Install unit components.• If the <strong>GEA</strong> servo actuators have been mounted at the factory(1) run the prepared and coiled connecting lines (2) foractuators through available cable openings, provide firmfixing and connection.• Use the relevant documentation to install other actuators.Fig. 7-17.2.5 Electric air heater• Connect electric heater coil as explained in the enclosed documentation/wiringdiagram.• Connect high temperature cut out and monitor.A high temperature cut out and limiter is supplied.• Check that the high temperature cut out is functioning correctly.• The heater coil may only be switched on if the minimum volume of air required foroperation of the heater coil is flowing through it.• During control and regulation you must ensure that the fan has been running on forat least 3 minutes once the heater coil was switched off.7.2.6 Additional electrical components• Connect additional electrical components in accordance with the provideddocumentation/wiring diagram.PR-2006-0019-GB • Subject to modifications • Status 05/2009 41
Electrical Connection<strong>GEA</strong> <strong>CAIRfricostar</strong>7.2.7 Overview of cable connections for <strong>GEA</strong> <strong>CAIRfricostar</strong> mixed air unitsNOTE!Only the unit wiring diagram provides exact information about the unit delivery condition.The switch cabinet is supplied loose! (Special configuration including intermediateterminal box). Use the enclosed documentation for detailed information aboutthe installation of the terminal box.Unit sizes 015-083 with swing switch cabinet on the unitUnit sizes 100-360 with upright switch cabinet near the unit*9Fig. 7-2:Swing switchcabinet134( )5 5287Fig. 7-2:Swing unit611 10Fig. 7-4: Overview of cable connections of the <strong>GEA</strong> <strong>CAIRfricostar</strong> mixed air units1: Pool water immersion sensor (option) 2 x 0,75 mm²; screened LIYCY-0B2: Reheater 3-way-valve 6 x 0,75 mm²; screened LIYCY-JZ3: Outside temperature sensor 2 x 0,75 mm²; screened LIYCY-0B4: On-site BMS connections provided by others (see unit wiring diagram for options)5: System cable set in protective hose (press and attach plugs, aslo see Fig. 7-1 on page 41)6: Power supply; 3 x 400 V+N+PE/ 50 Hz7: Connection for pool water pump (option); 3 x 1,5 up to 083 if more 5 x 1,5 mm² (not withCW_-unit) + 2 x 0,75 mm² fault message contact.8: Connection for auxiliary heater pump; 3 x 1,5 up to 083 if more 5 x 1,5 mm² (not with CW_-units) + 2 x 0,75 mm² fault message contact9: External switch off; smoke and gas alarm; 2 x 0,75 mm²Fig. 7-3:Upright switchcabinet* Special configuration for Austria:It is usually not necessary to screen the sensor supply line!1: Pool immersion temperature sensor 2 x 0,75 mm²2: Reheater valve 5 x 1,5 mm²3: Outside temperature sensor 2 x 0,75 mm²4: On-site BMS connections provided by others according to wiring diagram5: System cable set is not necessary (standard in terminal box)6: Power supply; 3 x 400 V+N+PE/ 50 Hz7: Connection for pool water pump 3 x 1,5 mm² up to 037 if more 6 x 1,5 mm² (400 V)8: Connection for auxiliary heater pump 3 x 1,5 mm² up to 037 if more 6 x 1,5 mm² (400 V)9: External safety switch off only on request10: Inlet temperature sensor, heater 2 x 0,75 mm²11: Room temperature and humidity sensor 5 x 0,75 mm²42 PR-2006-0019-GB • Subject to modifications • Status 05/2009
<strong>GEA</strong> <strong>CAIRfricostar</strong>Electrical Connection7.2.8 Overview of cable connections for <strong>GEA</strong> <strong>CAIRfricostar</strong> circulating air unitsNOTE!Only the unit wiring diagram provides exact information about the unit delivery condition!The terminal box is supplied loose!*111021485 5 5697Fig. 7-5: Overview of cable connections of the <strong>GEA</strong> <strong>CAIRfricostar</strong> circulating air units1: Pool water thermostat (option); 3 x 1,5 mm²2: Auxiliary heater valve; 5 x 1,5 mm²3: Terminal box4: Power supply; 3~ 400 V+N+PE/ 50 Hz5: System cable set in protective hose (press and attach plugs)6: Exhaust fan (option); 5 x 1,57: Connection for pool water pump (option); 3 x 1,5 mm²8: Remote control/humidistat; 5 x 0,75 mm²9: Auxiliary heater pump; 3 x 1,5 mm²*Special configuration for Austria:It is usually not necessary to screen the sensor supply line!1: Pool immersion temperature sensor 2 x 0,75 mm²2: Auxuliary heater valve 5 x 1,5 mm²3: Terminal box4: On site BMS connections provided by others according to wiring diagram5: System cable set is not necessary (standard in terminal box)6: Power supply; 3 x 400 V+N+PE/ 50 Hz7: Connection for pool water pump 3 x 1,5 mm²8: Connection for auxiliary heater pump 3 x 1,5 mm²9: External safety switch off only on request10: Inlet temperature sensor, heater 2 x 0,75 mm²11: Room temperature and humidity sensor 5 x 0,75 mm²PR-2006-0019-GB • Subject to modifications • Status 05/2009 43
Commissioning<strong>GEA</strong> <strong>CAIRfricostar</strong>8 CommissioningNOTE!The following information applies for the initial commissioning as well as in case ofrepeated commissioning after the unit has not been in operation for a long period oftime.The <strong>GEA</strong> <strong>CAIRfricostar</strong> unit may only be commissioned by <strong>GEA</strong> authorized personnelor <strong>GEA</strong> service staff!NOTE!Data sheet and assembly instructions can be found on the inside of the equipmentwhere this label appears. These documents must be removed prior to commissioning.DAMAGE TO THE UNIT!When accessing the <strong>GEA</strong> CAIR units care must be taken to ensure that no loads areapplied to the floor panels. During installation and maintenance work, suitable measuresare to be taken to ensure that all loads are spread across the bottom profiles(e.g. using grid walkways). It is not allowed to scratch the unit surfaces ordamage the unit in a similar way!8.1 RequirementsInspection of mechanicalcomponentsInspection of electricalconnectionBefore switching the unit on and after the installation make sure that:• The operating mode corresponds to the opearting limits. Refer to „Operating limitsand range of application“ as well as „Ambient conditions“ on page 17.• The unit has been properly positioned and anchored in order to avoid unusual noiseand vibration during operation.• The unit has been inspected for interior and exterior damage, like, for example,damaged components or pipes.• The unit has been thoroughly cleaned inside and outside. Drilling chips orany other possible dirt must be carefully removed.• Make sure that the on-site wiring provided by others has been completed in theaccordance with requirements and instructions as stated in Chapter „ElectricalConnection“ on page 38. The given Chapter points out that it is imperative to followspecifications of wiring diagrams and make all electrical connections in compliancewith European and national relevant regulations as well as regulations of localpublic unitily companies.• Make sure that the grounding lines have been properly connected and thegrounding clamps have been tightened.• Make sure that there are no loose connections and damaged parts in the terminalbox. Tighten all connecting terminals on the terminal board and strips.• Check supply voltage. The voltage must correspond to the specifications stated onthe type plate or in the unit related documentation.• Make sure to observe the operation manual on controls (DDC or electronic).For unit commissioning it is necessary to follow additional steps. Follow all specifiedinstructions to perform commissining of all unit components.8.2 General unit-related instructionsThe following commissioning steps must be carried out:• Carefully check the entire casing and parts such as– Doors and service openings– Seals– Handles and levers– Connections with foam rubber seals44 PR-2006-0019-GB • Subject to modifications • Status 05/2009
<strong>GEA</strong> <strong>CAIRfricostar</strong>Commissioning– Inspection windows– Panelsfor damage and firm seating.• Remove protective film, if present.• Remove all transportation locks.• Make sure that there are no loose items inside the unit.• Check that the unit is airtight.• Clean the unit as described in section „Basic cleaning and maintenance work“ onpage 50.8.3 Fan unit and drives8.3.1 Belt-driven fan unitELECTRICAL HAZARD AND DANGER FROM ROTATING UNIT PARTS!OBSERVE PERSONAL PROTECTION MEASURES.In this connection make sure to observe the safety information on page 44.DAMAGE TO THE UNITDo not start the fan with closed dampers.The following commissioning steps must be carried out:• As a general rule the entire casing and all parts must be checked for damage andfirm seating.• Remove transportation locks.• Check tension and belt alignment.• Check the rotational direction of the fan at all speeds.• Measure the power consumption of the motor. The rated current of the motoraccording to the plate must not be exceeded under any operating conditions.• Make sure motor protection device is working effectively.• If using a motor with external ventilation, make sure that the air intake grille and airduct are clean. The complete cross-section of the air duct must be unobstructed.• Perform a functional check of system components like air control and shut-offdampers, fire protection dampers, volume controls. Ensure that they are ready foroperation and open them.PR-2006-0019-GB • Subject to modifications • Status 05/2009 45
Commissioning<strong>GEA</strong> <strong>CAIRfricostar</strong>8.4 Direct-driven fan unitsELECTRICAL HAZARD AND DANGER FROM ROTATING UNIT PARTS!In this connection make sure to observe the safety information on page 44.DANGER OF ELECTRIC CURRENTWITH DRIVES WITH FREQUENCY CONVERTER!Due to life danger do not touch any live electric parts – even after the unit has beenisolated from the mains!Make sure that you observe all instructions provided in the operating manual by themanufacturer!• Remove tools, parts and foreign matter which could have been left in the impellerand air suction area.• Check if the motor protection has been properly adjusted (see the enclosed projectrelateddocumentation and/or „Motor protection“ on page 39).• With Y/Δ starting, set up the motor protection device for 58% of the rated current ifthe phase current flows through it – i.e. motor protection device must be installedbetween motor terminals U1, V1, W1, and not upstream of the switchgear in the netsupply line.8.5 Filter unitsELECTRICAL HAZARD AND DANGER FROM ROTATING UNIT PARTS!OBSERVE PERSONAL PROTECTION MEASURES.In this connection make sure to observe the safety information auf page 44.The following commissioning steps must be carried out:• Check the filter unit and installed filters for damage.• Check that the filter unit is correctly seated in the filter retaining frame.• Clean the filter unit and system parts in the airflow direction upstream of the filter toremove installation dust, if required.• The air handling unit and air ducts must be cleaned again before installing filters ofF9 class and higher.• Put the fan into operation then mark and record the initial pressure difference shownon the display unit (if installed).8.6 Heater unit8.6.1 Heater unit (L.P.H.W.)ELECTRICAL HAZARD AND DANGER FROM ROTATING UNIT PARTS ANDSHARP EDGES! OBSERVE PERSONAL PROTECTION MEASURES.In this connection make sure to observe the safety information on page 44.The following commissioning steps must be carried out:Requirements: • Check that the configuration of the water inlet and outlet connections is correct.• Counter flow principle with water inlet on the air outlet side.• Check that shut-off devices and other fixtures have been installed correctly.46 PR-2006-0019-GB • Subject to modifications • Status 05/2009
<strong>GEA</strong> <strong>CAIRfricostar</strong>CommissioningCommissioning: • Open air vents if automatic air vents have not been installed.• Fill the system starting at the lowest point to prevent air cushions and water surges.• Open gate valves or valves slightly and wait until water is discharged from the airvent.• Fully open gate valves or valves.• Close air vent; if the levels are different: close air vents gradually until thedischarged water is free of air.• Switch on primary and secondary pump, check rotational direction and operate thesystem for a fairly long time.• If necessary, initialize the control valves (see separate manual provided by themanufacturer). Press the „INIT“ button in the terminal box and hold it for 2 seconds.• Perform another check by opening the air vents again.• Check for tightness.• Regulate the operation of the frost protection in order to prevent over-conditioning.8.6.2 Electric heater unitELECTRICAL HAZARD AND DANGER FROM ROTATING UNIT PARTS!In this connection make sure to observe the safety information on page 44.• The heater coil may only be switched on if the minimum volume of air required foroperation of the heating register is flowing through it.• Once the heating register has been switched off, make sure that the fan run on timeamounts to at least 3 minutes.8.7 Cooler unitELECTRICAL HAZARD AND DANGER FROM ROTATING UNIT PARTS ANDSHARP EDGES! OBSERVE PERSONAL PROTECTION MEASURES.In this connection make sure to observe the safety information on page 44.With droplet eliminatorThe following commissioning steps must be carried out:• Clean condensate tray and condensate drain.• Fill siphon with water, see „Connecting siphon and water drains“ on page 37; thewater trap for the siphon must always correspond to the overpressure/underpressure of the unit as a minimum requirement.The performance of the droplet eliminator (DE) becomes fully effective once theseparating agent is volatised following a start-up phase of approximately 4 weeks.• Clean the droplet eliminator by rinsing it with water if necessary.• Dust with lime if necessary.If performance of droplet eliminator is insufficient:• Verify that the installation position of the droplet eliminator is correct.• Check the velocity of air passing through the droplet eliminator.DE standard w max =3.8 m/sDE 100 High-performance w max =5.8 m/s8.8 Evaporator/condenserNOTE!The following tasks and all necessary repair work may only be carried out by atradesman of the refrigeration industry!Make sure to observe regulations regarding refrigerants!PR-2006-0019-GB • Subject to modifications • Status 05/2009 47
Commissioning<strong>GEA</strong> <strong>CAIRfricostar</strong>ELECTRICAL HAZARD AND DANGER FROM ROTATING UNIT PARTS ANDSHARP EDGES! OBSERVE PERSONAL PROTECTION MEASURES.In this connection make sure to observe the safety informationf on page 44.DAMAGE TO THE UNIT!Make sure that the evaporator or condenser is never exposed to ambient temperatureshigher than 60 °C (due to shutdown of the fan and/or water temperatures (heatingcoil) > 60 °C).The following commissioning steps must be carried out:• Protective gas charge must be available when making the connections.• Check that the configuration of the water inlet and outlet connections is correct.• Check that the shut-off devices and other fixtures have been correctly installed;counter flow principle with medium inlet on the air outlet side.• Check that pipe connections and mountings are secure.• Fill the refrigeration circuit with the medium for which the system was designed.• Check tightness of system.• Check that the the safety valves are functioning correctly.• Check the maximum temperature and pressure when the system is in operation(particularly when using R410A refrigerant)Saturation temperature = 60 °C/Bursting pressure: 38 bar.8.9 Heat pipeELECTRICAL HAZARD AND DANGER FROM ROTATING UNIT PARTS ANDSHARP EDGES! OBSERVE PERSONAL PROTECTION MEASURES.In this connection make sure to observe the safety information on page 44.Upright heatpipe:Horizontally installed heatpipe with fixed slope:Upright or horizontal withbypass damper control:The following must be checked during commissioning:The warm air flow (exhaust air) must be at the bottom and the cold air flow (fresh air)must be at the top.The warm air flow (exhaust air) must be at the bottom and the cold air flow (fresh air)must be at the top.For commissioning see „Dampres and shut-off dampers“ on page 49.48 PR-2006-0019-GB • Subject to modifications • Status 05/2009
<strong>GEA</strong> <strong>CAIRfricostar</strong>Commissioning8.10 Liquid-coupled heat exchangerSee „Heater unit (L.P.H.W.)“ on page 46.8.11 Plate-type heat exchangerELECTRICAL HAZARD AND DANGER FROM ROTATING UNIT PARTS!In this connection make sure to observe the safety informationf on page 44.• Check damper efficiency if the energy recovery system with the bypassconfiguration is used (also see „Dampers and shut-off dampers“ on page 62).• Check the function of the bypass damper if necessary.8.12 Dampres and shut-off dampersELECTRICAL HAZARD AND DANGER FROM ROTATING UNIT PARTS!OBSERVE PERSONAL PROTECTION MEASURES!In this connection make sure to observe the safety information on page 44.The following commissioning steps must be carried out:• If several dampers are linked together, ensure that the linkage is seated correctlyand check for ease of movement.• Check that all screw connections and joints are firmly seated.With actuators • Adjust the linkage so that a rotation angle of 90° is provided, and so that thedampers reach their end position when closed (observe tightening torques).• Check that the drive (damper actuator) reaches its end position.PR-2006-0019-GB • Subject to modifications • Status 05/2009 49
Maintenance<strong>GEA</strong> <strong>CAIRfricostar</strong>9 MaintenanceNOTE!The measures relating to maintenance and cleaning are aimed to keep the unit’sfunctional operabilty. Additional national and international regulations and provisionsconcerning unit cleaning and operation are to be taken into account and followed bythe unit user on a separate basis.ELECTRICAL HAZARD!The following applies for all maintenance and cleaning work: the doors of the unitmay only be opened if the unit has been switched off and cannot be accidentallyswitched back on.DANGER FROM ROTATING UNIT PARTS!The fans do not come to a standstill immediately if the unit has been powered down.You should therefore wait for at least 5 minutes until the fans have come to a standstillbefore starting maintenance and cleaning work.DAMAGE TO THE UNIT!When accessing the <strong>GEA</strong> CAIR units care must be taken to ensure that no loads areapplied to the floor panels. During installation and maintenance work, suitable measuresare to be taken to ensure that all loads are spread across the bottom profiles(e.g. using grid walkways). It is not allowed to scratch the unit surfaces ordamage the unit in a similar way!PERSONAL PROTECTION MEASURES!When cleaning and conducting certain maintenance work on the unit it is obligatoryto wear a mask and protective gloves.Atmospheric load inswimming poolsAbout maintenance intervals:Maintenance log bookRecommendation forservice/maintenancecontract:The <strong>GEA</strong> <strong>CAIRfricostar</strong> units are supplied with high quality components but netherthelessrequire certain maintenance. Therefore in order to ensure long service life andeconomical operation, we recommend to perform regular inspections and maintenanceprocedures.Due to the fact that the concentration of chemical elements (chlorine, pH increasers,pH decreasers, salts, detergents, etc.) is significantly higher in the air of swimmingpools and on enclosed premises as compared with air treated by standard air handlingunits, we recommend to adjust regular visual inspections and cleaning and maintenanceprocedures to these conditions. Special attention must be paid to unit componentsthat are subjected to wear and tear and parts that are located within the „wet deck/splashing area“ and in such a way come into direct contact with condensate - thesecomponents are to be inspected on a regular basis.The actual maintenance and cleaning intervals depend on concrete unit applicationand configuration. During the first three months after the commissioning it isnecessary to perform maintenance on a monthly basis in order to obtain verifiedinformation about the operational status of the unit.Perform the necessary maintenance steps during the specified intervals. The unitmaintenance log book for the first two years of operation has been enclosed in theAppendix. Continuous entries into the log constitute the basis for warranty claims!We would like to recommend to keep account of all maintenance procedures in the logbook even after the first two years of operation have elapsed. Under all circumstancesit is obligatoty to conduct regular maintenance and cleaning procedures specified onthe following pages.We would like to recommend to you to conclude a service contract with your installer/service firm or with <strong>GEA</strong>.50 PR-2006-0019-GB • Subject to modifications • Status 05/2009
<strong>GEA</strong> <strong>CAIRfricostar</strong>MaintenanceNOTE!Intense cleaning is necessary with salty air. Filters clog slightly, check them regularlyand if necessary clean or replace them.Use only alcohol-based disinfectioning substances.9.1 Basic cleaning and maintenance tasksELECTRICAL HAZARD AND DANGER FROM ROTATING UNIT PARTS! OB-SERVE PERSONAL PROTECTION MEASURES!In this connection make sure to observe the safety information on page 50.Cleaning of wet area:Condensate contains chlorides, organic compounds, chemicals and detergents thatenter the unit as a result of evaporation process. These susbstances can result in sedimentsin form of thin crusts on the unit surfaces which in extreme case can lead tostrong corrosion.• These sediments must be thoroughly cleaned using a soft sponge with a slightlyalkaline detergent. At the same time the unit/components surfaces may not bedamaged.• After that, rinse the cleaned part, the condensate tray in particular, with enoughfresh water. The damaged corrosion protection layer must be repaired withoutdelay.WARRANTY IN CASE CORROSION DAMAGE:The corrosion protection of the <strong>GEA</strong> <strong>CAIRfricostar</strong> units is provided according to thestate-of-the-art technology and has been carefully designed by <strong>GEA</strong> technical staff.However, even the best corrosion protection can not substitute regular maintenanceand cleaning of corrosion endangered components. Furthermore, during the unitconfiguration and planning stage on-site information about expected or general operationalconditions in the swimming pool is required.If corrosive damage occurs, warranty claims can be processed only if <strong>GEA</strong>specified maintenance intervals have been properly performed and enteredinto the log book.• Rough dirt should be wiped dry or, if possible, removed with an industrial vacuumcleaner.• Eliminate dirt that has originated as a result of on-site assembly of unit componentsor accessories.• Procedure for other kinds of dirt: remove with dry cloth or if necessy wipe off withsome water containing slight amount of alkaline.Do not use abrasive cloths or toolsthat may scratch or scrape the protective surface during cleaning as this will causeirreparable damage.• Process galvanized parts with preservative spray.• Apply lubricant spray to all moving parts, such as door levers and hinges – with theexception of dampers!• Clean the seals on the inspection doors and check for leaks.It is recommended that seals are treated with moisture-repellent preservative.• Check electrical connections.• Check earthing.PR-2006-0019-GB • Subject to modifications • Status 05/2009 51
Maintenance<strong>GEA</strong> <strong>CAIRfricostar</strong>9.1.1 Basic information regarding the cleaning of finsELECTRICAL HAZARD AND DANGER FROM ROTATING UNIT PARTS! OB-SERVE PERSONAL PROTECTION MEASURES!In this connection make sure to observe the safety information on page 50.DANGER FROM SHARP EDGES!There is a danger that the thin fins may inflict cuts during cleaning.The fin assembly must be cleaned to ensure that the heat exchanger continues tooperate at full capacity. This can be carried out using a brush (not wire brush) or anindustrial vacuum cleaner. Do not use hard or sharp cleaning tools!Copper or aluminium fins may be blown out against the direction of the airflow usingcompressed air, or sprayed with water at low pressure for cleaning.9.2 Maintenance intervals (check list)The maintenance intervals as defined in European guidelines and standards (e. g.: VDI2089) must be observed.ELECTRICAL HAZARD AND DANGER FROM ROTATING UNIT PARTS ANDSHARP EDGES! OBSERVE PERSONAL PROTECTION MEASURES!In connection with maintenance procedures described in this section make sureto observe all safety information on page 50 and page 51!The following tables contain short description of all maintenance intervals and associatedprocedures. Detailed description of maintenance steps for individual units componentsis specified starting from page 54.Additional maintenance procedures during the first three months after commissioningare apecified in „Table 9-1“ .All other maintenance procedures are specified in „Table 9-2“ .Pay attention during the first two years after commissioning to „Maintenance log bookfor your <strong>CAIRfricostar</strong> – Air handling unit for swimming pools“ on page 65 in Appendixto the current operation manual.During the first 3 months after commissioning:Unit component Interval Procedure ✓The whole unit monthly • Perform all operations as described in „Basic cleaning and maintenance tasks“on page 50.• Clean and refill existing siphons. (reduce the interval if necessary)• Test the unit’s dehumidification function.Tab. 9-152 PR-2006-0019-GB • Subject to modifications • Status 05/2009
<strong>GEA</strong> <strong>CAIRfricostar</strong>MaintenanceUnit componentUnit(see page 54)Beltdrivenfan units(see page 55ff)Directdrivenfan units(S. page 58)Basic requirementsfor allfilters(see page 58)Bag/panel/fine-dust filters(see page 59)Other filtersHeater unit(L.P.H.W. seepage 60)Electric heaterunit(see page 60)Tab. 9-2Interval(months)Procedure1 month • Clean and refill existing siphons.3 months • Check casing for damage/firm seating.• Check/renew seals on all service openings.• Check panels for damage and corrosion, renew corrosion protection and checkfunction of door safety catch (on discharge side).• Hygiene inspection (we recommend the maintenance steps and intervalsspecified in VDI 6022!): Check built-in parts for contamination and clean ifnecessary; carry out wipe disinfection; check sealing materials for microorganismsand fungi, clean/replace if necessary.3 months • Check fan/motor mountings, also check for dirt, damage and corrosion.• Check that anti-vibration mounts are functioning correctly.• Check that belt guards are functioning correctly, clean if necessary.• Check impeller for out of balance.• Check V-belt for tension and wear and tear; tension or replace if necessary – fordescription see page 57ff.• Check fan/motor for noise in bearings, replace bearings if necessary.• Observe recommended lubrication interval for fan bearings without lifetimelubrication (see Table 9-5 on page 58).3 months • Check motors for dirt, damage and corrosion, also check mountings.• Check motors for noise in bearings, replace bearings if necessary.• Check impeller (welded seams in particular) for cracks; replace bearings ifnecessary.3 months • Check filters for dirt, damage and smells.• Clean filter section.6 months • Check whether the maximum permissible pressure differential (see RLT 01Guideline, for example) or pressure differential specified by the manufacturerhas been exceeded; if so, replace the filter.at leastevery6-9 months• Hygiene inspection (we recommend the maintenance steps and intervalsspecified in VDI 6022!): Even if the filter shows no visible signs of contamination,fungi and micro-organisms may have grown through the filter as a result of longtermuse (in air with low dust content).continuous • Replace the filter when the maximum pressure differential is reached.measuringreplaceevery 3monthsRefer to the relevant documentation providing information on maintenance.6 months • Check for tightness and for possible contamination on the air side.• If there is a risk of frost, also check the safety devices regularly, or takeappropriate precaution measures such as draining the equipment or addingantifreeze.• Check that pipe connections and mountings are secure.• Clean air side if necessary (blow through heat exchanger using compressed airor low pressure water).• Bleed.6 months • Dry clean on air side.✓PR-2006-0019-GB • Subject to modifications • Status 05/2009 53
Maintenance<strong>GEA</strong> <strong>CAIRfricostar</strong>Unit componentCooler unit(see page 60)Evaporator/condenser(see page 61)Heat pipe(see page 61)Liquid-coupledsytem(see page 61)Plate-typeheatexchanger(see page 61)Dampers andshut-offdampers(see page 62)Soundattenuator(see page 62)Tab. 9-2Interval(months)Procedure6 months • Check for tightness and for possible contamination on the air side.• If there is a risk of frost, also check the safety devices regularly, or takeappropriate precautionary measures such as draining the equipment or addingantifreeze.• Check that pipe connections and mountings are secure.• Clean air side if necessary (blow through heat exchanger using compressed airor low pressure water).• Bleed.• Clean condensate tray/drain.• Check siphon, top up as necessary.• Clean droplet eliminator with descaling spray.beforeeach winter• Drain cooler coil before winter beginning if necessary.6 months • Clean and check evaporator/condenser.• Make sure that all refrigeration components in direct evaporators (refrigerationunit, direct evaporator, distribution manifold, refrigerant lines, etc.) are workingefficiently.6 months • Clean the heat transfer fins.• Clean condensate tray/drain.• Check siphon, top up as necessary.• If a heat pipe with bypass is used, check the air control and shut-off dampers.6 months • Carry out tasks specified under “Cooler with/without droplet eliminator”(interval – 12 months).6 months • Carry out cleaning depending on the type of contamination in the plate block.• Check the function of the bypass damper if necessary.• Wet cleaning may only be carried out if a tray has been installed!• Remove oil and fat deposits.3 months • Vacuum clean dampers (blow out), never apply grease!• Detach the drive from dampers and check them for ease of movement.• Check that the drive (damper actuator) reaches its end positions.6 months • Check the sound attenuating chamber and sound insulating splitters forcontamination, clean if necessary.✓9.3 General unit-related instructionsELECTRICAL HAZARD AND DANGER FROM ROTATING UNIT PARTS! OB-SERVE PERSONAL PROTECTION MEASURES!In this connection make sure to observe the safety information on page 50.NOTE!Perform intense cleaning if air is salty or/and agressive.54 PR-2006-0019-GB • Subject to modifications • Status 05/2009
<strong>GEA</strong> <strong>CAIRfricostar</strong>MaintenanceThe following maintenance steps must be carried out:• Carefully check the entire casing and parts such as– Doors and service openings– Seals– Handles and levers– Connections with foam rubber seals– Inspection windows– Panelsfor damage and firm seating.Doors and service openings• Check seals, renew if necessary.• Check that door safety catch (on discharge side) is functioning correctly.Panels• Check for damage and corrosion.• Renew or apply corrosion protection (paint), impregnate, etc., if necessary.Siphon• Clean and refill existing siphons.Hygiene inspectionObserve current guidelinesand standards! Werecommend themaintenance steps andintervals specified inVDI 6022• Check built-in parts for contamination, clean if necessary.• Carry out wipe disinfection (disinfectant must not be aggressive towards thematerials used, only use alcohol-based disinfectant).• Check the sealing materials for bacteria and fungi. Clean or replace the sealingmaterials if required.9.4 Fan unit and drives9.4.1 Belt-driven fan unitsELECTRICAL HAZARD AND DANGER FROM ROTATING UNIT PARTS! OB-SERVE PERSONAL PROTECTION MEASURES!In this connection make sure to observe the safety information on page 50.DAMAGE TO UNITWhen the fan is at a standstill and the unit heater control valve (water, steam orrefrigerant) is open, the temperatures inside the unit reach a rough equivalent of theinlet temperature of the heating medium (normally around 90 °C). This causesdamage through deformation of plastic parts (particularly to plastic dropleteliminators, humidifier honeycombs etc.).Furthermore, fan and motor bearings with permanent lubrication may be damagedat temperatures above 80 °C. Many electric built-in components (frequency convertersetc.) may only be operated at temperatures up to a maximum of 40 °C – also seethe relevant manufacturer's instructions.The following maintenance and inspection steps must be carried out:• Check that fans are securely mounted.• Check fans for dirt, damage and corrosion.• Check that anti-vibration mounts are functioning correctly.• Check that belt guards are functioning correctly, clean if necessary.• Check impeller for out of balance.PR-2006-0019-GB • Subject to modifications • Status 05/2009 55
Maintenance<strong>GEA</strong> <strong>CAIRfricostar</strong>Initial check:Regular checks:Tensioning/renewing V-beltCarry out the initial check after approximately 50 operating hours..The subsequent checks depend on the operational load.– In event of normal operation (roughly 8 hrs a day), perform checks on a quarter ormore frequent basis.– Define shorter intervals between checks with greater number of operating hours.BeltprofilesDiameterof small pulley (mm)Force F(N/belt)SPZ 70 – 85 13 – 1986 – 155 15 – 23116 – 150 19 – 27151 – 200 25 – 24201 – 250 29 – 38SPA 112 – 150 25 – 34151 – 200 29 – 38201 – 250 35 – 44251 – 300 40 – 50SPB 180 – 224 40 – 52225 – 300 46 – 60301 – 400 55 – 76401 – 500 67 – 90Deflection x [mm]Tab. 9-3: High-performance narrow V-belt in accordance with DIN 7753504030201000 500 1000 1500 2000 2500 3000Distance between axes A [mm]DAMAGE TO UNIT AND NOTEAlways reduce the distance between the axes to the point where the V-belt can beplaced in the grooves without using force. The application of force during installationusing tyre levers, screwdrivers or similar tools is not permitted.If the V-belt pulleys have multiple grooves, all V-belts must be replaced. It is notallowed to combine V-belts made by different manufacturers in one set.V-belts do not require a great deal of care or maintenance. Belt wax and belt sprayare to be avoided.• Check the tension of the V-belt and check for wear and tear; tension or replace ifrequired.For V-belt tensioning via the pivoting motor base or replacement proceed as follows:• Slacken the lock nuts of the adjusting bolts.• Replace V-belt if necessary.• Check/adjust pulley alignment (see Fig. 9-1).• Tension V-belt (adjust using measuring device, see Fig. 9-1).• Tighten lock nuts.The deflection of the belt is approximately 5-20 mm when a load of P = 20-30 N isapplied, depending on the distance between the axes (see Fig. 9-1).56 PR-2006-0019-GB • Subject to modifications • Status 05/2009
<strong>GEA</strong> <strong>CAIRfricostar</strong>Maintenance•••Straight edgeFig. 9-1:Pulley alignment and V-belt tensioningShifting or removing V-belt pulleys• Slacken V-belt, see „Tensioning/renewing V-belt“ on page 56, then:• Remove V-belt.• Release and unscrew both hexagon-socket screws (2).• Screw a hexagon-socket screw into the empty threaded hole (1) and turn to loosenboth pulley and sleeve.• Pull the pulley unit off the motor shaft (fan shaft) and remove.Fig. 9-2ShaftSleeveHexagon socket screwsfor securing pulleyTo install the V-belt pulley, proceed as follows:• Position the pulley and sleeve so that they engage with oneanother. Align both holes and screw in screws withouttightening.• Slide the pulley and sleeve along the shaft until it is as closeas possible to the motor or fan (to keep leverage small) andalign. (Alignment: see „Tensioning/renewing V-belt“ onpage 56).• Tighten the hexagon-socket screws evenly.Threaded holeto press out pulleyV-belt pulleyFig. 9-3:Installing the V-belt pulley• Please observe the maximum tightening torques of the hexagon-socket screwsduring installation:Sleeve-Nr. 1008 1108 1210 1610 1615 2012 2517 3020 3030 3525 3535Max. tightening torque (Nm) 5,6 5,6 20 20 20 32 50 90 90 115 115Tab. 9-4: Maximum tightening torques• Check electric motors for dirt, damage and corrosion, also check mountings.• Check motor and fan for noise in bearings, replace bearings if necessary.PR-2006-0019-GB • Subject to modifications • Status 05/2009 57
Maintenance<strong>GEA</strong> <strong>CAIRfricostar</strong>• Observe recommended lubrication interval for fan bearings without lifetimelubrication (see Table 9-5 on page 58)!Fan type V 700 V 800 V 800 R 400 R 450 R 500 R 560 R 630 R 710 R 800 R 900 R 1000 R 1120Lubrication interal(h)21.300 24.400 25.500 7.800 8.100 9.900 9.500 10.500 11.200 14.500 12.700 14.600 1.700Grease quantity (g) 10 10 14 6 7 7 9 9 10 10 14 14 20Fan type R 1250 H 400 H 450 H 500 H 560 H 630 H 710 H 8100 H 900 H 1000 H 1120 H 1250Lubrication interval(h)1.700 5.200 5.000 6.400 5.100 6.700 6.500 8.600 8.900 11.200 900 900Grease quantity (g) 20 7 9 9 18 18 24 24 34 34 32 32Tab. 9-5: Lubrication interval for fan bearings without lifetime lubrication9.4.2 Maintenance of direct driven fan unitELECTRICAL HAZARD AND DANGER FROM ROTATING UNIT PARTS!In this connection make sure to observe the safety information on page 50.The following maintenance steps must be carried out:• Check electric motors for dirt, damage and corrosion, also check mountings.• Check electric motors for noise in bearings, have bearings replaced by qualifiedpersonnel if required.• Check impeller (particularly welded seams) for cracks; have bearing replaced byqualified personnel if necessary.9.5 Filter units9.5.1 Basic maintenance work to be carried out on all filtersELECTRICAL HAZARD AND DANGER FROM ROTATING UNIT PARTS! OB-SERVE PERSONAL PROTECTION MEASURES!In this connection make sure to observe the safety information on page 50.DANGER DUE TO COMBUSTIBLE SUBSTANCES!The filter material may be combustible and may easily catch fire. With used filters,the danger due to fire may be more probable depending on the filtered substances.Keep filters away from open fire!NOTEWe recommend that you never operate the system without a filter – always keep aset of spare filters in stock. Be sure to avoid damaging the surface of the filter as thismay cause the filter to break down during operation which means that the filter classcan no longer be guaranteed.ENVIRONMENTAL DAMAGE!Heavily contaminated filters pose a danger to health and may adversely affect productionprocesses. Depending on the filtered substances, contaminated filters mayneed to be treated as special waste and therefore disposed of professionally and inan environmentally friendly manner in accordance with applicable guidelines andlegislation.58 PR-2006-0019-GB • Subject to modifications • Status 05/2009
<strong>GEA</strong> <strong>CAIRfricostar</strong>MaintenanceAs a general rule, all filters must be checked at regular intervals according to theoperating conditions and replaced if necessary. The following maintenance steps mustbe carried out:• Check filter for dirt, damage and smells.• Clean filter section.• Check whether the maximum permissible pressure differential (see RLT 01Guideline, for example) or pressure differential specified by the manufacturer hasbeen exceeded; if so, replace the filter.Hygiene inspectionObserve current guidelinesand standards! Werecommend themaintenance steps andintervals specified inVDI 6022Even if the filter shows no visible signs of contamination, fungi and micro-organismsmay have grown through the filter as a result of long-term use (in air with low dustcontent).• Filters must be changed regularly (at least every 6-9 months), even if contaminationis barely visible.9.5.2 Bag filters/panel filters/fine-dust filtersELECTRICAL HAZARD AND DANGER FROM ROTATING UNIT PARTS! OB-SERVE PERSONAL PROTECTION MEASURES!In this connection make sure to observe the safety information on page 50.The following maintenance steps must be carried out:• Check filter and filter frame for dirt, corrosion and damage, replace if necessary.The final pressure differential of the bag filter varies and can be obtained from therelevant technical data (see filter type plate).• Replace the filter when the maximum pressure differential is reached.Replacement of filter medium• Open the service door/panels with sash fasteners when the system is inactive.• Open the retaining springs at the top and bottom railsor open the quick clamping filter frame.• Pull out filter frame.• Replace damaged/contaminated filters.• Push in filter frame. Make sure the seating is airtight!• Close the retaining springs at the top and bottom railsor close the quick clamping filter frame.• Bag filters may only be installed in the upright position!• Close service door/panels with sash fasteners.9.5.3 Maintenance of HEPA filterRefer to the relevant documentation providing information on maintenance.9.5.4 Maintenance of all other filtersRefer to the relevant documentation providing information on maintenance.PR-2006-0019-GB • Subject to modifications • Status 05/2009 59
Maintenance<strong>GEA</strong> <strong>CAIRfricostar</strong>9.6 Heater unit9.6.1 Maintenance of heater unit (L.P.H.W.)ELECTRICAL HAZARD AND DANGER FROM ROTATING UNIT PARTS! OB-SERVE PERSONAL PROTECTION MEASURES!In this connection make sure to observe the safety information on page 50 andpage 52.The following maintenance steps must be carried out:• Check for tightness and for possible contamination on the air side.• If there is a risk of frost, also check the safety devices regularly, or take appropriateprecaution measures such as draining the equipment or adding antifreeze.• Check that pipe connections and mountings are secure.• Clean air side if necessary (blow through heat exchanger using compressed air orlow pressure water).• Air vent.9.6.2 Electric heater unitELECTRICAL HAZARD AND DANGER FROM ROTATING UNIT PARTS!In this connection make sure to observe the safety information on page 50.• Dry clean on air side.9.7 Cooler unitELECTRICAL HAZARD AND DANGER FROM ROTATING UNIT PARTS ANDSHARP EDGES! OBSERVE PERSONAL PROTECTION MEASURES!In this connection make sure to observe the safety information on page 50 andpage 52.The following maintenance steps must be carried out:• Check for tightness and for possible contamination on the air side.• If there is a risk of frost, also check the safety devices regularly, or take appropriateprecaution measures such as draining the equipment or adding antifreeze.• Check that pipe connections and mountings are secure.• Clean air side if necessary (blow through heat exchanger using compressed air orlow pressure water).• Air vent.• Clean condensate tray and condensate drain.• Check siphon, top up if necessary.• Clean droplet eliminator with descaling spray.Further measures before the cold season• Drain cooling coil before the winter start if necessary. As the system pipes in thiscase have relatively small diameters, it must always be assumed that some waterwill remain in the unit following normal drainage. For safety reasons, the systemmust also be blown through with compressed air to remove any remaining water.60 PR-2006-0019-GB • Subject to modifications • Status 05/2009
<strong>GEA</strong> <strong>CAIRfricostar</strong>Maintenance9.8 Evaporator/condenserNOTEThe following tasks and any necessary repair work may only be carried out byqualified refrigeration tradesmen!Ensure that regulations regarding refrigerants are obsered!ELECTRICAL HAZARD AND DANGER FROM ROTATING UNIT PARTS ANDSHARP EDGES! OBSERVE PERSONAL PROTECTION MEASURES!In this connection make sure to observe the safety information on page 50 andpage 52.The following maintenance steps must be carried out:• Clean and check evaporator/condenser as described in „Heater unit (L.P.H.W.)“ onpage 46.Direct evaporator • Make sure that all refrigeration components in direct evaporators (refrigerationunits, direct evaporator, distribution manifold, refrigerant lines, etc.) are workingefficiently.9.9 Heat pipeELECTRICAL HAZARD AND DANGER FROM ROTATING UNIT PARTS ANDSHARP EDGES! OBSERVE PERSONAL PROTECTION MEASURES!In this connection make sure to observe the safety information on page 50 andpage 52.The following maintenance steps must be carried out:• Clean heat transfer fins regularly:– by blowing out the fins using compressed air against the direction of the air flow or– by spraying the fins using low pressure water only!• Clean condensate tray and condensate drain.• Check siphon, top up as necessary.• If a heat pipe with bypass is used, the air control and shut-off dampers must bechecked in accordance with the maintenance instructions (also see „Dampers andshut-off dampers“ on page 62).9.10 Liquid-coupled heat exchanger (LCHE)See „Maintenance of heater unit (L.P.H.W.)“ on page 60.9.11 Plate-type heat exchangerELECTRICAL HAZARD AND DANGER FROM ROTATING UNIT PARTS!In this connection make sure to observe the safety information on page 50.The plate heat exchanger operates independently of any external, mechanical orelectrical actuators, it has no moving parts and its service life is limited only by theeffects of corrosion.The following maintenance steps must be carried out:• Carry out cleaning depending on the type of contamination in the plate block.Remove dry dust and fibres at the exchanger inlet using a hair broom and blow out.• Check the function of the bypass damper if necessary.• Wet cleaning may only be carried out if a tray has been installed!PR-2006-0019-GB • Subject to modifications • Status 05/2009 61
Maintenance<strong>GEA</strong> <strong>CAIRfricostar</strong>Oil and fat(kitchen exhaust air)• Remove oil and fat deposits using hot water and fat-dissolving detergents9.12 Dampers and shut-off dampersELECTRICAL HAZARD AND DANGER FROM ROTATING UNIT PARTS! OB-SERVE PERSONAL PROTECTION MEASURES!In this connection make sure to observe the safety information on page 50.The following maintenance steps must be carried out:• Vacuum clean dampers (blow out), never apply grease!• Detach the drive from ampers and check them for ease of movement.• Check that the drive (damper actuator) reaches its end positions.9.13 Sound attennuatorELECTRICAL HAZARD AND DANGER FROM ROTATING UNIT PARTS! OB-SERVE PERSONAL PROTECTION MEASURES!In this connection make sure to observe the safety information on page 50.The following maintenance steps must be carried out:• Check the sound attenuator chamber and sound insulating splitters for dirt, clean ifnecessary, using a vacuum cleaner.62 PR-2006-0019-GB • Subject to modifications • Status 05/2009
<strong>GEA</strong> <strong>CAIRfricostar</strong>Disassembly and Disposal10 Disassembly and DisposalENVIRONMENTAL DAMAGE!Only appropriately trained personnel may dismantle and dispose of the unit!10.1 DisassemblyTo dismantle the unit, proceed as follows:ELECTRICAL HAZARD!When carrying out any decommissioning and dismantling work on the unit, switch offall power supply connections, ensure they cannot be switched on again unintentionallyand verify that they have been disconnected. Earth and short-circuit them, andcover or otherwise isolate any neighbouring live parts. Failure to do so may lead toserious injury or death.• Close all hydraulic shut-off valves.• Disconnect all connections – make sure that operating fluids (such as oil, refrigerantand water-glycol mixture) do not escape.As pipes in the system have a relatively small diameter, it must always be assumedthat some water will remain in the unit after it has been drained in a usual way. Forsafety reasons, the system must also be blown through with compressed air toremove any remaining water.• Release the connection with wall or floor.PERSONAL INJURY!Secure the unit against slipping. The unit is ready for transporting.• Please be sure to observe all information in chapter „Transportation“ on page 18.10.2 DisposalAuthorized technical services department must dispose of the unit or individualcomponents. The technical services department must ensure that:– the components have been separated according to material types.– the used operating materials have been sorted and separated according to theirrespective properties.ENVIRONMENTAL DAMAGE!• Depending on material type, dispose of all parts, filters (activated carbon filter,filter cartridges, etc.) and operating supply materials (such as oil, refrigerant andwater-glycol mixture) in an environmentally friendly manner in accordance withlocal laws and environmental regulations.PR-2006-0019-GB • Subject to modifications • Status 05/2009 63
Troubleshooting<strong>GEA</strong> <strong>CAIRfricostar</strong>11 TroubleshootingNOTE!Troubleshooting and repairs may only be carried out by tradesmenwho on the basis of their training and experience have the necessary knowledge ofrelevant accident prevention regulations and other established regulations in connectionwith health and safety in the workplace.Due to the wide variety of built-in parts and special applications, a simple plancontaining information on trouble shooting and corrective measures can not beprovided.You should therefore only consult your supplier regarding maintenance and repairs.64 PR-2006-0019-GB • Subject to modifications • Status 05/2009
<strong>GEA</strong> <strong>CAIRfricostar</strong>12 Appendix12.1 Maintenance log book for your <strong>CAIRfricostar</strong> – Air handling unit for swimming poolsCommissioning date:Commissioned by:Maintenance intervalUnit partscheckedO.K.not O.K.Note: Date SignatureHeat exchangerFan unitRefrigeration unitControlsMonth 1Panelsafter commissioningFilterCondensate trayDampersother partsThe fault was directly communicated to company/service: on:The fault was repaired by:on:Heat exchangerFan unitRefrigeration unitMonth 2Controlsafter commissioning PanelsFilterCondensate trayDampersother partsThe fault was directly communicated to company/service: on:The fault was repaired by:on:Heat exchangerFan unitRefrigeration unitControlsMonth 3Panelsafter commissioningFilterCondensate trayDampersother partsThe fault was directly communicated to company/service: on:The fault was repaired by:on:NOTE!Servicing swimming pool dehumidifiers constitutes an important element in the unit’s life time.Due to the fact that a number of chemical components are present in a swimming pool, like disinfectioning,cleaning and detergent substances, changes of unit surfaces may occur.You must report all heavy corrosive changes of unit surfaces to your installer in short time!PR-2006-0019-GB • Subject to modifications • Status 05/2009 65
<strong>GEA</strong> <strong>CAIRfricostar</strong>Maintenance intervalUnit partscheckedO.Knot O.K.Note: Date SignatureHeat exchangerFan unitRefrigeration unitControlsMonth 6Panelsafter commissioningFilterCondensate trayDampersother partsThe fault was directly communicated to company/service: on:The fault was repaired by:on:Heat exchangerFan unitRefrigeration unitControlsMonth 9Panelsafter commissioningFilterCondensate trayDampersother partsThe fault was directly communicated to company/service: on:The fault was repaired by:on:Heat exchangerFan unitRefrigeration unitControlsMonth 12Panelsafter commissioningFilterCondensate trayDampersother partsThe fault was directly communicated to company/service: on:The fault was repaired by:on:Heat exchangerFan unitRefrigeration unitControlsMonth 15Panelsafter commissioningFilterCondensate trayDampersother partsThe fault was directly communicated to company/service: on:The fault was repaired by:on:NOTE!Servicing swimming pool dehumidifiers constitutes an important element in the unit’s life time.Due to the fact that a number of chemical components are present in a swimming pool, like disinfectioning,cleaning and detergent substances, changes of unit surfaces may occur.You must report all heavy corrosive changes of unit surfaces to your installer in short time!66 PR-2006-0019-GB • Subject to modifications • Status 05/2009
<strong>GEA</strong> <strong>CAIRfricostar</strong>Maintenance intervalUnit partscheckedO.Knot O.K.Note: Date SignatureHeat exchangerFan unitRefrigeration unitControlsMonth 18Panelsafter commissioningFilterCondensate trayDampersother partsThe fault was directly communicated to company/service: on:The fault was repaired by:on:Heat exchangerFan unitRefrigeration unitControlsMonth 21Panelsafter commissioningFilterCondensate trayDampersother partsThe fault was directly communicated to company/service: on:The fault was repaired by:on:Heat exchangerFan unitRefrigeration unitControlsMonth 24Panelsafter commissioningFilterCondensate trayDampersother partsThe fault was directly communicated to company/service: on:The fault was repaired by:on:NOTE!Servicing swimming pool dehumidifiers constitutes an important element in the unit’s life time.Due to the fact that a number of chemical components are present in a swimming pool, like disinfectioning,cleaning and detergent substances, changes of unit surfaces may occur.You must report all heavy corrosive changes of unit surfaces to your installer in short time!We would like to recommend to keep account of all maintenance procedures in the log book even after the first twoyears of operation have elapsed. You must perform the specified maintenance and cleaning procedures in regular intervalsanyway.PR-2006-0019-GB • Subject to modifications • Status 05/2009 67
Customer proximity, sales structuresReachable always and everywhere!AEATBABEBGBYCHCZCZDE<strong>GEA</strong> Air TreatmentMiddle EastUAE-DubaiTel. +971 / 4 / 887 3881<strong>GEA</strong> KlimatechnikGmbH & Co KGA-4673 GaspoltshofenTel. +43 / 7735 / 8000-0<strong>GEA</strong> KlimatechnikGmbH & Co KGRS-11070 Novi BeogradTel. +381 / 11 / 3193955<strong>GEA</strong> Happel Belgium N. V.B-1130 BrusselsTel. +32 / 2 / 2406161EVISS Ltd.BG-7000 RousseTel . +359 / 82 / 81000<strong>GEA</strong> Klimatechnik UABLT-01141 VilniusTel. +370 / 5 / 2106060ATC Klimatec Schweiz AGCH-3065 BolligenTel. +41 / 31 / 9171919<strong>GEA</strong> LVZ, a.s.CZ-46312 LiberecTel. +420 / 48 / 5225-111<strong>GEA</strong> Klimatizace spol. s r.o.CZ-46312 LiberecTel. +420 / 48 / 5225-303<strong>GEA</strong> HappelKlimatechnik GmbHD-44625 HerneTel. +49 / 2325 / 468-00The complete addresses are available on theInternet under: www.gea-air-eco2nomy.com.DEDEDEDEDKEEESFIFRFR<strong>GEA</strong> HappelWieland GmbHD-44625 HerneTel. +49 / 2325 / 468-754<strong>GEA</strong> DeichmannUmwelttechnik GmbHD-36179 BebraTel. +49 / 6622 / 504-0<strong>GEA</strong> DelbagLufttechnik GmbHD-44625 HerneTel. +49 / 2325 / 468-700<strong>GEA</strong> Delbag-LuftfilterVertriebsgesellschaft mbHD-10709 BerlinTel. +49 / 30 / 43592-3<strong>CS</strong> <strong>Klimateknik</strong> ApSDK-5450 OtterupTel . +45 / 38 / 887070<strong>GEA</strong> Klimatechnik UABLT-01141 VilniusTel. +370 / 5 / 2106060<strong>GEA</strong> Air TreatmentMarketing Services Int.GmbH – oficina EspañaES-28028 MadridTel. +34 / 91 / 3837701OY TEKNOCALOR ABFIN-01300 VantaaTel. +358 / 10 / 8201100<strong>GEA</strong> DelbagFiltration de l’airF-77450 MontryTel. +33 / 1 / 60043355<strong>GEA</strong> Happel France sarlF-59436 Roncq CedexTel. +33 / 3 / 20689020GBHRHUIEISLTLULVMENLNO<strong>GEA</strong> Denco Ltd.UK-HR4 8DS HerefordTel. +44 / 1432 / 277 277<strong>GEA</strong> Klima-rashladnatehnika d.o.o.HR-10000 ZagrebTel. +385 / 1 / 6064900<strong>GEA</strong> Klimatechnika KftH-1037 BudapestTel. +36 / 1 / 4393200Aspect Environmental Ltd.Ardee, Co. Louth IrelandTel. +353 / 41 / 6858983Rafn JenssonIS-110 ReykjavikTel. +354 / 56 / 780-30<strong>GEA</strong> Klimatechnik UABLT-01141 VilniusTel. +370 / 5 / 2106060<strong>GEA</strong> Happel LuxembourgL-4940 BascharageTel. +352 / 26 / 502970<strong>GEA</strong> Klimatechnik UABLT-01141 VilniusTel. +370 / 5 / 2106060<strong>GEA</strong> KlimatechnikGmbH & Co KGRS-110 70 Novi BeogradTel. +381 / 11 / 3193955<strong>GEA</strong> Happel Nederland B.V.NL-2909 LLCapelle a/d IjsselTel. +31 / 10 / 2350606<strong>GEA</strong> Klimaprodukter ASN-0484 OsloTel. +47 / 220 / 27990PLPTRORUSESISKRSTRUA<strong>GEA</strong> Klimatyzacja sp.z.o.oPL-53-609 WrocławTel. +48 / 71 / 3565866Nónio, Lda.P-1269-090 LisboaTel. +351 / 21 / 3826160<strong>GEA</strong> Klimatechnik s.r.l.RO-300222 TimisoaraTel. +40 / 356 / 423703<strong>GEA</strong> KlimatechnikGmbH & Co KGRU-105094 MoskvaTel. +7 / 495 / 9566674<strong>GEA</strong> EXOS Ventilation ABS-74528 EnköpingTel. +46 / 171 / 85530<strong>GEA</strong> KlimatizacijskaTehnika d.o.o.SI-1000 LjubljanaTel. +386 / 1 / 2573850<strong>GEA</strong> Klimatizácia s.r.o.SK-83104 BratislavaTel. +421 / 7 / 44457917<strong>GEA</strong> KlimatechnikGmbH & Co KGRS-11070 Novi BeogradTel. +381 / 11 / 3193955<strong>GEA</strong> ISISANTR-80700Balmumcu IstanbulTel. +90 / 212 / 2757171<strong>GEA</strong> Ukraina t.o.v.UA-01135 KyivTel. +38 / 044 / 4619356MRLOMMV=Ó=moJOMMVJMMNVJd_pìÄàÉÅí=íç=ãçÇáÑáÅ~íáçåë=•=`çéóêáÖÜí=db^=^áê=qêÉ~íãÉåíxx/xxxx – PR-xxxx-xxxx-xxxwww.gea-air-eco2nomy.com