Untitled - MetosExpo - Free
Untitled - MetosExpo - Free
Untitled - MetosExpo - Free

You also want an ePaper? Increase the reach of your titles
YUMPU automatically turns print PDFs into web optimized ePapers that Google loves.
GET THE15" SCROLLSAW15" PLANERADVANTAGE!10" TABLESAW(Stand isoptional)Table tilts 45°Max. thickness of cut - 2"• Table size 7%" x 17"• Uses standard 5" bladesINCREDIBLE PRICE!• Va HP totally enclosed motor$9950MODEL G1572 ONLYPrepaid to youThis is the most popular planer onthe market. 15"x6" capacity, 3 bladecutterhead, all ball-bearing construction,2 H.P. motor. Weighs 500Ibs.MODEL G1021Thousands sold! this is an excellentheavy duty saw that features precisionground table with cast-ironwings, 1 % H.P. motor and muchmore! Weighs 2351bs.$32500MODEL G1022(Both above prices are F.O.B. Bellingham, WA or Williamsport, PAlMANY MORE MACHINES AND ACCESSORIES AT LOW PRICES - CALL TOLL FREE FOR A FREE CATALOGINCRA JIGRGT HANDLERWOOD VISESPANTOGRAPH·Make intricate dovetails,finger joints, etc$2995. . with this amazingjig.Introductory Price!MODEL G1768Prepaid to youSafely & accuratelycut, shape, route andjoint$2995pieces as smallas 1" with this jig.Introductory Price! .MODEL G1771Prepaid to youHeavy duty cast-iron constructionwith quick settingfeature. G1091 opens8 G1092 opens 10'G1091 -$42.50-$59.95G1092Both prepaid to youEnlarge or reduce imagesright on the wood accurately.Comes with a scribe pOint &$1850lead. Made in Japan.MODEL G1731Prepaid to youTHE INCREDIBLE "SHOPHELPER"ANTI-KICKBACK DEVICEPrice Breakthrough!Sold elsewhere for $89.95MODEL G1630$4995prepaid to youALSO AVAILABLE: Model G1578Green shophelpers for shapers!Used as hold downs, these greenshop helpers are very popular withshaper owners.Only $49.95 Prepaid to youDOWELLING JIGYou'veread aboutit, you'veheardabout itTHIS ISONEDYNAMITEJIG!REGULARLY $49.00MODEL G1662ONLy$3995Prepaid to you: ..7 -PC. TAPEREDCOUNTERSINK SET: -Predrill holes for woodscrewseasily and correctly$3995the first time! This very highquality set is made in Japan.MODEL G1728Prepaid to youLarge parts inventory to back up our machines, highly qualified seNice departments with an in-house motor rewindingshop, courteous phone operators and fast shipping are just some of the things that make dealing with us a pleasantexperience. We buyCALLdirect fromTOLLtheFREEfactories and sell direct to the user at low prices. 2 large warehouses on theEast and West coasts enable us to seNe you better. Try us once and you'll be our customer for life!(FOR ORDERS AND CATALOG REQUESTS ONLY)EAST OF THE 1-800-523-GRRRMISSISSIPPI: (717) 326-3806.- (For Orders & Catalogs Only) -.-(For Inquiries & Customer Service) --WEST OF THE 1-800-541-5537MISSISSIPPI (206) 647-080188·166
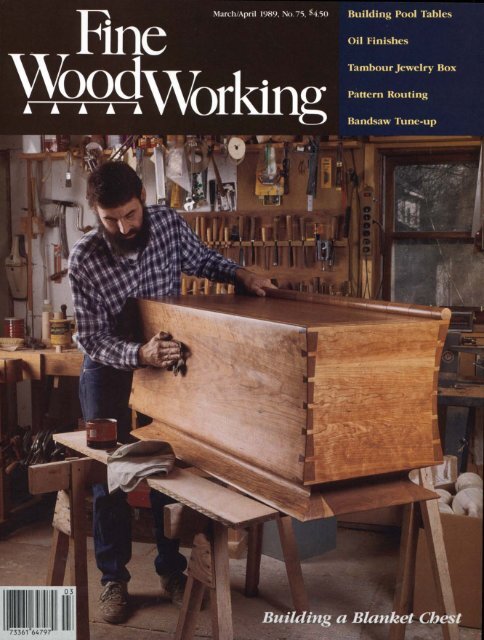
DEPARTMENTS4 Letters10 Methods16 Questions112 Events114 Books116 Notesof WorkHot-melt adheSive; hemispherical sander; plate joinery& AnswersTruing a plane sole; horsepower ratings; acidic woodand CommentSetting up a guild seminar program; award winnersA pool table is a large project, but not beyond thereach of the average woodworker. Paul Bowmantells how on p. 38. Cover: John Dunham waxes hisblanket chest, which has dovetailed sides and awooden hinge (see article on p. 48).EditorArt DirectorDick BurrowsRoland WolfAssociate Editor Sandor agyszalanczyAssistant EditorsCopy EditorJim Boesel, Alan PlattCathy McFannAssistant Art DirectorEditorial SecretaryContributing EditorsKathleen CrestonMary Ann ColbertTage Frid, R. Bruce Hoadley,Michael S. Podmaniczky, Graham Blackburn, ChristianBecksvoort, Michael DresdnerC01lSulting EditorsNorman VandalMethods of WorkIndexerHarriet HodgesAssociate PublisherGeorge Frank, Richard E. Preiss,Jim RicheyAdministrative SecretaryJohn LivelyLynn MeffertAdvertising Sales Manager James P. ChiaveUiNational Accounts Managers Don Schroder,Dick WestAssistant Accounts Manager Ben WarnerSenior Sales Coordinator Carole WeckesserTel. (800) 243-7252 Fax.(203) 426-3434Assistant Advertising Coordinator Kathryn SimondsAdvertising Secretary Sherry DuhiggFine \Voodworking is a reader-wrinen magazine. We welcomeproposals, manuscripts, photographs and ideas fromour readers, amateur or professional. We'll acknowledge allsubmissions and return within six weeks those we can'tpublish. Send your contributions to Fine Woodworking, Box355, Newtown, Conn. 06470.Title to the copyrights in the contributions appearing inFine Woodworking magazine remains in the authors, photographersand anists, unle s otherwise indicated. They havegranted publication rights to Fine \VoodworkingFine Wo()(lworking (ISSN 0361-3453) is published bimonthly, January, March, May,July, September and ovembcr. by The Taunton Press, Inc., Newtown, CT 06470.Telephone (203) 426·8171. Second-class postage paid at 'cwtown, cr 06470, andadditional mailing offices. Copyright 1989 by The Taunton Press, Inc. No reproductionwithout permission of The Taunton Press, Inc. Fine W oodworking® is a registeredtrademark of The Taunton Press, Inc. Subscription rates: nited States andpossessions, 522 for one year, 540 for twO years; Canada and other countries, 526 forone year, 548 for two years (in U.S. dollars, please). Single copy, 54.50. Single copiesoutside U.S. and possessions, 55.50. Send to Subscription Dept., The Taunton Press,PO Box 355, Newtown, CT 06470. Address all correspondence to the appropriatedepartment (Subscription, Editorial, or Advertising), The Taunton Pr(."Ss, 63 SouthMain Street, PO Box 355, Ne,,'1own, cr 06470. u.s. newsstand distribution by East·ern N(.'WS Distributors, loc., 1130 Cleveland Road, Sandusky, OH 44870.ARTICLES38 Building a Pool Table by Paul M. BowmanStarting from scratch with nuts-and-bolts joinery43 Covering the rails and slate bed by Eldridge Tucker45 Finishing with Oil by Michael DresdnerModern products for an age-old process48 Blanket Chest by John DunhamDovetails and wooden hinge are easier than they look52 Sandpaper by Robert Erickson and Jerry TecklinA wide variety of gritty choices55 Abrasives in finishing by Michael Dresdner56 Tambour-Top Jewelry Box by Jamie RussellPull the drawer and the top rolls open59 Complementary Template Routing by Patrick WarnerTight-fitting curved joints from a single pattern62 Narrow-Belt Strip Sander by Robert M. VaughanShop-built workhorse for shaping, sharpening and smoothing66 Kentucky Cupboard by Warren MayRetaining the essence of the country style70 Reviving Period Hardwareby Gregory Landrey and Helen StetinaHints for restoring the gleam in the maker's eye72 Turning Boxes by Kip ChristensenA perfect fit for lids and inlays75 Adjusting Bandsaw Wheels by Mark DuginskeSmall alignment changes improve performance78 Making Marble Rolls by Richard StarrA crooked path to fun and physics82 Tuning a Japanese Plane by Robert MeadowTaking the tool to its full potential86 Woodworkers of Saskatchewan by Sandor NagyszalanczyA tour of talent on the Canadian prairiePostmaster: Send address changes to The Taunton Press, Inc., PO Box 355, Newtown, CT 06470.3
LettersTunter responds to safety concerns-As the "guy with hishead almost in the center of a spinning tree trunk" in the articleon turning large bowls (FWW' #72), I feel I must respond to ].Osicek's letter in the following issue. First, let me assure himand any other concerned reader that my face shield is certainlyused where appropriate. Secondly, if his concern is about shavingsfrom the bowl flying out, he will be greatly relieved to know thatthe shavings come off the tip of the tool perpendicular to theaxis of the tool, impinge on the wall of the bowl and are capturedthere by centrifugal force. And because these shavingsdon't fly into my face, I don't wear a face shield. Lastly, althoughunclear from his letter, if his concern is about the bowl flyingloose from the faceplate and engulfing my head like some carnivorouscreature, a face shield would be of little use in such anevent. This has never happened, needless to say, or I would bewriting about needlepOint, not wood turning.The whole point of the article was to show that large turningscan be tackled safely and successfully. Although it doesn't showin the photo, I am sitting there, with my legs crossed, hollowingthe bottom of a 27-in.-deep bowl. If I weren't comfortable withthe Situation, I would certainly change it. And that most emphaticallyincludes eye protection. -james R. johnson, Bastrop, Tex.A PNG residenfs view of deforestation-I'd like to respond tocomments on tropical deforestation made by Lucinda Leech inFWW' #70, particularly with respect to the logging operations inPapua ew Guinea (P G), where I live. Leech states that the developingcountries she visited cannot simply leave their forestsalone; they need the income from tl1eir timber exports.There are several fallacies in this argument, and please remember,I speak only of PNG, having no direct knowledge ofpractices in other tropical countries.Virtually all logging companies are foreign owned, with theJapanese being the largest group of investors. Apart from the relativelylow levels of funds paid out in local wages, almost no realincome is derived by PNG from these foreign logging operations.Gross dishonesty is legion. Should the Ministry of Forests stipulateminimum selling prices for various species, the companiesapparently falsify the documents. I've heard of cases, for exan1ple,where companies call the exotics, such as walnut and blackbean, some lower grade and sell at that figure. As far as I can tell,lumber dealers all have short rulers, too. It is generally believedthat the real measurement of logs exported is double the submittedfigures. Invoices for shipping charges, machinery imports,head-office charges, consultancy fees and a maze of other costs canbe similarly distorted to ensure little or no profit is made in PNG.Reforestation is an equally sick joke. Token stands are plantedin visible areas where the politicians may visit occasionally, butthere is no wide-spread program in effect. Natural regrowth isalso not often successful. The massive damage done during theinitial logging operation normally leaves only undesirable saplings.These can quickly dominate, and valuable species are simply beatenby the competition. Selective hand-thinning can greatly aid theregeneration of a narural forest, but it is not generally carried out.The real question is what does P G gain? Is logging necessaryThe TauntonUNTONPUBUCATIONS... by fellow cnciwsitlStsPress: Paul Roman, publisher; Janice A. Roman, as·sociate publisher; Roger Barnes, design director; Carol Gee, executivesecretary. Accounting: Wayne Reynolds, controller; PatrickLamontagne, manager; Jeffrey Sherman, financial analyst; MarySuUivan, accountant; Carol Diehm, Rosemary McCulloch, JudithSmith, Rachel Yahwak, Elaine Yamin. BooksIVideos: John Kelsey,associate publisher, Eileen Hanson, administrativeCannarella,secretary, Deborahmanaging editor; Paul Benorelli, senior editor; OuistineTimmons, associate editor, Maria Angione, secretary; Videos: RickMastelli, producer/director; James Hall, assistant producer; Art:Deborah Fillion, manager; Steven Hunter, associate director;Gary Williamson, assistant art director; cathy Cassidy, art assistantjCopylProduction: Ruth Dobsevage. manager; Pamela Purrone, copy/production editor; Marketing: Jon Miller, manager; Philip Allard,senior copywriter. Corporate Marketing: Dale Brown, director;Andrea Ondale, manager; Donna Pierpont, public relations mallager;Barbara Buckalew, executive secretary; Christine Cosacchi,customer service coordinator. Data Processing: Drew Salisbury,manager; Brendan Bowe, senior programmer/analyst; Susan Partis,programmer trainee; Ellen Wolf, PC coordillator. Fulfillment &:Operations: Tom Luxeder, director; Jane Torrence, secretary; Circulation:Karen Cheh, coordinator; Barbara Hess, fulfillme1lt assistant;Customer Service: Terryl Thomas, manager; Anette Hamerski,coordinator; Patricia Malouff, Nancy Schoch, Marylou Thompson,Claire Warner; Distribution: Danny D'Antonio, manager; GraceAumuller, David Blasko, Timothy Harrington, Linnea Ingram, Maryfor its economy? The answer, in my opinion, is a definite nocertainlynot in its present form. In fact, it's probably negative:There is no significant income, and its forests are being destroyed.Apart from intelligent and controlled logging and processing on amuch smaller scale, leave the trees there. Every day they areworth more. When the world is prepared to pay the real priceand the benefits flow to the country and not to foreign exploiters,then the trees can be farmed intelligently.-M. F. Henderson, Rabaul, Papua New GuineaCastle piano hits sour note -As soon as I saw the November1988 Smithsonian magazine article on the Steinway piano byWendell Castle, I knew it would be on the back cover of fWWsnext issue. Fortunately, Smithsonian writer Edward Rothstein, amusic critic, kept his head while the FWW' editors were going"Yeah, Yeah, Yeah!"Rothstein is not one of those many who are infatuated withCastle's work. According to him, the piano body was "artifiCially'streamlined' -strikingly angular, with sloped side arms bracketingthe keys. It almost looked electronic. And when, past midnight, a10-year-old prodigy sat down and played it, the sound was brittleand unsubstantial."Imagine! Castle (and the current Steinway management, forthat matter) thinking that he could improve on the design of amusical instrument. Give us a break. The whole incident justgoes to show that when shallow, flashy, narcissistic, pop-art"deSigners" come up against a test of true craftsmanship, theyfail miserably every time. -William W Thomas, Hillsboro, N.H.RBI disputes scroll-saw test-In reading the article "TestingScroll Saws" (FWW' #74), I found what I consider several errorsand discrepancies concerning our machine, the RBI Hawk, that Iwould like to clarify for your readers.The testing facility could not have read the owner's manual,because the specifications in the information table on p. S3 donot match reality or the information in the owner's manual. Themotor speed (SPM) for the Hawk 220 is 700/1,300 and has beenfor the last four years; the table tilts 4So both left and right. TheHawk 220 now has three speeds of 37SnSOIl,5S0 SPM, incorporatinga dual-step pulley system that allows the owner to changespeeds in five seconds. The testing facility also neglected to installthe rubber glides for the Hawk 220 saw, as is shown in thephoto on p. SO. The set-up instructions clearly state to mount theglides to the feet to level the saw. The end result is similar todriving your car without tires on it: The car moves, but the rideis rough and you get vibration.Another misconception is the stability of the three-leggedstand. The article states that the three-legged stand is better thana four-legged stand. We feel this contradicts basic physical laws.How can a three-legged stand with 14 in. to a side be more stablethan a four-legged stand that measures 20 in. by 33 in.? It cannotbe. Try tipping over a three-legged stool with a small base; thentry tipping over a card table with four legs and a larger base. Youwill find it much harder to tip over- the four-legged, larger base.The biggest omission is the lack of testing of the scroll sawsAnn CostagUola, Fred Monnes, Alice Saxton, Roben Weinstein; Pu.r·chasing & Facilities: William Schappen, purchasing agent; LoisBeck, office·seroices coordinator; Donald Hammond, mail·seroicesclerk; Chuck Hollis, Office maintenance; Christopher Myers, Office·operatio,JS clerk; Debra Brown, cheflmanager, Yong Rogers, cafet eriaassistant; Subscription: Carole Ando, manager; Patricia Aziere,Connie Barczak, Donna Baxter, Gloria Carson, Dorothy Dreher, PeggyleBlanc, Denise Pascal. Man ufacturing: Kathleen Davis, director;Austin E. Starbird, prepress manager; Robert Marsala, graphiC artssupervisor; Peggy Dutton, production rmmagerlbOOks; Philip VanKirk,production manager/magazines; Diane Hanagan, print buyer; EllenOlmsted, production coordinator; Rosemary Pagel, secretary; RichardBooth, Monica Bulson, Priscilla Rollins, production assistants;Deborah Cooper, Mark Coleman, scanner operators; Laurene Jakab,color proofing operator; Dinah George, composition systems man··ager; Nancy Knapp, Margot Knorr, Usa Carlson, systems operators.Personnel: Carol Marotti, manager; Linda Ballerini, personnelassistant; Chris lincoln, secretary.4 Fine Woodworking
---------------,:L _____________I:Helld3i1LATHES ...J:r--------------1: BAN DSAWS(!ii:!) :L I ______________HOF PLANERS MANN..J ICUT ALIIG THESE LilES.There's no limit to what the skilled1lIQI1crafts- Burklee Tools. And backed by a rock solidman can create using the best equipment. one-year warranty. For more informationAnd for precision stationary power tools, on these fine lines, call Burklee Tools collectthe best means the complete Hofmann, at (508) 543-0704, Fax (508) 543-0715,Killinger and Hema lines. Allor write 56 Leonard Street,available to you now fromFoxboro, MA 02035.FineIlinesIfor fine lines.II I====Powermalic Model 81Band SawThe Model 81"Band Sa wcomplete with all standar dequipment , plus 1 bladeca pa city, 2 HP, 3 phase motor(or 1 Y2 HP, 1 phase motor),magnetic controls and wor kla mp. 230 volt.OODSHOS::E:CJ:ALTJ:::E:SCold River Industrial ParkQuality LaneRutland, VT 05701(802) 773-3240Telex 62946343: ===.WE AREN'T FINISHED ...UNTIL YOU'RE SATISFIED!Since 1928, WOODCRAFThas been an industry leader insupplying quality products towoodworkers. Our services andguarantee are the best, our qualitycontrol program, second tonone. Buying from WOODCRAFTgives you that kind of commitment... plus a whole lot more.Why not give us a try, youwon't be disappOinted!To receive a free copyof WOODCRAFT's toolcatalog, please call toll free1-800-225-1153 or write:_ 'YQS=FT' Woburn, 41 Atlantic MA Avenue, 01888SVSTIAfATICOur gives SuperFine you the cuts Dadoyou dreamabout.If you have evercussed yourdado resultsin chip-pronematerials likelaminatesand fine hardwood veneers, you will beDELIGHTED with the results you canget with our new SystiMatic SuperFinedado set. We absolutely guarantee thatit will run smoother and cut smootherthan any other dado you've ever used.The secret? The outer blades have42 teeth, anda very subtlegrind thatproduces absolutelysquare corners. Chippers are roundwith six teeth, so each tooth takes anibble instead of a bite. Result?Smooth, vibration-free running.Smooth, square-bottomed channelswith no chipping. Set comes in either8 or 10 inch diameters, 5/8 or 1 inchbore. Four 1/8" chippers and 1/16" forany channel width up to 13/16' Extrachippers available.Whereto buy? Call ustoll free at 800-426-0000.SystiMatic Company12530 135th Avenue NortheastKirkland, Washington 98034(206) 823-8200 (800) 426-0000 US A(800) 663-8001 CanadaFAX (206) 821-0804March I April 1989 5
Letters (colltillueli)for ease and speed in doing an intricate inside cut-somethingonly a scroll saw can do. It was a disservice for the writers toomit this, because most scroll saws are bought to do inside cuts.Heavy does not equal quality, as the writers seem to think.Weight is an easy way to eliminate vibration, because you areincreasing the mass. But, which would you rather take to a craftshow or move around your shop: a Hawk 220 (89 lbs.) or theDelta Electronic (230 lbs.)? It is easy to add weight to lowervibration, but why not engineer the vibration out of the machineand keep the weight low?Another point of contention is that the article speaks of testingall the Hegner saws, but why weren't all the manufacturers ableto send their entire scroll-saw product line? RBI makes six differentmodels of scroll saws-the most-extensive precision scrollsawline in the world.I think the best way for your readers to make an informeddecision about purchasing their scroll saw is to compare all themakes and models with their own hands-on experience; then drawtheir own conclusions about which scroll saw is best for them.-Kris L. Rice, President, RBlndustries, Inc., Hmrisonville, Mo.Vibration problems in scroll saws-I found the scroll-saw testresults very interesting, but I would like to add some of my ownobservations. I've owned a Hegner MultiMax for about threeyears. Two saws in the test run in the same speed range as theHegner: The Superscroll 18 and the Super 15 run at 1,650 SPM;the Hegner runs at 1,660. You mention vibration in the first twosaws, but you don't mention vibration in the Hegner.I consider vibration the greatest fault in the Hegner. My sawwill walk across the floor. Because I have a concrete slab floorand don't want to fasten the saw down in one spot, I put a 2x4laminated wood base on it, but it still moves when running. I'vehad people tell me the arms can be tuned to stop vibration, but Ihaven't been able to do it. Even the owner's manual says therewill be a certain amount of harmonic vibration. This driving vibrationfor long periods of time can drive you up the wall. Ithink the Hegner runs too fast.I tested the Delta and agree that the electronic control is kindof gimmicky, but at least you can set the saw at a speed whereyou feel it is cutting its best. I also tried the Lancaster Pro 20. Asyou said, it seems to be running too slow, but it is one of thequietest tools I've encountered. This all leads me to believe theideal SPM would be in the 1,200 to 1,500 range. You can get therewith the Delta.-Bob Killian, Lubbock, Tex.Speed control not a gimmick-As an owner of a Delta 18-in.electronic scroll saw, I would like to take exception to the statementin the scroll-saw review (FW'W #74) that the Delta electronicspeed control was "more a gimmick than a bonus." I have foundthe speed control very useful. By slowing the speed, the occasionaluser, or a new user, can reduce the chance of making acutting error. While I consider myself an experienced user, I willstill slow down the speed with a new design or a more intricatedesign. The speed control allows me also to cut a wide variety ofmaterials. Plastic is especially susceptible to the heat generatedby higher speeds. As for lower speeds affecting the smoothnessof the cut, I haven't noticed this to be the case.One comment on quality control: My saw was accompanied bya "Quality Assurance Standard Practice" card, indicating it hadbeen thoroughly checked before leaving the factory. I have mydoubts. When the box was unpacked, the table was not attachedto the saw. When attached properly, the table is quite secure, butI suppose it could have worked loose during shipping. The otherproblem was that the spring-steel tension pin that secures theblade-tensioning bracket was not pushed all the way into thebracket. Once the tension pin was inserted properly, the saw ranas advertised.-Bill Endress, Orlando, Fla.Claims against Tools-to-Go-Other readers might like to knowwhat I turned up while tracing my order to Tools-to-Go, which isno longer in business. The matter is now in the hands of thepost office and is being handled by Inspector Mike Bollie. Youcan contact him by writing to Box 520772, Miami, Fla. 33152.Those who bought tools on credit cards should contact theirbanks as soon as possible. You may be able to receive credit onyour purchase.-Bill Toth, Yuma, Ariz.Praise for Boomer sculpture -I really enjoyed the article inFW'W #73 on John Boomer's sculpture. ot only was the workbeautiful, but the artist expressed his feelings and motivations increating the work very well. There may not be a lot of us outthere who deal in such nonpractical stuff as sculpture, but it sureis nice to see an article on the subject once in a while. No technicalor how-to information is needed-we get plenty of that inthe other articles. Hopefully you can continue to give exposureto the artistic side of woodworking. -John Taye, Boise, IdahoNo ripping on radial arm- As a radial-arm saw user for 30years, I read with interest the articles on radial-arm saws inFW'W #73. I agree with those who don't like radial-arm sawsfor ripping. My complaint is that the carriage will creep if onerips a long or heavy piece; the carriage lock simply isn't goodenough. This weakness finally impelled me to purchase a tablesawwith sufficient power.Keeping the radial-arm saw properly aligned is a chore, asMark Duginske wrote on p. 66. Also, I found it impossible toestablish suffiCiently accurate parallelism between the table andthe blade path. Perhaps this is because of distortion of the tablesupports on my saw, but it does limit the uniformity of depth ofdado or rabbet cuts.onetheless, even with its faults, the radial-arm saw is a usefultool, especially as an adjunct to a tablesaw. With a Jacobs chuck,it can do horizontal boring when the arbor speed can be reducedbelow the usual 3,450 RPM. A similar comment applies todrum sanding and other operations.-N Leonard Wener, San Diego, Calif.Check out the radial saw table, too-Thanks for the comparisonof nonindustrial radial-arm saws (FW'W #73). However,there is one underlying issue that might deserve more attentionthan this study gave it. Over a few weeks testing, of course, youwon't see an inadequate table surface buckle or sag; in a year,easily, you will. And careful adjustment of the blade becomes, inthis circumstance, next to impossible. Thus, some comparison ofthe quality and thickness of the table and spacer boards wouldbe very helpful, as well as a look at the size of the support structureand any compensators built into it.This is an interesting problem in that an often-recommendedprocedure for "protecting" your table boards usually makesthem worse. My Sears radial, purchased a year ago, carne with I-in.particleboard surfaces. The manual suggests tacking or screwingY4-in. plywood over these to take up the kerf cuts and prolongtable life. But, you must drill %-in. holes through the cover toaccess the leveling and adjusting hardware. And the truth is, sawdustworks its way very quickly between the "protection" andthe table, causing it to buckle. Sawdust also comes through theseholes and along the edges, especially near the fence. In combinationwith deeper kerfs (to prevent splintering in plywood, forexample, or on high-bevel cuts), the surface has sagged off outbeyond the edges of the support structure and has hills and valleysaround kerfs and mounting holes.A friend of mine suggested covering the new table with Y2-in.plywood. This, perhaps with a little sealer over the seam edges,would certainly help prevent the sawdust-induced buckling. But,because it is tacked on, the extra beef in this covering will not6 Fine Woodworking
TheLASERWoodworker ToothlessQualityExoticWood » «TURNERS» «Thick Planks for7t)'>fx-cit-;Bowls/SquaresCABINET MAKERSIndividually Selected Lumberfa-1Xl®Ca orFurniture/Boxes/InlaysOvl,All Inquiries Welcome···Call Write125 Jac q uelineBerea Ohio 44017Drive·243·4452MIRRORA· OVALSPERFECTLY BEVELED MIRRORPernamMac. EbucobonyE." RosewBocoteCurly MapleQuilted MapleAI. EbonyZebranolacewoodoodlignum VitaeOsageTulipwoodBlackwMahoganyJelutongHollyoodWengeGoncalo AlvesMany More ...pride 01'"'s a matter ottor both us"• Five sizes of ovals from 2" x 3" to 7" x 9" and63 other sizes, shapes, and colors available• 1.000,000 pieces in stock-UPS deliveryready-to-ship• Highest quality float glassDouble-backed for protection • Wefabricate any shape or size of glass &mirror. Call now 1-800-MIRRORA toplace orders and get our color catalogtag!rI'895 Motor ParkwayHauppauge, New York 11788516/234-2200 800-647-7672WE PROVIDE PROVEN LASER WOODWORKINGAND EQUIPMENTCNC • POSITIONING SYSTEMS FOR: ENGRA VING SYSTEMS FOR:Fretwork LaserMarquetryRecognitionInlayingAd SpecialtyProfiling &Jlaehining., Ine. • PiercingGiftware DecorOdd Hole ProductionSignage & PlatageRepeatabilityFurniture Enhancementd#-,,;,. 5000 S .. 0 • Laser Drive. Somerset, WI 540250Tel: 7t5/247·3285 Fax:A Decade of Laser Processing And Systems Deuelopment -New Expanded 715/247-5650 FacilitiesOLe •• ,. 0 m oell.ry CHC Conlrol. S.,..k:. u.e,·G,..,. 0 XY r.b/ •• 0 Cu.'om S,.'.m. 0 L ..., Job ShopStudyWoodworkingat Bucks County Community ClW.llegeo Intensive 2 year career program infurniture design and constructiono Related courses in woodcarving,furniture conservation, basic'woodworking skillso Accredited by National Associationof Schools of Art and DesignCall or write for program brochure.Bucks County Community CollegeThe Hicks Art CenterNewtown, Pennsylvania 18940215-968-8425World's BestFeet-InchCalculatorJust Got aWhole LotBetter*!981- 6 " .*Now Time-Saving with ManyNew Woodworking Features/or-Still Just $79.951 Pro's 1JII _____ 1LJNow you can save time and avoid costly errors with the new andimproved Construction Master II feet-inch calculator.More Than Ever, It's The Perfect Tool for cabinetry, furnituremaking, design, framing, estimating, stairs, concrete, lineal footage,stringers, roof rafters, squaring-up rooms and much, much more.Add, Subtract, Multiply and Divide right in feet, inches & anyfraction -1/2's, 1/4's, 1/8's, 1116's, 1132's, up to 1164's - or nofraction at all. You can even mix fractions in your problems.Convert Between All Dimension Formats - directly to orfrom any of the following formats: Feet-Inch-Fractions, Decimal Feet(10ths, 100ths), Inches, Yards, Meters, Centimeters, Millimeters,Board Feet. Also converts in square and cubic.Calculate Area and Volume by simply multiplying your dimensionstogether. Plus, find the area of a circle with just one button!New Full Material & Board Feet Lumber Estimating lets youquickly and accurately do full material estimating (including withsquare and cubic dimensions) with its new "Unit Price" key. Also,improved board feeVlumber keys calculate board feet and totaldollar costs for individual or multiple boards or an entire job.Solves Angles Instantly - and directly in feet and inches.You simply enter the two known sides (or one known side and thePitch), and press one button to solve for the third. Ideal for stairs,trusses, roof rafters and squaring-up rooms. Plus, new HipNalleykey solves for adjacent hips/valleys - with just one button!Works As a Math Calculator & Includes Time-Saving NewUtility Functions Measures a mere 2-3/4 x 5-1/4 x 1/4" and worksas a math calculator with 4-function (+,-,x,+) Percent, Square Root,X2, +1-, n, Memory and battery-saving Auto Shut-Off.Comes Complete with easy-to-follow User's Guide, 1-YearWarranty, 2-Yr. batteries and vinyl carrying case - an optionalleather case is also available.New! 30·Day RISK-FREE Trial! Clip the coupon below, or callToll <strong>Free</strong> today 1-800-854-8075. If you're not 100% delighted withthe new Construction Master II, return it within 30 days for a full, noquestions-askedrefund. Why not order yours today - Risk <strong>Free</strong>lr:------- Clip & Mall Tod8II Yorba LlTlda, ....•.•.•.....•...-------::::;J:.........•.... >: .......:.....'. < ..•... :jj > F< 24 HIil:f II714-921-1800 CA 92686I 22720 Sffv, Ranch Parkw aY . 1480d854·8b7g . IPlease rush__me thefollowing$_ order:CA add 6 Yo -------------------------------------r.tax $add $1.50 shpg.TOTALNameAddressI IIICity/StiZip__________ _1_ I LAccount No.Exp DateSign HereFWC-3B9I 0 Check 0 VISA 0 MasterCard 0 Am/ExpIMarch / April 1989 7
NOW!!BUY BRIDGE WOOD IN CA NADA . . . BRETTWOOD MACHINERY WORKS LTD. MADOC, ONTARIO, CANADA KOK 2KO 613·473·4920SHAPERBW-2S$795EXTRA LARGE20" x 24"TA BLE2 H.P.220V1 PH.3;"" BW·2S '12", spindleBW-3S V2 ",BW·1S '12 " spindle .. .. . . . . . . . .... . . .. S269. . . . . . . 8795", 1" spindle . ... . . .. . . $1295BW·511TS sliding table, tilt spindle . . . $2495BW·512TS sliding table, tilt spindle . S3395TC-SO sliding table, industrial 7'12 HP . '4695ALL PRICES QUOTEDF.O.B. YORK, PAWOOOWORKING MACHINERYACT NOW - SPECIAL PRICES VALID WHILE QUANTITIES LASTPLANER$795BW-15Pwlstandanddust hood3 H.P.220V1 PH.two speedfeedBW·15P - 15" x 6" eeon. . .. . ..... $ 795BW·20P - 20" x 8" eeon . . . . .... . . . 1295BW·16PV - 16" x H.D . . .. ....... 2495BW·20PV - 20" x 7" H.D . . .. ....... 2995BW·508 - 20" x 9" INDUST . ...... . . 3695BW-612PV - 24" x 9" INDUST . . . . ... 5995JOINTERBW-8J$699LESS MOTORMARATHON2 HP, 1 PH.110/220VTEFC MOTOR6"x42" 1 HP, w/STD ....... $ 299$139• BW·6JBW·8J . 8"x66" less motor ........... 699BWJ·872 · 8"x72" H.D., 2 HP, U.S. motor 1495BW·12J · 12"x80" H.D., 3 HP, U.S. motor 2495CE-40N . 16"x100" indus!., 7'12 HPU.S. motor .................... 4195WE A POST ARE A OFFICE FUll UHf BOX, MACHINERY IlOO co -N(JI" JUSTNUMBER OR 1IIUlE·HOUSE.1I:lU CAN& OPEIWEO OOMPIWf TRUSrWlLKE, -WE A FAMILY OWNEDKNOWMACHINERY.120 DERRY COURT • YORK, PENNSYLVANIA 17402 • TELEPHONE 717-764-5000 • FAX 7177643778CA LL OR SEND $1.00 FOR COMPLETE 52·PAGE CATALOG"SUMMER WORKSHOPS 1989"WOODWORKING & FURNITURE DESIGNROBERT DEFUCCIOChair Design and DevelopmentMICHAEl DRESDNERUnderstanding FinishesTAGE FRIDFurniture Techniques and ConstructionJAMES KRENOVA Personal ApproachNORA HALLClassic European Carving ' Advanced CarvingPETER KORNBasic Woodworking · Basic Dra wing for Furniture DesignersDANiEl MACKRustic FurnitureSAM MALOOFFurnitureTHOMAS MOSERRunning a BusinessALAN PETERSTraditional Handskills and ConstructionMONROE ROBINSONPlanemakingRITA MILLER WAGENAARFaux and Pa inted FinishesHY ZElKOWITZDesigning for IndustryANDERSON RANCHART S C E N T E RP.O. Box 5598 • Snowmass Village, CO 81615 • 303/923-3181Ask for our free catalog.CERAMICS' PHOTOGRAPHY' PAINTING' CHILDREN'S CLASSESWOOD PARTS FROM MIDWEST DOWEL WORKS:0 ® -,Compare Our Low Prices!aQty. Cost3·1/2" Poplar Shaker Peg $15/100 1·3/4" Mini Shaker Peg $7/1003·1/2" Country Wall /Mug Peg $15/1002·1/2" Country Shorty Peg$12/100 Large Sean Pot Candle Cup$17/100Brass Inserts $9/100 1/2" Mini Candle Cup $10/100-- --1·1/2" Toy Wheel $10/1002" Toy Wheel $17/100Axel Pegs $4/100 SMOOTH SANDED HEARTS3/4" xl /S" Hearts $2.75/1003/4"x 1/2" Hearts $4.50/1001"x3/16" Hearts $6/1001"x3/S" ' Hearts $7/100 1·3/S"x l/S" Hearts $7/100--1·3/S"x 1/4" Hearts $S/1001 ·3/S" x 1/2" Hearts $10/1002"x1/2" Hearts $1S/100FREE 16·PAGE CATALOGUECircle this section for FREE Dowels- mixed pack, Maple, Oak, WalnutCherry, from '1/4" up to 1"Approximately 10 LFT. 14" long.$5.00 value with any order. ,. 0Great Buys!Qty.Cost3/S" x 36" Standard Dowels$21/100 3/4"x36" Oak Dowels $15/10 3/S" Maple Buttons $2.15/100--1/2" Maple Buttons $2.25/1001·1/2" Maple Spindles $9/1002·1/S" Maple Spindles $lS/l00D MCNisaORDER NOWD---Check Enclosed___Total Cost---Handling $3.00Ohio residentsadd 51'>% sales taxFinal CostMCfVisa NumberExpiresPhoneAddressNameMIDWEST DOWEL WORKSCity/State/Zip4631 Hutchinson RoadCincinnati, Ohio 45248(513) 574-8488FactorySame DayDirect/SatisfactionService / Order beforeGuaranteedNoonMarch /April 1989 9
Methods of Wo rkedited and drawn by Jim RicheyTwo rip-fence straddling jigsThis fence-straddling push stick was originally designed to fit aBiesemeyer fence, but it could be adapted to practically anyfence fitted with auxiliary face boards, as shown in the sketch.For added convenience, I installed plungers made from coilsprings and bolts to raise the push stick when not in use.-Bill Hatch, Greensboro, NC.By contrast, the transfer-web adhesive is applied by first meltingthe adhesive to the back of the veneer. Then you peel off thebacking paper, cut the veneer to size and fuse the veneer to theground with a hot iron. This approach seems to result in aneater glue job. To avoid ironing dirt into the wood, place aclean sheet of paper between the iron and the veneer. A sandbagwill apply the small amount of pressure needed to hold the veneerin place while the glue sets.The fabric-store adhesive works just fine, and at $1.70 perQuick tip:yard, I certainly can't complain about the price.-Gerald W Edgar, Renton, Wash.During the summer, I wear shorts while turning,and that lets the sawdust fall annoyingly into my shoes. Toprevent this, I bought a pair of hiking gaiters at the local sporting-goodsshop.-Helga Wink, Nashville, Tenn.Thickness-planing short piecesJig straddles rip fence.,W---7t-WorkpieceThis jig, above, is designed specifically for making those steepangled cuts on the edges of long workpieces, as in making fieldedpanel doors. If you've tried sliding a wobbling workpiece verticallyalong the fence, while watching to make sure the taperedend doesn't fall through the space in the saw insert, you'll immediatelyrecognize the advantages of this jig. With it, you can makea smooth, controlled, burn-free cut.Dimensions aren't critical, just make sure the jig slidessmoothly on the rip fence. The face of the jig can be large orsmall depending on the size of the workpiece. It can be fittedwith a vertical fence if needed. Just C-clamp the workpiece to theQuick tip:face of the jig, then slide the jig past the blade.-Alfred W Swett, Portland, MaineIf your screwdriver tip won't grip the slot of ahard-to-remove screw, put a little valve-grinding compound inthe screw slot. -Steve Daechsel, Abbotsford, B.c., CanadaHot-melt adhesive by the sheetWhen I couldn't find sheets of hot-melt adhesive for my veneeringproject at the store where I bought the veneer, I wentlooking elsewhere and found it at a fabric shop. The sheetadhesive comes in two forms: fusible web and transfer web.Fusible web is simply a sheet of hot-melt adhesive that you cutto size, place between the parts and press with a hot iron tofuse. With this type, there may be a bit of squeeze-out aroundthe edges of the veneer.Because feeding short boards through the planer may result insnipes and even kickbacks, the operation should be avoided. Butwhen the job is necessary, here's a way to make it less risky.Glue two scrap outriggers to the edges of the piece to beplaned, as shown in the sketch. These scraps, because they extendseveral inches beyond the ends, will stabilize the shortboard as it enters and leaves the planer, thus reducing thechance of sniping. When the desired thickness is reached, sawQuick tip:off the scrap outriggers and run the board's edges over the jOinterto clean them up.-Bill Clark, Bakersfield, Calif.If you run into burning problems when drillinghardwoods, try lubricating the hot bit by letting a little beeswaxmelt on it.-John Wiznak, Victoria, B.c., CanadaSliding dovetail jigStop blockT-nuts areinserted intoholes fromunderneath.I use this jig for routing the sliding dovetail housings for the legsof small pedestal tables and stands: It's fast to set up and veryaccurate. I made the jig's index head from a l/z-in.-thickaluminum plate bandsawn into a circle, but you can make it aseasily out of a thick piece of hard maple. I tapped the center of10 Fine Woodworking
Methods of Wo rk (C:Olltbllled)the index head to receive a short length of 1j2-in.-dia. aluminumrod with one end protruding slightly and pointed to act asa center. Three indexing holes are bored through the head tocorrespond with the dovetail housings to be cut in d1e pedestal. Aregistration pin pushed through the face of d1e router supportseats in one of these holes, positioning the pedestal for routing.I use a -in. dovetail cutter in my router to cut the housingsand install an adjustable stop block on d1e router support to keep@the housings the same length. -Eric Schramm, Los Gatos, Calif.Hemispherical sander®@(0JAttach sandpaperowith staples.'@@OIGlue half of ball toshopmade arbor.This little device, which works especially well for sanding concaveinterior surfaces, can be easily produced in the workshop.Start with a sponge-rubber ball, the kind available at toy stores invarious diameters from 1 in. to 3 in., and carefully cut the ball inhalf.ow saw the head off a Va-in. carriage bolt. Using jam nuts,screw the bolt to a plywood disc the same diameter as the spongerubberhemisphere. Hollow the hemisphere to accept the jam nutand attach it to the plywood disc with hot-melt glue or siliconeadhesive. Prepare an abrasive disc to conform to the hemisphereby cutting several radial slots at equal distances, as shown. StapleQuick tip:the abrasive paper to d1e wooden disc or hold the paper in placewith a hose clamp. -Donald F Kinnaman, Phoeni.,"(, Ariz.Cardboard tubes from the centers of newspaperrolls make good drums for lathe-mounted thickness sanders. Justturn end plugs and epoxy in place. My drum is 6 in. in dia. and 3ft. long, with l-in.-thick walls. Newspapers give them away fo rd1e asking.-j. Mark Fineout, Terrell, Tex.Dust collectorwould not believe the dust this thing sucks up. I keep the uniton the floor and direct my sweepings toward the inlet; whenI'm sanding, I stay close to the blower. All the dust that normallystays in the air fo r minutes and powders every inch ofQuick tip:the shop is sucked up instantly.-Thomas C. Turner, St. john's, Newfoundland, CanadaTo prevent your oilstone box from sliding aroundd1e bench while you sharpen tools, drive a small finish nail neareach corner. Clip each brad short and sharpen it to a point so itwill grip.-P. W Blandford, Stratford-on-Avon, EnglandMiter gauge for plywood edgebandingPlastic draftingtriangle, 4 in.Solid-wood edgebanding is often used around plywood doorsand tabletops to cover the edge laminations. But measuring,aligning and scribing the eight 45° miters on the banding isa tedious job, because the banding's length and the miters'angles must be perfect for everything to fit. This little gaugeeliminates the measuring and allows you to mark the mitersright from the workpiece.To use d1e jig, first tape the banding stock in place on theedge. Slide the jig into the corner where the work and the bandingstock meet, and scribe the 45° miter with a sharp knife. Moveto the other end and repeat. If the jig has been accurately made,you'll have perfect scribe lines for cutting miters on the banding.To cut the miters, I use a standard plywood jig with rails ond1e bottom that run in the miter-gauge slots on my tablesaw.-L.AD. Colvin, Satellite Beach, Fla.Plate joinery on a budgetWhen I went shopping for a shop vacuum system, the culminationof the salesman's pitch concerned d1e unit's large blowerd1at" sucked d1e dust out of the entire shop. I realized then d1at Idid not need another vacuum in the shop, simply a dust eliminator.Turning to an article by Mac Campbell in FWW on The SmallWorkshop, I found the key: a bag made from polyester fe lt. Thematerial, available from most large retail fabric outlets, allows airto flow through, but it catches dust, similar to the way a filter bagworks in a vacuum cleaner. I combined a homesewn bag with adiscarded squirrel-cage blower, and the rest is history. YouJig guides cutter in arcto fit radius of biscuits.When my hankering to take advantage of quick biscuit-joint systemsran up against the high cost of the required machinery, Ilooked fo r a cheaper approach. My solution was to use a wingslotting cutter in a router to make the kerfs for the standard biscuits.An Amana three-wing slotting cutter (available from WS.12 Fine Woodworking
PalmB04510Sanderlist Price $97SALE S44Ust Price $474SALE 5244449 WHITEWATER STWhMhthe_1M So4d Indi'fidulllyIIMI_I$69.95-""'OftA"""conl.guilton Shophelper', untqUt double w hee lgi,," it nilbihtv requ.red to \flftuallV .lIm,nilt.k.ckbackx the .mance lIS.W.r .,.ofthop%" %"._and nlltV. The infeedwheel holds mlterill down to stlb.lill thecut. The outleed wheel controlli ripping nar·row as Shophelpet is the perlectsaleguard lor prolessionals and hobbvi.ts,Iikl.TOLL FREEHI()().262-5482...shophelpet ®• All.• WHITEWATER. WI 53190 Check.SJtPID.PEI. ... II .. Ill. nI .... .nv..IItiff and_ iIodudIi!It .. """"',• FREE FREIGHT'Visa'MastercardMoney Order• InCIoIi Toll Fru: uti For801(Nearest Dealer800·344-7455WESTERN COMMERCIAL PRODUCTS . P.O.ulifOfnia CIoII: 8O()..318-38)3138, Tulare, CA 93175Hirsch Brand Carving ToolsThe world's finestProduced in Germanyfor over 200 years750 sizes & shapesavailable62-Rockwell hardness• Unsurpassed qualityand pricesold byNorthland Woodworking Supply1 Lee at N. Genesse StreetUtica, NY 13502315-724-1299Call now for your complete catalog only$2.00 refundable with first urchase.•WOLC&J.St.,2833 Perry Madison,Powermatic Specials#66 3 hp. phase wlNSO Beismeyer fence . . . . . $1,599.00NEW * 5 hp. 1... phase saw wlNSO Beismeyer fence . 1,723.00. 1,475.00#100 12" Planer 3.hp. 1 phase 1,n5.00#60 8" Jointer 1'h hp. 1 phase 1,299.00#180 18"POWEHAWJC'Planer 5 hp, 1 phase .. 4.150.00#115OA 15" V.S. Drill Press :V. hp, 1 phase . 1,125.00*225 24" Planer 15 hp. 3 phase 9,800.00FOB MADISON OR Me MINNVILLE*26 Shaper 3 hp. 1 phase .............WI 53713 aItl1-800-533-9282608-273-0148CE!=STA=CO• DOVER) RESOURCES COMPANYP.O. Box 2800, Troy, MI 48007(313) 589-2008March /April 1989 13
'IiMethods of Wo rk (contillued)Jenks & Sons, 1933 Montana Ave., N.E., Washington, D.C. 20002for about $15) can cut a 5j32-in.-wide, 1/2-in.-deep slot the sameas any biscuit joiner.The only problem is that the three-wing cutter's radius is justunder 1 in., while the radius of the biscuit joiner's sawblade is2 in. Because of the smaller radius, the profile of the routed slotwill not mate perfectly with the semi-circular edge of the biscuit.Although this mismatch will not affect the assembly or strengthof the joints, it can be eliminated by constructing a simple jig,as shown in the sketch. The jig guides the cutter through a 2-in.Quick tip:arc and also sets the depth of cut.-Richard Fryklund, Arlington, Va.Arm & Hammer washing soda cleans pitch andgum from sawblades. Dissolve about half a cup in a shallow panof hot water large enough to hold the blades, and let them soaka few minutes. Rinse with hot water and dry. This will not harmthe blade or your hands, and as a bonus, it will also help keepthe drainpipes clean. -Gerald Szejlinski, Greendale, Wisc.the box, I use a variation of the one-piece technique. First, beforeassembly, I cut a Ys-in.-wide groove in the inside face ofeach of the box's sides where the top of the lip is to be. After thebox has been assembled, I use a narrower blade to cut off thelid. I offset the second lid-removal cut from the inside groove, asshown, to produce a lip that nests into the lid.-F.B. Woestemeyer, West Chester, Penn.Clamping perch for irregular shapesHalf-round clamp perchesallow clamping fromvarious angles.Fixed-position marking gaugesKerf prevents corner damage.End viewDifferent width oneach side of gaugeUsing fixed-position marking gauges saves me time and tediumwhile laying out. Here's how I make them: Cut several shortpieces from a hacksaw blade. Drill a hole through each bladesection and bevel and sharpen one end to a knife edge. Thebody of the gauge is a 3-in. by 5-in. block with a mortise in itscenter. Cut stub tenons on the ends of two pieces of %-in. byI-in. hardwood so they each can be glued into the mortise fromopposite sides of the body. Cut each of these two pieces tolength so that when a section of hacksaw blade is screwed into anotch in the end, the knife edge will be the desired distancefrom the body of the gauge. Mount the blade with the bevelfacing the block. This way the blade will pull the block into thework and stay on track. When fmished, mark the gauge's measurementsso you can quickly find the size you're looking for.Quick tip:-Dennis R. Mitton, Gig Harbour, Wash.If your sandpaper tends to clog quickly because ofgum or glue, a quick pass with a file card or wire brush willextend its life.-Chris Dallsmore, Salt Lake City, UtahBox-lid trickCut here toremove lid.Lid fits overlip on box.When I make small boxes, I assemble them in one piece, includingthe lid. Then when I cut the lid off, it will match the boxexactly. When I want an undercut on the lid to fit over a lip onTo clamp up chair frames and other irregular shapes, I use semicircularclamping perches like the ones shown in the sketch. Tomake the perch, cut a 3-in.-dia. circle from a 2x4 with a largehole saw or ny-cutter. On the bandsaw, halve the circle withthe grain and make a V-cut in the flat side to match the angle ofthe corner of the piece being glued. An extra kerf at the apexwill prevent the block from crushing any sharp edges or frombeing glued to a mitered corner. The round surface will acceptclamping from any angle, even crossclamping.-Jobn M. Gray, Syracuse, NYQuick tip: Smoothly planed wood can be slippery to get agrip on when feeding a machine. Licking your fingertips greatlyincreases the control. -E.e. Kimball, McCall, IdahoHolding push sticks with VelcroFrustrated at never having my push sticks on my tablesaw when Ineed them, I glued a strip of Velcro on the right side of my ripfence and the mating Velcro material on the sides of my pushsticks. The push sticks now stand at attention on the rip fence,ready to be grabbed when needed. Most Velcro now comes witha peel-off sticky back that should fasten the material wellenough. This tip could be used for many accessories and toolsaround the shop. -David Crawford, Brownsboro, Tex.Methods of Work buys readers' tiPS, jigs and tricks. Senddetails, sketches (we'll redraw tbem) and pbotos to Methods, FineWoodworking, Box 355, Newtown, Conn. 06470. We 'll returnonly those contributions that include an SASE.14 Fine Woodworking
SQUARE, DRIVESCREWS• Deep• Square Drive Reduces"Cam-Out'"Thread forExceptional Holding Power• Heat Treated for GreatestStrength• Made With Pride in USAor Canadax $13.74 $3.00 upsCHECK OURPRICING!1000 #8 x 1 'f.FLAT HEADSQUARE DRIVE SCREWSGround1-800-443-7937Service ShippingCALL TOLL FREEASHMAN TECHNICAL L TO.CALLMachinery . Tools . $hop Equipment351 Nash Rd., N., Hamilton, Ont., Can. L8H 7P4(416)COLLECT560-2400GENERAL ._._ Model 350-1 ............................ $1340.with Biesemeyer ........................ $1470.with EXCAlIBUR ........................ $1565.160-2 VS Lathe, 1 HP ................. $1100.260-1 VS Lathe, 1 HP ................. $1980.1180-1 6" Jointer, 1HP ............... $ 740.480 8" Jointer, 1 1/2 HP ............ $1530.490-1 15" Bandsaw, 1 HP .......... $ 885..·. CELTA3 HP-10"-Tilting Arbor Unisaw$1 199.- SPECIALS -3 HP-10"-Unifence Model ........ $1350.RT3 1 10" Scoring Saw .............. $2875.Mobile Bases From .............20"$69.Delta Planer-5 HP- .. $4300New Excalibur Fence ........ $329U.S. FUNDS.-FREIGHT COLLECTlO0.O0OREASONSWHY1UU SHOULD OWN ®ASAW100,000 Over infact. Bob in Buffalo.Jim in Phoenix. Richard in Sydney.Heinz in Stuttgart. The list ofBiesemeyer T,Square sawfence owners spans the globe.Why so many? BecauseBiesemeyer sets the industrystandard. The T,Square sawfence system cuts precision partsfor all your home shop projects.Safely. Affordably.Btesemeyer's famousour newT#Square sawfence system fits any tablesaw.Shown here withBladeG uard'" system.And now Biesemeyer introduces the newsliding table. Perfect for cross,cutting.By using the T--Square slidingtable on your table saw, you getthe benefits of a radial armsaw-for a fraction of the cost.>Cap off your saw fenceand sliding table with theadded safety of Biesemeyer'snew BladeGuard system. Safetywas never this convenientbefore. BladeGuard easily liftsout of the way for dado cuts andsliding table use.And for useful hints835,9300. 1-800,782-1831.For more information, callIn Arizona,on the many uses of our products, justask for Bill Biesemeyer, fellow woodworker.1·800·782·1831Try them for two weeks. If you're notcompletely satisfied, you'll receive a fullrefund plus shipping costs.BIESEMEYER It still costs less to own the best.March /April 1989 15
Truing a jointer-plane soleHow do you true up the sole of jointer planes-both woodand metal? It seems that if a plane's sole is absolutely flat,the protrusion of the blade would cause the plane to rock.There must be a way to compensate for this.-John Latta, Anchorage, AlaskaRich Preiss replies: Truing the sale af any handplane, be itmetal ar waad, is essential if yau are to. abtain flawless perfarmance.Langer planes, such as jainter planes, require specialcare because af their size and because they are used mastly toshoot edges priar to. glue-up, an aperatian that demands accuracy.The process far truing waad and metal planes is similar; therequired taals are a large mill file, same large sheets af c1athbackedemery ar silicon-carbide abrasive and a flat referencesurface, such as a ground metal plate ar a pane af \.4-in.-thickglass (preferably tempered).I start by backing the plane iron aut af cutting range andclamping the plane upside dawn in my bench vise. Do. natclamp the cheeks af the plane, but rather clamp the plane by itshandle, with the front knab resting an top af the bench. Anycampressian an the plane's side walls during flattening willcause the sale to defarm and became unflat when the plane isunclamped. Using a gaad metal straightedge, or the rule from acambinatian square, carefully gauge the canditian af the battamaf yaur plane. Check across the sale starting at the nase, warkyaur way back to. the heel and then check lengthwise. Mare aftenthan nat, yau will find a hallaw in the center and also. a law spataround the mauth af the sale-a result af wear.Depending an haw far aut af true the sale is, yau'll have to.perfarm ane ar twa aperatians: The caarser step is filing argrinding away the high spats; the finer step is lapping the bottamsmaath. If the irregularities are slight, yau are fartunate andcan proceed right to. the lapping step. Remave the plane fromyaur bench. Tape yaur abrasive by the edges to yaur referencesurface and carefully, ane strake at a time, mave the plane averthe surface until the entire sale is unifarmly palished. Start witha 320-grit paper and proceed to 400 grit, ar finer if yau cho.ase.The finer the palish, the slicker the plane's ultimate perfarmance.Avaid the tendency to. rock the plane as yau go. back andfarth: This will round the sale. Be sure to. press squarely averthe plane's entire bady; to. ensure accuracy, accasianally reversethe plane and push it heel-first.If the straightedge reveals the sale is very uneven, carefullyfile it flat, ane stroke at a time, until it cames within lappingrange. Wark the file in ane directian until the high spats are justabaut flush with the majarity af the surface and then proceed tothe lapping. Do. the filing with the plane upside dawn in yaurvise as befare. Keep yaur file clean, and check yaur progressaften with the straightedge and a set af winding sticks. Windingsticks are twa straight strips af waad that are laid an the saleparallel to. each ather and perpendicular to. the length af theplane. By sighting the tap edges af the twa sticks, yau can see ifthere is any twist ar "wind" in the sale.Once the sale is flat, yau shauld check if the mauth af theplane is a straight and square apening. This is impartant, becausethe mauth allaws the chips to. escape between the saleand the blade. If the apening is nat square, scribe a fine line atthe leading edge af the mauth, perpendicular to. the lang edgeaf the sale; using a small mill file, carefully rem ave just enaughmaterial to true the apening.Waad planes require more frequent flattening, because theyare mare susceptible to. climatic changes. Hawever, if yau do. alittle bit af truing regularly, yau will never have to. face severemadificatians. Many contemparary waad planes have adjustablethroat inserts that shauld be reset after any majar retruing af theplane sale, to make the size af the mauth the same as it was.On a properly flattened jainter plane, the iron shauld pro-ject anly enaugh to. take a fine shaving, and that small amauntshauld never cause the plane to "rock," as yau mentianed.There's no. need to. do. any special truing to accaunt far theblade's projectian.[Rich Preiss is head af the woodwarking program at the Universityaf Narth Carolina at Charlatte and a consulting editar to. FWW.)Wormy mapleI recently ran across some wormy maple at a local lumberdealer. Although I understand that wormy wood is fa irlycommon, I wonder if such lumber is usually available commercially.Also, do they cut wood that's already been attackedby worms, or do the worms only attack sawn lumber?-Marilyn MacEwen, Fairview, N.CJon Arno replies: Wormy maple is quite camman, as is wormyash, butternut, chestnut and aak. Althaugh same species are resistant,mast waads will became warmy if attacked by the larvaeaf certain beetles. One af the primary culprits is the pawderpastbeetle, which has a special fandness far ash but will attackather species.Althaugh warmy waad can be attractive in paneling, pictureframes and rustic furniture, the lumber trade views "worminess"as a degraded canditian, because it structurally weakens thewaad. Far this reasan, sawyers avaid processing warmy waad atthe mill, and mast lumber dealers dan't stack any, except farwormy waad that's been milled far paneling and tharoughlykiln dried to. kill the eggs and larvae.The best way to track dawn a supply af warmy maple is to.contact same af the smaller sawmills in yaur area and ask theaperators to call yau if they receive any warmy lags. Yau'll haveto. act quickly, because warmy waad is usually discarded ar saIdas firewaad right away, as sawyers dan't like to. keep warmy lagsaround far fear the warms will infect their inventary af saundlags and lumber. Far this reasan, warmy waad is usually a littlehard to. find, but nat necessarily expensive. If yau get samewormy maple, it is impartant to. have it kiln dried befare you useit, to. kill the warms.[Jan Arna is a waadwarker and amateur waad technalagist in=Schaumburg, III.]Horsepower ratings and realityVolts X amps/746 watts horsepower, right? If so, why areEdso many motorized tools advertised as having higher-than-possiblehorsepower? Also, what is developed horsepower?-Ed Good, Nordland, Wash.Cowern replies: Much af the canfusian abaut electric-matarharsepawer is due to. the fact that manufacturers use differentmethads to. rate the pawer af different kinds af mators. Standardinductian matars that are used an mast statianary pawer taals,like tablesaws and planers, are rated accarding to. the matar'scantinuaus running capability. Althaugh not stated an the matar'snameplate, these matars can narmally produce 200% to. 300% afthe specified harsepawer rating far shart bursts af time. Whenproducing the higher harsepawer, they draw mare amps than thenameplate indicates, but as lang as the averlaad periods are shart(typically several seconds), the matar will not be damaged. If youuse the standard harsepawer farmula yau stated and figure in theamperage printed an the nameplate, yau'll came up with a harsepowerrating very c1ase to. the matar's cantinuaus power autput.Partable taals, such as electric drills, routers and jigsaws, haveuniversal matars. Campared to. inductian motors, universal motorsare smaller, lighter, capable af variable speeds and run an eitherAC ar DC pawer. Unfartunately, the rated autput of universal matarsisn't clearly a product af the standard harsepawer farmula:These matars are typically rated in terms af their "maximumdevelaped" ar "peak" harsepawer autput. Just as the pawergenerated by an inductian motar in a shart burst can far exceed16 Fine Woodworking
Q & A (continue,l)its continuous power rating, a universal motor can produce itsmaximum or "peak" horsepower for very short periods beforeburning out. During the overload or peak period, universal motorsdraw much higher amperage than what's stated on the motor'snameplate. When manufacturers calculate horsepower, they factorin this peak amperage figure, rather than the amperage onthe nameplate. This gives a rating higher than seems possible bythe standard formula. For more information about calculatinghorsepower, see my article in fWW 64, p. 57.[Ed Cowern is an electrical engineer and president of a companythat distributes electric motors. He lives in North Haven, Conn.]Making a wax mixtureI understand you can mix beeswax with paraffin wax tomake a furniture polish, but I don't know the proportions forthe mixture. Also, what is the procedure for combining them ?- William H. Crist, Charleston, W Va.Bob Flexner replies: Beeswax has been used on furniture forcenturies, both as a primary finish and as a polish. Paraffin wax isa soft wax that's a petroleum derivative usually combined withhard waxes, such as carnauba or candelilla, to make them easierto spread. When combined with beeswax, its purpose is usuallyto reduce the cost of wax, not improve the quality. Rather thanusing paraffin, I'd experiment with mixtures of beeswax and theharder carnauba or candelilla (see my article "DemystifyingWax," fWW #70, p. 66).Any wax can be made into a paste by mixing the wax with asolvent, such as turpentine or mineral spirits, and heating it in adouble boiler. However, if done on a stove top, this is a highlydangerous operation that can easily result in a fire or explosion,so I don't advocate amateurs doing it. Fortunately, there is anothermethod that is quite a bit slower than the heating methodbut far safer. First, shred the wax into a lidded glass or metalcontainer. Add about Y2 pint of solvent to 1 lb. of wax and stirthe solution to an even conSistency. Then, simply shake or stirthe mixture from time to time for several days until all the waxis dissolved. If you want the paste to be thicker or thinner, eitheradd a little more wax or more solvent. Rottenstone, oil-basedpigments or dark-color dyes can be added to create differentantique and scratch-covering effects.[Bob Flexner is a professional finisher and restorer. He lives inNorman, Okla.]Tenoning with a retoothed backsawI enjoy cutting tenons by hand. However, when cutting thetenon cheeks, I'm ripping with crosscut teeth. Is it possible torefile the teeth of a backsaw to work faster or cleaner whencutting with the grain ? -Paul] Pieper Jr., Abington, Penn.Michael Podmaniczky replies: Although it may not appearto be so, backsaws and dovetail saws are already designed forcutting both with and across the grain. True, the teeth are morelike crosscut teeth than rip teeth, but there's a reason: A crosscutsaw used to rip will merely take longer to use, but a ripsawused against the grain will grab, drag and tear. Try a few crosscutswith even the finest-toothed ripsaw, and you will understandwhy manufacturers have come up with "combination"tooth deSigns for saws that are meant to do a multitude ofsawing tasks.However, if you cut a lot of tenons by hand, the ideal situationis to have two different saws, one for each tenoning job: a crosscutsaw for the shoulders and a ripsaw for the cheeks. As I said before,you will find that most backsaws already come sharpenedto crosscut. To modify a backsaw for ripping, old-time craftsmenoften would grind or file off the fine teeth and cut new ones,reducing the number of teeth per inch at a ratio of six new ripteeth for each eight old crosscut teeth. The new teeth should befiled straight across, with no bevel, and the face of each toothshould be square to the axis of the blade. Rip teeth should alsohave less set than crosscut teeth. Unless you file saws on a regularbasis, it is unreasonable to attempt this task: Pay a local sawsharpeningshop to do the job for you.[Michael Podmaniczky is a conu-ibuting editor to fWW and a furnitureconservator at The Winterthur Museum in Winterthur, Del.]Acidic wood and carbideI have read that woods with high-acid content destroy carbide,so these woods should only be cut with steel or stellite.If this is true, which woods should I avoid cutting with carbideblades? -Stuart Grimstad, Amherst Junction, Wis.David Snook replies: Phenolic acid in wood does affect tungsten-carbideteeth cutting green or wet wood. The acid eats thecobalt binder that holds the grains of tungsten together, causingthe teeth to deteriorate. This effect, coupled with the high temperaturesgenerated during cutting, also causes the teeth to dullmuch faster than normal.Cedar is a real problem, because it has one of the highestphenolic-acid contents of any commercial wood and is naturallyvery abrasive. Conifers and most other softwoods are also highin acid content. Oak and other hardwoods have a very low acidcontent. Fortunately, the phenolic-acid content in dried woods islow, so it's not a concern.Steel and stellite tooth blades are not affected by phenolicacid and are therefore good substitutes for tungsten carbidewhen working with green woods. Special grades of carbide witha nickel binder rather than cobalt are also available. The aciddoesn't affect nickel, thus eliminating the problem, and nickelcarbide stays sharp longer than steel or stellite, because it ismuch more resistant to abrasion in green woods.[Dave Snook is a custom sawblade maker and owner of Snook'sSaw Shop in Salem, Oreg.]Drying turnings in the microwaveI cut logs from red cedar, cheny and oak for woodturning. Irough-turn the green stock, dry the wood and then do my finalcuts and sanding on the lathe. I've tried to expedite thedrying by using a microwave oven, but I don't get consistentresults. What's the proper way to do this ?-WL. Peterson, Princeton, Wis.Alan Stirt replies: From your letter, it's not clear to me whichway the grain runs in your bowls. I suspect you're turning theendgrain, with the tree's center as the center of the bow!. Inthis case, no matter how you dry the bowls, you're going tohave a higher loss rate and less consistent results than youwould if you turned bowls into side grain and eliminated thetree's pith center.To aid in drying, no matter what the grain orientation, thethinner you turn the green-wood bowl (while making sure there'senough wood to finish), the less chance of cracking. It's alsovery important to turn the bowl with an even thickness throughout.Thicker areas will have a greater tendency to crack. Whenair-drying, coating the bowl with a wax or other sealer to slowand even out the drying also reduces cracking. The portions of abowl with the most endgrain showing dry much faster than theside-grain portions. You can use paste wax, white glue dilutedwith water, commercial end coating (wax-emulsion type) dilutedwith water or anything that provides a moderate water-vaporbarrier. Too heavy a sealer can be counterproductive: The ideais to slow down, not stop the drying process.I've found that the moisture content of the wood probably hasthe greatest effect on how the bowl will dry in the microwave. Ifthe wood is too wet (above 22%), it will not dry evenly andcracking will occur. I have found this to be true even with butternutand other woods that can be dried by more conventionalmethods with little fear of cracking. If necessary, I air-dry my18 Fine Woodworking
THE OBVIOUS CHOICE!!3 H.P. Shaper2 spindle speeds, precisionground table, magnetic switchand weighs a husky 500 Ibs.Comes with 3 spindles - 1", 34"and Y2".G1182260Weighs/bs.!6 X 47" JointerAll ball bearing, 3-bladecutterhead, 1 HP single phasemotor, precision ground bedswith an exclusive 47" bed length.This is the nicest 6" Jointer onthe market.8 X 65" JointerAnother winner! All ball bearing,3-blade cutterhead, magneticswitch 1 V2 H P single phasemotor and precision groundcast-iron beds.20" Planer20" x 8" capacity, 2 automaticfeed rates, 3 HP single phasemotor, 4-blade all ball-bearingcutterhead, built in stand,extension rollers and dust chute.Weighs 950 Ibs.Regularly $335Regularly $850.NEWSALE PRICETOLL$825FREE LINES (FOREAST OF THEMISSISSIPPI:Regularly $665SALE PRICE $625-+ -+(For Orders & Catalogs Only) WESTInquiries & Customer Service) MISSISSIPPI:SALE PRICE $310Regularly $1295SALE PRICE $1175All above prices are F.O.B. Williamsport, PA or Bellingham, WA+-ORDERS AND CATALOG REQUESTS ONLY)1-800-523-GRRROF THE 1-800-541 -5537 (717) 326-3806(For (206) 647-0801 ::ilDependable extra hands for all types of clampingand work-holding jobs: woodworking projects,home maintenance, and furniture repair.iCL 1}= LO areli· Write for FREE LITERATURE. For big 32-page"how-to-clamp-it" catalog, send 50¢.ASK YOUR DEALERADJUSTABLE CLAMP COMPANYTHE CLAMP FOLKS431 N. Ashland Ave. / Chicago, IL 60622Produce Something Special!Route decorative panel designs in seconds. 32 differentcorner designs, a side design and arc attachmentare available to create unique panels to put you astep ahead of competition.• For panels up to 24" by 36".Accessory extension bars for panels up to 84".• 4 different corner designs.32 available as accessories.Accessory side design.Accessory arc attachment.See your woodworking machinery dealer or calltoll free for an informative brochure.• • • •PORTA-NAILS, INC . PO BOX 1257 · WILMINGTON, NC 28402PHONE (919) 762-6334, OUT OF NC 1-800-634-9281Porta-Nailer Dowel Mate Router Mate Ring MasterMarch / April 1989 19
Q & A (cOlltilllletl)bowls to get their moisture below the about 22% before dryingthem in the microwave. I measure the moisture content with amoisture meter. If you don't have a meter, you can experimentby varying the amount of time you leave the bowls to air-drybefore microwave drying. If you leave the bowls for a few weeksand they microwave crack-free, you can speed things up bygradually shortening the air-drying periods until you determinethe minimum air-drying time needed in your local climate.I prefer to treat the wood with several short microwave treatmentsrather than fewer longer ones. I set the microwave on thedefrost cycle and place the bowl on a carousel inside. This rotatesthe bowl slowly so it will dry more evenly. For a 6-in.-dia.bowl that starts just under 22% moisture content, I'll use threeor four 10-minute treatments, allowing the wood to cool off inbetween. The exact timing is dependent on the wood's mass,moisture content, grain orientation and species. The more mass(both size, thickness and weight), the longer it has to be zappedin the microwave to dry. Some woods are much harder to drythan others: Bowls with crotch figure or burls with large irregularareas of endgrain must be treated on a more gentleschedule. Very dense woods, such as ebony and lignum vitae,also need this gentler treatment. Burls with a heavy bird's-eyefigure, such as big-leaf maple burl, can be dried on a fasterschedule than normal wood. The amorphous structure ofthese burls seems to prevent any cracks that form fromspreading too far.Because the moisture loss in the microwave is caused by heatingthe wood, temperature is an important factor. In general,especially during the earlier stages of drying, don't let the bowlsget any hotter than you can hold in your hand. Getting the woodtoo hot causes internal cracking (honeycombing) and can adverselyaffect the wood's color and working qualities.[Alan Stirt is a woodnlrner in Enosburg Falls, Vt.]White dots in a mahogany finishAbout six months ago, I finished a mahogany dining-roomtable with a high-gloss lacquer. After applying a paste woodfiller, I let it dry for days before sealing it; the buffed-outsurface looked perfect. Several months later, random patchesof white appeared in the finish, as if it had blushed. In addition,there were countless tiny white dots at the base of thefinish, down at the wood level. What happened?-Phil Hostetter, New York, N. Y.Michael Dresdner replies: Apparently, oil from the fi llermixture was absorbed into the pores of the mahogany, heldthere and later released back into the fi ller after the finish haddried. The oil reacting with the fi ller forms a tiny white dot atthe mouth of each pore. For some reason, this only occurs inmahogany, not walnut or any other wood with similar pores;even then, it happens only occasionally.Unfortunately, there is no way to remove the dots, short ofrefinishing. My suggestion for avoiding it in the future is to lightlyseal the mahogany before filling, thus preventing excess oilabsorption. This is done by applying one very thin coat of vinylsealer on the wood prior to filling, but after it has been stained.(This vinyl sealer is available at professional paint stores. Don'tuse regular lacquer sanding sealer.) Applying the vinyl sealerwill also make the excess filler a bit easier to remove, and if thefiller is pigmented, will prevent it from coloring any of the woodexcept for the pores themselves. After the filler has been wipedoff, left to dry and lightly scuffed to remove any surface reSidue,the piece can be resealed with another coat of vinyl before movingon to the lacquer topcoats. In this way, you have essentiallycreated a vinyl "envelope" that isolates the pocket of filler ineach pore from the mahogany itself.[Michael Dresdner is a contributing editor for FWW and an instrumentmakerand finishing specialist in Zionhill, Penn.]Antiquing cherry with lyeI have been attempting to achieve an antique look on cher.ryusing a dilute lye solution. The results have been less thanexcellent: The wood does turn a beautiful color, but it alsobecomes splotchy. I have had a similar problem when stainingwith an aniline dye. Is there any way to obtain a moreuniform result? -Robert W. Hendrich, Williamsburg, Va.Tom Dewey replies: Your letter does not say whether or notyou followed on through and topcoated the treated wood with afinish. My experience with the process has been quite similar: Iwas apprehensive the first few times I used lye, because I, too,experienced uneven and splotchy coloration. However, uponfollowing through and finish-sanding and applying a good topcoatof varnish, oil or lacquer, the condition was eliminated.I suspect that it has something to do with the wood itself ratherthan uneven concentrations of the lye (although you shouldmake every effort to thoroughly mix and evenly apply the lyeand warm, not cold, water). Perhaps cherry naturally containssoft and hard (dense and less-dense) areas of grain. Keep inmind that regardless of the initial results, in time, the entire colorationtends to "mellow," that is, lighten up a bit.As a further check, I have just examined a 100-year-old dropleaftable, and sure enough, there is a color variation (thoughnot especially pronounced) from one spot to another. So perhapsthe lye merely accentuates what is already there. Bottom-line advice:Don't fret too much. Old furniture in the 100-plus-yearscategory isn't perfectly uniform anyway.[Tom Dewey designs and builds furniture in Coudersport, Penn.]#Keeping fumes out of your eyesDr. Paul Vinger's article on rye safety in FWW 72gives anice overview of appropriate measures for protecting the ryesagainst solids and liquids, but it doesn't deal with gaseousirritants. We know to wear a respirator when spraying finishesto keep from inhaling harmful vapors, but what effect do thesevapors have on the eyes ? -Clarkjenkins, Harrison, Ariz.Dr_ Paul Vinger replies: There are three main routesthrough which chemicals can enter the body: the respiratory system,tlle skin and the gastrointestinal tract. Gases, vapors, mistsand airborne particles are mainly inhaled; therefore, a respiratoris your most important defense against harmful substances.However, some vapors and gases, such as strong alkalies andacids, can cause severe, potentially blinding burns to the eye.Further, some solvents, such as lacquer thinner, can cause surfaceirritation on the eye by dissolving the fatty bonds that attachthe thin skin (epithelium) to the underlying cornea.The most efficient means of protection is to reduce the concentrationof gases, vapors or mists in your work area with anadequate ventilation system. Goggles that meet American NationalStandards Institute (ANSI) standards #Z87 for chemical use willgive some eye protection from low to moderate air-toxin levels,but they're mainly designed to protect from liquid chemical splashand are not a substitute for good air-quality control in your sprayroom. Contact lenses are not advised where there is exposure toeye-toxic chemicals in either the liquid or gaseous state, becausethe lens could make irrigation of the eye ineffective. More detailedinformation may be found in Occupational Health: Recognizingand preventing work-related disease, edited by B.S. Levyand D.H. Wegman, Little, Brown and Co., 200 West St., Waltham,Mass., 02254; (800) 343-9204 or (617) 890-0250 in Massachusetts.[Dr. Paul Vinger is a woodworker and ophtl1almologist. He livesin Lexington, Mass.]Send queries, comments and sources of supply to Q&A, FineWoodworking, Box 355, Newtown, Conn. 06470. We attempt toanswer all questiOns, but due to the great number of requestsreceived, the process can take several months.20 Fine Woodworking
Furniture-makingsecrets fromTV's favorite carpenter...You can make half-blind orsliding dovetails (both equally andvariably spaced), finger joints withANY pin spacing, precision models.toys, other iigs iust think of anywork-positioning req uirementyou may have on almost anystationary woodworking machine.and INeRA JIG will handle it withmuch greater ease and accuracythan your old method.HOW WOULDYOU MAKETHIS WITHOUTO[J[]fJ©IT@TMI u.s.JJL1107 ".'.'.'•••••••PATENT #4,793,604. . I cannot imagine doing closework Without it."Fine WoodworkingMagazine"It's the kind of tool you keepfinding new ways to use."American WoodworkerMagazine"The precision. accuracy and easeof setup make the jig an ideal toolfor production runs and a realtime-saver, too."Fine WoodworkingMagazineIn THE NEW YANKEE WORKSHOP, NormAbram shows you how to build traditional-stylefurniture usiog modem power tools, new materialsand time-saviog techniques. First, he helpsyou set up shop with a basic selection of tools.Then, he provides complete plans and instructionsfor buildioga dozen pieces of furniture.The Shaker inspirationInspired by the classic lioes of American Shakerfurniture these pieces embody the joioery andfunctional design associated with that style, whiletakiog far less time and effort to make. They are:Medicioe Cabioet * Workbench Drop-leafTable * Blanket Chest * Bedside Table *Bathroom Vanity * Trestle Table * BookshelfChest of Drawers * Candle Stand * Hutch*Tips from start to finishWriting DeskClearly illustrated throughout, here are tips onsafety, measuriog and markiog, woodworkiogjargon, saws, planiog and shapiog, drilling anddriving, and much more. The last chapter isdevoted to finishiog techniques. You'll make furniturethat will become heirlooms io the years ahead.Available io hardcover and paperback atbookstores,___or use the coupon and order today.UTIlE,200 WestBROWNStreet,DistributionWaltham, MACenter02254Please send me,OIy @ $19.95 hardcover, $16.95 paperback (Pricesinclude shipping and handling unless ordering by credil card. theno I enclose check or money order payable to UTILE. BROWN andadd $3.00 per orderl.COMPANY for the total cost. $California. New Yorkand Massachusetts residents must include sales tax.Charge myo American Express 0 Visa 0 MasterCardAcct.• ITIIJ ,I I I I I I I I I I I I IExpiration date __ --', __---''--__Please enter 4-digit number to the left of )
Raising Bits!:cal PanelRouter;"""":=-.;....LFREE ROUTER BITPro CATALOG Quality '"AccessoriesBits &Ctlot:;£PRECISIONCARBIDE TIPPED · VALUE PRICEDover 50 shapes · 350 sizes·48 shaper cutters '12" to 1'/4" Bore1-800-544-2487TOOLS. INC.P. O. Box 560993Orlando, Fl. 32856DELMHORSTPocket-size WoodMODELMoistureJ-88TesterLED display-type meter indicates ten ranges ofwood moisture content between 6 and 20 percent.Ideal for a woodworking shop or serious craftsman.•• "IL!IP.O.Limited 3-Year Warranty.Shipped complete withcarrying case, batteriesand pins.ORDER ONE TODAY!1-800-222-0638NJ-201-334-2557DELMHORSTInstrUDlent CompanyBOX 220, DEPT. 908BOONTON, NJ 07005Spindle Sanders.For large or smallshops. Ideal for contoursanding. Quickchange drums. %"to 4". Satisfactionguaranteed. Coveredby 1 yr. warrantee.4 models tochoose from. Formore informationwrite:Clayton Enterprises2505 W. Dewey Rd.MI 48867A good miteris hard to find.Made inNew EnglandMade InU.S.A.Now youknow whereto look!______________________POOTATUCK CORPORATION_P.O. Box 24, Dept FW893Windsor, VT 05089 (802) 674-5984NameAddressCity/StatelZipSHAKER FURNITUREAn exciting collection ofShaker dining chairs, tables,beds and other furniture availablein Kits or completely finished.All exemplifythe simplicity and versatilebeauty of Shakerdesign. Pegs, pegboard,Shaker baskets,oval boxes, and dolls .Large selection ofreplacement chair tapes.New 48 page color catalogand 12 tape samples $1.00SHAKER WORKSHOPSBox 1028-FW39, Concord, MA 01742- '-'w1d beltshown withoptional XT(extension tableoption) &Motortzed TableHeight AdJUstmentoption.Sandstars feature TEFC drivemotors and separate feed motors;Instantly-available air-actuatedplaten sanding as well as contactdrum sanding; Infrared electric-eyetracking and safety mechanisms;all-welded structural steel frame;24-lnch (Model 755) and 36-lnch(Model 757) sanding widths withmaterial thickness capacities from.025" to 6".FREE BROCHUREASK HOW YOU CANQUALIFY FOR FREEFREIGHT ON YOURORDER.Leasing makes yourchoice easily affordable.See our VHS video demonstrationtape - The KusterChoice - InnovativeSanding Solutions.SINCE 1917TUNG OIL FINISHES USED BYWOODWORKING FOR OVER PROFESSIONALS70 YEARS.For a FREE Product CatalogcallWATERLOX CHEMICAL & COATINGS CORP.1-800-321-0377 • 216·641-4877 in Ohiosandar n.Every day products are created thatredefine the way we work. Look atcalculators, personal computers,and cordless tools. Through technologyand innovation, these productswere redeveloped and put into thehands of a much broader group ofconsumers,empowering them with" ,'¥_ capabilities theypreviously lacked.Luster Manufacturinghas been redefiningwide-surface power sanding foralmost a decade. WithDynasand and Ultrasan
EveningNEW WORK IN WOOD 90, a new annual book from The Taunton PressYou're invited to participate in NewWork in Wood 90, the first in a newannual series of books that will lookat the state of the woodworker's art.We would like you to submit photographsof the very best work you'vedone in wood during the past twoyears. The editors ofworkingFine Woodmagazine will select about250 photographs for publication inNew Work in Wood 90. Every spring,we'll reissue the invitation and publisha new book each fall.New Work in Wood 90 will be a photographicsurvey of good design andSENDUSYOURBESTWORKsound craftsmanship. It's the successorto Fine Woodworking's Design Book series. In additionto photographs entered by readers, each annual will containa fully illustrated essay about the woodworking of aparticular region or about some specialized segment of thecraft, such as architectural woodworking, turning or studentwork. A separate section will feature photographicprofiles of individual makersdiscussed in the essay.Rules-An entry may consist of up to ten color transparencies of woodenobjects made by an individual woodworker or woodworking partnership.You can submit ten photos of a single object, photos of tendifferent objects or any combination that totals no more than ten.-If you enter slides of more than one object, you must enclose anentry blank for each object. Code the photos and the entry blankwith matching identifying letters (A, B, C, etc.).-Photographs must be good-quality color slides (transparencies).The photo background should be featureless and of a neutral colorthat doesn't interfere with the object. All slide formats are acceptable,including 35mm, 2'1. in., 4x5, 6x7 and 8xl0. Please protecteach slide with a plastiC sleeve, not paper or cellophane. Your nameand address must be legibly printed directly on each 35mm slidemount or on a label attached to the protective sleeve of large-formatslides. Wecannot accept or judge unlabeled slides.-Snapshots, color negatives, color prints, Polaroids and black-andwhiteprints cannot be published, so they will not be judged.-Work submitted must be of original design and completed since 1986. Theprimary material must be wood. There are no restrictions on species, tools ortechniques. If it's mostly wood and you made it, you can enter it.-If you want your photos returned, please include a self-addressed stampedenvelope. Otherwise, photos will not be returned. If you wish us to acknowledgereceipt of your photos, please include a self-addressed stamped postcardthat lists the photos submitted. We'll check it off and send it back to you.-All entrants, whether accepted or not, may purchase up toten copies of the book at 25% off the cover price.Call forEntriesDeadline•ISMarch 15,1989Entry for blank New Work in Wood 90Mail to: New Work______________________________Box 355Newtown, CT__06470 File number (office use)_______________________Name_________________________ ___Mailing address____________ __Ciry StaW ___ ________Zip___Daytime phone phone_______________(Make sure each objectNumber of photos submitted has__its own entry blank.)__________________Photographer's name and phone #Title and/or function of entry_______________________ __Woods used________ __ ________ ____________ _________Dimensions: Length WidthHeight DiameterThis entry fonn conveys to The Taunton Press the right to publish the photos itdescribes. If you wish to make additional comments. do so on a separate sheet.We may excerpt what you write for publication.
l-BAImEYUIIe.order or iIr W(In MD 301-82(). 7722)cBYfileY'(lJflectio!L L I·M ITED Dept fW39, 3 Airpark Drive, Easton, MD 21601OWN YOUROWNSAWMILLFour Models To Choose FromSAVE MONEY-CUT YOUR OWN LUMBERRemote hydraulic log handlingCapacities up to 32" in dia.by 33' longPortable - precise - rugged• Efficient-more lumber per logCALL FOR FREE CATALOG800)553-02---=.... 44-page catalog or useyour MasterCard or VISAto order our 50-minutedemonstration video-$10.00Wood-Mizer Products, Inc. • Dept.Indiana call: (317) 271 -1542 J::::!!I_ ... IZ338180 W. 10th St., Indianapolis, IN 46214-2430March /April 1989 25
BOSCHTrimming Laminates or Veneers?Bosch 1608 Laminate Tr imming Systemincludes 5.6 amp motor and complete setof accessories for virtually all shop, installationtasks. Includes standard, tilting andoffset bases.PLANE -MOLD-SAW-SAND TOOLS 4 • tPowerFeed 'InspeedsBoschSet Performance StandardsModel 1581VS. Run it through its 6and 4 blade orbits. Virtually vibrationfree,its controls, blade lock and guide,tilting foot -plate, blade options and 4.8 ampmotor let you meet all sawing requirements.rMONEY! MAKEKiln Dry for others.As the nation's largest manufacturerof dehumidification Dry Kilns,we can supply you with the sametype equipment used by many of themajor firms.Call or write1-80G-648-9200today for freefacts that willhelp you makeand save money.207-9SS-4335Nyle CorporationP. o. Box 1107, Bangor, Maine 04401...Now you can__use this ONE power-feed shop to turn rough.lumber into moldings, trim, flooring, furniture -ALLpopular patterns RIP-PLANE-MOLD·SAND separatelyor in combination with a single motor. Low Cost. .. Youcan own this power tool for only $50 DOWN !FREE T · SEND FOR30-Day I'EXCITING FACTSNO OBLIGATION-NO SALESMAN WIL' CALLFoley·BelsewRUSH Co.TODAY! 6301 Equitable Rd., Dept. 91433Kansas City, Mo.r------- --------------- 641206301 Co.Equitable Rd., Dept. 91433City, Mo. 641200 YES, Please send me complete facts aboutIName ________________________ _ __PLANER-MOLDER·SANDER-SAW and detailsabout 30-Day trial offer.tsla :Address'___________________________Cily' .!i£ iIM'AAITFoley·Belsaw Kansas3 HP Plunge Base RouterErgonomics, superior safety with leverand switch on handle for easy and totalcontrol mark the Bosch 1611. Collet capacityto 1/2".26 Fine Woodworking
Bosch Variable SpeedBelt Sander: As Good AtFine Finishing As It IsAt Finishing Fast.Control One Lets FingerThe Speed You Need. Dial-InNow you can .rely on more thanjust the grit of your sandpaper and the muscles of your arms - tocontrol the quality of your sanding.Believing is getting your hands onthe versatile Model 1273DVS variablespeed belt sander by Bosch.With six different speedranges to choose from, the 1273DVSlets you take advantage of thepower of a belt sander on jobs youmight not have thought possible.Choose a lower speed with a finegrit for finishing sanding - orwith a coarse grit to reduce heatbuild-up and clogging. Combinethe higher speeds with a coarsergrit for faster stock removal, nomatter what the material. Thespeed selector dial is convenientlylocated just under the trigger. Andthe on-board sanding guide helpsyou select the right speed foryour job.The powerful10.5 ampmotor gives youpower -even forheavy -dutyproductionsanding. Andthis sander'sfine balance letsyou control that power withminimal effort.Use the 1273DVS with its owndust collection bag-or connect itto the Bosch Air Sweep 1M Dust Extractionsystem. Change belts withthe snap of a lever. And the uniquebelt tensioning system makes surebelts stay centered through allkinds of work.So check out what a world classvariable speed belt sander cando for the quality of your sanding.See your Bosch Distributortoday - he's listed in the Ye llowPages "Tools - Electric." Let himshow you how this belt sander givesyou more control with one fingerthan others do withtwo hands.BOSCHIIQuality You Can Hold On To." 01988 Robert Bosch i'owerToo1 Corporation
CARBIDE TIPPED ROUTER BITSPROFESSIONAL PRODUCTION QUALITYModel AP-l010n Portlble PlanerList S2000 SpecList 20600 Spec3482;M)iI.9800Model L-120UK 3"10" Planer KitModel Tft-30U 3/4 H.P.•laminate TrimmerList 16300Spec 8900 PPDStandard Accessories Include TrirrmingGuide ('6330010). Slraighl Guide('6950070) and Tnomer Bil ('46775208).17mm (16240533) and 9mm x IOmm('6240623) WrenchesH·7DI.JmI ... TrI_'I, H.P. nn ...List 1S4°O•Model R-150K H.P.Model RE-600 3Plunge Router KitList 2 06'"Spec• 1 PPD 't-:-H.P, ElectronicVariable Speed Plunge RouterList 39SOO•Includes Straight i13mm Wrenc .. h. \"u,"u.,,",.WIeflChMadIt H·5OD 2'/, H.P. Pl1II1II RauIIr ;ncaPPDSpec9aoor..;:;;Incl udes Straiglt Guide (16150453). 1m ITemplate Guide ('6072483).'. .1-...(1607m3) and,.·List 32600 Spec 16900• 185PD _(16072213) BitAdapters. and 24mm Wrench '(16240863)Guide Holder (16070573). Slraigll Guide (16150453). RoI ... ModIl H·600 3 H.P. PIliiii' HouIIrAttachmenl ('6070563). Template Guide ('6090078)('607223) and ,.. (16072213) Bit AdaptersList 34SOO SpeCIncludes same as Oloove item SuppIiaPHILIPPS BROS. SUPPLY, INC. MASTERCARD aNi, 3•@" VISA1927 I3C2525 KENSINGTON AVE . • BUFFALO. N.Y. 14226 .716/839·4800 CHECK ORCALL TOLL FREE 1·800/544·4466 ·IN N.Y.S. l·8oo/238·4466MONEYFAX: 716·839·4051ORDERSPEEDThe Extremely ThinKer1 andHook Aggressive M.btorManufactureabyOldham SawBurt, NYList 51500Spec 22800/SMOOTHNESSThe urge Numberof Teeth ProvideSmooth Splinter·;M)iI.1000's SOLD TO READERS OF FINE WOODWORKINGBEST CUT ITEM LARGE CUTTINGBEST PRICE NO. DESCRIPTION RADIUS DIAM. LENGTH PRICEg..g.611~U11&6056Q#14n. ;"'or#13COVE601 1/4" R 1/4" 1" 1/2" $13.00602 3/S" R 31S" 1-1/4" 9/16" 14.00#03 112" R 1/2" 1-1/2" 5/S" 15.00ROUND OVER#04 114" R 1/4" 1" 1/2" $15.00605 3/S" R 31S" 1-1/4" 5/S" 16.00#06 1/2" R 1/2" 1-1/2" 3/4" 19.00ROMAN OGEE#07 5/32" R 5/32" 1·114" 15/32" $1S.00#OS 1/4" R 114" 1·112" 3/4" 20.003/S" Deep 1·1/4" 1/2" $14.00RABBETING 3/S"(KERF) SLOT CUTTER 1-1/4" lIS" 14.00#10 1/4" (KERF) SLOT CUTTER 1-1/4" 114" 14.00#09 liS"#12 45° 45° 1·1/2" 5/S" $15.00ChamferAngle615 Raised 20° 1·5/S" 1/2" $25.00PanelAngle#35 1/4" V GroovB 90° 1/4" 1/4" $ S.OO636 3/S" V Groove 90° 3/S" 3/S" 9.00637 1/2" V Groove 90° 1/2" 1/2" 11.00#16 3/S" Dovetail 9° 3/S" 3/S" $ 7.50#SO 1/2" Dovetail SO 1/2" 13/16" 12.00(For Leigh Jigs)#17 1/2" Dovetail 14° 1/2" 1/2" S.50#1S 3/4" Dovetail 14° 3/4"10.50CORE BOX (ROUND NOSE)3/16" 3/S" 3/S" $1 1.00620 1/2" CorB Box 1/4" 1/2" 11/32" 14.00#19 3/S" Core BOX!7/S"#21 3/4" Core Box 3/S" 3/4" 5/S" 1S.00Tongue & Groove 1·5/S"$30.00(FOR WOOD THICKNESSFROM 112" to I")624 1/4" Straight Bit 1/4" 3/4" $ 7.00#25 5/16" Straight Bit 5/16" 1" 7.00#26 3/S" Straight Bit 3/S" 1" 7.00#27 1/2" Straight Bit 1/2" 1" 7.00#2S 3/4" Straight Bit 3/4" 1" 10.501/2" FLUSH TRIM 1/2"$ S.50KEY HOLE(This Bit Only HSS) FOR FLUSH MOUNTINGPICTURE FRAMES. ETC. $ S.503/S" KEY HOLE CUTS 3/8"WHEN•ORDERING ANY THREE OR MORE DEDUCT $1 .00 EACHALL PRICES POSTAGE PAIDProfessional Production Quality . 1/2" Ball Bearing Pilot. 1/4" Diameter Shanks x 1-1/4" Long · One Piece ConstructionTwo Flute Thick High Quality Tungsten Carbide TipsTo order by MasterCard or Visa Toll <strong>Free</strong>7 Day-24 Hour Order Service Call'·800·533·9298or send check to :MLCS, Ltd., P.O. Box 4053F1, Rydal, PA 190461"1"28 Fine Woodworking
WHY PROFESSIONALS USEBRAD POINT DRILLSBrad Points are engineered especiallyfor wood - soft wood or hard.The center point (brad point) of thedrill is pushed into the markedlocation for the hole. It locks intoposition and will not slide out. Thenthe motor is turned on. The hole isdrilled where it is wanted.This is the most important part ofdoweling, after proper measuring.The two outside spurs cut cleanentry holes. There is no tear out(splintering) - not even in Oak orCurly Maple - so that if the hole is tobe later plugged to cover a screw,the periphery of the hole will bealmost invisible.These spurs provide smooth holewalls and almost flat bottoms. Adowel should touch bottom to glue properly. Metal working drillsleave a tapered bottom.It is best to own a complete 25-pc set and have every size from liS"to 112" in increments of 1I64ths (.0156") because commercialdoweling is seldom sized exactly. Dowels that are too loose don'tcut ; those that are too tight don't fit.WHY DOLLAR'S BRAD POINTS ARE BEST: Our drills are milledfrom the solid; others are only roll forged. Our brad points andspurs are first milled then ground for accuracy. We use highcarbon, alloy steel. Many others are made from plain carbon steel.Our drills are heat treated and hardened to Rockwell C4S-52. Theyare tough, sharp and long lasting. Most companies that sell drillsdo not know what they are made of, or what the hardness is.AS FOR PRICE, YOU BE THE JUDGE.These drills will fit any 31S" or larger chuck.FREE metal index included.ORDER .to-otao 25-pc Brad Point DriH 5., only $29.95 ea.2 or more sels 10 one address only $26.95 ea.ShiplHandling $3.00 for t, $5.00•for 2 or more 10 one address.CALL TOLL FREE 800 447 7770 ' VISA MC AM EXDolla,' 1I-:I(Iilll( ( o,-p. IEsl 1953) PO Box 8433 Grand Rapids MI 49518Dept FW03 Sales Tax MI 400 CT 7 1 2%NO HASSLE 30 DAY MONEY BACK GUARANTEEAlloy sleel lift'Optional 1 HP power packTHE ONLY DRUM SANDER MADEWITH ALL THESE FEATU RES!$1,00000*ALL THIS FORLESS THAN'Does not include optional itemsFor luther in/ormation contactyour local dealer or ...IIa55INDUSTRIES • INC.P.O. BOX 637 PINEVILLE, MO 64856motor feedcollectorTRUE VALUESIP'IECAl SALE IDUST COLLECTOR1 H P, 2 Bag,4" Connect Hole58" High, 15"x 26" BaseWeight 80 Ibs.Model no. DC-31ONLY $159.00(shipping $20)Customer Satisfaction GuaranteedOne year parts warranty(o-AVlTlaco MA TIC POWER FEEDSK-303FD1 HP, 3 phasesSK-301FD1 HP, 1 phasesSK-321FD1/4 HP, 1 phasesMarch /April 1989 29
leWOODWORKER II best on TABLE SAWWith this ONE ALL PURPOSE blade 40 Teeth and lis kerf.SMOOTH RIP & CROSSCUT I" - 2" ROCKHAROS andSOFTWOODS wilh smooth·as·sanded surface.PLY-VENEERS oak/birch crosscut with NO BOnOM•SPLINTER.Mostly lis kerf 15· ATB and 20· face hook (easyfeed).DOUBLE HARDER and 40% STRONGER CARBIDE.Ends blade changing (does rip, combo and crosscut).Ends scratchy saw cuts (for the rest of your life).Ends second step finishing (jointing and sanding).Ends cutting 1110" oversize to allow for RESURFACE.Buy and sharpen ONE blade instead of 3, 24T rip, SOTCombination, 80T Crosscut.• Strongly recommend our .001llatperfect cut everything!•large stiffener ·dampener against outside of blade for smoothest, quietest,cuts by this and any other blade.Use 30T if ripping mostly 2" - 3" hardwoods.Side wobble held .001-others .004/.010 is common IRAISE for THICK woods, LOWER for THIN woods and; 1 Lisl Sale Lisl Sale12"x40Txl" 51B3 5109 B" x 40PI32" $136 SB212"x30Txl" 162 97 30Tl/J2" 115 6910"x40T 156 94 71/," x30T 3/32" 112 4930T 135 81 7" x 30T 3I32" 112 499" xs:;gbrI'; 50ALSO help your SEARS blade. FREUD, PIRANHA , JAPANESETHIN SAW, OML, LEln,ele.oFORBETTER CUTS!Use our large 1/8" DAMPENERSTIFFENERS, against one side6" - 525 Parallel and flat to .00 I5" - 24 Slops vibration. flutter.cutting noise and bladering.4" - 21 TryableFREE dampener Dr $'0.00 of! with any 2nd blade.•WOODWORKER I Best on RADIAL SAW(tablesaw too) This ALL PURPOSE blade gives scratch freePOLISHED cuts on all materials RIP or CROSSCUT up to 2".All 60T and 3132" THIN kerf 20· ATB and 5· face hook.DOUBLE HARDER and 40% STRONGER carbide.THIN KERF:Saves 1/3 wood loss on each cut, radial or table.Feeds easy when used for moderate rip and crosscut on•table saw.Reduces "JUMP_IN" greatly lor betler "PULL-CONTROL".Practically elinlinates bottom splinter on RADIALCROSSCUT.Totally stops ALL bottom and top splinter on ply veneersin push-cut mode on RADIAL.Our STIFFENER STRONGLY RECOMMENDED AGAINSToutside of blade only for best cuts.Made and serviced in USA for your benefit.LislSale12" x 60T x I" or SIS"519B $1 1910" x 60Tx 5/8"1629" x 60T .< 5/8"156 94S" x 60T xS/8"New Bl/," x 40T x SiS"136 B2RYOBI RA200 TS200MAKITA 500S NBAHITACHI PSMBPORTER CABLE 36S-1Lasereul DADO KIMC MULTITlIDTH dad. sel cuts ALL 11,· - 13/16"U0LS oo N6 s sUT r R9go A , I :fillers and 24T oufslde saws. NOTHING UKE ITiN THE USA !!8" x 24T x 4T x 8T fillers 13/16" set S299S" x 24T x 4T 31," set 24910" x 24T x 4T x BT fillers 13116"sef 362FOR MCP MELAMINE & LOW10" Neg-shear 24T x 2T or 4T fillersSIS" holes - boring extra - SHIPPING 55.5097150 905/8" set S2091/2" set 179For TABLE and RADIAL SAW(very good on chop saw too!) STOP SPLINTERINGthose SPLINTERY OAKS, HARDWOOD VENEERS andthin 2 SIDE LAMINATES ON PARTICLE BOARD.FOR FASTER FEED RATES AND MORE ABSOLUTESPLINTER CONTROL.DURALINE HI·ATNote: Fine WoodworkingEditorial Nov.lDec. 1988No. 73 pg. 65 S.N.recommends !Ji9.!!.alternating top bevel (ATB)thin kerfs and lM9£ bladestiffeners for smoothestcuts on RADIAL SAWS,etc.All 5/S" hole.x 8" BOT9" x SOT10· x 80T12·x80TlOOTJim Forrest.mlcroscoping President cutting edge. and designer,Boring up to 11/4" $7.50 extra- Larger holes - time basis.Shipping $3.50.HI·AT Price ListS202 14" x BOT207 lOOT207 16" x BOT212 tOOT253and RETURNABLE.AVAILABLE SIZES.Lisl SaleFull cash refund.PRESSURE LAMINATESHitachi B1I2" DeWalf Bl/2" B1I2" x 60T x 5/S"8" Neg-shear 24T x 2T or 4T fillers 52593145/S" holes bore to t-c-$179 5 B9204 99Ryobi-Makita 10" x BOT x SiS" 207 10911," 57.50 extra. OthersRyobi-Makita 14"x 100Tx 1" 266 160available. Add 52.00 Shipping.Hitachi 15"xl00Txl" 277 164WE RECOMMEND OUR FACTORY SHARPENING 2-3 DAYS ON THESE AND ALL MAKES OF CARBIDE TIP SAWS SHIP IN UPSUse small stiffener where possible.(500 grit microscoped) 10 x40T 514.25. 60T$16 B3 Add relurn UPS $3 or 2nd Day AI[ $5NOW ORDER Iheone blade that will outlast yout (10-20 sharpenings possible)We honor Amex, VisaSATISFACTION GUARANTEED OR FULL CASH REFUND. Dealer Inquiries Welcome.40 years of fine Amencan saw making & & MasterCard..':J! Money Orders. Personal Checks and COD's IIiIIiiIII '-To order BY MAIL clip ad, circle chOices andsharpeningenclose payment SpeCify Dept FW when ordermgFORREST MANUFACTURING COMPANY, INC.PHONE TOLL FREE!250 Delawanna Ave., Clifton, NJ 07014S232266262294All CARBIDE is THE HARDEST OF THE C-4 gradesand 40% STRONGER. NOT WEAKER'!For 50% to 300% longer life!FREE dampener or S10.00 off with any 2nd blade.CHOPMASTER SERIES FOR MITER SAWS fortight, smooth, splinter-free miter-joints. NEWx Delta 9" x BOT SiS"1-800-526-7852 (In NJ: 201-473-5236)e3A-hp5259.00 (ships freight collect)Toll <strong>Free</strong>,;., $99.00Call(ships freight collect) 1 800 845 9356-6-- - -5348-),"(Shp. & Hd/Q. S30PO)288-4174 S.C. in or1 Hour Brochure VideoP.O.00YESI Please send me yourfree 24 page catalogYESI00 ..Please send me yourI hour V1deo brochure{Enclose SID refundddeposit -SpeCiIy VHS or'leta INameAddressCityStatelZipPhone30 Fine Woodworking
__--- - - - --- -- - - - -- .-IIffiE Qi!:q:0··.····.':.A ·· ...... Our 10th ANNIVERSARY Gift To You!' ..... : i ,'.". .,> ACT NOW! Buy 1-Dozen BeltsSANDING BELTSAvailable In 36, 40, 50, 60. 80, 100, 120,lSD, 180, 220, 240, 320 grit sizes. Pleasespecify when ordering. We will ship anassortment of 24 Fine, Medium andCoarse unless otherwise specllied.BELTS -I weight, a/o, cloth.01 'Ao" x 21" ...... $13.50/doz.o 1" 30" ... 15.50/doz.01" 42" .. . ... 15.70/doz.01" 44" .. 15.75/doz.02" 48" . 19.50/doz.o 2'12" x 16".. 16.50/doz.03" 18" ......... 16.75/doz.03" 21" ... 17.75/doz.03" 23:W .. 17.90/doz.03" 24" .. 18.00/doz.3" 27" .............. 18.50/doz.4" 21"19.95/doz.4" 210/," . . 20.00/doz.o 4" 24" ... 20.50/doz.04'12" x 26" ....... 20.95/doz.4" 36" .... . ... 23.95/doz.4" 52'12" .... 34.95/'12 doz:o 6" 48" .... 32.95/'12 doz:06" 89" .... 57.95/'12 doz:o 4" x 132" .......... 59.95/'12 doz:'(6 FREE)STIKY DISCStiky Disc, Rugged Cloth. Buy 5, get 1 FREE.Available in 50, 80, 120, 180, 240 grll size.6" diameter ............ $5.00/pk.8" diameter . . .... 6.25/pk.9" diameter. 7.50/pk.o 12" diameter ....... 10.00/pk.UJ 0 000 Steel Wool12l---- - ' -- -T---PRŌ S BĒS I SingleyISANDING I10000 Steel Wool ..Pack contains 16 pads.IGetABelts FREE!We are celebrating our 10th Year supplying Beltsand Sanding Accessories direct to the Woodworker.. $3.95/pk.... 3.95/pk."Wooden Memories" PLANSBessie the Cow . . ...... $9.00Bill E. Goat ... .. .. 9.00Beezer the Burro ..9.00o Ole Grey Mare.... 7.00Build an heirloom today!Life like, full size rockers.9" X 11" PAPER SHEETSA/O Cabinet Paper (Brown)50/pk. 100/pk.40-0 . . . $1 7/pk. $31/pk.50-0 ... 16/pk. 2B/pk.60-0 ... 15/pk. 26/pk.BO-O ... 14/pk.24/pk.100-C ... 13/pk. 22/pk.120-C ... 13/pk. 22/pk.150-C ... 0 13/pk. 0 22/pk.Garnet Paper (Red)5O/pk. l00/pk.40-0 ... 0 $17/pk. 0 $31/pk.50-0 ... 0 16/pk. 0 2B/pk.60-0 ... 0 15/pk. 0 26/pk.BO-O . .. D 14/pk. 0 24/pk.100-C ... 0 13/pk. 0 22/pk.120-C ... 0 13/pk. 0 22/pk.150-C ... 0 13/pk. 0 22/pk.1 BO-A ... 0 12/pk. 0 20/pk.220-A ... 0 12/pk. 0 20/pk.No-Load Finishing Paper (White)50/pk. l00/pk.BO-C ... D $1 6/pk. 0 $2B/pk.100-C . .. D 14/pk. 0 24/pk.120-C . .. D 14/pk. 0 24/pk.150-C ... 0 14/pk. 0 24/pk.lBO-A ... D ll/pk. 0 19/pk.220-A . .. 0 ll/pk. 0 19/pk.2BO-A ... 0 ll/pk.19/pk.320-A ... D ll/pk. 0 19/pk.400-A ... D ll/pk. D 19/pk.Wet or Dry SIC Paper (Black)50/pk. 100/pk.220-A ... 0 $1 5/pk. 0 $25/pk.320-A . .. 0 15/pk. 0 25/pk.400-A ... 0 15/pk. 0 25/pk.600-A ... 0 15/pk. 0 25/pk."SANDVIK"o HAND SCRAPER6" x 2'12" x .030 high qualitysteel cabinet scraper.o BELT CLEANING STICK"Sleeveless" DRUM SANDERSNo pre-made sleeveso 'Y," 3" $13.95to buy. Cut your 9 x 1101" x 3" .... 13.95sandpaper, lock Into... 15.95drum and begin02W x 3" .. 16.95sanding.03" x 3" . ... 17.95o 12 Piece Extra LengthDRUM KIT . . $9.95Included are 1 Fine and 1 Coarseabrasive band for each size drum.'12", 'Y,", l", l'12" dia. x 2" long.16 pc. asst., 1 Fine, 2 Medium,Coarse per drum ... $5.95City02" x 3"Bench Top CUSHION CONTOUR SANDERSSimply ... chuck into your drill press or hand drill,inflate to desired hardness and you're ready to go. Youreceive 4 FREE asst. sleeves with purchase 01 sander!2" x 4 '12" Sander w/"le" shaft .......... $34.951 W x 4'12" Sander w!3fe" shaft .......... 33.95Pk. of 5 Replace. Sleeves' 2" x 4'12" . 4.75o Pk. of 5 Replace. Sleeves' 1 '12" x 4'12" .. 4.25'Choose from 80, 100, 120, 150 grit.SAND·O·FLEX UNITMetal SAND-a-FLEX .Plastic SAND-a-FLEX"Ie" Shank Adapter for Metal Sand-a-Flex .o Sand-a-Flex Abrasive Ae-fills' ..'Available in BO, 120, 1BO grits.BOWL SANDING KITSKit includes 1 each, 2" dia. and 3" dia. sanders with Yo"shall. Sander conlonns to the contour of the bowl.Kit comes with 3 flexible discs/sander.1 each. Fine, Medium and Coarse25 2:' PSA FLEX DISCSo 25 3" PSA FLEX DISCSChoose from BO, 120, 1 BO &.•220 grilS. All 25 pes. same gritMITCHELL'S ABRASIVE CORDSITAPEAbr. Cord (.055 dia. x 25 yds 150 grit) ..o Abr. Tape (%2' x 25 yds., 150 grit)Reaches those Unear to impossible places" with ease!o Belt Cleaning Stick 0 Bill E. Goat D --Ole Grey Mare0 Beezer the Burro I NDUSTRIALI1-800-428-2222 (U.S.A.)644 N, 8th STREETREADING, PA 196121-800-222-2292 (PA only)SHIPPING CHARGES - MIN. ORDER $25.00Under $35 add $2.50. $35 or more add $4.00. PA residents add 6% sales tax.o MONEY ORDER 0 MASTERCARD 0 VISA 0 CHECKAcct.________________ --NIE(----------- _____ # Exp.Date _Name PRINTPLEASE State Zip Ii.-___ 0 Bessie the Cow1 W1T1---- 1ORE-FILL PACK. StreetL};. RASIVES co. For Fast Delivery Call Toll <strong>Free</strong> I-- -- ---- ---- ----------------IMarch /Apri1 1989 31
SignatureZipFroID Back Co erto PosterTOOL CHESTLEGACYBiscuit Joiner Handbook-Hugh Foster $14.00John Sainsbury's Router Workshop $19.00Fine Tuning Your Radial Arm Saw-Jon Eakes $9.50The Encyclopedia of Wood (Revised) $19.00Classic Furniture Projects-Thomas H. Jones $12.50Carving Carousel Animals-H. Leroy Marlow $18.00Scroll Saw Fretwork Patterns-Po Spielman $12.50Woodcarving Patterns from Around the World-E.J. Tangerman $12.50The Craft of Log Building-H. Phelps $14.50Workshop Formulas, Tips & Data-K. Swezey $14.50Build Your Own Wood Toys-R.J. DeCristoforo $12.50Blizzard 's Outdoor Toys- Richard Blizzard $9.50Shoji: How to DeSign, Build & Install Japanese Screens-J. Arsdale $15.50The Genius of Japanese Carpentry-SA Brown $24.00The Soul of a Tree-George Nakashima (Paperback) $34.00Sam Maloof Woodworker-Sam Maloof (Paperback)• $38.00Making Kitchen Cabinets-Paul LevineALL PRICES POSTPAID $17.00MANNY'S WOODWORKER'S PLACETO ORDER CALL: 1-800-243-0713; INQUIRIES 606-255-5444602 South Broadway, Lexington, KY 40508Hours: Man-Sat 9-5:30; Visa, MC, Checks, Add $3.00 for COONow available fromFine Woodworking magazineThe response to Fine Woodworking's July/August back coverwas overwhelming. So many of you called or wrote asldngfor a poster reproduction of the exquisite tool chest by H.O.Studley, that we decided to go ahead and print one up.We rephotographed the chest and enlarged the photo to fillthe 18" x 26" poster shown above. Seen at this size, Studley'singenuity and workmanship is even more apparent.The poster is printed in full color on the same book-qualitystock as the Fine Woodworking covers. And we'll mail it toyou carefully rolled to keep it suitable for framing.________________________________________copies89.95 each, plus $2 .50 postage and handling (#180).Name__ ____ ___Address__________________________________City Stateo__ Payment enclosed D1lasterCard 0 VISA 0 Am._Ex.ChargeTAUNTONcard #Exp. Date'--____The Taunton PressMAGAZINES 63 South Main Streeti-----j Box 355PWAM... by fcllowel1lhwii:ISCS --' Newtown, CT 06470__It makes a great gift for you or a friend.To order, use the coupon below or call 1-800-888-TAUNTON.o Please send me of The Tool Chest poster ata•professional production qualitybit makes better edge and endgrain joints by increasingthe glue surface areaIdeal for joining particle andcomposition board, as well•as solid woodMakes super strong mitre•jOintsReplaces•many casesQuick andaccurate:dLmortise and tenon in•set upsJoins1/2" -1" in onepass; 1" andup with multiplepassesFULL SCALEThree 3-wing carbidecutters on arborActualSizeBit #1611/2"Shank• The 3 cuttershave '12" boreand can beused on ashaper with'Ii' spindle.• An additionalcutter can alsobe added to thearbor for use on•a routerIndividualTo order by MasterCard or Visa Toll <strong>Free</strong>7 Day-24 Hour Order Service Call1-800-533-9298 or send check to:MLCS, Ltd., P.O. Box 4053F4, Rydal, PA 19046cutterscost $20.00 eachOrder N161-C forcutter only32 Fine Woodworking
IPanasonicTOOL CRIB OF THE NORTH SINCE 1948<strong>Free</strong>Kit ClockCatalog----------------,Send for your FREE copy of our 56-pagecolor catalog featuring the most intriguingcollection of clock and other rep . roductionkits in the world. Includes kits,dials, movements, tools, hardware, booksand accessories .586 Higgins Crowell Rd., Depl. 2163, W. Yarmouth. MA02673HORTON BRASSESNooks Hill Road, P.O. Box 120FCromwell, cr 06416(203) 635-4400Mfrs. ofFine Hardware for Over 50 YearsSend $3_00 for a Catalogue$VMMER$CJlOOL/Wo°DWORKEf?S, (,.) .S.' GREEN \'/OODWORKING I(,). LADJ)ERBACI{ CHAIRMAKINGToOLMAKING R CH#lIRMAKING lJINVOODWORKERSDSOfOil !90 MILL CREEK RP. I,I.roJAPANESE \JOOI>WOJU{ING '' FOR DETAILS WRITE OR CALL'CUNTW{r W@lH(())'MARSI-lALL, NC 2875) 70'1/6)"6-2281TOLL FREE 1-800-247·7178fCordless Driver-Drill2-5peed, Variable Speed,Reversiblee119.95• ...sale &'. / , sale Price - $189.953 H.P. Plunge RouterModel 3612BR J '" 318" Cordless Drill,10" Miter sawModel LS1020Price - $229.00Variable Speed, Rev.Model 6070DWsale Price - $59.95Finishing sanderModel B04510sale Price - $43.95CALL TOLL FREE FOR•OUR LOW PRICES ONOTHER MAKITA TOOLS. In Wisconsin Gall608-244-4m.5% sales Tax for Wisconsin Residents.HOURS: 8:00-4:30 Monday-Friday.VISA · Mastercard Money Order · CheckFREE FREIGHTOn All ToolsPRICES SUBJECT TOCHANGE WITHOUT NOTICE MADISON,LUMBER COMPANYIN CONTINENTAL U.SAP.O. BOX 76681801 EAST WASHINGTON AVE.WI 53707
The most substantial library ofNew!Direct from the pagesof Fin£ Homebuildingmagazine.LIBRARY, BUILDER'STo create theour editors haveFineselectedHomebuilding 46the bestconstruction-related articlesfrom the first issues ofmagazine. Now for thefirst time, all this hard-wonknow-how is available toyou in a six-volume seriesof hardcover books.Hardcover fonnat fo r long years of use.Proven successful on the job site.Because the infonnation in your library is timeless, we'vemade sure your books are made to last, too. Each bookfeatures a hard, durable cover that will withstand the wearIf it doesn't work in the real world, you won't find it here.Each topic you'll read about has stood up to rigorous workconditions.and tear of constant handling.Detailed color photos and technical drawings.Written by the experts who do the work.Every book in the BUILDER'S LIBRARY is filled withAs you know, the best building info rnlation comes straight detailed, accurate illustrations, photos and technicalfrom builders. In many cases, it took years of solidconstruction work and experience for these authors todrawings that bring the material to life. Whether thesubject is assembling insulated greenhouse shutters ordevelop the in-depth lmowledge you'll find here -they cover building stairs, you get the artwork that shows you exactlythe topicsSix full-color, hardcover volumes cover every aspect of residential construction.as no one else can.what you need to know.Tools far Buildi11!lExperienced home builders give youa detailed understanding of virtuallyevery tool you'll ever need to use.(See the opposite page for details onyour first book in the series.)Frame CarpentryExpert builders address all the majoraspects of house framing -from layingout and framing floors and walls tothe more complex tasks of framing hiproofs, bay windows and donners.Building Floars, Walls and StairsLearn the essentials of stairwayconstruction, how to hang and finishdrywall and plaster, build spiralstairs, sand and finish floors, installcrown molding and more.Building with Concrete, Brick and StoneDiscover what it takes to pourconcrete, work with brick, lay out andlay up a block foundation wall, putdown a flagstone walk or even build amasonry stove.Buildi11!l Doors, Windows and SkylightsBring high-quality custom detailing toany house or remodel. You'll learnabout building traditional entryways,casing double-hung windows andglazing a greenhouse.Building Baths and KitchensWhether it's detailed technicalinstruction on installing countertops orplastic drain lines, this volume isbrimming with infonnation you can useto upgrade your kitchen and bath.34 Fine Woodworking
in-depthinfharne-buildingtian er publishedannaavailable Notin stores!Here's how the offer works:When you subscdbe to the FINEHOMEBUILDING BUILDER'S LIBRARY.you'll J'eceive your first volume. Tools fo rBuilcling. for a FREE 14-day examination.You'll also receive Tips & Techniques fo rBuilders as a FREE gift when you purchaseTools for Building. If you decide to I,eepTools for Buildillg. you'll pay just 823.95 plusshipping and handling (and sales tax whereapplicable).As a subscdber. you'll then J'eceive futurevolumes in the sedes. shipped one at a timeabout every SLX weeks. Each yolume is justS23.95 plus postage and handling (and salestax where applicable) and comes on thesame 14-day examination basis. If you're notdelighted with any volume. you can J'eturnit without obligation. What's more. there's nominimum number of bool,s to buy. and youcan cancel at any time.Framing Hammersb 'fbra .. __ .""""'f«ItSc....,..a(if we do say so ourselves).Tools-forStart yourBuildingcollection...withFrom framing hammers andpowder-actuated fasteners torouters and motorized miterboxes, Toolsfor Building givesyou 176 pages of in-depthanalyses and evaluations ofpower and hand tools. Bydrawing on the job-siteexperience of expertauthors, you'll discover how tochoose the proper tools,speed production, use toolsBuilding Tools forsafely and gain bettercontrol over all your projects.What's more,is yours to examineFREE for 14 days. If you're notdelighted, simply return it!... and you'll receive aFREE BOl\TUS BOOK, too!To welcome you to the BUILDER'SLIBRARY, we'll give you 256 pages ofhard-won constmction tips culledFine HomebuildingTools for Building.from magazine'spopular Tips and Techniques column.This $9.95 book is yours FREEwhen you purchaseBUILDER'SF1nelloLIBRARYmebuildingDYES.____________________________________________________________Please send me my fiJ'st volume. Tools fo r Bui/cling, for a FREE 14-day examinationpedod. If I decide to keep it. I'll pay just 823.95. and receive my bonus book and__ __subsequent volumes in the BUILDER'S LIBRARY as descdbed at left. (#Al lO)NameAddress___________________ ____________________ __ UNTON ---CiStare ZipMail to: The Taunton Press63 South Main Street. Box 355. Newtown. CT 06470To order. use this coupon or the attached cards.BOOI
EMGLOAM3g..HC4V3/4 HP TWIN TANK $268AM78-HC4V1·1I2 HP TWIN TANK 298SAWC-15F8HITACHIC-8F8 8-1/2' COMPOUND MITER $48'15' MITER SAW 369TR·12 3HP PLUNGE ROUTER 16596W/ACCES. VALUE AT S60[).10DD 9.6V 2 SPEED CORDLESS 89F,20A 3-114' HAND PLANERLEEDS DESIGN WORKSHOPS Training ProgramUncompromising attentionto fine workmanship in contemporaryfurniture design.• •One to two year internships in finewoodworking, hand and machineinstruction Drawing•• .• •DraftingProfessional developmentamidst design·maker businessesLoan financing available.EASTHAMPTONONE COTTAGE STMABOX 34801027NewPerfect dovetails Sure/ in minutes?If dovetailing is time·consuminga hassle, you don't need more frustration,The You a..better dovetail JIg: needKELLER DOVETAIL SYSTEM."By far the simplest to usa" _ FINE WOODWORKING"In • dass by itself:' _ WOOD MagazineFast set·up. No test cuts. Precision joinery.KELLER & co. Dept. F39KELLER DOVETAIL SYSTEM(707) 763-93361b find out more, contact your Dealer or1327 'I' st., P8taIuma, CA 94952The quiet I'f!VOlutlon In dovetailing. Join It.:it B.. 121/2" - cet...TA itt . ' eJ10"AirIt ... fjiiIhorizontalRadial$237Arm Planer Band SawFlE?c,1rr -:111E $367 $127 SOURCE® $277 $297AM39HC4V, lWP,12 _ Compressors81/4 Surface Benchtop 3/4 UP 11/2 UPor vertical tanksSaw RA200 2 HPj 115V 28-160 AM39HC4 AM78HC4ifAiiii!iiii7305 Springfield,\I1SA" j. 800-452-9999 800-468-1778Boudinot DriveVA 22150(703) 644·5460ORDER TOLL-FREE US VAAM78HC4VSEND$2.00FORCATALOG36 Fine Woodworking
I I FACEMAKER.• CabinetI I.- Fixture to .,. ---AI Clamp, DrillIII PORTER+mBlE I345"'F, -, & Saew .. . ... .. . . 6 1/2"'Face Frames$279.00... SAW- $97.00BOSSe ,12')(40 Tooth ca_ _ 1t.-,00 7/8 HP Rout,r...l..I ..... Tr1nmO' ..1'310 LamRllle... Lani,..t.lril1"lTl8f TrirTmer 125 1121'319 Tit Bae lMrinIte TrinvnIf 121Yellow Shophelder 5911309Incra Jig34 1'3121536Oft1 112 HPa HO Raul" 113M90 1 112 HP Router 11'l! Dowl CrafterDowling Jig$35.005 SpeedRadi Plane3HDProductionAIRY PNEUMATICRouterTOOLS$31 5.00eQ:5 ...1 112HP Rout,r wI TIb6e 9118M52 Clitidt Door PW'Iner Kit ,.vM29 Var\IbIe Aane Speed tot 271TlOtr s.. KM 135505 112 ShHI Sander10153S2 Tx21-BeltSander wl&.g 1250230 '. Bf.t 518·13/16-0240 11g1.All(025Q '1gII.1I
FInev,,'Or \\bod\ -x l ki ng March/Aprd . 1989Building a Pool TableStarting from scratch with nuts-and-bolts joineryby Paul M. BowmanFig. 1: Pool tableBlind, or apron,fits into dado in railand covers edge ofslate assembly.Body frame's sidesslope at 15° angle.Wood plugs capscrews that secure bodycorners and leg supports.Rail is laminated from hardwoodand softwood and bolted to slate.Rubber cushions, K-66style, are glued to theangled face of the railand covered with cloth.Slate liner, -in.-thick spruceor poplar, is glued tounderside of slates.Slate frame, 3-in. by %-in. poplar,is screwed to top of body frame.Leave a Yrs-in. gap betweenliners where slatebutts.Slate frame crossmembersare 2x6s on edge that fitfrom side to side and supportthe joints between thethree-piece slates.Glue blocks reinforce joints between leg supportand body frame.Leg support is 2xB fir glued and screwed to body frame.Legs shown are splinedmitered boxes, but any stylefrom turned to intricatelycarved can be used.The distinctive crack of the break, brightly colored balls rollingacross the expanse of green and the "plop" of the balldropping into the pocket-these are the sights and sounds ofsatisfaction to pool afficionados. But, few of them have the satisfactionof sinking balls into pockets on a table they've built themselves.Building a pool table is somewhat intimidating, because of thesize of the table and the weight it must support. In addition tothe 400-lb. slate playing surface, a pool table must be able tosupport a person sitting on the edge while attempting a behindthe-backshot. On the other hand, aside from the compound angles,building a pool table doesn't involve anything that's beyond acompetent weekend woodworker with the gumption to take on alarge project.The table described here is constructed much like many highendcommercial pool tables (see figure 1, above). Each section ofthe three-piece slate is glued to a wood liner and then screwed,but not glued, to the main table body, a box whose sides inclinedown and in at 15°. A 2x8 leg support is screwed and glued be-tween the sides at each end of the box. The four legs are attachedto these supports with lag screws or hanger bolts. Bolted on top ofthe slate are six rails, which support the cushions and pockets. Anapron, or blind as it's called on pool tables, surrounds the railsand covers the edge of the slate assembly.The choice of wood, the carving or other decoration on the tableand the style of legs can be custom designed to suit an individual'stastes. But one thing is certain: The table must fit the slate, so buythe slate before you begin working. The slate comes from Italy orSpain, where it is cut to size and the pocket cutouts and holes aredrilled for assembly hardware. The chart on the facing page listscommon slate sizes, weights and playing areas. Unless you'rebuying 100 or more sets, you'll need to locate a local pool-tabledealer in your area who is willing to sell you a single set. Don'tbuy slate that is not predrilled. You'll also need a set of #6 leathercoveredpocket irons, type K-66 rubber cushions and facings, plasticsights for the "dots" in the rails and various hardware. After thetable's built, you'll need cloth to cover the slate, balls, a triangle,38 Fine Woodworking
Cloth, 75% wool, 25% nylon blend, isstretched over the slate bed and stapled tothe edge of the slate liner.Sights are pearl-like inlaysused for lining up bank shots.Pocket irons, #6,with leather pouchand fringeThis walnut pool table, built by the author, has sloping sides and leather-and-fringepockets, which are indicative of an antique-style table. The legs were purchased from acompany that specializes in carving pool-table legs, and the relief-carved blinds are froma millwork-supp ly house. Once you 've located the slates and accessories, there's nothingabout building a pool table that's beyond the abilities of a competent weekend woodworker.Figuring rail lengths3-piece slateRail lengths (in.)The three-piece slate is '% in. thick to 1 in.thick and comes with pockets cut outand assembly holes predrilled. Heightfrom top of slate bed to bottom of legshould measure 29 in.Size Weight Slate Plaving area Side End(lbs.) description between cushions rails (4) rails (2)1x45x85 398 Oversize 7 ft. 4Ox80 36% 37%%x51x95 422 Oversize 8 ft. 44x88, std. 8 ft. * 40% 41%1x51x9544x88, std. 8 ft. 40% 41%484 Oversize 8 ft.528 Oversize 8% ft.612 Oversize 9 ft.*1x53x9946x92, oversize 8 ft. 52% 43%1 x57x1 0750x100, oversize 9 ft. 46%.•The description of the slate size sometimes Formula for calculating rail length:differs from the description of the playing area.=Side Playing length - side pockets (5 in.) -2% in.To determine if your room is large enough. takethe desired playing area and add 57 in the 2length of a standard cue. to all four sides. In tightspots. you can always use a shorter cue. End Playing width - 2% in.47%cues and a bridge. The retail price of the slate and other supplieswill come to about $800. Methods for covering the table and railswith the cloth are explained in the sidebar on p. 43.Slate liner-The slate liner reinforces the brittle slate, anchors thestaples holding the cloth and distributes the effects of the shimsused to level the slate. You should use spruce or poplar lx8 linerson the long sides of the table so there will be enough stock toaccommodate the pocket cutouts. The rest of the liner can be fromlx4s. Be sure all the liner material is planed to the same thickness,or you'll be adjusting for the difference later. Bun the pieces togetherand glue the liner to the underside of the slate with Titebond glue orcontact cement, as shown in the top, left photo on the next page.Hold the liner back about Y16 in. from the edges where the slatesbun so they can be pushed tightly together. Cut out the pockets inthe liner by running a sabersaw blade along the slate cutouts. TheYs-in.- or l-in.-dia. holes along the slate's edge are for the bolts thatwill be used to attach the rails. These holes should be drilledthrough the liner, along with the smaller countersunk holes forscrews to hold the slate to the body.Legs-There's no end to the design possibilities for pool-tablelegs: They can be square, tapered, turned or carved. The only limitationis that you leave a way to bolt or screw them to the table. Thelegs on the table in the photo above were purchased from a dealerwho specializes in duplicating intricate carvings (see sources ofsupply, p. 43). The cross section in figure 1 shows the basic constructionof simple, square legs. An official pool table should measure29':.1.i in. from the bonom of the leg to the top of the slate. For thetable described here, the legs should be about 15Y2 in. tall.Body frame -The body sides are made from 11 ':.I.i-in.-wide 6/4 flatand straight hardwood lumber. If you need to plane the pieces toflanen them, leave them as thick as possible. To detennine the frame'sdimensions, measure the slate's overall size and subtract 7 in. fromeach dimension, so the slate will overhang the body by 31;2 in.Drawings: Kathleen CrotonMarch / April 1989 39
The 3/4 -in. -tbick poplar slate liner is glued witb Titebond glue andclamped to tbe underside of tbe slate. The slate's sides are linedwitb lx8s to overlap tbe pocket cutouts, tben lx4 crosspieces arebutted between tbem and beld back %6 in. from tbe slate edgestbat will butt togetber.To complete tbe body, tbe slate frame is screwed to tbe top edge oftbe body frame, and tbe crossmembers are installed to support tbejoints in tbe slates. Glue blocks, screwed below tbe crossmembers,add support. The slate frame stops sbort of tbe corners to allowpocket clearance, and a 3;4-in. block ties tbe corner togetber.all around. The incline of the sides is common, especially on antiquetables. Joining these angled pieces, however, requires compoundmiters, so I initially crosscut the parts a couple inches longer thanthe final size to allow a little leeway for cutting these miters.I prefer to cut the compound miters with a sliding tablesaw.However, a radial-arm saw will do. The arm of the saw should beswung 17' to the right of its normal, square position, and the bladeshould be tilted to 43Y40. Because the blade may wander in bevelcuts, I cut each end twice: I first cut about Y4 in. past my mark,then slowly trim to the line. You can cut the compound angle onboth ends of each piece without changing the saw-arm setting.First, place the board to the left of the blade, with its bottom edgeagainst the fence and its outside face down on the saw table. Aftercutting this end, roll the board over and slide it to the right of theblade. Measure and mark the long, top edge of the board and cut tolength. After the angles are cut, rip the edges of all four box piecesat a 15° angle so the edges will be parallel to the floor when theslope-sided box is assembled. If you're using a scalloped bottomedge, shown in the photo on the previous page, saw the pattern now;be sure to leave the first 10 in. from each end square for the legs.Assembling the bodyframe-Many commercial pool-table buildersjoin the parts with nails, which are set and hidden with woodfi ller or molding. I prefer the additional strength provided byscrews; the wood plugs covering the screws also add a nice detail.I drill plug holes for the screws that secure the comers and legsupports at the locations shown in figure 1. Then, I drill pilot holesthrough for the screws. I sand to 120 grit with a belt or strokesander and use a vibrating sander after assembly for finer sanding.I assemble the body frame on custom-made 20-in.-high sawhorseswith 2xSx4S-in. tops that can support the weight of the table andslate. The wide tops make it easy to assemble the sides, and thelow height makes it easier to lift the heavy pieces of slate onto thecompleted body. Set the sawhorses where the body will be assembled,and level them in place, shimming beneath their legs, if necessary,to ensure that the body can be assembled square and true.To assemble the four sides, I place the parts upside down on thesawhorses and brush a liberal amount of glue on the miters of twoadjacent ends. Then, I carefully hold the comer in alignment anduse a power screwdriver to run a 1 Y2-in. #10 screw into onehole in the side and one in the end. I draw the comer tightly togetherwith the rest of the screws, being careful not to strip out theend-grain holes. Repeat this process until the body is complete.The next step is to cut and install a kiln-dried 2xS leg support ateach end of the body. Crosscut the ends with opposite 15° bevelsso the supports fit snugly side to side. Then rip one edge of each at15° to fit against the ends of the If body. you scalloped the bottomedge of the body, bandsaw the leg support back away from thescalloped portion of the end so the support doesn't show. Screwand glue the supports in place, running 2Y-l-in.-long screws throughthe predrilled holes in the body frame and into the leg supports.Glue wooden plugs in all the screw holes, and sand them flush.To drill for the lag screws or hanger bolts that attach the legs,make a plywood template the same size as the top of the legs anddrill four evenly spaced YI6-in. -dia. holes. Place the template inthe comers of the leg supports and drill through the template andthe support. Use the same template when drilling the tops of thelegs. Before I tum the table over, I round over the bottom, outsideedge of the body and the four outside comers with a %-in.-radiuspiloted router bit. With a helper, I tum the body over and reinforcethe leg supports by gluing and screwing in hardwood glueblocks cut from scraps from the table sides (see figure 1).A frame to support the slate completes the table's body. It'smade from 3-in.-wide 6/4 stock and should overhang the bodyframe by 1 Y-l in. all around. Cut off the comers of the end piecesat 45° for pocket clearance, or let the parts come up short of thecomer, as shown in the photo above, right. Screw and glue thisframe to the top of the body. Install two crossmembers to supportthe joints in the slate. The crossmembers should be at least 1 Y2 in.by 5Y2 in. (a standard 2x6) and cut to fit on edge from side toside. Glue them to the frame, and run a long screw into each oftheir ends from the outside of thebodyframe. Screw and glue a blockunder the ends of each 2x6 crossmember for support. I usuallyalso glue in side blocks to prevent twisting. With a sabersaw, cutout 6-in.-dia. arcs tangent with the for the side pockets. Finally,round over the inside edges on the top of the frame so it's easierto insert wedges between this frame and the slate liner when levelingthe slate. Now, set the slates on the body and slide themaround until they're tightly together and centered on the frame.The rails -The rails, more than anything else, make a slate-top tableinto a pool table. They can be made from a single piece of clear,straight hardwood, but hardwood and softwood laminated rails,shown in figure 2 on the facing page, reduce the possibility ofwarping and provide softwood for stapling on the cloth.The most critical rail dimension is the cushion height. Accordingto the Billiard Congress of America, the point of the cushionshould be 11%2 in. from the bed of the slate on a standard tablewith 2Y-l-in.-dia. balls. The balls tend to climb a lower rail and beforced down under a higher rail. This height is determined by the1 Y-I-in. thickness of the rail in conjunction with the 15° angle of itsface. If you vary the thickness of the rail, you must adjust the faceangle to provide the proper cushion height, as shown in figure 2.To make the laminated rails, you'll need six l0/4x3V4x4S-in.40 Fine Woodworking
softwood boards (I prefer poplar because of its stability) and six%x3Y:zx48-in. hardwood boards. Mill enough for one extra railfor tool setup and test cuts. Saw out a 2 \!.i-in. by 11/16-in. rabbetin each piece of the softwood by making two cuts on the tablesaw.Glue the hardwood segments into this rabbet, and when dry, planethe hardwood flush with the softwood. Begin shaping the rail byripping the 15° and 45° angles along the length of each rail's cushionface. On its top, cut a \!.i-in. by 'l'16-in. groove about 7/1 6 in. backfrom the 15° angled face. This groove is for the feather strip, whichsecures the cloth to the top of the rail. On the bottom of the rail,saw a shallow Y2-in. by Y32-in. rabbet where the rail cloth will bestapled. Finally, set the dado blade to just skim the back edge ofthe softwood as you cut a Y4-in.-deep dado for the blind into thehardwood. Mold the top edge of the hardwood with a router orshaper to add a detail and break the sharp corner.Use the chart on p. 39 to determine rail lengths for your playingarea, and crosscut the rails to length. These lengths are figured for #6pocket irons, so be sure that's what you use. Bore %-in.-dia. holes inthe rail ends; 2 in. should be deep enough for the pocket "ears" (seethe left photo on p. 42), Center the hole 2 Y:z in. back from the pointcreated by the 15° and 45° angles of the angled face and % in. downfrom the top of the rail. I drill the holes with a spade bit in an electrichand drill, using the bit's long shaft to align the hole.Assemble the rails and pockets on the slate to check your playingarea. Be sure the pockets are tight in the ear holes, and checkthe whole assembly for squareness. Tape pieces of cushion rubberonto rails across from each other, using double-faced tape, andmeasure the distance between their "noses." The measurementsshould be your desired playing area. If your measurements are long,you can trim the ends of the rails to leave the proper playing area.Now you can cut the pocket angles on the rail ends with theradial-arm saw. The angles and sizes for the pocket openings areshown in figure 3 on the next page. The ends of the rails thatborder the corner pockets are cut with the blade tilted to 10° andthe arm set at 52°. For the side pockets, the arm is reset to 15°. Theangle in the rail's horizontal plane creates the correct-size openingfor the pockets. The angle in the vertical plane serves to extendthe cushion's nose around the ends of the cushions.Cutting the pocket angles is much like cutting the opposite compoundmiters for the body: Cut one end, roll the board, move it tothe other side of the blade and cut the other end. However, all thepocket-angle cuts should begin at the back of the feather-stripgroove. So, cut the first rail to the right of the blade, with it's outsideedge against the saw fence and its top side up so you can seewhere to begin the cut. The opposite cuts are made to the left ofthe saw blade with the top side of the rail face down. This makes itdifficult to line the cut up with the feather-strip groove, so line upthe first rail you cut with the other rails, bottom to bottom, to markthe location of the top-side-down cuts. The end rails get the 52°corner-pocket angle cut at both ends (in opposite directions), whilethe four side rails have one of their ends cut at 52° and the otherscut with the saw arm reset to 15° for the side pockets. After theangles are cut, use a router to extend the shallow rabbet on thebottom of the rails, along the angled ends, for stapling the cloth.The cast pocket irons are anchored in the ear holes with 6-in.by I-in. bolts run up through the rail. Drill 1-in.-dia. holes, deepenough to countersink the bolt heads and washers, directly belowthe threaded holes in the pocket ears. Then, drill a Y2-in.-dia. holethrough to the ear hole. The bolt should screw into the ears whenthe pocket is snug to the rail, and it should have enough play forminor adjustments during final assembly.Attaching the ralls -There are several different ways to attach therails to the table: lag screws, mortised nuts, threaded inserts andthreaded discs. Threaded discs, often referred to as metal railplates in billiard-supply catalogs, are used most often, but they maybe hard to find. I'll describe how to use them, but the same basicprocedures apply for the other methods as well.To locate the threaded discs, assemble the rails and pocketstightly together on the slate. Center the assembly by lining theFig. 2: Rails and blindsHole, % in. dia., for pocketIearHardwood, 3% in. by 'Y'6 in.1--.;-----'\'---4% --'----+--_lFeather strips, 'k in. by 'k in. softwood, are used to secure rail clothin the feather strip groove.Rubber cushion, type K-66Softwood,3% in. by 1% in.Threaded discBlock forsecuringblind toslate linerFender washerRail bolt, hex head% in. dia by 2% in.Slate, 1 in. thickSlate liner, % in. thickRail cloth, 5% in. wideSlate frameBody frameMarch /April 1989 41
Fig. 3: Bed-and-rail assemblySights are spaced equidistant within playing area (cushion to cushion).Pocket ears----End-rail lengthOffsetbetween theend of one railand the nose ofI t-----oE90° the cushion at to it is 1Y16 in.
idea to screw down the center of the slates along the joints unlessyou need to pull down a bowed slate, which is very uncommon.Run your fingers across the four points where the slate jointsmeet the edge of the table to detect any difference in height. Ifthere's a difference, loosen the screws in the lower slate and raiseit by inserting a playing card or folded paper shim between theliner and body. Repeat this until the three slates are even at thetable's edge. If your body frame is straight and true, the slatesshould be too. To double-check this, stretch a taut string from endto end, near the edge of the table, anchored to nails in the slateliner. Slip a coin or poker chip beneath the string at each end anduse another chip as a gauge to test for equal clearance along thelength of the slate. Next, the joints are felt their whole length. Ifone piece is lower, drive a 1 \l2-in. by 6-in. softwood wedge, taperingup to in., between the slate liner and crossmember. One personcan tap the wedge in place while a helper feels for the momentwhen the two pieces of slate are even. When the three pieces of slateare as even as possible, putty the joints with "Durham's Rock Hard"(available from local hardware stores) and a wide putty knife. Anygouges, scratches or screw holes in the playing area should also beputtied and sanded smooth. After the putty has hardened, use 120-grit sandpaper on a block to gently sand off any excess. Putty andsand again if necessary, then brush the table clean.The bed of the table can now be covered with the cloth, as describedin the sidebar below. Then, the rails and pockets are assembledon the covered bed, as shown in the photo (right) on thefacing page. The rail bolts and washers are inserted through theslate liner and slate and finger-tightened in the threaded discs.Then the pocket-and-rail assembly is centered on the slate, and theend rail bolts are tightened with a socket wrench. Sight down theside rails and adjust them until they are straight, then tighten themdown. To test their alignment, roll a pool ball down the side rails.The ball should pass the side pockets without catching a point of thecushion. Nail or screw the loose ends of the woven leather pocketsto the underside of the slate liner, making sure that the balls will notescape through this opening. Lastly, slip the blinds up into the dadoin the rails, and screw through the glue blocks into the slate liner.Fine-tuning the table -To check the table for final leveling, holda pool ball between your thumb and fi rst finger about 12 in. aboveone of the rails. The line from your thumb to your finger shouldbe perpendicular to the front of the cushion rubber. Drop the ballso it will strike the slate and the front of the cushion simultaneously.It should travel across the table at 90° to the cushion; if the tableis the slightest bit out of level, it will roll toward the low point. Asan alternate technique, grab a cue and shoot a ball slowly the lengthof the table, about 6 in. from the side rail. As the ball slows andstops, it will veer toward the low pOint, if the table's out of level.The severity of the ball's drift, using either method, will helpestimate the thickness of the shim needed under the leg towardthe low point. Lift the table from the end so both legs are off thefloor, and have your partner place the shims under the proper leg.If you pick up only the low corner, the torque is sure to break theputtied joints between the slates. Repeat this procedure around thetable until the balls show no drift.Paul Bowman is a freelance writer and builds pool tables on specialorder in Vancouver, British Columbia, Canada. For an articleon turning a pool cue, consult FWW #59, pp. 66-69.Sources of supply ______ _Wholesale billiard-supply houses usually won't sell to individuals,so find a local dealer or pool-table manufacturer who will sell youthe slates and accessories. If that fa ils, you can order everythingyou'll need, including slates, from the following supplier:Tucker's Billiards, 3381 Ashley Phosphate Road, North Charleston,S.c. 29406For machine-carved legs and decorative blinds:Adams Wood Products Inc., 974 Forest Drive, Dept. 1-3, Morristown,Tenn. 37814DCovering the rails and slate bedby Eldridge TuckerExperience has convinced me that the bestcloth for pool tables is a blend of 75% woolto 25% nylon, with a weight of 22 oz. perlinear yard. A purist might prefer all wool,but the nylon adds durability, and the heavyweight is well worth an extra couple dollarsper yard. It comes 62 in. wide; you'll needaround 3 12 linear yards. Figure 4 at rightshows how to cut the cloth for an 8-ft. tablewith a playing area of 44 in. by 88 in. Adaptthis layout to the size of your slate.Attaching the cushions: After the finishon the rails is dry, the cushions are glued tothe angled face with either contact cementor yellow glue. The top edge of the rubbershould be flush with the top of the rail. If youuse yellow glue, use masking tape to holdthe rubber in place until the glue dries.After the glue has set, trim the rubber tolength. Hold the rail so the cushion nose isdown against a board or workbench, align aknife blade with the pocket angles and slicethrough the rubber from base to nose to extendthe angle. Dip the knife blade in waterfor a smoother cut.Fig_ 4: Cloth layoutFor 8-ft. table with 44-in. by 88-in. playingarea53/.127Rail cloths, 56 in. by 5% in. each(six needed) 5%The cushion facings, made of laminatedrubber and canvas, reinforce the cushionends and cut down on the springiness of thecushion so the ball is not deflected too easilyout of the pocket opening. Contact-cementthem to the angled ends of the cushions andrails, flush with the beginning of the pocketangle and the top of the rail and cushion.Trim the facing's other edges to the contourof the rail with scissors or a knife. Break thetop and front edges of the facing with sandpaper,as shown in the top, left photo on thenext page, so a corner won't tear the cloth.Covering the cushions: You'll need six\I4-in. by \I4-in. softwood feather strips tosecure the cloth to the rails. Lay a featherstrip in the groove on each of the rails so it'sflush at one end, and mark the other end forlength. Before removing the strip, make aline near its center, extending onto the railand cushion, as a reference for lining up thestrip when the cloth is being secured, asshown in the top, right photo on the nextpage. Remove the strip and cut it to lengthwith a saw or chisel. Then, lay one of theMarch /April 1989 43
precut rail cloths so its edge lines up on thejoint between the wood and the rubber.Place the feather strip on the cloth above thegroove, align the centerlines and tap thecenter of the strip partway into the groove.Work toward one end, tapping the strippartway in and pulling a little tension on thecloth in the direction you're working. Continueto the side-pocket ends, but stop about6 in. back from the corner-pocket ends.While holding the feather strip down in thegroove, pull about 2 in. of cloth through thegroove below the strip, as shown in the rightphoto this page, to create a "pucker" so youcan stretch the cloth around the angledcushion. Drive the last 6 in. most of the wayinto the groove to secure the cloth.With a wood block, tap the length of thestrip into the groove so it's just proud of therail's surface. Trim the excess cloth by slicingwith a knife against the cushion side ofthe protruding strip. Flip the cloth over thefeather strip and cushion, and with a clothwrappedblock, tap the strip flush with therail's surface. Stretch the cloth tightly overthe corner-pocket angle, and staple it to therail right behind the facing and on the rail'sbottom near the edge. The photo (right) onp. 42 shows where to staple. On the sidepocketends, fold and tuck the cloth like youwould wrap a gift, with the open part of thefold on the lower edge of the cushion. Pullthe cloth tight and staple like you did on theother ends. Starting at the middle of the rail,stretch the cloth tightly over the cushion andstaple it every 2 in. in the shallow rabbet onthe rail's bottom. Trim the excess along thisrabbet and close to the staples on the ends.Covering the slate bed: After the slate'sjoints have been puttied, you can cover theslate bed. Start by lining the pocket cutoutswith 1 'l2-in. by 12-in. strips of cloth contact-cementedto the edges of the slate andliner. Brush the slate clean of any small particlesleft from sanding the putty, and lay thecloth down so it overhangs the slate evenly.Figure 5, below, shows the steps forstretching the cloth over the slate bed. Alwaysbegin at the center of a side and stapleThe cushion fa cing is contact-cemented tothe angled rail end and cushion, thentrimmed with scissors or a knife. The fa cing's sharp edge is eased with a sandpaperblock so it won't tear the cloth whenstretched tightly over the pocket angle.the cloth every 3 in. into the edge of theslate liner. Work toward the corner pockets,pulling the cloth slightly in the directionyou're working. Staple to within 2 in. of thepockets, to leave some play for stretchingthe cloth over the pocket cutouts.Pocket cutouts: To stretch the clothsmoothly over the pocket cutouts, you'llneed to make radial cuts in the cloth withinthe pocket areas, as shown below. Grasp thecloth at the pocket and pull it down gentlyto reveal the outline of the pocket cutout.With a razor knife, cut in the center first andthen once or twice on either side to createtriangular tabs. Always cut toward the cloth'sedge. Again starting at the center, pull downfirmly on the tabs and staple them in a neatline near the slate liner's bottom edge. Trimthe cloth as close to the staples as possible,to avoid a loose flap that a hand may catchwhen retrieving the balls from the pocket.The feather strip is driven into the grooveto within 6 in. of the corner-pocket ends.Here, about 2 in. of the cloth is pulledthrough the groove to create a wrinkle or'pucker, , which helps stretch the cloth overthe corner-pocket angle.Trim the overhanging cloth around the table ifit's long; if there's not too much excess, theblinds will hide it. Finally, cut circles out of thecloth with a knife for all the rail-bolt holes. Ifyou just make an X-cut, the cloth will getcaught in the bolt's threads. Now assemble therails and pockets, and bolt them in place onthe slate bed as described in the main article.All that's left is to place the center spot forlocating the rack of balls for the break. I runa string between the middle Sights on twoopposite side rails, at the end where the ballswill be racked, and one between the middleSights on the end rails. Holding a level alongsidethe strings, I mark on the cloth the pointwhere the two strings intersect and placethe self-adhesive spot. Now you're ready.Rack 'em up. 0Eldridge Tucker has been in the pOOl-tablebusiness for 30 years. His shop, Tucker Billiards,is in North Charleston, S. CFig_ 5: Covering the slate bedFirst1Staple from centertoward each corner,pulling slighttension towardcorners.Start cuts 1 in. frompocket cutout in slate.:e;oftS'lStaple every3 in. Stop tFourthPull tightly; staple from side pocket to corners.1J!SecondPull tightly;staple fromcenter towardeach corner,pulling slighttension towardcorners.Size of arrowsindicatesamount oftension tobe used.ThirdStaple from side pocket to corners,pulling moderate tension straight across table.44 Fine Woodworking
Finishing with onModem products for an age-old processby Michael DresdnerAn oil finish's beauty, as well as its easy and forgiving application qualities, make it an ideal finish for woodworkers who have littlefinishing experience or who don't want to invest in spray systems or other specialized equipment.The expression "hand-rubbed oil finish" conjures an imageof the venerable craftsman practicing an ancient craft tobring beauty to a fine piece of woodworking. Oil finishestrace their lineage to "China wood oil," an Oriental tung-oil mixturereputed to go back 800 years. Although they are still widely usedtoday, oil finishes must compete for space on the paint-storeshelves with the most advanced chemical soups and coatings thatthe wizards of technology dish up.Without question, oil's long suit is its simpliCity, both in terms ofits subtle appearance and its ease of application. Oil is generallythe first finish a fledgling woodworker will attempt, because it requiresvirtually no equipment and will yield excellent results tothe most inexperienced hand. Many consider a basic oil finish tobe the only finish that allows wood to look "natural," imparting therich color characteristic of freshly surfaced wood, while leaving thepores open and the surface feeling uncoated. And for those whoview finishing as a necessary evil, the wipe-on, wipe-off modern oilfinish is perhaps as close as you can get to not finishing at all.Oil finishes have come a long way since the old days, when applyingan oil finish was an involved process, requiring hours ofarduous labor. The old-timers who taught me about woodfinishinghad been trained to rub boiled linseed oil into the wood withtheir bare hands, following the "rule of two:" twice a day for aweek, twice a week for a month, twice a month for a year, andtwice a year for life. Unquestionably, this process still will producean excellent finish, but few woodworkers, and fewer customers,are willing to agree to the sustained effort needed. As a result, the"modern" oil finish, one buffered with resins and prepolymerizedoils, has taken its place. But just as few old-timers understood whatboiling had to do with linseed oil, most craftsmen today have adim understanding of what modern oil finishes are all about. I recentlyinvestigated about a dozen oil products and talked to severalmanufacturers, and I'd like to share what I learned about oil finishes:what they're made of, how they cure, how to go about applyingthem and how to use them when repairing and refinishing.Oil mixtures-In spite of what manufacturers claim in their advertisingand literature, various brands of oil finishes are more alikethan they are different. Most commercial products, including "Danish-oil"finishes by Minwax, Watco, Waterlox and Deft, are mixturesof oil, resin, driers and a solvent. The natural oils most commonlyused are linseed oil, pressed from flaxseed, or tung oil, from thenut of the tung (Montana) tree. The oil finishes made by Minwaxand Watco, two of the best-known brands in the field, are of alinseed-oil base, while Deft Danish oil and Waterlox's "Transparent"are based on tung oil. Although there are many other naturaloils, linseed and tung are inexpensive and readily available.Resins added to oil mixtures may be natural or synthetic. Themost common are modified alkyds, which are often added to linseedoil, and phenolic resin, which is used with tung oil. These resinsare solids-in many cases the same solids used in varnishes andlacquers-and add bulk to the oil mixture. They result in a harderfinish, one that builds film thickness quickly, because the solids fillthe pores of the wood more readily than oils alone. The solventdissolves all the components of the mixture and reduces its viscosity,which makes the finish easier to apply and increases its ability topenetrate the wood. The most common solvent used in commercialproducts is mineral spirits, though some products use turpentine.Curing-Most oil mixtures include driers, heavy-metal salts thatspeed up the drying process. Although both natural linseed andtung oil will dry by themselves when exposed to air -a reminderto keep oils in closed containers with little airspace-raw oils maytake weeks or even months to dry. By adding driers, this time isMarch / April 1989 45
educed to a matter of hours. The driers, sometimes referred to as'Japan driers," include zinc, cobalt, magnesium, manganese andlead. Some of these work as "top driers," causing the oil to forma "skin;" others act as "through driers," causing the oil to dryevenly throughout.Linseed oil, as well as tung oil, can be purchased as raw oil,without driers in it. Linseed oil also comes boiled, with driers added.In spite of its name, boiled linseed oil is not actually boiled: Themetal salts are added with the help of a chemical catalyst. The referenceto boiled is probably a throwback to an early process inwhich oils were heated to help dissolve the metal salts. Usedalone, boiled linseed oil makes a credible finish, and there aresome purists who will use nothing else to finish their woodwork(see the sidebar on the facing page). Another method manufacturersuse to shorten oil's drying time is polymerization. In fact, mostcommercial tung-oil products are partially polymerized. The processinvolves heating the oil, causing a percentage of its molecules tobond, which increases the oil's viscosity and shortens its dlying tin1e.Application-The first thing most proponents of oil finishes raveabout is oil's most alluring feature: It is easy to apply. You simplywipe it on, and after a short time to allow for penetration andsolvent evaporation, you wipe off the excess. The time this takesmay vary, so it's best to go by the manufacturer's recommendationson the label. It is almost impossible to get bad results; theamount of oil applied and the speed, pattern and method of applicationhave virtually no effect on the result. You don't even needspecial equipment or a dust-free room to get excellent results.However, because oil finishes don't hide surface imperfectionsvety well, you must sand to a finer grit than necessaty for surfacecoatingfinishes, such as lacquer or varnish. Final sanding shouldbe to at least 220 grit, but it may need to be 400 grit or 600 gritwith fine-grain woods, such as rosewood or ebony.The first and second coats of oil tend to be completely absorbedinto the wood's surface and act as a sealer. Once the wood is saturatedwith cured oil, successive coats will start to form a film onthe surface. You can get an etfect that ranges from a barely perceptiblefinish in a single sealer coat to a glossy film, which can takefrom two to five coats. Because oil is a reactive fi nish (once itdries, subsequent coats will not redissolve it), a dried oiled surfacecan be recoated by wiping, brushing or even dipping, without fearof disturbing the dried layer. Some woodworkers prefer to do finesanding while the surface is drenched with oil, which helps tobuild the finish quicker, because the wood's pores get fi lled with asluny of wood dust and oil. I don't care for this approach though,because it puts sanding dust and grit into the pores and spoils theclean look I like my oil fi nishes to have.About the only major mistake you can make with oils is neglectingto wipe off the excess before the oil dries. This will result in asticky mess, which must be scrubbed off with steel wool. Althoughacetone or lacquer thinner might help lubricate this abrading process,neither is a true solvent for cured oil. If you need to removean oil finish by redissolving the film, about the only thing that willwork is methylene chloride, the active ingredient commonly foundin paint and varnish removers.The one common glitch that users of oil finishes often run into is"bleeding." On large-pore woods, such as oak, there is a tendency forthe extra oil trapped in the pores to leach out and form shiny spotson the wood's surface. This generally occurs only on the first coat ortwo, until the cured oil seals the pores. Bleeding can often be avoidedby applying the oil early in the day and rewiping the surface everyhour or so until the leaching stops. Once the spots are left to harden,there is no way to remove them except by sanding the surface withfme paper (400 grit) or by stripping the finish entirely.While oil's simple nature is its advantage, it also contributes toits downside. An oil fi nish is an inherently weak finish, whichwears off easily and has a very low moisture-vapor resistance. Becauseoil is largely absorbed into the wood rather than becoming afilm over it, the wood surface is given little protection from abrasionor staining. Although some people contend that an oil fmish can casehardenthe wood surface, evidence suggests that the effect is due toresins added to the mixture and not the oil itself. Because of its lowmoisture-vapor resistance, water molecules can penetrate easily, andoil also offers little protection against alcohol and other liquids. Thismakes oil a poor choice for furniture, cabinets, tabletops, counters orother wooden objects used in wet or humid conditions. Due to oil'spoor performance as a vapor barrier, it also offers little protectionfrom changes in humidity-one of the most important functions ofany wood finish. Therefore, designing with regard to expansion andcontraction is essential for work that's to be oil-finished.Despite the easygoing attitude finishers have toward oil finishes,there is one very serious warning: Oil-soaked rags or paper towelsare ready prey to spontaneous combustion; if left in a pile, theycan heat up and burst into flames on their own accord. Therefore,any oily rags or paper should be disposed of quickly and carefullyby incineration or by being completely immersed in water. If youcan't do this immediately after oiling, hang the single-thickness ragup to dry until it can be disposed of properly. Although oil fumes arenot as hazardous or offensive as those produced by most lacquers,you should work in a well-ventilated area, wear a vapor respiratorand rubber or neoprene gloves when handling or applying oilmixtures. Also, many commercial oils are toxic, and unless otherwiseindicated on the label, they shouldn't be used for woodeneating utensils or children's toys that are likely to be chewed, suchas baby blocks or rattles.Repairing and refinishing-Oil's reactive dlying properties andforgiving application qualities make it a finish that's extremelyrepairable. A white water ring or a damaged spot can be lightlysanded or steel wooled, and new oil can be applied. Due to itsinability to redissolve itself, the newly applied oil will not affect theundamaged finish in the surrounding area and will blend the spotalmost invisibly, even if the finish is many years old. With oil's repairabilitycomes a responsibility for maintenance. Ideally, an oilfinish should be rejuvenated with a new coat evely year or so,depending on the amount of wear it's subjected to.While oil may be the ideal solution for a new project, it is oftena poor choice when refinishing. Bob Flexner oforman, Okla., anexpert in antique conservation and repair, points out that the originalfinish on most old pieces was seldom oil. He considers oil aninappropriate replacement finish for most commercial and evenpre-industrial revolution handmade furniture. Few commercialfurniture producers today use oil finishes on their furniture (seethe sidebar at right for some exceptions). Even woodwork that iscommonly believed to be finished in oil, like Swedish and DanishModern furnishings, is more often than not fi nished with a thinfilm of catalyzed lacquer. In spite of oil's low cost, ease of applicationand moderately innocuous fumes, it remains the province ofthe individual craftsman. There, an oil finish's subtle good lookscontinue to be the earmark of handmade furniture.Michael Dresdner is an instrumentmaker and woodfinishing specialistin Zionhill, Penn., and a contributing editor at FWW. Hewill conduct a seminar entitled "Understanding Finishing" theweek of August 7th at Anderson Ranch Arts Center, Box 5598,Snowmass Village, Colo. 81615; (303) 923-3181.D46 Fine Woodworking
Using oil finishes: two approachesWhile oils are often the finish of choice forbeginning woodworkers, there are manyprofessionals who prefer to use them aswell. I recently discussed oil-finishingmethods with two woodworkers who representcompletely different-size shops:woodturner David Ellsworth, who worksalone, and Tom Moser, founder of Thos.Moser Inc., a 90-person furniture- andcabinet-building company.Ellsworth, one of the most prominentturners in the world, produces a variety ofwork, including the hollow forms that arehis hallmark. Wood turners are a strongbastion of allegiance to oil finishes, and likemany of his peers, Ellsworth finishes hispieces with a tung-oil product, specificallyWaterlox Transparent.After power-sanding with 320-grit paperon a foam-back disc, a process Ellsworthclaims is equivalent to hand-sanding with600 grit, he soaks the outside of the piecewith Waterlox, spreading it on evenly butnot wiping it off. Because he generallyturns wood while it is still green, the oil isbeing applied to the outside of a relativelywet turning even before the inside hasbeen turned. Ellsworth leaves the inside ofhis pieces unfinished.As the tu rning dries, more coats of oil areadded, the exact number depending on thewood's porosity. When both the oil andwood are thoroughly dry, he buffs off the oilresidue using tripoli or white-diamond compoundapplied to a 6-in. stitched-cottonbuffing wheel spinning at 3,500 RPM. This isfollowed by further polishing with a cleanbuff The process removes all of the surfaceoil, leaving only finish that has been absorbedby the wood. The turning's exteriorlooks as if the wood has no finish on it at all.The ability to get what Ellsworth calls a "natural"appearance is what led him to chooseoils over other finishes he had tried. Whilehis application methods may be unorthodox,the results are excellent, as witnessedby this oil-fmished vessel at right (above).A notable exception to the fact that mostcommercial furniture companies don't useoil finishes is Moser. His company grossesmillions of dollars yearly building Windsorand Shaker-style chairs, such as the onepictured at right (below), tables and casegoods that are finished in linseed oil.Flying in the face of the furniture industry'sconventional wisdom, Moser proudlypoints to the beauty and durability of theboiled linseed-oil finishes on thousands ofhis tables and chairs. The soft, natural appearancegives each brand-new piece thefeel of a vintage classic; in fact, Moser saysthat chairs that are 10 or 15 years old lookAfter turning this 24-in. -tall, 13-in. -dia.vessel from redwood-pitch bur4 Ellsworthapplied tung oil to give it a soft, rich finish.The inside is left unfinished.A simple finish of boiled linseed oil on topof a polished surface of cherry wood sandedto 400 grit gives Moser's 'reader's side chair'a soft appearance that ages gracefully.better than the new ones. This is especiallytrue on the arms and back, which are enhancedby repeated contact with humanskin and the subaceous oil it secretes.Moser admits that offering only oil-finishedfurniture was a sales obstacle at first,because potential customers were used toseeing lacquer and varnish finishes in thefurniture stores. With time, however, hisbuying public came to associate his style offurniture with what he calls "an extremelylow-tech finish." But after trying dozens offinishes, including lacquers, polyurethanesand oils other than linseed, Moser settled onthe finishing procedure he still uses today.Preparing a wood surface for an oil finishis conSiderably more time-consuming thanfor any other kind of finish. A full one-thirdof his shop's production hours are spentsanding the pieces up to 3M's 40-micronImperial Microfinishing Film paper, a polyesterfilm-backed sanding material that 3Msays is equivalent to 300-grit paper. (Theproduct comes in sheets and self-stick 5-in.and 6-in. discs, ranging in grits from 9 microns[1,200 grit] to 100 microns [150grit]. It is available from 3M, Box 33053, St.Paul, Minn. 55133-3053.) Moser's woodsurfaces are indeed smooth and feel finishedeven before the oil is applied.To increase penetration, Moser's finishersheat the boiled linseed oil to 120°F beforeapplying it to wood. The oil is appliedwith fine Scotch-Brite pads and allowed todry for about four hours before it is wipedoff with special industrial-quality papertowels. To avoid the danger of spontaneouscombustion, the oil-impregnated towels areburned after use. After the first coat, thewood is resanded with 400-grit paper, thena second coat is applied, and if needed, athird coat. When the oil is dry, two coats ofButcher's Wax are applied and rubbed downwith 0000 steel wool. The wax gives the surfaceits characteristic sheen, and incidentally,helps repel water slightly. Moser's customersreceive a furniture-care kit consisting ofsandpaper, steel wool and a small jar of wax.How does Moser deal with oil's poormoisture-vapor protection and low abrasionresistance ? Wood movement is accommodatedfor in case goods by making a differentfit fo r drawers and doors in winter thanin summer-"a nickel fit versus a dime fit,"as Moser puts it. As for abrasion resistance,Moser sees the marks of wear that furnitureaccumulates as part of its overall charm. Hetells of a table in his house that bears theimprint of a Spirograph drawing his son didas a 6-year-old child. "It is a beautiful signatureon that table," Moser remarks, "andthat's priceless."-M.D.March /April 1989 47
Blanket ChestDovetails and wooden hinge are easier than they lookby John DunhamFig. 1: Blanketchest'IIIO;;;.-. ...J--E----- ...::..-.::t-1 __ PivotinghandleFrame-and-panellid, % in. thickHinge-barrel segmentsSteel rod, 46% in. long, V. in. dia.Plug endswithdowels.Chest,1 %-in.-thick cherry16%Bottom, % in. thick,rabbeted into groovePedestalDrawer front,rabbeted for sides... Drawer glideUse flexible wood strip tolay out curves on chest sides.48 Fine Woodworking
When people see my blanket chest, the first thing theynotice is the curved sides, which appear to requiresome especially complicated dovetails. Next they noticethe hinge and wonder if a metal hinge can really be replaced bywood. When they try to test it, they can't find the handle. If they'rebold, they reach for the rectangular cutout in the lid and are startledwhen a handle pops up at the touch of a finger. They areusually so caught up in these obvious details that they miss what Ithink is the real surprise: the drawer hidden in the base.I designed the chest pictured at right nearly 20 years ago when Iwas a graduate student in furniture design at Virginia CommonwealthUniversity in Richmond. It remained one of a kind for a long time,but in the last few years, I've built several on commission. In theprocess, I've worked out a way to rough out the curves on the sidesquickly by running them perpendicularly across a tablesaw moldinghead. And, I've learned to cut the dovetails after the curves areroughed out, to avoid chipping them out when I cut cross-grainwith the molding head. By reproducing the chest, I've been able tostreamline the hinge construction so it is simple and straightforward.I've seen a lot of wooden hinges, both at craft shows and in thepages of Fine Woodworking. Most of them, although clever, are difficultto make, requiring intricate router jigs; or, they are bulky, somewhatfragile finings out of scale with the box or piece of furniturethey're arrached to. This wooden version of a piano hinge, however,is strong, easy to build and designed as an integral part of the chest.The 13 turned hinge segments are alternately glued onto the backframe piece of the frame-and-panel lid and the back edge of thechest after these two overlapping partS have been notched to meshwith each other. I use a l;4-in.-dia. steel rod for a hinge pin insteadof a long dowel, to eliminate the squeak of wood against wood.It's the combination of these features that challenge the builderand ultimately please the owner of this blanket chest. If you decideto tackle this project, you'll need about 52 bd. ft. of 8/4 cherry forthe chest, base and hinge, and 8 bd. ft. of -in. stock for the lid.The chest-Begin by gluing up about 36 bd. ft. of the 8/4 cherryfor the front, back and sides, then plane these parts to 11;2 in.thick. The front and back will finish up 48 in. by 161,12 in.; the twosides, 19 in. by 161,12 in. To lay out the curves on the outsidesurfaces, draw a symmetrical arch on the endgrain of one of theside pieces by bending a thin strip of wood across it and drawingalong its arch, as shown in figure 1 on the facing page. The curveshould begin about 1 in. from each edge and peak in the middle atjust under in. The 1 in. at the ends allows room for final shapingto achieve a continuous curve from top to bottom.You could cove the sides by running them diagonally across aregular sawblade, taking small cuts and raising the blade untilyou've removed most of the waste. However, my molding-headmethod, shown in the lower photo this page, speeds up the processconsiderably. To make the cove cut, I clamp a wooden fence to thesaw table 81;4 in. from the center of the arbor and perpendicularto the blade. I replace the blade with a three-cutter molding headwith Y2-in.-radius cuners and set the blade to take only a l;4-in.-deepcut. I run an edge of each of the pieces against the fence so theygo over the spinning cunerhead perpendicular to it. Then I flip thepieces around and nll1 them through again, with the opposite edgeon the fence. I raise the cuner and repeat the process until I've cutan arch within 1,132 in. of the line. I move the fence about 1,12 in.farther from the cutter, lower the cutter so it takes only a l;4-in.deep cut and repeat the process at the new fence sening. I keepmoving the fence and adjusting the cutter until the curve isroughed out. The rotation of the molding head helps keep the workagainst the clamped fence, and the sharpened arch of the cuttersThis cherry blanket chest features curved and dovetailed sides, awood piano hinge, a pivoting flush handle and a drawer hiddenin the deeply coved pedestal base.Dunham speedily roughs out the curved sides by running thework perpendicularly across a molding head fitted with %-in. -radiuscutters. To remove the waste up to his layout line, he adjuststhe cutter height and the clamped fence, and runs opposite edgesof the piece against the fence.allows easy crossfeeding. As with any power-tool operation, thinksafety. Make sure your hands are well away from the cutter, anddon't force too deep a cut in a single pass: I recommend a maximum1;4 in. per pass. I smooth the slightly fluted surface of the roughed-outcurves with a round-bottom plane before assembling the chest.The dovetails look tricky because of the curved sides. Actuallythey're regular dovetails, but they can only be laid out on the flatinsides of the parts. First, lay out the pins on the inside surface ofthe ends. I use a 9'" angle for the five pins with a half pin at eachend. Saw them out with a handsaw or bandsaw as you normallywould. To prevent chipping when chiseling out the waste, I backup the curved side with a soft woodblock bandsawn to match thecurve. The tails are scribed from the pins onto the inside of thesides and cut in the same manner. When they've been fitted so allfour sides pull tightly together, dry-clamp the chest and mark thepins and tails where they extend past the curves of the adjacentside. Take the chest apart and trim these ends on the bandsaw. Atthis time, dado each of the four carcase pieces for the bonom, % in.wide, 1;2 in. deep and % in. from the bottom edge, with a routeror tablesaw. Stop the dadoes about in. from each end, or they'llshow on the outside of the completed chest. The -in. plywoodbottom is rabbeted all around its bottom surface so it fits into thedado. Then the chest is glued up.Because the lid is a flush fit, you'll need to cut a -in.-deeprabbet around the inside of the chest's top edge. The rabbet is in.Drawings: K:lthleen CreslonMarch / April 1989 49
Fig_ 2: Pivoting handleFront of chest "Ud p,"elPress here to pivot handle.Hollowslightly.1,%Fig. 3: Notches for hinge39°I //I \/Rabbetfront andsides,% in. by% in.by o/.! in. on the front and ends, but it's only '12 in. wide along theback, to accommodate the hinge. I cut the rabbet in several passeswith a 'I2-in.-dia. straight, carbide router bit and a fence clampedto the base of the router that runs along the outside of the chest : Istop the rabbet when I get close to the corners. After all thestraight runs are done, I take d1e fence off the base and removemost of the waste left in the corners freehand with the router. Iuse a gouge to clean out these corners to a smooth 1/2-in. radius.Sanding completes the chest. I prefer to sand by hand: It's quieter,and besides, these curved surfaces don't match platens of any electricsanders I know of. I begin with 60-grit sandpaper that has aheavy-duty cloth backing and sand to 120 grit. Later, when I applythe oil finish, I wet-sand wid1 220 grit.The chest's frame-and-panel lid is made from o/.!-in.-thick solidstock. The frame parts are 2'12 in. wide, joined with mortises ando/.!-in.-long tenons that I cut on the tablesaw. The o/.!-in.-thicksolid panel is rabbeted from both sides on the tablesaw to leave atongue that fits into grooves in the frame. Because the back framepiece gets notched to become part of the hinge, it and the frontpiece run fu ll length, with the side pieces fitting between them.Size the parts so the assembled lid will fit into the rabbet in the topof the carease, with its back edge extending flush with the outside ofthe carcase back. However, don't glue the lid together until thehinge is completed, because the hinge work is so much easierwhen the frame is apart. Round the front corners of the frame to fitinto the -in. radius of the chest's rabbet, then dry-clamp the lidtogether and check its fit on the chest. Take the lid apart to installthe handle in the panel and to do the hinge work.Figure 2, above, shows how the wedge-shape, pivoting handle fitsinto the cutout in the lid's panel. It's best to make the cutout firstand fit the handle to it. Begin by drawing a 2-in. by 41/2-in.rectangle, centered lengthwise and % in. from the panel's frontedge. Drill a hole in one corner of this rectangle and insert a saberor coping sawblade to saw the rectangle out. With a block clampedto your router base as a fence, cut a -in. by -in. rabbet alongthe front edge of the cutout on both sides of the panel to create alip that acts as a stop for the handle in both its open and closedpositions. Hollow out the back surface of d1e rectangular cutoutwith a gouge to allow clearance for the handle to pivot.The handle is made as shown in figure 2. Cut out the basicwedge shape on the tablesaw, but leave the piece long so it's easierand safer to handle when making the finger hole. Hollow out thefinger hole % in. deep by drilling a series of holes with a %-in.-dia.Forstner bit and cleaning up the bottom with a gouge or on arouter table with a %-in.-dia. core-box bit. Crosscut the handle tolength, and drill through the handle fo r a 'I4-in.-dia. steel pivotpin. Chisel two slots, '12 in. by '14 in., in the bottom of the lidpanel to receive the pin. Sand the handle until it fits snugly butpivots easily, then set it aside. The handle isn't installed until afterthe lid is glued up and both the handle and the lid are finishsanded.Then, you'll plug the pivot slots by gluing in woodenblocks trimmed for a snug fit.The hinge- ow you're ready to bevel and notch the chest's backedge and the lid's back frame piece so they will mesh and swingpast each other, making d1e hinge. On the top back edge of thecarcase, lay out for the 4-in. hinge segments, starting and endingwith 2-in. lengths. Draw a line with a combination square acrossthe top edge and down to the bottom of the rabbet. Saw and chiselout every other segment, beginning with the first 4-in. segment oneach end, to leave a flat angled surface from the top outside edgeto the bottom of the rabbet (see figure 3, this page). Make theinitial cuts with a dovetail saw on the waste side of d1e lines, stoppingshort of sawing into the rabbet's base or into the chest's outsidesurface. Then, chisel out the waste between d1e sawcuts.Next, you will notch the back frame piece to mesh with thenotches you just cut in the chest. First, measure in 1 in. from thebottom back edge of the frame piece, and mark this point on oneend. Draw an angled line on d1is end from the I-in. mark to d1etop, back corner. The angle will be about 39°, the same as youchiseled on the back edge of the chest. Tilt the tablesaw blade tocut this angle. Because most tablesaws don't tilt past 45°, set the tiltangle at 39° from the vertical and run the frame piece edge downand with its surface flat against the fence. Rip this angle the lengthof the piece, d1en hold the frame piece against the notched backedge of the chest and mark it for the COinciding notches. Extendthe marks across the angled surface wid1 a square, and saw outalternate segments. I crosscut to the lines with the tablesaw bladeset to cut 1 in. deep by holding the frame piece on edge and runningit over the blade using the miter gauge. Then, I bandsaw out the50 Fine Woodworking
notches and pare them clean with a chisel. After you round theframe piece's notched ends to match the radius of the rabbet's corners,it should drop into the rabbet, flush with the chest's top, itsnotches meshing with those on the chest back, as shown in figure 3.To make the barrel of the hinge, begin with 13 1 -in. by 1 -in.blocks that are slightly less d1at1 4 in. long. Crosscut two of theblocks 2 in. long for d1e ends. Make sure all end cuts are square,and use a stop block to ensure uniform length. Mark the center onone end of each block, and after checking your drill-press table tobe sure it's square with the bit, bore a V4 -in.-dia. hole througheach block. To mount the blocks on the lathe, I replace the pointof the spur center with a short piece of Vt-in.-dia. metal rod,which fits into the hole in the blocks, and use a cone-bearing centerin the tailstock, which centers itself in the holes. The blocks areturned to 1 V2-in.-dia. cylinders. Lock your calipers at 1 \t2 in. andmake sizing cuts with a parting tool at both ends and at the centerof each block. Then remove the waste between these cuts with alarge gouge. After turning, the holes in the blocks are reamed outto %2 in. and the cylinders are strung on a V4-in.-dia. steel rodthat is approximately 50 in. long with threaded ends. Arrat1ge thecylinders in the order you want them on the chest, with a 2-in.segment at each end, and clamp them with a washer and nut oneach end. I line up the segments as closely as possible and sandthe whole hinge barrel smooth. This segmented dowel Cat1 now berun across the joiner as if it were one piece of wood until you'vegot a flat area 1 in. wide. I number the cylinders on this flat sidebefore I remove them from the rod so I can reassemble them onthe chest in the same order.ow you're ready to glue the hinge-barrel segments to the lidframe. To aid in clamping these segments, clatTIp a I-in. by 4-in.board to the underside of the fratTIe piece so it extends out overthe 39° angle, as shown in the photo this page. Then dry-clamp oneof the 2-in. segments at one end. Start at the od1er end and glueand clamp the numbered hinge segments to the frame piece. Linethem up with the fratTIe's back edge, at1d align them by sightingthrough their holes. Use the sequentially numbered segments to testfo r the proper spacing between the segments you are gluing. Whenyou reach the end, unclamp the dly-clat11ped 2-in. segment and glueit in place. You Cat1 test the alignment by numing the rod throughthe segments, but I've found the eyeball method works every time.After the glue for the hinge segments dries, glue up the frameat1d-panellid. Clamp to d1e flat, notched areas, not to the hingesegments. When the lid is unclamped, position it on d1e chest, andonce again, Sight through the holes as you glue the remaining bingesegments to the chest. ClatTIp these hinge segments to the back ofthe chest with pipe clamps. Remove the lid while the glue dries,and chip off any glue squeeze-out between the segments. Whenthe glue has thoroughly dried, replace the lid and slide a 46V2-in.long, Vt-in.-dia. steel rod through the hinge barrel. The first timeyou operate the assembled hinge, do so cautiously. Minor adjustmentsto the angled notches are usually necessary. Note anywherethat they don't swing smoothly past each other; remove the hingepin and file or sand the offending parts. When the hinge operatessmoothly, open and close it a few times. If any of the hinge segmentsare rubbing end to end, you will see a polished area ontheir endgrain when you take the hinge apart again. Fix these witha sanding block. When these adjustments have been made, trap themetal hinge pin by gluing short sections of doweling in each end.The base -I laminate the pedestal from 2-in.-thick stock. The longsides are each glued up from two pieces of 2x4x48-in. stock, andthe end pieces are glued up between the sides so the endgraincontinues across the whole end of the base. One of the ends isThe author aligns the hinge segments by sighting through theirholes while gluing them to the lid frame. The lx4 clamped to theframe piece extends over the notched and angled edge to aid inclamping the hinge segments.Fig. 4: PedestalCut covewithmoldinghead beforegluing up.Glue up from2-in.-thickstock.Bandsaw end blocks to profile before glue-up.split horizontally for the front of the hidden drawer. Before lamilutingthe long sides, preshape the profile as much as possible onthe tablesaw, as shown in figure 4, above. For the end without thedrawer front, glue up two blocks 5V2 in. long by 4 in. wide.These two blocks get glued together side to side when the wholebase is assembled, but first I mark the profile of the cove on theirends and saw this curve out on the bandsaw. The end with thedrawer front is made up of four pieces of 2-in.-thick stock: two5V2 in. wide by 4 in. long for the drawer front and two 5V2 in.wide by 5 in. long for the base. These four pieces are bandsawn tod1e cove's profile, and d1e drawer-front parts are glued together.Before gluing up the base parts, plow a %-in. by %-in. dado onthe inside of the two long pieces, as shown in figure 4, to insertglides for d1e hidden drawer.The pedestal can now be glued up at1d the %-in. by I-in. drawerglides glued in. To be sure the base is flat, I clamp the long piecesto my tablesaw while gluing the base together. I do as muchcleat1up as possible on the cove wid1 curved-bottom moldingplanes, then I scrape and hand-sand to 120 grit. The carcase is securedto the base with screws from the inside of d1e carcase bouom.The drawer front is rabbeted so the drawer sides can be gluedon flush to its sides (see figure 1 on p. 48). Rabbet or dado thedrawer back into the sides, and groove d1e drawer parts for d1eV4-in. plywood bouom. Finally, carve a finger grip in the undersideof the curve in the drawer front and slide d1e drawer into the base.All that's left is to install the pivoting handle in the chest's lid, plugd1e pivot pin slots and sand d1e plugs flush.The chest is now ready for finishing. I use a minimum of threecoats of Watco Danish oil, wet-sanding the first coat with 220-grit wetor-dlYsandpaper. I often leave the inside unfinished to avoid trappingthe smell of the oil. You could also line the inside of the chestwith d1in, aromatic cedat· paneling -adding one more surprise. 0John Dunham builds custom furniture in Glens Palls, N.Y.March /April 1989 51
ASandpaperwide variety of gritty choicesby Robert Erickson and Jerry TecklinIn our furniture shop, more than 50% of our time is spent shapingand smoothing wood with abrasives, usually some type ofsandpaper. The labor involved and the cost of the abrasivesmake these operations very expensive, so we began a detailedstudy of the bewildering array of abrasive products on the marketto determine which products would increase the productivity ofour belt, orbital and drum sanders. We found that the vast technologicalchanges that have occurred in recent years offer woodworkersmore options than ever, but you need a basic understanding ofabrasives to take advantage of these new products. Even in nonproductionsituations, we think the following information canmake sanding a less tedious chore for the individual woodworker.A little history-Early woodworkers made their own sandpaperby using hide glues to attach flint, quartz, brick dust or fine volcanicpowders like pumice to parchment. Even in ancient times, theterm "coated abrasive" was valid; all it means is some type of backingcoated with an adhesive that holds the actual abrasive particles.American inventors revolutionized the abrasives industry in thelate 19th century when they synthesized aluminum oxide and siliconcarbide, which are harder, tougher and sharper than any of thenaturally occurring abrasives. The variety of abrasives continued toincrease as manufacturers experimented with both natural andman-made abrasives bonded to paper, cloth, fiber or polyester-filmbackings. We concluded that the backings play a major role in theperformance and life expectancy of an abrasive.Shaping and smoothing-In our shop, we break the abrading orsanding process into three stages: shaping, smoothing and finishing.Traditionally, thickness planers and handplanes were used toshape or change the dimensions of the stock, but many productionshops, like ours, now rely more on various belt and drum sandersfor rough-milling operations. Both flat and curved surfaces can beworked. In cases of highly figured woods, abrasive tools are actuallyfar more effective than planers and other cutters, which can tear thewood. We do most of our shaping with 40-grit abrasives, which canremove material quickly without clogging up or burning the wood.Smoothing involves refining the form, polishing the piece andremoving any tool marks, glue residues and coarse grit scratches.Smoothing, like shaping, is done mainly using belt, drum and orbitalsanders, but hand-sanding also is often necessary. To get awell-sanded surface with a minimum of effort, use abrasives in aprogression of grits, starting with the coarsest and progressing tothe finest (the higher the number, the finer the grit). Each grit sizeThere are coated abrasives available today to satisfy anywoodworker's shaping, smoothing or finish-sandingneeds. The cornucopia of products comes in awide variety of grits, backings and formats, as isevident in this photo. A basic understanding ofabrasives is needed to choose the right materialfor your application.52 Fine Woodworking
will leave a characteristic pattern of scratches in the wood's surface.The goal with each grit size is to effectively (and efficiently)remove scratches made by the previous grit, producing an everincreasingscratch density but decreasing scratch depth. When thescratch pattern is uniform, you're ready to change to the next finergrit. Sometimes, skipping a grit in the progression will only makethe work harder and take more time. For the coarser grits, you willbe able to tell by feel (or by eye) when it's time to change grits; forthe finer grits, the best way to evaluate your progress is to useraking light to examine the scratch pattern with your eye. For mostwoods, even your eye won't be able to discern scratches made by400-grit or finer papers, so instead, again using raked lighting, lookfor a diminished "foggy" or matte surface before changing grits.For grits finer than 220, sanding might more aptly be called polishing.Here, the changes in surface are so subtle that a trainedsense of touch rather than your eye can be a better indicator ofhow the work is going. These final polishing steps in preparationfor applying finishes are critical, requiring care and patience toensure that the finish will show off the wood grain and color to itsmaximum advantage. Most stains and oil finishes will magnifyscratches to an embarrassing degree; stains applied to poorly preparedsurfaces often appear blotchy or mottled, especially onsoftwoods. Don't neglect these final stages, because it's virtuallyimpossible to remove scratches from finished surfaces without agood deal of work and mess. To ensure high-quality surfaces, wegenerally spend about 20% more time on smoothing and polishingthan we do on shaping. The last grit used before applying a finishdepends largely on the wood and the finish itself. On soft, openporewoods, such as mahogany, 120 grit or 180 grit is sufficient,especially if a pore filler and lacquer finish is being used. For veryhard woods, such as ebony, or when oil finishes or stains are used,400 grit, and sometimes even 600 grit, is necessary to remove allvisible scratches. On pieces to be painted or lacquered withopaque colors, 120 grit is usually sufficient. The role of abrasivesin the finishing process itself is discussed in the sidebar on p. 55.Manufacturing abrasives-The abrasives industry is highly competitive,so companies are reluctant to reveal their manufacturingprocesses. Basically, a continuous sheet of backing material runsunder a spreading mechanism, which uniformly deposits the abrasivegrit. The abrasive itself is screened to the desired size, which determinesthe cutting power of the final product. With more advancedelectrostatic coating, the process most commonly used today, thebacking is passed through an electrostatic field located above aconveyer carrying the abrasive. The negatively charged abrasivegrains are attracted to the positively charged backing and becomeembedded with their sharp points faCing outward. Because thepoints face outward and the grits are so uniformly dispersed, sandingefficiency is about 20% to 25% better than with abrasives madewith the mechailically spread grain coating process. Once the abrasiveis bonded to the backing, the gritty surface is reinforced withadditional glue or resin and the material is formed into variousbelts and sheets. Manufacturers' product literature does not generallyrefer to how the abrasive was made; you must contact themanufacturer directly for this information.Most abrasive products are classified as "closed coat" or "opencoat." The backing on closed-coat abrasives is completely coatedwith abraSive; only about 40% to 70% of the backing is coated onopen-coat abrasives. These uncoated areas mean the paper will beslower to clog or "load up" than closed-coat products. It makessense to use open-coat products when working with soft or oilywoods, painted surfaces and other substances that tend to gum up.Suppliers recommend closed-coat abrasives for hardwoods and forshaping applications where you want to quickly remove a lot ofmaterial. In our shop, however, we've found that the difference incutting ability between open- and closed-coat papers is not thatgreat. It's also easy to clean the cheaper, open-coat papers with thecrepe blocks available from most woodworker suppliers. Just turnthe sander on and press the block against the moving abrasive.Most suppliers offer abrasives coated with a load-inhibiting substance,such as zinc stearate. Norton's "No-Fil" and 3M's "Fre-Cut"product lines are examples. The stearates are soft, powdelY mineralsthat act as a lubricant to minimize heat buildup and prevent thesanding residue from sticking to the abrasive grains. While it's desirableto use the nonclogging, stearated papers on raw woods,particularly oily woods like teak, they're a necessity for scuffing offpaste-filler residues and for sanding between coats of most finishes.Because these papers are "lubricated," they prevent the buildup ofheat, which can soften some finishes. Papers greater than 400 gritare not available with stearates. Here, it's best to use wet-or-dlYpapers with naptha, mineral spirits or water as a lubricant.Selecting an abrasive -Hardness isn't the only factor in selectingthe proper abrasive. Equally important is toughness, the propertythat allows the abrasive grain to wear down slowly while maintainingsharp, cutting edges by fracturing along the definite cleavageplanes. Woodworkers understand these qualities in a practical wayand know the abrasive is worn out when the cutting action decreasesand the paper begins to clog and heat up appreciably. Garnet rateslowest in terms of both hardness and toughness. Silicon carbide rateshighest in hardness, but only above garnet in toughness. Zirconiaalumina is tops in toughness and only above garnet in hardness.Aluminum oxide is surpassed only by silicon carbide for hardnessand by zirconia alumina for toughness. This combination of hardnessand toughness makes aluminum oxide a popular choice ofboth professionals and hobbyists.The cutting abilities of abrasives vary dramatically, so it's importantto match the abrasive to the task at hand. When we openedour shop 16 years ago, we only used garnet, which is a naturalgemstone (described as an iron/aluminum/silicon amalgam). It isespecially useful whenever sanding heat might burn the wood: forexample, on the hard endgrain of oak and curly maple. Garnetdoesn't heat up, because it fractures so easily that fresh, sharp surfacesare constantly exposed. This also means, however, that garnetwears out rapidly. Consequently, the much harder, synthetic grainshave all but replaced it in our shop. Aluminum oxide and siliconcarbide have become the real workhorses in our operation. Becausethey don't wear down rapidly or scratch deeply, they're ideal forshaping or finish-sanding. Scratches are well defined and widerather than deep, and so are more easily removed, which is whatit's all about. Silicon carbide, which is synthesized from silica sandand coke, is much harder than aluminum oxide and almost as hardas diamond. It has sharp-edge grains that shave rather than grind;the grains have a self-sharpening quality, splintering off as theywork, presenting ever-fresh, sharp cutting surfaces. Instead of followingour normal grit sequence of 100, 120, 180, 220, 400, we'vefound silicon carbide helpful in enabling us to use a 100-150-220-400grit sequence. This is an immense time-saver for even a small productionshop like ours.Zirconia alumina (or alumina zirconia) is an alloy not quite ashard as silicon carbide or aluminum oxide, but velY aggressive andtough. We've found its aggressive cutting action and long-wearingqualities useful in shaping, but for finish-sanding, its aggreSSivenessis easily misapplied. A little too much pressure sometimescauses deep scratches, requiring extra time and effort to remove.One additional point on abrasives: Color is not a reliable prod-March /April 1989 53
Grit comparison between grading systemsMicron U.S.A. European Coarseness AughtCAM I .p'" Grade I'IIting systemGrade9 - 1000 -600 - -P1200 Extra Fine15 -500 - -P1000Applicationsuct-recognition device. Aluminum oxide, for instance, appears intans, pinks, blues, browns and grays. Suppliers may also identifyproducts with trademark labels instead of more descriptive generiCnames, as shown in the chart at the bottom of this page. 111e tradename primarily identifies the kind of grit, but manufacturers oftenuse the same label for products with different backings, bondingadheSives, open-coat, closed-coat and lubricated abrasives. Again,the best way to be certain you're getting what you want is to contacta sales representative or knowledgeable supplier (see sourcesof supply on the facing page).400 - -P800-P600360 --P500 Very Fine 101030 -320 - -P400 9/040 - 280 - -P360-P320240 - -P280 8/0-P240 Fine 71060 - 220 - -P220 6/0180 - -P180 5/080 -100 -120 -150 - -P150 Medium120 -4/0-P120 3/0100 - -P100 Coarse 2/080 - -P80 1/060 - -P60 Very Coarse 1/250 --P50 140 - -P40 1 1/236 - -P36 230 - -P30 2 1/224 - -P24 320 - -P20 Extra Coarse 3 1/216 - -P16-P12 412 -41/2• Manufacture ... names for abrasive grainsGrain type Norton 3MGarnet Garnet 3M GarnetAluminum oxide Metalite 3-M-iteAdalox ProductionNo-Fil Adalox ImperialResinall Cut-RiteSilicon carbide Durite Tri-M-iteWetordryZirconia alumina NorZon CubicutCeramicaluminum oxideCubitronGrits abovethis lineare usefulforfinishing.Grits inthis areaare usefulforsmoothing.Grits belowthis lineare usefulfor shaping.CerborundumGarnetFastcutAluminum-OxideAloxiteFastcutDri-LubeFastcutSandscreenGrit size-The coarseness or fineness of a particular sandpaperand the amount of material it will remove is determined by thesize of the grain-its grit, in common parlance. Understanding thegrading system for sandpaper is easy. Eighty-grit paper, for example,has grains that passed an 80-hole-per-inch screen but were trappedby the finer 100-hole-per-inch screen. The confusing part is thatdifferent manufacturers use several different grading systems, asshown on the chart at left.Backings and bondings for abrasives-We use abrasives withpaper, cloth and polyester-film backings. Generally, though, thenature of the backing and bonding material determines how wellthe product will hold up under heavy use.Paper backings are designated by the letter A, C, D, E or F. Asthe letters progress, the papers get heavier and stiffer. For example,the lightest, most-flexible "A" paper weighs 40 lbs. per ream(480 sheets, each 24 in. by 34 in.); the heaviest and stiffest "F"paper weighs 170 lbs. The lightest-weight papers are prone to rip,so they are mainly used for fine hand- or light machine sanding.Their flexibility makes them ideal for smoothing contoured surfacesand for getting into tight corners and crevices. Our shop uses mainlyA- and C-weight papers for orbital and hand-sanding, J- and X-weightcloth fo r beltsanding and polyester-film backings in both belt andsheet formats. Generally, light-weight papers are found with finegrits; the coarser grits need heavier papers to minimize tearing.Cloth backings also are designated by letter and come in sheetsand belts. J-weight cloth is light, flexible and strong; it is probablythe most-used cloth backing. (We found Ekamant's Extraflex J-Clothmore durable than any other product we've tried on our Singleycylinder sanders.) X-weight is a heavier, drill cloth for medium- andheavy-duty applications. Other less-common cloth backings includecotton, rayon and polyester. Their weight classifications, fromlightest to heaviest, are ], X, Y, T and M.Paper and cloth backings are affected by climatic conditions.Sanding belts and drums should be stored away from heat ormoisture sources and hung singly on large-radius (4 in. dia.) wallhangers to prevent creasing and cracking.Polyester film backings offer both high strength and toughness.They have a subtle rigidity that helps get the high spots out of flatsurfaces like tabletops. Their effectiveness makes us overlook thefact that the polyester sanding belts are more prone to tearing thancloth belts. The polyester backings are available with virtually everytype and grade of grit, but the material's thickness conSistencyand high strength make it especially effective with the finest grits.Heavy-backing materials combined with larger grit sizes are notvery flexible, so some companies provide "preflexed" products forcontour sanding. During manufacturing, the backing is flexed tocrack the bond in one or more directions, usually 45° or 90° to therunning direction. These products are especially handy fo r strokeand drum sanders, and for hand-sanding.Manufacturers use animal-hide glues and urea or phenolic resinsto bond abrasives to the backings. The adhesive is important. Unfor-54 Fine Woodworking
tunately, manufacturer labels don't usually indicate which glue hasbeen used. The highly flexible hide glues have low heat resistanceand are not moisture proof. This isn't a problem for dry sanding orlow-heat generating applications. But, with wet sanding or for beltsanding,where heat buildup is a conSideration, water- and heatresistantresin bonding should be used. Fortunately, whether or notthey're labeled, most products you buy for these hard applicationswill be resin bonded. The best way to determine if you're usingthe right stuff is to watch what's happening while you're sanding: Ifthe bond fails or the backing wears out before the abrasive getsloaded with sanding residue, you should contact a knowledgeabledealer to order a resin adhesive and/or a stronger backing material.Putting it aU together-The industry is large and highly competitive,so you can get excellent assistance from sales representativeslisted in the yellow pages under "abrasives." The major manufacturersmaintain technical-assistance centers that will help you solvesanding problems. Keep in mind that the industry serves a muchgreater public than woodworkers. Consequently, there may beproducts out there that were never intended for woodshop use,but which might be very useful.We don't want to leave the impression that technical knowledgeof coated abrasives is a substitute for that most-elusive quality-theright touch, which all good finishers have. One of our finishers,Abrasives in finishingTove Killigrew, was both dazzled and amused by the knowledgewe had acquired about coated abrasives. Her approach is to "justtry things." And, her guiding prinCiple is simple: "It doesn't serveyour purpose to sand too fast."DRobert Erickson and Jeny Tecklin make chairs and furniture inNevada_______City, CalifSources of supplyA variety Of abrasive materials and technical help are availablefrom the fo llowing companies:Carborundum Abrasives Co., 6600 Walmore Road, Box 350, NiagaraFalls, NY 14304; (716) 69 5-BI 20.Ekamant, Uneeda Enterprises Inc., 640 Chestnut Ridge Road, Box 322,Spring Valley, NY 10977; (9 14) 426-2BOO.Industrial Abrasives Co., Box 14955, Reading, PA 19612; (215) 37BIB61.Norton Co., Consumer Products, 1 New Bond St., Worcester, MA01606; (BOO) 321-3316 (East Coast) or (BOO) 423-4621 (WestCoast)Standard AbraSives, 9351 Deering Ave., Chatsworth, CA 91311; (BIB)718-7070.3M, Home Products Division, Building 223-4S-01, 3M Center, St. Paul,MN 55144- 1000; (refer to the yellow pages for a local 3M representative)by Michael DresdnerThere are two major differences betweensanding finishes and sanding bare wood:With finishes, finer grits are normally requiredand the abrasive must be lubricated.The basic sanding techniques are the sameas with bare wood, but you usually must bea little gentler with finishes.Sandpaper will gum up quickly whensanding finishes. When finishes are sandedbetween coats, the finish usually has notcompletely cured, so it is still soft and rubbery.The abraded finish will build up evenon open-coat'papers; the situation is furtheraggravated by the frictional heat generatedeven from hand-sanding. Finishers handlethis problem in one of two ways: by using"self-lubricating" paper or by using waterproofpaper with a lubricant (wet sanding).Self-lubricating papers, or stearated abrasives,are mentioned in the main article.A good way to understand how they work isto think about what happens when a bakerflours his hands before kneading dough: Theflour sticks to the dough before the doughsticks to the baker's hands, so his handsremain relatively clean. Similarly, the lubricantsin the paper prevent finish residuefrom building up, and the abrasive stayscleaner, cuts faster and lasts longer.Stearated papers are not available in gritsfiner than 400, so it is not practical to usethem with gloss finishes. For gloss finishes,it's best to use silicon carbide, double-resinbonded to waterproof backings. Here, a liquidlubricant does the job of the stearate tokeep the surface cool, reduce friction andfloat off finish particles before they can gumup the paper. The lubricant can be any liquidthat does not harm the finish, but I prefernaptha or mineral spirits. These materialsevaporate quickly and leave no Si gnificant residue.Light oil, or water with a small amountof mild liquid detergent added, also workswell, but any remaining film residues must beremoved before applying additional finish.Use plenty of lubricant. If the slurry of liquid,grit and finish particles becomes toodry, the sandpaper will be clogged. Sandinguniformity and efficiency are affected, buteven worse, the clumps are often large andcan cause deep, finish-destroying scratches.It's not possible to check sanding progresswhile the surface is flooded with slurry, soit's necessary to wipe or "squeegee" thearea periodically.Sanding finishes is one area many workersneglect, but it's very important. Sanding improvesthe surface quality by leveling brushmarks and by eliminating orange peel, sagand overspray. It also roughens the surfaceto promote mechanical bonding betweenfinish coats. Generally, a finish can only beas good as the surface to which it is applied.Fast-drying coatings, such as lacquer, shellacand spirit varnish, accurately replicate thesurface on which they are applied. Whilethis characteristic is advantageous in delineatingfine carving detail or subtle grain, italso magnifies any surface imperfections inthe base wood or in previous finish coats.For the final finish coats, usually applied inthinner layers, surface preparation is morecritical, and increasingly finer grits, 400 andhigher, are used.Evaporative, or "solvent-release" systems,such as lacquer and shellac, dry by evaporationof the solvent. These finishes can beredissolved by the same solvent. To somedegree, this is what happens with each successivefinish coat that is applied. So, sandingbetween coats doesn't improve adhesion,but it can eliminate minor defects. As longas the quality of the surface is acceptable,there is no need to sand between each coat.This is one reason why lacquer is a cost-effectivefinish.The mechanical bonding between layersonly applies to "reactive" finishes, like oilbaseor conversion varnishes and catalyzedlacquers. In addition to releasing their solvent,reactive finishes cure by a chemical reactionand are distinguished by the fact that,once cured, they cannot be redissolved bytheir own solvent. Hence, each successivelayer is separate and distinct, adhering tothe previous coat mainly by mechanicalmeans. Sanding between coats roughens thesurface to provide a good adhesive base forthe subsequent finish layer.Sanding during the finishing process, especiallywith sprayed evaporative finishes, isDnowhere near as onerous a task as sandingraw wood. Once the wood's surface has beenproperly prepared, it's all downhill.Michael Dresdner is an instrumentmakerand wood finishing specialist in ZionhilPenn., and a contributing editor at FWW.March /April 1989 55
Tambour-Top Jewelry BoxPull the drawer and the top rolls openby Jamie RussellTrick tambour boxes are fu nctionalobjects with a surprise: Opening thedovetailed drawer reveals acompartment under the tambour top.The system works with two-drawermodels and various shapes of tambours.Customers at craft shows are always mystified but delightedby the way my boxes work: The tambour top automaticallyopens as the drawer is pulled out. When I first used this"trick tambour" to push out the writing surface on a desk I made, Ithought I had an original idea. But, an acquaintance shattered myillusions when she showed me an old Japanese crayon box with atambour attached to its drawer. It may be an old idea, but tambour-topboxes are fun to make.In addition, small projects like these boxes offer a craftsman lotsof design possibilities. You can afford to experiment with differentideas without risking much material or time, you don't need a lotof room or equipment and you can turn cutoffs from other projectsinto money-makers. It's also much easier to sell three piecesinvolving 40 hours of labor and $50 worth of material than it is tosell one piece requiring the same labor and $200 in materials. Personally,I find my optimum attention span for a given project isone week; after a week, my interest loses its fine edge and I getsloppy. It's simple to tailor a batch of jewelry boxes like the onesshown above to make a perfect week's work.Even though I work in batches, this article will deal only withhow to build one single-drawer jewelry box. You can come upwith your own production techniques or design variations fordrawer-and-tambour boxes, but the basic principle is Simple: Anytambour needs a track to carry it out of sight when it's opened. Itake advantage of this fact and screw the slat at the rear of thetambour to the drawer bottom and run the track groove under thedrawer, as shown in figure 3 on p. 58. Because the tambour topis fairly light and the drawer is barely 8Y2 in. wide, the drawereasily pulls the tambour open. The tambour also acts as a drawerstop when it reaches the end of the track. The base and moldedshelf-supports tenoned inside the box align the gable sides andkeep the box square and rigid-important features for a smoothrunningtambour.Rough-milling stock-Because thick wood has a tendency tomove after it is sliced into thin pieces, the first step is toresaw all the box components about a week before you want tobuild the boxes. This gives the wood time to stabilize before youwork it. So far, my best sellers are boxes in oak and walnut. Forstability and attractiveness, I prefer stock with a grain patternsomewhere between quartersawn and rift-sawn. Depending on theexact thickness of your stock and your bandsaw blade size, youshould end up with three pieces about % in. thick, which willfinish out after planing to either Y1 6 in. or 'i2 in. thick, dependingon how badly the wood cups. Because it's safer and easier to handle12-in.- to 13-in.-Iong sections rather than individual pieces, Ilay out both gables, or case sides, on a single board, as shown infigure 2 on the facing page, then bandsaw them out after cuttingthe tambour track and mortises for the shelf and bottom.I also cut the Yt6x'Yax8'i2-in. tambour slats a week or so beforeI need them, to let them stabilize. The slats are glued to acanvas backing and their ends run in a groove routed in the insideof each gable. To help the vertical-opening tambour run smoothly,I also rabbet the slats slightly to create tongues on the ends. Thefront end of the tambour is a thicker piece dadoed to fit over theedge of both the slat and cloth, as shown in figure 3. AlphonseMattia's article in FWW #12 (or FWW Techniques 2, p. 88) taughtme most of what I know about making tambours; I reconunendyou study Mattia's method if you need more information on tambourconstruction.56 Fine WoodworkingPhoto: Michele Russell Siavinsky
Designing router jigs-Jigs are essential for quick, accurate andsafe work, and I don't think you should avoid them even if youdecide to make just one box. To make router jigs for routing thebox gables, I generally construct one template for the horizontalgrooves (and vertical grooves used on some of the larger boxes),one template for the tambour track and one for the escape/entryslot that allows the tambour to slide in and out of the assembledcase. As you can see in figure 2 below, the grooving template has arim on three sides to index the board to the workpiece. It's easierto glue up the grooving template from separate plywood stripsthan it is to machine it from a single piece of plywood. I usescrews to attach the templates to the workpieces during routing,and the screw holes in the grooving template are indexed to thetwo other templates so all three can be mounted in turn in exactlythe same location on the stock. Thus, the grooves cut with onetemplate will align perfectly with those cut with the other template.The screw holes are located so they'll be hidden by tl1edrawer once the box is assembled.I cut the horizontal grooves first, then tl1e curved tambour trackand finally the escape/entry slot. When routing the track, cut counterclockwiseand push the router firmly toward the center to keepFig. 1: Gable layoutTambour escape/entry slot5%Tambour track, 0/16 in.3/16 in. IFig_ 2: Jigs for cutting grooves in gablesStep 1:Grooves for shelf and bottom of boare routed in two gables cut from single board.Grooving template Strips tacked to edges of jig reference workpiece. Stock for pair of gablesr- 4-1IIi!II!II- .. -I1'o/leGroovefor shelf :2For ease of construction, assfmble jigfrom strips glued together.Step 2:Routing tambour trackAll parts, %-in. plywoodTambour track templateHoles to screw jig to workpiece arelocated in the same place on all three jigs.Width of slots in template matchesoutside diameter (00) of router bushing.To figure length of slots, subtract bit diameter from bushingoutside diameter and add it to the desired length of groove.Grooves are routed 0/16 in. deep.Router bushing fo llowsoutside of template.Step 3:Routing escape/entry slotBlock stops groove under drawer.Escape/entry slot templateWidth of template guides routerbushing past edge of workpiece.This part of template is shapedto match tambour track.Slot allows tambour to be installed or removed after box is assembled.After routing, workpiece is ready tobe cut in half and radius of gables bandsawn out.Screws holes from jig also serve as center pointfor compass in laying out gables after the grooves are cut.Drawings: Joel KatzowitzMarch /April 1989 57
Fig. 3: Box joineryTambour detailTenons cut on edge of tambourTop shelfTambourRails are glued; shelf floats.Lapping rabbet joinsrail and shelf.Rabbet and tongue joinsdrawer back to sides.Drawer sides are extendedto allow drawer to bepulled out further.Length of last two slats is trimmedto fit between drawer sides.Screw tambour throughdrawer bottom, into drawer back.it from taking off for parts unknown. After roughing out each slot, Irotate my router 1800 and make a final pass to compensate for anyguide-bushing eccentricity.Constructing the box interior-The next step is to cut all theshelves and rails to width and then to length, using a single tablesawsetup in each operation to ensure all the parts are identical. Asshown in figure 3 above, cut tenons on the ends of the rails and onthe two halves of the bottom shelf to fit the grooves routed in thegables. For accuracy in cutting the tenons, I set the saw fence so allthe tenons will be the same length, then move the blade up anddown to adjust for the various thicknesses of the rails and shelves.I cut the tenons with a few passes over a good carbide blade to avoidtearout, then glue up with WEST SYSTEM epoxy (available fromGougeon Brothers, Box X908, Bay City, Mich. 48707; 517-684-7286).Epoxy has excellent gap-filling qualities, in case the tenons aren't aperfect fit. The ridges left on the tenons by the multiple sawcutshelp lock the joint; should you need to adjust the tenon for a tightfit, it's easy to pare the ridges with a chisel. I make pairs of railsfrom a single piece to keep my fingers farther from the cut and togive myself solid contact with my router fence and table when Icut the inside coves. For the convex edges of the rails, I rough outthe curve by cutting a series of bevels on my tablesaw. Then, afterI've ripped the rails apart, I round the bevels over on a 6-in. by 48-in.belt sander. Next, I cut the lapping rabbets on the shelves and railsand try them in their grooves for fit and tambour clearance. Scrapeand sand the shelves and rails prior to assembly. I leave the frontedge of the bottom shelf square and shape it to the gable's curveafter assembly.I clean up both sides of the gables with a cabinet scraper butonly final-sand the inside. I final-sand the outside to 400 gritafter assembly. Because these gables are part of a circle, I put thepoint of my compass in the screw hole left from mounting thetemplate and draw the outside of the box. I rough-out the gableson the bandsaw, fair up the curves on my stationary sander androundover and clean up the edges with a spokeshave and sandpa-Two-piece bottom shelf isglued at ends so middle floats.per. After dry-assembling the box to make sure everything fits, Iglue up the box and leave it while I finish-sand the tambour.Shaping drawer fronts-I build my drawers square, then shape thefront curve after fitting them into the box's opening. This enables meto match the drawer front's curve to the gable's curve. You can buildthe drawer anyway you like, but I prefer drawer sides of contrastingwood and hand-cut dovetails. The graphics of the dovetails are classy,and I don't think there is enough wood or glue surface to cut astrong rabbet in a small drawer like this. And, after several days ofmachining and sanding, it's a pleasure to shut off the power tools,sharpen my chisels and be a hand-tool woodworker for awhile.I also enjoy shaping the drawer front mostly with hand tools. Iprefer to carve a pull directly into the drawer front, but you maychoose to use a separate pull glued or screwed on the front, oreven eliminate it entirely, as I did on the oak box shown in thephoto on p. 56. With no pull, the tambour itself is slid back, pushingthe drawer open in the process. Starting with a 4/4 piece of thesame stock as the gables, I cut the drawer front into a rough curvewith several beveled cuts on the tablesaw, running the back of thedrawer against the saw fence. Then, I fair the curve and match it tothe gables using rasps, planes, spokeshaves and sandpaper, leavingenough stock to shape the lip-like drawer pull with carving tools.Fit the drawer into the box, slide the tambour into its track andattach it with a single screw to the bottom of the drawer back. Nowyou're ready for finishing. I use Watco oil mixed three to one withgloss alkyd urethane or varnish and a bit of Japan drier (availablefrom paint and hardware stores)-about l;4 teaspoon to a pint.After the finish dries, try the tambour by pulling on the drawer. Itshould open smoothly; if it doesn't, you may have to detach thetambour and either adjust the fit of the drawer or lubricate thetambour ends and drawer bottoms with a bit of wax. DJamie Russell is a self-employed furnituremaker. He would likeanyone who makes trick tambour-top boxes to wn'te him at Box43, Ruddell, Saskatchewan, Canada SOM 2S0.58 Fine Woodworking
Complementary Template RoutingTightfitting curved joints from a single patternby Patrick WarnerTemplate routing is one of the most powerful methods inthe workshop. With homemade medium-density fiberboard(MOF) templates and a router with a bushing or ball-bearingpiloted bit, you can quickly rout grooves, chop mortises, recessinlays and shape workpieces. Template routing is repeatable, accurateand capable of handling either straight or curved shapes withease. You can encounter problems though, when you want to fittwo workpieces along an irregular curve. For this jigsaw work, youusually must painstakingly make two templates that precisely matcheach other, a hassle that limits the usefulness of template routing.To avoid this predicament, I developed a method I call complementarytemplate routing. Its beauty is that only one master templatemust be shaped by hand-a router handles all the subsequent stepsandthe final fit is perfect. I've used the method for all sorts of curvedjoinery and inlay. Some applications are shown at right. Best of all,aside from buying a few sealed ball bearings and perhaps a standardrouter bit or two, no expensive fixtures or custom cutters are needed.The template-routing process is straightforward: A master templateguides a piloted straight bit that plows a path through a piece ofparticleboard, Simultaneously creating complementary work templates.These templates guide the router as it shapes the right andleft halves of the workpieces. The two work templates don't nestsnugly together, because the bit used to cut the templates apartcreates a kerf as wide as the bit. This is where the trick to mymethod comes in: In making and using the work templates, you mustmake offset cuts with the router, to shift the final joint line enoughto compensate for the kerf and allow the workpieces to mate perfectly.Offset cuts are accomplished by piloting a router bit with aball bearing that has an outside diameter (00) larger than the cuttingcircle of the bit. Figure 1 on the next page shows how my methodof template routing can be used to produce a butt joint. By varyingthe combination of bits and bearings used with the templates, asshown in the chart on p. 61, you can cut several other commonjoints. Note that in each case, only stock, off-the-shelf straight bitsand sealed ball bearings are used. Once you get accustomed tomaking the offset cuts, you can also figure out bitlbearing combinationsfor making other joints, as described later in the article.But first, let's go through the steps of making a butt joint.Making the templates -Before you can make the master template,you must lay out the joint line along which two workpieces willmeet, say the leg and the foot of a trestle table. For a butt jOint, thepieces can meet along any straight or curvy line, because right andleft workpieces can slide down over one another, much like interlockingjigsaw-puzzle pieces do. Sometimes the workpieces aren'tclearly a "right-hand" piece and a "left-hand" piece, but I alwaysdesignate one right and one left, for clarity. The only restriction onComplementary template routing allows a wide range of possiblejoinery and inlay designs that are quick to make and reprOduce,and dead accurate. The author uses his router method to makedecorative drawer fronts and panels, marquetry and structuraljoints for furniture.the joint line is that you cannot make curves so tight that the bearingsof your piloted bits won't fit into them. In other words, a curvedsection can't be less in diameter than the outside diameter of thelargest pilot bearing you'll use at any stage of the routing process.Next, draw your joint line on the master-template stock. I useY2-in. "Medite" MOF, because it shapes easily, is dimensionallystable and holds screws well. But, any high-quality particleboard,other than underlayment grade, will do. Before cutting out themaster, the jOint line must be transferred %2 in. to the left tocompensate for the offset created by the YI6-in. bit and %-in.-oobearing combination used here to cut templates apart (see steps 1and 2 in figure 1 on the next page). I do this by setting the legs ofa compass Y32 in. apart, and following the original joint line withthe point, pivoting the compass around curves as necessary tokeep the new line parallel. The left side of the particleboard willbecome the master template; therefore, saw on the new line withthe blade on the right, or waste side, using a coping saw or bandsaw.Then, rasp, file and sand the work edge until it is smooth.The master template can now be used to Simultaneously cut theMarch / April 1989 59
Fig. 1 Complementary template routing a butt jointStep 1: Making the master templateUse a compass to transfer aline %z in. left of desiredjoint line. Cut to this line.Desiredjoint lineStep 2: Making work templatesRouter support blockLeft worktemplate-Left workpieceIn step 1, the cutting linewas 0/32 in. to the left of thejoint line. This cutter bringsthe left template 0/32 in. back tothe right, back to the joint line.Step 3: Using the leftwork templateBecause the left work templateconforms to the shape of thejoint line, a flush-trimming bitis used to trim the workpieceto the desired joint line.Step 2router bit---10/..r-the left template matches theY32r--joint line, this cutter will make theright work template 0/16 in. tothlf the joint Hne5 I WhileStep 4: Using the rightwork templateIn step 2, the right worktemplate was cut 0/16 in. tothe right of the desiredjoint line. The bit/bearingcombination brings theworkpiece 0/16 in. back to theleft, and now it matchesthe joint line.Fig. 2: Making a.... ---tongue-and-groove jointRight workpiece,' ........ _ ...Follow the same steps as above, only substitute a %-in.-dia. bit and 1U,-in.-oD bearing in step 3. Step 4remains the same. After trimming the workpieces, cut the joint as follows.Step 1 : Making the grooveSlot cutting bit, withit's pilot bearing againstedge of right workpiece,routs 'k in.-deepgroove to fit tongue.Step 2: Making the tongueThe pilot bearing ofrabbet-cutting bit routs '.4-in.step in left workpiecethat fo rms one side of tongue.Workpiece is flipped and routedagain to complete tongue.----i v. two work templates, as shown in the top photo on the facing page.Start with a large piece of particleboard. You want the two worktemplates to end up at least 5 in. or 6 in. wide, to leave room forclamping the templates to the workpieces later. I clamp or screwthe master template on top of the particleboard, then clamp theassembly over a piece of scrap plywood. The scrap is needed toprotect the workbench, because you'll be cutting clear through theparticleboard to make the work templates.The work templates are cut with a 5j16-in.-dia. straight bit in a%-in.-oD pilot bearing. This bitlbearing combination results in acut that's offset by %2 in., the same offset used in drawing up themaster template, as previously discussed. To bear on the template,the pilot bearings must be above the cutter instead of below it, asis more usual on piloted router bits. Therefore, I use sealed ballbearings that have a V4-in.-1D (inside diameter) that will slideright over the V4-in. shank of the bit (see step 2 in figure 1). Thesebearings, as well as the others mentioned in the article, are availablefrom Valley Chain and Gear Inc., 1320 Grand Ave., San Marcos,Calif. 92069; (619) 744-4200. I stack two bearings on the bit's shankto ensure solid contact with the template and to prevent any gougingof the particleboard edge. A drop of Locktite (available from auto-supply stores) between the shank and the inner race of the bearingswill keep them from riding up on the shank, if that becomes aproblem. For the bit itself, use only carbide straight bits with acutting length long enough to cut through the work-templatestock. The bit's shank should be long enough to hold the bearingsand still have at least % in. chucked in the router's collet.With bit and bearing chucked in the router, I cut through theparticleboard in one pass. Following the contour of the master,concentrate on keeping the router's base flat and the pilot bearingtight against the template's edge. To help keep the router fromtipping, I screw a small, V2 -in.-thick scrap (the same thickness asthe master template) to my router base, to slide on the right worktemplate as I cut. If the contours of the master are very curvaceousor convoluted, the router will want to pull away from the templateas the cut changes directions. To prevent this, use the biggest routeryou have, to dampen the cutting forces. Try to keep full, evenpressure at a right angle to the tangent of each curve you follow.Fortunately, even if the bearing loses contact and the cut deviates,the pair of work templates can still yield a tight jOint, because thedeviation is transferred to both templates equally and will be complementaryin the final joint.60 Fine WoodworkingDrawing: Roland Wolf
Routing the workpiece -Once the work templates are cut,you're ready to use them to shape the joint on the workpieces.Once again, a combination of straight bits and ball-bearing pilots providesoffsetting cuts. If you follow the bitlbearing combinations inthe chart, you'll see that for a butt joint, you'll need a bitlbearingcombination that yields a 'l'16-in. offset for the right half of the jointand a flush trim bit (one that yields zero offset) for the left half.Like the bitlbearing combinations for making the work templates,use a carbide straight bit. The bearings you'll need are listed in thechart by their outside diameter; the inside diameter should bechosen to fit the shank of the bit you use- Yl in., % in. or liz in.depending on what your router will handle. The flush-trimming bitcan be any diameter, as long as the pilot bearing's outside diametermatches the bit's cutting circle. I prefer to use larger-diameter %-in.or Yz-in. shank bits, like the ones shown in the lower photo at right,because they are less susceptible to flexing and chatter.To cut the butt joint, follow steps 3 and 4 in figure 1 on thefacing page. Trace the outline of the left work template on the lefthalf of the joint and bandsaw away the waste to within YI6 in. ofthe line. Clamp the left template and workpiece to the bench andshape with the flush-trimming bit. The procedure is the same forthe right half, except shift the joint line you trace from the rightwork template Y16 in. to the left. Use the 5/16-in.-offset bit combinationto take the final trim cut; always keep the router base flatand the pilot bearings against the template. If you've routed carefully,the right and left workpieces should fit together with lessthan .003 in. to .005 in. of variation along the joint line.Using a master template to guide a router fitted with a ball-bearingpiloted straight bit, a piece of particleboard is cut into left- andright-hand subtemplates. These templates are used to rout bothhalves of a joint so two pieces can be fitted together accurately.Tongue-and-groove joint-A butt joint is adequate if the twopieces are glued together with mostly long-grain to long-grain contact.But, if the parts join cross-grain, or if the joint needs to bereinforced, say for curved joints where the seat rails join the rearlegs of a chair, I prefer some sort of interlocking joint. Fortunately,the same work templates created for a butt joint can also be used tomake interlocking joints: The chart lists the bitlbearing combinationsnecessary for making two different-size rabbet or tongue-andgroovejoints. These joints strengthen the mechanical connectionbetween the workpieces and provide a better glue surface, even ifthe pieces join entirely cross-grain to one another. Further, an interlockingjoint helps to register the two pieces, to keep themfrom sliding during glue-up; if the ends of the joined pieces arevisible, they provide a nice bit of visual detail.To make a tongue-and-groove jOint, prepare the master andwork templates exactly as described above. When you're ready totrim the workpieces, trim the joint surfaces on the workpieces justas shown in steps 3 and 4, but substitute the bitlbearing combinationsfrom the chart that are designed for a tongue and groove or rabbet,either Yl in. deep or 0/1 6 in. deep (see figure 2 on the facing page).After trimming the jOint, I rout the tongues and grooves using arabbeting bit for the tongues and a slot-cutting bit to plow thegrooves. Make the groove in the right workpiece first, taking careto center the piloted bit on the thickness of the workpiece. For thetongue, choose a piloted rabbeting bit that cuts a shoulder thesame width as the amount of overlap: Yl in. or 0/1 6 in. Set the depthof cut so that after passes are taken from both sides of the leftworkpiece, the resulting tongue will fit snugly into the groove. Theadvantage to this method is that by making passes from both sidesof the stock, the tongue will automatically be centered. Make atest piece from a scrap of stock the same thickness as the workpieceto test the fit. If your stock is thin enough, you can get byusing the slot cutter as a rabbeting bit to cut the tongue as wellas the groove. The joint-making process is the same for making arabbet jOint, but only a single rabbet cutter is needed to routThe author fits most of the router bits used for his complementaryrouting process with a ball-bearing or two slipped down on theshank, to serve as a pilot. Each bit/bearing combination is chosento give a prescribed amount of offset, for snug-fitting joints.Bitlbearing combinations for trimming workpiecesLeft workpieceRight workpieceType of Joint Bit Bearing Bit Bearingdia. 00 dia. 00Butt joint Flush trim bit (same % in. 1Ya in.dia. bit and bearing) 3;" in. 1% in.Tongue and % in. %in. Yz in. 1Ya in.groove or rabbet 0/4 in. We 0/. in. 1% in.3/18 in. deep 1 in. 1% in.Tongue and % in. 1Ya in. % in. 1Ya in.groove or rabbet % in. % in. 3/4 in. 1% in.%-in. deepcomplementary lips on both workpieces.My complementary-template method isn't limited to the jointsI've described: You can use other bitlbearing combinations tomake more elaborate jOints, like the glue-lock joint. You can dothis by figuring out the bit-diameter/bearing-outside diametercombinations needed to give the proper amount of offset to makea joint with the bit you've chosen. The amount of offset is calculatedby subtracting the cutting diameter of the bit from the outsidediameter of the pilot bearing and dividing by two. 0Patrick Warner lives in Escondido, Calif. He teaches classes in routertechniques and making jigs and fixtures.March /April 1989 61
Narrow-Belt Strip SanderShop-built workhorse for shaping) sharpening and smoothingby Robert M. VaughanMy narrow-belt strip sander is one of the handiest tools inmy shop. It's great for easing or beveling edges, roundingcorners, sharpening dowels, fudging miters for a perfect fitand smoothing the bandsawn edges of straight and curved surfaces.In addition to working wood safely and precisely, it's a metalworkingtool, perfect for sharpening lathe tools and drill bits, deburringrough edges and shaping metal parts.I built the sander shown below, because most of the $100-andupstore-bought models vibrated excessively and were too flimsyto be accurate. I wanted a sander that would be stable withoutbeing bolted to a bench, inexpensive and easy to build with normalworkshop tools and readily available hardware (ideally, theodds and ends hanging around my shop).My sander is nearly the same size and weight (about 48 Ibs.) asmany commercial models, but my hardwood-and-plywood frameabsorbs vibration much more effectively than the plastic and sheetmetalcommercial units. I used oak and ash for the frame on thesander shown below, but because these ring-porous woods deflectdrill bits, they make it difficult (0 properly center a hole. I'd r:ec-ommend using maple for the frame members. The frame supportsa large, Formica-laminated work surface that can be tilted through45°. Although the sander uses l-in.- wide, 42-in.-long belts, availablefrom Sears and several other companies, you can also use I-in.strips ripped from 6-in. by 48-in. belts. The belt runs over three woodwheels. One of the two idler wheels attaches to a spring-loaded, pivotingupper arm, which tensions the belt. Belt tracking is controlledby adjusting this idler wheel with two counteracting thumbscrews.A salvaged Y3-HP, 1,750-RPM motor turns a 3Y2-in. pulley, whichis V-belted to a 3-in. pulley on the mandrel. With a 3%-in. drivewheel, the belt moves at a rate of 1,900 surface feet per minute(SFM). Commercially available sanders usually run 3,000 SFM to6,000 SFM and vibrate a whole lot more than mine does.Figure 1 on the facing page shows the dimensions of the hardwareand fittings on my sander. Your hardware may be different, especiallyif you scrounge your materials as I did, so collect the metalparts before you begin construction, and adjust the dimensions asneeded. The mandrel is the heart of the sander, so look for onewith ball bearings, a threaded shaft on one end for the drive wheeland a plain shaft on the other end for the pulley. Even if you followthe plan exactly, you'll want to trial-fit and fine-tune most of theparts before assembly. I clamped the parts together and did notdrill any pilot holes or install any screws until I was sure of the fit.Building the base and frame -There are six basic wood parts inthe frame, including the 'Y.!-in.-thick plywood baseplate on whicheverything is mounted. The other components, all cut from 8/4hardwood, are the base block supporting the mandrel, the trunnionblock holding the table, the back post, the top arm and theplaten block, which supports the sanding surface.After cutting the plywood base, I run countersunk screws upthrough tl1e plywood into the base block. The base block must bewide enough to support the drive-shaft mandrel and about 10Y2 in.long, as shown in figure 1. You will have to remove this base blocklater, so don't glue it down. Set the mandrel on the base blockwith its centerline about 3'Y.! in. back from the front edge; screwit down with the largest wood screws that fit the mandrel base holes.You can't accurately align the mandrel without the drive wheel, sothe next step is to build that wheel and the other two for the sander.Vaughan's narrow-belt sander, assembled from scraps Of oak, plywood,fiberboard and assorted hardware, is stable, accurate andcapable of performing a multitude of tasks.Wheels, shafts and bearings-The wheels are seven pieces ofYo-in.-thick tempered hardboard laminated together with Titebondglue. Hardboard, available from most large building-supplyhouses, has no voids or dense spots that could cause vibration orbalance problems. The drive wheel, bored % in. for the mandrel'sdrive shaft, is 3% in. in diameter, while the two idlerwheels are 3 Yo in. in diameter and bored out to accept two stan-62 Fine Woodworking
Fig. 1: Narrow belt sanderAdjust dimensions to suitavailable hardware.Top idler whee11A: Tracking adjustmentr--'rlr--:::;;;,...-..--Counteracting thumbscrewstilt shaft to regulateThreaded holes,'.4 in. dia.i '//: 1-;=iiii::==-.,be::j,'ta t.J...... Cking.Shaft salvagedfrom electric motorNuts lockaxle in position.Spring tensions pivoting arm.Steel bar, '.4 x 1 '12 x 6'12Tracking mechanismBack and top idler wheelshave two bearings each.Angle iron_.:.....:'---- Top wheel, 3% in. dia.I)Plywood boxand belt.Table trunnion covers pulleysLaminate-coveredtable, 12 in. by 8 in.Wood screwsattach mandrelto base block.Motor, Yl HP,split-phase 1,750 RPMBack wheel, 3 in. dia.,is set for 48-in. belt. Mount onfront of post for 42-in. belt.Back post, 2x2%x 16, screwsto trunnion block and base block.Platen block, 2x3%x6%Plywood base,%x1 2x24Drive shaft, % in. dia.Belt guard18: Trunnions and supporting blockPlaten block location is shown by dashed line.>-I < 2%T lo11:---_ ' _ ' " _I ......'--.l.-..J/ '----'I-------- 10% ----;-...!1 ShapeRemovethickness oftabletop fromeach trunnion.block to fit over mandrel., "" / 45° \I \Slot, 0/,. in. wideDrawing: Roland WolfMarch / April 1989 63
dard 40mm-dia. by 12mm-thick ball bearings. I bandsaw eachwheel slightly oversize, mount it on a lathe faceplate and turn itsoutside diameter with a slight crown -about the d1ickness of a penny.Then, with a drill bit in a chuck mounted on the lathe tailstock, Ibore a large starter hole in the wheel's center. The tip of an oldfile, ground like a regular lathe scraping tool, is used to enlargethe hole enough to slip-fit the bearings.I use sealed ball bearings in both idler wheels, because they aredurable and resist lateral movement of the wheels, which wouldlead to inaccurate tracking of the sanding belt. You can purchased1e four ball bearings at most elecu-ic-motor repair shops andbearing distributors, or from ww. Graingers (stock #lL050), 5959W Howard St., Chicago, Ill. 60648. These are tl1e standard-size 203sealed bearings used in almost all EMA 56 frame-electric motors.The center shafts of old discarded motors (usually free of chargefrom motor-repair shops) are also a good source for the precision-ground stock needed to support d1e bearing. Many of these shaftshave precision-ground bearing seats that will accommodate twobearings. Cut off tl1is section. If the bearing seats are not longenough, see if the motor shop will press a couple of d1e shafts out ofd1e rotors for you. To make dulling and mounting much easier, file,mill, sand or grind a flat on both sides of the portion of the shaftthat will be resting on the machine. Don't flatten the actual seat.Press the ball bearings on their shafts, coat the insides of d1e hardboardwheels wid1 epoxy and insen d1e wheels over the bearings,being careful to leave them proud of the wheel. This will provide asurface for pressing the wheel on or off the shaft. ever put pressureagainst the hardboard wheels. Use sleeves to press against theinner edge of the bearings, if necessary, or you risk damaging thebearings. Let the wheels dry square and aligned with the shaft.111en, mount d1e drive wheel on d1e motor shaft and turn it true. Ifthis wheel is ever removed, it may have to be turned true again.Trunnion assembly-The trunnion supporting the table is simplyan arc of a circle that rocks in a round cradle around a commoncenter pOint, as shown in d1e top photo at left. To ensure free andaccurate movement, the center point of that circle should be rightwhere d1e tabletop meets the front of the belt. The trunnion cradlesare routed 511 6 in. deep in bod1 sides of a 5Y2-in.-wide 8/4upright with a circular router template. Leave the trunnion blockabout 2 ft. long to allow room for clamping d1e router templateand to provide stock fo r the platen block, which supports the sandingbelt. A disc is then lathe-turned to match the 5 YH n. diameterof the circle cut by the router template. The disc is cut so d1e twoequal halves plus twice the thickness of the table equals the disc'soriginal diameter. You can make the template any way that's comfortablefor you, but don't forget to account for d1e diameter of therouter bushing you'll use so you can accurately produce recesseswith the 2%-in. radius shown in the drawing on d1e previous page.The template is also needed to rout a circle in a piece of scraplarge enough to hold the trunnion discs when they're crosscut ond1e tablesaw. Also, rout another circle to serve as a diameter gaugewhen you turn the trunnion disc.After turning d1e plywood trunnion disc to size, leave the pieceon d1e faceplate and score a 511 6-in.-wide area % in. in from theoutside rim. This area is used to lay out the slot that the trunnionclamping bolt runs in. It's a good idea to make extra circles in caseThe mandrel fits through the trunnion block and supports the laminatedhardboard drive-shaft wheel. The trunnion block is routedand shaped to accept the trunnion cradle and worktable assembly.The trunnion cradle is screwed to the table near the openingthrough which the belt runs. The bolt is needed to secure the cradleto the supporting trunnion block and to lock the table in place.you later want to make special grinding and sanding platforms forthings such as lad1e gouges and chisels. With your trunnion cut-offjig, cut d1e trunnion discs in equal parts, so when d1ey are screwedon d1e bottom of the table, the tabletop will be at the center of thetrunnion circle, as shown in the bottom photo at left.Place me trunnion disc halves in their cradles so d1e tops of thetrunnions are parallel to the top of the block; use a drill press to borea -in. hole d1fough all three pieces. The hole should be positionedbehind the center vertical line (about 1 in.) to give good clampingsupport. Take the trunnion halves out, mark where d1e bolt holewould be at the 45° setting, drill a hole through both pieces and cutout d1e slot on d1e jigsaw. Use a small rasp to do the final fitting, andelongate both ends of d1e slot slighdy to allow for fine adjustments.Now joint off about V'6 in. from the top edge of the trunnionblock so it will be slightly below the table's surface, and cut d1eblock the same length as d1e base block. Bandsaw out an opening sothe block will fit comfonably over d1e mandrel. Set a u-unnion half inits cradle, pivot to d1e 45° setting, and mark and bandsaw a slope asshown on the front of d1e uunnion block to allow the table to drop.Making the back post and top arm-Clamp the trunnion blockin place over tl1e base block, then clamp on the back post. Hold64 Fine Woodworking
the top arm where you think it should go, giving it about a 10°droop, and clamp it in place for later trimming. Now make the t\:voaxle assemblies and clamp them in place. The top-wheel adjustmentassembly shown in the top photo at right, is made from apiece of 1/4XII/2 x61/2-in. steel and a couple pieces of II;4-in.long, I-in. by I-in. angle iron. Drill and tap four 10-24 thread holesto secure the opposing pieces of angle iron. Drill (\VO 3 1i6-in.holes in each piece of angle iron, and slightly elongate the holesfront to back for adjustment of the top-wheel shaft. Drill and tapthe top-wheel axle with 1;4-20 threads. The %-in. diameter of theaxle is a long way to thread, so a %4-in. hole could be drilledabout halfway down and the remainder tapped. Clamp the shaft bet\:veenthe angle-iron sides, and mark and drill (\VO l;4-in. holes inthe 6Y2-in. steel plate to mount the assembly to the arm. For finalseating of the shaft in the top brackets, pinch the shaft with the topedges of the angle iron, and then tighten the angle-iron screws.Because the distance be(\Veen the angle-iron sides is wider at thetop than at the bottom, the shaft will seat quite snugly as the bottomadjustment screw pulls it down into the recess. Tracking adjustmentsare made by tightening and loosening the opposing thumbscrews.Now, clamp the (\VO axle-and-wheel assemblies in place. Thefront edge of the top wheel should be directly over the front edgeof the bottom drive wheel. Be sure there is enough overhang onthe back of the top arm to fasten the spring eyebolt. The backwheel should be high enough on the back post so it can be boltedon the front or back of the post, depending on whether you wantto use 42-in. or 48-in. belts. For now, clamp it on the back, loop a48-in. sanding belt over the wheels and move the arm around untilit fits properly and secures the belt. Note the location of the toparm, and trim the back post accordingly.Now take your hinge and determine the allowances needed for theknuckle, then cut the parts as shown in figure 1. Mount the hinge,and if everything fits okay, mount the top-wheel assembly. Take offthe top arm, adjust the front bevel as needed so the arm can movefreely and mount the eyebolts and the spring. (The spring I usedcame from a local hardware store's "Select-A-Spring" display, spring#171, for about $3.) Also at this time, predrill the back post for thescrews that go through it into both the trunnion block and the baseblock. If you're sure of the pOSition, you can also mount the backaxle. In both cases of axle mounting, drill a hole in the wood about1,132 in. larger than the bolt used, to allow for some adjustment.With the sanding-belt system set for a 42-in. belt, make a templateof the platen block. Get the remainder of the stock you usedfor the trunnion block and route a trunnion cradle in one side, alittle deeper and a little farther back than the actual trunnion, asshown in the bottom photo at right, to allow free movement of thetrunnions after the platen block is installed. Cut the platen block tolength, allowing for the Y8 -in.-thick steel platen, and bandsaw tothe needed profile. Install the platen, clamp the assembly in placeand test-run a belt. The platen should deflect the belt out of lineabout 1/8 in. Unclamp the base and trunnion blocks and drill forplaten-block mounting bolts.Table assembly-Clamp the trunnion block to the base and clampon the trunnion halves. Position the table, then clamp it to thetrunnions. I let the table's centerline go right over one of the trunnions.Mark where the trunnions go, remove the table and drillcountersunk holes in the table so it can be screwed to the trunnions.Reclamp the table to the trunnions and drill pilot holes in the trunnionhalves, using the screw holes as guides. Drive the screwshome while everything is still clamped. Next, mount the platenblock and determine how much the table must be notched to fitover it. Allow for an extra l;4-in. clearance to the left of the platenTwo counteracting thumbscrews move the top-wheel shaft to controlbelt tracking. Belt tension is provided by the spring pullingagainst the hinged arm. A motor switch mounted on the samepost is easy to reach from the front Of the sander.The platen block must be relieved so the trunnion cradles can bemoved freely to adjust the angle Of the sanding table.for slipping belts in and out. Turn the table upside down andbandsaw out the clearance for the platen and block. Once the tableand belt run satisfactorily, take the table off, turn it upside downand chisel out the relief for the 45° tilt.Now unclamp everything and unscrew the base block from theplywood baseplate. Clamp the base and trunnion blocks in theirproper position and install the screws through the back post intothese (\VO pieces, keeping everything as square as possible. Cutand bore a piece of flat strap steel, and screw it into the front ofthe trunnion block and into the base block. Reinstall the assemblyon the plywood baseplate.One point of caution: If a belt breaks, the top arm will flip upwardabout 4 in. in a sudden and unsettling manner. Keep away from thetop wheel when sanding, to avoid a face full of sander. The springdoes limit the upward movement of the top wheel, but a safety chainfrom the top arm to the front of the back post could easily be installed.You should also make hoods to cover the belts, pulley andwheels. A dust mask and eye protection are also recommended.Robert Vaughan is a professional woodworker and has his ownshop in Roanoke, Va.DMarch / April 1989 65
Kentucky CupboardRetaining the essence of the country styleby Wa rren MayFig. 1: Cupboard plans39%Rails and stiles for all doors are 2111 in. by in.1-..:1-":---- 36 ----1A: Top corner molding detailTop is shapedwith reground cutter.Top, 'l'e in.Moldingradius,% in.Adjustable shelfLeft door latch is shaped to engage catch in shelf.Left door acts as catch for right door latch.18: Section through glass doors1C: Latch10: Panel cutterReground shaper cutter cutstongue to fit standard groove;versatile panel edging is usedfor door panels, back panels.Panelf1IEo-+---150/. ---I66 Fine Woodworking
In the early 1800s, lumber was so abundant that Kentucky becameknown as the hardwood capital of the world, and therewere more than 30 cabinetmakers in the central Kentucky(Lexington) area alone. Even though these cabinetmakers were farfrom major cities and fashion centers of the day, prosperous rurallandowners and prominent townspeople in the area wanted furnitureof d1e u'endy Chippendale, Sheraton, Hepplewhite and Federalstyles popular in the East. Striving to meet the needs of their pau'ons,d1ese local cabineunakers made d1e fashionable pieces as best theycould, but at d1e same time, developed d1eir own "Kentucky style."The Kentucky ' builders took advantage of the ready availability oflocal hardwoods, such as cheny, walnut and poplar, rather thandepend on mahogany or veneers. And even dlOugh they often simplifiedconstruction procedures and didn't bother weh curveddovetails and other elaborate devices, their pieces were not plain.The furniture was often embellished wid1 inlays that conveyed astrong folk quality and a sense of the individual builder. Variouscabinetmaking schools in the area and individual craftsmen, intraining their apprentices, solidified d1ese characteristics into anidentifiable and lasting style. I've always found the honest meldingof function wid1 design and the use of the marvelous local hardwoodsin d1e fu rniture of this period to be particularly appealing,and 1 try to incorporate these characteristics into my own pieces,such as the cheny cupboard shown below.The cupboard is tall, light and functional, wid1 simple, cleanlines commonly found on Kentucky-style pieces. The cabinet ismade in two sections, which simplifies construction and assembly.I begin by building the legs, then the bottom and upper sectionsand finally d1e doors and back. All the rails and stiles are joinedwith mortises and tenons. The backs of each section are largeframes fitted with floating panels.The top, display section has two shelves: one adjustable, the otherfixed. The framed glass doors overlay the sides of the cabinetand are rabbeted along their abutting edges so they "nest" togetherwhen the doors are closed. The molding crowning the upper sectionis formed by shaping the edge of the top and adding a simpleunderlying cove molding. This molding treaU11ent is the displaysection's single decorative feature.The base section has a single, fixed-pOSition shelf. The paneleddoors are flush-mounted. Flared, Kentucky-style legs are integral tothe sides of the base and are reminiscent of the proud stance ofpieces from the Federal period. Both the scalloped sides and bottomapron combine with the legs and top molding to provide a softeningcontrast to the otherwise straight-line features of the cupboard. Tomake d1e most of the wonderful grain of the cherry used throughout,d1e cabinet is finished with oil and then several coats of lacquer.Feet first-Even after 20 years of furnituremaking, I still make afull-size "rough-out" to test any new leg design. A pine 2x4 prototypecosts only a few dollars but will give you a good feel for howthe drawing u'anslates into three dimensions and help you visualizethe proportions of the entire piece. The same curve pattern is usedfor both the front and back legs. I've flared the front legs sidewaysand forward; the back ones flare only sideways. For this reason,they are laid out and cut differently, as shown in figure 2 below.I make each leg from a single piece of cherry, because the gluelines and interrupted grain patterns of a lamination would deu'actfrom the appearance. Square the stock for the front and back legs,cut the pieces to length and lay out the patterns. TI1e front legs areinterchangeable, but d1e back ones are not and should be marked"right" and "left" to avoid mistakes when the joints are cut. Carefullybandsaw the legs close to the line; later, after the legs are glued toFig. 2: Leg constructionFront legRear legLeg patternBack leg extendsto this line.34The author's cherry cupboard featuresflared legs, patterned front and side panelaprons and an unobtrusive top molding,identifying it as 'pure Kentucky. '1Drawings: Lee Hov; photo: Warren E. BrunnerMarch / April 1989 67
Fig. 3: Cupboard constructionthe side panels, these bandsawn curves can be spokeshaved to blendgracefully into the side panel surface and smoothed with a scraper.Offset mortises,tenons awayfrom bottom edge.Screws throughsubtop arecounterboredand plugged tofasten top.Dowel supportholes, 0/,6 in. dia.Slot acceptsleft door latch.Making the base section-You can make each side panel shownin figure 3, left, from a single, wide board, or you can joint andedge-glue two or more narrow pieces to make the needed width.After jointing the mating edges, I apply Titebond yellow glue andsimply clamp the pieces together. The long-grain joints are strongand do not require dowels or other reinforcement. I am quitefussy, however, about selecting wood for grain and color match. Ialso orient the grain for maximum visual effect. For example, placingdenser, more intense grain patterns toward the bottom of the tall,narrow sides of the cupboard imparts a welcome sense of balance.I also like to use arching grain patterns on the horizontal rails,which seems to lighten and lift a piece visually.After cutting the side panels to width, align each one with its frontand back legs, then dry-clamp everything together. If you've beencareful in your wood selection, the grain pattern along the edgejoints between the legs and the side panel should match closely. Nowyou can mark the decorative bottom curve using the pattern shownin figure 4 on the facing page. I make sure the shape and grain patternharmonize with the legs; if they don't, I substitute another piece.The next step is to cut the mortises for the front and rear toprails and the shelves. I rout the mortises with a %-in. spiral cutter,which makes a smoother cut than a straight bit and chatters less. Ioffset the mortises and tenons for all the rails away from thesidewalls of the legs to leave more wood to support the tenonsand to help prevent Side-grain breakout. I finish the job by slightlyrounding the ends of the tenons with a hand chisel.ext, I cut the stopped rabbet in the rear legs for the paneledback with a dado blade on my tablesaw. Once the corners, whichare not reached by the blade, are squared up with a chisel, theside panels and legs are ready to be glued up. Use caul blocks toensure uniform clamping pressure, and edge-glue each side panelto its front and back legs.The front legs serve as stiles to frame the flush-mounted doors,so here you just need to cut the tenons on the rails and apron, andshape the apron. Bandsaw Y16 in. or so proud of the apron curveso you can blend the apron into the curve of the front leg. A sharpknife or round-bottom spokeshave works well for this. For additionalsupport, I screw a small block to the leg under the tenoned back rail.Fitting the middle shelf and bottom to the base is a bit tricky andrequires careful measurement. The bottom must be level with andbutt against the bottom apron rail. The middle shelf must set backexactly the door thickness plus Y3 2 in. for clearance so it can actas the doorstop. Notching around the front legs and marking outthe tenons is critical here to ensure that the shelf and bottom fitsnugly to all their mating surfaces. Finally, the shelf and bottommust be cut so the back-panel assembly can butt against them at finalassembly. Carefully aligning the bottom shelf and gluing it to theapron rail at this point makes it easier to square up the carcase duringassembly. Check all joints in a final dry run. Multiple tenons onthe shelves should be an "easy fit," but even here, sturdy caul blocksacross the sides should be used for clamping in the final glue-up.The top of the lower cabinet is made with a %-in. overhang onthe sides and front. I soften the edges using a router with a stockY4-in. cove bit. The top is held in place with screws driven upthrough strips fastened to the inside top edge of each side andfront rail. Be sure to use elongated screw holes in the strips toallow for the seasonal expansion and contraction.Building the top section-Mortise-and-tenon joints are also usedfor the frames and fixed-shelf top section of the cupboard. The68 Fine Woodworking
1 square 1 in.Front apron patternupper display shelf is adjustable, but the fixed lower shelf providesneeded rigidity. The cabinet has a subtop that acts as a doorstop.The top, attached by s rews driven up through the subtop, overhangsthe sides and front, and with its shaped edge, forms the upper partof the top molding. The lower molding is a cove-shape strip installedunder the overhang. The top molding works visually withthe flared legs to give the cupboard a well-balanced appearance.Construct the sides, shelves, bottom and subtop as shown in figure3 on the facing page. Note that the subtop is set down from the topof the sides by in. This provides a space between d1e top andsubtop, giving me room to screw through the sides to attach the covemolding. This space also means there is plenty of wood to supportthe joints, so there's no need to offset the mOltises and tenons here. Ido, however, offset the tenons on the bottom shelf to minimize therisk of tearout. Dado the rabbet for the back, rout mortises, cut tenonsand dry-clamp the pieces together for a fmal check. Again, usesturdy caul blocks for applying even pressure during glue-up.After assembly, I add -in. filler strips to the subtop and glueon a spacer strip for attaching the molding above the door, asshown in figure 3. The molding is shaped with a stock Y2-in.-radiuscove bit. The front cove molding can be glued along its entire ength.The end moldings are glued only at their mitered ends; they'rescrewed at the back ends, as described above. I shape the edge ofthe top in two steps, using first a I/dn. cove bit to roundthe top edge and then a Y2-in. roundover bit, which I've customshapedon my grinder (see figure lA on p. 66), to extend the curveback from the edge. This bit allows me to emphasize the overhangand at the same time blend its curve smoothly into the underlyingcove molding. The top is attached with countersunk screws run upthrough the sUbtop. These screws are hidden with wood plugs.Doors and back panels -Again, I select my wood very carefullyfor grain pattern and straightness. I also rough-cut the lumber afew days before I need it, to identify pieces prone to warping. Second-choicepieces become the frames for the paneled back; reallywarped pieces are discarded. On the back, rather than cut mortisesin rails for the stile tenons, I groove the entire rail. The grooveaccepts the tenoned ends of the four stiles as well as the routededges of the floating panels. I modified this construction procedureslightly for the bottom doors. Here I grooved the stiles toaccept the rail tenons and the panel edges. This makes for a strongdoor, and the tenon is only visible on the top edge. The door panelsare resawn and finished to 9/16-in. thickness; the backs are 'l2 in.thick. I shape d1e edges of the floating panels using a cove bit withone edge ground flat, as shown in figure ID on p. 66, which permitsthe panel edge to fit snugly in the frame's groove. The backassembly is then fitted to the routed opening in the back of thecarcase and attached with countersunk brass flat-head screws. Forthe glass doors, I cut stopped grooves in the ends of the stiles toaccept the tenoned ends of the rails. I use a -in. dado blade tocut these and then square them up with a chisel. The rabbet forthe glass is routed using a Y4-in. straight bit. Here again, I use achisel to square the corners. The butting edges of the doors arerabbeted to allow the right door to overlap the left one by lis in.when closed. After fitting d1e glass, I secure it with molding that'sattached to the frame with countersunk nails. Note that the glassdoors are designed to fit against the front of the upper section,while the lower, floating panel doors are flush-mounted. This visuallyties the top and bottom sections of the cupboard together byallowing the full width of the leg line in the bottom section toextend through the full height of the cabinet. To mount the doors,I use extruded brass 1 Y4 -in. by 1 J's-in. desk hinges (available fromThe Wise Co., Box 118, 6503 St. Claude, Arabi, La. 70032; 504-277-7551), because of their strength and ease of installation. Thesehinges also add to the appearance of the cupboard, because wheninstalled flush, the gap between the door and the frame is smallerthan is possible with conventional door hinges.Early Kentucky pieces sometimes had wooden spools for pullsand buckles for catches, because these items could be designed tofit any application and were easily repaired or replaced. I preferthe knobs shown in figure lC on p. 66. I turn the stems and roughout the knob ends on a lathe. The knobs are finish-shaped byhand-sanding. The stem extends through a hole drilled in the doorand is secured to a wooden latch, which holds the stem in placeand engages a catch when the knob is turned. The catch for the leftdoor is a groove formed in the fixed shelf; for the right door, theback inside edge of the left door acts as the catch.Finishing up -Most projects will bring rave reviews only if theyare well finished. After all fitting, shaping and detailing is completed,I round all edges with sandpaper to about Y32 in. radius. This givesthe cupboard a soft look and pleasant feel. I sand first with 80 grit,then dampen the surfaces with water to locate glue residues and toraise the grain before finish-sanding with 120 grit. Planed surfaces,such as panels, need only be hand-scraped and sanded with 120 grit.After 20 years of experimenting with different finishes, I've settledon an oil-and-Iacquer finish I feel best complements d1e naturalbeauty of the cherry and walnut hardwoods I use. I apply severalcoats of my oil recipe (two part boiled linseed oil, two part highglosspolyurethane, one part turpentine) until the wood is evenlysealed. After two to three days of drying time, I apply two coats oflacquer sanding sealer, sand with 240 grit and fm ish with two additionalcoats of high-gloss lacquer. After buffing the surfaces with 0000steel wool, I apply a protective layer of Lemon Pledge spray wax. 0Warren May makes traditional Appalachian Mountain dulcimersand Kentucky-style jurnitw-e. He and his Wife, Frankye, operateThe Upstairs GallelY in Berea, Ky.March / April 1989 69
Reviving Period HardwareHints for restoring the gleam in the maker's eyeby Gregory Landrey and Helen StetinaBrass hardware has been an important decorative and functionaldesign element on American furniture since the early1700s. Hardware catalogs of the day indicate the metalcomponents were originally bright focal points on the furniture,not the heavily patinated antique brass sometimes envisioned today.Thus, keeping "brasses" bright, despite the effects of time,wear and pollutants, is a major concern among those working withperiod furniture. The 18th-century cabinetmakers and brass manufacturersused lacquer or other natural resin coatings to protectthe brasses-a tradition that still is followed at The WinterthurMuseum in Winterthur, Del., but with much improved materials.The Agateen 2-B cellulose-nitrate lacquer described here (availablefrom Agate Lacquer Manufacturing Co. Inc., 11-13 43rd Road, LongIsland City, .Y. 11101), when properly applied, will help protectfurniture hardware and enhance its visual qualities for at least 10years, as long as the metal is not handled excessively.Brass and its degradation-Most furniture brasses are alloys ofcopper and zinc, although they may also include lead, iron andod1er elements in varying mixtures. These variations are responsiblefor making the brass appear yellowish or reddish and also forthe types and degrees of corrosion that arise, as shown in the top,left photo on the facing page.Airborne contamination produces the familiar black tarnish onbrass. "Stress corrosion cracking" (season cracking) can resultwhen brass, stressed from being stamped out, is exposed to a mixtureof water, air and ammonia (a major ingredient in most householdbrass polishes and perhaps hardware's greatest enemy). Agreen corrosion product, possibly a copper/salt mixture, is formedin this instance. Frequent polishing causes further degradation andd1e eventual loss of surface detail through wear. Also, in time,body salts and acids from skin appear on the hardware as etchedfingerprints. Acetic acid, which is released by wood over a longperiod of time, is also a source of hardware deterioration.The look of 18th-century hardware-It is rare to find an earlyhardware coating intact. Lacquer deteriorates as it ages and wasoften abraded away by polishing. The brasses were occasionallyrecoated, but we still have a good idea of how the originalslooked. One 18th-century English catalog referred to brass hardwareas "a fine burnish'd gold colour" or "burnish'd and lacquer'd."In addition to preventing tarnishing, these high-lustercoatings imparted a gold-like color to the metal. In fact, the 1804edition of The Royal Standard English Dictionary (published by E.Merriam & Co., Brookfield, Mass.) defines "Iacker" as "yellowvarnish used in brass-work." Some traditional lacquer mixtures, ofsuch d1ings as spirits of wine, turmeric (Curcuma longa) or dra-gon's blood (Daemonorops draco), were described as makingbrass resemble "pale French brandy," as shown in the top, rightphoto on the facing page.Removing old residues-Assuming that any existing coating on thebrasses is not antique, it must be removed. Soaking and scrubbingthe hardware with lacquer thinner (we use Agateen Thinner #1),followed by acetone rinses ensures complete removal in mostcases and degreases the metal. More tenacious, waxy deposits canbe treated by swabbing them with mineral spirits or petroleumbenzine (available from chemical-supply houses). Very often, incrustationsof old varnishes, shellacs and polishes will accumulateon the reverse sides of escutcheons and back plates, around thebases of posts and along the ends of bails. We remove these incrustationswith a fine stream of glass beads from an air-abrasionunit, which acts as a miniature sandblaster. The glass beads leave asatiny, matte finish, so this process is not recommended for thehighly polished, visible surfaces of hardware. Rinsing the metalwith reagent alcohol (90% ethanol, 5% methanol, 5% isopropanol)removes any abrasive reSidue; denatured alcohol is not recommended,because it contains too much water.Cleaning brass-The metal should be as clean as possible beforerecoating, to prevent further corrosion and to provide a goodbonding surface for the lacquer. Heavily tarnished brasses shouldfirst be dipped in a thiourea and acid solution (available from FisherScientific Co., 50 Valley Stream Parkway, Great Valley CorporateCenter, Malvern, Penn. 19355). At d1e museum, we use a mixtureof 8% (by weight) thiourea crystals, 5% (by weight) sulfuric acidand 87% (by weight) distilled water that contains 05% (by volume)Photo-Flo 200 wetting agent (available in photo-supply stores).Commercial preparations used for removing tarnish from silvercan be used if they contain the key ingredients-thiourea (alsoavailable from Fisher SCientific) and acid (sulfuric or hydrochloric). Athorough rinsing first with water and then pure acetone shouldfollow the dipping. Take care when handling acids and other materialslike d1iourea, which is a suspected carCinogen and "slightlytoxic" to d1e skin or when ingested or inhaled. Wear latex or polyethylenegloves; if thiourea crystals are used, wear a particle mask.If the brasses still have a green, copper corrosion in crevices andin the decorative relief, swab the areas repeatedly with 10% (byweight) formic acid solution (concentrated preparations are availablethrough chemical-supply houses), followed by thorough rinsing inwarm water and drying with acetone.Polisbing-To ensure that the brasses remain "chemically" clean,polish them with pure abrasive containing no an1monia, tarnish70 Fine Woodworking
Brasses on 18th-century fu rniture were bright and jewel-like, farfrom the heavily patinated pieces often associated with old work.That dull work, shown above left, is due more to age, wear andpollutants than to the maker's intent However, cleaning and lacqueringtechniques can bring old metal back to its original state,as shown above right.Brass hardware is sprayed on a platform equipped with various pegs and holes to accommodate the small, hard-to-handle pieces.inhibitor or other chemicals. We apply a slurry of Buehler's ( nionCarbide) 0.3u and 1.0u microaluminas (available from BuehlerLtd., 41 Waukegan Road, Lake Bluff, Ill. 60044) and reagent alcoholwith soft, clean, additive-free, cotton flannel cloths or cottondiapers. Various sharpened sticks and dowels, dental picks,toothbrushes and strong, cotton thread can be used to scrapeaway more tenacious residues. After the alcohol in the slurryevaporates, the abrasive dust is blown away with compressedair. The brasses are then buffed to a high polish with either asoft flannel cloth or a chamOis-like, 100%-cotton cloth called"Selvyt" (available through Allcraft Tool & Supply Co., 60 S. MacQuesten Parkway, Mount Vernon, N.Y. 10550). If the hardwarecan't be coated immediately, it's stored temporarily in polyethylenesandwich bags; avoid potentially corrosive cling-type plasticwraps that may contain polyvinyJidene chlorides.Applying Iacquer-Agateen's 2-B cellulose nitrate lacquer is clearand durable, bonds well to the metal surface, dries within secondsand flows smoothly to minimize drips and runs. Its slight yellow tintmakes the brass more mellow looking. We apply two coats of a 50/50mixture of 2-B lacquer and #1 thinner with a spray gun at approximately40 to 50 psi in a prefabricated industrial-size spray booth. Thelacquer can be easily removed with the #1 thinner by soaking orswabbing. Don Heller, Winterthur's objects conservator, who researchedand instituted this metal-coatings program, has designedspecial boards with various pegs and holes to acconU110date small,difficult-to-handle pieces, as shown in the larger photo above. DGregory Landrey is fu miture conservator and Helen Stetina is aformer metal-coatings technician at the HenlY Francis du PontWinterthur Museum in Winterthur, Del.Photos: Courtesy of The Winterthur MuseumMarch / April 1989 71
T urningBoxesA perfect fit forlids and inlaysby Kip ChristensenA challenge for even experienced turners, an inlaid box requires patiencein preparing and drying the stock, precision in fitting the lidand inlays and artistry in shaping the form. The largest Of these,only 3% in. in diameter, is Macassar ebony with Indian ebony andspalted maple inlays; the smallest has inlays Of tagua nut and spattedmaple; the third is rosewood topped with holly and tulip.The feel of a properly fitted lid on a turned box provides afascination that some people find almost addictive. Whenthe lid is lifted with a gentle twist, there's a touch of vacuumresistance, and as the lid is removed, the box catches a small breathof air. When the lid is replaced, the box vents a soft sigh of relief.I was introduced to turned boxes seven or eight years ago. Aftertrying to make one, I realized there was more to it than meets theeye: Both technical and aesthetic challenges must be met for a boxto be successful. I've made boxes with shapes that looked nice butwere unacceptable because the lid was not comfortable to grasp oreasy to remove. A perfect grain match where the lid meets thebase is another element of a quality box.And then there's the. fit between the lid and the base. There's avery fine distinction between a fit that is too tight, too loose or justright. The nature of wood complicates the matter of obtaining, andin particular, maintaining a perfect fit. Even the slightest expansionor contraction in the wood can be detected in the fit, resulting in aloose-tight-loose-tight feel as the lid is rotated. A box that is flawlessin every other aspect but lacks that just-so fit is always somewhat ofa disappointment. Wood movement, due to seasonal changes inthe atmosphere, cannot be completely eliminated, but it can besignificantly reduced by rough-turning the box to its basic shapeand then patiently controlling the drying of the wood. After havingmade a few hundred turned boxes, I still find the process challengingand fun, and the end result rewarding.The addition of an inlay to the top of a turned box can highlighta unique piece of wood or other material. I have experimentedwith inlays of metal, plastic, scrimshawed bone, tagua nut, stoneand wood. The inlay, which is actually an insert, is a circular wafer72 Fine Woodworkingabout 0/16 in. thick fitted and glued into a recess in the top of thebox. Figure 1 on the facing page shows a cross section of a boxwith two concentric inlays. However, the addition of an inlay is notalways an improvement; it may even detract if the box is madefrom an exceptional piece of wood.Making a turned, inlaid box can be broken down into three separateprocesses: preparing the box blank, preparing the inlay andfinally, turning the box. The procedure may seem long and cumbersome,but in reality, each step (with the exception of drying theblank) can be accomplished rather quickly. Once you're comfortablewith the process, the challenge comes in improving the efficiencyof your cuts and reducing production time while still maintainingthe fine distinctions that result in a quality box.Preparing the box blank-Hardwoods with tight, close grain aremost appropriate for turned boxes, because they turn more cleanlyand generally present fewer wood-movement problems than ringporouswoods. The direction of the grain should run parallel tothe lathe bed to make any wood movement less critical to the fit ofthe lid. Box blanks can be made from quartered log sections or fromprecut turning squares. If beginning with a log, I saw a bolt 12 in.to 15 in. long, quarter it with a chainsaw and remove the bark andsapwood. Sapwood is attractive in some species, but I generallyremove it completely, because it's typically less stable than heartwoodand therefore more susceptible to movement that may underminethe fit of the lid. When a 3-in.- to 4-in.-thick piece of wood is hollowedout, stresses are relieved and movement occurs, even withdry wood. So, whether beginning with green or dry wood, I roughturnthe box blanks inside and out, then set them aside to stabilize.Photo lhis page: Michele Russell Siavinsky; drawing: Bob La Pointe
Begin by mounting a 3-in. to 4-in. turning square between centers,and with a large gouge, turn a cylinder of equal diameter itsfu ll length, then turn its ends clean and square with its sides. Acylinder 12 in. to 15 in. long will yield four to six box blanks. I layout for the lids and bases by cuning 1.I-in.-deep kerfs with a specialnarrow parting tool. I made the tool, shown in figure 2 at right, bygrinding a Y. -in. by 1.I-in. steel bar so it will cut a kerf less thanYI6 in. wide. Removing a minimum of wood here preserves thebest possible grain match between the box and the lid. Mark thecylinder across the kerf lines with a magic marker to indicate pairsof lids and bases. Remove the cylinder from the lathe, and usingthe narrow kerfs to guide the bandsaw blade, saw it into lid andbase blanks (see the photo this page).To remove the bulk of the wood from the interior of the blanks,mount the bottom of the base blank on a waste block and faceplateor in a three-jaw chuck. If you're turning green wood, leave someextra thickness at the blank's base and screw a faceplate to thebottom, because the green wood will not glue well to a wasteblock. Hollow out the center, keeping in mind the desired shapeof the box and leaving the wall approximately 'i2 in. thick. Hollowout the inside of the lid in the same manner. Now, take the partsinto the house and lay them on their sides to allow air access to allsurfaces. Allow three to six weeks if you begin with dry wood and16 to 20 weeks for green wood. During the first three weeks,watch the blanks closely for initial surface checking. I've found thatif I place the blanks in a double paper sack, it reduces checking byslowing down and evening out the drying process of the hollowblanks. When the moisture in the blanks has reached equilibriumwith the new environment, they are ready to be finish-turned. Youcan measure this to some extent by weighing the pieces periodically.When they stop losing weight, they are at equilibrium.Preparing the inlays -The recess in the lid must be sized to acceptthe inlay, so the inlay must be turned before you work on the box.First, bandsaw the inlay stock, which you've selected for exceptionalcolor or figure, into o/1 6-in.- to y.-in.-thick wafers. The round orsquare wafers should be large enough so that when they're turnedtrue, they'll yield the desired diameters. To mount an inlay waferon the lathe, remove any accessories from the spindle and placedouble-faced tape on the end of the arbor shaft. Sand the bottomside of the inlay flat on a belt or disc sander, and center the sandedside of the wafer against the tape. Slide the tailstock up to the wafer and adjust the tailstock center so it exerts light pressure againstthe center of the wafer. Turn the inlay round, taking care to leave a90° angle between the edge and the sanded bottom. Remove theinlay from the lathe and set it aside.Fig. 1: Anatomy of a turned,inlaid boxFig. 2: ToolsBoth tools are made fromhigh-speed steel.Layout tool, l4 in. by l4 in.,produces kerf slightlyless than Y16 in.Width of tool tapersslightly from top tobottom fo r clearance.Modified parting tool,!4 in. by J.7 in.,produces clean cuts.BurrLeft side ground slightly longer fo r undercutting lip of base.Second inlayProfileScraping angleTurning the box-To mount the base during the turning process,I prefer a center-screw faceplate and waste block. I use a three-jawchuck to hold the lid fo r turning, but you could also use anotherfaceplate and waste block.First, mount a 2-in.-thick waste block on the faceplate and turn itround and its face flat. Make the waste block's diameter about Va in.larger than the diameter of the base blank you'll be turning. Thismakes it easy to center the blank by eye when gluing it to thewaste block. The 2-in. thickness of the block holds the box farenough away from the faceplate to allow access for shaping thebottom. Sand the bottom of the box blank flat and glue it to thewaste block. With a %-in. spindle gouge, turn the blank justenough to bring it into round inside and out. To turn the lip thatwill receive the lid, I use a modified parting tool, as shown in thetop photo on the next page, but a skew or normal parting tool willalso work. I've designed this tool (see figure 2 this page) to cutChristensen bandsaws the rough-turned cylinder into base and lidblanks. Thin kerfs, made with his narrow parting to04 are used tolay out the sections and guide the bandsaw blade. Marks acrossthe kerfs identify lid and base sets and register the grain match.March (April 1989 73
on the lid. Try the base to the lid. When the base's lip fits insidethe chamfer, you know you're close, and you can see just howmuch more needs to be removed for a perfect fit. Every small cuton one side of the circle is Simultaneously coming off the otherside, so proceed cautiously. When you make the final sizing cutson the sides of the recess, they must be parallel to the lathe bed,not tapered in or out. The fit should be snug but not forced. Nowfi nish shaping the inside of the lid, but remember, you'll be insertingan inlay in its top, so don't dish it out too much. The final cutshould be as clean as possible to avoid excess sanding, so makesure your tools are sharp, and take a light cut. To avoid heating upand distorting the lid, use light pressure while sanding; if you feelthe sandpaper warming up, take a break and let the work cool down.With a modified parting tool, the author turns a lip on the base toreceive the lid. The base is glued to the waste block, which ismounted on a center-screw fa ceplate. The 2-in. -thick block holdsthe work away from the faceplate to allow access for tools toshape the bottom of the box.A shallow recess for a second inlay is cut into the first with amodified parting tool. The interiors of both the base and lid areturned to completion, and the lid is pressed onto the base tomount the inlays and shape the exterior of the box.with a true scraping angle, which gives a much cleaner cut thanthe blunt angle on standard parting tools. (This tool is now availablefrom Craft Supplies USA, 1287 E. 1120 S., Provo, Utah 84601.)Make the lip's sides parallel to the lathe bed or slightly undercutand about 1,18 in. to 0/16 in. long. The shorter the lip, the better thegrain match between the lid and base. Now I use a gouge to shapethe outside, then make the finish cuts on the inside with freshlysharpened scrapers, leaving the walls about 0/16 in. to '14 in. thick.Don't sand the base until after the lid is turned to fit it, becauseheat from sanding can cause the base's shape to temporarily distort.Remove the box and faceplate from the lathe and attach thethree-jaw chuck. Mount the lid blank in the chuck, with the insidesurface exposed, so you can fit the lid to the lip on the base. If youdon't have a three-jaw chuck, mount the faceplate and waste blockthat's attached to the lid on the lathe. True the inside face of the lidand make a couple of concentric pencil lines on the lid's face, approximatelythe diameter of the base's lip. Hold the base up to thelid and use the concentric lines to visually determine where to cutthe recess to mate with the lip on the base. Turn the recess to adepth matching or slightly exceeding the length of the lip on thebase, with a diameter about 1,11 6 in. smaller than the lip. To finetunethis fit, turn a small chamfer on the shoulder you just createdFinisbing-The finish can now be applied to the inside of the lid.If a finish with a strong odor is used on the inSide, the odor willlikely become a permanent characteristic of the box. To avoid this,I use a light coat of mineral oil topped with a coat of odorlesspaste wax. Then, I remove the lid from the chuck and the chuckfrom the lathe. If you are using a faceplate, just part the lid off thewaste block. Remount the faceplate and the base on the lathe, andpress the lid onto the lip of the base with the grain lined up.The recess for the inlay is cut at this time, before the fm al shapingof the lid. True the top of the lid with a gouge or a scraper, thenworking from the center out with a parting tool, cut a recess about1,18 in. deep and the diameter of the inlay. Here again, I prefer mymodified parting tool, and I use the concentric lines and the chamferon the shoulder of the recess as I did when fitting the lid to the base.The bottom of the recess should be flat, and the sides should beparallel with the lathe bed. If glue is applied to the full bottom surfaceof the inlay, it may pull the lid out of shape as it dries. So, applyyellow glue only to the inlay's edge and the outer edge of its bottom,and tap it into the recess with a mallet. If a double inlay is desired,Simply cut a slightly shallower recess into the first inlay, as shown inthe bottom photo this page, and insert an inlay wafer with a smallerdianleter. The inlays should fit so tightly that you don't need to waitfor the glue to dry before cutting the recess for the second inlay.With inlays in place, turn the total exterior shape of the box sothe form flows continuously from top to bottom. When the shaping iscompleted, take the lid off and sand and apply finish to the inside ofthe base. Then, replace the lid and sand and finish the outside of theentire box. Because I turn tiny beads and sharply defined lines, I takespecial care to preserve them while sanding. I cut the sandpaperinto 'I4-in. strips so I can sand right up to the smallest beads withoutrounding them over. I sand the inside of my boxes to 400 or 600 gritand the outsides to 600 grit or 1,000 grit. On the exterior of mostof my boxes, I use Super Rapid Pad by Mohawk Finishing Products,Inc., Route 30 ,Amsterdam, N.Y. 12010. This is an extremely fastdryingfinish that provides a good gloss without excessive buildUp.The box is completed now except for the bottom. Separate thebase from the waste block with a parting toot. To hold the base onthe lathe while turning the bottom, cut a shoulder on the wasteblock to fit the inside diameter of the base lip. If the fit isn't tightenough, use masking tape to build up the diameter of the shoulderfor a pressure fit. Then shape, sand and apply finish to the bottom.I usually turn a small foot to add a touch of detail to the bottom(see figure 1 on the previous page). Take the base off the latlle,gently press the lid onto the base, and admire your latest creation.A well-made box will feel nice in the hand and provide an attractivehaven for anything from paper clips to diamond rings. 0Kip Christensen is a woodturner and assistant professor of industrialeducation at Brigham Young University in Provo, Utah.74 Fine Woodworking
Bandsaw alignment problemsA. Wheel twist B. Wheels out of parallel C. Wheels out of planeWheels viewed fromdirectly aboveWheels viewedfrom front of sawWheels viewed fromfront of sawDegree of twist isexaggerated for clarity.Top wheel is tiltedin relation tobottom wheel.Wheels are parallel, butcenterline of two wheelsare not plumb.Exaggerated for clarity.Uncommon, but difficultto correct on most sawsCorrect by adjustingwheel tilt withtracking knob.Correct by either shiftingposition of bottomdrive wheel on shaftor shimming top wheel.Adjusting Bandsaw WheelsSmall alignment changes improve performanceby Mark DuginskeThe bandsaw can be one of the most useful tools in theshop: It can resaw thick stock or slice off thin veneer andcut curves, circles, tenons, dovetails and more. But don'texpect it to do all these jobs well straight from the factory. For topperformance, you must fine-tune the saw, paying special anentionto wheel alignment. This takes no special tools, gadgets or miracleblades, just a linle time and attention, and a shim or two.In the course of my travels in the past 10 years, teaching classesand giving seminars on woodworking tools and techniques, I'veadjusted at least 100 different bandsaws. Most of these were poorlytuned, and many were miserably out of adjustment. Unfortunately,when a bandsaw doesn't work correctly, people tend to blame themachine, the blade or themselves rather than alignment or anyother adjustment. Some workers seem almost afraid to mess withthe machine, but the method I'll describe here is simple and virtuallyfoolproof, if you follow the steps properly. But before gening intothe "how to," I'll explain a bit about the dynamics of a bandsawand why misalignment can be such a complex problem.Good alignment-For any blade to cut accurately, the wheels ofthe bandsaw must drive it smoothly and continuously. Proper wheelalignment is essential for this to happen, just as correct wheelalignment is necessary for a car to travel in a straight line withoutDrawing:Bob La Pointeexcessive vibration. For top performance, the wheels must line upwith each other in three ways, as shown in the drawing above. Thewheels must align in the vertical axis, be in the same plane and beparallel to each other. When the wheels are aligned all three ways,I refer to them as being "coplanar." With poor wheel alignment,the blade can hop around on the wheel, yielding an erratic cut.These undesireable movements will shorten the life of the bladeand the thrust bearing, as well as wear the guides unevenly.Because bandsaw wheels have no rims, the only thing that holdsthe blade on the tire covering the wheel is proper tracking. To adjustthe tracking, you must alter the angle of the bandsaw's nondrivenwheel while the blade is running. On most saws, this adjustment ismade by screwing a knob in or out. This tilts the arbor supportingthe top wheel, which in turn causes the blade to run or track on adifferent section of the tire. The goal is to keep the blade ridingevenly on the wheel: A properly tracked blade will run withoutrubbing hard against the thrust bearing or coming off the wheel.Blade tracking is also enhanced by the crowned wheels foundon most small American and Taiwanese bandsaws, like the Delta,Sears and Grizzly. The wheels' convex profiles tend to automaticallycenter the blade in the middle of the wheels, just as the crownedfront roller on a belt sander tends to center the belt. This naturalcentering occurs because the blade wants to equalize the tensionMarch /April 1989 75
that it prematurely wears the bearing and the blade.If wheel alignment is so critical, why don't manufacturers takecare of it? In fact, the wheels are aligned at the factory, but beforea blade is installed. This presents yet another variable: blade tension.Wheels that are coplanar under no tension can be forced outof alignment when the blade is mounted and brought up to properrunning tension. Also, a saw that is coplanar at normal tensioncan become misaligned under excessive tension. When a wideblade that runs at a higher tension than a narrow one is installed,the misalignment may become even greater. That is why a saw thatruns fairly well with narrow blades can perform poorly with wideblades. For this reason, bandsaw wheels should be aligned while awide blade is fully tensioned on the saw. This will ensure that thewheels are coplanar when the relationship is the most critical.Some authors claim that many bandsaw problems can be curedby drastically increasing blade tension beyond the manufacturer'sspecifications (see FWW #63, pp. 62-69). This is something I amstrongly against, because I think it reduces the quality of cut andcan eventually damage the saw. Bandsaws, as well as bandsawblades, are designed to work at specific tension settings; higherblade tensions unduly stress the saw and make the blade muchmore susceptible to harmonic flutter, a rhythmic vibration that resultsin poor cuts. In contrast, blades will run truer and last longeron a bandsaw with coplanar wheels, because there is no bindingor twisting of the blade. You will notice more accuracy and power,with less vibration and less blade wander.With the table tilted out of the way, the author uses a strip ofplywood with a straightedge jointed on it to check the wheels of aDelta 15-in. bandsaw for plane and parallel alignment.on its inner and outer edges. Crowned wheels also buffer manywheel-alignment problems and even compensate for irregularitiesin the blade's thickness and width.Variables of poor tracking-Despite the crowned wheels andtracking adjustment, there are several variables that constantlywork against good tracking and often make even a high-qualitybandsaw perform poorly. First, bandsaw blades are rarely perfect:Each blade has its own performance characteristics or "personality."If the weld joining the ends of the blade is uneven, the front andback edges of the blade won't be the same length, and the blademay track poorly and tend to hop around on the wheels. Bladestraighmess is also affected by the manufacturing process: Whenthe front of the blade is heat-treated to harden the teeth, it oftencontracts, making the back of the blade longer than the front.Other variables include wheels that are out of round, causingthe blade to loosen and tighten on every revolution, or tires thatare worn unevenly. Even the self-centering quality of crownedwheels can be a disadvantage with misaligned wheels: The twocrowns compete for control of the blade, rocking the blade backand forth, producing a crooked cut. This is similar to what happenswhen you drive down a rutted dirt road: The car will jerkfrom side to side as the wheels slip into one rut, then the other.Tension and tracking-Even though we can't always change thevariables described above, we can cure the biggest cause of trackingproblems: misalignment of the bandsaw wheels. If poor alignmentisn't remedied, an excessive amount of wheel tilt, via the trackingadjustment, may be needed to keep the blade tracking properly. Inextreme cases, it's nearly impossible to keep the blade on thewheel or to keep it from riding so hard against the thrust bearingChecking wheel alignment-This simple procedure only takesabout half an hour. As already mentioned, the alignment should bechecked with a blade in place. Tension the widest blade you useon your saw according to the gauge on the saw. In my opinion, aY2-in. blade is the largest practical size for a consumer bandsaw. Ifyour saw is old, or if you do not habitually release the tension afterusing the saw, the spring may be compressed and not give you a uuetension reading. You can check this by raising the upper guideassembly for a 6-in. cut and pushing sideways on a liz-in. blade:The blade should only deflect about 14 in. If it's a lot more, youshould increase the tension until the deflection is right. If you'reusing a wide blade, you may need to increase the tension slightlypast the highest mark, but not to the point where you're at the endof the adjusunent screw. When the spring is compressed completely(you can see if it's squashed all the way down), it loses its ability tofunction as a shock absorber, which is its secondary purpose.Use a straightedge, a board or a piece of plywood with a trueedge on it to check if the wheels are parallel and in plane witheach other. Hold the straightedge vertically and lay it across themiddle of the wheels, as shown in the photo on this page, but avoidthe hubs if they protrude. If the straightedge touches on the top andbottom rims of both wheels, the wheels are parallel and in the sameplane. If this is the case, rest easy: The wheels are aligned and you'reready to check for twist, as described at the top of the next page.If the wheels are out of alignment, the straightedge will touch attwo or three points. In most cases, only the top wheel or only thebottom wheel will touch the straightedge. In either case, one ofthe wheels will have to be moved to make both wheels coplanar.It is important to know exactly how far to shift the wheels. Thiseliminates a lot of trial and error in adding and subtracting washersfrom behind the wheel. The measurement is made at two points:at the top and bottom edge of the wheel not touching the straightedge.The distances between the straightedge and the two pointsshould be exactly the same; if they're not, tilt the top wheel with thetracking adjuster until they are. This will make the top wheel parallelto the bottom wheel. The distance from the straightedge to the wheel76 Fine Woodworking
is the amount the wheel must be shifted to be in the same plane.Finally, you need to check the wheels for twist by laying thestraightedge diagonally across the wheels, as shown in the lowerphoto at right Check both diagonals. You may have to tilt or removethe saw table to accomplish this. The straightedge should contacteach wheel on both rims; if it doesn't, the wheels are twisted.Don't worry if your saw doesn't have an adjustment for wheel twist; itis velY uncommon and doesn't affect the saw's performance nearlyas much as the other misalignments. Some old bandsaws and Europeansaws have top wheels that tilt from side to side, allowing theblade to find its alignment in this vertical plane (twist).All the above procedures can be done on a three-wheel bandsawas well: Just check the relationship of the drive wheel to onenondriven wheel, then the other. Finally, check the two nondrivenwheels to each other. One or two wheels may need to be shiftedto get them into plane with each other.Shifting the wheels-Each bandsaw will require a slightly differentmethod for shifting the wheels to get them coplanar. Somemanufacturers, such as Sears and Inca, allow for an adjustment with amovable bottom wheel. This is the easiest kind of saw to adjust.The bottom wheel is mounted on a shaft with a keyway and lockedin place with a setscrew. To adjust the wheel, loosen the screw andslide the wheel the desired amount, then tighten the screw.Delta and some Taiwanese saws must be adjusted by shifting thetop wheel, which is mounted on a threaded shaft and held securewith a nut. Unscrew the large nut and remove the wheel, as shownin the top photo at right. The wheel is shifted by either adding orsubtracting the shims or washers on the axle behind the wheel.Some saws won't have any shims to remove, but it's almost alwaysnecessary to add shims, so this isn't a problem. The Delta bandsawhas a %-in. axle that standard hardware-store washers will fit. If asmaller adjustment is necessary, you can make shims from sectionsof an aluminum can. Replace the wheel and tighten the nut snugly.After you make adjustments, rotate the wheels several time tomake sure the blade is tracking properly. On machines withcrowned wheels, the blade will often find a new equilibrium that'snot in the middle, so don't WOrty. Recheck the plane and parallelalignment one more time. It is a good idea to mark the originalwheel positions relative to the straightedge so the reading won'tbe thrown off by an uneven section of the wheel's rim. Use a pencilor magic marker to mark the wheels.Don't be afraid to realign your saw often-think of it as part ofyour regular maintenance. If you plan on doing much work withone blade, it's not a bad idea to align the saw for that blade. It isimportant to continually monitor the performance of your saw.New blades often stretch, and any blade will expand as it getswarm from sawing, and this may affect blade tracking. Remember,wheel alignment is the best adjustment. You can still use the topwheelangle to fine-tune the running blade, but don't depend on ittoo much. After you align your saw a couple of times, it will becomevery quick and easy to do. The minute it takes to align thewheels is a small price to pay for good performance.Final tricks-There are two more things you can do to make yourbandsaw a pleasure to use. With the blade running, gently round theblade's back corners. This simple modification makes an enormousdifference. I use a diamond hone, but you can use a rme sharpeningstone or even 100-grit sandpaper on a block. A blade with roundedcorners catches less at the back of the cut, especially in tight turns,and tends not to dig into the thrust bearing during curved cuts,preventing excess heat and wear. The second trick is to exchangeyour saw's stock guide blocks for a new type of block made fromSlipping a regular 5Js-in. hardware-store washer on the axle of theDelta bandsaw's top wheel shifts its position sideways to put it inplane with the lower wheel.Laying a straightedge diagonally across the bandsaw's wheels allowsthe author to check the wheels for twist. This often requiresthe bandsaw table to be tilted out of the way.graphite-impregnated phenolic. The replacements, called "CoolBlocks," can be set tight to the blade, for more cutting control andaccuracy, without heating up the blade or wearing down excessivelyfast. They're made to fit most popular bandsaws and are availablefrom Garrett Wade Co., Inc., 161 Ave. of the Americas, New York,N.Y. 10013; (800) 221-2942 or (212) 807-1155 in New York. Customblock sets can also be ordered to fit practically any saw.Mark Duginske is a woodworker and author. He also teacheswoodworking at his shop in Wausau, Wis. He has written a bookon the bandsaw that's due to be out in the fall of this year (SterlingPublishing Co., Inc., 2 Park Ave., New York, NY 10016).DMarch /April 1989 77
Above left: Laurel Bernini gets ready to demonstrate the zigzag marbleroll she built as a sixth grader in one of the author's classes.Above right: Topher Wilkins uses a gouge to make a marble channelin a piece of pine. When this section of track suits him, he'll glue itin place on the plywood backboard. Masking tape provides theclamping power for Odd-shape pieces used for tracks or guardrails.AMcrooked path to fun and physicsaking Marble Rollsby Richard StarrIdeas in my middle-school shop drift about like dandelionseeds looking for fertile soil. The seeds may stay aloft for years,but when they finally settle and take root, the blossomsabound. So it has been with marble rolls. Even in this age of radiocontrolledcars, computer games and VCRs, kids still delight inmaking these simple structures, which use gravity to propel marblesin ingenious and amusing ways. In the process, they learn the valueof patience and care, which results in pride of accomplishment aswell as the ability to deal constructively with the frustration ofthings going wrong.Building a marble roll is an enjoyable trial-and-error exercise inengineering and physics, a painless way to learn about motion,friction, gravity and momentum. The photos and drawings accompanyingthis article illustrate the basic constructions and some ofthe devices-I call them "events"-we've experimented with inclass. If you build a marble roll, you should experiment with dimensions,making adjustments as you go along. Shapes and sizesaren't critical. The point of this project is not to follow a plan, butto boldly roll where none has rolled before.Zi gzags -The easiest-to-build marble roll is the traditional zigzag,like the one shown above, left. Sloping U-channel tracks madefrom thin strips of pine are glued and nailed at each end to L-shapeuprights. A Yt-in.-dia. exit hole is drilled near the bottom end ofeach track section and sawed through to the end so the marble candrop through to the track below. The uprights support the tracksand redirect the rolling marbles onto the top end of the lowertrack segment. At the bottom of the zigzag, marbles are collectedin a scrapwood corral. For additional support, the uprights are fastenedto a flat base. To decide how many tracks, how high andhow wide the roll will be, a child can sketch the project full-sizeand take measurements from the drawing. The actual constructionis simple, requiring only hand tools, white glue and small brads.A nifty variation is the double-track marble race shown in figure 2on the facing page. Make your upright posts exactly as wide as twotracks side by side. Lay out the first set of tracks and then place thesecond set of tracks alongside the first, but tilted in the oppositedirection so the tracks cross in the middle.Automatic s tarter-You can add to the excitement and validity ofthe race with a simple mechanism for starting two marbles at thesame time. This automatic starter is made from three Yt-in.-thickpine boards that fit between the uprights. Drill them as shown infigure 1 on the facing page so the holes in the top piece are thesame distance apart but offset from those in the bottom and middlepieces. The top and bottom pieces fit between the uprights, withthe middle piece, which is Yt in. shorter, trapped between them.When the middle piece is slid side to side, its holes line up eitherwith the top holes, letting a marble drop into and be trapped inthe center section; or with the bottom holes, letting a trapped marbledrop onto the track. Carve sloping channels on the top board,directed toward each hole, so several marbles can be lined up andfed to the tracks. It's amazing to see dozens of colored glitteringballs clunk and zoom down the tracks on their way to the finish line.78 Fine Woodworking
Fig. 1: Automatic starter ,..-_________________________________________Shown in 'drop' position---,Holes, in. dia.,line up withcenter of track.Equal distancebetween holes onall three pieces,offset -in.on top piece.% in. or Sli9htlthicker than.Offset 3/. in.from center to center------Handle, Y.-in.-dia. dowel, for sliding center piecediameter of marble ,,':!'r;;;;;.1a5iiii:z;=:r::;::_:;:;.:;:;:;:;;::;:s;:"!"'=':""'"::;:-:--,,---::-:;;:;:;:::;:__:;z::=-'"'"":,.... ...-:--....-.,..JFig. 2: Double-track marble race====== ==J[!JlJ=-UprightSaw exithole outto end oftrack.Marble corral and baseThe author built this three-dimensionalmarble roll to show his students what ispossible when basic 'events' are combinedwithin, on and around a simple framework.Rube Goldberg, eat your heart out!Chutes and ladders -After mastering the zigzags, many kidsmove on to building chutes-and-Iadders marble rolls on a pieceof plywood mounted vertically in a simple stand (see the top,right photo on the facing page). Although they begin as twodimensionalconstructions, paths often run out from the boardand sometimes bore through it. The backboard is a less restrictivestructure than the uprights of the zigzags, offering more opportunityfor experimentation. Sometimes we miter the U-chaIU1el trackfo r the zigzag rolls into curves, steps and even spirals by gluingsegments end to end and using masking tape to hold the piecesuntil the glue dries.As imaginations run rampant, students raid the bandsaw scrapbox for odd-shape pieces that can be glued to the backboard toalter the marble's path. A gouged path in a block of wood or aguardrail in just the right place keeps the marble on track. Anda small wedge at the start will add to the marble's speed, enablingit to overcome obstacles farther down the line.1hree dimensionals -If building a backboard marble roll is likecomposing a quick aI1d amusing scherzo, three-dimensional rollsare a symphony. There is less structure to fasten things to, butroom for much more to happen. The framework is four uprightYl-in.-dia. dowels glued in holes bored at the corners of anH-shape base. We use U-channel tracks mitered and glued into variousshapes and doweled to the uprights. Begin at the top andwork your way down. Think of straI1ge things you CaI1 make themarble do. To encourage the kids, I built the marble roll shown inthe photo above. It is 3 ft. high, with three separate paths. Severaldifferent events cause the marbles to accelerate, slow down, spinwildly, rumble or fall abruptly along the way. An automatic switch-Drawings: Kathleen CrestonMarch / April 1989 79
Fig. 3: The 'events'Automatic switchesWood washer..----- -Vertical switch- ---Bandsawnswitch gate;;.---Adjustable stops, Y.-in.-dia. dowelSpiralThe marbles roll between the loops of the spiral. Theloops are held apart by dowels pinned to the basestrip at one end and glued into shallow holes inthe spiral.Layout for bandsawing spiralCut off for desired exit direction.5ta ;;cut.Brads secure dowels to base.11/ 1 )/I "'----/11 ---'>Iing system feeds marbles to the various paths in sequence, and atthe bottom, a marble pulls a lever that starts another at the top.The major events on this machine can be used together or aloneon rolls as simple or complex as you care to build.Switches -Any marble can be directed to a variety of paths by us·ing intersections and automatic switches. Furthermore, severalswitches can be used together to introduce an element of surprise.A simple switch gate is shaped like a three-point star and swivelson a dowel inserted in the track floor where two tracks intersect,as shown in figure 3 above. The gate swivels until its long leg hitsthe Sidewall, opening one path and closing the other. A marblerolling by the gate hits a short leg in the open path, causing theswitch to swivel to its alternate position. Beveling the bottom edgesof the gate will keep it from hanging up on the track surface. A smallpiece of scrapwood acts as a nut to hold the gate on the dowel.The basic principle is the same for a vertical switch. When amarble drops onto a vertical switch through a hole in the trackabove, it is directed to one of two paths, and the position of theswitch is Simultaneously reversed. Dowels located in the floor ofthe track limit the gate's tilt. To ensure that the marble doesn't rolloff the side of the switch, you can hollow out the edge of the switchslightly with a gouge and cup the lip where the marble exits. Or, youcan make the switch with a narrow sidewall to contain the mat'ble.80 Fine Woodworking
Tilting rampsWeight of marble tilts ramp down until it hits ramp below. Whenmarble rolls off end of ramp, the counterweight brings ramp back upagainst upper dowel-stop._-=:::::§§;§J L attachesAdjustablecounterweight Pivot, -in.-dia. dowel,to frame, butis loose in ramp.hole. On a %-in. by %-in. strip of pine, which will support thespiral, mark the position of each dowel and drill Y4 -in.-dia.holes clear through. With this strip in a vise, use a hammer togently tap the spiral above each dowel until each one is throughthe base strip.To expand the spiral to its fu nnel shape, start at the center anddrive the first pair of dowels through the base strip about 1'2 in.Moving outward, drive each successive pair of dowels through alittle less than the previous set. Return to the center and repeat thisprocess until a funnel shape is fully formed. The loops should bespaced so a marble is just barely retained by the next track up.You'll find the wood is stiffer near the bottom and can't be spreadas far without breaking. As you approach full depth, test the track:Start a marble at the top with a little push so it'll cling to the rim. Ifit slows down anywhere along the path, drive that section of thespiral down slightly and try it again. When you're satisfied with therun, pin each dowel in the base strip with a small brad.A spiral makes a fine beginning for any marble roll. If you installthe spiral some distance from the starting pOint, you may need touse an entrance ramp to ensure the marble has enough speed totake the long, sweeping, ever-accelerating path, instead of walkingdown the fu nnel's steps.Musical stepsWhen mounted at an angle, the chimes become stepsfor marble to walk down.Dowels, in. dia., are just long enoughto extend through chimes.Holes in chimes, 0/,& in. dia.,for loose fitSidewall can beremoved tochange chimes.To tune chimes,use different woodsand vary lengths.Spiral-In this event, the marble should accelerate dramatically,making a whirring sound as it races down the spiral path. A spiralis an unusual shape for wood, but it's easy to make. Select an II-in.square of %-in.-thick white pine with clear, straight and flat grain.Bandsaw this square by eye, with successive loops about I in.apart, leaving a straight tongue tangent to the circle and parallelwith the grain as an entrance (see figure 3 on the facing page).Then decide which side will be up, thus determining whether itwill be a left- or right-handed spiral when stretched open. On thebottom surface, draw a line perpendicular to the grain and drillY4 -in.-dia. holes, almost through the board, on the line at eachturn of the spiral. Glue an 8-in.-long piece of Y4-in. dowel in eachTiltingramp-The rhythmic, cascading motion provided by a seriesof tilting ramps contrasts nicely with the faster, swirlingmotion in a spiral. Short ramps give a rapid, herky-jerky motion;longer ones dip and rise more slowly in a less frantic way. Figure 3,left, shows how these tilting ramps are made. At the end of asection of U-channel, where the marble enters, a Y4 -in. dowel isinserted to hold an adjustable wooden counterweight. Anothersmall dowel is installed to prevent the marble from escaping.The bottom of the other end is beveled to increase the distancethe ramp can tilt. The ramp pivots on a dowel about one-third thedistance from the counterbalanced end. When a marble dropsonto the inclined ramp, it rolls toward the exit end, tilting theramp more as it rolls. When it falls off the ramp, the counterweightcauses the ramp to snap back to its original position. I call thetilting ramps "click-clocks," because of the regular beat they produceas they dip, hit the underlying ramp and then rise and hit theupper dowel stop.Musical steps -One of my favorite events is the musical stepsshown at left. Marbles march down a set of stairs, creating an entertainingpercussive sound. To make the steps, mark out and drillequally spaced holes (one for each step) in a Y2-in. by I-in. strip ofwood, which will be one of the sidewalls. On the other sidewall,drill just the two end holes. Glue a Ys -in. dowel in each hole onthis sidewall. The dowels at each end should be long enough torun through and support the other sidewall. For the stairs, whichwill be the chimes, cut varying lengths of %-in.-thick pine, drill ahole near the end of each strip and hang one on each dowel. Theyshould fit loosely. Drill two Ys -in.-dia. holes in the other sidewall,and install it in place on the long end dowels from the firstsidewall. Finally, hang the stairs on the framework of the marbleroll at an angle t11at allows a marble to drop from step to step.Different kinds of wood give different tones. The chimes can betuned by adjusting their lengths, and the scale can be changed byremoving the sidewall and rearranging the chimes.Richard Starr teaches woodworking at Richmond Middle School inHanover, N.H. He is also the author of Woodworking with Kids;1982 (The Taunton Press, Box 355, Newtown, Conn. 06470). Allphotos are by the author, except where noted.DMarch /Apri1 1989 81
Tuning a Japanese PlaneTaking the tool to its full potentialby Robert MeadowFig. 1: Plane anatomyCutting bladeSubblade_----.:,.-;o. Ear is bent down toincrease holding forceon cutting blade.Microbevel, 60°,%2 to %2 in. wideSubbladeThroat,'Is in. wideEdge is slightlv curvedacross width.Tool steel laminatedto mild-steel backingBed (Pare with chisel tomatch blade contour.)Wood bodySale (See Fig. 2 for contour shapes.)Handplaning at its best is perhaps the most pleasurable ofall woodworking surfacing techniques; at its worst, it's oneof the most frustrating. The handplane can surface eventhe most figured woods, such as bird's·eye maple, to a mirror-likefinish, producing far better surfaces than possible with a cabinetscraper or sander. As a musical instrumentmaker, I have conductedmany tool demonstrations, and my students invariably are astonishedat how my Japanese planes produce long ribbons of tissue-thinshavings with any wood. They sometimes think some magic orU"ickery is involved. There isn't. But to make these fi ne cuts, youneed a we ll-designed, high-quality plane that has been meticulouslyfine-tuned. The planing itself requires a high degree of concentrationand sensitivity. You must be aware of what is going on at theblade's edge as it moves through the wood, continually adjustingyour plane and technique to achieve the best results.A newly purchased Japanese plane possesses the potential forsuperior performance, but it won't work well right off the dealer'sshelf: The wooden body may have dried out and shrunk since it82 Fine Woodworkingleft the moist Japanese climate. The blade and subblade alsomust be shaped, sharpened and fitted to the body. But beforeyou make these adjustments, you need to understand a bit aboutthe planes themselves.I was introduced to Japanese planes by my friend Makoto Imai,who apprenticed as a temple builder in Japan and now works inCalifornia. Although I had been getting good results from Westernplanes for years, it wasn't long before I abandoned them in favorof the Japanese planes. Their heavy irons can be sharpened to anincredible edge, and their wood bodies can be customized tomake fine cuts in any wood.The Japanese plane appears primitive alongside a metal Western-styleplane. It has few parts: a wood body with tapered slotsthat hold the cutting blade, also tapered, and a subblade wedgedtightly behind a pin that spans the width of the plane. Figure 1,above, shows the plane's anatomy. There are no built-in adjustingmechanisms. The Japanese plane, unlike its Western counterpart, isnormally pulled rather than pushed. One hand grasps the longDrawings: Bob La Poinle
part of the plane's body in front of the blade to provide downwardpressure and to pull the plane over the workpiece. The otherhand, positioned behind the blade, guides the plane. At alltimes, one must be sensitive to the balance between the pressureof the two hands.The blades used in Japanese planes are thicker than those usedin today's Western planes and are laminated from two pieces: athin, high-carbon steel layer that forms the cutting edge and athicker, wrought-iron back. This thicker blade rigidly supports thecuning edge, and because the bulk of the blade is a fairly soft metal,its cutting edge and bevel can be shaped more easily. The key tosuperior performance, however, is in the steel itself. The Japaneseuse unalloyed high-carbon tool steels, which they call "whitesteel." Western tool steels have alloys added. High-carbon toolsteel without alloys warps when it is quenched in hardening. Thiswarpage can be controlled by laminating the tool steel to a thickerbacking. One great advantage of white steel is that it can beworked over a wide range of temperatures, so the size and shapeof the metal grains can be manipulated. The edges of these flanenedcrystals are hard yet still flexible. The round crystals of alloyed toolsteels used in Western planes (and the so-called "blue steel" insome Japanese planes) lose flexibility as you increase hardness.The process of "tapping out," which will be discussed later, alignsthe flat crystals of white steel so their hard edges form the cuttingedge of the blade. This gives you a blade that wears evenly, ratherthan one that dulls or chips.Because the bodies of Japanese planes are made from solidwood, they can be affected by changes in temperature and humidity.Fortunately, these effects are small, and in any event, correctable.As mentioned earlier, the cutting blade is held in position by thetapered slots in the wood body. The blade is sprung when it isheld in the body, which helps it to resist deflection as the tool cuts.The range of elasticity of the wood body affects its ability to springthe blade without requiring excessive force to get the blade in andout. Metal has too little elasticity to work well in this way, and asoft wood doesn't have the stiffness to support the blade sufficiently.Japanese white oak, the wood commonly used for the bestplanes, has the best balance of these characteristics. Additionally,as will be discussed later, the plane's wood sole can be reshapedfor the particular task at hand, whether it be roughing, trueingor finish-planing.Conditioning the plane -You must understand what happenswhen you plane a piece of wood before you can grasp the rationaleinvolved in conditioning a plane. As you pull the plane, theforces on the blade deflect the cutting edge down into the wood.When working with softwoods, such as pine, these forces are notgreat, so the blade easily resists deflection. The forces on the bladeincrease, however, when taking heavy cuts or when working withhardwoods. Eventually, these downward forces can exceed the stiffnessof the blade, causing it to pull down into the wood abruptly. Asthe blade snaps back to its original, nondeflected pOSition, thewood will tear out. We think of steel as being a hard, rigid substance,yet in reality, it is flexible and whippy. Students are amazedat how the blade's edge is easily deflected simply from fingernailpressure applied along the back of the blade near its cutting edge.No small wonder then that even a slight change in edge angle hasa great effect on how the blade flexes and how it feels as it movesthrough the wood. The trick in getting a plane to work well is toadjust the body to provide maximum support for the blade as it'scarried across the wood surface, and to shape and sharpen theblade to resist deflection. A well-conditioned plane shaves cleanly,is easy to use and control, and doesn't vibrate.Shaping and s harpening the cutting blade-Begin by disassemblingthe plane. Remove the blade and subblade by sharply hittingthe chamfered surface on the back end of the body with a hammer.Keep your thumb on the blade to keep it from popping out.Note how the hard, high-carbon steel side of the blade has a flat atthe cutting edge, then a dish-shaped area. The hollow is formed asthe blade cools when it is being hardened; the thin, high-carbonsteel layer contracts more than the plane's thicker, mild-steel back.The flat area is an essential part of the cutting edge and must bemaintained at all times.The process for maintaining the flat, or land as it's often termed,is called tapping out, and it's the first step in the blade tune-up. Inaddition to aligning the metal crystals as previously discussed, thisprocess gently curves the edge of the blade to provide metal forshaping the flat. Over time, the flat wears away, so it's a good ideato tap the blade out a little each time you resharpen it. Using across-peen hammer, I gently tap on the mild-steel portion of thebevel, as shown in the photo on the next page. The blade has to besupported directly under the hammer blows; I use the roundedspot on the corner of an anvil. Begin tapping at the heel of thebevel, moving the blade back and forth like a typewriter carriage,and progress down the bevel toward the weld line between themild steel and the tool steel. Don't tap on the hard, tool-steel lam inate, because you're liable to chip it.Once you've finished tapping out, you can flatten the land alongthe edge and alongside the hollow. The land along the edge shouldbe perfectly flat, but the blade is slightly concave along its length.To preserve this slight curvature, don't place the whole blade downflat on the sharpening stones. Instead, begin at the edge, supportingthe weight of the rest of the blade, and move farther into the stonein a controlled manner. Coarse and medium stones are used toform the flat area; it'll be polished later. Check for flatness usingwhite light (the reflection of your light source) to highlight anyuneven areas. The photo below shows an example of a well-preparedflat, along with some examples of problems to be avoided.The next step is to prepare the bevel on the other side of theblade. Steep bevels support the edge best, making it more resistantto deflection, but this configuration, because of its bluntness, alsodecreases the blade's sliCing effectiveness. A shallower bevel cutsmore effectively but is weaker and more prone to chipping. Optimally,hardwoods require a larger bevel angle than softwoods, butfor Japanese planes, a 25° bevel is a practical compromise for mostplaning applications. The bevel itself should be perfectly flat, butas you shape the bevel, you want to form a slight convex curvePhoto: Michele Russell SlavinskyThe left blade has been tapped out correctly, and the flat land is welldefined. The other blades need to be tapped out The flat area on themiddle blade ext ends too far back, forming a groove. The flat on theright blade has almost disappeared from repeated sharpenings.March/April 1989 83
The author uses a small cross-peen hammer to gently tap out the blade, which is supported on the rounded corner of an anvil. Only themild-steel portion of the bevel is struck. In this way, the hard tool steel, which is laminated to the mild steel, can be gently curved.across the width of the edge by applying more pressure whenstoning the outside edges than in the center of the bevel. The deviationfrom straight should be about five times the thickness of theshaving you want to take. This allows for the angle and deflectionof the blade by the body and prevents the corners of the bladefrom nicking the planed surface. I carefully remove the burrformed during sharpening with a slower-cutting medium stone(3,000 to 4,000 grit), working alternately on the back side of theblade and the bevel. The objective here is to cut the burr off cleanlywithout work-hardening the edge. If you bend the burr back andforth to remove it by causing the metal to fatigue,. the edge willwork-harden, dull more quickly and be more prone to chipping.Finally, fi nish the edge by polishing it on fine stones. As before,work alternately on the back side and the bevel. Again, as you proceed,use reflected white light to make sure that these surfaces aresmooth, flat and free of imperfections. When the white light reflectsuniformly off the bevel and no longer reflects off the edge of theblade itself, the job is done.The subblade -The subblade directs shavings up and over thecutting blade and out of the plane, but its major function is to deflectthe cutting blade so it resists being pulled down into the wood. Asthe cutting edge dulls, the planing forces will increase and the subblade'srole becomes more important. For finish-planing, where thegoal is to produce a smooth and shiny surface and not to remove alot of wood, the planing forces are minimal, because extremely fineshavings are made. Here it's possible to use the plane without itssubblade and produce gleaming, mirror-like surfaces, because thesubblade is not changing the shaving's angle as it leaves the plane.The subblade, like the cutting blade, is made by laminating toolsteel to mild steel. It is conditioned in the same way as the cutter,with a couple of important differences. Because the subblade isn'tused for cutting, the keenness of its edge is not critical. Its bevelshould be formed accurately, but it doesn't need to be polished.To provide additional support at the subblade's edge, I blunt theend of the bevel by forming a 60° micro-bevel. The micro-bevelshould be polished. For hardwoods, where the most support isrequired, I make the width of the micro-bevel about %2 in.; forsoftwoods, about Y3 2 in. If you are working with a wide variety ofhardwoods and softwoods, the hardwood width will do for all thework. This eliminates the need to keep two sets of planes withdifferent blade angles for use with hardwood and softwood. Theedge is made straight so that when the subblade is aligned witllthe cutting blade, this edge will sit back just far enough from thecutting blade's curved edge to prevent shavings from getting ja!11ffied.Fitting the blades to the body-Changing the plane's white-oakbody to compensate for climatic effects and to fit the blade andsubblade is not very difficult. The purpose here is to adjust thebody so the cutting blade and subblade conform to their matingwood surfaces. Once these initial adjustments are made, youshouldn't have to make any major adjustments, as long as you useand store the plane in a reasonably constant environment.The width of the tapered slots and the cheeks, which support thesubblade, need to be adjusted first. The blades should be centered inthe body and fit snugly, not tightly, at the bottom. At the top, leaveabout Y3 2 in. of play on each side of the blades to allow for lateraladjustment. Use a chisel to carefully pare the sides of the taperedslots and cheeks. Keep the shoulders of the tapered slots squareand clean. If you have any question about the fit, you should err onthe side of tightness; you can always loosen the fit later, if necessary.The back of the cutting blade must lie firmly on the bed. Adjustingthis area is a matter of "cut and try. " Cover the back of the bladewith lead from a soft pencil and gently tap the iron into the body.When you remove the blade, the lead marks left on the wood willhighlight areas where the blade interferes with the bed. Becausethe blade and the bed have small curvatures, some of the markscan be misleading, thus not all the marked areas should be paredaway. Instead, look for how the blade skews to one side or theother as you tap it in. First pare the high spots, where the bladehangs up, repeat the marking procedure and check the fit again.Repeat this process until the blade can be positioned smoothly,with the tightest fit near the throat in the center of the plane.Once the blades fit the body properly, adjust the subblade toapply the desired amount of pressure on the underlying cuttingblade. The subblade is tightly wedged between the holding pinand the cutting blade. Contact between the two blades is made bythe beveled edge of the subblade and the "ears," the bent-over topcorners of the subblade. The ears are formed by hammering overthe top corners of the blade, using the tapping-out process describedearlier. As before, the blade has to be supported on therounded corner of the anvil when being struck. If the ears areunevenly bent, the subblade will rock, so check for this beforetrying out the plane. If the cutting blade digs in or tears the sur-84 Fine Woodworking
The author uses winding sticks to check the sale of this plane for twist in the plane's body.Using a single stick, Meadow will later check the sale for flatness.Meadow is shown here adjusting the saleof a plane, flattening its surface and removingany twist with a scraper plane.The wooden sale should be checked frequentlyso any necessary adjustments tocompensate fo r wear or changes in environmentalconditions can be made.face, the blade is too loose and you'll need to bend the ears a bitmore to increase the pressure on the blade. When working withhardwoods or when taking thick shavings, you may find it necessaryto increase the pressure to resist the increased planing forceson the blade. The pressure is about right when you get shavings ofthe same thickness whether you plane with or against the grain.Checking out the sole-Before using a wooden plane, you shouldcarefully check the plane's sale. When a plane is not cuning smoothly,it almost always involves a problem wid1 the bonom of the plane.Eid1er d1e shape of d1e sale is not right for d1e job at hand, the bodyis twisted or the sale is not flat across the plane's width.The first step is to check the body for twist with a pair of windingsticks, a matched pair of wooden parallel straightedges. Place onestick on the sale just in front of the plane's throat and the other at thefront end, as shown in the photo above, left. Sight across the topedges of the sticks. If the end of one stick is higher than the other,.d1e body is in winding-twisted. Use a scraper plane, working acrossd1e grain, to eliminate the high spots, as shown in d1e photo above,right. The scraper plane, because of its near-vertical blade, takes fine,dust-like shavings, so the adjustments can be made gradually.When you're sure d1e sale is flat wid1 no twist, you can modifyits shape along its length. The shape of d1e sale depends on howyou intend to use the plane. For trueing, the idea is to removelocal high spots from the wood's surface and make it flat. To dod1is, the plane has to bridge the high spots, so the sale is supportedat the far ends of d1e plane and near the blade. For rough-surfacingor finish-planing, the idea is to remove the wood uniformly. Forfinish-planing, the sale must conform to the trued, flat surface ofthe workpiece, so d1e plane is supported only at its front end andat d1e blade. For rough-planing, more relief is needed between d1esupport points to allow the sale to conform to the more irregularsurface of d1e wood. Figure 2 at right illustrates the ideal sale configurationsfor u-ueing and for roughing or finishing. Use thescraper plane again to contour d1e sale. Finally, you want to cleanup d1e d1roat of d1e plane wid10ut enlargening it any more thannecessary. The opening should be small, not larger than VB in.Your aim is to make d1e plane as immune as possible to subtlechanges in grain and wood hardness. The most critical point ofsupport for d1e plane is at the throat opening: The closer d1is point isto the edge of d1e blade, the easier it will be to control the plane.ow d1at you've worked your way through the tune-up proce-Fig_ 2: Sole configurationTrueing configurationRoughing or finishing configurationSole contqcts work at blade and front end of body.Note: Sole contours are exaggerated for purposes of clarity.Actual maximum relief is approximately Y64 in.dures, it's time to see how well you've done. Try your plane out on awood that's hard to surface, such as bird's-eye maple or quarter-sawncherry. If you've tuned everything right, the plane should producewide, uniform shavings. The plane should also feel good, be easyto handle and be free of vibration or chaner. And, it should be quiet:The only sound should be that of the blade sliCing into d1e wood. Iftl1ings are not quite right, you probably need to increase the pressureon the cuning blade or check the plane's sale configuration. 0Robert Meadow is an instrumentmaker. He and his wife, BonnieRobiczek, who helped prepare this article, operate The Luthierie inSaugerties, NYMarch / April 1989 85
Rudy Mihalicz's walnut andbirch lamp, left, has a stacklaminatedbase carved to formfour helixes twinning aroundeach other. The lamp 's shade ismade Of thin slices of agate thatare set into a multifaceted walnutframe.Jamie Russell's ash armchair,right, is part of a six-piece set hemade using laminated bending,spindle turning and router10inerytechniques.John Leach made the tiny loonpictured below, left. It is lessthan 2% in. long. Leach carvedand painted the tupelo miniaturein the same way he makesfull-scale bird decoys.Stan Wy chopen did all thework on his IfBth-scale model ofa WellS-Fargo stagecoach, belowright, including the fa bricationof the rosewood, maple and ebonybody parts and casting Ofthe brass hardware and fittings.The coach's lamps and windowsare glazed with beveled glasspanes, and the interior is finishedwith leather upholsteryand silk curtains.StaffWoodworkers of SaskatchewanA tour of talent on the Canadian prairieby Sandor Nagyszalanczy
Before I visited the Canadian province of Saskatchewan, Ihad visions of furniture made from old barn wood andkitsch souvenirs carved from petrified bison horns. Afterall, the northern prairies are far from the pace and sophisticationof the cultural trendsetters of New York and Toronto. What greetedme in Saskatchewan, however, was a surprise: Not only was theprovince's crafts community sophisticated and thoroughly cosmopolitan,but the local woodworking community had more than itsshare of what I'd call world-class craftsmen. In this article, I'll tellyou a bit about Saskatchewan and the craftsmen I met in my travels.My plans to visit the North country sprouted when I was askedto be one of three judges in the annual Saskatchewan HandcraftsFestival Juried Exhibition: Dimensions '88. The show, sponsoredby the province's crafts council, included such diverse crafts aswheat weaving and glass blowing, ceramic sculpture and leatherwork, and papermaking and fine jewelry. Although woodworkingrepresented only a small percentage of 45 pieces selected for theexhibit, the work was spirited and the quality was high throughout.Some of my favorite pieces in the exhibit are shown on the facingpage. The ash armchair by Jamie Russell of Ruddell featuresbent-laminated arms, rear legs and back, turned front legs andskillfully jigged router joinery throughout. Russell designed thechair for a client who commissioned a dining table and wanted amatching set of chairs. Because six chairs were needed, Russelldesigned a streamlined process that relied on an extensive arrayof router jigs to help him make identical parts without too muchfuss. He was pleased enough with the design to make an extrachair for the exhibition. Like so many craftsmen in Saskatchewanwho do all sorts of woodworking to pay the bills, Russell builds awide range of pieces, from custom one-of-a-kind pieces to a line oflimited-production tambour-top boxes (see how to build theseboxes on pp. 56-58).The lamp by Rudy Mihalicz of Regina is an unusual piece, bothin design and materials. The lamp has a stack-laminated walnutand birch base and stem. For the shade, Mihalicz built a walnutframe reminiscent of a faceted gemstone and set it with 30 thinslabs of agate. The lamp sheds a soft, colorful light and brings outthe veining and character of the translucent stone. Because Mihaliczworks full-time in the family cabinet shop, he had to build thepiece after hours. It seems only fitting that he built a lamp, consideringall the midnight oil he burned.John Leach of Saskatoon didn't have the largest piece of woodworkingin the show, but it was certainly one of the best: a miniatureloon. The loon, measuring only 2Yz in. long, is carved from tupelowood and realistically painted. The small details of the carving aredone with such deftness that the piece, which won a special meritaward, has what I call "the breath of life." At a critique followingthe jurying, Leach introduced himself and gave me a good laugh:His little bird is actually called a "liquor loon," because he carvesthem for his friends to float in their drinks. He had another sensitivepiece of carving in progress: a martini mallard.After jurying the show, I spent a week exploring the area surroundingSaskatoon, Saskatchewan'S largest city, getting acquaintedwith the local woodworkers. Despite being far from the beatenpath, the woodworkers of Saskatchewan are a well-connected andorganized group. Their local association, the Saskatchewan WoodworkersGuild (SWG), has had a strong membership for more than10 years. They also sponsor frequent woodworking conferences,which this year will feature instruction by Wendle Castle, Judy KensleyMcKie, Gary Knox Bennett, Wendy Maruyama and Alan Peters.Stan Wychopen-One of the fi rst stops on my tour of local shopswas in North Battieford, a frontier-like town west of Saskatoon,to see Wychopen. After working for years as a prison counselor,Wychopen decided to take up woodworking. He walked into ahardware store, asked what machines he would need and boughtthem on the spot. In much the same way, he taught himself metalworkingand jewelry making as well. Not encumbered by the needto make a living from his crafts, Wychopen combined his talentswith an interest in model making to come up with an impressivearray of sculptural creations and replica-type models. His bestmodel undoubtedly is his scaled-down Wells-Fargo stagecoach,shown on the facing page. The basic coach body is a frame-and-panelconstruction of Brazilian rosewood, maple and ebony. Hundredsof investment-cast brass parts (gold plated to prevent tarnishing)provide all the metal fittings, from the coach's brake lever to theworking door locks. Other materials include leather, for upholsteryand rigging, silk curtains and beveled-glass windows. Eachcoach is highly detailed: Just one of the side lanterns has morethan 80 parts and features a working wick-raising mechanism.ConSidering all the work involved in a single coach, Wychopenwisely decided to produce an edition of 20 coaches. He spent ayear making all the parts in his spare time. To speed up the process,he invented dozens of ingenious jigs and construction methods.For instance, to make the dozens of tiny frames needed for eachwindow, Wychopen miters and glues up a square tube, then slicesoff thin frames one at a time.Despite his rural setting and lack of publiCity, Wychopen's reputationas a master model maker has spread afar: His coaches areowned by distinguished clients, such as Prince Phillip and ConradHilton. He reluctantly put a $7,500 price tag on his first coach,which he sold more than five years ago, but now public demandfor the limited edition has boosted the price to $50,000. There arebins and bins of coach parts awaiting assembly in Wychopen's meticulouslykept shop, but he may not get around to building all thecoaches for years. He was building an altar screen for a GreekOrthodox church when I visited him, and despite all the work, heacted as though he had all the time in the world.Don Kondra-Kondra came to woodworking as a refugee fromthe corporate world. A manager at a meat-packing company, Kondrarecently moved to the outskirts of Saskatoon to pursue a careermaking functional furniture. With the help of 13 friends, he builthis modest-but-comfortable combination house/shop in only 30days, and only cut down one tree in the process. As an indicationof his priorities, Kondra's shop takes up more than half of his floorspace. The shop is well equipped with Canadian-made Generaland homemade machinery, and it even has a well-insulated, heatedfinishing room-not a luxury in a land where the thermometersrun short on mercury every winter.Like many woodworkers struggling to learn their trade whilemaking a living, Kondra has built everything from bread-and-butterplywood cabinets and wall units to custom pieces, including a corneraquarium and a Balans-style chair. As his skills have improved overthe years, Kondra says his clients have been inspired to give himmore challenging commissions. Kondra has also been working ondeveloping production items, including turned-and-inlaid boxesmade from local and exotic burls, a lacquered wood and spaltedbirch serving tray and some clean-line rosewood round-top tables.Kondra, then chairman of the SWG, hosted a combination guildmeetinglbarbecue that I had the pleasure of attending. Working inrelative isolation, local woodworkers relish the opportunity to gettogether to talk shop and discuss each other's latest creations. Theannual Dimensions competition is the big event of the year, somethingKondra considers to be his "yearly final exam: an opportunityto build something that displays my best abilities." Kondra's walnutPhotos: Grant Kernan, except where notedMarch /April 1989 87
Don Kondra uses frame-andpanelconstruction to make hiswalnut blanket chest (Jeft)light, yet strong and free Ofwood-movement problems. Heglued up the curved panels forthe chest from thinner veneers,applying a burl-walnut face veneerfor a beautiful contrast tothe straight-grain walnut frame.StaffLeon Lacoursiere built all thevarious parts of this maple,rosewood and brass balancescale, right, using turning, castingand sculpting techniques.The balance scale's maple-leaffinial is appropriate, becauseLacoursiere is Canadian andbecause the scale was made forthe Canadian CommonwealthHeads of Government.blanket chest, above, scored well with the judges, though it mightnot have made the grade Kondra was hoping for: He won Premier'sPrize in 1985 for a modern sofa table he built from Honduras rosewood,ebony and osage orange.I was surprised to see so much work being done in Saskatchewanwith exotic, hard-to-get woods, but once again, I underestimatedprairie resourcefulness. Russell, who was my guide, took me tovisit a lumberyard called Renaldo's Supply. After driving along dozensof miles of dusty roads, we came to the one-street town ofArelee, which was lined with faded and boarded-up storefronts. Imet the owner of Renaldo's, Rick Dawson, who took me past arank of old school buses used for wood storage to a couple ofsheds fi lled with lumber. At fi rst, I naively thought it was a goodsizesupply of lumber for such a barren area. Then Dawson tookme for a tour of Renaldo's other lumber-storage rooms, whichended up including half the buildings in Arelee. As it turns out,Renaldo's ships orders all over the world and regularly stocksmore than 100 species, including many exotics I have never heardof, such as guanacaste and kauvula.Leon Lacoursiere -Like Wychopen, Lacoursiere is an accomplishedcraftsman in several fields, including woodworking, stonecarving and jewelry making. I visited him in Delmas, a farmingcommunity a couple of hours northwest of Saskatoon. Lacoursierehad run the family farm until just a couple of years ago, when heopened a modest-size cabinetmaking shop. A shy man with astrong French-Canadian accent, Lacoursiere is so soft-spoken thatit's a good thing his work speaks for itself. When I arrived, theshop was fi lled with ordinary-looking cabinet parts awaiting assembly.After we talked for a while and he became comfortable withmy interest in his work, he brought out some boxes and unpackedenough of his "artistic" work to fi ll a display window. He showedme turnings, both of wood and alabaster, some of which weremade with tools he had designed and made himself. He also hadjewelry, spinning tops, a 7-in.-high ebony goblet with a hair-thinstem and the finely made balance scale shown above, right.Why isn't a talented craftsman like Lacoursiere well known ?Among his friends in the SWG, Lacoursiere is notorious for hismodesty. At a turning seminar several years ago, he declined todemonstrate his talents in front of the class, but instead worked allnight to complete an exquisite turned goblet before the next day'sclass. Not surprisingly, Lacoursiere hasn't done much to promotehimself or his work outside of Saskatchewan. The one time he sentwork, including the balance scale, to an exhibit at the CanadianCommonwealth Heads of Government Meeting in Vancouver, B.C.,the card that accompanied his scale in the show was misprinted toread "Artist: Unknown."Mike Hosaluk-As one of Canada's best-known wood craftsmen,Hosaluk has created wooden bowls and vessels that can be foundin collections around the world, and his resume reads like a list ofthe important woodturning events of the decade. But when he'snot traveling around North America or elsewhere (he spent amonth last summer in Australia), Hosaluk leads a modest lifestyleworking in a simple, two-car-garage-size shop next to his housejust outside Saskatoon. The day I viSited, he was experimentingwith a new vacuum chuck he had built for his lathe. But instead ofturning a wood bowl or platter, Hosaluk used a body grinder toput a swirl pattern on a steel plow disc-the top to a playful steeltable finished in gun blueing. Later in the day, he worked on anew stack-laminated vessel (see top, left photo on facing page) thatcombines a painted particleboard cone and intersecting rods withaluminum feet. The final result, shown in the top, right photo onthe facing page, is more like an architectural construction than abowl or vessel.After seeing this modern, urban-inspired work, I wondered ifthe guy I was visiting was the same Mike Hosaluk who had donethe more traditional woodturnings I was familiar with: naturaledgevessels adorned with porcupine quills (one of these won the"Best in Wood" award at Dimensions '88). As it turns out, likemany of his compatriOts, Hosaluk has explored many styles ofwork. After first being exposed to woodworking by his father, whomade him a scroll saw from an old sewing machine, Hosaluk ran aleather-goods shop, then attended the Kelsey Institute of AppliedArts and Sciences in Saskatoon and focused his attention towardprofessional woodworking. Hosaluk's early turned work explorednatural edges, but he quickly turned to lamination and began incorporatingother materials, such as porcupine quills bravelyplucked from road-kills. The quill-decorated work is an outgrowthof his fascination with Canadian Indian art and culture and alsoreveals his playful nature: "The whole trick to these vessels is toplay on people's reactions to objects. They want to pick up thepiece and admire the wood and touch it Then, there's a whole otherresponse when they see those hostile-looking quills." Hosaluk hasalso played tricks with other bowls that have unstable bases androck when touched, scaring people who brush against them. This88 Fine Woodworking
StaffMike Hosaluk, one of Canada'sbest-known woodworkers,is an inventive woodturnerwho's at home doing work inboth traditional and contemporarystyles. He applies a littlefiller to the surface of a turnedvessel, left, to fill voids in thesurface prior to final sandingand lacquering. Before Hosalukglued up the cone-shape vesselfro m rings of particleboard, hecut out little windows designedto allow straight particleboardrods to pierce the sides andform a geometric pattern of intersectingparts. After experimentingwith different piercingpatterns, Hosaluk refined hisdesign, right, and added threespike-shape aluminum feet thatsuspend the vessel in midair.mischievousness, coupled with great technical skill, keeps Hosaluk'swork fresh and his fans guessing.Photo: Gary RobinsBrian Gladwell-Although he's an accomplished cabinetmakerand a woodworker in residence at the Neil Balkwill Center, a community-artscenter in Regina (Saskatchewan's capital), Gladwell'smost innovative work isn't made from wood. It all started whenGladwell was trying to create an affordable furniture piece for saleat a local crafts show. In lieu of an expensive hardwood, he builtthe piece from cardboard, the same material he customarily usedfor maquettes of his wooden furniture.The idea caught on so well that Gladwell developed a wholeline of cardboard furniture, induding tables, desks, shelves andcabinets. He employs many regular woodworking tools and techniquesto build with inexpensive cardboard, mitering corners andjoining edges with great precision. To make strong surfaces fortabletops and shelves, Gladwell glues up a kind of structural boxby laminating precisely cut cardboard strips on edge between topand bottom cardboard skins, like a hollow-core door. The edges ofthe panels are usually left open so you can see the grid work of theinner core, a visual detail incidental to the construction process. Heuses dowels for much of the joinery, pinning different sections orpanels to each other. Gladwell also uses long dowels as a core forhis cabinet and table legs. He wraps a long, triangular-shape stripof single-face cardboard around the dowel. The taper of the stripgives each leg a spiraling surface and a soft profile. For cabinets,such as the one shown at right, Gladwell mounts cardboard doorswith regular brass hinges and gives each piece a final surface-hardeningfInish with colorful automotive lacquers. The pieces are waterresistant and strong enough to sit on; Gladwell predicts they'll lastfive or 10 years.Last fall, Gladwell showed collections of his cardboard creationsin both Chicago, Ill., and England. Gladwell, as well as Hosaluk andWychopen, have been successful at what many Saskatchewan craftsmenhope to do: develop markets for their work outside the provinceand carve out a profitable living on the orthern prairie. 0Sandor Nagyszalanczy is an associate editor at Fine Woodworking.The Saskatchewan Woodworker's Guild is hosting "ContemporaryFurniture Design and Technique 2" this summer. For more information,write to Saskatchewan Crafts Council, Box 7408, Saskatoon,Sask. S7K 4J3. For a wood and price list from Renaldo 's Supply, writeto Box 64, Arelee, Sask. SOK OHa.Brian Gladwell uses gracefu l lines and a colorfu l lacquer finishon this cabinet to disguise the fact that it's made of inexpensivecardboard. Gladwell uses many woodworking tools and methodsto build his cardboard furnishings.March / April 1989 89
THE GREATEST ADVANCE IN WOODTURNING IN 50 YEARS!SYMTEC has re-examined every aspect of woodturning, introducingnew design principles which make turning fluting and copying easier andmore accurate than ever before.FOR FURTHERINFORMATION1 66 Robie St.SyrnTE[:Truro, N.S., Canada• Two models available. 1800mm and1 500mm length bed.• Easier to use than any othercomparable lathe.• Motor, drive belt and cone pulleysare completely enclosed for maximumsafety.• Exact replicas and repetition workaccomplished in a fraction of the timepreviously required.• Copies can be turned from a flattemplate.• Built in sharpening feature and resettingdevice.• Can be used with traditional chiselsand tool rest.• Many accessories, including routerand holder, 'steady' for long work, fullrange of centres and faceplates, andthe exclusive SYMTEC centering guide.1-800-565-1490AMERICA 902-893-1915HARDWOODSDOMESTIC & FOREIGNQuality stock forCabinet WorkMost all sizes from1" up to 4" in thicknessHARDWOODSASH - BASSWOODBIRCH - BUTTERNUTCHERRY -CHESTNUTEBONY -MAPLE-OAKPOPLAR-ROSEWOODTEAK-WALNUTAlso hardwood plywoodsSOFTWOODSBAND SAW BLADESWELDED TO YOUR EXACT LENGTHComplete Band Saw Blade LineIncluding Saw• •Mill BladesWe also carry:• •Scroll Saw Blades Hand SawsCircular Saw Blades Hole SawsHack Saws Sanding BeltsSanding Disks Router BitsFiles · Rasps Scrapers'BUCKEYE SAW COMPANYSEND 51.00 FOR CATALOG orTO ORDER PHONE OR WRITE TO:P. O. BOX 14794CINCINNATI, OHIO 45250-07941-800-543-8664 (Except Ohio)1-513-621-2159 (In Ohio)Scrollsaw The First That ECONOMICALTHE REAL Works THING LikeSave with Our Package Deal$149.95A $204.85 V alle, roNplus $6.00 shipping(within 48 states);JSta giant leap fOIwardSCROl.l.SAW lEOflOl.OGYil the latetxlk1970's when a Getman manufa::lureriltroduoed the roc:I
PORTER-CABLEPUTS THE SCREWS TOTHE COMPETITION.If you want a cordless driverldrill that works as hard as you do,pick up PORTER-CABLE'S NEWMODEL 9850 12·VOLT 3/8"DRIVER/DRILL with exclusiveMAGNEQUENCH® power. Thistough tool has the guts to do thejobs other units can't handle. Andto keep working long after thecompetition has run down.Why? The 12-volt battery packhas full-size, select, gradednickel-cadmium cells for maximumenergy. Combined with thenext generation in cordless toolmotors-MAGNEQUENCH usingrare-earth magnets that dramaticallyincrease the power ofmotors-you get higher torquewith less battery drain. In fact, the9850 produces substantiallyhigher watts output than competitivecordless driver/drills.So take charge of your next jobwith Porter-Cable's new 9850Cordless Driver/Drill. At PorterCable distributors everywhere.screws laboratory TEsr RESULl'Son wood show Independent lests Ihe Quantltyof Ii 12 II:11/2 variOus cordless driver/drills candrive one charge195America's Working ClassPORTER+[ABLEPROFESSIONAL POWER TOOLSP.O. BOX 2468 ' JACKSON,TN 38302
Exotic WoodsThe Sawmill is an excellent wholesalesource for exotic and domestichardwoods, and musical instrumentcomponents.Call toU free 800-345-3103*for price lists and Information.For specialty woods, MartinThe Sawmillmemorabilia, guitar kits or parts,with no minimum order, ask forWoodworker's Dream*In Pennsylvania, call (215) 759-2064THE MAImN GUfIAR COMffi.NYNazareth, Pa. 18064----.-ISHODD OILin Concentrate!Just (up to add 50 %) Mineral to give Spiritsfull working strength! you$15 +$3.00 ShippingFULL QUARTAMAZON OIL CORP.p.o. Box 530156Miami Shores, FL 33153FTAGERIDTOMHIJUNE 19 -JULY 21FEATURING ONE WEEKlORKSHOPS WITH:RICKB U TZL L boalbulldlngfurnitureconstructionwoodcarvingSUZANNEK I TT R ELL faux finishesDUST COLLECTORUFO-1 02B4 Bags. 2 centrifugal.2 filtering3 hose connections3H P motor12"PORTABLE PLANERWP-3012 ....... $379.00WP-12 ST .. ..... $39.002H P 6" Thickness65 lb.DOUBLE DRUM SANDERSK-1 5DS 15" width .... $1 545.00SK-20DS 20" width .... $1 875.00Excellent Sanding Machine.Two different grit.Precision contact drum.3 H P sanding motor.TRUE VALUE1/4 H P auto feeding motor.Customer Satisfaction GuaranteedOne year parts WarrantyLOBO POWER TOOLSNOW INCANADA10922 Klingerman St. #3, So EI Monte, CA 91733(81 8)350-1096 Canada:(604)299-091 1All Prices FOB. -HIGH QUALITYL.A.Write or call for <strong>Free</strong> catalogueSPINDLE SHAPERSP-0034 ..... $31 9.003/4" and 1/2" spindle1 HP with forwardand reverse controlFull-Size Professional PlanADIRONDACK CHAIRMake Ihis classic Americandesign. Our specialversion may belolded lor slorageby using ordinary•••••hardware availableal your localslore. 8e readylor Summer andgel your plan now!Plan #700 $12.00(Calalog Iree wilh order).•FURNITURE DESIGNS, INC., Dept. KA-391827 Elmdale Ave Glenview. IL 60025(312) 657-7526LUMBER SPECIALSCOCO BOLO BOcOTE\" $7.00 BF \" $4.50 BF2" $8.00 BF 2" $6.00 BFfrom vv'-""••• •"... "" 'SOIJItt"• • .Hardwood Lumber and Plywood ' VeneerMou(ding Dowels · Carving•Too(s BooksFinishing Supplies ' Clamps Power Too(sDELTA ' PORTER CABLE · RYOBI · BOSCHTo order cali: 1·800-451-4086Wrile for complele woodworking calalog:13650 Floyd Rd., # 101 Dalias, TX 75243(214) 669-9130SelectedJapaneseby RobertToolsMeadowAI'ailahle riiil 12"TILTING ARBOR TABLE SAWHTS-0012A ........... $795.00With cast aluminum guide rail3 H P Motor.......STROKE BELT SANDERSK-1 500BS $1095.0060"x21 1/4 sliding table5" sanding belt width. 2 HP motor7{Jw Cata£og $3.00.Prict fist frU. 'Wuk.;enti 'Wurkifwps.The Luthierie-2449 W. Saugerties RdSau erties, NY 12477(914)246-520792 Fine Woodworking
TO DOYOURALONEBESTF:'ir3HTC PRODUCTS, INC.1. any Models machine available forWORK 2. OUTFEED neatly toSUPPORTSsave ROLLERS space loldAND TOORGANIZE '----'YOUR SHOP WITH EASEL,LJ,J.t! Ito E. HUDSON, ROYAL OAK, MICHIGAN 48067FREE CATALOG! CALL 800-624·20271(3 13)399-6185, ext. 120STEVE WALL LUMBER CO.QIWlly Hardwood. IUId Woodworldnl1 ""chllUlryThe Cra",numFtNand Educational In,ll,ul/on,IT'S A LOT OFMACHINE$FOR THE MONEYTHE11tuei?1taFSB 35Jointer/Planer withMortiser takes youfrom rough lumberto precision joinerywhile savingtime and space!CEDAR (Aromatic Red)4/4 1C & Btr. $1.10CHERRY4/4 Select 2.255/4 Select 2.358/4 Select 2.45OAK (Red or White)4/4 Select 1 .80MAPLE (Hard)4/4 Select 1.45MAHOGANY (Genuine)4/4-5/4-6/4-8/4 $ 2.5012/4 2.8016/4 3.00WALNUT4/4 - 5/4 Select6/4 Select (Speclsl)8/4 SelectBUTTERNUT2.35*2.002.554/4 Select 1.60A131/2"COMPLETE LINE OF QUALITYplaner Independent mortiserWOODWORKING MACHINERYAbove Prices are for Kiln Dried Rough Lumber soldby the Bd. Ft. FOB Mayodn, N. C. Quantity discountsavailable. For sizes and species Send$1.00 for Lumber & Machinery Catalog.Call for best price on Mini-Max & Delta.'" Hawk' . . . . 20-$699 $1 149"f ' 16-$599:612 - Planer-Molder14-$499A Division of SCMI. 5933-A Peachtree Ind. Blvd . Norcross, GA 30092FOR INFORMATION AND NEAREST DEALERCALL 1-800-447- 1351March /April 1989 93
JIG SAWS1582VS3238VS16511654Orbit. Action Nob Holle Jil SIWUnv. Shlnk Muh. Orbit. Jil SIW7 1/4" Cir. SIW. 13 .mp7 1/4" Pivotinl Circ. SIW1632 VSK Pln llr Recp. SIW.124.00109.0099.00105.00139.00DRillS DRillS DRillS920VSRK 3/8" 9.6 V Cordless Drill 115.00920VS 3/8" 9.6 V Cordle .. Drill wlo Clse 122.001158VSR 3/8" VII. Spd. Rev. Drill 69.0091066 1/2" VSR Mighty Midg .. Drill 109.001196VSR 3/8" VSR Hornel Hlmmer Drill 115.001198VSR 1/2" VSR 2 spd. Hlmm .. Drill 135.00921VSRK 3/8" Cordless 9.6 Drill wlclulch 139.00ROUTERS ROUTERS ROUTERS1601 1 hp Roul .. 99.001602 1 112 hp Roul .. 119.001604 1 3/4hp Roul .. 111.001606 D-Hlndle. 1 3/4 hp Roul .. 138.0090300 Filld B .. e Roul ... 3 3/4 hp 309.0090303 Plunle Blse Roul ... 3 112 hp 449.501608 Trim Router 89.001608M Molor for 1608/1609 Series 85.001608L Laminite Trimmer 95.001608T Tilt Blse Trimmer 99.001609 Offset BlSe T ,immer 129.001609K InstlUers Kit 169.001611 Plunge Rouler. 3 hp 209.001611 Plunle Rouler. 3 hp. 220 Voll 268.00161 1EVS V.r. Spd. Plunge Rouler. 3'1, hp 259.00SANDERS SAN DERS SANDERS3270012723121 Dusdess B.h Sind ..3"124" B.II Sind ..129.00149.0012720 3"124" Bell Sind .. wlDusl Colleclor 169.001273 4"124" Beh Sinder 168.0012730 4"124" Bell S.nder wlDusl Colleclor 175.001290 Finishing Sind ... 112 sheel 129.0012900 Finishing Sind ... 1/2 she .. dusde .. 139.001273 DVS 4"124" Bell Sind.. 195.00OTHER TOOLS1702 10 Gil. WeI/Dry V.cuum1347 4 112" Mini Grinder1323 9" Grind ..11210 5/8 Rol.ry Hlmmer11212 3/4 Rollry Hlmmer3258 3 1/4" Pow .. PI.n ..11202 1 %" Rota,y Hammer11304 Brute Bre.ker Hammer11305 Oemolition HlmmerC15FBFl000ACB75FHITACHID.lu .. 15" Miter SIW12" Plln .. /6" Join .. Comb.Bind SIW30% off all Bosch Power bits229.5075.00125.00169.00189.00119.00385.001199.00689.00380.001440.001580.00C8FB Compound Mitre SIW 480.00FREE FREIGHTColo. Watts 1 -800-523-6285CAll TOll FREE1-800-525-0750VISA and MASTERCARD ACCEPTEDAVIATION/INDUSTRIAL SUPPLYP.O. Box 38159 • Denver, CO 80238MACHINERY, TOOLS, SUPPLIESFOR EVERY WOODWORKERTHE HOUSTON SHOWMarch 3 - 5, 1989Fri. 5-9 / Sat. 10-6 / Sun. 10-5Pasadena Convention CenterHouston, TexasTHE BUFFALO SHOWApril 7 - 9, 1989Fri. 5-9 / Sat. 10-6 / Sun. 10-5THE TOLEDO SHOWApril 14 - 16, 1989Fri. 5-9 / Sat. 10-6 / Sun. 10-5Seagate Center, Toledo, OhioErie County Fairgrounds, Hamburg. NYTHE BOSTON SHOWApril 28 - 30, 1989Fri. 5-9/ Sat. 10-6 / Sun. 10-5The Bayside Expo Center, Boston, MACall Toll <strong>Free</strong> M-TH1-800-521-7623Woodworking Association of North AmericaP.O. Box 706, Plymouth, NH 03264*(603) 536-3876SANDPAPER *NO GIMMICKS - GREAT PRICESSHEETS: (9 111) PftICEBELTS: GRITS ASSORTEDUNLESS OTHERWISE SPECIf1EO1 130 5.69 ea 3x 24 5 .80 ea1142 .69 ea 3127 .83 ea1 144 .69 ea 412114 .91 ea211 116 .73 ea 4124 .94 ea3x 18 .74 ea 4x 36 1.14 ea3121 .n ea 6 I 48 2.98 ea3 I 2314 .80 ea 211 180 2.47 eaOTHER SIZES ON REQUESTNO LOAD PAPERl8lJ.A lhru 400-ACABINET PAPER4O-ll6O-D80-1)SO/pk l00/pk516/pk $3O/pk 15/pk 27/pk14/pk 25/pk13/pk 23/pk100 tfInIl50C 12/pk 21 /pkFINISHING PAPERso 1 pk 1001 pkso 1 pk 1001 pk59/pk 516/pk100 tfInI 280A 8/pk 14/pk510/pk 518/pkPRESSURE SENSITIVEADHESIVE DISCS! 2208IJ.AWET lORY PAPERSO/pk l00/pktf1n1 600A 513/pk 523/pk6" 51.06 N * OTHER ITEJIS * * JUII80 CWHIHG STICK *8" 1.99 ea * WIO£ BELTS $8.809" 2. ea * ROllS SEND MAIL ORDERS TO:10" 3.05 N FlAP WHEELS ECON·ABRASIVES12" U5 ea * PUMP SlEEVES P. O. BOX 886502115" 6.95 N PLANO, TX 75086NATIONAL 1-800-367-4101MINIMUM ORDER 525.00 IN TEXAS (214) 3n-9n9IlASTERCARO, VISA OR CHECK nEXAS RES. ADO 7%SAIlS TAX* SATISfACTION GUARANTEED!! * SliIPPlNG CHARGES ADO 54.25350-1 10" Table Saw3 lIP. 1 ph. 2:30V MOlOr MagneLicControlCalllltl HP. 1151230V 1 ph. Motor &SwitchCall160-2 Speed Lathe lIP115t230Call260-1 Var. Speed Lathe 1 lIP115f23O Mag. Control Cnll1180-1 6" Jointer 1 III'. 1 ph.115f230V MOlOrCall4808" Jointer Iltl lIP. 1 ph.115t23OV MoWCall490-1 15" l3:U1d Saw1 Iu>. 115f230V w/baseMolOr Call34-01 15" Floor Model Drill pressItl I-U>. MoLorCaJl130-1 14" Planer 3 III>, 1 ph. 230V,oo_"'• So. Burlington, vr 05403 802-003-9036Freight included. Except Alaska & HawaiiALY?lr ROBLANDThein telligentone-manshop.Saw10" Table12"• Jointer12" PlanerShaper• Mortiser50" Sliding TableLAGU\IA TOOLS2081 Lagtma Canyon RoadFor Information and your nearest dealer callLagtma Beach, Califo1-(800) 234-1976rnia 9265194 Fine Woodworking
ORDER TOLL FREE 1-800-328-0457 -MAIL ORDER HOURS 7:00-5:30 C.S.T. MONDAY-FRIDAYTOP TOOLSMAKITA CORDLESSPIRANHA By Black & Decker WORKMATES By BlackCARBIDE TOOTH & DeckerSAW BLADE6 bench grinder V. 79-032 11 H.P. 81600ModelUsl Slle23·700 WeUdry grinder 201 13511-95023·6101223-880 8 '/2Model Ust Slle6070DW %" var, spd. rev. 7.2v . 123 65Diameter NTeeth6071DWK lAl var. spd. rev.bench grinder H.P. .. 136 992J . !I8O 10" bench grinder 1 H.P. .. 246 1998" drill press .. 164 1191·040 14" drill press . . 313 24040-150 15" 171w/removable ball, 7.211 190 1053" 5090DW saw kil, 9.6v56OODW'list S.le73-756 6-112 36 28.96 16.30. . 2'3 12573-717 7·1146V."3J1"lB 13.14 7.10circular saw, 1O.8v 117 16773-T.Il 1·1/4 246010DWK cordless drill kit, 7.211 .. 155 19hobby scroll saw 1256010SOW' 3..-1" cordless drill, 7.21128·160 10" OAJOOODW 4Q,6.3679-033ModelUlt S.lt19·029 N85, 18N.N2oo, 23NN300, 28N9.0073-757 29.7279-034 '400. 35N 152.103.lI.0II63.00 31.00... ... 117. 11 71/.007·1/4 16.3573-758 8103 5142.04 24.15hobby band saw . 189 129 3A1" angle drill, 7.211 . 73-759 8·1/4 40 42,86231 13031-050 '" belt sander 2.0 amp. 9331·460 4" belU6" disc sander . 178 125DELTA STATIONARY34-761 10" 11f.!4390DW 9.6 volt cdls. recip saw kit .lAl" 30 24.60... .Black & Decker Deals1707 81h"73·739 31.48 17.85 2037 469crosscut mitre saw . 8131).4000 5 92218 122unisaw H.P. .1579 111913" 22-651 planer 29999796010Dl drill wlflashlight, 7.2v . 198 1136412HDW 232&spd. driver drillwlelutch case', 9.6v7.21160amp drywall gun 160170373-769 9 66.58 38.95 10 mitre saw w/73-770 blade . 313 16973-740 10 32.98 14.002660 1).4000 45 11amp drywall gun 13173-no 10 f51.02 25006092DW'4015 112 sheet sander 3 amp ... 190 10922' 11073-715 5-112 16 13.00 7.30 HOG 3..-1" 0-1200 4.5 amp drill ... 1256710DW Cordless screwdvr kit, 186 103H.P .1516Vlspd. drill, kit complete 211 11534·429 10" tilting arbor bench sawSTYLE 32 PONY SPRING CLAMPS1'k H.P. . . ."79 28·2C3F 14" band saw wJsland, no motor 621 "933·990 10" radial arm saw . 727 539II·an 32" 487 3606093DW Wspd. dritt w.lclutch--complete 2" 119radial drill press37·280 6"J4 44068910W Drywall gun 0·1400, 9.6v 225 119motorized tointer . 3195Q.119 H.P. 2 435DK1001 6010 &lJ>1S4011 'h sheet sander 2.3 71amp .. 1223051 7V."1'1. 170 142worm drive 13 amp .. 246with coated tips and handles 3027·09 circ. saw 10.5 amp . 75Sale3103 2 spd recip w/case 193 95DWK drill kit camp.40710 vac. cleaner . 118 115632007·'632002·'Size lis' Ea. 0125 3021 7V. " circ wlt8 tooth carb bid. 130 751" 1.89 1.10 24.75 3047·09 7V." 212 super saw cat w/brake 164stage dust collector 339Deluxe OJ-IS 6"m9.6 voll battery . 49 292"1.657.2 volt ballery . 42 27jointer5007 NBA 7V." saw w/elec. brake 2211 125w/Jl" H.P. molor .1281BRAND NEW BY DELTA :33·050 8V.· SawbuckList Price 742SOOI NBA 8V." 21637.15 3041·09 8V."3"... 202 2fT super saw cat w/brake 1745.22 3.00 67.50 1157 Orb vlspd. jig saw . 1254"15 115.85 3153 Vlspd. jig saw . . ...... 195 121saw w/elec. brake 1(5ADJUSTABLE HANDSCREWS RYOBI SPECIALS804510 Sander . 80 46BY JORGENSEN99008 3"x21 belt sander w/bag 254 139Special Sale 539!!34·330 8V.· Ta ble Saw 13 AmpList Price 321992'D8 3"x24"9a35 %Modellist S.leOpen80xbelt sander wlbag . 268 139sheet linish sander 106 51lh 90458 sheet linish sander 216 116Special Sale 225!! V.'200HJaw length Cap list Sale of 64" 2"MILWAUKEE TOOLSlAl"9045N sht fin. sand. w/bag 219 11743..-1" circ. saw 75 amp 213 111521)1NA lOV." cire. saw 12 560 291112.88 7.25 40.505" 2"'h" 45.30JPl55 "NEW" por1able 6" 335jointer/planer 545R500 21/, 326 H.P. plunge router . 15913.83 7.956" 3"ampPAICE BUSTEAS list Sale4301BV Orb. v/sp jig saw 3.5022'·1 drill 4.5A magnum 179 1100234·1 '12" drill 4.5A mag 0·850JRlOOOWl14.13 1.3S 47.607" 3'h" 11.95TS251U 10" 392APIOmitre saw . . 169TS25IUS 10" & 60amp 274 " 52JRlOOOV15.!M 51.008" 41h" TS380US 820 3511mitre w/acc. kittOO(h carbide blade .19910" surface planer 13 amp. .rpm 189 1050244·1 'h "driIl 4.SA mag l).600 rpm 189 1050222·1 lJ1" drill 3.SA Q..l000 rpm . 169 950228·1 lAl" 3.5A44017.74 9.95 56.70 14" m 339mitre saw10" 6" 2U9 11.40 64.95drill Q..l0002D8 3M71/." AClDe dbl insul. 210 99sp recip saw w/cse . 220 12212" 8112" 23,29 13,00 74.00 RI50K IVs. reeip saw w/case 224 12514" 10"rpm 154 88037$-1 lJ1" close quarter drill 115112"lAl"370529.53 17.50 19.15LSl020 New 10" mitre saw . 22916" 12" 31.311 2100 139.959820·2 Blade sharpener 199(10 Dust collection unit 480 269STYLE 37 2'12" W740CH.P. plunge router w/cse . 2i)6 951).25003.7A drywall gun 143 69RJl02K 2 6A sp. recip saw wJcse . 2111 898V." N:;iOC saw Z34Throat 1f4 "XJ/4 "OJ79.1 close quarter drill 2'3 1390212·1 cordless drill vlspd. 263 1496539·1 Cordless screwdriver 190&Ollset trimmer 255 129 DELTA TOOLS JORGENSEN19008W 3'1. planer wlease 198 1151100 3V."r ofdbl insul eire 115rpm 108 62rt drill . 290liz PAl & 37068E321 3"x21" vlspd. belt sdr . . ... 259 119801Item No. Jaw length list Sale 6 PORTER CABLEplaner wlcase 311 1859207SPC sander·polisher 262 1396540·1 Cdlss. screwdriverw/bits cse 137 8936018 H.P. router 242 1256546-1 Cdlss.screwdriver 200&400 rpm 120 n3102·1 Plmbrs rt angle drill kit 295 1753002 ·1 Electricians angle 1795399 'h"23537008 H.P. trimmer 180 92D·hdle ham drill kit . 299 1691676-1 H.o. Hole Hawg wlcs 3956511 2 20995018 4"804530grinder 111 656" 57 In' lB" 63034·(10 Table Saw Complete6" 8.86 5.50 29.70 Model list S,lew/W2 H.P. motor stand 3712 12" 9.81 5.95 32.50 1804550 V •.. 46579.003718 10.83 6.85 37.5024"3730H.P. router 6.8 amp 170 11011.13 7.35 40.00round sander 95sheet pad sander w/bag 85DA3000R lJ1" angle drill 256 130sp SawZall wlcs 119DP'7006405 8'1. J3..15OSV,"Saw 8uck30"3736690 1112 H.P. router 8 0. 536 Ph 235amp . 215 115691 H.P. router hdle . 1291119 8.25 45.00vlsp w/rev. 4.8liz"499.0038" 14.C3 8.15 41.00amp 198 10928·243S 1(" 8lnd Saw PONY CLAMP FIXTUREScircle saw . 209 1206751)..1 Drywall gun 0·4000 4.5A 1(9 1196798·1 Te k screwdriver . 173 1056226 265a7 427 2796300lR angle drill w/rev 325 1752708W 81/." liz lJ>1SH.P. speedmatic router 110 195511 H.P. 5520 560 speed router 3193GVSOOOIf.''H.P. 15309 291amp router ... 5103.8 amp lam trimmer . 135 115w/open stand, light attach.310 3.8Modellist Sale of 12table saw 474 245H.P. motorsp band saw wlcase 416 2'06234 TSC band saw w/caseTSC SawZall wJcase 219 1296170 14" QO 2952711 10" table saw w/brake SOO '60Disc sander 5" 109 59chop saw .6012 Orbital sander 3SA."x73..-1"601( 68OOD8 2500 rpm 3.5 amp 140 79V.68OOD8V 1).2500 rpm 3.5 amp 154 119. 179 100Orbital sander 41h .. x91/.... 119 1106305 6V. " cordless circle saw 284 1556753-1 Drywall gun 1).4000 3.SA021'·1 lAl" 220n6801D8 4000 rpm 3.5 1(0 &50 black pipe clamps'79.00V.52 112" 221amp H.D. lam trimmer . 190 11(312 Ollset base lam trimmer 215 11912.48 7.50 80319 Tilt base tam trimmer . . 129black pipe clamps 10.41 6.00 65695 l'h 299 H.P. routerlshaper. . 19028·283F 14" Sand Saw696 H.D. shaper table . .. 165 105STYLE J. ADJUSTABLEwlenclosed stand 351 3"x21"HANDSCREW KITS352belt sander w/o bag 215 119amp. 110H.P. motor3"x21"6801D8V 1).4000 rpm 3.5 amp 154 S92030N 12 planer/jointer 2970 15752272040 15%" U.360 225 belt sander w/bag . 122planer . . 2'70 111512918058 6'A1"JV2000 220 &Model length JawsUst Slle599.003"x24" belt sander w/bag . 310 175J04 47.10 3.75361 3x24" 290 belt sander w/o bag 170J06 68.13 4.2543·122 Duty Shaper362 4"x24J08 Bplaner kit wlcase 546 339w/stand 1 H.P. motorJl0 10 363belt sander w/bag . 325 1115. 9.12 4.104"x24"8m Var. temp heat gun 109 70spd. cordless drill . 1255397·1 lJ1" spd. hammer drill kit 1395371·1 'h" v. spd. hammer drill kit 313 1993107-1 'h" rtJVl600 var. speed lig saw 119499.00J12 12 "'h" .. . ... 295belt sander wlo bag 310 18010.66 5.757556 right angle drill. 17513.21 6.90v. spd. angle drill kit 305 11106754·1 Drywall gun ()..4ooo 4.SA 179 1156232 4lf.tlAl"..r1var. speed orb. Jig saw 2'2 1275005 BA 51h" circular saw 211 11541h6(04 lAl"31$-1 7V " top helle 13amp cire saw 195 10595038H sander'grinder 153 79drill 1).2100 rpm, 2l"."17·900 16¥!" Floor [)fill Press9311BOSCH315--1 & compo wiese. cart. bid. 225 125211.00617 1v.."& bid.pushhandle 13 amp . 195 105Modellist Silleamp, 102961755617 compo wiese. cart. 225 125bandsaw w/case . 432 27567'7·1 Drywall driver.Q·25OO 149 110230-1 drill 1).1700 rpm 169 9933OC)..1 5620 5660Y,"6510lVA drill rev. 0·1050 rpm 111 n6013aA 'h" drill rev. 6 amp . 2'0 1255402A 16" circular saw · 12 amp 605 325v spd magnum angle k!l 2119 179Router 1 H.P'-8 amp 289 169Router Ph568D36128A 39401 3761581VS Top hdle. jig saw . 235 12940·601 18" Scroll Saw3611·1 8'1. " tOP handle 13 205 amp . 129H.P. plunge router 1154"x24" 302158M Barrell grip jig saw 220 119w/stand and bladesbelt sander w/bag 162H.P.-l0 amp 299 1110Router 2 H.P.-12 amp 350 2055455 %" polisher 1750r3620 1'1. fT 3001 314 4 liz" trim saw 4.5 amp . 205 125Bosch metal case lor above679.00548 X95(1HD bayonet saw 255 165jig saws 34 26X9629Bosch blade assortment lor jig sawsBosch's best seJling blades 2199H.P. plunge router wiese IS2 1942 Heat gun 6SOO·gooo 694302C Vlspd. orb. jig saw 211 14550778 7V." Hypoid saw 248 139rpm 199 1255535 polisher 2800 rmp . 209 1296215 16"6366LS1(30 14" Mitre saw 62' (19chain saw . 2110 1898975 Heat gun . 115 557V."6368circular saw 198 1127v.." 2262'" 14" cut·off saw ACIDC 350 1955007 N8 71/." circ saw 13 209llnD 3x24" 299HD bayonet saw wlease 275 1759.S. w/bag 1namp 11036128 3H3761273D 4" x24"If.B.S. w/bag 315 17911·212 Bulldog l".".Recip saw vlsp 89627 230 amp .130Recip saw 2 speed 8666 lAl" 3J1"220 amp . 125H.D. vsp drill · Hdl .... 1115 122SDS rotary 339 1891196VSAK vs hammer drill 215 1101191VSR 'h" 229621 H.D. v spd. 1).1000 rpm 155 90vs hammer drill 125HP plunge router sq/b 1851&011 5.6above n320 Abrasive plane 3 amp . 9119652 1 290150 126 Porta plane amp . 154amp lam trimmer 140circular saw wiese . 125 SKIL SIZZLERS0216-1 2 1601T9118 Porta plane amp kit . . . . . 325 185spd cordless drill Hi·torque 222 134023$-1 112"'I.l&o11l Same as wftrimguide 145 "5.6drill keyless chuck mag 199 1236016 sheet pad sander . 75 4461(5 411z grinder 10,00011950Model Ust Salerpm . 149 9582795510 (551) 5'12" circ saw 112 925625 (552) 6112" eirc saw . 175 1105656 (553) 7V.5665circ saw . 132 103gal wet/dry vac . 205 139(554) 8V." 2048955 10 gal wetldry vac . 1890239-1 'h" drill keyless chuck 189 11(6749-1 Drywall gun 1).2500 4.SA&:171circ saw 1115750 (807)(808) 1'1."•amp tilt base trim 159 911609 5.6wl1609... 205Versa plane 10 amp kit .. 430 Z752957545 1).2500 v spd. drywall gun5.21).4000Vamp 169 1007540 5.2505amp gun . 165 99amp ollset base trim 122'12lA.nsheet pad sander. 195 10010011609K lam installers kit 1657511 spd. drill 5.2 amp 185 105Offset base, trimmer lilt base, trimguide, V. "eire · drop 198 11557$5 8 V." circ . drop loot 216 130. 189 11757907V."(810) 1011." (00 229collet. collet nut, wrenches, hex keys and casecirc drop footworm drive saw . 275 1555125 (367) 2291601 I H.P. Router25,500Ph 911751' lh v spd. drill 0-750303 4000..... . 195 114Paint remover . 230 150304 disc sander rpm 195 125rpm 165H.P. Router6W" worm saw 13925,000 rpm . . . 199 1105165FREUD SAW BLADES(825) 8V." worm saw . . 250 1(9Ph H.P.%"0305 7"367 2000 disc polisher rpm 195 1253'1." planer 6.55J7 225 U8handle Router . 223 120Bore-Industrial GradeGen.P\I'p.AIB. 4Q'510 Vari . orbit jig saw w/cse. 144 82CARBIDE Pulp.TIPPED SAW40BLADES3110 10" The lamous Bosch 16041'1. h.p. Router 7648l"'h 0 325 205ampH.P. helle router ..7548 Top hdl jig saw 4.8 amp . .. 215 119Mitre saw . 263 119lUl2Mt1Cl 60595 3"x21" sander w/bag 5.SA 1fT 125Lisl $219 Super Spec. $117Item No. Dtscrtption Diam. Tetlh Usl SllelUl4Ml11 507565 V. " palm sander 52 34lU121I010 10"nel 34lU.'M010 Tt.Ch 10'Cut-off 10'Combtnation lUI5M01O Cut-ofl Super 10'lM72M010 Ripping 80l!J2 39lUI 1210·LU73M010 Cut24off 10"lUl1M01O kerl 6015.25 35Thin 10" PS2t3 PS3I3 Gen' Purp.. 12UO 507313 3x18 belt sander 4.SAn 0Barrel grip jig saw 4.8330345 SA 'I. 210amp 119Speed block sander sht 97 54555 Plate biscuit jointer wiese 1596"IV. H.P. hdle. Aouter .. 243 135n 517V." 31/." planer w/blade guard . 210 121worm drive 230 132605350 21133258 planer wiese. . 235 139HP circ. saw . 10.99 695250 2V. 3"x21" belt sander w!bag SA 225saw boss 95060 wood. . 204amp ...... 160 95"Stair Ease" stair templet 194 1255061 "Stair Ease" hard131HP circ. saw . A..99 '974.22 311XTRA SPECIAL BY SKIL11.11PIyMlod24Os. 'III!.III 3U2 13 162735-04 1211&Var spd. 4"x24 6 speedrange sander 10.5 amp.V.Spd. Cordless Drill3 H.P. plunge router5UII 31Thlfl kerl 10'OSlOl37.1. 22camp. wiese 2 1'1. 202stair templet .135659 Q..4000 drywall gun 47;' 22914amp 130100 H.P. router . 160 !M331 189349Batt.7V." 24fO H' .."_5A• lil13210 118LEIGH DOVETAIL JIGS!57"6" Dado Carbide8' Dado CarbideBiscuits lOOQ.QIy.flOno 21,,·x¥.· 1()()().Qfy tOOO-Oly.2II5JI moo 24500circ. saw drop loot 179 997V.. .239 500159381 Door hanging kit 15223550096.75 5.50399 Drywall cutout unit . 110 69circ. saw pivot base 179 99225500299.5043218 Drywall cutout unit bit301 "MEW" & 31Dovetai' template kit . 69Cdlss. jig saw wiese.161D1258-12-Ust 314.oo-SoI. 921VSRK lJ1" cdls$. drill vlspd.D1251·24-Usl 115.00-SJle wlclutch and case . 111101Biscuits2%"xl" Biscuits .we-.. fA AssMs lOOO-OIy.25 HITACHI TOOLSII1IbeIn."NEW"$lub-rite plastic pipe 99.9539575Mortise Tenon jig . St.95cuner1632VSRK Recip. saw 8.4A orb. v/spd. 129Model Ust SaleSENCO AIR NAILERSZ65"NEW"laminate slitter .. .. 189 135BiscUits4 chisel se( '·1'wcno WC10i pee. seI: 'Mt:se25 TM Trimmer . .. 956 chlsef '·1"10 wiese V. "';'21 TAl Plunge rouler, l1Jl H.P. 219 119pee. chisel se(filto 16JS1GO 5 sef v..··2'A·39 77 TA12 Plunge router, 3 3M•H.P. 169215 ttOFA 52 31 10" Z65SfNl Finishing nailer I" . IV." 349dlxe. mitre saw . .. 490.. 59 ClF8 8'h" 1159SfN2 Finishing nailer flh" . 21h"PA." 23..-1" 52S 529 3955116 omni·jig 219-BRAND NEW-By Porter CableSN2 General purpose . .,5 ModelUstSale1112 General purpose 1" 2" 440 345slide compound saw . 475Stu General purpose 2" . 3" 635 9647 TIGER CUB recipro saw.FREE FREIGHT TO THE 48 CONTINENTAL'75pee forstner bit 211 152 tt5FB IS" lS2STATESsAl" mitre saw ... 745 319Pinner 1" .ON325EVERY185 1159850 comp YOIt cordless drlYe,!jrillITEM.12.251w/Charger-ban
I ) TRANSPOIER ACOMMITMENT TO EXCELLENCE • ORDER TOLL FREE 1·800·654·7702 wm•12" AUTO PLANER 3HP SHAPER 10" TABLE SAW 15" AUTO PLANER 90" EDGE SANDER2HP, 12.5",6" capacity, 2 leeder.,8000 RPM/16000 cui., I/S" cui,65 lb •.Sale $328DUST COLLECTOR1", 3/4" & 1/2" .plndle., 3HP, 2re.er. speed., rouler chuck, 20".120" 3HP, 3·1/4" cui, T .101, 27",40"lable, 2.5" tra.el, 350 Ibs.table, precision lence, 440Sale $645 Sale 574520" AUTO PLANER S" JOINTERlb•.3HP, 15",6" capacity, 2 leeder., 3blades, 1/4" cui, 15300 cuts,520 1bo.Sale $645IS" BAND SAW2HP, 6",90" belt lilts 90', 2S" caslIron lable, adj. lence, 260 lb •.Sale $4456"x12" SANDERcapacity, 1/4" cui, 4 2HP, 9",6S" long bed, 3 blades,2HP, Ihree 4" holes, 1500 CFM, blades, 2 speeds, aulo 2 leeders, 1/2",S" cui, 36" lence, 4500 RPM,21".37" base w/caslers, 210 Ibs. 9S0 Ibs. 500 1bs.2HP, IS",IO" capacity, IS" lable,adj. lence, 6S0 RPM. 3S0 Ibs.$335 prepaid Sale $1175 Sale $625 Sale $595 Sale $325PANEL RAISING $49 Your Choice"'L7€! B": . ., ' . •. B": .. J] UTI _ II' ::EJ ::r=:Ao. .. loIGSOFKe' 342Coac:ne 337INDUSTRIAL CARBIDE MULTI·CUTTER SET $169 Your Choice:rr:::::7 '1 ,. .: .' ,, !.23 Conca.e Sel 24Ogee Set 25Convell Set &J] JJ U4 c_...2HP, 6",4S" bell, 12" disc, liltinglable, vert/horizonlal, ISO Ibs.LJJ lTIIII U .LJJ328 $29[]JStl 15° Face 343 12° F 338 $29 339 $29 321 $29$45 345 $69TCM Industries, Inc. 322 Paseo Sonrisa, Walnut, CA 91789 IN CA. (714) 594·0780Studvd John Cedarquist'j 00 Skip Mark Johnson Sfirriat Haystack1989 two and three week SummerSessions, June 4th thru September 1 st.Brochure available on request by writingHaystack Mountain School of Crafts,Box 87W, Deer Isle, Maine, 04627,or by calling (207) 348-2306.Tired About of Fine Just Joinery? Readinghas full capacityThe K5 Wood Machining Center wll get you out of thearm chair and Into the shop - Even if you're limited on space!But, don't let the size fool you. The& K5full power at each of its operations - Table Saw. Jointer,Thickness Planer. Spindle Shaper & Slot Mortiser.informative new video-. It's $14.95 and includes free plans foran attractive Contemporary CoffeeTable.If you're not the 'Video' type, we have a comprehensiveTake a look at this surprising machine in 'THE K5' . an""iInformation KitCall or Write to Orderthat we'll be glad to send at no charge.orders, please send cheCk or credit card info. No COO's .309 10thFARRISVideo or <strong>Free</strong> Info KitMACHINERY64015 N. • Blue Springs, MO • 1-800-USA-KITYR · I · TA,O, S:CreativeASSOCIATEA New Two-YearOF OCCUPATIONALDegreeSTUDIESin Wood• • •'Fonnerly offered at the Wendell Castle SchoolA• •two-year program leading to excellence in woodworking and furniture•design.Wood Studio I Crafts Drawing Sources Technical DrawingWood Studio II Professional Practices Furniture History• • • •3·D Design2· D DesignRochester Institute of Technology(716) 475-2646There are over 4,000 money·savingreasons why woodworkers relyon Constantine...4,000 woodwork items-to help you Build-Restore-Repair,Refinish! Over200 different woods ... 150 veneers ... 500 plans ... cablnet hardware ...96 How-To Books ... 118 carving tools and chisels .and lots more for One StoP. Right-Price Shopping without leaving home!CONSTANTINE Est. 18122065R Eastchester Road, Bronx, NY 1046176 inlay designs . . .116 Page Catalog-Only $1.0096 Fine Woodworking
DUST COLLECTOR STAMPEDE CONTINUESWe have negotiated a multi-million dollar dealwith the factory and are pleased to inform youof a huge promotional price-break on all thedust collectors we carry. This is a time-limitedspecial and prices are subject to changewithout notice.G1031G1028/G1029G1030•IMPORTS, INC.WE WIL.L. NOT BE UNDERSOL.D PERIOD!MODEL G 1 031 : Mini Dust Collector, features 2 bags, V2 H.P. motor. Stands 58" high, intake hole is 4", base measures 15" x 26".Beware! A lot of importers are selling this model as 1 H.P.! Weighs 75 Ibs. ONLY S18995 Prepaid to you!MODEL G1028:Features 2 bags, 1 H.P., 12 amp. motor. Stands 76" high, 61 0 fP min., base measures 20" x 35", one 4" intake hole.Weighs 185 Ibs. ONLY $26500 F.O.B. Bellingham, WA or Williamsport, PAMODEL G1029:Features 2 bags, 2 H.P. motor that draws 10 amps at 110V and 20 amps at 220V, 1182 11.3 min., base measures20" x 35", two 4" intake holes. Weighs 210 Ibs. ONLY $29500 F.O.B. Bellingham, WA or Williamsport, PAMODELNEWG1030:TOLLFeatures 4FREEbags, 3 H.P.LINESsingle phase motor that draws 18 amps at 220V or 36 amps at 110V, 1883 11.3 min., three 4"+- -+ -+(FOR ORDERS AND CATA LOG REQUESTS ONLY)..:EAST OF THE 1-800-523-GRRR(For Orders & Catalogs Only)WEST OF THE 1-800-541 -5537 MISSISSIPPI: (717) 326-3806(For Inquiries & Customer Service)MISSISSIPPI: (206) 647-0801 PORTER+[ABLE BOSCH • , PENlAN 1·701·772·8725•27 SHOWS IN 1989!<strong>Free</strong> Workshops· 100 Exhibits Prize DrawingUS YOUR ORDER! *THE\WOODWOOSHOW*DWORKING spRING \machineryI•, \Orders Over $1 00 rJ"__ :J....J rli=-'''tools-suppliesSee the Widest Variety of WoodworkingProducts All Under One RoofCRAIG AU MENl I --T,HUNDREDS OF ITEMSSUMMER \May 15· sept. I:,I, \ x 6'1716 1-800-358-3096Machinery · Power & Hand Tools · SuppliesTOOL CRIB OF THE NORTH SINCE 1948",Kansas CityJan. 27-28-29Indianapolis Feb. 3·4-5RANDY S HUllGrand :r ColoradoFeb. 1G-11-12McOERMonNorth Texas Feb. 17-18-19. lAURENNGSE. CUMMIfRANKPIERSCHAllA!.-Greater Milwaukee Feb. 24-25-26Soulh Florida Mar. 3-4-5MICHAELMetro-Richmond Mar. 1G-11-12I\lRENl WHIlING10NArizona Mar. 17-18-19, No. California Mar. 31-Apr. 2SlEVENPROC10RMarch 4 26, 1989 Featuring:Tennessee Apr. 7-8-9': pHERPIERSONAtlanta Apr. 14-15-16PRICKEll Art Carpenter Rick MartinConnecticut Apr. 21-22-23DOUGLASJeffry Mann Bruce ParkerChlcagoland Apr. 28-29-30Greater Cleveland May 5-6-7Tom Allen PoShun Leong... and moreliMichael Elkan Anthony KahnSeminars by Ian Kirby - Roger Cliffe\Mark Hanson Robert Erickson -Bob Rosendahl - Rude OsolnikEmmett DayNick Cook - and other Master Craftsmen\ 0--1-800-826-8257 or 21 3-4n-8521P E N LANDCall for free brochure 8:3G-S Pacific TimeMARKETPLACE AT SALIS HANSave $1 off reg. $6 admissionHwy 101, Gleneden Beach, OR 97388with this ad4 - 503-764-2318-20.AP' .- Mar.IEff ARVINintake holes, base measures 21 " x 46". Weighs 270 Ibs. ONLY $41000 F.O.B. Bellingham, WA or Williamsport, PAB BpEN LA DS C HOO LD P T F WN C 287 6 5704.765·235930% OFF ROUTER BITSFAXShipped <strong>Free</strong> By c..::I a I,ml, Cfaruv I»LAWRENCE GALLERYFine Furniture ShowMarch /April 1989 97
$110Popular,Pockel-sizeMINI-L1GNOOnlyNew Low PricesfromXYLOPHILE'SWorld's BestJointer-Planerlncl.and Batteries PinsCase,for :Y'6 and 7/16"Measuring Depth._SUNHILLSEATTLE1000 Andover Pal1< EastSeanle, Washington 98188(206) 575-4131moisture defects are irreversible.Therefore don't waste money andlime on wet wood. Use a moisturemeIer to be sure you workonly with dry wood.ATLANTA3184 Marjan DriveChamblee, Georgia 30340(404) 455-8109SINGLE PHASE 25" & 37" WIDE BELT SANDERSIf you have only single phase power in your shop and wishto have a wide belt sander THIS IS FOR YOU!!The famous Sheng Shing SDM-series cabinet shop wide beltsander with built-in phase converter is now available fromSUNHILL.SATISFACTION GUARANTEED!THlEI I'IItImtPlease contact Sunhill for more information-or-Call our toll free number 1-800-544-1361I\mcIInf!. 111_ 11111 mdudodoMWood JointsSimpleorFinally. there is a precisionirJcD.woodworker laced withbuilt madine designed for thepnlleuional, bobbyisttrialproducing wood joints that arec:orred ePa}' time. Our baDIJearintIipped stylus and uniquesystem of templates allow therepeaI!d mE PIOCkJction of eJ'IOI'freejoints. MUL'J1.ROlTI'ER '"operates on tine axes and thework table tilts a fuU 45°.TIDnson linear bearings andhardened steel rods assure safe,smooth movement Air poweralso available.clamps areCall or write lor a free brochureor ask about receiving ourdemonstrationvideo tape.JDS 800 Dutcb SQuIreCOMPANYBhd.1Suite 200Columbia.INSC ....SC 29210_8\ 13\OURCALLPRICE!FORIwidth of cut10"motor_. .... Powerteedamp, 110AP-l0 Thickness PlanerV00-10092,'0094·'00fB-,ooEC·OOOEe-2m213 Raised Panel CunersEC-260 314" Cabinet Door SetSawbladeslIr. SOT, SOT.S LM72M 10", 24T, Rip Blade 38LU73M ATB Cutoff $ 38LU84M 10", Combination $ 38Set of Three8"SOT, SAbove$109$10059lU82M 10", Tipte Chip $ 42lU85M 10", Super Blade $29OSDi 6" Dado 99OSll8 DadoJS100 Plate Joiner $169JS020 100) Biscuits $F1100 Spare Cutter $ 35Kit4" FInishing Sander3-1/4" Planer6-118" Planer 10" Cabinetmakers Saw8-1/4" Table SawwithIf('8" 339Biesemeyer fence $131943484910" Table SawJJ-6 6" Jointer $Plunge RouterJJ-8 Jointer $344for 3612BROC·610 1 HP Oust Clector $ 319RouterOC-1182 2 HP Oust Collector $1I4" lrimmerOC-'883 3 HP Oust Conector $ 719Orbital Jig SawJBS-14MW 14M Bandsaw$7-1/4" Circular SawJBS-18318" Clutch Drill940' )( vr& 96918" Bandsaw $ 749WSS-3-1 Heavy Duty Shaper $12252 3/B"Cordle$S clutchJWS·34-' 314" '" Sp;ndtedrill$109Shaper_$20409900 B 3]1(IS"21 Ben Sander $ 129 JWS·'8 Shaper$ 349_ _52999240B 3 24 Beh Sander $ 139 JTS-,O 10" Contractors Saw $ 4194 x 24 Beh Sander $ 169 JTS-'2 12" Contractors Saw $ 46998202 Blade Sharpener $ 179 JSG·6 Beh.-Oisc Sander $Planer$1299 OSS-'5 Scroll Saw $ 119The Xylophile's Company'·100-354-9083KV. 40505 $35 Orders over include delivery JET prices include deliveryeast of the Mis138 E. loudon Ave. lexington, unless otherwise notad. Prices(6061 254-_KNECHTCheck - Money OrdersHOMEVisa MasterCard subjectCENTERto change without notice. sissippi.INC.320 W. BLVD.OURRAPID60th YEIIRCITY, S.D.IN BUSINESS57701ALL TOOLS PREPAID SHIPPEDVar.spd/clutchComplete Kit2012 12" planer, 12 amp52 lbs, $4996071 DWK VSR .. 7.2V 1056092 DWK VSR .. 9.6V 1209005B 5" HD Grinder 85B04550 wlbag451900 BW 3 \II Planer 116360 I B D handle router 1293612B 3 hp router 1953620 11. router 1051553700B TIim router 98135•Bullel Bils & SetsFull Line MakitaCALL FOB PBICES ON:Parts And Access.Piranha T M all sizesAir Hose - all made•in U.S.A.(We also custommake hoses)Sandpaper (1MScrews And BitsMany one of a kindspecials - Call forand Belts M
Buy 1 tool and get our 212 page tool free.Just a few of the unique woodworking cools ofthe 3,500 others available from our most versatiletool, the 1989 Garrett Wade Catalog.The 212 page Catalog, regularly $4.00, is <strong>Free</strong>with any order from this ad. Or if you wouldjust like the Catalog, send us $4.00 with yourname and address.A lOur 202GF Gap Filling Glue HasRemarkable PropertiesIt has a very high solids content so that smallgaps in our joinery are actually filled - withstrength. And the "s q ueeze-out" beads right upand chips off when dry. No soaking in to ruinfinishes. Dries ro a light tan. Water clean-up.62J0 1.01 1 pt. 202GF $ 6.5062J0 1.03 1 qt. 202GF $11.50B I Special Bandsaw "Cool Blocks" ProlongBlade Life And Increase AccuracyMade of a special Graphite impregnated PhenolicLaminate, this set of 4 replaces your upperand lower side blade guides.They run cooler than conventional steel guidesand are more "slippery". You can set themactually couching the blade, consequently givingmore control and accuracy over the cut.They are sure to improve the performance ofwhatever bandsaw you use. 9 sizes are availableCO fit most bandsaws.Model33K09.01 "K Delta 14" $9.9533K09.02 "B" Sears 12" $9.9533K09.03 "C" Inca lOW $9.9533K09.04 "D" Shopsmith $9.9533K09.05 "E" Old Sears (\I4"Rd.) $9.9533K09.06 "F" Jet 14" $9.95(fits most Delta-type copies)33K09.07 "G" Gilliom ('i'h" Rd.) $9.9533K09.08 "H" Delta 16" $9.9533K09.09 "K" Sears 12" (Elemon.) $9.95C I Garrett Wade Has Discovered SomeVery Interesting Bandsaw Blades.YI6" "Super Narrow" BladesYou may have never seen a blade like this 24tpi . In a raker style, these give smooth cutswhile making incredibly tight turns. Westrongly recommend our "Cool Blocks" fo rthese delicate blades, because they can be setcloser co the blade without danger of overheatingor destroying the teeth as normal metalguides can.Cabinetmaker's Special Bandsaw BladesA Garrett Wade exclusive. In appearance, theylook like "skip cooth" blades. But each cooth isactually fo rmed as a hook, with every 5th coothan un-set raker. The result is a very smoothcutting blade that feeds very easily. Use the W'(4 tpi) blade for general work, and the Y2" size(3Garrett Wade CO.,tpi) for resawing and heavy straight sawing.161Inc.Avenue of the AmericasNew York, NY 10013 Dept 625Call Toll <strong>Free</strong>(NY 212·807·1757800·221·2942___________________0 Collect Calls Please)Please 1989 Catalogsend mewiththese Garrett Wade tools and include a FREEmy order. (Prices__ good until June 30,__ 1989)___Name:City:Addrcss::Statc: Zip: Check0_________________Numbero I I I I I I I I I I I I I I I I _ Ior Money Order CardVisa MasterCardAmerican ExpressExpiralion DatcSTOCK #GWQTY.I93 Y2" Blades (Delta 14" and copies)33Kl1.01 YI6" Scroll33Kl1.02 \14" Cabinet.33Kl1.03 W' Cabinet.80" Blades (Sears)33K12.01 Y,6" Scroll33K12.02 W' Cabinet.33K12.03 WCabinet.72" Blades (Shopsmith)33K13.01 YI6" Scroll33K13.02 W Cabinet.33K13.03 W' Cabinet.$12.50$11.65$11.95$11.95$11.30$11.50$11.25$10.20$10.5073 W' Blades (Inca lOW')310. 160 YI6" Scroll $11.25310.161 W Cabinet. $10.20310. 162 WCabinet. $10.50104 W' Blades (Delta w/Riser and Inca 20")710. 101 YI6" Scroll $12.85710.201 WCabinet. $11.95710.202 WCabinet. $12.90D I Saw Setting Gauge Can Be Read FromAny PositionMost saw setting gauges have at least one or twomain weaknesses. They either rest partially onthe insert plate which is usually not the sameheight as the main table, or they are so thinthat it is difficult CO ensure that teeth are beinggau g ed at the cop of the arc. This Gauge ismade from machined Aluminum a full 3/4"thick and 9" long. With \14" graduations on oneend and Ya" on the other, it will indicate anyheight from Ya" co 2". Most useful for TableSaws but also handy fo r Router depth setting.The markings are vertical on one face and horizontalon the other, so you can read them easilyand accurately.71K26.02 Saw Setting Gauge $16.95DESCRIPTION PRICE TOTAL1989 Catalog (free with order) $4 00Shipping: Orders up to $100-$2.50Orders over $100-$6.95New York Residents add appl icable Sales TaxSub TotalSales Ta xShippingGrand To talMarch /April 1989 99
24" THICKNESSModel PLANERDSMC-63Builtin Knife Grinder, '(l1pJo/l• 4Sec1101la11l FeedKnlle CuTlerFeed RoIsHead•-:=F.lQCfSPQ,yerLlfl Tabie• Vanable Rale•_ • lmtedBreaS.'o'ltch.1hi1IeBe\$6090• S,1tCTy· 2 300 Ills• ftc16" -orS148/mo ..14" TABLE SAWModel DMMA-35:lI21abIe \,'" Cast :- '.-,• rull1·114"HEAVY DUTYModel DFDA-4SHAPERS- • OpIionai Accessories : -:-..-•[lectrooc ".. .,'.ValIronConSlnJCil()(l• 1S10ngSOOIbS"""Also[xlIii t..orog$pwlClleSpd ConIrOi_:•$3390Available•with Support 7-1/2 hp, 3ph•• Long Spmc:fie Arm.,.:;.,. $5690 aotIIWpM.UotMODEL DFFA-5 TILTING ARBORHEAVY DUTY SHAPERSSSl '16" JOINTER•or S134/mo. ·Model DSZA-41tisor S781mo.: p,:" Heal 16 . $2980 • 1.700•_Top& Bolbn-_ rt:'ii" 90 • 1 500 1>5.or S861mo .•.. f :::h $3990Model DRSC-SO16"·10· 32FT.. 2 200 1>5 orSl02l mo.·BANDSAW "carter_ Guides"SUDING TABLE PANEL SAWw/SCORING UNITLockedonQuality!The kind you've come to expect from us-whetherirs locks and keys or any one of the thousands of finehardware fittings for the demanding furniture craftsman.Irs all in our new 70-page catalog-a valuablereference tool that fully describes our expanded lineof period hardware. To get your copy. send $4.00 to:============== PAXTON.HARDWARE LTD.7818 Bradshaw Road. Dept. FW18. Upper FailS, MD 21156Ouick Shipment <strong>Free</strong> Mini-Catalog (301) 592·8505Model DMMB-315$6900• 1(l1p 3ph- 3 Belt Sys!em.2 00l1lSor 171/mo. ·Also Available in 6 Ft$550001' $1_•JET+FREEFREIGHTOn Jet Orders Over $ 2000Now, a perfect shaper for the small productionshop or serious craftsman. Compact but powerfulwitha 2hp Single Phase reversible motor.JWS·34·1 Woodworking ShaperJWS-1 8 Woodworking ShaperWSS-3 Woodworking ShaperTWSS-2 Tilting SpindleShaperSTSS-2-3Sliding Table ShaperDC-61 0 Dust CollectorDC-1 182 Dust CollectorJJ-6, 6" JointerJJ-8, 8" JointerJBS-1 8 18" BandsawJWP-1 5H 15" Woodworking PlanerJWB-1 3P 13" x 60" Widebelt SanderJWB-25P 25" x 60" Widebelt Sander$89531912492595420029539931979565989549006395Nationwide service, $2,000,000 parts inventoryand the most reliable warranty in the business. Jetis unquestionably the best value in woodworking.Call for quotes on other JET productslll_Quantities limited at above prices. Order Now.Orders shipped from Santa Rosa, CA., Smyrna, TN.Tacoma,WA.Ad expires 4/30lB93Wing, Carbide Tipped, Shaper Cutters""" \MOIHMATERIALNo. Width Radius Nel Price No. Radius Nel PriceL·t400 1 4 1 'B 551 .10 L· 1432 1/4 $74.20L-1401 3 B 3/16 57.40 L-1433 5/ 16 7 .. 30L- 1402 112 1/4 85.10 L-1434 31B 82.80L-1404 3/4 3,B 8O_SO L-1435 7/16 84.50L-1406 1n i 112t:1: :::102_20 L-1436 112 1oe.40L-1437 SIB 11 .. 10f4No. Radius Nel Price i'am CU:IH""""'"L- 1412 1/4 574.20L- 1414 31B 82.80 ._,L-1416 112 104.30L-141B_cum_'_+-e.:-_-.,;;x;3/4 121.00No. Width Nel PriceL· 1419 1 13 •• 30L-1440 114 537.80L-1441 31B 41.30L-1442 1/2 44.10L-1 443 SIB 47.80L-1444 3/4 51 .10No. Opening Radius Net Price L-1445 71B 53.10L-1420 1.4 liB H3.00 L-1446 1 s..70L-1421 3:B 3/16 71 _40 L-1447 1·1/4 84.40L-1422 112 1/4 8O_SO L-144B 1·112 ".SOL-1424 3/4 31B .7.30 L-1449 1-3/4 81"20L-1426 1 112 1 22.50 L- 1 450 2 ... 80Shaper Cutlers With 3/4" Bores3/4"".'To 1/Z' Flange Bushings For All Cutlers · $6.30 Per Set jil!II30% Diecount.It (800) 346-0387Incl udee the Entire Line oflRH o;H&FAX (707) 545·3705SUPPLY , INC. 1651 Piner Road, SantaRosa, CA 95403SANTA ROSA TO 0 LCallfoC!;Iad i:Yea r' 'Call for quotes on custom cutters !II(800)345-8665 in Calif.-How to OrderHARPSICHORDS& FORTEPIANOSBuild it yourself fromone of our kits or letour experienced craftsmenbuild it for you.HarpsichordThree CenturiesMakingofby Frank Hubbard($30 postpaid)HARPSICHORDS HUBBARDINCORPORATEDFor brochuresend S 3.00 to144-W M oody Street,Waltham,(617) 894·3238MA 02154COOL BLOCKSFor your BandsawFor longer blade life and smoother, quieter operallon.Only $9.95 a Setplus $3 shippingSend Check, Money order,or Visa/MC info along withyour Name and Address.From the list below, specifyyour bandsaw brand (or thesize of your old guide blocks):'Dea 14" 'Taiwanese 14''Inca 10" 'Shopsmith 11"Mail orders to:'Sears (3IB" x 3IB" x 314")HIGHLAND HARDWARE 'Sears (1/4' round x 314")1045 N. Highland Ave, Dept F 'Sears (511 6' round x 314")Atlanta, Georgia 30306100 Fine Woodworking
BLUME .• SUPPLY, INC.3316 South Blvd Charlotte, NC 28209·1 998704·523·781 1 OR 1·800·288·9200r.I.-'llCALL TOLL FREEORDERS ONLY51350#66 10" TABLE SAW w/50"BIESEMEYER FENCE#100 12" PLANER 51595#26 SHAPER 5127553899 51250#180 18" PLANER #60 8" JOINTERwI KNIFE GRINDER55950 5875025" I 37"POWERMATIC WIDE BELT SANDERSINDUSTRIES, INC.THE "DOOR-STICK"* r-----==----:;,CalculatesNEVER THROW OUT ANOTHER DOOROR DRAWER FRONT AGAIN!MODEL NO. DS-48PRICE $49.95+4.05 postage & handlingTHE FAST, EASY WAY TOMEASURE EUROPEANSTYLE CABINETRYCuts Measuring Time Up To 60%Designed Primarily For Use WithFrameless Box*ConstructionEliminates Erratic Spacing of Doorand Drawer Fronts Both Verticallyand HorizontallyCompensates For Overlays, Inlays,Door Gaps and Edging Material* Drawer Fronts - 1 to 5 PanelsCalculates Doors - Singles and PairsCalculates Actual Drawer DimensionsWithin a Cabinet Compensating ForDrawer SlidesFEEL THAT SIGH OF RELIEF WHEN THE DOORS FIT...GET ON THE "STICK"!CALL 1-800-526-300345 HALLADAY ST. 175 LAFAYETTE ST. 3660 GENESEE ST 7215 N. WEST 31ST LANEJERSEY CITY, NJ NY,NY BUFFALO. NY MIAMI, FL(201) 433-3800 (212) 226·4000 (716) 634-8930 (305) 691 -2277VISA - MASTERCARD ACCEPTED1-800-327-6250OTHER INFORMATION714-525-35818 AM to 5:30 PM PST1567 HARBOR BLVD.FULLERTON, CA 92632.vJamAll ORDERS SHIPPED UPS FREIGHTPREPAID (CONTINENTAL USA) ONORDERS $50. OR MORE. SINGLEnEMS WEIGHING 70 LBS. OR MOREARE SHIPPED F.O.B. SANTA FESPRINGS, CA. CAll FOR DISCOUNTFREIGHT RATES. SALE PRICES,LIMnED TIME ONLY AND SUBJECTTO CHANGE WITHOUT NOTICE.NEED IT QUICK?FEDERAL EXPRESSSHIPPING AVAILABLEHITACHI$189TR 12 3 HPPlunge Routerwith $60.00AccessoryPackage.You get:Straight guideMicro guide holderRoller guidev, , 'h and '12" colletsTemplate guide* Template guide adapter* '12" carbide straight bit$1591581 VSK Tophandlejig saw kitwith metalcase $159PORTER+[ABLE·330 Finish Sander with<strong>Free</strong> Stik-It Pad NewModel with 15000OPM $59• •PORTER+[ABLE'5116 Omni·jig DovetailMachine with Half·Blind Template,Dovetail bit, templateguide and manual.$299PORTER+[ABLE'42000 Template guidekit. Fits most routers.$39$159 NEW!ADJUSTABLEFENCE FOR THEPORTER·CABLE555Tilts 0-45·Slides parallel up &downPrecision accuracy* Screws right on, nodrilling or tapping.INTRODUCTO RYOFFER $59.95555 Bisquit joiner withcase$159555A Bisquit joinerwith adjustable fence &metal case $199AFPC adjustable fencefor 555 $59.950-10·20 Bisquits $29$299#3338 2114 H.P.electronic variablespeed plungerrouter.New Freud Thin KerfCarbide BladesLU87M010 10" x 24TRipping $44LU88M010 10" x 60TCut·Off $54FINE CUT.m:F CROSS CUT BLADESLU73MOOS 8"X48T ATB $54YWOOOLU73MOO9 9"X54T A TB 59LU73M010 10"X60T ATB 39LU73M012 12"X72T ATBPRECISION PL BLADES 85LU82M008 8"X48T TCG 59COMBINA T/ON BLADES64LUB2MOO9 9"X54T TCGLUB2M010 10"X60T 59LUB2M012 12"X72T TCG 92LU64M008 8"X40T COMB. 53LU84MOO9 9"X40T COMB. 53LU84MOll 10"X50T COMB. 34LU84M012 12"X60T COMB.LM72M008SUPERRIPPING BLADES 698"X24T FLAT TOP 43LM72M010 10"X24T FLAT TOP 36LM72M012 12"X30T FLAT TOP 65LU85M008TEFlON FINE CUT.m:F COA TED BLADES8"X64T ATB S69LU85MOO9 9"X72T ATB 75LU85M010 10"X80T ATB 59LU85M012 12"X96T ATB 99=DS306= SETSLU85M014 14"Xl06T ATB 119LU85M015 15"Xl06T ATB 149A TB Allernate Top BevelTCG Triple Chip Grind$COOl Saw Blade Stabilizer 17CARBIDE DADO6" Dado S998" Dado109Adjustable Dado 49ADBOO 8"29JS-l00 Joining Machine 169()'1()'20 Bisquits box of 100094-100 5pe Cabinet Set 517995-100 5pc Cabinet Set with 99PK·lMuniform 5229Both Sets Come Wh FREE Doormaking book!9().100 15pc Carbide set 517991·100 13pc 'h" Shank set 519991·102 'h" Shank set $8991-104 'h" Shank set 512992·100 router b set 5295FB-l07 7pe M set $49FB-l00 16pc Forstner set 5179WC·l06 6pe Chisel Set $39WC·l1 0 lOpe Chisel Set 559March /April 1989 101
34-782 3hp unisaw w/Bies34-763 3hp 1 ph unisaw34-761 1-1I2hp lph unisaw43-375 3hp 1 ph shaper34-897 DELTA unifence1 10' handscrew2 12' handscrew3 14' handscrew4 16' handscrew210 r handscrew3/0 6' handscrew4/0 5' handscrew5/0 4' handscrew7224 24' I-Bar clamp7236 36' I-Bar clamp7248 48' I-Bar clamp7260 60' I-Bar clamp0359-1:;'i..""3/8' VSR cdls drill kit NEW1790222-1 3/8' VSR 3.5A drill 990244-1 1/2'VSR magnum drill 109 .5.With Case0234-1 112' VSR Magnum drill 109 .....$1296508 VS sawzall w/case5397 -1 3/8' hammer drill kit6256 VS jig saw8975 dual temp. heat gun6016 1/4 sheet finish sander63687-1/4" Saw:te JOintrWith Case .$1593523X21 sander w/bag 119I I360 3X24 sander w/bag 179362 4X24 sander w/bag 189503 3X24 wormdrive w/bag 335504 3X24 wormdrive sander 325330 Speed bloc finish sander 59505 112 sheet finish sander 1091:p 5 speed1214 RouterIIiiiiI18 $319 .. U 23690 1-112hp router ""'"n1199691 1-112hp D-handle router 1298537 1 -112hp Speedmatic router 199;:e hr:le 1695 router table w/router 19919219315-1 7-1/4' saw w/case,ct blade1299617 7-1/4' saw w/case,ct blade 1299627 2 sp tiger saw w/case 1299647 NEW tiger cub w/case 1197548 VS top-handle\§'rjig saw 1197648 VS barrel grip jig saw 1199118 Porta-plane kit w/ct cutter 1895116 NEW Omni-Jig 27900'@V.S. Tiger Saw IWith Case$135II12V. cordless drill kit 1293/8' VSR drill 991 3/8' VSR drill 1094 112' VSR drill 1154000 VSR 79wlCT Blade,Case & Fence _-==--''--'''$129.. 5. 011120 ......"' •• 1111.56540-1 cordless screwdriver kit6753-1 0-4000 VSR screwdriver 890375-1 3/8'close Quarter drill 119 Deluxe 1.9·X4.7' workbench 3990379-1 112' close Quarter drill 149 Major 2.23·X5.5' workbench 4996142 4-112' grinder kit 119 Zambesi 2'X5.5' teak workbench 6991-701-772-8725d!»l1cI3048-09 8-1/4' Super Saw Cat2647 3/8'VSR cdls drill kit2687 3/8' VSR cd Is kit w/clutch 1091703 10' mitersaw w/60T ct blade 16998003 9.6V battery w/purchase 30@1/2HP1 ph.l3504M1725 THClli0 .'/$105L3507M 3/4hplph 1725 TEFCL3506 3/4hplph 3450 TEFCL3510M lhplph 1725 TEFCL3509M 1 hplph 3540 TEFCL3514M 1-1l2hplph 1725 TEFCL3513M 1-1l2hplph 3450 TEFCL3516TM 2hplph 1725 TEFCL3515M 2hplph 3450 TEFCSN-II+ 6d-l0d nailer 449SN-4 6d-16d frame nailer 478SFN-1I 1-1/2 to 2-112 finish nailer 398M-II 1-3/8' to 2' HD stapler 348LS-2 5/8' to l' brad tacker 258LS-5 1' to 1-1/2' brad tacker 299PW roofing stapler 258Nails and Staples Priced to Sell!FAX US YOUR ORDER! CALL TOLL FREE FOR MIKE OR TOM1-800-358-3096Box 1716 . Grand Forks, ND • 58206Send $2 ,00 For 120 Page CatalogN12B-l coil roofing nailer 399N80S-1 16d stick nailer 399Nl00S-l 6d-20d nailer 499N60FN 1-1/4' to 2-1/2' fin. nailer 339T28-5 1-3/16' finish stapler 259T31-1 5/8' to I' brad tacker 139CWC100 lhp 4gaL compressor 299Nails and Staples Priced to Sell I6012HDW 3/8 2 sp. cdls drill kit3612BR 3hp rd base routerLS1020 10' miter saw410 dust collector2040 15-5/8' planer2030N 12' I jJS100 «JointingSystemWith Case $1 54EC-900 5pc shaper cabinet set94-100 5pc router cabinet set91-100 13pc 1/2' router bit set92-100 26pc router bit set90-100 15pc router bit set88-100 router bit setFB-l 00 Forstner bit setWS-6 4' angle clampK3.512 12' K body clampK3.524 24' K body clampK3.540 40' K body clampK3.550 50' K body clampComplete Line in Stock!1273DVS4X24VariableSpeedBelt Sander_--_. .•$18512730 4X24 sander w/bag 17912720 3X24 sander w/bag 169920VSRK 9.6V cordless w/case 109921 VSRK 9.6V cordless w/clutch 1391581VSVS Top HandleJig Saw$1241582VS barrel grip jig1654 7-1/4' saw w/ct blade.,;;/.9911212VSR 3/4' rotary hammer kit 1993258 3-1/4' power lane 13916113HP'Plunge Router ..$1 951604 1-3/4 HP router . 11816CIj 1-3/4 HP D-handle router 1491609K 3 in 1 trimmer kit 16916'1EVS 3-1/2 VS router 2591611-220V 259;;::·':'"'IjR500 2-1/4hp plunge routerR501 2-1/4hp plunge router 158BE321 3X21 VS elect. belt sander 118---Planer$338 "_RA200 8-1/4' port. radial saw 238TS200 8-1/4' compo miter saw 148TS251U 10' miter saw wlFREEaccessory kit and ct blade 198BD1025VRK 3/8' VSR cd Is kit 118'3/4HP Dust Collector31-050 lX30 belt sander 6940-150 15' bench scroll saw 12911-950 8' bench drill press 12931-460 4' belV6' disc sander 13923-700 WeVDry grinder 13931-340 lX42 belV8'disc sander 18931-352 1 X 42 belt sander 229Planer$389JBS-14MW 14'meVwd bandsawJBS-18 18' wood bandsawJJ-6 6' long-bed jointerOVS-l 0 oscilL spindle sander2-1/4 HP ElectronicV.S. Plunge Rn ..t'o-;-",J:$2693337 2-1/4hp plunge router3304 1 hp elec. plunge router3375 3-1/8' universal planer3380 jointerlspliner4024 3X21 elect.VS belt sander40900 1 hp router acces. kit
NEW BOOKTake the mysteryout of designing furniture.You may think that furniture designers are born, not made.But that simply isn't so. If you want to design your ownfunliture, you can. Seth Stem's new book shows you how.A well-lmown woodworker and professor at the RhodeIsland School of Design, Stem gives you what you need totum your design ideas into furniture. He presents adisciplined approach to design that anyone can learn.Order your copy today.Available March 15, 1989Hardcolrer, color, 224 pages, 182 photos, 94 draWings, S24.95#81You'll discover how to draw design inspiration fromordinary objects around you-the finely cast stem of a wineglass, for instance, or a favorite type of architecture.Using such examples, Stem shows you how to flesh out adesign concept and l{eep practical considerations likesize, scale, comfort and cost in mind.Stem cuts through the "design-speali" by presenting hisconcepts in down-to-earth ternlS. Whether he's looking atprovocative contemporary furniture or period pieces, hegives you the infonnation you need to design furniture thatsuits your own requirements and tastes.SI I'JfJ draWlnq:fr2112 concept toa practical gt110eSETH STEMedited by Laura TringaliYou'll also learn how you can strengthen your workwhile it's still in progress. And you'll get advice on maltingperspective drawings, creating blueprints and using avariety of design tools. Most important, you'll come awayfrom this bool, confident and able to create your designs.To order from The Taunton Press, use the attached insert or call 1-800-888-8286.March /April 1989 103
....R EBORN CO E & PATTERNSETS. TOP QUALITY AT ASPECIAL PRICE.SAVE EIGHT ON PIECE ALL C&P SIX SETS! ANDPrices Effective Feb. 1 List Pricethrough April 30, 1989 Mini-Pro Pro-line6 Piece Carbide ........... 5255 53266 Piece Tantung .......... 5n5 5346B Piece Carbide ........... 5516B Piece Tantung .......... 5395 5536Glass Panel Carbide ....... 5145 5165Glass Panel Tantung ....... 5165 51B55375<strong>Free</strong>born Company, Inc.Tool3355 E. Trent Avenue' Spokane. WA 99202-4459CALL FOR THE1·509-535·3075DEALER NEAREST YOUThe colors yellow and orange are trademarks of <strong>Free</strong>born Tool Company. Inc.Tantung"' is a registered trademark of Fansteel VRlWesson1S- PlANERS LENEAVE mUALITVNORTHSTATINORTHSTATINORTHSTATI PlANERSRAISEO PANB.DOOR MACHINENDRTlISTATIWIDE BaT SANDERDUST COUICTORS• Model 310: $725• Powerful 3 hp motor• Cast iron construction• Magnetic S'Nitch• 1 year walTllnty• Dust hood• Anti-kickbackNDRTlISTATI10".12".14" CABINETSHOP SAWS• 3. 5. 7Yz hp motors• Magnetic controls• Cast iron top• Uni-Iock fence• VERY HIGH QUAU1Y• $1-050 w/std fence• $1,150 INith 50" rip fence• FREE FREIGHT• Senco AJr Nailer avail.• Model 315: $795• Same fearures as theModel 310 plus:• Table extension.2 speedsDB.TA SHAPER• 2!l". 5 hp: $1,295• 24". $2,595.5 hp & 7Yz hpNDRTlISTATIBANDSAWS• 14". 1 hp: $295• 18". 2 hp: $695• ": $1-495• 24": $2,465DELTA "UNISAw"• Heavy cast iron const• 2 hp. single phase.9" xfi1" bed• 3 kne cutter head• Dual tilt fence• Magnetic co ntrols• SALE: $775• FREE FREIGHT• 6" jointer: $395• 12" joi nter:$1,895• Delta 8" joi nter:$1-245DELTA 18" VARIABlESPEED SCROll SAW• Requires 6 sq It space• Set-up time reduced by am• Easy top side adjustments• All cutters fully guarded• Cutters included• Safe. easy operationNORTHSTATI CABINETSHOP SHAPER• 3 hpll ph. 5 hp13 ph• Model 43-375• 2 speed-reversible• ¥ ' & Yz" spindles• 1 Yz. 3, 5 hp motors• 2 spindles: ¥ .. 1• $1,399 • Pricing starts at $1,150Y(• <strong>Free</strong>born & Freud Shaper • Specials on unence • Reg.: $1,114CuttersLENEAVEavailable.MACHINERY SUPPLYmodels • SALE:COMPANY• Yz". 1" available• Router collets avail.$689• Cast iron table• 96 free blades• Spring hold down &miter gauge& • Extra•heavy duty• 1 year walTllntyCharlotte,305 WestNorthMoreheadCarolinaStreet• $1-050(704) 376-742128202• FREE FREIGHT• Best buy in the industry!• Variable speed• Platen head• Dual motors• Heavy cast iron & steel• Plate construction. 10. 15 & hp• 25" Us!: $7,950• SALE: $5,695, 15 hp• 37" list: $12.(XXl• 2 hp, 2 bag: $325• 3 hp, 4 bag: $489. , 'I• SALE: $8, 100, hp• Phase converter avail.•Shaper<strong>Free</strong>bornCutters& Freudavail .' ,• Reg. $1,479• SALE: $895[JeLTA SPECIALS37-350: 8" jointer w/stand:34-444: Hl"$1-245contractor saw: $59528-243: 14" bandsaw: $47817-900: 16Yz" drill press: $29928-2835: 14" bandsaw: $598 after rebate43-122: shaper:33-990:$49910" radial ann saw:34-985:$535stock feeder: $489 after rebate34-994: stock feeder: $695 after rebate34-995: stock feeder: $650 after rebate33-150: sawbuck: $509104 Fine Woodworking
'The Bester is thB best waterstone for the professional"Jay van Arsdale, Author of ShojiIThe harder, wider waterstoneBlends natural stoneand ceramic to workIBefaster and last longer(Three-inch width -perfect for plane blades.)Bester #700 #1000 #1200 Polish #8000Prices $19.80 $23.80 $25.80 $38.80Special set of four $100<strong>Free</strong> shippin g in cont. U.S.(AK &HI add $18. CA tax 7%)Comes with #150 surface flattening stone(list $9.80) Sale ends 3/31/89Send $3 for com plete tool catalog.HIDA JAPANESE TOOL 415-524-37001333 San Pablo, Berkeley, CA 94702VICTOQIANCASINGS' BASES. CROWNS.ELEGANCECORNER BLOCKSDOORS ' GINGERBREAD LARGEST . INVENTORY WAINSCOTOF• & MILLWORK VICTORIAN MOULDINGS ANYWHERESpeCIalizingIn CUS(QmerSelVlceBuy D,rect from Mfr.Premium & CommerCIalGrades•No Minimum OrderRush Orders - No Problem!Expen Shipping & Packaginglots of ConstruOlon IdeasTop Quality PreciSIOnMtllvvorkHIgh Ouahry Full ColorCatalog wuh over 60 photosSend 54 for Catalog or& use your credit card PhoneDurango, P.O.303-255915Box 2987-FW3Colorado 81302One and Two· Week WorkIhopa June 5 • August 11. 1989The RBI HAWK Scroll SawFamily of Precision Scroll Sawsirecl Mill SavingOver 20 different hardwoodsand veneers!Domestic and exotic.Books, supplies, plans andseminars.FREEVisit our NEW store anddemonstration woodworkingshop.' cAmericanCATALOG 1025 South RooseveltPiqua, OH 45356CWarlcrafte.rs®Phone 513-773-7414 Ext. 263Recane or re·rush heirloom chairsfor yourself cr for others as 2profitable hobby - with our full lineof materials & instruction books.Since 1934 America's largestselection of caning &•basketrymaterials & supplies -Superior qUllity welving cane& machine woven caneIllustrated catalog Flit, oV11 & round reedswith complete howto-dc-itinformaFibrl &CANE & BASKET SUPPLY CO.genuine rushtion. prices, order Donish selt cordform· $1 (refund· Raffia, rattan, ,"grass1283 S Cotran. Dept. FW, los Anleles. CA 90019The RBI JOINT MACHINE • Precision Joint Making · Spindle Shaper RouterTable •Inverted Pin RouterCreate beautiful w ood joints so precise, you may beAmerica's largest line of Precision Scroll Saws canunlock your creativity. With 6 models to choose from,there is one suited for your needs. It takes a realwoodworker to build a fIrst class tool and that's whatRBI is all abouL We're American Woodworkers buildingquality, affordable tools with pride for you - theAmerican Woodworker. Send today for your freeinformation kit to see why rbi is the best value for yourwoodworking dollars.tempted not to glue them! Making fm ger joints,mortise and tenons, all types of dovetail joints,The RBI WOODPLANERmitered joints, and raised panel doors has neverbeen easier. Your rbi Ioint Machine can also convertinto a spindle shaper or an inverted pin router withaccessory attachments. Send for your free fact kittoday!Planer · Sander · Molder · Gang Rip SawCall Toll <strong>Free</strong> 1-800-535-8665(In MO 816-884-3534) for informationDealer Inquiries InvitedFour essential woodworking functions designed intoone precision, dependable machine. Plane your roughstock into dimensioned lumber to the size you want,save yourself hours of hand sanding using thesanding attachment, you can edge cut and widthdimension your stock with the power-fed gang ripsaw attachment, or create beautiful standard orcustom mOldings out of any wood you want with themolding head assembly. All these functions withoutI Hawk Scroll Sawshaving to remove the knives from the cutterhead andthe time and trouble needed to reset the planer knivesagain like other machines on the market Send todayfor your free fact kit on this extraordinary tool!1,--------------,Yes, Please rush me a free fact kitWoodplaners011: rbindustries -Joint Machine (Mark lnterest)1801 Vine St. Name____PO Box 369 Address IHarrisonville, MO64701 I CityStateFW15 IMarch /April 1989 105
621 3/S" VSR Drill751 1 3/S" VSR Drill7514 112" VSR drill666 31S" T·Handle drill7556 2·Spd. rt. angle drill303 Pro 7" paint remover304 Pro 7" disc sander305 Pro 7" disc polisher320 Abrasive plane367 3V." plane90.100.115.119.91 16 Porta·plane kit 209.9652 Versa·plane kit 265.309 Laminate trimmer 89.310 Laminate trimmer 120.312 Offset base lam. trimmer 129.319 Tilt base lam. trimmer 144.399 Drywall cutout unit 69.100 7/S HP router 100.518 3 HP mlcroprocssr, 5spd. 335.536 1112 HP speedmatic 195.537 '" HP 'pdm,PORTER+OIBLE""_ 54.630 1 H P router 109.690 1112 HP router 115.Speed· BlocFinishing Sander .Model 330_ ._691 1112 HP router, d·hamlle 134.555 NEW! plate joining machine 185.505 112 Sheet pad sander 105.352 3"x21 " dustless belt sander 125.360 3"x24" dustless belt sander 195.362 4"x24" dustless belt sander 205.503 3"x24" wormdrive belt314315-15487548764896279629752375427756255510579058850239-10224·10234-10375-10379-11678-13002·13102·15397·18975568059255935601260148215822882488256112" drill, keyless chuck318" Magnum holeshooter112" Magnum holeshooter318" close-quarter drill112" close-quarter drillHole-hawg kitElectricians rt. ang. drill kitPlumbers rt. ang. drill kit318" VS hammer drill kitHeat gun2 hp router3"x24" dustless belt sander4"x24" dustless belt snader1/3 Sheet sander112 Sheet pad sander16" Electric chainsaw2 speed band saw w/caseSingle speed jigsawSDeed SawzallVariable speed jigsaw2Moder1165118507 Var. sp. sawzall wlcase8365 7'14" top handle circular saw8377 7'4" wormdrlve saw8405 8'4 " circular saw6539·1 Cordless screwdriver8543·1.fHITACHIVSR Screwshooter6750·1 VSR Drywall driver8754·1 VSR Magnaum drywall driver8798·1 Adj. clutch screwshooter 1$/(11. 12 V. VSR0100 318" 9.6 v. cordless driverldrillDrill Kit &@HITACHIode1 2735:04 119. NEWIsander with bag 349.4V2" Trim saw 125.7'/. " Top handle saw 105.Heavy duty bayonet saw 165.VS, var. oroit, d·handle jigsaw 134."169PlungeVS, var. orbit jigsaw 134.Router.2·Spd. Tiger saw wlcase 130.Model TR12Var, spd Tiger saw w/case 136. F20A 31,4" Plane w/casePos. clutch screwdriver 139. TR8 Laminate trimmerTEKS Driver 119. TR8 V. " Plunge routerVSR Drywall driver 109. CR10V VS, Var. orbit reclpro sawORC10 318" Cordless drywall screwgunW8V1 ().4()()(). -drywall screwgunCordless297V." worm drive saw 135.6W' Worm drive sawMI ·S139. '.- tar aw5112" Trim saw 83. ' :CLUDED·81f2" cobiundl,o('" Circular saw 225.Cl0FA Deluxe 1 0" miter saw 289.8 Worm drive circular saw 149.FREUD•C15FB Deluxe 15" miter saw 379.'Fl000A 12" Planer/6" jOinter combo 1399.'90·100 15 pc. router bit set 159. CB75A Sand saw 1549.'94·100 5 pc. router cabinet set 179. Rl00Y Dust collector 559.'R'if'-m'gOB'()50 50 pc. comb. drill bitlbradpI. set 49·05-308 6" dado 92.OS·308 S" dado 105.I 10"CSl 12 12 pc. carving set 109. PlOOF 12" Planer 1059.'•PortableEC·900 5 pc. door making shaper Planer'FB·l00 16 pc. Forstner bit set 169.LM72MOO8 8"x24T rip 32. Model AP10LII7211010 10"x24"T rip 36. FREIGHTLU73II010 INCLUDED10"xtiO''T ATB 42.cutter set 319. .. 359LU7811OO8 8"x64T TCG gen. purpose 59.LU82II010 10"xtiO"T TCG 42.LU84IIOO8 8"x40" 4&R Combination 42.LU84IIOll 10"xSOT 4&R combination 37.LU85IIOO8 8"x64T ATB fine cut-off 49.LU85II010 10"x80T ATB fine cut-off 59.LU85M014 14"xlO8T ATB fine cut-off 98.LU85II015 15"xl08T ATB fine cut-off 105.PS203 7v." x24T ATS gen. purpose 18.PS303 7'4" x4OT ATB gen purpose623.WC106pc. chisel set 34.RA200 8" portable radial arm sawL 120UK 3-518" Planer kitR500 214" HP plunge routerRl50K 1 HP plunge router kitTR30U Laminate trimmerB7075K 3"x21" Belt sander kitS500A Finishing sander, 1/6 sheetTS251 U 10" Miter sawTS380 14" Miter saw7Iuz.Ki:l4 71/4"•Framers Saww/hypold gears139Model50778270894011582VS VS, Var orbit Jigsaw'6713238VS V5, Var. orbit std. duty Jigsaw1854 7'4" Sullders circular saw1 500 16 guage shears1942 Heavy duty heat gun3268 Std. duty heat gun3256 314" Power plane1600 21f.z HP, [)'Handle router1804 1 HP Router1808 1 HP, [)'Handle router90300 3V. HP Production router1609K1609..:: .-SuperSaw Cat7'(." Suilder's saw cat7v." Worm drive saw12" DeWalt cant. radialarm saw7770·10Screwdriver Drywall10" DeWaltIE:1Icont radial95arm saw...•()'4000 •rpmModel SCR2E·2H6SE755 3x21 VS Belt SanderEZ502 Cordless screwdriverEZ508 318" Cordless drillOilstone Multi·275.Model85960-9 '"-ADJUSTABLE CLAMP COMPAN3/4 HPTwin TankHand·CarryAirCompressorModelAM39·HC4David Instruments WhiteSight LevelPackageLps·20I---....;;... -: . ;Os5:7'()911304EA. BOXl12#50 'PONY' clamp fixture 7.50 60.00#52 'PONY' clamp fixture 8.00 85.00EA. BOX/8310 6" JORGENSEN hlscrew 8.35 47.60210 7" JORGENSEN hlscrew 8.95 51.00/10 8" JORGENSEN hlscrew 9.95 56.70#1 10" JORGENSEN hlscrew 11.40 84.95112 12" JORGENSEN hlscrew 13.00 74.003712 12" Steel bar cl llp 5.95 32.503724 24" Steel Bar 7.35 40.00laminate trimmer Installer's kitOff set base laminate trimmer91084 318"Mighty Midget VSR drillanther reclpro sawPlungeRouterModel 16111808T 89.1832VSK VS, Var. orbit Panther recipro saw 129.1530 14 auge nibbler 289.91068 1/2' Mighty Midget VSR drill 109.1158VSR 318" VSR drill 59.1196VSR 318" Homet II hammer drill 109.1198VSR 112" VSR hammer drill 125.11203 l1f.z" Rotary hammer 409.•11212VSR5I8" VSR bulldog 50S rotaryhammer 185.Brute breaker hammer 1299.'11305 Demolition hammer 85912720 3'x24" dustless belt sander 189.12730 4"x24" dustless belt sander 179.12730VS 4"x24" VS, dustless belt209.sander3270 3"x21" dustless belt sander 129.1347 41f.z" mini grinder 85.1099.*UniS8W1112 HP34·761F&&&CELTAif10"10" Unisaw, w/unifence 1379.'10" Unisaw, w/unlfence 3HP1380.'2 Spd. wood shaper 1379.'Sawbuck 509.10" Radial arm saw 469. '99. OELT:28-2435.•8" bench drill press 10916.5" Drill press 259.'14" Wood band saw w/HPmotor steel std 589.'599.10" ContractorsSaw w/1 1h HPmotorModel34-410450.'14" Wood bandsaw wlstd.,'h hp motorShaper, light duty, lhp, 1 ph 45O.'RC-33 13" Planer950.'6" Iong.bed jointer wlelectricals 929 ••8" tong.bed jointer wlelectricals 1249.'6" Ben, 12" disc wlelectricals 839.'Production stock feeder 575. •106 Fine Woodworking
CLASSIFIEDThe ClASSIFIED rate is S 5.25 per word, minimum ad 15 words. All payments mustaccompany orders; all are noncommissionable. The WOOD & TOOL EXCHANGE andSITIJATIONS WANTED are for private use by individuals only; the rate is $7.25 per line.Minimum 3 lines, maximum 6 lines, limit 2 insertions per year. DISPLAY ClASSIFIEDrates on request. Send to: Fine Woodworking, Advertising Dept., Box 355, Newtown,CT 06470. Deadline for the MaylJune issue is February 25.Busn. OppotiesSTIJDIOISHOP SPACE FOR LEASE GENOAnow leasing space to professional furnjturedesigner/makers, craftspersons, anists. EachstudiO resident enjoys full access to GENOA'scomprehensive machine rooms, spray paintingfacilities and promotion through on-sitegallery. To receive a copy of our catalog andmore information, please contact: GENOA,Box 250, Academy St., Genoa, NY 13071.(315) 497-3000 or 889-7291.WANTED TO BUY: Wooden plates andOOwls. Substantial quantities and good qualityneeded. Contact Penny, PO1ft ..c::::l- t±:lBox 215, Wingate,NC 28174 Phone (704) 233-4033INQUIRIESDEALERINVITEDWe Irut Im,. .. e. lIockIDl all tW-111 ha ••• 0011 .eN" I •• a ......... klDlt .. l Itore or specialty departmeDt.Resalt oDly -.0 tD'DHr•• krt salt •.Larson Cempa."n DormaJlIDC.Annuesa. FraDdlCO, CA 94114 (415) U1-ltUHelp WantedWOODWORKER/RESTORER - PremierWashington studiO. (703) 548-4604. 1101Duke, Alexandria, VA 22314.CABINETMAKERlFURNI1lJREMAKER Excellentopportunity for experienced woodworkerin well-equipped shop located incentral New Jersey. Must be able to produceextremely high-end work. Salary commensuratewith abilities. Call (201) 442-4023.WOODWORKING INSTRUCTOR to teachand live-in at summer camp for teenagers inNew Milford, cr. July - August 1989. Buck'sRock, 140 Riverside Dr. NY 10024. (212) 362-2702.EXPERIENCED CABINET MAKER FOR SUPERVlSORIPROJECT MANAGER positionwith established firm. Send resume to 116 S.Forbes Rd., Lexington, KY 40511, attn. GeneralManager.Kisco, NY. DesignsEXPERIENCED CABINETMAKER, customfu rniture, salary negotiable, located Mt.For Leisure, Ltd., 41 KensicoDr, Mt. Kisco, NY 10549. (914) 241-4500.APPRENTICE JOINER-HOUSEWRIGHTWITH 3 + YEARS ADVANCED EXPERIENCE in traditional American hand woodworking.18th-cenrury museum work rangesfrom pit-sawing to sash and wainscote joinery.Requires strong communication andpublic contact skills. $15,500 to 20,500. Excellentbenefits. Send resume to Roy Underhill,Colonial Williamsburg MHW, PO Box C,Williamsburg, VA 23187. EOElAACUSTOM CABINET SHOP, seeks highlyskilled craftsman for high-end reSidentialand commerCial work. Neil (415) 761-2754or Jack Davis Cabinets, 292 East Grand Ave.,South San Francisco, CA 94080-4805.SKILLED WOODWORKERS & FINISHERSneeded for established high-end customcontract furniture manufacturer. Competitivewages, comprehensive benefits, freeshop use. Fully-equipped 14,000 sq. ft. facility.Affordable housing, good schools, safeclean environment, 4-season activities. EOE.Women and minorities encouraged to apply.WalVGoldfinger, Inc., 7 Belknap St, Northfield,VT 05663. (802) 485-6261.APPRENTICE VIOLIN MAKERS and restorers:Positions available with finest rare violinshop in the country. Good salary and benefits,excellent training program. Professionalwoodworking experience required. Must bewilling and able to l earn. Bein & Fushi Inc.,410 S. Michigan Ave., Chicago, IT. 60605.CUSTOM CABINET SHOP DOING EXTREMELY HIGH-END WORK looking forexperience cabinetmaker. Park Slope, NY.(718) 237-2592.Situations WantedResponsible man, 34. Carpenter 10 years seeksapprenticeship in fine furrUrure, cabinetmaking,doing custom and period reproductions.One on one or small shop. (203) 270-1705.Cabinet maker/amateur carver with familyseeks employment & education in top qualitytraditional furniture shop. Will relocate.Jim Lavelle, 177 Vreeland Rd., West Milford,NJ 07480. (201) 728-1246.InstructionAPPRENTICESHIP IN PROFESSIONAL FINEFURNlTIJRE MAKING with the prominentJeffrey Greene Design Studicr-realistic preparationfor an uncompromisingly vital careeras an independent anisan designing, making,marketing the very finest furniture in solidwalnutlrosewoocls. Tuition. New Hope, PA(215) 862-5530. Call don't write. Mondaythru Friday, 9:30-4:00.HAVE YOU EVER WANTED TO BUILD AWOODEN BOAT? Come to Maine and takeour six-week course. Rockpon Apprenticeshop,Box 539F, Sea Street, Rockpon, ME04856 (207) 236-6071.THE HYMILLER SCHOOL OF FINE FlNlSHINGIREPAIR AND HAND JOINERY. Orle-tv.vbusiweekthe necessaryintensive in4lop training Will give allknowledge to stan your ownness. Send 55 for complete info package. 3rdgeneration master craftsman. 912 Lakeshire Dr.,Fairfield Glade, TN 38555. (615) 484-9309WOODWORKING & LUTHIERY SCHOOLOne year intensive woodworking program.Four-month guitar-building course. Finaflcialaid. Accredited member NATIS. <strong>Free</strong> brochure.Robeno-Venn School of Luthiery, 401 1S. 16th St, Phoenlx,AZ 85040. (602) 243-1179PRESERVATION CARPENTRY- Nine-monthcourse. Preserve and restore pre-2Oth-centurybuildings. CABlNEf & FURNITURE MAKING -two years, custom furrU ture construction. Traditionalstyles; hand joinery and embellishmentPlANO TECHNOLOGY -two years. Tuning,action repairs, and rebuilding. VIOLINMAKING & RESTORATION - three years formaking; optional fourth year for repair/restoration.Financial aid available to qualified students.Accredited member NATIS. NORTHBENNET SfREET SCHOOl., 39 North BennetSt, Box A, Boston, MA 02113. (617) 227-{)155.WOOD KITCHEN CABINET REFINISHING. ONE WEEK INTENSIVE IN-SHOPTRAINING will give you all necessary knowledgeto Start your own stripping and refinishingbUSiness. Big profit in refmishing woodkitchen cabinets and furrU rure. Call StrippingUnlimited and Refinishing. Holbrook, NY(516) 585-5742For a catalogue describing0our two year educationalprogram in the fine an of=e making, contal:AaNIeMy"'250,o.-,IIYStNetFurniture Making13071:Studios and CaBeryEducation,315315.07.3000.... 7291GENOA does nUl disnimimnewith regard to rJ(:e. religion.t'olor.
SOUTHWEST Ii ARTS&CRAFTSCALL FOR ENTRIES IFESTIVALShow Dates: Nov. 9th . 12th 1989$8,000EntrytoDeadline:$10,000Apr.15thin awardsP.D.Box 11416 Dept. DAlbuquerque,NM 87192(505) 262 - 2448BRANDING IRONS. Names, signarures, logos,any size, design. Norcraft CustomBrands, Box 277F, So. Easton, MA 02375.Telephone (508) 238-2163 anytime.BUlIDING? RESTORING? REPAIRING? USECHEM-TECH T-88 - the epoxy glue professionalsuse! Strength and reliability proven inboats and aircraft over 15 years. Introduaoryoffer - pt. ofT-88 only S9.95 ppd. USA Ordersshfpped within 48 hrs. Technical staff oncall to answer your questions. Call/writeCHEM-TECH, 4469-F Lander Rd., ChagrinFalls, OH 44022. (216) 248-0770.Musical SuppliesHAMMERED DULCIMER PlANS! By notedbuilder Charlie AIm. Best boo k on subjea$19.95. Woodworks, Box 428, Brookston, IN47923. (317) 563-3504.LUIlflERS' SUPPLIES: Imponed tonewood,tools, varnishes, boo ks, plans, pans, accessories, strings, cases, for violins, violas, cellos,basses and guitars. Asse mble-yourself violinand guilar kits. Catalog, $.50, includes 10%discount certificate. International ViolinCompany, Ud., Dept. WW, 4026 W. BelvedereAve., Baltimore, MD 21215.VIOLIN, GUITAR, banjo, mandolin-makingmaterials, accessories, books. Catalog, $1. InternationalLuthiers Supply, Box 580397, Tulsa,OK 74158.GUITAR SUPPLIES, KITS AND REPAIRBox 9OOF, Athen
s.-t, _d'.uYour. . TIGERand BIRDSEYE.. Maple Specialistand other NativeFigured HardwoodsCHRIS S. POND921-A Lancaster Pike, Quarryville, PA 17566(717) 284-5030. r\\V: _rP .\_v IV':".M.\\\:,O .,.,f)\) ' r-, ....... I:'< ttJ'.! \.\:. ."-- p..'i.G £'I \..V \:..\\G \.I'.... '1'
Qfuropean 3JmportebarbbJareCAll. US FOR PRICES ONPOWERMAnC MACHINES,DEWALT RADIAL-ARM SAWSBOSCHNf) ON• FREID•TeasMAKlTABYSKlL • PORIER-oaE • JORGENSEN•ClAM'Sfor prepaid freight prices:(800) 821-2750. M for Tools DeptIIBfor8 you buy. call us toll·fr88ROUTER BITS SHAPER CUTTERS - P.P.D. IN U.SAVISA & MASTERCARDS ACCEPTEDIn Miss. (800) 321-8107..THE SANDER(601) 354-3756126 E. Amite St., PO Box 102, Jackson,WITHMS 39205""APPEALI -44" TO BE PRECISEUniform thickness accuracy to within .010 of an inch-precision that you almost haveto see to believe. Or take the word of thousands of woodworkers who are achievingflawless sanding results in their cabinet shops, craft shops, home workshops, customfurniture shops and in musical instrument making.The Performax Component Sander appeals to such a wide variety of woodworkersbecause it allows you to select the components to fit your needs now with retrofittingoptions for potential heavier use later..Plus, your sanding width won't ever be limited with the 44" wide sanding capacity,due to the open-end design of the Performax SfT Sander, which is just one of themany innovative features that makes the Performax Component Sander a wise investmentand an excellent choice for all types of woodworking.For More Information or the Dealer Nearest YouCall 1-800-334-4910 or Write to:Performax Products, Inc., 11975 Portland Ave. S., Suite 142, Burnsville, MN 55337CALL TOLL FREEnLearn all about combination machinewoodworking. <strong>Free</strong> color catalog and othermaterial available. Tremendous Savings.Ex ands our workshop area by 90 percent.1-800-535-4788 USA1-800-325-8330 CACreate ovals &exotic curves !FAST NEW WAY TO MAKESHAPELY FURNITURE, ETCSee VHS videoRENT-FREEWE REFUND $5 DEPOSITSend $5 check (no cash) to:Compu-Compass Co.WHEN YOU RETURN VIDEOQUALITY • •HARDWOODS• • Clear Kiln Dried Surfaced 4 Sides 3/4' Thick3' to 10' Widths 2-Ft. to 7 -Ft. Lengths20 Sq. Ft. Packs Random Widths & LengthsRed..................................................................Oak-Plain . $45.00Red Oak-Quarter Sawed.. . $51.00White Oak $44.00Cherry........ . $59.00Walnut................................... . $60.00Hard Maple . $33.00Ash $49.00Basswood. ............ $31 .00Poplar .................................. ........................... $27.00Aromatic Red Cedar (Tight Knots) ................... $32.00Cypress. ........ ................... $31.00Birch .............................. ................................. $43.00Orders Shipped C.O.D. by UPS. Shlppll1II Charges Added.Texas•Residents Add '" Sales Tax.To Order Call 214-693-4735 or Write to:K & S SPECIAL TV LUMBERP. o. Box 125 Hill's lake Road - Carthage. TJ( 75633SHELLAC DRY ORANGE$5.95 FLAKES_per tbsend for our free finishing catalogTop QualityImmediateBest Prices. -2000 NE 100, Seattle WA 98125-Serving the craftsman aince 1898 withALLTECII U.S.A.HEAVY DUTY SHAPER3ffl.1 PhaseReverslbl9-2 Speed3W SpindieCast IrCl" Fence Auv.Pledslon QOLndCost Tobie Top(S0I'T'Ie9'!ipcing WI·f.OJ Ibs.5DELUXE 011 above MODEL: with foHowing opllon.)HP-Magnetlc Controls3/4" & 1 1/4" Spindle AssembliesSALE PRICE: $1,075.00Spring Hold DownsSPECIAL20·PRICEPLANER$1,875,00Heavy Duty Cast Iron Construction5 HP- Magnetic ControlsSegmented Infeed RollIndividual Cast Iron Chip BreakersTotal Gear Driven Feed AssemblyShipping We ight 990 Ibs.o·_·1 ¥.,' .Shipment1712 E. BROAD STREETRICHMOND, VA 23223804-643-900737"SANDERWIDE BELTSALEPRICEDAT ONLY$8,450,00Heavy Duty Plate ,nn
Unique replaces Right a Arm whole Clampof special clamps setand visesDear Woodworker:Cascade is continually onthe lookout to find the absolutelybest value in tools to complementour SY brand router bits and shapercutters. We believe we have found a realgem in "The Right Arm Clamp." This new clamp does it all!Its secret is its pivoting arm, which, when positioned,squares the work for perfect joining, gluing, and fastening.lifetime manufacturer's warranty. Instructions included. Suggested retail -$1795Cascade price -$1 (JDO -or 6 for '5SOONEW1989 SALEWrite or call for ourCatalog!!Great prices!!Exciting new profiles!!Super seleclion of top-qualitycarbide-lipped ...router bits andshaper cutters atterrific factory-toyouprices like:CARBIDE TIPPED SHAPER CUnER PANEL RAISER -3 WING, 5 PROFILES, 3MM THICK CARBIDE · 4·5/8" D.O. with 3/4 " BORE (1/2" BUSHING)$6995 · 5-1/2 " 0.0. with 1-1/4" BORE (1 " BUSHING)5° FACE 15° FACE CONCAVE 12°CUT CUT & OTR FACE RO CONVEX6 PC CARBIDE TIPPEDCABINET SETS• 3 mm CARBIDE· 3/4" BORE W/1/2" BUSHINGONLY $179.9513 Great Cabinet Sets including these popular Profiles:SY 1280 SY 1283L:!;;, (1-114" Bore with1 "BushlngONLY $249.95)FOR THE SHAPER3 mm thick C-2 carbide, 314" Borew/Y2" BushingSY-1 212-11/4" $24.95SY-1212-23/8" $26.95StraightSY-1 212-43/4" $32.95SY-1 212-S1" $35.95SY-1212-3 SY-1212-61/2" $28.95 1-1/2" $36.95SY-1212-82" $59.95FluteSY-1223-1 SY-1223-41/4" $24.95 3/4" $32.95SY-1223-2 SY-1223-S3/8" $26.95 1" $35.95SY-1223-31/2" $28.95BeadSY-1224-1 SY-1224-41/4" $24.95 3/4" $32.95SY-1224-2 SY-1224-S3/8" $26.95 1" $35.95SY-1224-31/2" $28.95NEW Concept in Router BitFOR THE ROUTER!SOLIDCabinet Door Construction!!CARBIDEThe SY brand 3" Panel Raiser with undercutter SPIRAL BITSDovetailin 5 profiles automatically provides a 1/4"$1 5.00 eachPART NO. D PRICEtongue, and your panels and rail & stile are atB02 31B $7 the same height. Complete with bearing forB04IT112 $7402I B B04-112 1/2IT •"m,"" Md I,,,h, .. ''''og.B06 9/1 6 $8$2995rs:B10 3/4 $95B10-112 3/4 $9B12-112 $122-5/8" 0.0. Panel Raisers in9the 5 profiles above -each.- Flush Trimming-f'I :!O € p:rRoundover PART NO. A PRICEs""' SC::: 02"'y-'--:1-:7/1""'6R: -- Bull Nose PART NO. A PRICE-'-;;;-;-= $11SY9-1 1/4 $14• SB016Y'h 1/2 $BSS04Y 11BR $1 1SB020 SIB-.i .o •SY9-1 'I,SS06Y 3/16R$10$1 1SY9-3 31BI SSOBY 1/4RSB020'l, SIB$11$10$12SS12Y 3/BR $1SSS ,:,: :-:-: 16 ::, Y $16:-:-:::---", 112 = R ,----'!'-',,-.$16'' J• SY9·3'I, 31B $1SSY9·4 112 $1SA - r' 8SS20Y-112 SIBRCove Bits PART NO. A PRICESS24Y-1/2 3/4RS702Y 1/16 $12• SY9-4'12 1/2 $1SSY9-S SIB $16SY9·S'12 SIB $16$20SY9-6$20•SY9-6'12SS2BY-112 71BRSY9-B'12$1BS704Y 1/B $12SS32Y-1/2 1 RSY9-9'I, 1-11B $30S706Y, 3/1 6 $12SS36Y-1/2 1-1/4R $40SY9-10'12 1-1/4 $3SS70BY 1/4 $13 CoreSY9-1 1'I, 1-31B $3BS710Y S/16 $13SY9·12'I, 1-1/2 $40BoxS712Y 31BPART NO. A PRICES716Y 1/2S40B 1/4 $10S716Y-112 112S412 31B $10• Roman OgeeS724Y-1/2 3/4 $2BS416 112 $12PART NO. A PRICES420 SIBS424 3/4 $1SCorner RoundS424-1/2 3/4 $1SS432-1/2 1 $1B•.*1SS70SY S/32 $16SS70SY'I, S/32 $16SS70BY 1/4 $17• SS70BY'I,S4S0-1/2 1-112 $30--I'Beading PART NO. A PRICE Slot Cutter · 4 FlutesSY-1225-1 SY-122S-41/4" R $24.95 3/4" R $35.95I 1 IS602Y 1/16R $1 1PART NO. A PRICES604Y 1IBR $1 1$20S606YS60BYSY-122S-2 SY-122S-S--IS610Y3/8" R $26.95 1"R$49.95 03/16R $1 1 12 1IB $201/4R $12SY7004 S/32S/16R 1 (4mml. SY7004' 12 S/32S612Y 31BR $1S -A• $22(.mml $22SY7006 3/1 6S616Y 112R $16SY-1225-3 SY-122S-6S616Y-112 112R $16• l$22$22c SY700B 114S624-1/2 3/4R $20SY700B'I, 114 $241/2" R $28.95 1114 "R $49.95• Indicates '12" shank. 1 '12" HP. 2 speed, Reversible3/4" and '12" spindles1.2" vertical spindle travel , Holddown clamps•MCIVISA/COD USERS ORDER TOLL FREE1-800-235-0272Individual fence assembly adjustment IN WASHINGTON STATE CALL 1-236-02721k" and 1/4" router collets7AM - 7 PM Monday through Friday (P.T.)Mitre dovetailed into table$7$13$14$14r-r-Lrl--t S="S""10,:,:Y_-=S,-,:/16,,:-R,---,,,-,,=-·S =-=S 16Y-112--"'112R' --- =" -$34$34$14$13I 0• ,.SY7002' """'-0-- j- r . SY7006'I, 3/161/4 $14$153/4 $163/4 $161/4 $17$24March /April 1989 111
EventsListings of gallery shows, rIUljor craft fairs, lectures,workshops and exhibitions are .free, but restrictedto happenings of direct int erest to woodworkers.We'll list events (including entry deadlines for futurejurled shows) that are cu rrentwith the monthsprinted on the cover of the rIUlgazine, with a littleoverlap when space p ermits. We go to press twomonths before the issue date of the rIUlgazine andmust be noti fied well in advance. For example, thedeadline for events to be held in M arch or April isJanuary l;for July and Augus ifs May 1, and so on.AUBAMA: Juried exhibit-"Magic City Art Connection,"April 7-8. MCAC, Eileen Kunzman, 1128 Glen ViewRoad, Birmingham, 35222; (205) 595-3563.CALIFORNIA: Exhibit-"Four Traditions," the revitalizationof the fine craft traditions within the larger artscommunity context, April 2-21. Southwestern CollegeArt Gallery, 900 Otay Lakes Road, Chula Vista, 92010.Contact Joanne Peterson at (619) 421·0349, 421-6700,ext. 636 or 423- 7405 (home); or Judith Nicolaidis at 421-0349, 421-6700, ext. 635 or 266-2605 (home).Class-Building Sea Urchin, a traditional Nova Scotia rowingskiff, wi Simon Watts, April 22-29. Contact CrissyField, National Maritime Museum Assoc., Bldg. 275, SanFrancisco, CA 94 1 29. (415) 929-0202.Workshops-Traditional Japanese woodworking shojiscreen, tansu chest, joinery & hand sharpening by Jay VanArsdale. Contact Hida Tool Co., 1333 San Pablo Ave.,Berkeley, 94702. (415) 524·3700.Class-Building the Petaluma, a recreational rowing shell,wi Simon Watts, April 8- 15. Contact Ann Smith, 240 12thSt., Arcata, 95221. (707) 826- 1544.COLORADO: Classes-Comprehensive carpentry andwoodworking courses, day and evening. Red Rocks CommunityCollege, 12600 W. 6th Ave., Golden, 8040 1. Forspring 1989 class information, call John Sperling at (303)988·6160, ext. 211.CONNECTICUT: Workshops-18th-century joinerytechniques, wi Eugene Landon, Mar. 4-5; surface design& techniques, wi Robert Dodge, Mar. 11-12; woodfinish·ing techniques, wi Gregory Johnson, Mar. 18-19. ContactBrookfield Craft Center, Box 122, Route 25, Brookfield,06804. (203) 775-4526.Exhibit-"Beautiful Soup," tureens and bowls, Mar. 22-May 6. The Elements Gallery, 14 Liberty Way, Greenwich,06830. (203) 661·0014.DISTRICT OF COLUMBIA : Show- 1989 WashingtonCraft Show, April 20-23. Departmental Auditorium, 1301Constitution Ave., N.W. For info., call (202) 357-2700.Selllinar-Smithsonian Institution meeting of ornamentalturners, Mar. 30-April 1. Reception Suite, Nat'l Museumof American History. Contact Ted Crom, Route 2, Box212, Hawthorne, FL 32640. (904) 475·1609 or 475-2291.FL ORIDA : Workshop- 1 ·week "Ultralight" canoebuilding workshop with Thomas Hill, Mar. 6-12. ContactWally Mason, Florida Gulf Coast Art Center, 222 Ponce deLeon Blvd., Belleair, 33516. (81 3) 584-8634.ILLINOIS: Expo-5th annual American Craft Expo,Sept. 7- 10. Application deadline: Mar. 1. Need duplicateslides of 5 works and nonrefundable S 15 application fee.Contact Christine Robb, 530 Willow Road, Winnetka,60093. (312) 441-7964.Show- 10th annual Fountain Square Arts Festival, June24-25. Evanston. Application deadline: April 7. For appli·cation, contact FSAF, do Evanston Chamber of Commerce,807 Davis St., Evanston, 6020 1. (312) 328-1 500.Show-Chicago Art Buyers Caravan Show, May 6-8. Ex·pocenter, Chicago. Open to buyers from the trade only.Contact Paul Karel, ABC, 408 Olive St., St. Louis, MO63102. (314) 421-5445.INDIANA: Workshops-Sharpening techniques, tablesaw,router seminar, scroll-saw use. <strong>Free</strong>. Contact EdwardB. Mueller Co. Inc., 3940 S. Keystone Ave., Indianapolis,46227. (317) 783-2040.IOWA: J uried show-1 9th annual "Art in the Park,"May 20-2 1. Four Square Park, Main Ave., Clinton. Closingdate: April 1. Clinton Art Assoc., Box 132, Clinton, 52732.(319) 259-8308 (Carol Glahn).Exhibit-American Wildfowl Decoys, April 16-J une 10.Shorebird and duck decoys carved between 1870- 1960.Muscatine Art Center, Muscatin. Contact Susan Flamm,444 Park Ave. S., New York, NY 10016. (212) 481·3080.KANSAS: Seminars-13th annual wood technologyseminar, Mar. 30-3 1; installation of architectural woodworkseminar, April 9-12; veneering procedures & applications,May 4-7. Nat'l Wood Technology Ctr., PittsburgState Uttiv., Pittsburg, 66762. (316) 232-5500J uried show-"Dimensions '89," Lenexa's 5th annualnat'l 3-dimensional art show, May 19-21. Sar-Ko-Par Park,87th Street Parkway at Lackman Road, Lenexa. For moreinfo. and entry forms, contact William H. Nicks Jr., showdirector, City of Lenexa, 13420 Oak, Lenexa, 662 15;(91 3) 541-8592 or 492-8800.KENTUCKY: Workshop-Greenwood chairmaking,techniques, technology & design, April 1-2. Instructors:John P. Alexander Jr., Drew Langsner, Brian Boggs; SilO.Contact Brian Boggs, 114 Elms St., Berea, 40403. (606)986,9 188.MAINE: Lecture-Chuck Paine will review recent developmentsin design and construction of yachts, Mar. 1.The Rockport Apprenticeshop, Box 539, Sea Street, Rockport,04856. (207).236·6071.C1asses-2·week design-&·build courses, Mar. 6-17,June12-23, Nov. 6-17. Shelter Institute, 38 Centre St., Bath,04530. (207) 442-7938.MARYLAND: J uried show-Rocky Gap Music & CraftsFestival, Aug. Rocky Gap State Park, Cumberland.Traditional and contemporary crafts (no kits). Deadline:April 1. Contact Lisa Land, Governor's Office of Art andCulture, 80 West St., Annapolis, 21401. (30\) 974,51 10.J uried shows- 14th annual Spring Arts & Crafts Fair,April 14-16. Montgomery County Fairground, Gaithersburg.12th annual Spring Crafts Festival, April 28-30. MarylandState Fairgrounds, Timonium. For info. and application,send 3 stamps (75¢) for postage to Deann Verdier, SugarloafMountain Works Inc., 20251 Century Blvd., Germantown,20874. (301) 540-0900.MA SACHUSETTS: C1ass-"Three Centuries of AmericanFurniture," Thursdays, Mar. 16-May 25. Codman CarriageHouse, Codman Road, Lincoln. 7 P.M. to 9 P.M. ContactSPNEA, Harrison Gray Otis House, 141 Cambridge St.,Boston, 021 14. (617) 227-3956.Show-7th annual Woodworking World Show, April 28-30. The Bayside Expo Center, Boston. Contact WANA,Box 706, Plymouth, NH 03264. (800) 521·7623 or (603)536,3768 Mon. thru Thurs.ExhibitS-Ceramics, fiber, furniture, glass and metalworks by students and faculty of Swain School of Design,Southern Mass. Univ., Mar. 11-22. Turned wood by DanKvitka, April 29-May 27. The Society of Arts and Crafts,175 Newbury St., Boston, 02166. (617) 266· 1810.Workshops-Various weekend workshops. Contact Ho·rizons, The New England Craft Program, 374 MontagueRoad, Amherst, 01002. (413) 549-484 1.MICHIGAN: Meeting-Annual meeting of Early Ameri·can Industries Assoc., May 18-21. Ford Museum & GreenfieldVillage, Dearborn. Reservation deadline: April 10.Contact EAIA, Box 2128, Empire State Plaza Station, Albany,NY 12220-01 28.Class-Lofting and building the Herreschoff pram, wiSimon Watts, May 6- 13. Contact John Wilson, 500 E.Broadway Highway, Charlotte, 48813. (517) 543·5325.Show-Woodturning show, April 28-May 20. JaniS Wets·man 20th Century Decorative Art at Artpack Services,Inc., & A.I.R., 31505 Grand River, Door #10, Farmington,48024. Call (313) 645·62 12.MINNESOTA: Show-ACC Craft Fair's American CraftExpo., Mar. 29-30 (trade) & Mar. 31-April 2 (public). St.Paul Civic Center, St. Paul. ACC Craft Fair, Box 10, 256Main St., New Paltz, NY, 12561. (914) 255-0039. ContactMarylou Krajci at (212) 420· 1140.MI SOURI: Show-2nd annual Laumeier ContemporaryArt and Craft Fair, May 12-14. Laumeier SculpturePark, St. Louis. Applications due Mar. 3. Contact GinnyHerzog, art chairman, Laumeier CACF, 12580 Rott Road,St. Louis, 63127. (314) 82 1·1209 or 391-8201.MONTANA: Festival-Western Montana College IndustrialArts Department's Annual Festival of Arts and Industry,April 28-29. Cabinetmaking, furniture restoration andwoodturning. Contact Western Montana College, Dillon,59725. (406) 683-70 11.NEW JER SEY: Show-Super Crafts Star Show, Mar. 31-April 2. Meadowlands Stadium Club, East Rutherford.Contact Creative Faires Ltd., Box 1688, WesthamptonBeach, NY 11978. (516) 288·2004.Auction-CRAFTS of NJ annual tool auction, April 1.Holiday Inn, Clinton. 10 A.M.art,For more info., writeCRAFTS, 85 Brunswick Ave., Lebanon, 08833.Exhibit-Spring Showcase, contemporary Americancrafts & jewelry, April 14-May 13. Will feature w oodturnectvessels by Michael Foster. Sheila Nussbaum Gallery, 358Millburn Ave., Millburn, 0704 1. (201) 467· 1720.NE W YORK: Workshops-Hand-tool workshops byRobert Meadow. Mar. 11-12, April 15-16. Japanese tools,sharpetting techniques, joinery, furnituremaking, instrumentmaking.The Luthierie, 2449 W. Saugerties Road,Saugerties, 12477. (914) 246,5207.Juried show-3rd annual American Craft At The Armoryexhibit and sale, May 4-7. 7th Regiment Armory, NYc.American I:::raft Enterprises, Box 10, New Paltz, 1256 1.(914) 255-0039.Show-1st annual Woodworking World Show, April 7-9.Erie County Fairgrounds, Hamburg. Contact W ANA, Box706, Plymouth, NH 03264. (800) 521·7623 or (603)536-3768 Mon. thru Thurs.Show-5th Spring Fling Crafts Festival, April 28-30. Nas·sau Coliseum, Uniondale, Long Island. Contact CreativeFaires Ltd., Box 1688, Westhampton Beach, 11978. (516)288·2004.Shows-Frame·O·Rama, April 14-16. Piers 90 & 92, NewYork Passenger Ship Terminal, NYc. Galeria, April 14-16.Pier 88. Open to buyers from the trade only. Contact PaulKarel, Art Buyers Caravan, 408 Olive St., St. Louis, MO63102. (314) 421-5445.Workshops-Weekend boatbuilding workshops, Jan. thruMay (last weekend of each month). South Street SeaportMuseum, NYc. For reservatiOns, call (212) 669-94 16.Shows-Pratt Creative Arts Therapy Expo, Mar. 18. SpringCreative Arts Therapy Institute, Mar. 12-18. Pratt Institute200 Willoughby Ave., Brooklyn, 11205. (718) 636-3600.OHIO: Conferenc:e-Northcoast Woodturners TurningConference, Mar. 30-April 1. Coventry High School, 3257Cormany Road, Akron. Rude Osolnik, Dale ish, CleadChristiansen & featured club members. Also, trade showand instant gallery. Contact Steve Geiger, 5834 MallardCourt, Mentor, 44060. (216) 257·0346.Show-1st annual Woodworking World Show, April 14-16.Seagate Center, Toledo. Contact WANA, Box 706, Plymouth,NH 03264. (800) 52 1-7623 or (603) 536-3768.OREGON: Workshops-"Art Furttiture: Surface Treatments,"by Beth Yoe, Mar. 5. Various workshops in woodworkingfor summer quarter, June 13-Aug. 22. OregonSchool of Arts & Crafts, 8245 S.W. Barnes Road, Portland,97225. Call (503) 297-5544 for a summer schedule.PENNSYLVANIA: Show-1st Annual Graduate ApprenticeShow, featuring woodworking of former apprenticesof Jeffrey Greene, Mar. 4-April 14. Divergence Gallery,ey Alley, ew Hope. Contact Kay Lord at (215) 862-9620.J uried show-7th annual PA Nat'l Arts & Crafts Show,Mar. 24-26. PA State Farm Show Complex, Harrisburg.PA. Nat'l Arts & Crafts Show, Box 11469, Harrisburg,17108-1469. (717) 763- 1254.Workshop-japanese woodworking, wi Robert Meadows,April 29-30. PGC Craft Center, Tyler State Park,Richboro. 590. To register, contact the PA Guild of Crafts·men, Box 820, Richboro, 18954. (215) 860-073 1.TENNESSEE: Exhibit-Seeking exhibit proposals insculpture, painting, drawing, metal, clay, w ood, printmaking,glass, textiles & designs. Deadline: Mar. 15. Send proposals,12 slides wi dimension, resume and SASE to Trent Whitington,Exhibit Committee, Appalachian Center for Crafts,Route 3, Box 430, Smithville, 37166. (615) 597-680 1.nus: J.uried show-Annual Winedale Spring Festival& Texas Crafts Exhibit, April 1-2. Winedale HistoricalCenter, Univ. of Texas at Austin. Contact Gloria Jaster,Box 11, Round Top, 78954. (409) 278· 3530.UTAH: Workshop-Annual Woodturning West Sympo·sium, May Brigham Young Univ. Richard RaIfan, May8- 12. Craft Supplies USA. Contact Craft Supplies USA,1287 E. 1120 S., Provo, 8460 \. (801) 373-0917.VIRGINIA: Exhibit-Miles Carpenter Cententtial Ex·hibit, April 28-June 23. Hand Workshop, 1812 W. MainSt., Richmond, 23220. (804) 353-0094.Seminar-"Maximizing Quality & Profit for Your Woodworking,"April 29. Registration closes April 1. ContactJack McClintock, 990 1 Burke Lake Road, Burke, 22015.(703) 250-7122.WASHINGTON: Shows-"Members' New Work," newpieces by gallery members, Mar. 2-26. "Elegant Simplicity,"of furnituremaker Ross Day, April 6-30. NorthwestGallery, 202 1st Ave. S., Seattle, 98104. (206) 625-0542.Workshop-Lapstrake construction by Simon Watts,Mar. 18-26. 8:30 A.M. to 5 P.M. The Center for WoodenBoats, 1010 Valley St., Seattle, 98109. (206) 382·BOAT.Workshops-Planking, Mar. 4; sailmaking & repair, Mar.18; interior joinery, April 8; flat-bottom skiff, April 29-30.Contact Northwest School of Wooden Boatbuilding, 251Otto St., Port Townsend, 98368. (206) 385-4948.Lec:ture!workshop-Woodworking joinery & design,wi Tage Frid, April 14 (lecture), 15-16 (workshop). TheCenter for Wooden Boats, 1010 Valley St., Seattle, 98109.(206) 382-2628.WEST VIRGINIA: Workshops-Wooden handplanes,wi David Finck, Mar. 10-12; wood turning, wi Alan Stm,April 21-23; progressive Windsor chairmaking, wi RandallFields, April 24-29. Crafts Center, Cedar Lakes, Ripley,25271. (304) 372-6263.WISCONSIN: J uried show-17th annual Festival of theApril 2. Fine Arts Bldg (interior courtyard), Univ. ofWisc.-Stevens Point. Contact John Morser, Festival of theArts, Box 872, Stevens POint, 54481. (715) 341 -4655.CANADA: Workshops-Specialty lumber milling, wiWill Malloff, author of "Chainsaw Lumbermaking," TheTaunton Press, which is course prerequisite reading, April22-28. Contact Don Gillingham at Selkirk Rosemont Col·lege, 2001 Silver King Road, Nelson, B.C., V1L 1C8. (604)352-660 1, ext. 232.CHINA: Study tour-Visits to famous woodworkingfactories, Imperial Palace Museum, Shanghai FurnitureFactory, Xian Raw Lacquer Research Institute, June 3-19.S3,505 includes air fare. Contact Eva Frank, 3504 BenevaRoad, Sarasota, FL 34232. (813) 923-3377.112 Fine Woodworking
BooksDesigning Furniture and Building projects) and Early American(with 47Colonialby Percy W. Blandford. TABBooks, Inc., Blue Ridge Summit, Penn. 17294-0850; 1988.$12.95, paperback; 193 pp.This book covers virtually all the pieces one might need to furnisha well-appointed colonial-American home, but it's not just aprojects book. In the first four chapters, the reader is eased intothe subject with background information on furniture woods,tools and techniques, joints and special processes for duplicatingtime-honored styles with today's materials and equipment.Blandford, both a woodworker and a journalist, presents hismaterial in a smooth-flowing style that is every bit as easy to readas the daily newspaper. The text is organized by furniture categories,with chapters on boxes and chests, tables, chairs andseats, cupboards and cabinets. Each chapter opens with a briefdiscussion of the history and evolution of these various types offurniture and the functional necessities that dictated their structureand influenced their deSign. Blandford is not a purist, however,and while he discusses the old joinery methods, he does notworship them. Every effort is made to describe techniques forachieving comparable results using modern tools.Overall, this is a good book and especially appropriate for thewoodworker who fmds comfort in knowing a little more about aspecific piece than Simply how to build it. The drawings are clearand understandable enough to guide the amateur to success. Thelayout, however, suffers a little in that some of the illustrations readhorizontally with the text while others are vertical, causing thereader to constantly turn and twist the book to follow the flow.The book's one inexcusable shortcoming is its shallow andinaccurate coverage of wood species. A three-page section is devotedto this topic early in the text, and were it not for theauthor's excellent treaUnent of other topics, the errors here wouldhave destroyed my confidence in his expertise. For example, thebook's general theme is colonial-American furniture, but the scientificnames provided for various woods are, in part, those of Europeanspecies, and out of a total of 15 hardwoods mentioned, atleast four of their scientific names are misspelled. For this kindRouter Jigs Techniquesof inaccuracy to survive into a second edition is surprising anddoesn't serve the author's credibility.-Jon Arno&: by Patrick Spielman. SterlingPublishing Co., Inc., 2 Park Ave., New York, N.Y 10016; 1988.$14.95, paperback; 383 pp.Spielman's Router jigs & Techniques might be seen as a sequelto his earlier Router Handbook. While I found the handbook tobe an entry-level how-to with a sometimes out-of-date survey ofrouters and related items, this book is packed with up-to-theminuteproduct reviews, theory and enough tips and techniquesto fi ll two shops with sawdust. Well organized and written foreasy reading, the book targets a broad audience, from weekendhobbyists, through school labs, to production shops. AlthoughSpielman opens his chapters with assumptive generalizations,when he gets into the subject matter, it's solid meat and potatoes.Viewing the router scene, Spielman breaks the book into sixsections: bits, safety, commercial aids, commercial machines,shop made jigs and the ultimate router table.The first section alone is worth the cost of the book. Here hetakes a long look at the revolution in bits, cutter technology andcutting theory. Next comes a much-needed focus on safety thatgoes beyond the "roll-up-your-sleeves-and-tuck-in-your-tie" clichesI grew up with. Concerned with the working environment, Spielmanoutlines hearing protectors, hold-downs and dust collection.He cautions against the misuse of the new oversize bits.The chapters on commercial aids and devices and commercialrouter machines look at such products as benchtop must-haves,questionable hobbyist gadgetry and spectacular self-containedrouting machines that encompass joining, duplicating and pinrouting.Spielman winds up with a frank put-down on commercialrouter tables vis-a-vis professional needs. His look at severalbacks up his assertion that the market thrust is at casual amateurs.The book closes with the chapter "Ultimate Router Table,"which attempts to concentrate all the router's potential into onegrand fi xture. Building it looks like a major undertaking. Beforelaunching into it, I'd make sure of my needs.Judging from the book's deSign, some color and innovation inlayout would perk things up visually. Also, an appendix codifyingsource addresses would be welcome. For those of us who stillcan't visualize a millimeter, including a metric conversion chartis a nice touch.Woodcarving: Complete CourseOverall: Two thumbs up for Router jigs & Techniques.-Bernard MaasA by Ron Butterfield.Guild of Master Craftsmen Publications Ltd., 166 High St., lewes,Sussex BN7 lYE, England; 1987. $14.50 plus $3 postage andpacking, softbound, 128 pp. (Also available from Garrett WadeCo. Inc., 161 Ave. of the Americas, New York, N.Y 10013.)This book comes very close to living up to its title, at least wherethe beginning carver is concerned. The introduction states simplythat woodcarving to one degree or another can be learnedby almost anyone and that the "most important requirementwhen considering taking up the subject is the desire to do."From this pOint, Butterfield, in a very logical and workmanlikemanner, proceeds to guide the reader through the areas of projectconcept, wood selection, equipment, tool care and sharpening,finishing and a progression of projects.Throughout the book, instructions are never intimidating andalways given with obvious thought to how it was to have oncebeen a novice carver. A basic set of chisels and gouges is recommendedto get started; others are to be added after the carvergains experience. The reader is warned not to get caught upwith the acquisition of needless tools and gadgets.Sharpening is explained in the most clear manner I've seen,and the carver who follows these basic techniques will develop,with practice, a solid feel for the edge. Polishing and finishingare presented from the viewpoint of achieving a natural lookand bringing out the wood's integrity. Butterfield has an interestingformula that feeds the wood and allows for a hand-rubbedfinish. Color is not mentioned; this is the only fault in the book.The first project is a very simple chip carving, and as with allof the projects, a brief history of the style procedes the instructions.This project is followed by several relief carving exercises,each a little more challenging than the one before. Some areillustrated with very nice cross-section drawings to complementsharp photographs. Butterfield does not give these projects timelimits, seeming to realize that this would frustrate the beginner.The first in-the-round project is a standing bear. This is putforward in a sequence of well-developed line drawings. Upon thecompletion of this, the carver is taken back to carving in relieffor a few projects that are more difficult than what has beenattempted before. By the time the reader is brought back toround carving, he should be much more confident and competent.There is much more to this book than I have time to relate.Suffice it to say, this is one of the finst, most well-thought-outbooks of its kind to come along in years.-John L. Heatwolejon Arno is an amateur woodworker and wood technologist inSchaumburg, Ill. Bernard Maas is an associate professor of art atEdinboro University of Pennsylvania. john L. Heatwole is a profession£llwood carver with a studio in Bridgewater, Va.114 Fine Woodworking
PERFORMANCE ACCESSORIES40" PRECISION SAW FENCE50"-'21 gooPRECISION SAW FENCEr-'229"RADIAL ARM SAW• f 'FENCE/STOP SYSTEM -511000New!MITER SAW FENCE/STOP SYSTEM -511000TABLESAW TENONING AnACHMENT -S7gooSLIDING TABLE52" -S65000Other Sizes)CROSSCUT CAPACITY - FITS MOST SAWS36" LATHE DUPLICATOR -SSSOOO (Call ForS: INCRA-GAUGE -$15.99:SAWSAWBLADE BOXED SET ..... $1 19.00GOLDEN EAGLEBLADE SET . . . . . . $166.00TEKNA!ROUTER BIT SET ........ $89.0012 PIECE BOXED6" JOINTER ROUTER BIT SET ....... $145.00PLANER COMBO .... $599.00.. -----------18 PIECEBOXEDVISE BLOCKS ............ $35.006" JOINTER . . . . . . . . . . . $299.00SENCO LS-1PIN-NAILER ........... $247.008" JOINTER . .......... $500.00RGT HANDLER ........... $29.00RADI-PLANE . . . ... .....WOODWORKING MACHINERY.. $18.0012" JOINTER .......... $999.00MILL-ROUTE ............ $279.00(Limited Quantities) BLADE&SUPPUESRUNNER ......... $170.00(704) 827-3190 800-662-0947ROUTE 273 - 1/4 MILE NORTH OF 1-85 - BELMONT, N.C. 28012LOCAL: ORDER DESK:FREE FREIGHT ALL ADVERTISED ITEMS CONTINENTAL U.S.A.UNDERSTANDINGORIGINAL HARDWAREUNDER THE TABLE HARDWARE ...Seldom seen, usually neverpolished, often taken forgranted, - catches for tilttop's, hinges for drop leavesand holding clips forsectional dining tables allcontribute to the function ofthe finished piece.Square, round, lion paw, orcup casters of all sizes, usingbrass, china, wood, cast iron,leather, or no wheelsfinished thousands of legssince 1700.Call or write for free minicatalog,or send $5.00 forour full 108 page catalog.We now reproduce morethan 100 items like these.CONTROL THE SPEED OF YOUR ROUTERROUTE AT THE SPEEDTHAT GIVES THE BESTRESULTS WITH THEWOOD AND BIT YOU•ARE USINGILESS TEAR OUTSTOPS BURNINGFEED•AT COMFORTABLE RATEBETTER. SAFER RESULTSWITH LARGE DIAMETERPANEL·RAISING BITS• LESS WEAR ON BITSLESS •FEATURES:SPEEDFULLGONOISE AND SOFTER STARTSAT LOWER SPEEDSI'\A.L_",.,._.,. c.,..3 _ 7o 1 9. • •.0 101 8ADJUSTABLE FROM FULL SPEED TO 0 RPM•HORSEPOWER AND TORQUE AT ALL SPEEDSBACK AND FORTH FROM ANY PRE·SET SPEEDTO FULL SPEED AT THE FLIP OF A SWITCHWORKS WITH ALL ROUTERS 3 HP OR LESS120V 15 AMPGIVES YOUR ROUTER A FEATURE ONLY AVAILABLEON ROUTERS THAT COST OVER $500.00•EASY TO USE -SIMPLY PLUG IN SPEED CONTROL AND PLUG YOURROUTER INTO THE SPEED CONTROL - TURN DIAL FOR BEST RESULTS.(SPEED CONTROL HAS A CLIP THAT CAN BE WORN ON YOUR BELT ORHUNG ON WALL OR LEFT LOOSE.)REDUCES SPEED ELECTRONICALLY WITHOUT REDUCING TORQUE;ELECTRONIC FEE[)'BACK MAINTAINS SPEED BY INCREASING VOLTAGETO MOTOR AS LOAD INCREASES.To order by Master Charge or Visa Toll <strong>Free</strong>7 Day - 24 Hour Order Service, Call1-800-533-9298or send check to: MLCS, Ltd., P.O. Box 4053F3, Rydal. PA 19046MAKE BEAUTIFUL RAISED PANEL DOORS ...WITH YOUR 1/4" ROUTER!ALSO AVAILABLE IN 1/2" SHANK -$79.95Professional production quality bit makes it quick and easy to$6995produce matching rails and stiles - the panel raising bit withball bearing guide makes the raised panel perfect every time.Regular value Over $150.00SALE PRICE FOR COMPLETE SETORDER ITEM #054 for 114" Shank Set(Includes all bits shown)RAISED PANEL BITSUPPLIED WITHBALL BEARINGRAILPANELPERSPECTIVE VIEW OF PANEL DOOR(WITH ONE RAil REMOVED)REVERSIBLECOMBINATIONRAIL and STILE BIT'1116" 107/8"(For makIng matchIng raJls and sWes inraised panel doors, etc.)WOfks WIth stock Iromthick463 W. Lincoln Hwy • Exton, PA 19341 • (215) 363·7330I suppliedwith Ball BearingTo order by Master Charge or Visa Toll <strong>Free</strong>7 Day -24 Hour Order Service Call1-800·533·9298or send check to: MLCS, LTD., P.O. Box 4053F2, Rydal, PA 19046March /April 1989 115
Notes and COl1l1nentWoodworkers Associationduring a brief visit to the area.In order to gauge the education needs, theAWA surveys all members approximately evelY18 months. We have been getting about a60% response on these questionnaires, sowe feel the results are fairly accurate. We askmembers their preferences for the workshopday, length and time. We also list 20 ormore possible workshop topiCS and ask eachmember to list their top three choices. Aboutonce a year, the AWA tries to bring in a wellknowncraftsman from out of state. We askmembers to list their preference for thesespecial programs. In 1987, AWA membersasked that Australian RichardRaff an teach atwo and one-half day turning workshop.During a workshop sponsored by the Albuquerque Woodworkers Association, guest instructorGunther W6rrlein shows participants how to carve a ball-and-claw foot.Setting up a guild seminar programA well-planned, well-managed educationprogram can add a new dimension to anywoodworking guild or association: It canattract new members, improve the skills ofworking professionals and introduce hobbyiststo new techniques. A poorly executedprogram can become a financial drain onyour treasUlY and damage the credibility ofyour group.When I joined the Albuquerque, N.M.,Woodworkers Association (AWA) in FebrualY1984, I was excited about woodworkingand volunteered to head up the AWNs neweducation program. I had about five yearsexperience as a hobbyist furnituremaker. Myfu ll-time (nonwoodworking) job involvedsetting up management workshops, so I hadexperience with developing practical workshopsand was able to transfer some of theseskills to the AWA program. Here, I'd like toshare some of these experiences.The AWA began as a small group of designer/craftsmen.Not so much a guild, butmore a voluntary association, the AWNsmembership is open to both professionalsand hobbyists (see FWW #60, p. 84), so itseducation program needed to serve a broadspecuum of woodworking skills and interests.Our first three workshops were taught by AWAmembers in their own shops. The topiCS includedhand-cutting dovetails, router joinelY,and shaping and smoothing techniques.Since that time, the AWA has sponsoredone or more demonstrations, workshops,seminars or slide lectures each month (inaddition to our monthly meeting). Attendancehas averaged 20 people per event, with asmany as 50 people for some special projects.AWNs membership has grown from about adozen woodworkers in 1983 to more than 160members today. More importantly, theAWNs credibility with local woodworkers,suppliers and the public has been enhancedby its successful education program.Planning and coordination-Establishinga guild education program requires overallplanning and needs assessment, locatingsuitable instructors, marketing events tomembers and others, obtaining suitableworkshop sites, day-of-event tasks, dealingwith the financial aspects (fees, expenses, income)and finally evaluating the results. Itcan be as simple or as sophisticated as theguild members desire. You can "plunge in"and hold two or three events, learning fromyour early mistakes and successes. Or, youcan preplan a year's program in infinite detail.We did some of both.Your guild will face a diverse range ofissues as you plan the typical education program.The key to its success is to appointan education coordinator to handle the dayto-dayarrangements for the program. Thisperson should have a strong commitment toyour group and to a quality program. I averagedeight hours a week planning the AWAprogram, meeting with prospective instructors,developing workshop topics, informingthe media of our plans and attending theworkshops. As education coordinator, Imade monthly reports to the AWA SteeringCommittee and frequently met with orcalled the guild officers to advise them ofwhat I was doing. However, the educationcoordinator needs some authority to makequick interim decisions, say when the grouphas a chance to take advantage of an out-ofareacraftsman's unexpected offer to lectureor give a demonstration in AlbuquerqueWorking with instructors-For instructors,the AWA draws on the skills of itsmembers as well as on some excellent nonmemberwoodworkers throughout the state.We presently pay each instructor a $150honorarium for two two-hour demonstrations.Instructors of longer, hands-on workshopsare paid on a negotiated rate. We try tofind instructors who are highly skilled andwho can communicate their ideas clearlyduring the workshop.Local suppliers refer us to several prospectiveinstructors. Woodpecker's Tools inSanta Fe, N.M., suggested we contact GuntherWorrlein, a carver and chairmaker inLamy, N.M. He has taught two well-receivedworkshops for the AWA, including last year'stwo-day program on how to shape a cabrioleleg and carve a ball-and-claw foot.Because many woodworkers do not havea teaching background, we try to work closelywith each instructor prior to his or her fi rstworkshop. A couple of members may previewthe demonstration and suggest changes orvisual aids. (A common problem with earlyworkshops was that instructors tried to covertoo many topiCS in a single session.)While I rarely used formal conu'act formswith instructors, I did always utilize a "letterof understanding." After meeting with the instructorat the workshop site, I would followup with a one- to two-page letter detailingthe terms of the agreement: what is expectedof each party; the size of the group (in manyhands-on workshops, the limit is eight or 10people); d1e date, time and place of d1eworkshop; the amount, method and time ofpayment; how the purchase of supplies willbe handled; etc.For out-of-area instructors, we sometimesprovide lodging and meal allowances, althoughmost craftsmen prefer to stay wid1AWA members during their visit. Becausethey may see their visit to New Mexico as atourist opportunity, I always had the StateTourism Deparunent send our instructors amap and brochures. Workshop space forseminars is provided by individual instructors,other AWA members, schools or supplystores. Frank Paxton Lumber Co., Kitts Enter-116 Fine Woodworking
EhrsJ51 PIN - ROUTER ACCESSORYMoney Orderspayable to:Hirsh Company.For FurtherInformation 1-800-USA-EASYCall Toll <strong>Free</strong>THE SCHOOL OF CLASSICAL WOODCARVINGThe school offers a uni q ue opportunity tolearn the traditional skills of woodcarving fromBritish Master Carver, Ian Agrell, and hisassistant, Adam Thorpe.Those crafts people who are aware of therebirth in quality ornamentation on furnitureand architecture and who have the skills to bepart of this venture will have a satistying andrewarding fu ture ahead of them.Subjects include:Mirror Frame CarvingCarved RestorationBall and Claw FeetMouldingThree Dimensional CarvingLetter Carving• GildingThe school has courses for students with noprevious eXferience and courses for theprofessiona crafts p eople who want to extendtheir skills to suit their particular needs.Our priority is quality and professionalism.All enquiries to:EronJohnson Antiques1 444 Blake StreetDENVER COLORADO 80202Telephone (303) 825-1178Make precise repetitive cuts includingintricate designs for cabinetwork orsimple shapes for plaques or anynumber of work pieces.Steel welded support arm,die cast aluminum rack andpinion height adjustment.20-in.x27-in. table. Orginallysold for $199.95.$1 49 CdingFreightHirsh Company8051Skokie,N. Central Park Av.I L 60076IIAir Handling SystemsYOUR BEST DUST COLLECTION SOURCE ...COMPLETE LINE Of ROUND PIPE flTiiNGS IN STOCK fOR fAST DELIVERYFOR CATALOG & PRICESCALL l-SOO-fOR-DUCTOr in Connecticut 203-336-0533Buy direct from manufacturerand save.• Install yourself andsave more.• We supply you withall the materials.• All you have to dois put it together.SHAKER PEGS CANDLE CUPS MUG PEGS$17.95 per 100, prepaid.Wide selection of otherwood products.Catalog $2.00 or free with order.Benny's WoodworksP.O. Box 840, Dept. FW1Shelbyville, TN 37160 615-437-2295Out of State 1-800-255-1335Shaker PegMug Peg®··.····-B 0'9Acme Electric 33, 97, 102 .Addkison Hardware 110Adjustable Clamp 19Alltech U.S.A. 110Amazon Oil Corp. 92American Woodcrafters 105Anderson Ranch 9AndreOli Industries 100Arrowmonr School 105Ashman Technical 1594Aviation/lndustrial SupplyBall & Ball 115Bartley Collection 25Rudolph Bass 101Benny's Woodworks 117Berea Hardwoods 7BiesemeycrBlume Supply 101Bosch Power Tools 26, 27Boulter Plywood 36Buckeye Saw 90Bucks County Comm. College 7Burklee Tools 5Calculated Industries 7Cane & Basket 105Cascade Precision ToolIII15Choice Precision Tools 23Classified 107- 109Clayton Enterprises 23Compu·Compass 110Maurice L. Condon 90Constantine 96Country Workshops 33Craft Supplies USA 37De·Sta-Co 13Delmhorst lnstrument 23Delta 25, 119Diamond Machining Technology 90DML 17Dollar Trading Co. 29Econ-Abrasives 94Farris Machinery 96Fisher Hill Products 109Floral Glass & Mirror 7Foley- Belsaw Co. 26Forrest Manufacturing 30<strong>Free</strong>born 104IIFreudFrog Tool Co. Ltd. 105Manufacturers Service Co., Inc.358 Bishop Ave. Dept. F1Bridgeport, CT 06610•• utsr .\1'1'.\1..\(;111.\:\ II.\RUW()()UDdried to 8% moistureall widths & thicknesses"TwOAvailable HardwoodsASH . BASSWOODBEECH . BIRCHBUTTERNUT0MAHOGANY•. MAPLE(hard or light.•(medium or heavycurl) . OAK•RED OAK . WHITE OAKWHITE PINEYELWW POPLAR . TEAKWIDE WALNUT AND CHERRYP.O. Box 323 EAST GOLDEN LANENEW OXFORD, PA 17350INDEX TO ADVERTISERSFurniture Designs 92Garrett Wade(717) 624-4323 OR (717) 334-930199Grizzly Imports 2, 19, 97Harper Hardware 110Hartwood 117Haystack School 96Hida Japanese Tools 105Highland Hardware 90, 100Hirsh Co. 117Home Lumber 13Horton Brasses 33HTC Products 93Hubbard Harpsichords 100Imported European Hardware 110Incra Jig 22Industrial Abrasives 31Japan Woodworker 100JDS Company 98Jesse Jones Ind. 109K&S Specialty Lumber 110Keller Company 36Knecht Home Center 98Kuster Mfg. 23Laguna Tools 94L1Ser Machining 7Lawrence Gallery 97Leeds Design Workshops 36Leigh Industries 26LeNeave Supply 104Lignomat USA 98Lobo Power Tools 29, 92Little Brown 22TIle lutherie 92Manny's \Voodworker's Place 32Manufacturers Service 117Marling Lumber 33Mason & Sullivan 33McFeely Hardwoods 15Miami University 92Midwest Dowel Works 9Mini Ma.x 93MLCS 28, 32. 115orthland Woodworking Supply 13Nyle Corporation 26Paxton Hardware 100Penland School97Performax Products 110Philipps Bros. Supply 28Pootatuck 23Porta- ails 19Porter Cable 91Powcrmatic 21, 113Pro ToolsRBI Industries 105RlT 96Robert Sorby Ltd. 109Ross IndustriesSanta Rosa Tool 100nle Sawmill 92School of ClassicalWoodcarving 117Seven Corners 95Shaker Workshops 23Shophelper 13Silverton Victorian Millworks 105Sisco Supply 94TIle Source 36Steve H. Wall LumberSuffolk Machine 13Sunhill 37, 98Svmtec America 90SystiMatic 5Tarheel Filing Co. 36TIle Taunton Press 24, 32, 34, 35,103372993Tools Etc. 101Toolmax 110Total Shop 30Transpower 96U. S. Saw 28, 29Vise-Grip 33Waterlox Chemical 23\'(Iaver)y Woodworks 90Whole Earth Access 106Wilke Machinery 9Williams Tool 22Wood· Mizer 25Wood World 92Woodcraft 5Woodshop Specialties 5Woodworking Machinery &Supplies 115TIle Woodworking Show97Woodworking World Shows 94Worcester Crafts 117Workbench Tool 13Xylophile's 98March / April 1989 117
(colltimwd)Notes and COl1l1nentprises, Woodworkers Supply and the Albuquerquepublic schools all regularly providefree use of their space for AWA events. Thetype of educational events will, of course,dictate the size of space needed.Safety and follow-up-The safety of participantsand instructors is a concern in allAWA workshops. We do not encourage instructorsto demonstrate experimental orquestionable techniques. We ask that instructorsand participants wear safety glassesor shields and use appropriate blade guards.During one of our earlier workshops, aparticipant once accidentally backed into alathe switch and started a large bowl blankspinning, only inches from his back. Nobodywas hurt, but now we do a quick safety checkof the faCility right before the workshop begins.I unplug machines, check the floor forhazardous extension cords and check eachstationary power tool for dull or brokenblades. We make sure a well-stocked first-aidkit, fire extinguisher and directions to thenearest hospital emergency room are available,too. At the start of each workshop, weclearly state the rules to the group and askeach participant to sign a liability release.While not absolutely protecting the organizationin any legal sense, this form does providea warning to participants. After severalyears of workshops, we've had nothing moreserious than wood splinters.As the organizer of the AWA educationprogram, it was my job to ensure the workshopspace was "ready." In a two- or threehourworkshop, you simply can't afford anydelays due to the lack of necessary tools orsupplies. I was there to ensure that the demonstrationwas not held up due to preventablecauses. I tried to make sure that extrabandsaw blades, 100-grit sandpaper, a Y32-in.Allen key or scrapwood were available. Ifthe site did not have a blackboard, webrought in a large easel, tape, newsprintand marking pens.TI1e AW A's education program is marketedto members and nonmembers alike. Wesend fliers on AWA workshops, seminars,films and slide lectures to woodworkersthroughout the state. The AWA also tries toserve the working cabinetmakers amongthe membership. We asked Rick Koenlingerto teach a class on working with plasticlaminates, which was attended by severaltwo- and three-person shops.At least three months prior to any event(certain hands-on workshops are planned10 months in advance), we mail out a typewrittenpress release to national woodworkingpublications. There is generally nocharge for this publiCity, and it helps usreach a large audience. Each month, theAWA newsletter spotlights the upcomingevents. Both Frank Paxton Lumber Co. andWoodworkers Tools have included AWAeducational reports in their sales fliers.If you do the required prep lanning, youwill experience few surprises the day of theworkshop. At the start of any hands-onworkshop, the instructor reminds participantsof the safety rules and distributes anyhandouts. During the presentation, the educationcoordinator may assist the instructorwith his presentations. Most instructors appreciatean extra hand to hold up the end ofa long board, set up a clamp or bring insupplies. And, it goes without saying that weask all participants to assist with the clean-up.The education coordinator can also behelpful with any problems or complaints ofparticipants or instructors. The most commonrequest is for written notes or a bibliographyon the instructor's presentation.If we can't provide these at the workshop,we'll try to mail them at a later date to allnames on the sign-up sheet. We generallyprovide coffee and tea at the workshop, butanything more seems to add unnecessarilyto the cost. (I don't like to allow alcoholicbeverages at the workshop site, even after thework is done and the tools are put away.)Some other issues may arise. You shoulddevelop a policy on refunds for participantswho are unable to attend or who are dissatisfiedwith the quality of the workshop. TheAWA provides at least a partial refund forcancellations, as long as we receive advancenotice. In an effort to anticipate future problems,we ask each participant to evaluatethe longer workshops.The AWA takes a careful look at the financialaspects of each workshop. We try tobalance the expenses and revenue of eachevent or series, but some events do not generatesufficient revenue from partiCipantfees. Also, we like to provide a number ofno-fee workshops throughout the year. Forthese, we rely on sponsorship from localbusinesses and suppliers; in return, they askthat the event be held in their store showrooms.These events generally attract muchlarger audiences than could be accommodatedfor in most small shops.I prepare a line-item budget of projectedincome and expenditures for each event.This details income from fees paid by partiCipants,donations from businesses, aswell as expenses such as instructor's fees,travel expenses, supplies and publiCity. I tryto be as realistic as possible so there are nosurprises. We use member volunteers asmuch as possible. Very occaSionally, theworkshop instructor donates his fee to theAWA, although in light of the substantialpreparation involved and the time consumedby the actual workshop, most instructors endup donating a chunk of their time anyway.The financial risk from hands-on workshops,however, is substantial. I wouldn'trecommend you undertake such a programwithout the full discussion and support ofyour group membership.-William Pike, Albuquerque, HM.Photo: Courtesy of league of N.H. CraftsmenAward winnersThis prize-winning Windsor side chair ischerry with ash sp indles.Jan1es R. Becker of Lebanon, .H., won theBallentine Best-In-Show Award at the Leagueof New Hampshire Craftsmen Foundation's14th annual juried exhibit last fall for hiscontemporaty-style Windsor chair, above. Thechair, 40\!2 in. high, 22\!2 in. wide and 22\!4in. deep, is cherry with ash spindles.Becker, a former chemisuy major, openedhis studio, Jas. Becker, Cabineunaker, twoyears ago in Lebanon and specializes in custom-designedfurniture and reproductions.Among the other craftsmen honored atthe exhibit at the University Art Galleries ofthe University of New Hampshire in Durhamwas J. Paul Fennell of Topsfield, Mass.,who earned the Woodworkers GalleryWood Award for his redwood "TurnedWood Vessel # 1." The owner of a Salemmanufacturing business, Fennell says he devoteshis spare time to wood turning as a"passionate avocation." His work is also ondisplay in the International Turned ObjectsNotes and CommentDo you know something we don't aboutthe woodworking scene in your area?Please take a moment to fill us in. Notesand Comment pays for stories, tidbits,commentary and reports on exhibitsand events. Send manuscripts and colorslides (or, black-and-white photos-preferably with negatives) to Notes andComment, Fine Woodworking, Box 355,Newtoum, Conn. 06470.Show (ITOS), For more on this travelingshow, see FWW #74, p. 116.118 Fine Woodworking
EGAL TEN OER BLIC AND PRIVATE 3 ,'\VA8Hl89 ASERIES 1985Buy one of these Delta toolsand we'll send someone to thank you.Someone once said, ''A pennysaved, is a penny earned:'And along that same line of thinking'a hundred bucks saved is a hundredbucks to spend on wood. Or possiblya second Delta tool. A tool thatcould save you a second hundreddollars. That's right, every time youbuy one of these three Delta Qualitymachines, we'll rebate you $100.So what's our angle? Simple.We 're fairly certain that once you'vehad your first taste of Delta Quality,it'll be tough to work with anythingless.Let's say you 've beenlooking for agood 10" TiltingArbor Saw. Thisone has a cast irontable and wings. It'llmake a cut up to 3Ys"deep and rip to the centerof a 50" panel. Andwith its self-aligningJet-Lock, Micro-Set®rip fence you 've gotboth capacity andprecision in one tool.You've also got an extra $100 inyour pocket that you might want toput toward the 14" Band Saw. With its61f4 " capacity, and micrometer adjustmentblade guides, it's perfect for contours,straight cuts, even resawing.And, you 've got it. Another hundred.I.We could go on about our 6" Jointer,with its extra long 551/2" table andits parallelogram support system, foruniform chip breaking and smootherfinishes. But the best way to introduceyou to Delta Quality tools is to put thefirst one into your shop. Along witha hundred dollars. Or two. Or three.Call toll-free for the name of yourparticipating Delta dealer.Delta International Machinery Corp. ,800/438-2486 (In PA, 800/438-2487) .Offer good on 6" Jointer/ModeI 37-154, 14" BandSaw/ModeI 28·283, and 10" Tilting Arbor BenchSaw/Model 34-429 only from participating dealersin continental U.S., Alaska andHawaii from January 1 toJune 30, 1989.Building• On Tradition[JELTA ••A Pentair Company
TABLE DESIGNSHIGHLIGHTPHIlADELPHIAREUNIONRic Photo above: John Kane; below: Tom Brummett; right: MurrayThe tables shown here were among the highlights at a to-year reunion for threegraduates of the former Boston University Program in Artisanry during a joint showlast winter at the Snyderman Gallery in Philadelphia, Penn.James Schriber of New Milford, Conn., veneered the top of his dining table, above,with Swiss pear bordered with lacewood and holly, and edged it with solid lacewood.Squares of holly veneer in the four comers mimic the cross section of the four-piecesolid lacewood legs. Two leaves extend the 40-in. by 62-in. table to 90 in.Michael Hurwitz, director of the Wood Program at The University of the Arts inPhiladelphia, sandblasted the parts of his 3-ft.-dia. hickory tea table, below left. He thenpainted them with white enamel and sanded the surface to get the painted-grain effect.The curly maple and Swiss pear nightstand, below right, was one of a matched pairshown by Timothy Philbrick of Narragansett, R.I. The drawer case is a spline-miteredbox that nestles into cut-out comers in the delicate turned legs.