Coin/banknote change machines Operator's ... - Comesterogroup
Coin/banknote change machines Operator's ... - Comesterogroup
Coin/banknote change machines Operator's ... - Comesterogroup
Create successful ePaper yourself
Turn your PDF publications into a flip-book with our unique Google optimized e-Paper software.
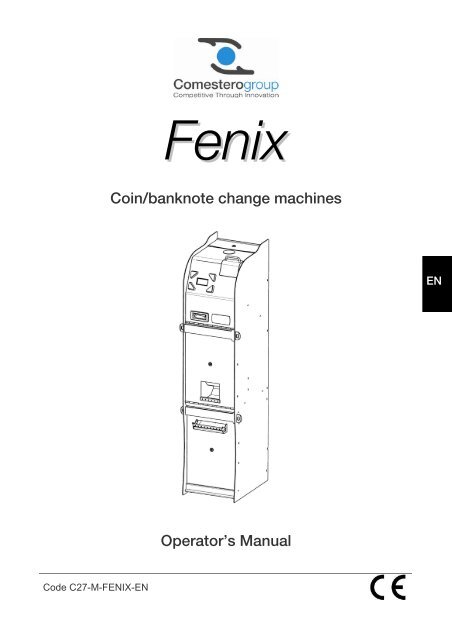
Fenix<br />
<strong>Coin</strong>/<strong>banknote</strong> <strong>change</strong> <strong>machines</strong><br />
EN<br />
Operator’s Manual<br />
Code C27-M-FENIX-EN
DESCRIPTION OF THE SYMBOLS USED IN THIS<br />
MANUAL<br />
The following symbols are used in this manual in order to<br />
facilitate its understanding.<br />
Important information<br />
EN<br />
Read carefully before use<br />
Attention!<br />
3
Operator’s Manual Fenix<br />
DECLARATION OF<br />
CONFORMITY<br />
THE MANUFACTURER: <strong>Comesterogroup</strong> s.r.l. via M. Curie 8,20060 Gessate MI<br />
STATES:<br />
That the product:<br />
TYPE: Change Machine<br />
BRAND: <strong>Comesterogroup</strong><br />
MODEL: Fenix<br />
Is compliant with the following European Directives and related amendments, and with the national laws that<br />
have acknowledged these directives:<br />
2004/108/EC<br />
2006/95/EC<br />
And that it has been designed in accordance with the following harmonised standards:<br />
EN 55014-1<br />
EN 55014-2<br />
EN61000-3-2<br />
EN61000-3-3<br />
EN62233<br />
EN 60335-2-82 used in combination with EN-60335-1<br />
Gessate, 15/06/2011<br />
Riccardo Chionna, Managing Director of <strong>Comesterogroup</strong> s.r.l.<br />
SAFETY INFORMATION<br />
This machine is fitted with safety devices to prevent potential damages originating<br />
from short-circuits and fires.<br />
These devices should never be disconnected from the circuit,<br />
removed or disabled for any whatsoever reason.<br />
If the devices must be disabled to carry out maintenance or servicing,<br />
work on the appliance only when the power supply has been switched<br />
off.<br />
All safety devices are compliant with current regulations.<br />
We recommend that the operator periodically check their correct<br />
operation.<br />
4
Risks deriving from using the machine<br />
If maintained in good operating conditions and installed correctly (according to the<br />
instructions of this manual), the machine does not pose any danger for the operator.<br />
Personnel responsible for filling the dispensers, switching the machine on and<br />
servicing it must take into account that all mobile parts, the doors and cash box may<br />
cause several types of injuries if incorrectly used. Therefore, it is always advisable to<br />
disconnect the machine from the power supply before performing any operation on<br />
the machine when it is open (maintenance, etc.).<br />
Electrical hazards: direct contacts during connection to the main<br />
power supply.<br />
Operations to be carried out by a qualified technician.<br />
Crushing risks when moving mobile parts of the machine.<br />
The machine must be opened and closed slowly and carefully.<br />
EN<br />
Hazards during machine installation and setup<br />
Follow the machine installation instructions below to minimise risks for people and<br />
property.<br />
Crushing risks during handling and positioning of the machine.<br />
The machine must be transported by a qualified technician<br />
experienced in the handling of loads (truck operators, etc.).<br />
Precautions:<br />
• Use suitable lifting devices and slings<br />
• Perform all operations in an area free from obstacles and people<br />
• Before lifting the machine, always verify that the load is stable and perform all<br />
operations while very carefully keeping the load as balanced as possible.<br />
5
Operator’s Manual Fenix<br />
Electrical hazards: direct contacts during connection to the main<br />
power supply. These operations must be performed by a qualified<br />
technician.<br />
Precautions:<br />
• Make sure that the distribution line is sized according to the power supply used by<br />
the machine.<br />
• Connect the system to ground before connecting the machine and the<br />
accessories.<br />
Hazards during machine maintenance<br />
Electrical hazards: direct contact with live parts within the electrical<br />
cabinet.<br />
Operations to be carried out by a qualified technician.<br />
Precautions:<br />
• Service the machine only after the main power supply has been switched off.<br />
Labels<br />
Warning labels have been installed on the machine close to dangerous areas. These<br />
labels contain traditional danger pictograms with symbols and/or reference<br />
indications.<br />
GENERIC DANGER RISK OF ELECTRICAL SHOCK EARTH<br />
6
GENERAL WARRANTY CONDITIONS<br />
Carefully read the following section for information on the general warranty<br />
conditions provided with this product.<br />
All products supplied by our company are covered by a 12-month warranty. The<br />
warranty period starts from the date of purchase (as stated in the invoice). The<br />
warranty covers only the ordinary operation of the machine and the guaranteed<br />
performance. Warranty repairs will be carried out in the manufacturer’s factory only.<br />
The manufacturer declines any responsibility for damage resulting from the use of the<br />
machine in environmental conditions different from those stated and in technical<br />
conditions other than those prescribed and stated in the technical documentation.<br />
The manufacturer also declines any responsibility for direct or indirect damage not<br />
related to faults.<br />
The warranty is void and null if the purchaser is insolvent in paying the established<br />
price.<br />
The warranty does not apply in the following cases:<br />
• Tampering with the label showing the serial number of the machine;<br />
• Damage or fault caused during transport<br />
• Damage or fault resulting from acts of vandalism, natural disasters or fraudulent<br />
acts<br />
• Incorrect or inappropriate installation of the product<br />
• Inadequacy or anomaly of the electric systems<br />
• Carelessness, negligence or lack of skill in using the product;<br />
• Failure to follow the operating instructions<br />
• Operations linked to alleged faults or inspections conducted for convenience<br />
• Unauthorised operations on the machine<br />
EN<br />
Unauthorised operation or manipulation of the goods supplied will result in the<br />
immediate cancellation of the warranty. The manufacturer hereby states that he has<br />
carefully considered, to the best of his knowledge and in compliance with<br />
manufacturing practices, the possibility that the operation of the goods supplied could<br />
be altered by malice by other subjects, but declines all responsibility whatsoever for<br />
unlawful behaviour or damage that may arise from fraudulent use of the goods<br />
supplied.<br />
7
Operator’s Manual Fenix<br />
Dear Customer,<br />
Thanks for choosing a <strong>Comesterogroup</strong> product. If you follow the instructions<br />
contained in this manual carefully, you will be able to enjoy the performance and<br />
quality of this machine over time.<br />
Please read the operation and maintenance instructions carefully, in compliance with<br />
the safety provisions, before using the machine and store this manual for future<br />
reference.<br />
Contents<br />
Contents .................................................................................................................... 8<br />
1. Introduction.......................................................................................................... 10<br />
2. Product overview ................................................................................................. 10<br />
3. Warnings.............................................................................................................. 11<br />
4. Handling and unpacking ...................................................................................... 11<br />
4.1 Receipt of the packaged product........................................................................................... 11<br />
4.2 Handling ............................................................................................................................... 11<br />
4.3 Unpacking............................................................................................................................. 12<br />
4.4. Identification of the machine ................................................................................................. 12<br />
4.5 Accessories .......................................................................................................................... 16<br />
5. Installation............................................................................................................ 17<br />
5.1 Overall dimensions ................................................................................................................ 17<br />
5.2 Wall anchorage ..................................................................................................................... 18<br />
6. Connections......................................................................................................... 19<br />
7. Starting the machine............................................................................................ 20<br />
7.1 Removing and replacing the cash box.................................................................................... 20<br />
7.2 Filling the dispenser with <strong>banknote</strong>s....................................................................................... 21<br />
7.3 Changing the programming of the <strong>banknote</strong> dispenser........................................................... 25<br />
7.4 Filling hoppers with coins....................................................................................................... 27<br />
7.5 Basic operation ..................................................................................................................... 27<br />
A. Change in coins .................................................................................................................. 28<br />
B. Change in Banknotes .......................................................................................................... 29<br />
C. Mix <strong>change</strong> ......................................................................................................................... 29<br />
8. Programming ....................................................................................................... 30<br />
8.1. Introduction.......................................................................................................................... 30<br />
8
8.2 Setup menu .......................................................................................................................... 31<br />
A Alarm ................................................................................................................................... 31<br />
B. Recharge dispensers........................................................................................................... 32<br />
C. Configuration ...................................................................................................................... 36<br />
8.3 Administrator Menu............................................................................................................... 42<br />
9. Care and maintenance ........................................................................................ 45<br />
9.1 Maintenance and cleaning of external surfaces....................................................................... 45<br />
9.2 Maintenance and cleaning of the interior ................................................................................ 45<br />
9.3 Periods of inactivity................................................................................................................ 45<br />
10. Troubleshooting and technical support.............................................................. 46<br />
11. Technical specifications..................................................................................... 47<br />
12. Appendices........................................................................................................ 48<br />
12.1 Removal from service and disposal...................................................................................... 48<br />
12.2 Electrical diagram................................................................................................................ 51<br />
EN<br />
9
Operator’s Manual Fenix<br />
1. Introduction<br />
This manual and its attachment provide all the information required to install the<br />
machine and all its components and use it, along with all the technical information for<br />
correct maintenance.<br />
The information in this manual can <strong>change</strong> without notice and is not binding upon<br />
<strong>Comesterogroup</strong>. While <strong>Comesterogroup</strong> has taken all measures to collect and check<br />
the information contained in this manual, it declines any responsibility for damage<br />
arising from the use of the manual.<br />
Unless otherwise specified, all references to companies, names, contacts and<br />
addresses used in the examples are purely fictional and have the aim of illustrating the<br />
operation of the product. The whole or partial reproduction in any form of this manual<br />
without the explicit authorization of <strong>Comesterogroup</strong> is strictly forbidden.<br />
2. Product overview<br />
<strong>Comesterogroup</strong> is happy to present Fenix, a new generation <strong>change</strong> machine<br />
offering superior performance capable of accepting both notes and coins and giving<br />
<strong>change</strong> according to the user’s preferences or in automatic intelligent mode. <strong>Coin</strong>s<br />
may be inserted all at once in the pivoting drawer, making the product the perfect<br />
partner for medium to large game rooms.<br />
Fenix uses the CCTalk protocol to communicate with all peripherals and also has an<br />
advanced CPU with a removable SD card so that all accounting data and the event<br />
log may be exported with an SD card and processed on a personal computer in<br />
Excel. The SD card may also be used to clone the machine’s configuration<br />
parameters and export them onto another Fenix, all without the aid of an external<br />
programmer.<br />
To achieve maximum security against vandalism and theft, Fenix is supplied with<br />
special chrome-plated iron bars to protect the cash box and its contents.<br />
10
3. Warnings<br />
Read this manual carefully before installation. Acquiring familiarity<br />
with the information and prescriptions contained in this manual is<br />
essential for a correct use of the machine. Upon receiving the<br />
machine, verify that the machine and packaging have not been<br />
damaged during transport.<br />
Pay particular attention to electrical connections. Damage originating from the failure<br />
to comply with all the warnings provided in this manual is not covered by warranty.<br />
Specific symbols are used in this manual to emphasise specific instructions that must<br />
be carefully observed.<br />
4. Handling and unpacking<br />
4.1 Receipt of the packaged product<br />
Check upon receipt that the product has not been damaged during transport. If<br />
damage of any kind is visible, immediately report it to the carrier.<br />
After transport the package must be complete, that is, it must not:<br />
EN<br />
• Show dents, signs of shocks, deformation or breakages of the container.<br />
• Show areas that are wet or signs that would point out to the fact that the casing<br />
has been exposed to rain, frost or heat.<br />
• There must be no signs of tampering on the container.<br />
Check that the content of the package matches the order.<br />
4.2 Handling<br />
In order to avoid damage to the machine we recommend moving it<br />
only within its original package, using suitable handling <strong>machines</strong>.<br />
Follow the handling instructions printed on the container. Given the<br />
weight of the machine, it is advisable to handle Fenix with automatic or<br />
manual trolleys designed for the transportation of heavy loads. If this is<br />
not possible, slide the <strong>change</strong> machine on its base or on an axis with<br />
wheels as far as the site of installation.<br />
Fenix is fitted with four adjustable supporting feet that enable the machine to be<br />
levelled even on irregular surfaces and that enhance its stability. Adjust the height of<br />
these devices depending on the characteristics of the resting surface.<br />
Following initial inspection, put the apparatus back in its box for transportation to its<br />
final location.<br />
11
Operator’s Manual Fenix<br />
It is advisable to:<br />
Avoid dragging the machine.<br />
Avoid tilting the container or resting it on one side during transport and handling.<br />
Avoid bumping the machine.<br />
Avoid leaving the machine exposed to the weather (even if still in the package).<br />
4.3 Unpacking<br />
After being tested and equipped the machine is delivered within a corrugated carton<br />
package which ensures it is protected during transport and handling.<br />
To simplify the loading/unloading of the machine, even if special machinery is used,<br />
the container is usually placed on a special wooden pallet.<br />
Unpack the machine following the instructions printed on the<br />
container.<br />
Both the cardboard package and the pallet meet the standards for<br />
recycling and disposal (follow current local regulations).<br />
4.4. Identification of the machine<br />
Figure 1 shows the nameplate with the main operating specifications and identification<br />
data. Pay particular attention to the serial number printed on the box.<br />
Always mention this number any time you require service, parts, repairs or information<br />
relative to the operation of the machine.<br />
Fig. 1<br />
The machine’s identification plate must always be clearly readable. It<br />
is prohibited to remove it or tamper with the data printed in it. If the<br />
nameplate is damaged or is lost, it is necessary to order a<br />
replacement from the manufacturer. The plate is assembled on the<br />
machine. It is important to remember that the warranty is associated<br />
with machine’s identification number.<br />
12
DESCRIPTION OF COMPONENTS (external view):<br />
EN<br />
A. Hopper filling opening with lock<br />
B. Pivoting drawer<br />
C. Display<br />
D. Selection buttons<br />
E. Banknote feed<br />
F. Central compartment with lock<br />
G. <strong>Coin</strong> dispensing area<br />
H. Banknote dispensing area<br />
13
Operator’s Manual Fenix<br />
DESCRIPTION OF COMPONENTS (external view):<br />
I. Hopper loading channels<br />
L. Main switch<br />
M. Feed hopper<br />
N. <strong>Coin</strong> mechanism<br />
O. Banknote reader<br />
P. Pivoting drawer (open)<br />
Q. Banknote dispenser<br />
R. <strong>Coin</strong> dispenser hopper<br />
S. Banknote compartment<br />
14
DESCRIPTION OF COMPONENTS 2 (internal view):<br />
EN<br />
T. Buzzer<br />
U. CPU<br />
V. SDcard slot<br />
Z. Banknote reader<br />
15
Operator’s Manual Fenix<br />
4.5 Accessories<br />
The machine is supplied as standard with the following accessories:<br />
• Operator’s Manual<br />
• Anti-theft bars made of special chrome-plated steel<br />
• Funnel for manually loading hoppers<br />
• SD card (already installed)<br />
• Keys to open the compartments:<br />
Two keys are supplied for each of the three locks fitted on the machine.<br />
It is advisable to separate them and keep one copy of each key in a safe place<br />
different from the ones on the bunch of keys normally used.<br />
It is also advisable to note the serial number chiselled on each key in order to be<br />
able to request a copy to Comestero Group in case of loss.<br />
• Programming key: for accessing the configuration menu.<br />
Keep the programming key in a safe place.<br />
16
5. Installation<br />
5.1 Overall dimensions<br />
The figure below (fig.2) shows the overall dimensions of the machine and should be<br />
used as reference during the positioning and installation of the machine.<br />
EN<br />
Fig. 2<br />
17
Operator’s Manual Fenix<br />
5.2 Wall anchorage<br />
It is advisable to fix the machine to the wall using expansion plugs.<br />
Felix has four pre-drilled holes on the rear of the cabinet to allow the machine to be<br />
fixed to a wall and two holes on the base for floor anchoring (Fig. 3).<br />
Fenix also has four adjustable supporting feet to permit levelling and improve stability,<br />
even on an uneven surface. Adjust the height of the feet as appropriate to the<br />
supporting surface.<br />
Fig. 3<br />
18
6. Connections<br />
All electrical connections of the machine are already installed except<br />
the power supply. Before connecting the machine to the power<br />
supply, check that the main switch situated in the top compartment<br />
inside the <strong>change</strong> machine is in position “0” or OFF, as shown in<br />
Figure 4.<br />
Fig. 4<br />
Check that the rating of the outlet to which the machine has to be<br />
connected matches that of the machine and is protected by a<br />
differential magneto-thermal switch with appropriate specifications.<br />
Connect the machine to the mains using the cable supplied (the<br />
cable that is pre-assembled in the main machine switch, situated on<br />
the rear of the machine).<br />
EN<br />
Note: for installation instructions, refer to the specific regulations concerning<br />
protection against contact with electric components.<br />
19
Operator’s Manual Fenix<br />
7. Starting the machine<br />
Read the instructions provided below carefully before beginning to use Fenix.<br />
7.1 Removing and replacing the cash box<br />
The hoppers and cash box are located in the central compartment of the <strong>change</strong><br />
machine, protected by a safety lock. Open the central door 180° to access the cash<br />
box.<br />
The cash box contains all <strong>banknote</strong>s introduced through the <strong>banknote</strong> reader and extra coins<br />
if both hoppers are overfull, as well as any coins that may be used exclusively in the cash box<br />
compartment.<br />
To remove the cash box, release it from the side supports holding it onto the cabinet,<br />
using the chrome-plated handle and the appendix on the top of the dispensing<br />
tray(Fig.5).<br />
To replace the cash box, lift it by the handle and the appendix, rest it on the bottom of<br />
the compartment and slide it towards the back of the cabinet until it is in contact with<br />
the cabinet’s side supports.<br />
When it is in position, lift the cash box a little so that it fits into the supporting prongs<br />
and push it all the way in (against the front surfaces of the hoppers).<br />
N.B. Inserting the cash box incorrectly could cause the machine to malfunction<br />
(always make sure that the cash box is resting perfectly against the hopper).<br />
Fig.9<br />
Fig. 5<br />
20
7.2 Filling the dispenser with <strong>banknote</strong>s<br />
Banknotes are dispensed by the Puloon Technology LCDM2000 device installed in the<br />
lower compartment of the <strong>change</strong> machine (fig. 6), which may be accessed using one<br />
of the 3 keys provided.<br />
The Puloon LCDM2000 device has two drawers for storing <strong>banknote</strong>s to be<br />
dispensed and one reject drawer in which <strong>banknote</strong>s considered unsuitable are<br />
stored.<br />
The drawers are supplied in the appropriate format for the type of <strong>banknote</strong> specified<br />
when purchasing the <strong>change</strong> machine(fig.12).<br />
EN<br />
Fig. 6<br />
Each drawer containing <strong>banknote</strong>s may be filled with notes of a single type only, so<br />
Fenix can dispense two different types of notes.<br />
Follow these instructions to fill the drawers:<br />
1. Shuffle the <strong>banknote</strong>s repeatedly before putting them in the drawer, especially if<br />
they are new (fig. 7)<br />
Fig. 7<br />
21
Operator’s Manual Fenix<br />
2. Put the notes together in a single bundle (fig. 8)<br />
Fig. 8<br />
3. Open the lid of the drawer and lift the pressure surface, locking it in place(fig. 9)<br />
Fig. 9<br />
4. Check the type of guide to be used, according to the dimensions of the <strong>banknote</strong>s. Size<br />
S for € 5-10-20 and size L for €50 and up.<br />
22
5. Put the bundle of notes in the drawer (fig. 10)<br />
Fig. 10<br />
6. Release the pressure surface so that it presses down on the notes (fig.11)<br />
EN<br />
Fig. 11<br />
7. Before putting the drawers back in their compartments, press down on the notes<br />
as shown in fig. A (also shown on the lid of the drawer). This permits correct<br />
positioning of the first <strong>banknote</strong>s to be dispensed (incorrect positioning of <strong>banknote</strong>s<br />
is shown in figure B).<br />
Check that the <strong>banknote</strong>s are positioned as shown in the figure before placing the<br />
drawer in its compartment.<br />
Fig. A Fig. B Fig. F<br />
C<br />
23
Operator’s Manual Fenix<br />
8. Place the drawers in their housings (fig.12)<br />
Fig. 12<br />
N.B. Placing the <strong>banknote</strong>s in their drawers incorrectly could cause malfunctioning<br />
(always make sure that the <strong>banknote</strong>s have been inserted correctly and the<br />
drawers are in their proper compartments).<br />
24
7.3 Changing the programming of the <strong>banknote</strong> dispenser<br />
To <strong>change</strong> the initial configuration parameters of the <strong>banknote</strong> dispenser, set the dip<br />
switches positioned in the top part of the <strong>banknote</strong> dispenser.<br />
The dip switches are normally positioned as follows: the first 5 Dip Switches in the ON<br />
position and the 6th in the OFF position, as shown in Fig. 13.<br />
Dip Switch 7 refers to the lower drawer in the second note dispenser (at the bottom).<br />
Dip Switch number 8 refers to the top drawer of the first note dispenser.<br />
Dip switch settings allow you to pilot the type of dispensing of <strong>banknote</strong>s in drawers. They<br />
should be set on the basis of the size of the <strong>banknote</strong> contained in each individual drawer.<br />
Follow the instructions in the table below to set the dip switches correctly.<br />
EN<br />
Fig. 13<br />
25
Operator’s Manual Fenix<br />
ADMINISTRATION OF INCOMING AND OUTGOING BANKNOTES FOR FENIX<br />
BANKNOTES<br />
Banknotes<br />
acceptable<br />
by NV10<br />
May be<br />
accepted<br />
Banknotes that Puloon may dispense<br />
Height<br />
62mm<br />
Minimum<br />
Width<br />
100mm<br />
Maximum<br />
Height<br />
78mm<br />
May be dispensed but not<br />
recommended<br />
120 x 62<br />
Width<br />
162mm<br />
Banknot<br />
e guides<br />
(right &<br />
left)<br />
Model S<br />
27 mm<br />
Dip Switch settings<br />
Dawer<br />
Drawer<br />
Super.1<br />
Infer.2<br />
Dip Switch<br />
Dip<br />
8<br />
Switch 7<br />
OFF OFF<br />
May be<br />
accepted<br />
May be dispensed<br />
127 x 67<br />
Model S<br />
27 mm<br />
OFF<br />
OFF<br />
May be<br />
accepted<br />
May be dispensed<br />
133 x 72<br />
Model S<br />
27 mm<br />
OFF<br />
OFF<br />
EURO<br />
May be<br />
accepted<br />
May be dispensed<br />
140 x 77<br />
Model L<br />
12 mm<br />
ON<br />
ON<br />
May be<br />
accepted<br />
May be<br />
accepted<br />
May be<br />
accepted<br />
May not be dispensed<br />
147 x 82<br />
May not n<br />
be dispensed<br />
153 x 82<br />
May not be dispensed<br />
160 x 82<br />
/ / /<br />
/ / /<br />
/ / /<br />
May be<br />
accepted<br />
May be dispensed<br />
135 x 70<br />
Model S<br />
27 mm<br />
OFF<br />
OFF<br />
May be<br />
accepted<br />
May be dispensed<br />
142 x 75<br />
Model L<br />
12 mm<br />
ON<br />
ON<br />
POUND<br />
May be<br />
accepted<br />
May not be dispensed<br />
149 x 80<br />
/ / /<br />
May not<br />
be<br />
accepted<br />
(too high)<br />
May not be dispensed<br />
156 x 85<br />
/ / /<br />
N.B Values outside the specified range are shown in bold type.<br />
N.B. Dip Switch settings take into consideration the shortest side of the <strong>banknote</strong>.<br />
N.B. The machine must be restarted whenever dip switch settings are <strong>change</strong>d.<br />
26
7.4 Filling hoppers with coins<br />
Fenix has a device for automatically filling hoppers whenever coins are fed in through<br />
the pivoting drawer on the front panel.<br />
The first time the machine is used, or whenever necessary, the <strong>change</strong> machine<br />
hoppers may be filled using the filling chutes.<br />
To fill hoppers manually, refer to section 8.2/B.2.<br />
Use the feeding funnel provided (fig.14) to feed coins into the hoppers correctly, then<br />
set the value fed as described in the section on this topic.<br />
EN<br />
Fig. 14<br />
7.5 Basic operation<br />
Fenix has a graphic display (B) to guide the user through basic functioning and<br />
configuration procedures.<br />
There are 4 triangular backlit selection buttons on the display for selecting the<br />
functions in the four corners of the display.<br />
From the initial screen the user can select the language in which Felix will show<br />
information on the display. Press the button in the corner with the desired language,<br />
and the display will appear in the selected language.<br />
27
Operator’s Manual Fenix<br />
To start using Fenix, the user must insert coins into the pivoting drawer all at once and<br />
then close it again, or introduce <strong>banknote</strong>s to be <strong>change</strong>d. The machine will turn on<br />
and the following screen will appear:<br />
<strong>Coin</strong>s<br />
60.00 €<br />
Choose better<br />
payout<br />
Mix<br />
Banknotes<br />
Fenix will offer the user three <strong>change</strong> modes.<br />
• If you select <strong>Coin</strong>s, <strong>change</strong> will be given in coins<br />
• If you select Banknotes, <strong>change</strong> will be given in notes<br />
• If you select Mix, <strong>change</strong> will be given in a combination of notes and coins.<br />
A. Change in coins<br />
If you select <strong>Coin</strong>s, <strong>change</strong> will be given in coins and the display will show:<br />
In the example above, if you put in 20 euro, you may choose to obtain <strong>change</strong> in 2<br />
euro or 1 euro coins or automatic <strong>change</strong> with a combination of 1 and 2 euro coins.<br />
While the <strong>change</strong> is being given, the display will show:<br />
28
B. Change in Banknotes<br />
If you select Banknotes, <strong>change</strong> will be given in notes. The credit introduced may<br />
therefore be converted into <strong>banknote</strong>s; you may also choose the value. The display<br />
shows the following screen:<br />
In the example above, if you put in 20 euro, you may choose to obtain <strong>change</strong> in 5<br />
euro or 10 euro <strong>banknote</strong>s, or automatic <strong>change</strong> with a combination of 10 and 5 euro<br />
notes.<br />
C. Mix <strong>change</strong><br />
If you select Mix, <strong>change</strong> will be given in a combination of notes and coins.<br />
The display will show the following screen:<br />
EN<br />
You may select MORE or LESS to <strong>change</strong> the proportion of <strong>banknote</strong>s and coins.<br />
Select GO to start giving <strong>change</strong>.<br />
N.B. If the machine is out of either <strong>banknote</strong>s or coins, the display will indicate this.<br />
29
Operator’s Manual Fenix<br />
8. Programming<br />
8.1. Introduction<br />
Fenix may be programmed without the aid of an external programmer, simply using<br />
the buttons on the corners of the display.<br />
To access Fenix’s configuration menu, you must insert the programming key in the<br />
lock shown in the figure and turn it clockwise(fig.13).<br />
Fig. 13<br />
WARNING!<br />
If you leave the key all the way to the right, whenever you exit the configuration<br />
menu or turn on the machine you will be asked if you want to load the default<br />
configuration. It is therefore advisable to put the key back in its starting position all<br />
the time (turn it all the way to the left, anti-clockwise).<br />
30
The display will show the following:<br />
ALARM<br />
SETUP<br />
RECH<br />
Select an<br />
operation<br />
SET<br />
ESC<br />
8.2 Setup menu<br />
From the setup menu you can choose 3 sub-menus:<br />
• Alarm<br />
• Recharge<br />
• Configuration (with password only)<br />
EN<br />
A Alarm<br />
If you select “ALARM” in the setup menu, you will see all the alarm signals that are<br />
preventing the machine from working properly.<br />
Select “>>” to go forward and display other alarms.<br />
Select “ESC” to exit.<br />
31
Operator’s Manual Fenix<br />
B. Recharge dispensers<br />
If you select “RECHARGE” you will be able to access the function for recharging the<br />
dispensers installed in Fenix.<br />
Select “AUTO” to recharge automatically (automatic recharging is for coins only).<br />
Select “MANU” to recharge manually (coins and <strong>banknote</strong>s).<br />
B.1 Automatic recharging (coins only)<br />
Select “AUTO” on the recharge menu to access the automatic hopper recharging<br />
function. Insert coins in the pivoting drawer. Fenix will start to count them and divide<br />
them between its two hoppers. The display will show the following message:<br />
When it has finished counting, the display will show the value entered:<br />
32
B.2 Manual recharging (coins and notes)<br />
Select “MANU” on the recharge menu to access the manual hopper recharging<br />
function. Insert coins in the hoppers manually and then set the value introduced into<br />
hopper 1 (HOP1), hopper 2 (HOP2) and in <strong>banknote</strong> dispenser 1 (BAN1) and<br />
<strong>banknote</strong> dispenser 2 (BAN2).<br />
HOP1<br />
RECHARGE<br />
MANUAL<br />
BAN1<br />
EN<br />
COINS: Hop1 0 HOP2<br />
BANKNOTES: BAN1 BAN2<br />
HOP 2<br />
BAN2<br />
Select the dispenser using the buttons at the corners of the screen; supposing you<br />
want to recharge hopper 1, the display will show the screen below:<br />
Select ADD to increase the value, and the display will show:<br />
33
Operator’s Manual Fenix<br />
The first numerical row indicates the max. value that may be inserted, while the middle<br />
row shows the value to be set, and the last row indicates the minimum value that may<br />
be introduced.<br />
Select “>>” to move among figures.<br />
Select “+” to increase the value of the selected figure.<br />
Select “OK” to confirm.<br />
Repeat the operation for the <strong>banknote</strong> dispensers.<br />
Similarly, if we wish to recharge the first <strong>banknote</strong> dispenser drawer, the display will<br />
show:<br />
The display will show the following when “ADD” is selected:<br />
34
The first numerical row indicates the max. value that may be inserted, while the middle<br />
row shows the value to be set, and the last row indicates the minimum value that may<br />
be introduced.<br />
Select “>>” to move among figures.<br />
Select “+” to increase the value of the selected figure.<br />
Select “OK” to confirm.<br />
EN<br />
35
Operator’s Manual Fenix<br />
C. Configuration<br />
Select “CONF” on the setup menu to access Fenix’s configuration settings. These<br />
settings are password-protected to prevent tampering with the system. The display<br />
will show the following screen:<br />
For password activation and management, refer to “Administrator/setup menu 2”<br />
(page 32). The default password is: 111111<br />
When you enter the password the test and maintenance menu will appear:<br />
ENAB<br />
Setup<br />
Test & maintenance<br />
MANU<br />
CONF<br />
ESC<br />
You may use the test and maintenance menu to perform verification, maintenance<br />
and configuration operations.<br />
C.1 Enabling peripherals<br />
The system will show the following screen when “ENAB” is selected:<br />
ON >><br />
Device<br />
Hopper evolution<br />
Address 04<br />
Enabled<br />
OFF<br />
ESC<br />
36
The display shows the peripheral and its address at the top and its status at the<br />
bottom; it may be enabled or disabled by selecting “ON” and “OFF”, respectively.<br />
Select “>>” to move on to the next peripheral.<br />
Select “ESC” to exit.<br />
Peripherals that may be enabled or disabled:<br />
• Hopper 1<br />
• Hopper 2<br />
• Banknote dispenser Banknote 1<br />
• Banknote dispenser Banknote 2<br />
• Banknote reader<br />
• Banknote reader 2 (optional)<br />
• <strong>Coin</strong> mechanism<br />
C.2 Maintenance<br />
Select “MANU” from the test and configuration menu to perform the following<br />
maintenance operations: accounting and export.<br />
EN<br />
• Accounting<br />
37
Operator’s Manual Fenix<br />
Select “ERAS” to reset partial and/or total accounting:<br />
Select “SHOW” to show accounting data:<br />
TOT<br />
Show<br />
accounting<br />
PART<br />
Select an<br />
action<br />
ESC<br />
Select the type of accounting to be displayed: “TOT” for total accounting or “PART”<br />
for partial accounting.<br />
Select “>>” and “
Attention! To prevent inconsistencies in accounting, reset<br />
partial/total accounting and hopper content whenever you <strong>change</strong><br />
c<br />
machine programming.<br />
• Export<br />
Select “EXP” in the maintenance menu to export/import the Fenix configuration to an<br />
SD card. This allows you to “clone” a machine.<br />
EXP<br />
IMP<br />
Export or Import<br />
configuration<br />
Select an<br />
action<br />
RST<br />
ESC<br />
Select “EXP” to export the current Fenix configuration to an SD card.<br />
Select “IMP” to import a configuration to Fenix.<br />
Select “RST” to reset the factory configuration.<br />
EN<br />
C.3 Advanced maintenance<br />
In the maintenance menu, select “>>” to go to the “Maintenance 2” screen which may<br />
be used to set advanced maintenance parameters.<br />
39
Operator’s Manual Fenix<br />
From this menu you may perform the following operations:<br />
• Selecting a removable memory “MEMO” (memo indicates the amount of space<br />
available on the sd card)<br />
• Emptying the hopper “EMPT”<br />
• Setting the clock “CLK”<br />
• Selecting a removable memory “MEMO”<br />
Select “MEMO”, then select SD. The names and sizes of the files created will be<br />
shown.<br />
SD<br />
Memory<br />
Select a<br />
memory<br />
ESC<br />
• Emptying the hopper “EMPT”<br />
If you select “EMPT” the Hoppers will be emptied. You may select the hopper to be<br />
emptied, the value to be emptied, and if you wish, you may decide to empty both of<br />
Fenix’s hoppers at the same time.<br />
Select “>>” to choose which hopper to empty.<br />
If you select “ALL”, the hopper will be emptied in steps of 250 pieces.<br />
Select “5 euro” or “20 euro” to indicate the value to be emptied.<br />
40
Alternatively, you may empty the hopper up to the value set (set point) using the<br />
manual recharging procedure. The display shows the following screen:<br />
Select “GO” to start emptying the hopper up to the set point.<br />
Select “ESC” to exit.<br />
Select “>>” to go on to the next page.<br />
You may empty the hoppers completely using the complete emptying function. The<br />
display shows the following screen:<br />
EN<br />
Select “GO” to start completely emptying the two hoppers<br />
Select “ESC” to exit.<br />
Select “>>” to go on to the next page.<br />
41
Operator’s Manual Fenix<br />
• Setting the clock “CLK”<br />
Select “CLK” to <strong>change</strong> the time.<br />
+<br />
Time setting<br />
Hour<br />
>><br />
23<br />
00000<br />
OK<br />
0 ESC<br />
Select “>>” to move among figures.<br />
Select “+” to increase the value of the selected figure.<br />
Select “OK” to confirm.<br />
8.3 Administrator Menu<br />
In the “setup test & maintenance” menu, select “CONF”.<br />
SCAN<br />
MANU<br />
Setup<br />
Test & maintenance<br />
CONF<br />
ESC<br />
The “Administ. Setup" menu will appear.<br />
42
Select “CONF” to go to “SET UP 1” and “SET UP 2” (by selecting “>>”) in which you<br />
may:<br />
SETUP 1<br />
• Enable/disable the function for accepting<br />
50 cent coins: “CASH”<br />
CASH<br />
Setup 1<br />
SAVE<br />
• Save the selected settings: “SAVE”<br />
Select an<br />
action<br />
>> ESC<br />
CASH: enable/disable the function for accepting 50<br />
cent coins<br />
SAVE: save the selected settings.<br />
SETUP 2<br />
• Set the password: “PWD”<br />
• Change the language: “LANG”<br />
PWD<br />
Setup 2<br />
Select an<br />
action<br />
LANG<br />
EN<br />
ESC<br />
PWD: set the password<br />
LANG: <strong>change</strong> the language<br />
><br />
Choose the<br />
default language<br />
IMP<br />
ESC<br />
To <strong>change</strong> the default language, select “>>” or “
Operator’s Manual Fenix<br />
To export/import the language, the display will show:<br />
EXP<br />
IMP<br />
Export or Import<br />
languages<br />
database<br />
ESC<br />
Select “EXP” to export or “IMP” to import the language database with the SD Card.<br />
Finally, in the “Administ. Setup” menu, select “OVERP” to view and/or delete the<br />
overpay log.<br />
CANC<br />
Overpay<br />
LIST<br />
Select an<br />
action<br />
ESC<br />
CANC: delete overpay list<br />
LIST: show overpay log<br />
N.B. to set the default values again, turn the key all the way clockwise when<br />
turning on the machine. The display will ask you if you wish to load the default<br />
configuration.<br />
The machine will ask you for a password. For security reasons, you must request a<br />
password by calling <strong>Comesterogroup</strong>’s post-sales service.<br />
44
9. Care and maintenance<br />
All maintenance inside the machine must be carried out when the<br />
power supply has been switched off.<br />
Follow the warnings carefully so that the machine is always in the best<br />
operating conditions, preventing dangerous situations or situations<br />
which would render the warranty null and void.<br />
9.1 Maintenance and cleaning of external surfaces<br />
Keep the exterior surface of the machine clean; use a damp cloth with water or a mild<br />
cleaning solution.<br />
Do not use aggressive chemical solvents that may damage the finishing of the<br />
machine. Do not dip or expose the machine directly to water or liquids of any nature.<br />
Do not clean the machine with a jet of water. Periodically check the surface of the<br />
machine, taking particular care to the areas that could be dangerous for the user due<br />
to normal operating conditions or wilful damage (sharp or bent metal sheets, rust, etc.)<br />
For information on how to order replacement parts, refer to the “Spare Parts” section.<br />
EN<br />
9.2 Maintenance and cleaning of the interior<br />
Clean the machine interior with a damp cloth; use only compressed air to clean the<br />
electronic components.<br />
Regularly inspect the connections of all cables and verify that the connection cables of<br />
the devices have integral insulation and are not excessively bent. If the cables or their<br />
connectors are damaged, replace them immediately consulting manual “Spare Parts”<br />
for information on the correct codes.<br />
9.3 Periods of inactivity<br />
We recommend turning the machine off by means of the main power switch located<br />
inside the case for short periods of inactivity when the machine will not be used for<br />
two or three days. If the machine will not be used for a long period of time, it is<br />
advisable to disconnect it from the power supply and detach the plug from the wall<br />
socket. To protect the machine from dust, cover it and store in a dry and ventilated<br />
location.<br />
45
Operator’s Manual Fenix<br />
10. Troubleshooting and technical support<br />
This section presents the principal faults that may occur during operation and the<br />
corresponding possible solutions in order to minimise or completely eliminate machine<br />
shutdowns.<br />
If the fault is not among those listed below or if it is there but the<br />
suggested solution does not solve the issue, call our after-sale<br />
service at the following number: 02/95781111<br />
Problem<br />
The machine doesn’t switch on.<br />
Solution<br />
Check that the cable is plugged in.<br />
Check that the main switch is in the “I”<br />
position.<br />
Check that the 2 protective fuses have not<br />
been burnt.<br />
The machine does not accept<br />
<strong>banknote</strong>s.<br />
The machine does not recognise coins<br />
inserted.<br />
Counting doesn’t start.<br />
The machine does not dispense<br />
<strong>banknote</strong>s.<br />
The machine accepts <strong>banknote</strong>s but<br />
does not credit them.<br />
Check that there are no <strong>banknote</strong>s<br />
jammed in the bottom of the reader.<br />
Check that the level of <strong>banknote</strong>s in the<br />
cash box does not prevent <strong>banknote</strong>s from<br />
falling as they come out of the reader.<br />
Check the sensors of the validating coin<br />
mechanism.<br />
Check that coins have not already been<br />
inserted and counted.<br />
Check that the dispensers are full and<br />
connected to the machine correctly.<br />
Check that the level of <strong>banknote</strong>s in the<br />
cash box does not prevent <strong>banknote</strong>s from<br />
falling as they come out of the reader.<br />
Check that the denomination of the<br />
inserted <strong>banknote</strong> has been configured in<br />
the table with the <strong>banknote</strong> values.<br />
46
The reader does not accept all<br />
<strong>banknote</strong>s.<br />
The machine does not dispense<br />
<strong>banknote</strong>s even though it is full.<br />
Detach the reader, open it and use a damp<br />
cloth to clean the upper and lower section<br />
of the LED sensors.<br />
Check that the reader is closed.<br />
Check that there are no bills or <strong>banknote</strong>s<br />
jammed in the dispenser or dispensing<br />
channel.<br />
Check that the <strong>banknote</strong>s are positioned<br />
correctly in the drawers.<br />
Check that the drawers are inserted in their<br />
seats correctly.<br />
11. Technical specifications<br />
Power supply:<br />
230V / 50Hz<br />
Current consumption:<br />
120 VA<br />
Dimensions (lxhxw) (mm):<br />
340x1515x497<br />
Weight (kg):<br />
95 (circa)<br />
Banknotes that may be dispensed:<br />
20/10/5/50 Euro<br />
<strong>Coin</strong> or token capacity: 6800 (0,50) 6800 (1,00) 6400 (2,00)<br />
Banknote or bill capacity:<br />
1000 (x2)<br />
Pivoting drawer coin capacity 250 (€1.00)<br />
Cash box coin capacity: 10000 (1,00€)<br />
Installed peripherals:<br />
Electronic coin mechanism: <strong>Comesterogroup</strong> RM5 HD<br />
Banknote reader: Innovative Technology NV10 (x2 – second unit optional)<br />
<strong>Coin</strong> hopper: Hopper Suzo Evolution (x2)<br />
Banknote dispenser: Puloon Technology LCDM2000 (x1)<br />
EN<br />
47
Operator’s Manual Fenix<br />
12. Appendices<br />
12.1 Removal from service and disposal<br />
At the end of its life cycle, the machine must be removed from service and disposed<br />
of through an authorised collection centre.<br />
Remove the machine from its installation place, empty all coins and remove the power<br />
cable. Contact <strong>Comesterogroup</strong> to arrange for collection of the unused machine.<br />
Call number 02/95781111.<br />
It is mandatory to dispose of the machine pursuant to Legislative Decree 25/07/2005<br />
no. 151.<br />
Please read the following sections carefully.<br />
Since December 31, 2006, precise criteria have been established with regard to the<br />
Disposal of Waste Electronic and Electrical Equipment (WEEE), with the purpose of<br />
protecting the environment.<br />
This machine falls within the field of application of Legislative Decree 151/2005,<br />
Attachment 1B, clause 2, paragraph 1 as:<br />
7.6 Change machine/coin mechanism<br />
10.2 Automatic dispenser of cash or products<br />
In summary:<br />
• This machine cannot be disposed of as urban waste, but must be collected<br />
separately through a special collection facility.<br />
• Dealers will collect used <strong>machines</strong> for free, then they will send them to specialised<br />
collection centres so that they can be correctly disassembled and any reusable<br />
material can be recycled.<br />
• Special centres have been set up for collection of used electric and electronic<br />
equipment (RAEE). Users can return used <strong>machines</strong> to their dealers when a new,<br />
equivalent machine is purchased.<br />
• These <strong>machines</strong> or their parts are potentially harmful for the environment and<br />
human health if used incorrectly or if not disposed of pursuant to the present<br />
procedure, due to some substances being present in the electronic components.<br />
48
• The symbol representing a crossed-out trash bin, well visible on these <strong>machines</strong>,<br />
means without doubts that the machine has entered the market after August 13,<br />
2005 and that it must collected separately.<br />
Sanctions applicable in case of unlawful disposal of this kind of waste:<br />
1. Retailers, as specified in Article 6, paragraph 1, letter b), who fail to collect used<br />
electric or electronic equipment free of charge or without reason, shall be<br />
penalised with an administrative sanction ranging from 150 to 400 Euro for each<br />
machine that has not been collected or has been collected upon payment of a fee.<br />
2. Manufacturers who fail to organise a separate waste collection system for<br />
professional used electric and electronic equipment, as stated in Article 6,<br />
paragraph 3, and fail to implement collection, delivery, treatment and recovery<br />
procedures for used electric and electronic equipment, as per Articles 8,<br />
paragraphs 1 and 9, paragraph 1, 11 - paragraphs 1 and 12 - paragraphs 1, 2<br />
and 3, and, except for the latter operations, fail to sign agreements in accordance<br />
with Article 12, paragraph 6, are penalised with an economic administrative<br />
sanction ranging from 30,000 to 100,000 Euro.<br />
3. Manufacturers who after August 13th 2005 fail to provide a financial guarantee at<br />
the time of introduction of an electric or electronic equipment in the market, in<br />
compliance with Article 11, paragraph 2, or 12 - paragraph 4, are penalised with<br />
an economic sanction ranging from 200 to 1,000 Euro for each machine<br />
introduced in the market.<br />
4. Manufacturers who fail to provide in the instructions for use of electric or electronic<br />
equipment the information specified in Article 13 - paragraph 1, are penalised with<br />
an economic administrative sanction ranging from 200 to 5,000 Euro.<br />
5. A manufacturer that, within one year from the launch on the market of any new<br />
WEE, does not provide the instructions pursuant to article 13- section 3 to re-use<br />
centres and treatment and recycling plants will incur a monetary sanction of Euro<br />
5,000 to Euro 30,000.<br />
EN<br />
49
Operator’s Manual Fenix<br />
6. Manufacturers who, after August 13 th 2005, introduce electric or electronic<br />
equipment without the indication or symbol specified in Article 13, paragraphs 4<br />
and 5 on the market, shall be penalised with an economic administrative sanction<br />
ranging from 200 to 1,000 Euro for each item of equipment introduced in the<br />
market. The same economic administrative sanction shall also apply if the<br />
indications and symbols are not compliant with the requirements stated in Article<br />
13, paragraphs 4 and 5.<br />
7. Manufacturers who are not registered with the Chamber of Commerce, in<br />
compliance with Article 14, paragraph 2, and who introduce in the market electric<br />
and electronic equipment, are penalised with an economic administrative sanction<br />
ranging from 30,000 to 100,000 Euro.<br />
8. Manufacturers who, within the term specified in Article 13, paragraph 8, fail to<br />
communicate the information specified in Article 13, paragraphs 4, 3 and 5 to the<br />
national register of the entities obliged to dispose of electric and electronic<br />
equipment.<br />
9. With the exceptions set out by article 5 section 2, everyone that after July 1, 2006<br />
launches on the market WEE containing substances listed in article 5, section 1 or<br />
further substances identified pursuant to article 18, section 1, will incur a monetary<br />
sanction of Euro 50 to Euro 500 for each device that enters the market or of Euro<br />
30,000 to Euro 100,000.<br />
50
1<br />
2<br />
+12V c c<br />
+12V c c<br />
+12V c c<br />
+12V c c<br />
GND<br />
3<br />
GND<br />
3<br />
GND<br />
GND<br />
USC. 8<br />
GND<br />
USC. 5<br />
GND<br />
USC. 7<br />
USC. 6<br />
P E<br />
1<br />
4<br />
1<br />
2<br />
5<br />
2<br />
4<br />
3<br />
6<br />
5<br />
6<br />
5<br />
7<br />
9<br />
8<br />
7<br />
8<br />
10<br />
9<br />
9<br />
10<br />
GND<br />
11<br />
1<br />
3<br />
+12V c c<br />
GND<br />
G ND<br />
+24V c c<br />
USC. 3<br />
USC. 4<br />
USC. 5<br />
USC. 7<br />
USC. 6<br />
USC. 8<br />
12<br />
+24Vcc<br />
P E<br />
2<br />
2<br />
1<br />
4<br />
3<br />
3<br />
4<br />
6<br />
5<br />
2<br />
3<br />
3<br />
5<br />
GND<br />
1<br />
5<br />
9<br />
+24Vcc<br />
7<br />
GND<br />
8<br />
+12Vcc<br />
GND<br />
1<br />
4<br />
1<br />
2<br />
+24Vcc<br />
10<br />
GND<br />
2<br />
3<br />
4<br />
3<br />
1<br />
4<br />
OUT 1<br />
1<br />
1<br />
2<br />
5<br />
2<br />
OUT 2<br />
2<br />
4<br />
3<br />
6<br />
5<br />
3<br />
6<br />
5<br />
7<br />
9<br />
8<br />
7<br />
8<br />
10<br />
9<br />
+12Vcc<br />
9<br />
1<br />
10<br />
GND<br />
2<br />
1<br />
11<br />
OUT 2(GND)<br />
12<br />
2<br />
DATA<br />
2<br />
1<br />
+12Vcc<br />
5<br />
4<br />
3<br />
6<br />
5<br />
C C TALK<br />
GND<br />
+12Vcc<br />
16<br />
17<br />
18<br />
19<br />
20<br />
1<br />
2<br />
3<br />
4<br />
5<br />
6<br />
7<br />
8<br />
9<br />
10<br />
11<br />
12<br />
13<br />
14<br />
15<br />
GND<br />
VDD<br />
Vo<br />
RS<br />
RW<br />
E<br />
D0<br />
D1<br />
D2<br />
D3<br />
D4<br />
D5<br />
D6<br />
D7<br />
A<br />
K-CS3<br />
CS1<br />
CS2<br />
/RST<br />
VEE<br />
DATA<br />
8<br />
DATA<br />
1<br />
11<br />
15<br />
2<br />
1<br />
11<br />
15<br />
2<br />
15<br />
16<br />
4<br />
L<br />
L<br />
L<br />
O<br />
A<br />
D<br />
F<br />
L<br />
F<br />
L<br />
I<br />
N<br />
E<br />
12.2 Electrical diagram<br />
REV<br />
C<br />
START COUNT<br />
BUTTON<br />
LOWER RIGHT<br />
BUTTON<br />
UPPER RIGHT<br />
BUTTON<br />
LOWER LEFT<br />
BUTTON<br />
UPPER LEFT<br />
BUTTON<br />
PROGRAMMING<br />
BUTTON<br />
1 2 1 2 1 2 1 2 1 2<br />
+ - + - + - + -<br />
1 2<br />
P E 5<br />
P E 4<br />
P E 6<br />
P E 7<br />
P E 0<br />
cod. C4-22-12808B---<br />
cod. C4-22-12807---<br />
cod.1058-40-0023-B<br />
4<br />
5<br />
6<br />
7<br />
0<br />
J16<br />
P E<br />
P E<br />
P E<br />
P E<br />
P E<br />
7 8 9 4 5 6 7<br />
POLO ON<br />
1<br />
2<br />
1 2 3<br />
1 2 5 6<br />
J17<br />
J3<br />
J4<br />
RXD<br />
TXD<br />
cod.1058-40-0028-A<br />
CCT ALK J25<br />
Type 8/9 GND<br />
RX<br />
TX<br />
BUTTON LIGHTING<br />
BUTTONS<br />
DATA<br />
J20 CCT ALK TYPE 5<br />
MCB1 REV . 04<br />
J9<br />
IIC INTERFACE<br />
cod.1058-40-0012-A<br />
COMESTERO<br />
SEPARATOR<br />
cod.1058-40-0005-A<br />
Cn3<br />
J2<br />
OUT PC1 1/PC12<br />
1 2 3 4 5 6 7 8 9 10<br />
OUT 2<br />
OUT 1<br />
GND<br />
+12Vcc<br />
J19 NV9-10 BANK READER<br />
J1<br />
FAN-LED-BUZZER<br />
11<br />
15<br />
24 V AC<br />
COIN<br />
VALIDATOR<br />
GRAPHICAL LCD DISPLAY<br />
BANKNOTE COLLECTION<br />
LIGHTING<br />
BUZZER<br />
(RES 1K 1/4 WATT)<br />
J1 1<br />
J21<br />
1 3 4<br />
J6<br />
1 2<br />
1 2<br />
cod.1058-40-0010-A<br />
OUT 2(GND)<br />
+12Vcc<br />
1 2<br />
OUT<br />
+12Vcc<br />
1(G ND)<br />
cod.1058-40-001 1-B<br />
c od. C 4-22-12803----<br />
TOKEN DISPENSER<br />
CCT ALK Rm5 HD<br />
1 3<br />
DATA<br />
GND<br />
+12Vcc<br />
c od. C 4-22-12802---<br />
+12Vcc<br />
GND<br />
DATA<br />
DATA<br />
BANKNOTE<br />
READER NV 10<br />
GND<br />
VDD<br />
Vo<br />
RS<br />
RW<br />
E<br />
D0<br />
D1<br />
D2<br />
D3<br />
D4<br />
D5<br />
D6<br />
D7<br />
CS1<br />
/RST<br />
CS2<br />
K-CS3<br />
VEE<br />
A<br />
1<br />
2<br />
3<br />
4<br />
5<br />
6<br />
7<br />
8<br />
9<br />
10<br />
11<br />
12<br />
13<br />
14<br />
15<br />
16<br />
17<br />
18<br />
19<br />
20<br />
AUTHOR:<br />
10 A DISPLA Y LCD GRAFICO<br />
24 V AC<br />
192 X 64 5 V<br />
220 V AC<br />
250 V A<br />
(Toric)<br />
M.MILELLA<br />
TITLE:<br />
SCHEMA ELETTRICO FENIX<br />
SIZE A4 DOCUMENT NUMBER:<br />
CODICE: S. E. 0014<br />
DATE: 25/07/2011 1 of 1<br />
FUSE 5 A T<br />
cod.1058-40-0014-A<br />
EN<br />
+12Vcc<br />
GND<br />
GND<br />
DATA<br />
ADDRESS SELECT 1<br />
DATA<br />
ADDRESS SELECT 2<br />
+24Vcc<br />
+24Vcc<br />
ADDRESS SELECT 3<br />
CON 4X3<br />
CON 5X2<br />
Jumper Select<br />
10<br />
GND<br />
GND<br />
DATA<br />
GND<br />
+24Vcc<br />
GND<br />
+24Vcc<br />
1 4 7 8 10<br />
DATA<br />
+24Vcc<br />
+24Vcc<br />
HP ADD<br />
Select Address<br />
GND<br />
GND<br />
DATA<br />
ADDRESS SELECT 1<br />
FUSE 2 X 1,6A T<br />
L:2X2.5mH<br />
R:1.0Mohm<br />
C:0.22MicroFarad<br />
C 1/2: 2X2200pF<br />
N<br />
G<br />
SW<br />
N<br />
G<br />
C C1<br />
C2<br />
DATA<br />
ADDRESS SELECT 2<br />
+24Vcc<br />
+24Vcc<br />
ADDRESS SELECT 3<br />
CON 4X3<br />
CON 5X2<br />
Jumper Select<br />
Line input<br />
230V ac 50 Hz<br />
Hopper 1<br />
10<br />
cod. C4-22-12815---<br />
cod. C4-22-12815---<br />
GND<br />
GND<br />
DATA<br />
GND<br />
+24Vcc<br />
GND<br />
+24Vcc<br />
1 4 7 8 10<br />
DATA<br />
+24Vcc<br />
+24Vcc<br />
HP ADD<br />
Select Address<br />
cod.1058-40-0003-A<br />
GND<br />
+12V c c<br />
HOPPER AZKOYEN U<br />
1 7<br />
1 2<br />
11<br />
GND<br />
DATA<br />
DATA<br />
VOLTAGE<br />
REDUCING BOARD<br />
GND<br />
R E G .<br />
1 7 8<br />
+12V c c<br />
1 5<br />
R E G .<br />
BANKNOTE<br />
READER NV 10<br />
GND<br />
DATA<br />
+12V c c<br />
cod.1058-40-0027-A<br />
Hopper 2<br />
51
Operator’s Manual Fenix<br />
52
53<br />
EN
Operating Manual Nexus<br />
EN<br />
<strong>Comesterogroup</strong> Italia S.r.l.<br />
Via Marie Curie 8, 20060 Gessate (MI)<br />
Tel : +39 02 95781111 Fax:+39 02 95 380178<br />
www.comesterogroup.it comestero@comesterogroup.it


