Spicy Tuna Yaki Onigiri with Kimchi
This post may contain affiliate links. Please read my disclosure policy for details.
These spicy tuna yaki onigiri are a fantastic fusion of Korean and Japanese flavors. The crispy rice exterior gives way to a burst of tangy, umami goodness from the filling, made with canned tuna, kewpie mayo, gochujang and kimchi. With every bite, you’ll experience a satisfying crunch and a delightful explosion of taste.
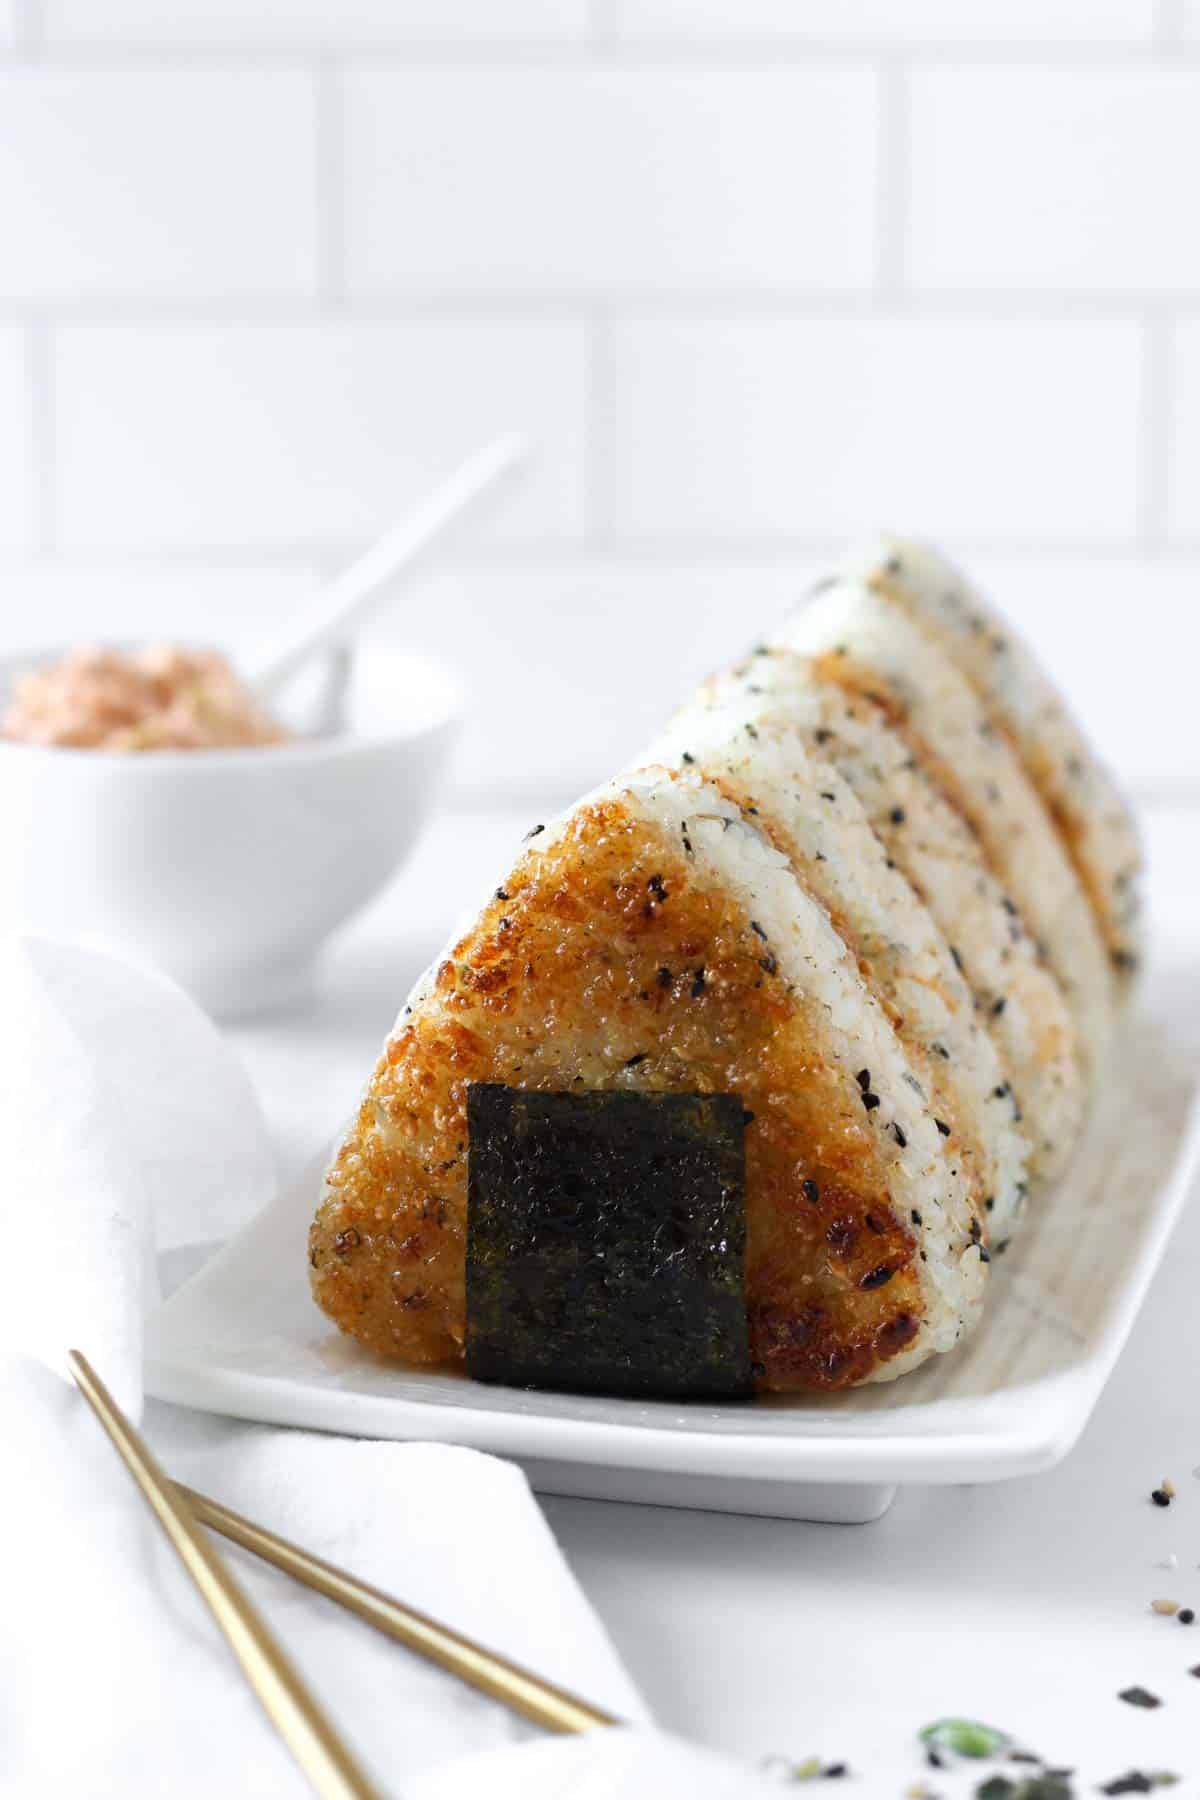
My favorite part about these tuna yaki onigiri? The grilled rice layers! The glossy CRUNCH goes so well with the creaminess of the spicy tuna.
They are so easy to make (especially with an onigiri mold) and are perfect for a quick on-the-go snack or to bring to a party or gathering with family and friends – just like my Tuna Mayo Jumeokbap. I’m 100% certain that they’ll impress everyone.
I wanted to make yaki onigiri with spicy tuna and kimchi, so you could say they’re a fusion of Japanese and Korean flavors (adding my Korean touch wherever possible). In Korea, the equivalent of onigiri is called samgak kimbap (삼각김밥 – triangle kimbap). Whenever I have a small hunger or don’t have time to sit down at a restaurant, I grab one from a convenience store.
But I have to say, I much prefer yaki onigiri, just because of their crispy sides! The crunchy layers add so much texture!
What is yaki onigiri?
Yaki onigiri is a Japanese dish made with grilled rice balls. The word “yaki” means grilled or cooked over direct heat, while “onigiri” refers to rice balls that are usually shaped into triangles or rounds.
They are made with white short-grain rice and often filled with savory ingredients such as umeboshi (pickled plum), bonito flakes, or grilled salmon. After being shaped into rounds or triangles, the rice balls are grilled or pan-fried until they become crispy on the outside.
The two sides of the onigiri are typically brushed with a mixture of soy sauce and/or mirin, but some people like to use miso or mayonnaise instead.
You can serve yaki onigiri as a snack or side dish, and you can enjoy it on its own or pair it with various toppings, such as nori seaweed, sesame seeds, or furikake seasoning.

WHY YOU’LL LOVE THIS RECIPE
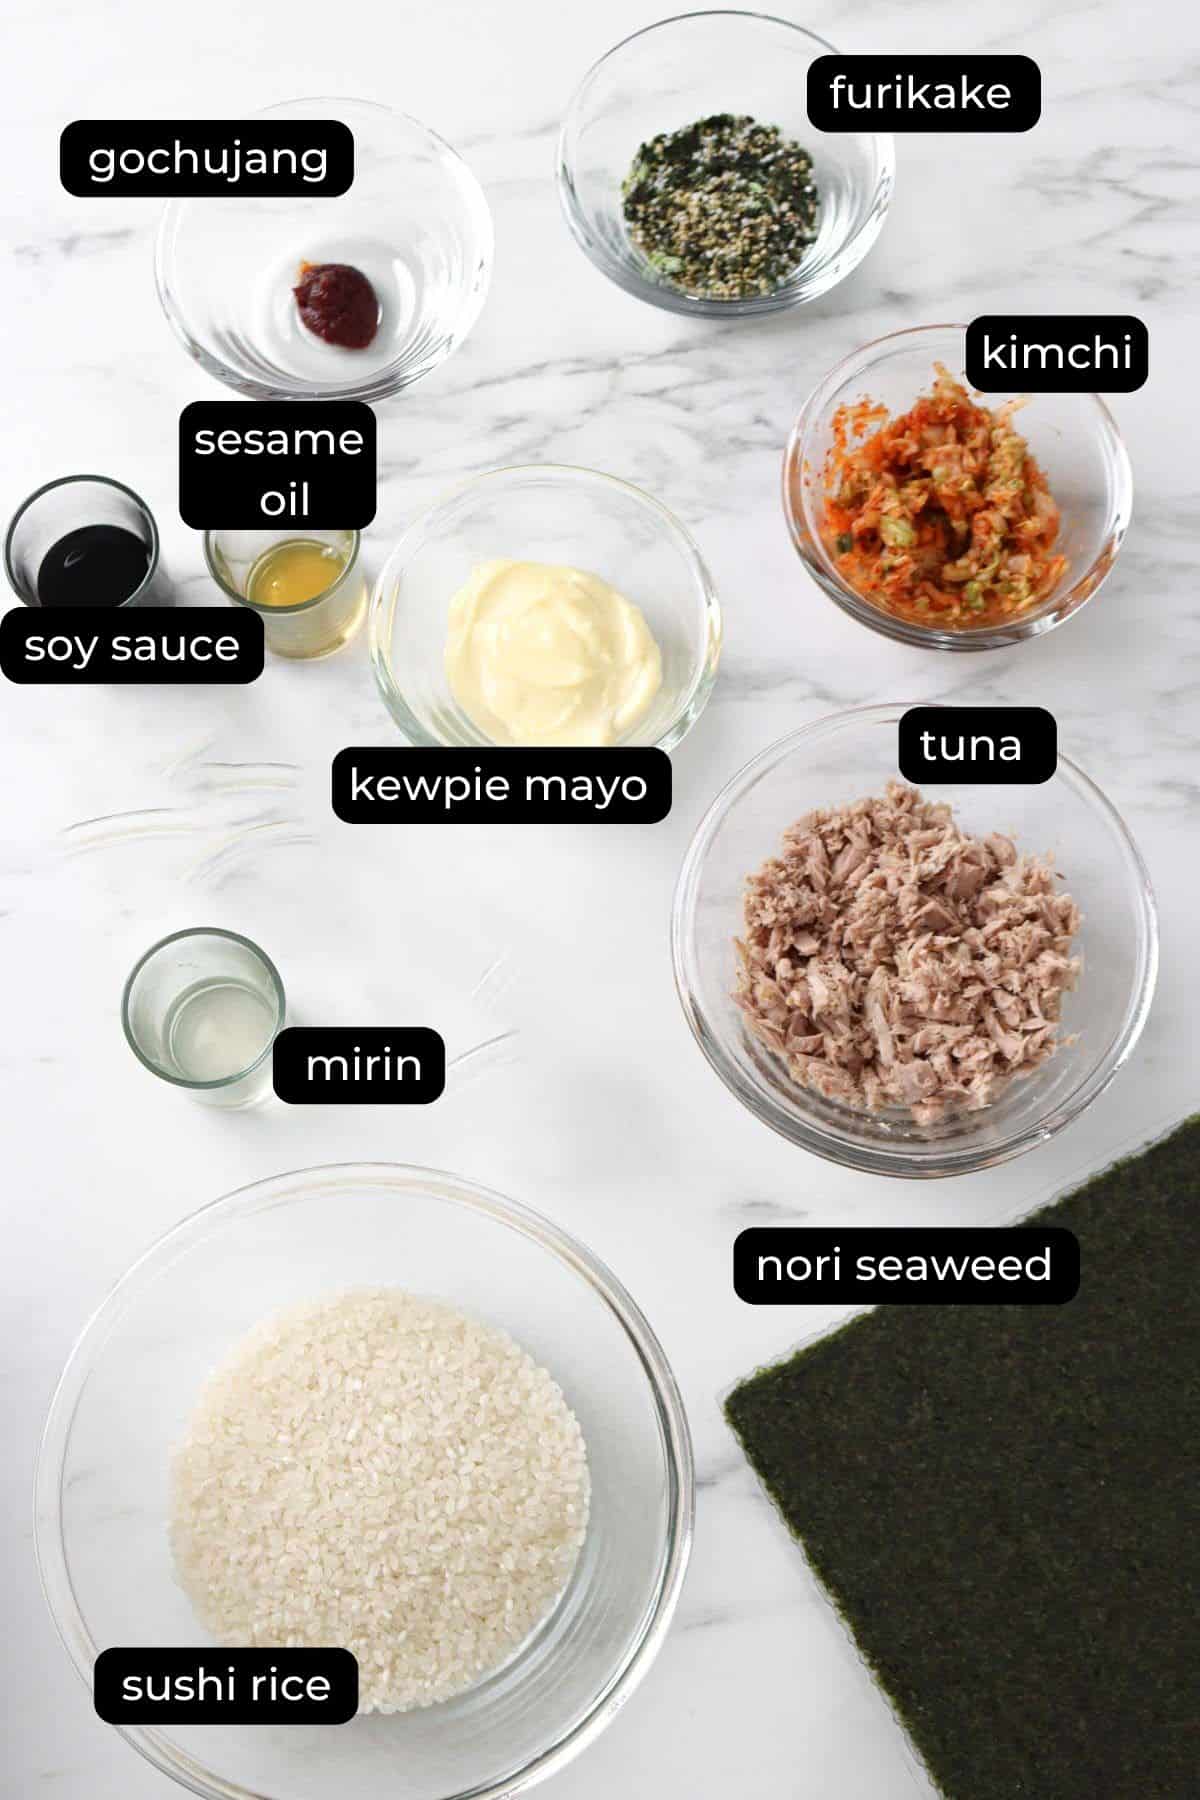
Ingredients
rice
- sushi rice – use short-grain rice specifically made to make sushi.
Note: The term “sushi rice” can have two interpretations:
- Sushi rice can refer to a specific type of short-grain rice that is commonly used in making sushi. This rice has a sticky texture that makes it easy to form sushi rolls or other shapes. The rice for making yaki onigiri usually isn’t seasoned hence I am referring to this interpretation when indicating “sushi rice”.
- Sushi rice can also refer to the seasoned rice used in making sushi, which includes vinegar, sugar, and salt. This rice is an essential component of sushi and provides the base for a variety of different sushi styles and preparations.
- furikake – furikake is not compulsory when making yaki onigiri but it adds a lot of umami to the rice.
- soy sauce – use regular soy sauce, be sure not to use dark soy sauce which would make these yaki onigiri too salty.
- mirin – brushing yaki onigiri with mirin not only enhances the taste but also helps to caramelize the rice and create a crispy texture on the outside. It also adds a touch of sweetness to balance out the saltiness of the soy sauce.
- nori seaweed – this is optional. I usually don’t wrap the yaki onigiri with seaweed when I make them and instead, add furikake to the rice to get the seaweed flavor. However, if I’m bringing the onigiri to share with friends or family (or for the purpose of photographing them in this case) I may choose to wrap them with nori.
spicy tuna
- canned tuna – you can use canned tuna in water or in oil. But using tuna in oil adds some creaminess and flavor to the spicy tuna. I recommend using Korean canned tuna which tastes better than regular tuna because it’s made with higher quality tuna. This results in a richer and more flavorful tuna that’s less salty and has a better texture.
- kewpie mayo (Japanese mayonnaise) – kewpie mayo provides a creamier texture and richer taste compared to regular mayonnaise, so if you can, use kewpie mayo. If you don’t have kewpie mayo, you can use regular mayonnaise, but in this case, I suggest adding a pinch of salt. Kewpie mayo has a slightly saltier taste than regular mayonnaise due to the addition of monosodium glutamate (MSG) so I did not add salt to this recipe. However, if you’re using regular mayonnaise, make sure to add a bit of salt.
- gochujang (Korean red pepper paste) – gochujang brings some spiciness to the tuna mayo but if you prefer making regular tuna mayo, feel free to skip gochujang.
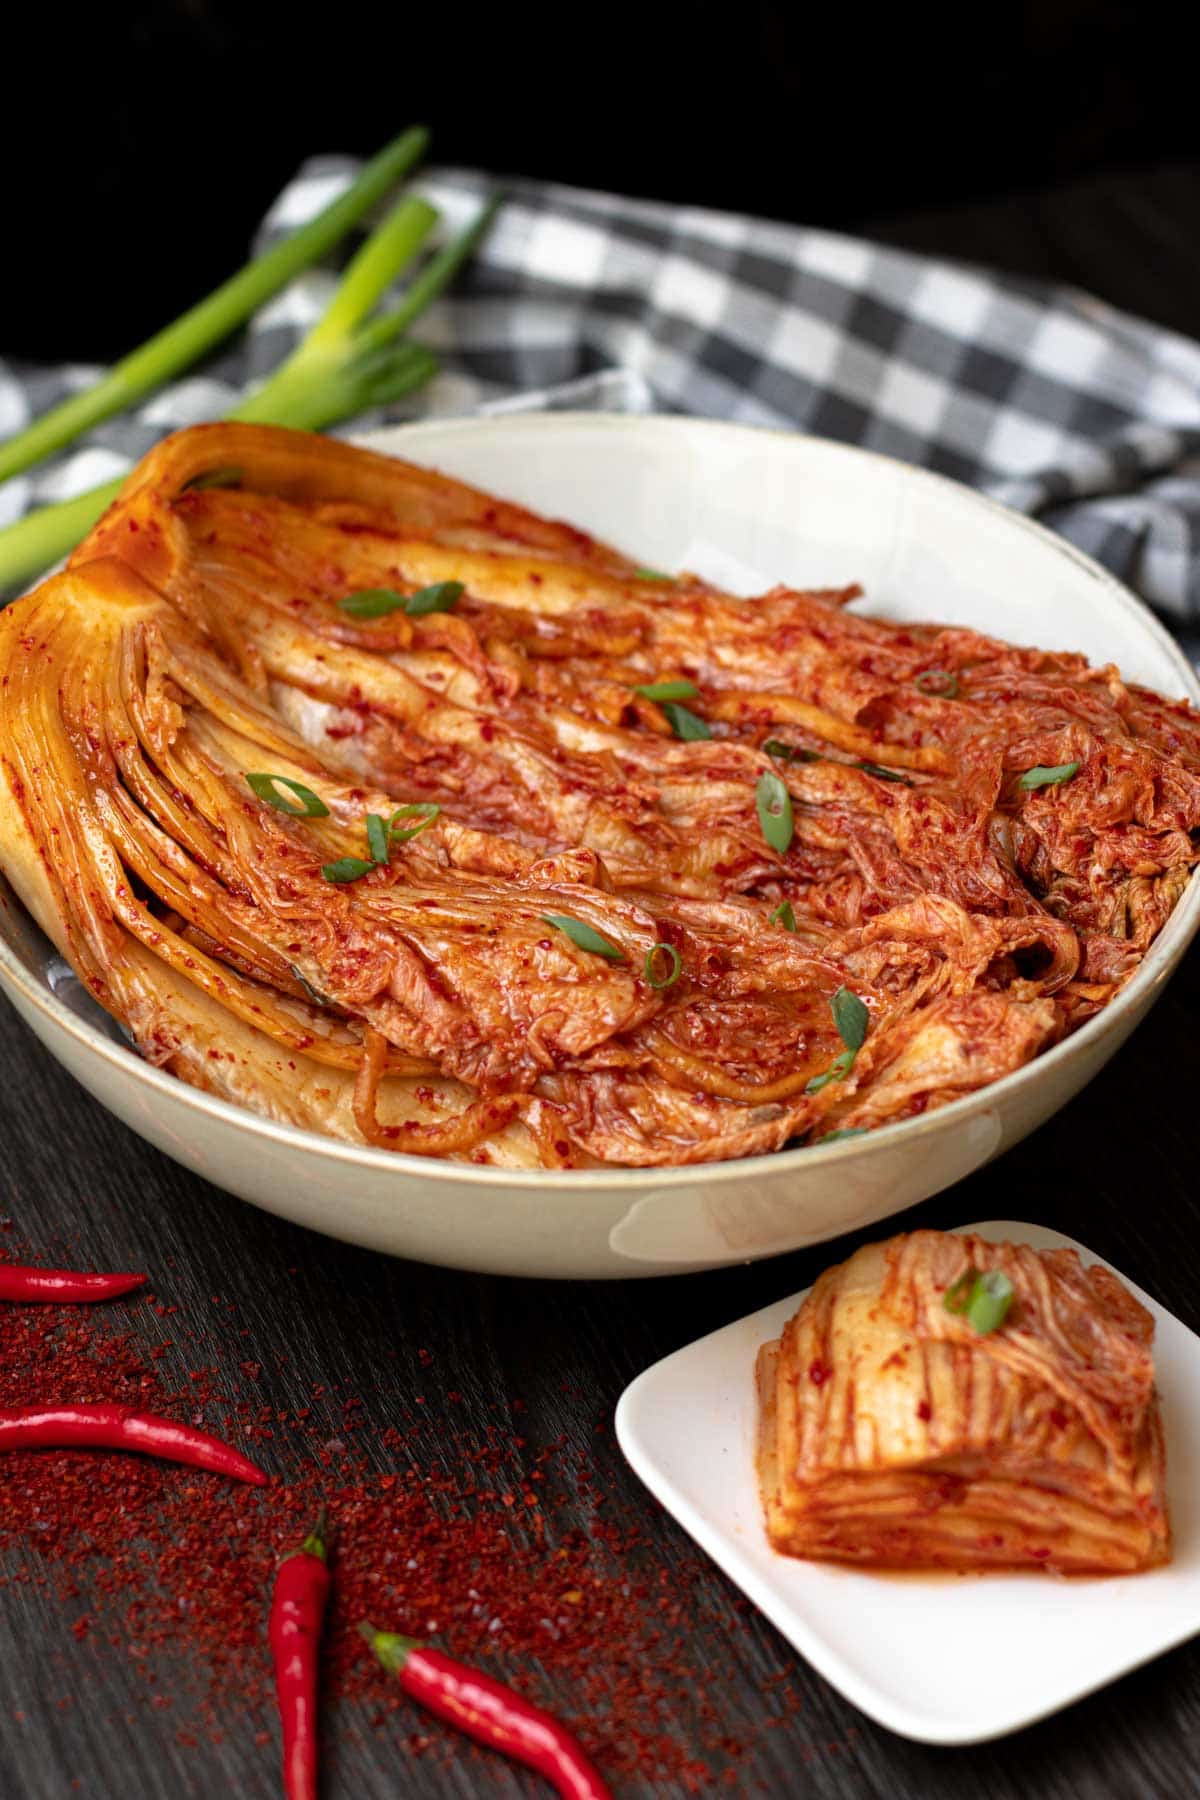
- kimchi – make sure you chop the kimchi finely and drain the excess liquid.
- sesame oil – adds a nutty flavor to the spicy tuna.
How To Make spicy tuna yaki onigiri?
- Prepare the rice – Cook rice as per your rice cooker instructions – be careful not to overcook the rice. For 4 rice cooker cups of uncooked sushi rice, I use 5 rice cooker cups of water. The rice/water ratio is 1:¼. Allow the rice to cool a little before shaping the yaki onigiri.
- In a bowl, mix together the cooked rice and the furikake. Set aside.
- Prepare the tuna – In another bowl, combine tuna, kewpie mayo, gochujang, kimchi and sesame oil. Mix well.
- Shape the yaki onigiri – Wet your hands before shaping the onigiri, or alternatively wear some gloves so that the rice doesn’t stick.
- Using an onigiri mold, place some rice at the bottom of the mold, add the tuna filling in the center (Note 3) and top it with more rice (be sure to add some rice on the sides to prevent the filling from slipping away). Press it down firmly to shape the onigiri. If you don’t have a mold, you can shape it by hand. Start by shaping a large rice ball, flattening it a little, and making a hole in the middle. Add the filling, then close the ball and shape it into a triangle with soft edges.
- Repeat for all onigiri.

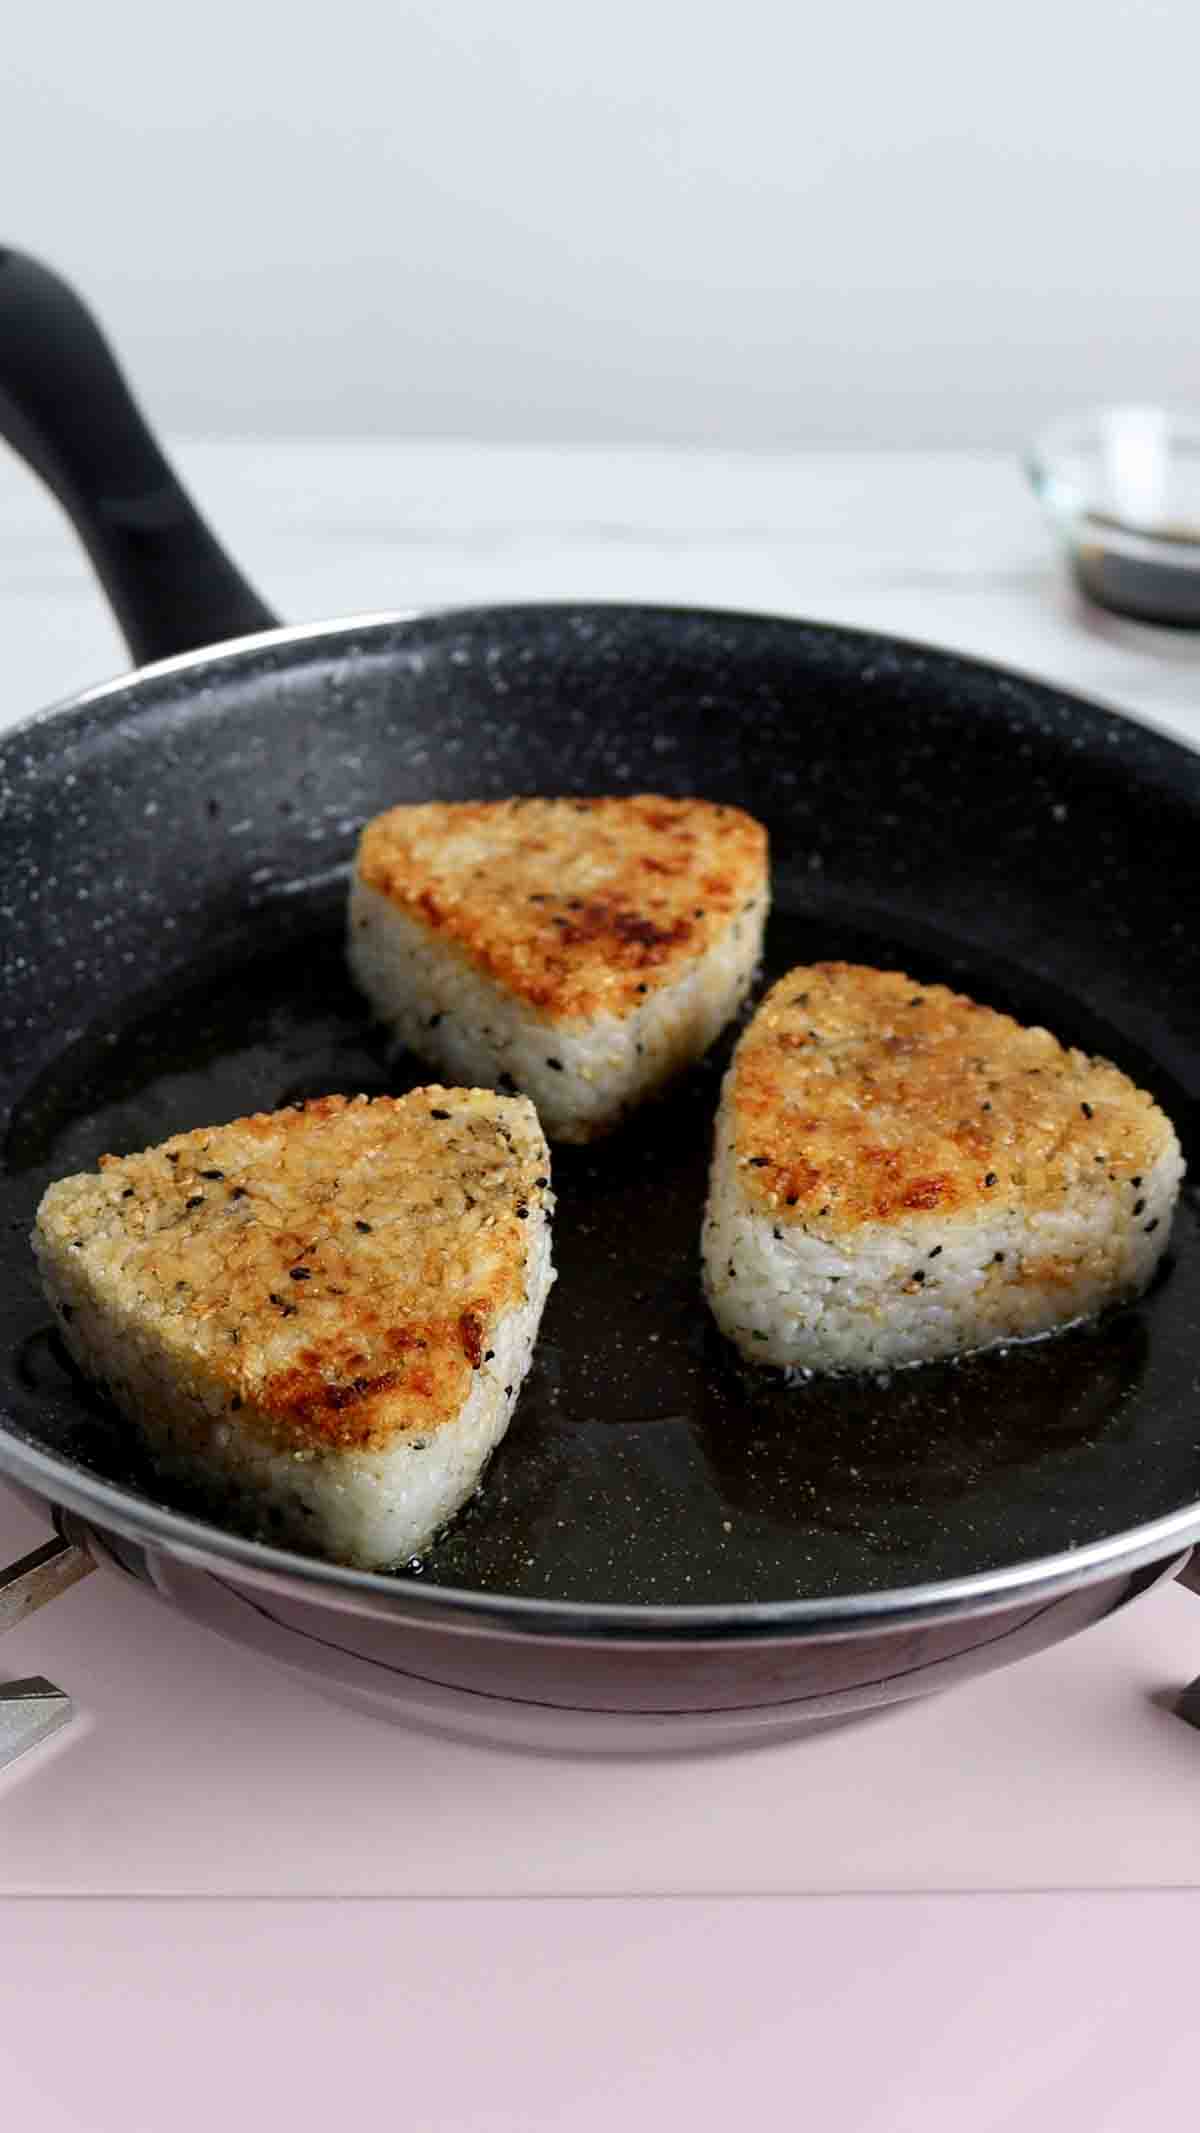
- Pan-fry the onigiri – In a small bowl, mix soy sauce and mirin.
- Heat a large pan over medium heat and add a generous amount of cooking oil to prevent the rice from sticking or burning. Add the onigiri to the pan and fry for 2-3 minutes on each side or until golden brown and crispy.
- Turn the heat on low and lightly brush the top of the onigiri with the soy sauce mixture. Turn it around and cook for 1 minute. Repeat on the other side.
Note: Yaki onigiri is typically grilled using a stove-top grill or an outdoor grill. To grill yaki onigiri, simply heat up the grill to medium-high heat and place the onigiri on the grill. However, pan-frying it is a more accessible option since most of us have a pan at home.
- Wrap the nori strips around the onigiri.
- Serve hot or cold.
- Garnish (optional) – to wrap the nori strip around the onigiri, place the strip on a flat surface and position the onigiri in the center. Fold the ends of the nori strip underneath the onigiri and press lightly to seal. The strip should wrap around the bottom half of the onigiri, leaving the top half exposed. If the nori strip doesn’t stick, you can add a small amount of kewpie mayo to both ends to help it adhere.

Variations
- Salmon Yaki Onigiri – you can replace canned tuna with canned salmon or freshly cooked salmon.
- Use miso paste to brush the onigiri – mix some miso paste with sugar and mirin instead of soy sauce and mirin.
- Cheese Yaki Onigiri – add a cube of cheese in the center of the rice ball before pan-frying for a cheesy yaki onigiri.
- Teriyaki Yaki Onigiri – brush the onigiri with teriyaki sauce before pan-frying for a sweet and savory flavor.
Serving
How to serve yaki onigiri?
You can serve yaki onigiri as a side dish to accompany other Japanese dishes such as miso soup, tempura, or grilled fish. Or, you can have it on the go as a quick and satisfying snack.
What to serve with yaki onigiri?
Some common dishes to serve with yaki onigiri include miso soup, pickled vegetables, grilled fish or meat, and Japanese-style salads such as sunomono.
How to Store, freeze and Reheat?
Store
Wrap the yaki onigiri individually in plastic wrap or place them in an airtight container and store them in the refrigerator for up to 3 days.
Freeze
Wrap them individually in plastic wrap and then place them in a freezer-safe bag or container. They can be stored in the freezer for up to 2 months. Note that the texture of the rice will be altered if frozen.
Reheat
To reheat yaki onigiri, you can either pan-fry them again over medium-high heat for a few minutes on each side until crispy or you can microwave them for 30 seconds to 1 minute, depending on the strength of your microwave. If microwaving, it’s best to wrap the onigiri in a damp paper towel to prevent them from drying out.
Emma’s Tips
- Use a rice cooker – a rice cooker is the easiest and most foolproof way to make perfect sushi rice. If you don’t have one, you can cook your rice in a pot however you need to master some technique to cook it on the stovetop.
- Use the right type of rice – as mentioned above, use sushi rice only.
- Make sure the rice is not too wet – wet rice is difficult to form into onigiri. Make sure to use the proper rice/water ratio. As mentioned earlier, the right rice/water ratio when using a rice cooker is 1:¼.
- Wet your hands or use gloves – wet your hands with water or wear some gloves to avoid the rice sticking to your hands when shaping the onigiri.
- Use an onigiri mold – this onigiri mold is the one I use. It is not necessary (you can make them manually – check my recipe instructions) however using a mold makes the process much faster and gives you PERFECT and regular triangles every time.
- Use a non-stick pan for pan-frying – if not using a non-stick pan, you risk breaking the yaki onigiri when flipping them over.

RECIPE FAQ
Looking for more easy-to-make Japanese recipes?
RECIPES IN YOUR INBOX? Don’t forget to subscribe to my newsletter to receive the latest recipe updates delivered for free directly to your inbox! Oh, and you will also find me on Youtube, Instagram, Facebook and TikTok. Come say hi and leave me a message, it is always a pleasure to connect with all of you!
Thanks so much for stopping by! xx


Spicy Tuna Yaki Onigiri with Kimchi
Equipment
- onigiri mould | optional
Ingredients
rice
spicy tuna
- 150 g canned tuna (in water or oil), drained | equals 1 can of tuna
- 80 g kewpie mayo
- 1 tsp gochujang | Korean red pepper paste
- 80 g kimchi, chopped
- 1 tsp sesame oil
Instructions
- Prepare the rice – Cook rice as per your rice cooker instructions – be careful not to overcook the rice. For 4 rice cooker cups of uncooked sushi rice, I use 5 rice cooker cups of water. The rice:water ratio is 1:¼. Allow the rice to cool a little before shaping the yaki onigiri.
- In a bowl, mix together the cooked rice and the furikake. Set aside.
- Prepare the tuna – In another bowl, combine tuna, kewpie mayo, gochujang, kimchi and sesame oil. Mix well.
- Shape the yaki onigiri – Wet your hands before shaping the onigiri, or alternatively wear some gloves so that the rice doesn’t stick (Note 2).
- Using an onigiri mould, place some rice at the bottom of the mould, add the tuna filling in the centre (Note 3) and top it with more rice (be sure to add some rice on the sides to prevent the filling from slipping away). Press it down firmly to shape the onigiri. If you don't have a mould, you can shape it by hand. Start by shaping a large rice ball, flattening it a little, and making a hole in the middle. Add the filling, then close the ball and shape it into a triangle with soft edges.
- Repeat for all onigiri.
- Pan-fry the onigiri – In a small bowl, mix soy sauce and mirin.
- Heat a large pan over medium heat and add a generous amount of cooking oil to prevent the rice from sticking or burning. Add the onigiri to the pan and fry for 2-3 minutes on each side or until golden brown and crispy (Note 4).
- Turn the heat on low and lightly brush the top of the onigiri with the soy sauce mixture. Turn it around and cook for 1 minute. Repeat on the other side.
- Wrap the nori strips around the onigiri.
- Serve hot or cold.
- Garnish (optional) – to wrap the nori strip around the onigiri, place the strip on a flat surface and position the onigiri in the centre. Fold the ends of the nori strip underneath the onigiri and press lightly to seal. The strip should wrap around the bottom half of the onigiri, leaving the top half exposed. If the nori strip doesn't stick, you can add a small amount of kewpie mayo to both ends to help it adhere.