How to install a CPU cooler
Fortune favours the cold

Now that you’ve installed a CPU, the logical next step of building a PC would be to install a CPU cooler. So, let’s do that.
These essential chip-chillers come with varying degrees of sci-fi design tendencies, ranging from simple fan-and-radiator combos – air coolers, to use their actual name – to the mathematical pipework of "open loop" liquid coolers. For your first PC build, don’t worry about constructing an open loop system; I know this is guide is meant to inform you, but plumbing knowledge is more than you need at this point. Instead, you can simply pair your CPU with either a simple air cooler or a more powerful, yet still relatively easy to install, "closed loop" all-in-one liquid cooler.
For a detailed breakdown of how these two types compare, you can always read our liquid cooling vs air cooling guide, but in short: air coolers are simpler, cheaper, and effective enough to cool all but the hottest of hot chips at stock speeds. AIO liquid coolers are more expensive, and have a slightly more involved installation process, but are more effective at soothing temperatures on high-end and overclocked CPUs. They’re often quieter than air coolers, too, and still aren’t anywhere near as tough to install and maintain as open loop systems.
This guide will outline how to install both air and AIO liquid coolers, though please forgive some hedging along the way, as different manufacturers use slightly distinct mounting systems for their coolers and trying to cover them all would be an incomprehensible mess. I can give you broad-strokes walkthroughs, though, and if you’re ever unsure about a specific detail, you can always check your cooler’s manual.
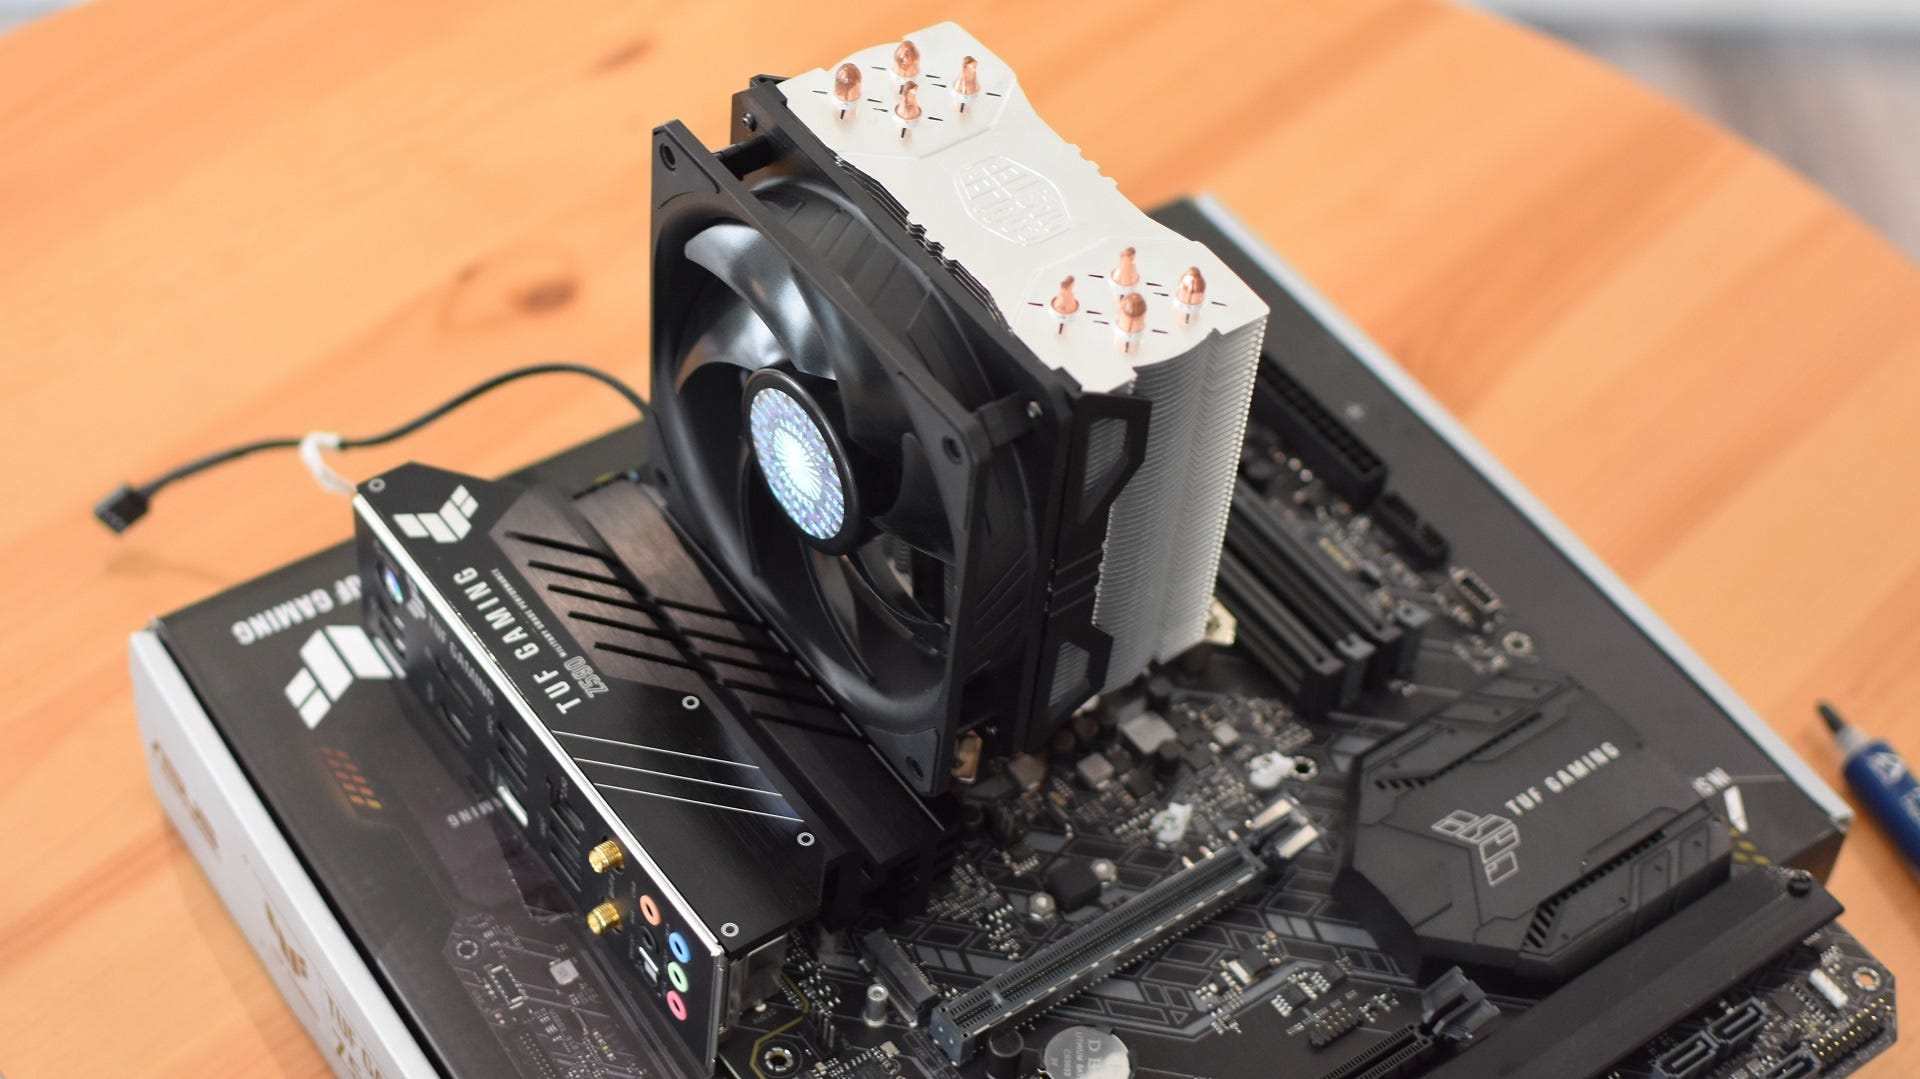
As with installing the CPU itself, installing a CPU cooler onto a motherboard is easier when the mobo is outside the case – though AIO coolers will eventually require you to affix the fans and radiator to your PC’s chassis. Be sure to have your tube of thermal paste at the ready too, and have a read of the thermal paste section below if you’re not already familiar with how this heat transfer gloop works. Otherwise, use these links to jump to the relevant section:
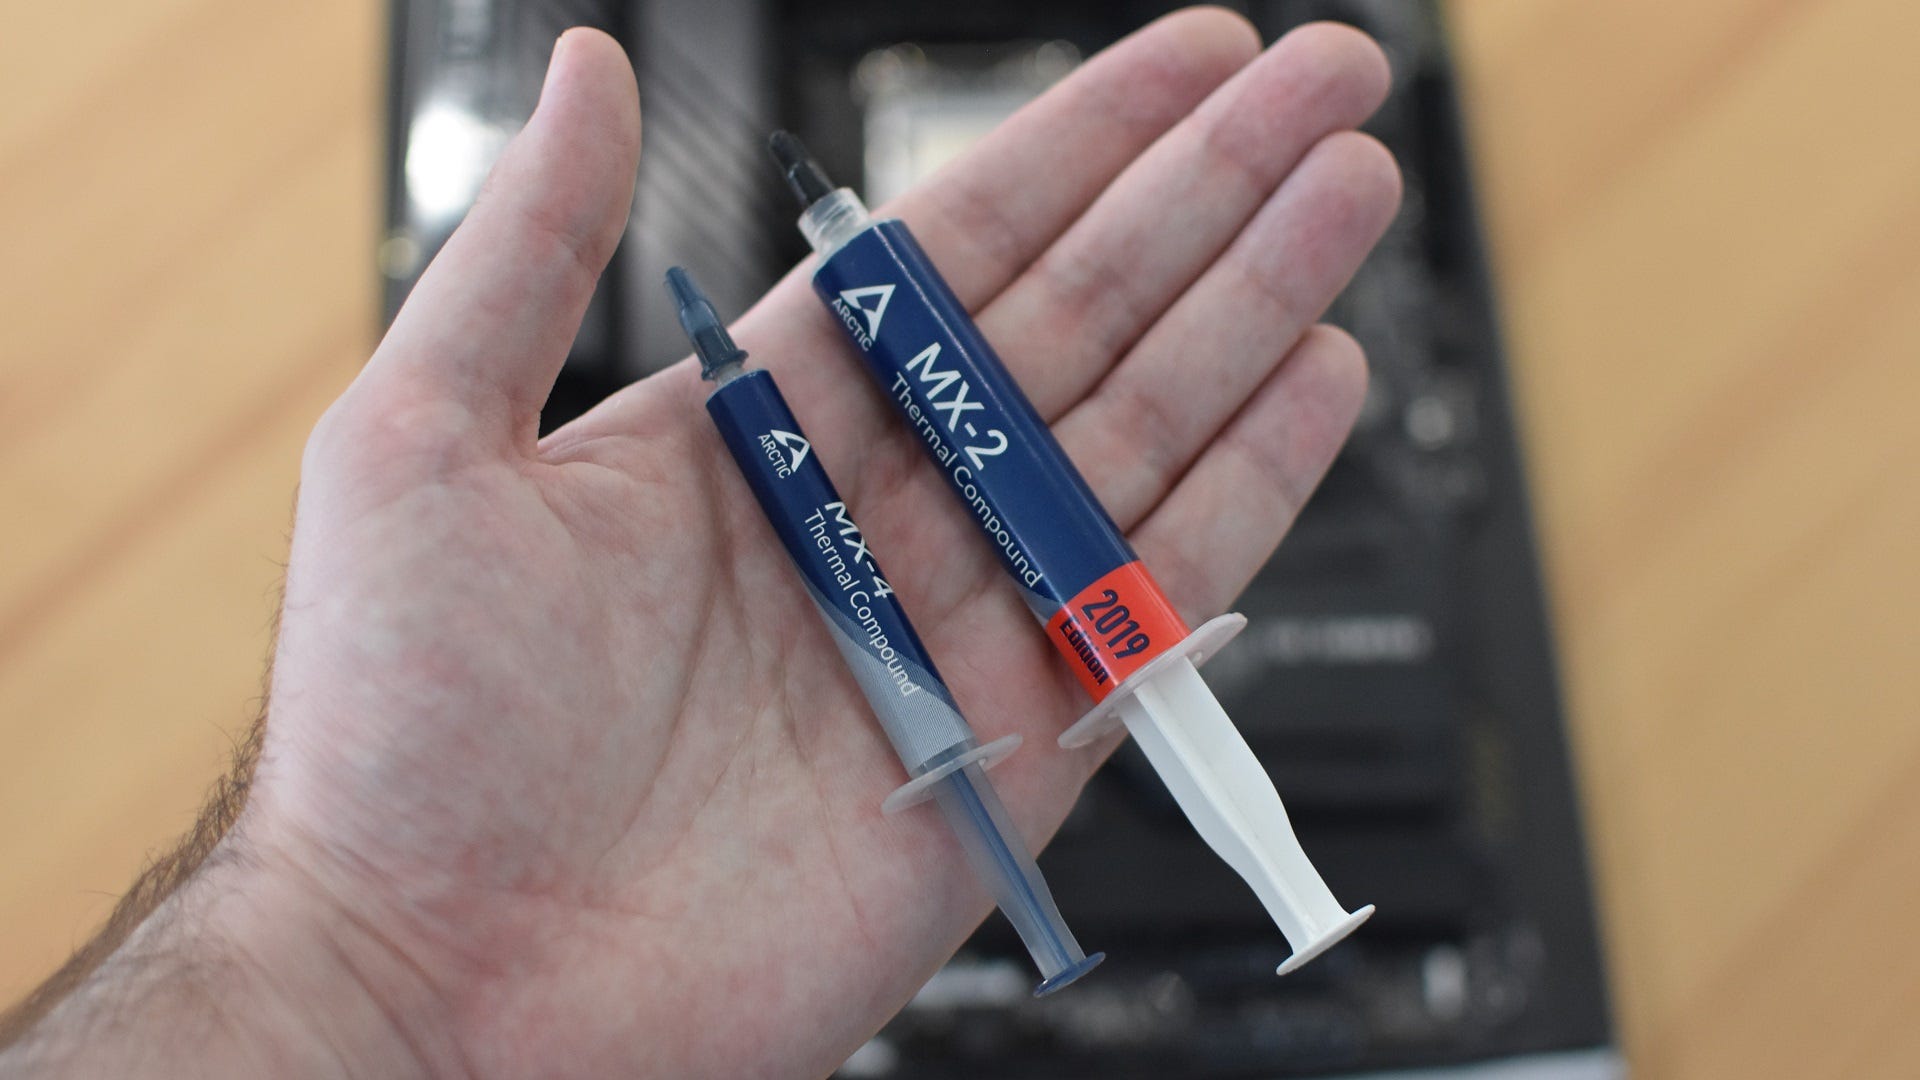
Thermal paste: how it works and how much to use
If you simply pressed the bare metal of your CPU cooler onto the processor, it wouldn’t absorb as much heat as it needs to: tiny gaps between the two would prevent proper conduction. Add some highly conductive thermal paste between the two, however, and heat from the CPU has a much easier time passing through to the cooler, which eventually dissipates it.
Sadly, thermal paste has a reputation, maybe not entirely undeserved, for being a pain point of PC builds. Apply too little, and not enough heat will transfer from the CPU to the cooler, causing overheating. Apply too much, and it will seep all over your motherboard socket, while insulating the CPU rather than facilitating the thermal transfer. Aaaaand causing overheating.
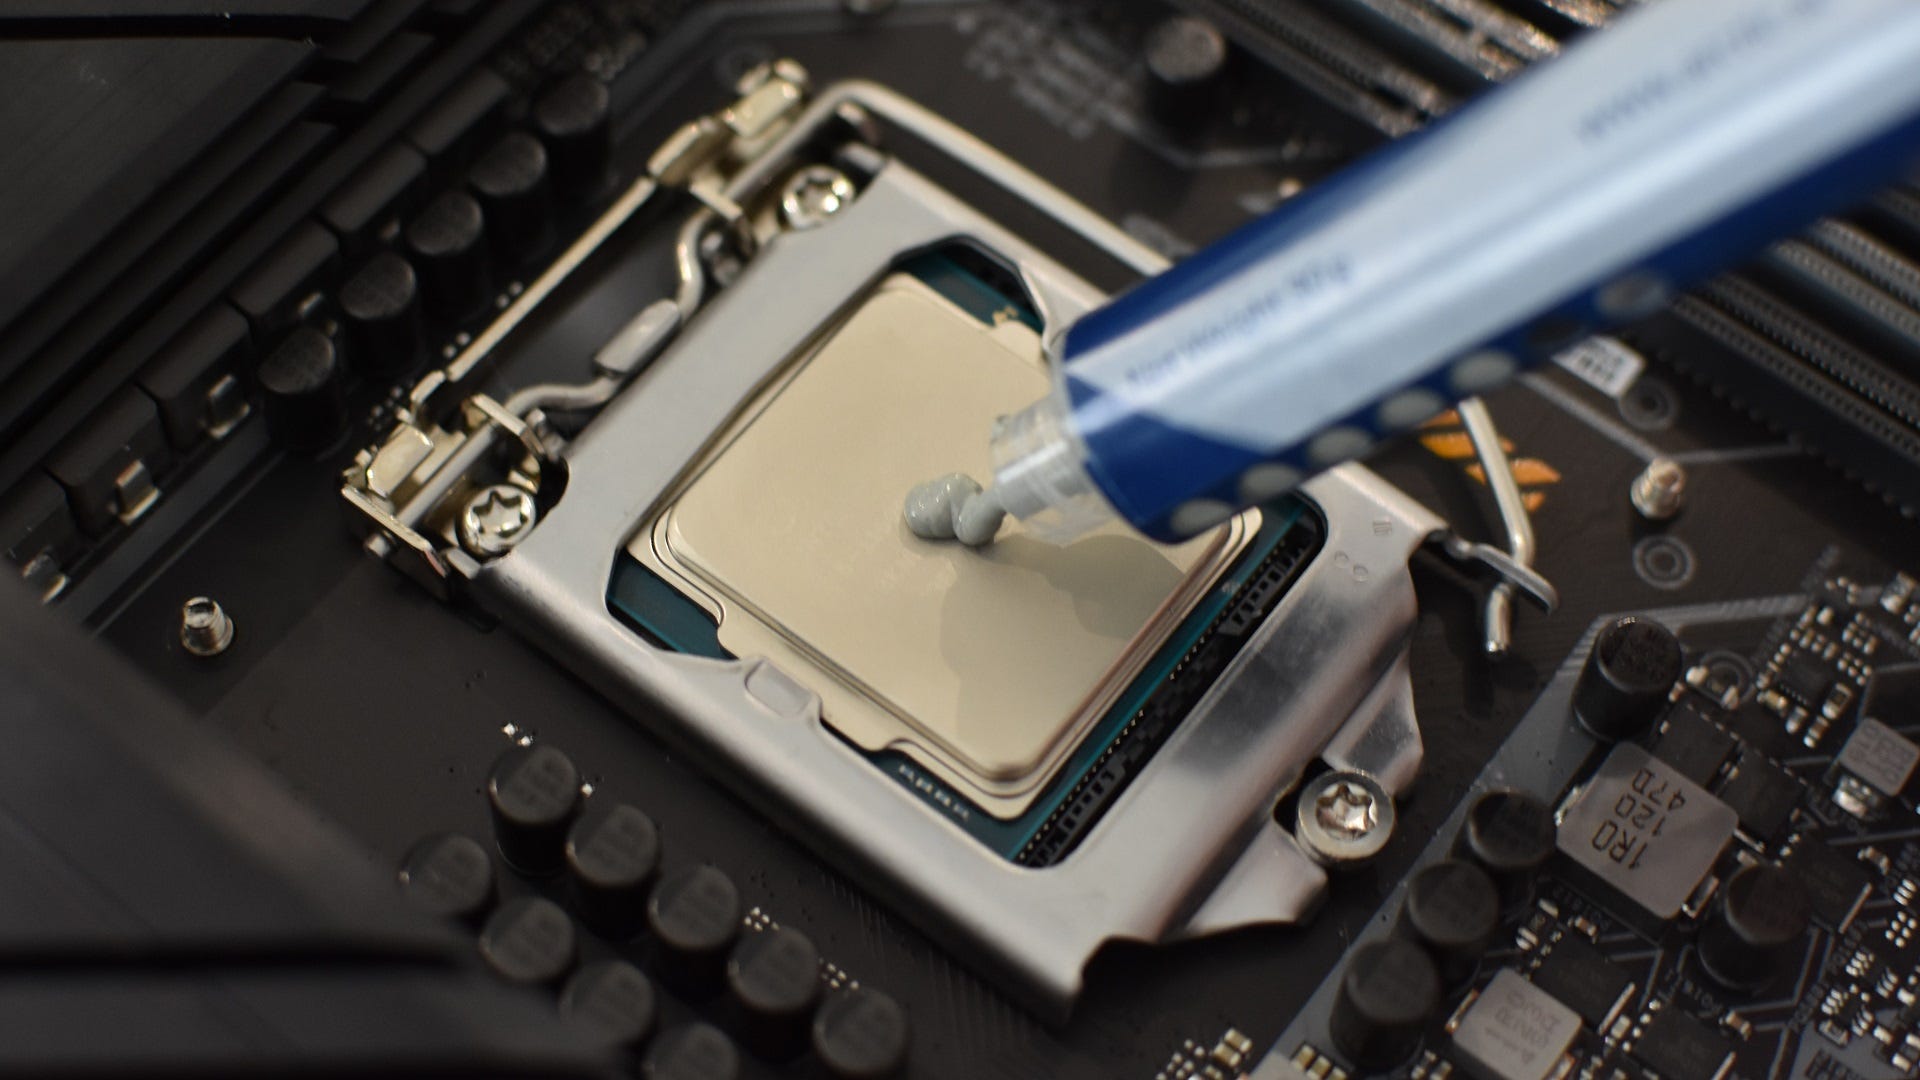
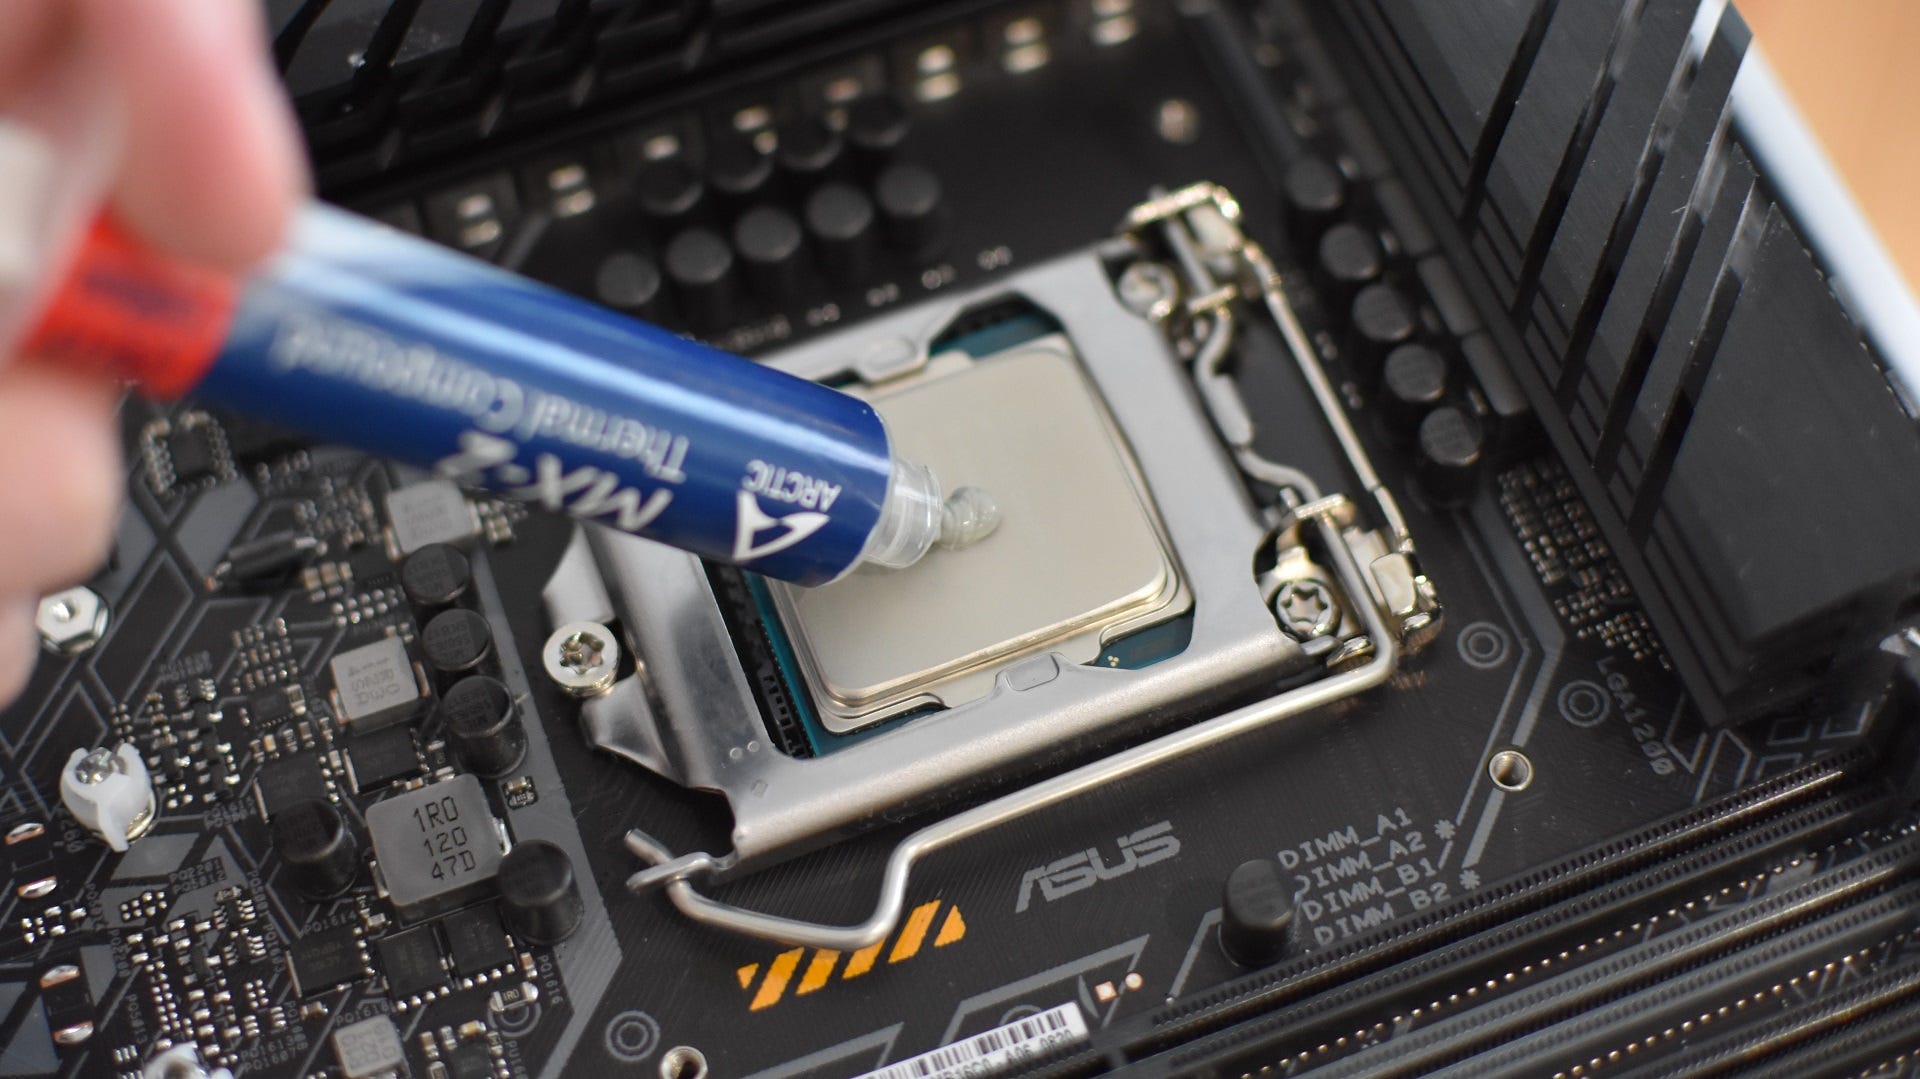
Yes, getting the thermal paste right is important, though it’s not as scientifically precise a process as the horror stories make it sound. You just need to apply enough to form a thin, even layer across the top of the CPU – think a single coat of paint. On Intel chips that fit in LGA 1151 or LGA 1200 sockets, that amounts to about a small pea-sized blob of paste, while AMD’s bigger Ryzen chips need a slightly-bigger-than-pea-sized blob. Intel LGA 1700 processors are taller than 10th and 11th Gen chips, so could also use a tiny bit extra. Like so:
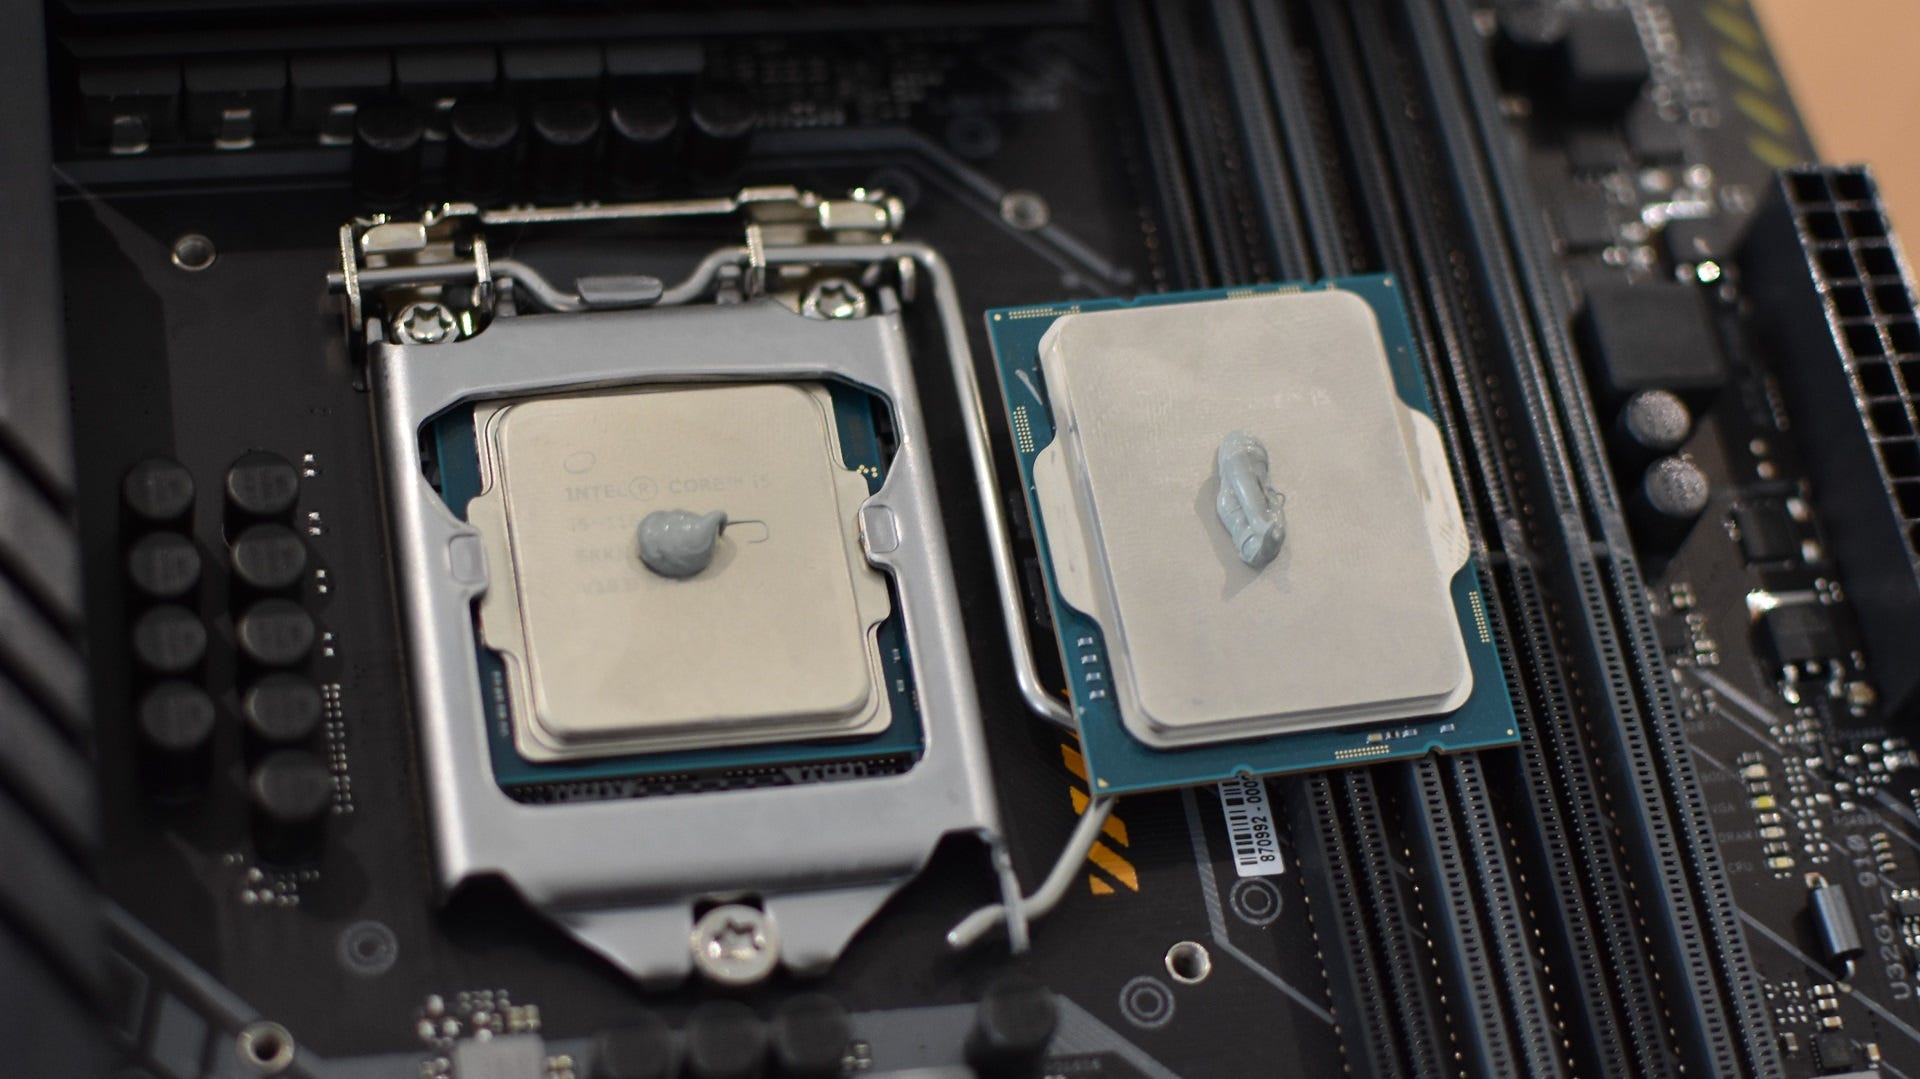
A lot of CPU coolers come with thermal paste pre-applied to the contact plate, though I think it’s worth learning how to dab it onto the CPU yourself. Firstly, in my experience, the amount of pre-applied paste is rarely enough to cover the whole chip, especially if it’s a bigger model like Intel’s 12th or 13th Gen CPUs. Secondly, if you remove the cooler for any reason – whether it’s an abortive installation attempt or upgrading in a few years’ time – then you'll have to apply new paste anyway. Don’t ever re-use paste that’s already been squished between the CPU and the cooler, as separating them leaves the paste with a distressed texture that prevents you regaining the perfectly flat, airtight layer you want.
How to install a CPU air cooler
Air coolers are perfect for beginner-level, compact, and/or low budget builds. Cooling power won’t match a quality AIO, but will still comfortably manage the vast majority of CPUs out there, and there are far fewer cables and components to worry about when installing.
Step 1: Check if your cooler comes with a mounting backplate, or if it’s designed to attach directly to a pair of retention clips around the motherboard’s CPU socket. Most modern CPU coolers, including some stock coolers like AMD’s Wraith Stealth, use backplates – if yours does, and your motherboard includes these retention clips, use a screwdriver to remove them.
If your cooler does need these clips, leave them on and skip to step 3.
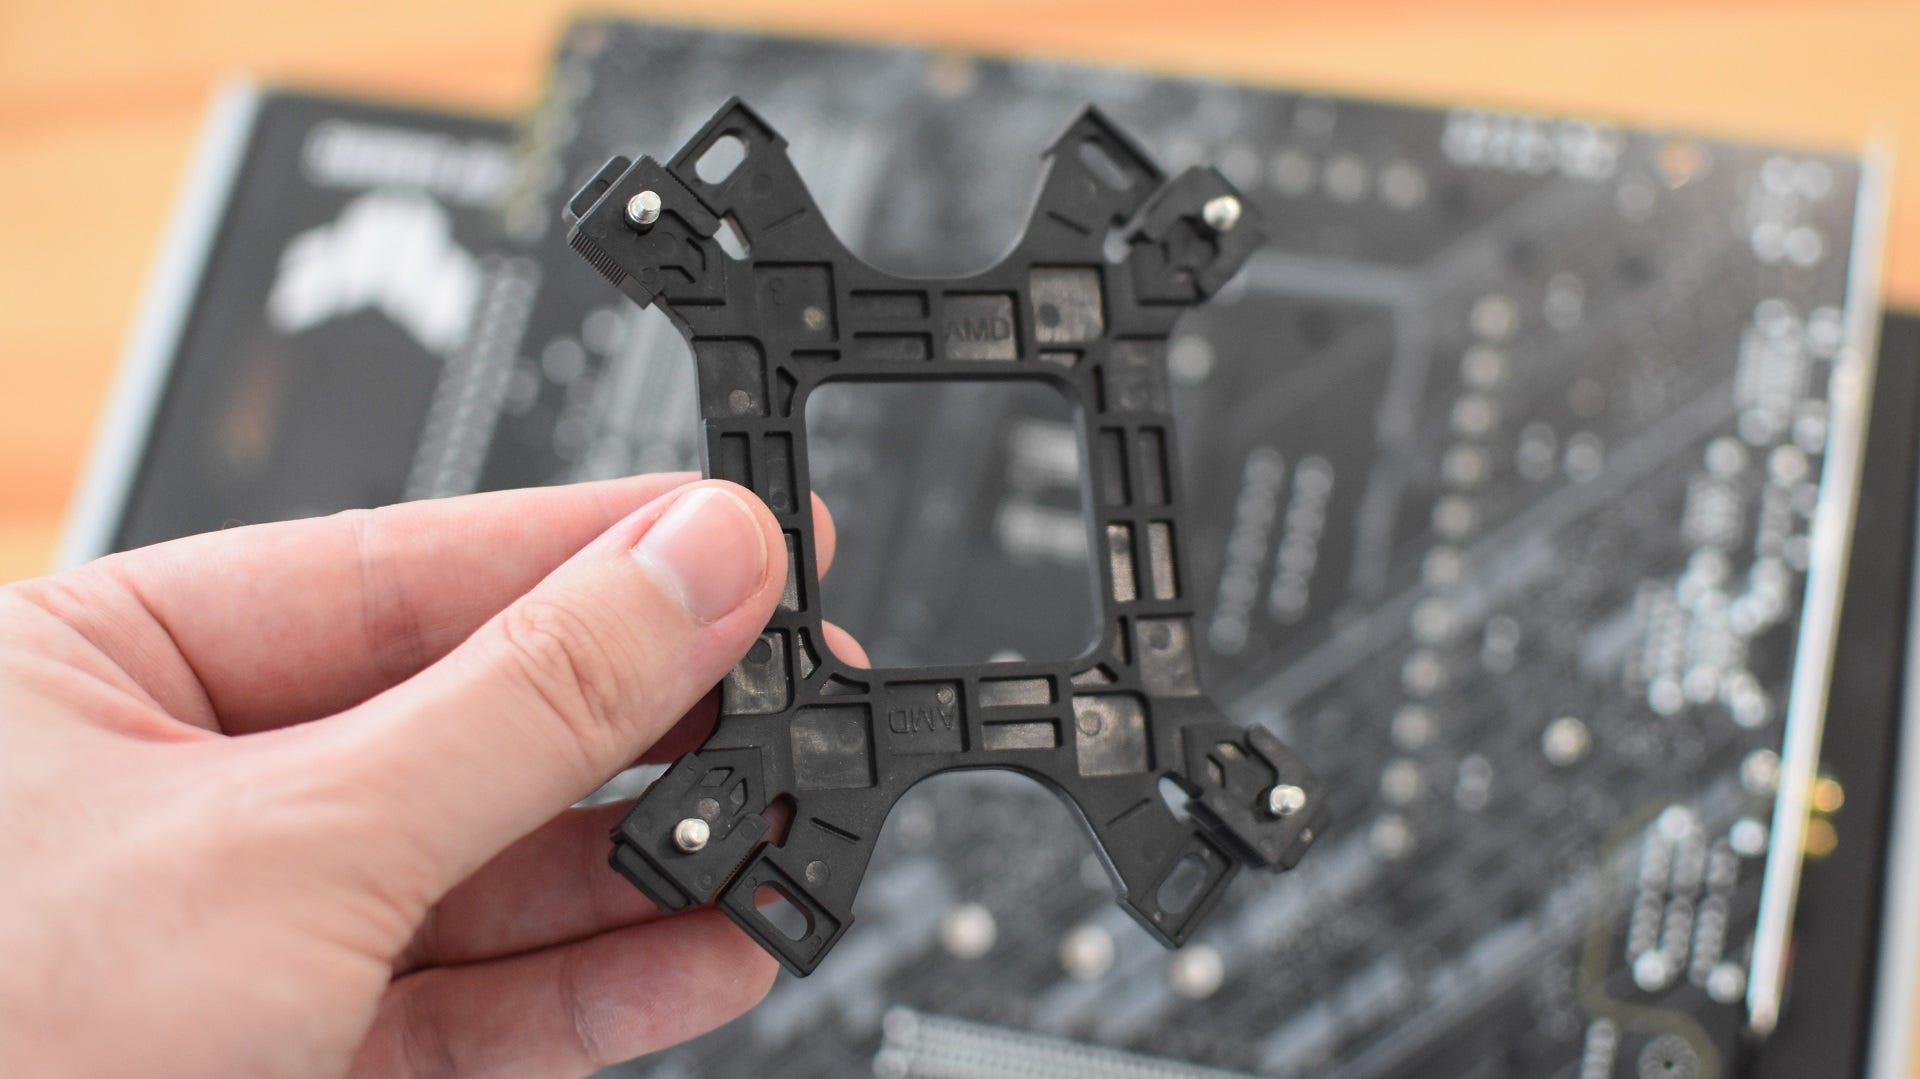
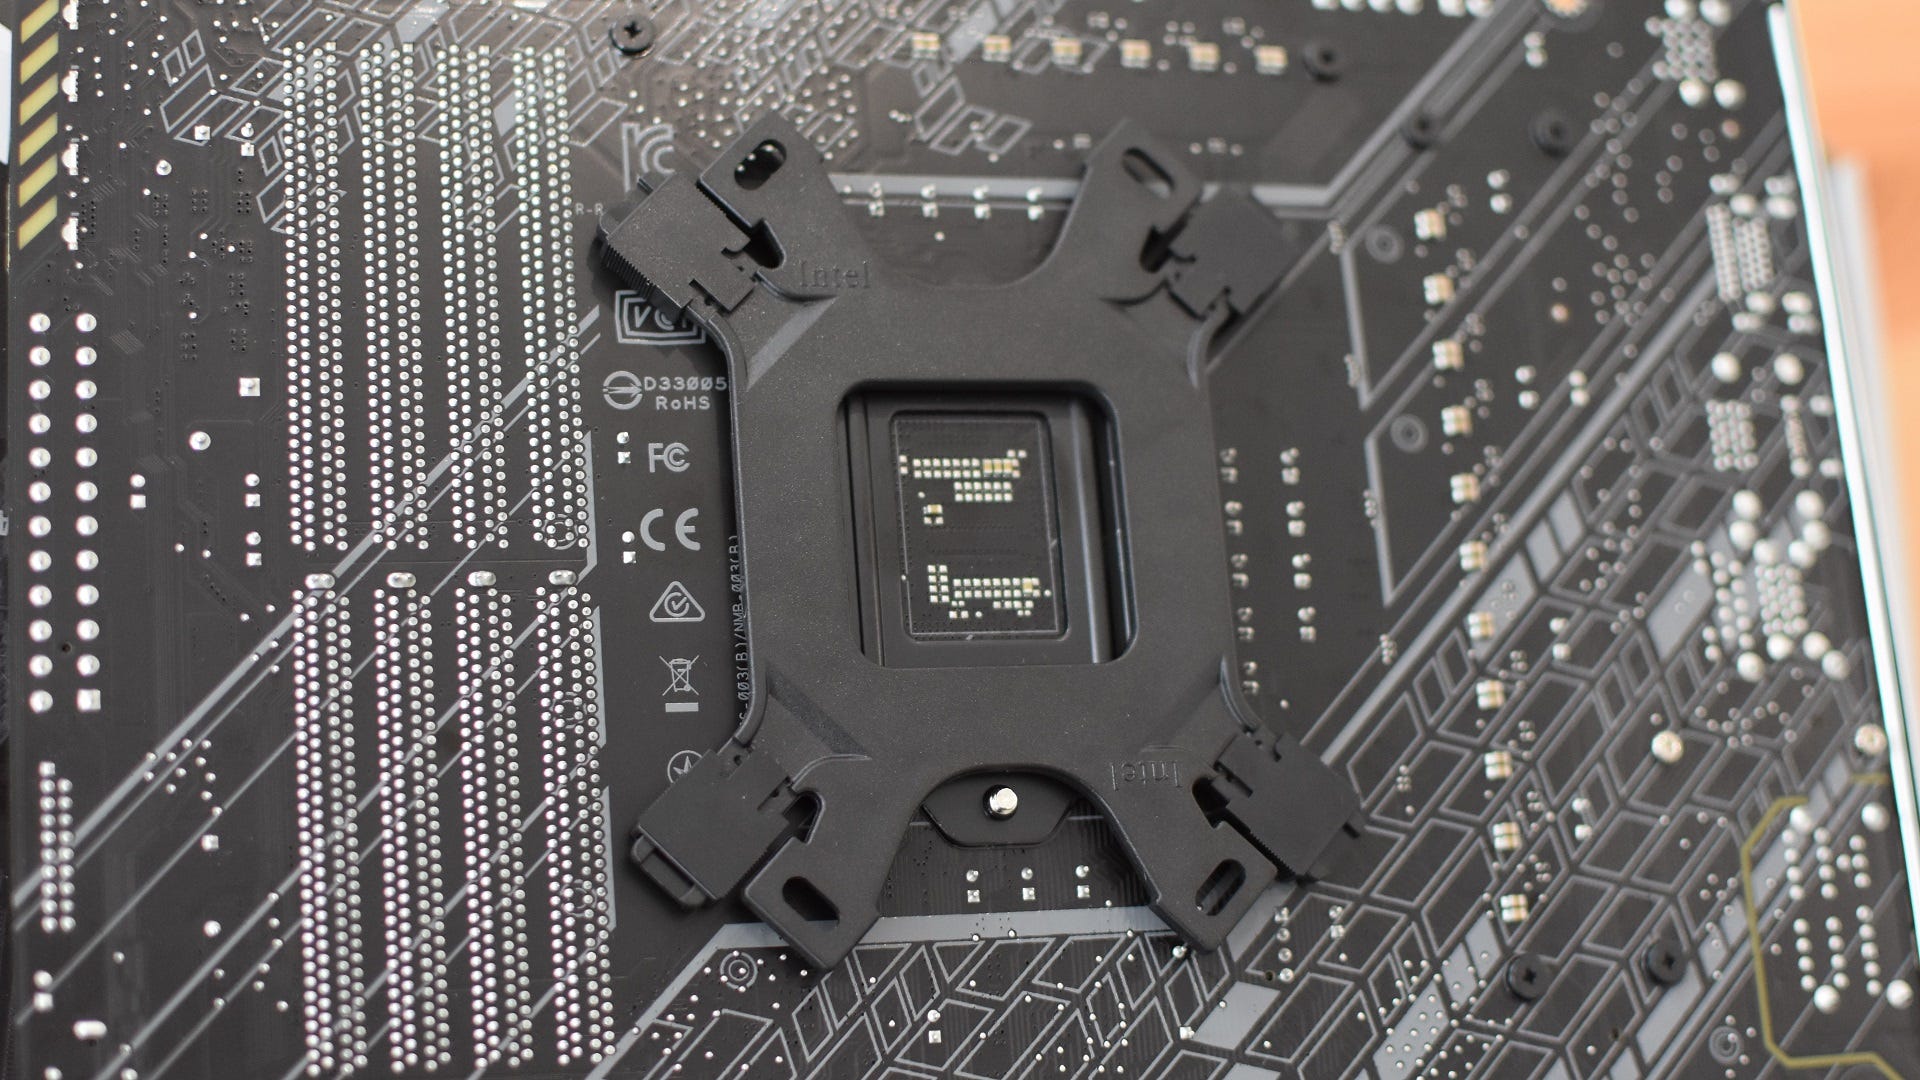
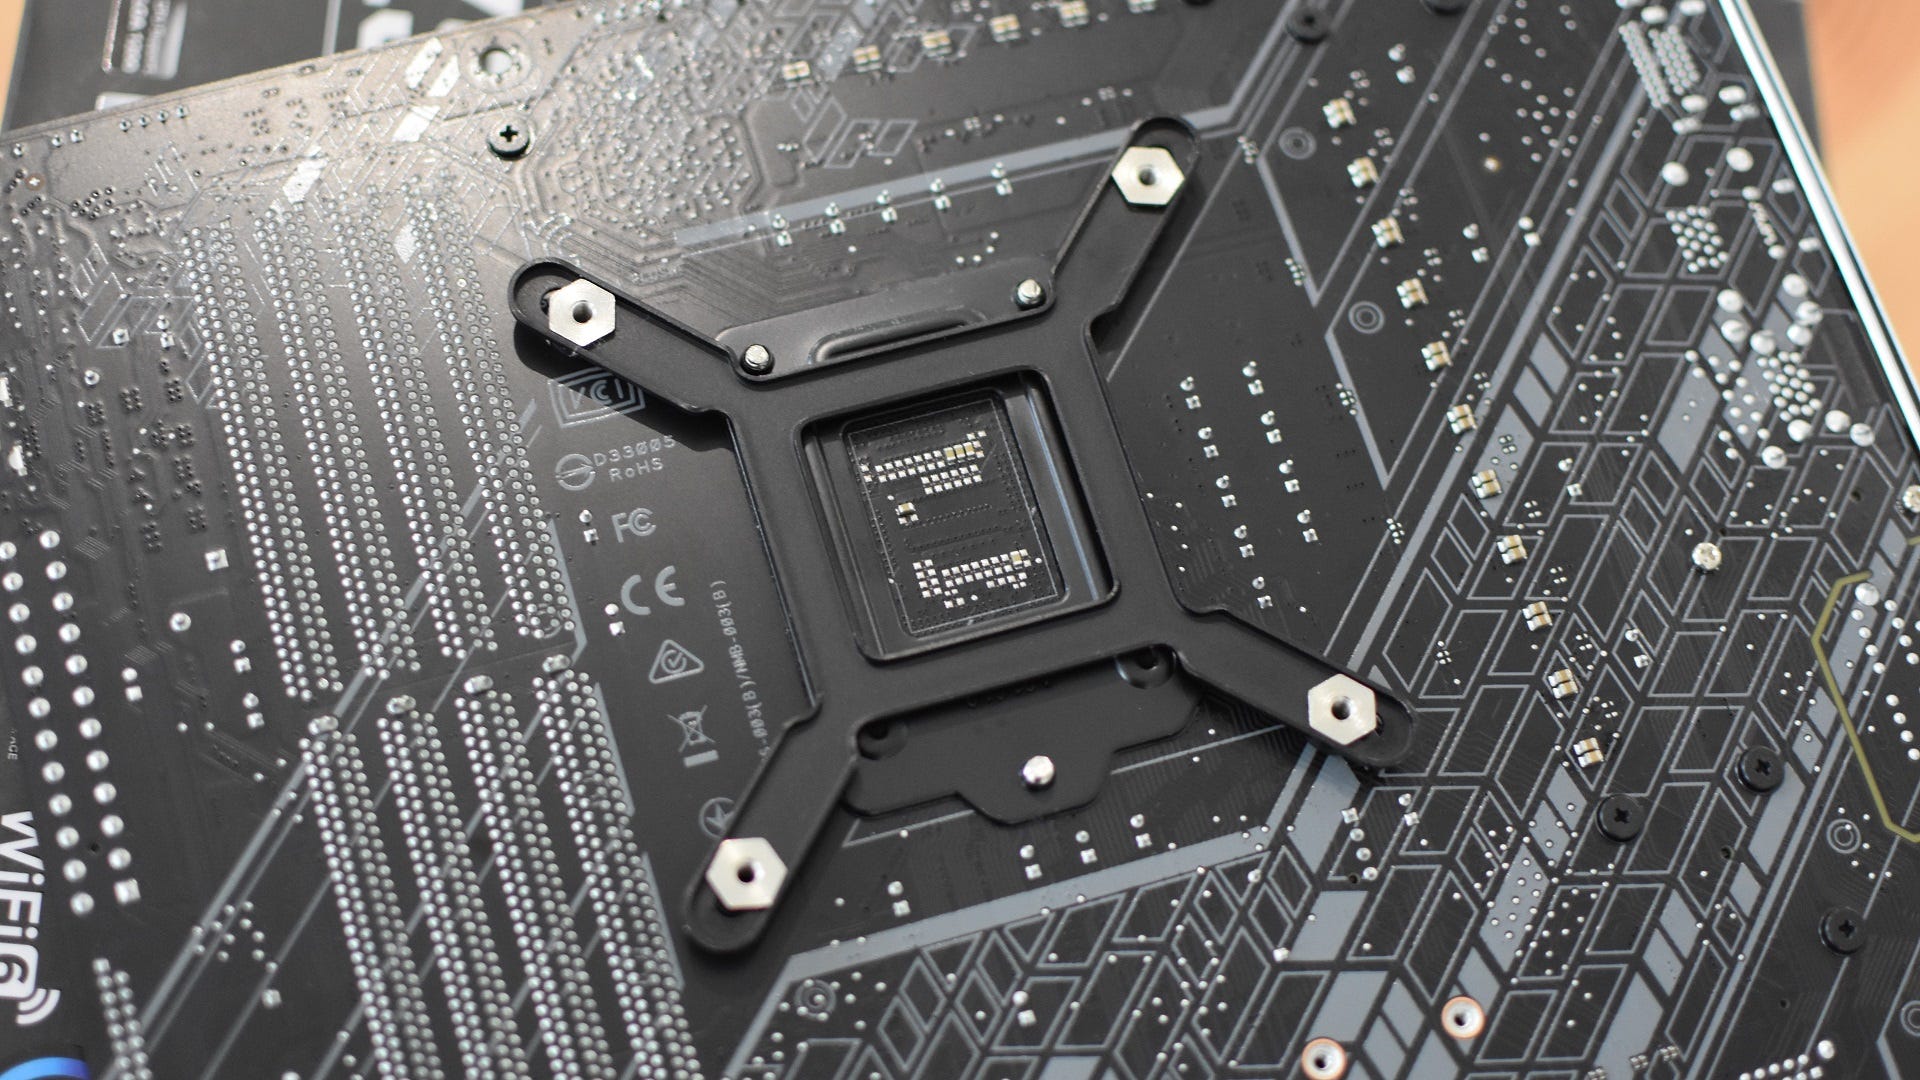
Step 2: Assemble the air cooler’s backplate; this is what the main cooler will hold onto once it’s installed. The backplate will likely need to be adjusted according to the motherboard socket type, but you should end up with four screws (or raised screw holes) that align with the four pre-cut holes around the motherboard socket. Press the backplate against the rear of the socket so that its protusions end up poking through to the other side, then lay the motherboard flat.
Step 3: It’s time to apply thermal paste to the CPU, but what’s the best way of actually doing so? Some say you should drop a dollop on the chip than use a piece of card or plastic to spread it over the CPU, like butter on toast. Others say to draw an X pattern with two thin lines of paste. I think, to get a consistent, fool-proof layer, you should squeeze a blob onto the chip (see above for how big this should be, per your CPU) and use the weight of the cooler itself to spread the paste nice and evenly. For now, just add that blob onto the middle of your processor.
If your cooler has thermal paste pre-applied, I’d go as far as to say to wipe it off with a paper towel and apply it manually. Pre-applied patches rarely cover the whole CPU, and total coverage is ideal.
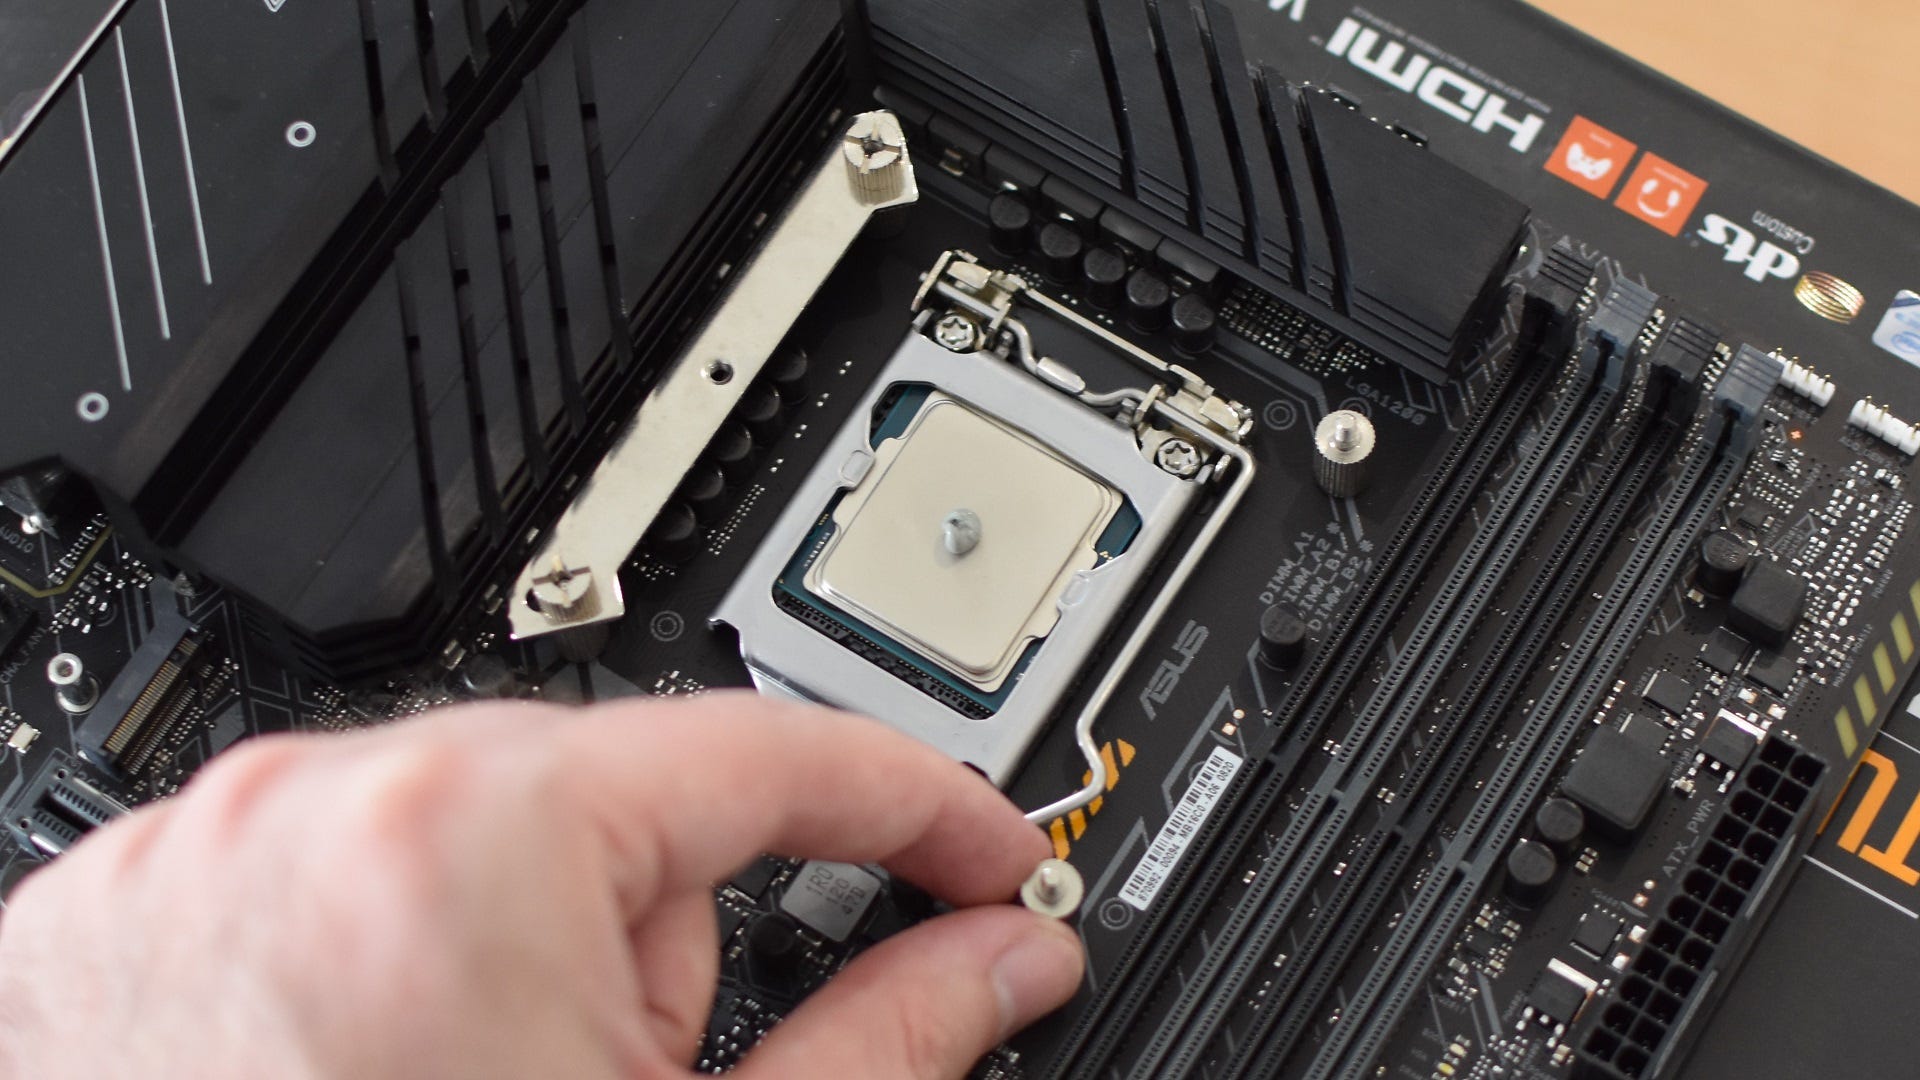
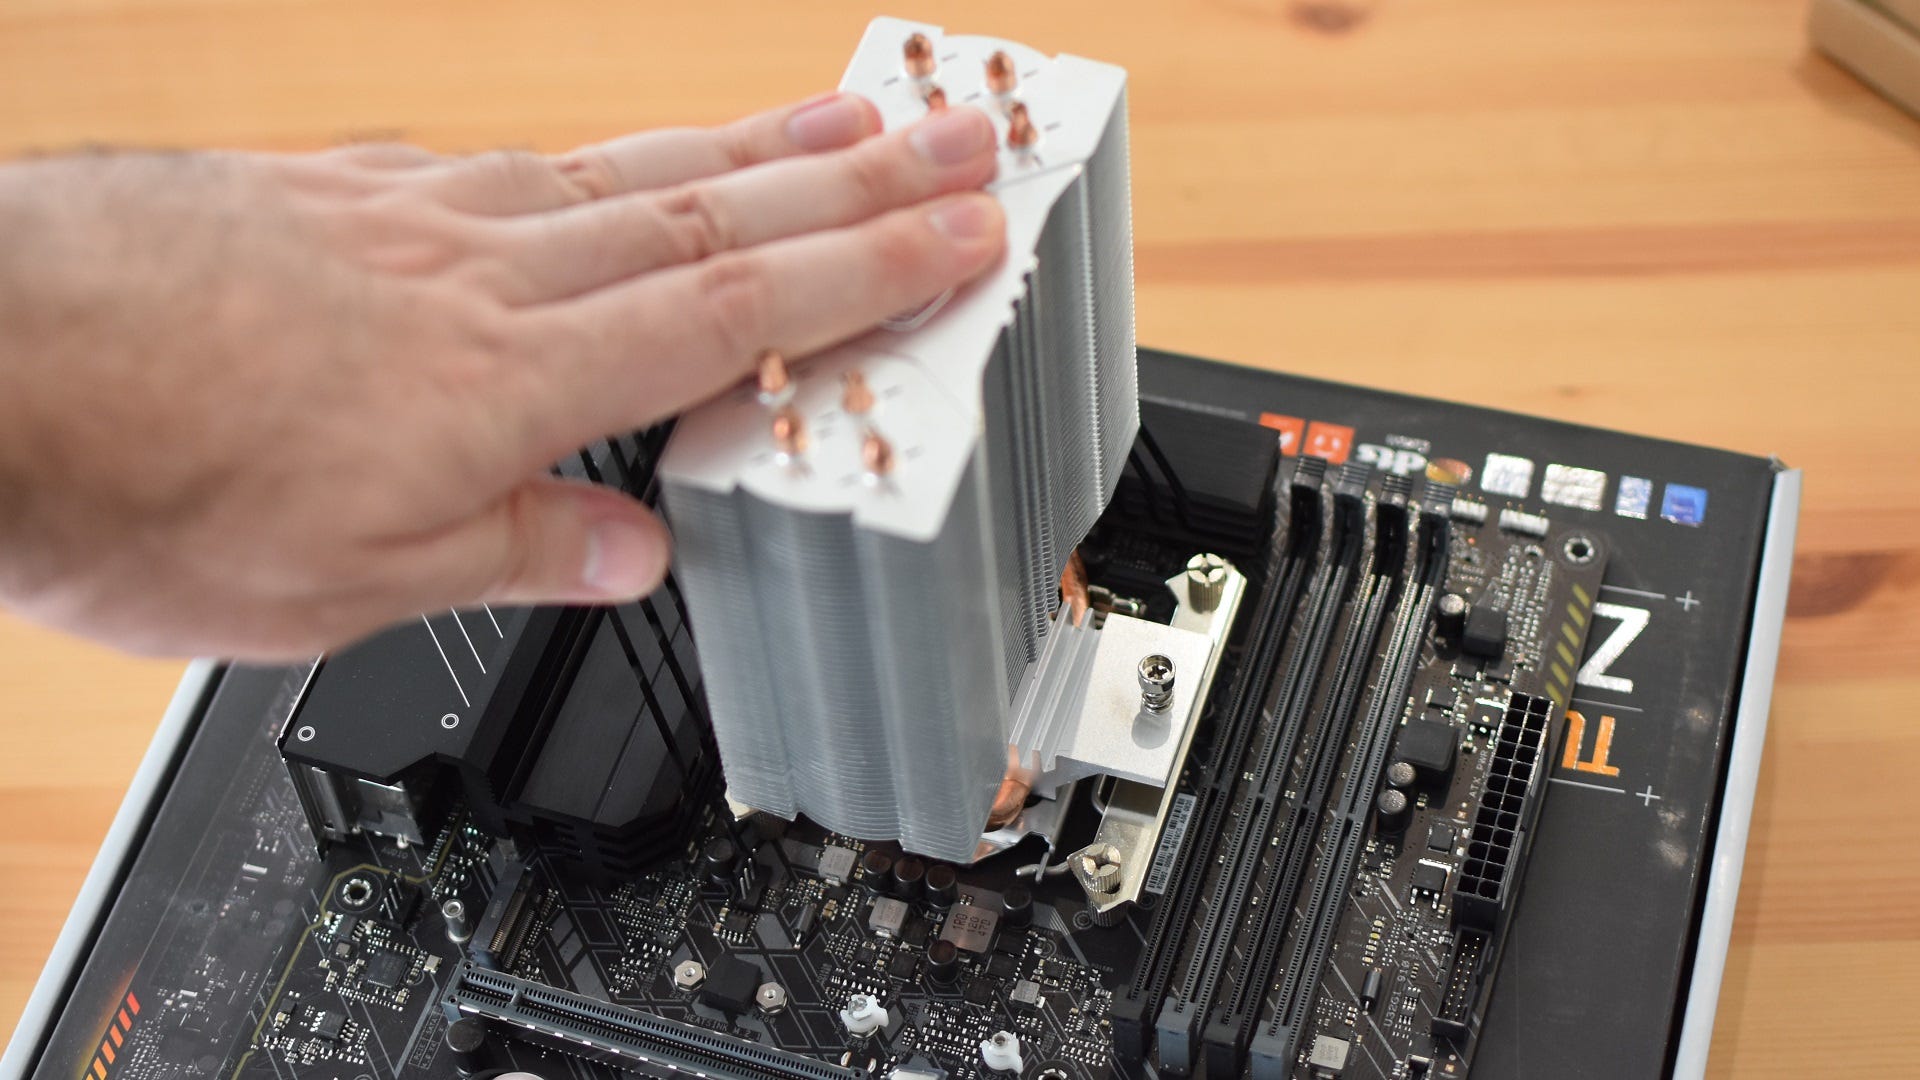
Step 4: Here’s where the installation process really diverges, depending on the cooler. Some coolers have four spring screws that go directly into the screw holes on the backplate; others may have metal loops that hook onto the aforementioned retention clips. For both of these types, just line them up, carefully push down on the cooler so that it spreads the thermal paste out from the centre, then secure it to the respective mounting mechanism. If your cooler has the four screws, turn them only partially, one at a time, repeating until they’re all fully tight – this makes sure pressure is applied to the thermal paste more evenly.
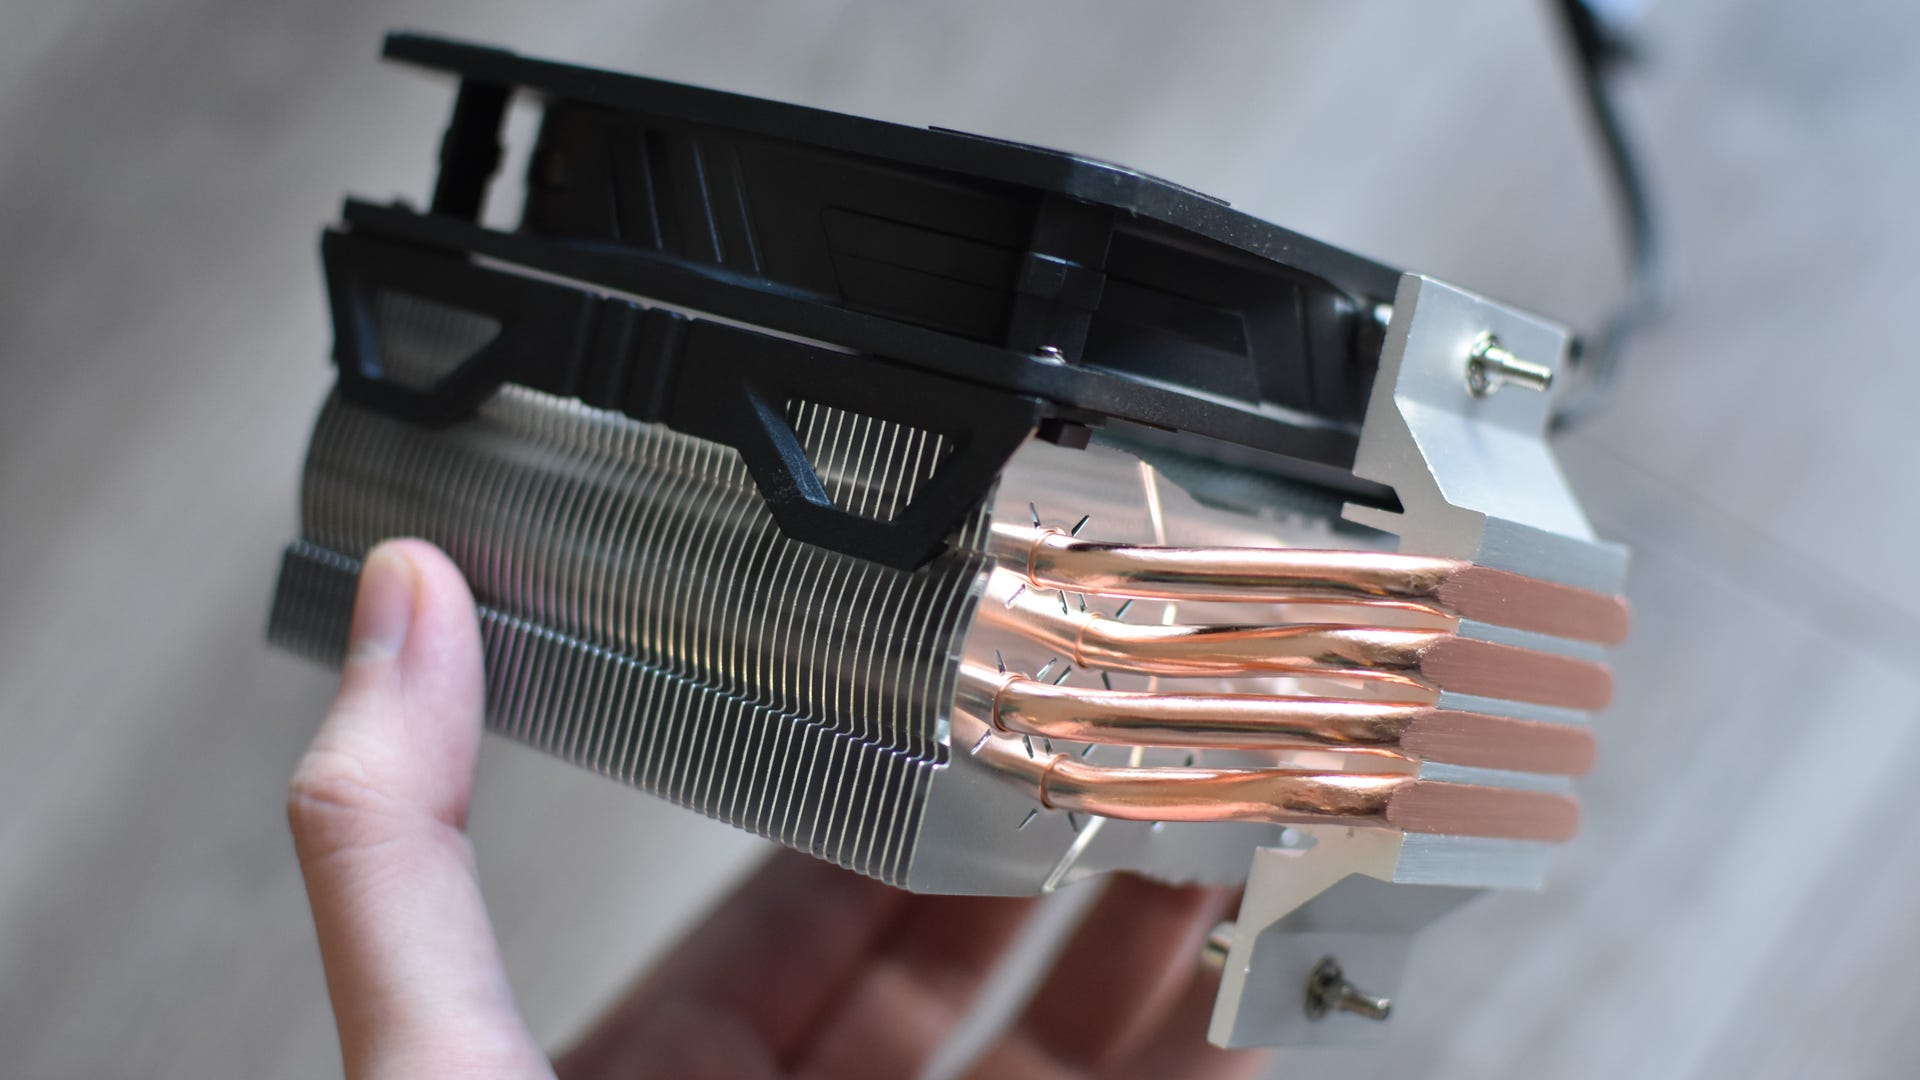
For other coolers, you may need to screw a set of standoffs onto the backplate’s protusions first, as shown in these pictures, then possibly install a pair of mounting risers on top of those. Just follow the manual if you’re not sure, but eventually you should have a means to affix the cooler to the motherboard. Again, bring it down level onto the thermal paste, and tighten any fastening screws at an even rate. If you find the cooler’s fan is in the way of any screws, you should be able to unclip it from the radiator, to clip back on later once you’re done. Remember to keep the fan oriented so that it blows towards the left side of the motherboard – this will help make sure the hot air wafts towards the rear of your eventual PC, where it can be pumped out by an exhaust fan.
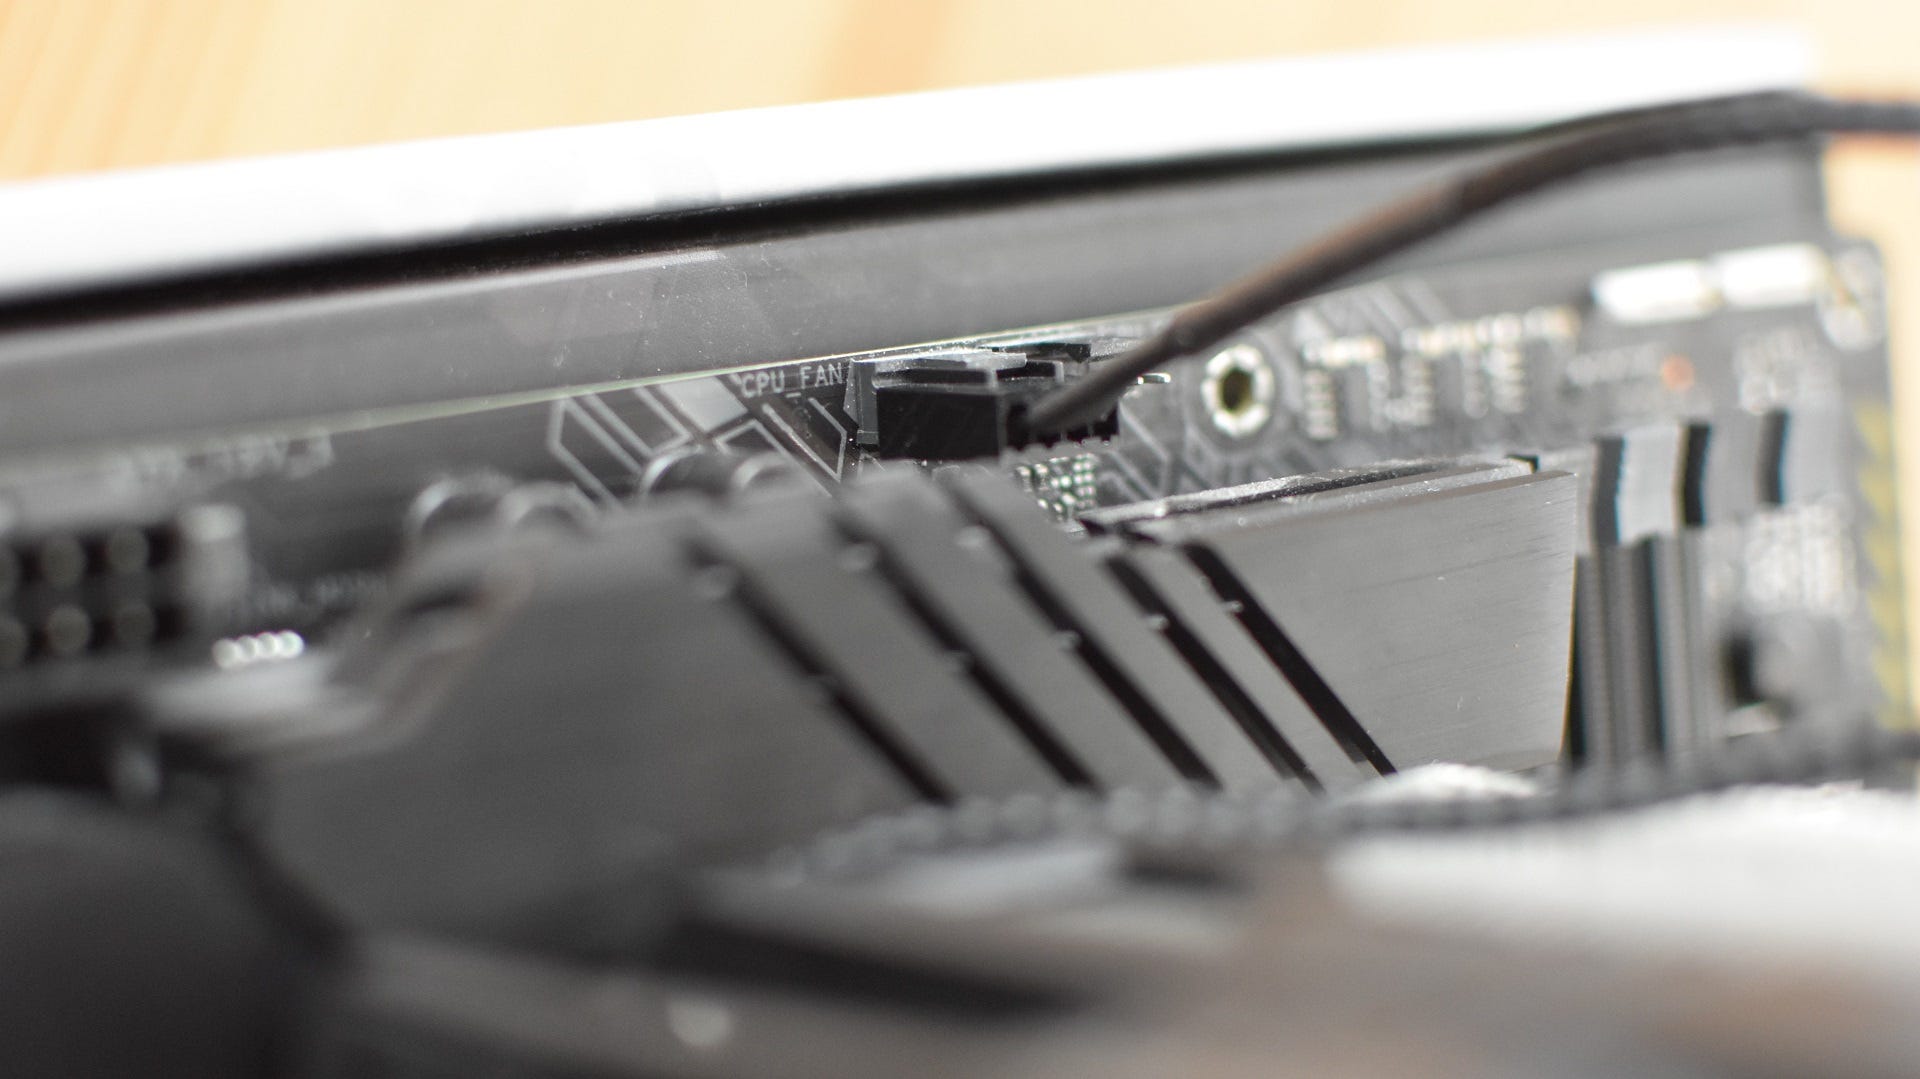
Step 5: By this point you should have a fully mounted CPU cooler with, presumably, a suitably spread-out layer of paste between it and the CPU. All that’s left to do is connect the fan to the motherboard, so grab the fan’s cable and plug it into the 4-pin CPU_FAN header on the mobo. This is usually found along the board's top edge, or next to the CPU socket further down.
How to install a CPU liquid cooler
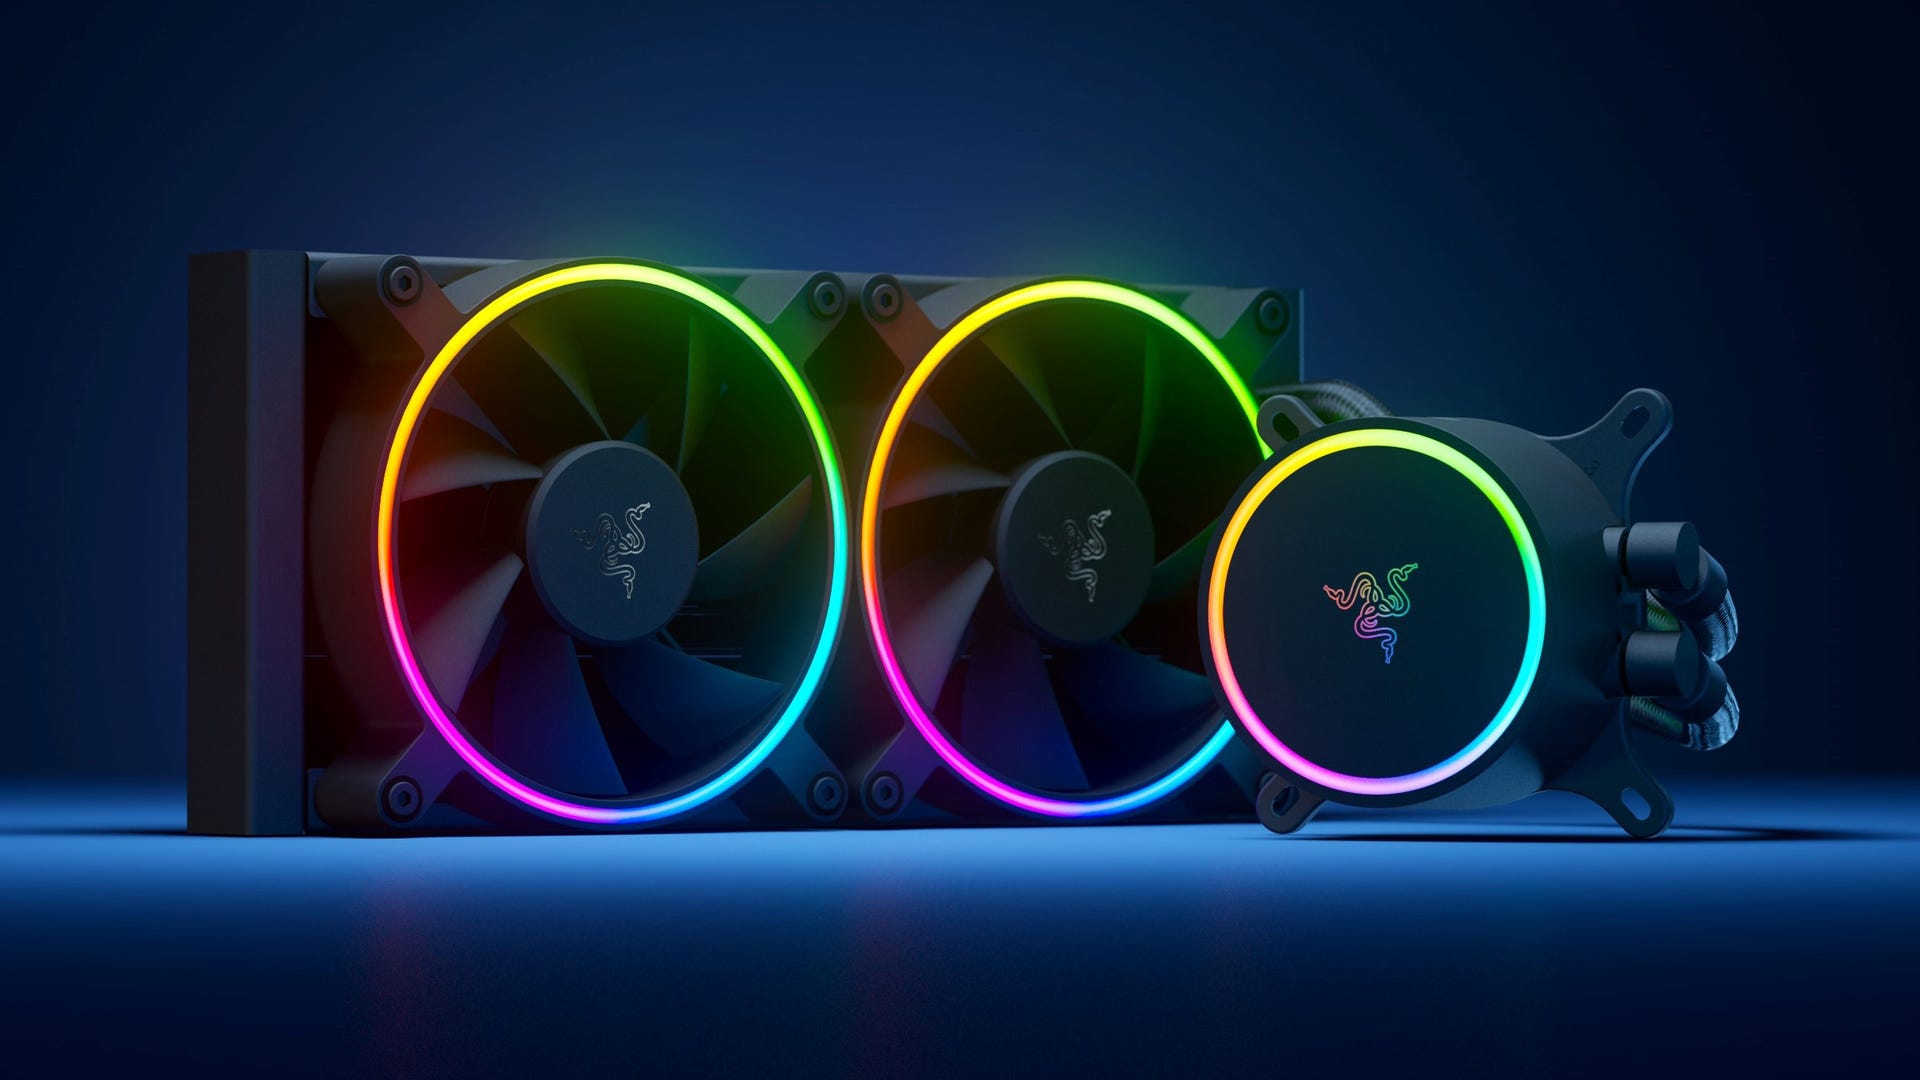
Liquid coolers (also called watercoolers) are a high-performing yet relatively convenient middle ground between simple air coolers and complex open-loop cooling setups. There are no pipes to hand-cut here, nor coolant reservoirs to find room for: just a pump, connected by two flexible tubes to a radiator, and one to three fans.
Nevertheless, installing an AIO liquid cooler is still somewhat more involved than mounting an air cooler. In fact, you should probably keep this tab open, because the whole setup process takes place both before and after you install the motherboard inside your PC case.
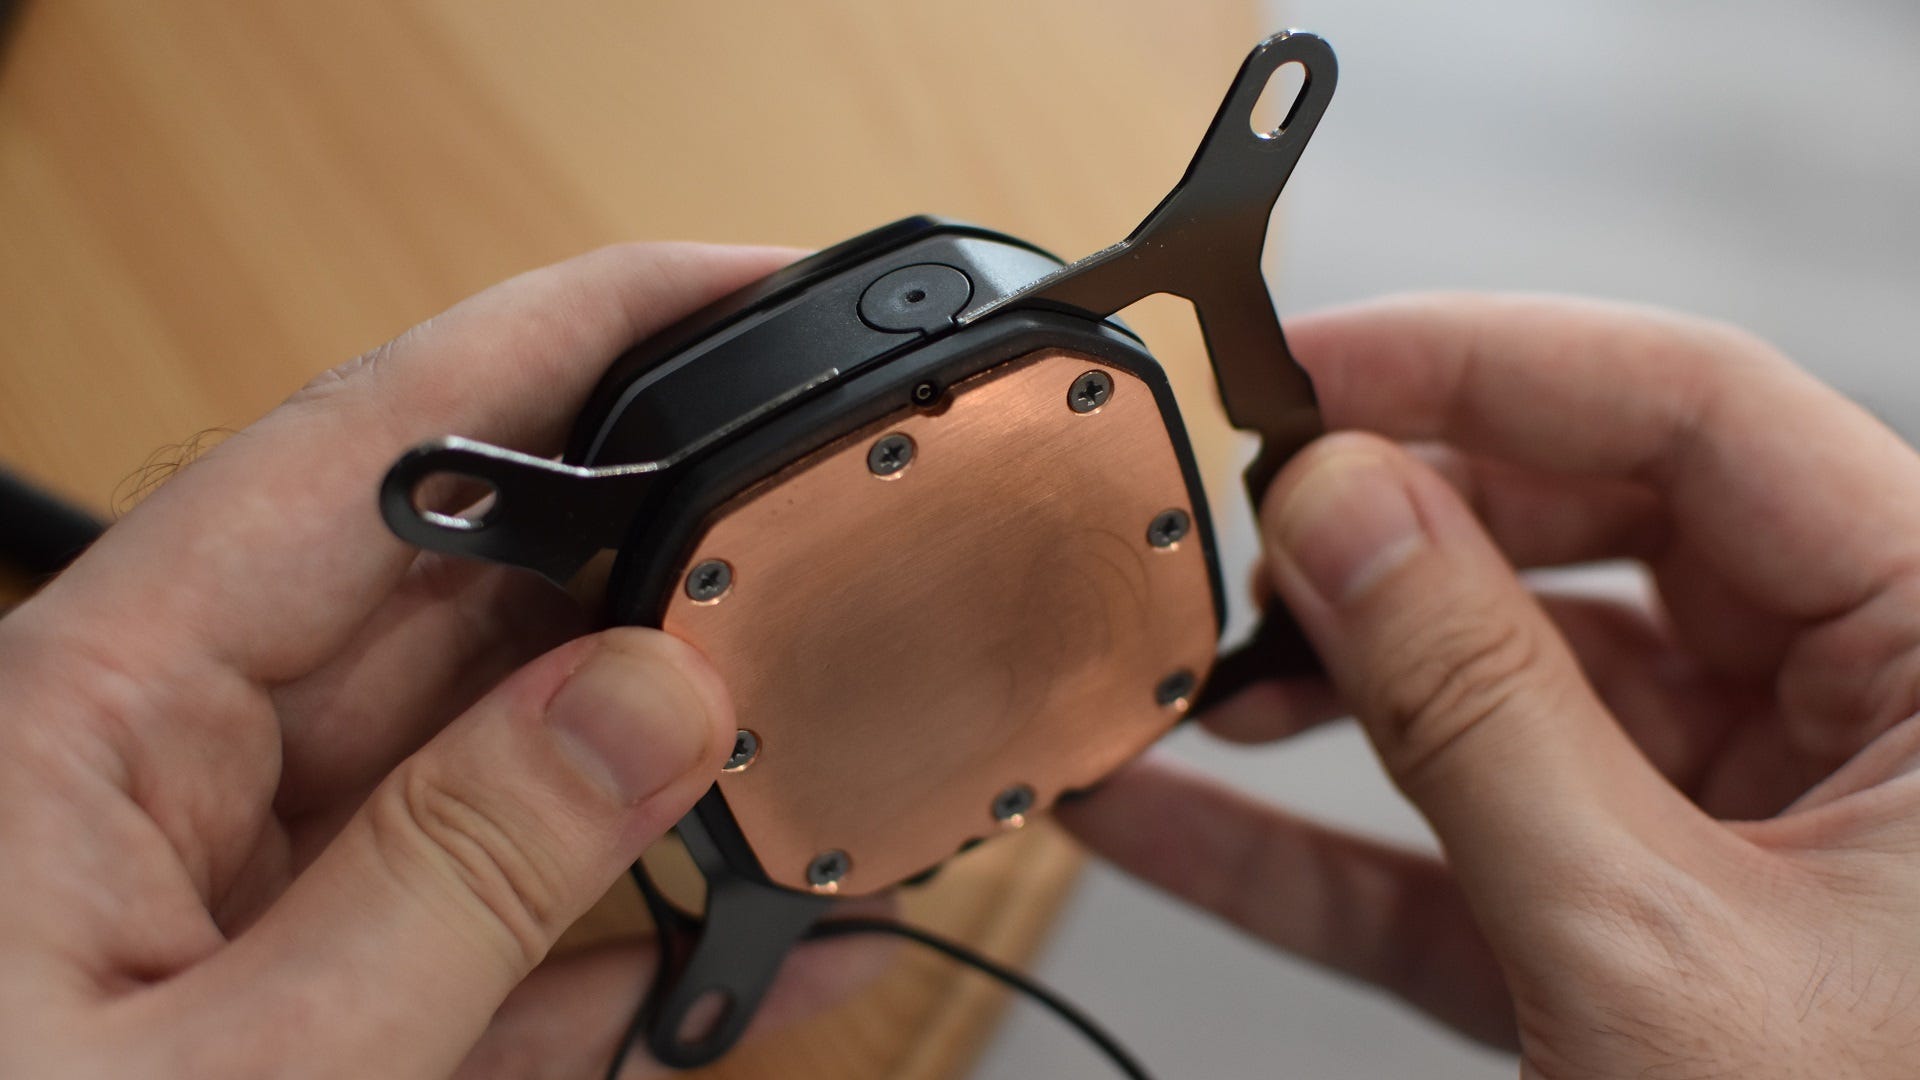
Step 1: Check whether your cooler uses a backplate to mount the pump, or if it’s for an AMD socket, whether it uses the motherboard’s retention clips. If it uses a backplate, assemble it per the included instructions, and remove the retention clips with a screwdriver. Intel motherboards don’t have these clips, so just assemble the backplate if you’re doing an Intel-based build.
Remember: the screw holes on the corners of the backplate should line up with the four empty holes on the motherboard, surrounding the CPU socket. Get these aligned, seat the screw receptacles in the mobo holes, avoiding any obvious dirty jokes, and lay the motherboard flat.
Step 2: Fit the included mounting bracket to the cooler’s pump, if the correct one isn’t installed already. You’ll likely have multiple brackets in the box for various Intel and AMD sockets, so find the appropriate one and secure it to the pump. Again, the exact technique for this will vary by model, but you’ll likely need to either twist the bracket into place or – if it’s split into two parts – push them into locking slots on either side of the pump.
Step 3: Apply your thermal paste. Similarly to air coolers, I’d argue the best way of doing this is to squeeze a pea to slightly-bigger-than-a-pea sized blob in the middle of the CPU, so when you secure the pump in place, it smushes the paste evenly over the top of the chip.
Step 4: Coolers that use AMD’s retention clip system can, at this point, latch onto those clips immediately, with just a thumbscrews needing tightening to get the pump fully secured in place.
Other coolers will need a touch more assembly of the mounting system, usually involving four standoffs attaching to the backplate. Specifically, the bits poking through those four holes. From here you fit the pump over the CPU with thumbscrews, or install a set of risers and screw the pump onto that instead. Either way, make sure to keep the pump level when you’re pressing it down onto the thermal paste, and tighten any screws gradually so that you’re applying even pressure underneath. If you fully tighten a screw in one corner and leave the opposite corner completely loose, the paste won’t spread as well as it could, and that’s poor paste practice.

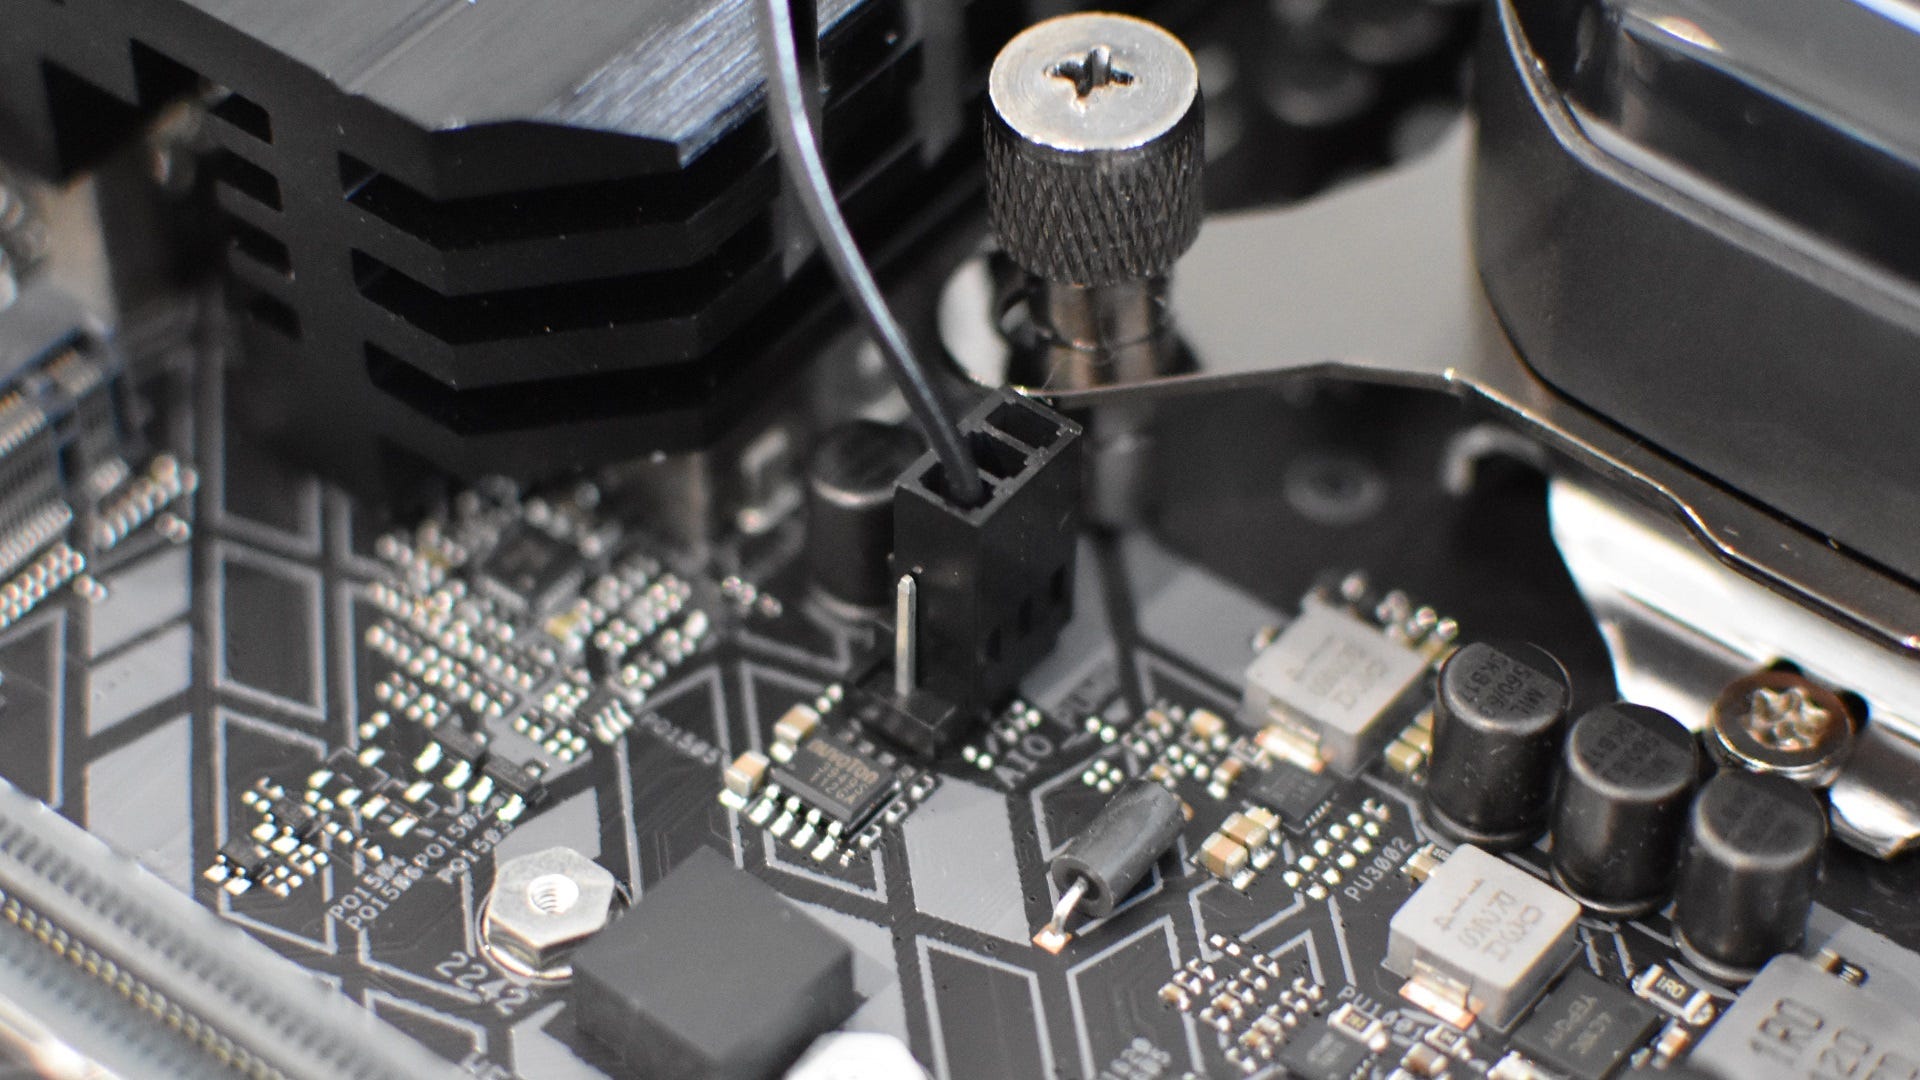
Step 5: There should be a 3-pin cable coming out of the pump; grab this and connect it to the CPU_OPT header on your motherboard, or if it has one, the AIO_PUMP head instead. Don’t worry about plugging a 3-pin connector into a 4-pin header; the latter will have plastic fins showing you which three of the four pins to connect to.
Now, here’s where you can put the cooler installation on hold for a while. You should have the pump securely attached to the CPU and motherboard – nice one, if so – but the radiator and fans will still be loose. We want to attach these to both each other and the PC case, but it makes more sense to do that once the motherboard is inside the case as well. And we don’t want that just yet, as we can still do some component installations on the board outside the case, like installing the RAM. So, leave this page open, and see you momentarily…
Step 6: Hello again. By now your motherboard and PSU should both be installed in your case, meaning everything is in place to continue installing your liquid cooler. The first order of business is marrying the chassis with both the fan(s) and the radiator.
How you go about this will depend on where exactly in the case you’re mounting everything. Keep in mind, the fans need to cool the radiator by either blowing cold air onto it, or blowing heat away from it like an exhaust. Therefore, if you want to fit them near the front of the case, where cold air will be rushing in, you’ll want position the fans between the chassis and the radiator, oriented to suck air from the front and blow it backwards across the fan. If you’re positioning the radiator near the back of the case, it’s better to position the radiator between the fans and the case. This will ensure the fans push hot air from the radiator out of the case’s vents. Not sure which direction the fans will push/pull air? Look on their sides for a little arrow, which indicates airflow direction.
It's sometimes a little easier to install AIO coolers with the fans acting as exhausts, as you can use the included long screws to secure the fans onto the radiator while they’re both outside the case. Then, move the radiator into its mounting position on the case, and use the smaller screws and washers to secure it to the case.
If you’re using the fans as intakes, you’ll need to use the long screws to secure the fans and the radiator to the chassis all at the same time. Make sure all screw holes are aligned first, then use one hand to hold the radiator, fans and case together – like an unappetizing metal and plastic sandwich. Then, with you other hand, thread the first screw through the chassis, through the fan, and into the radiator. Tighten it up with a screwdriver and you’ll have a much easier time with the rest of the screws.
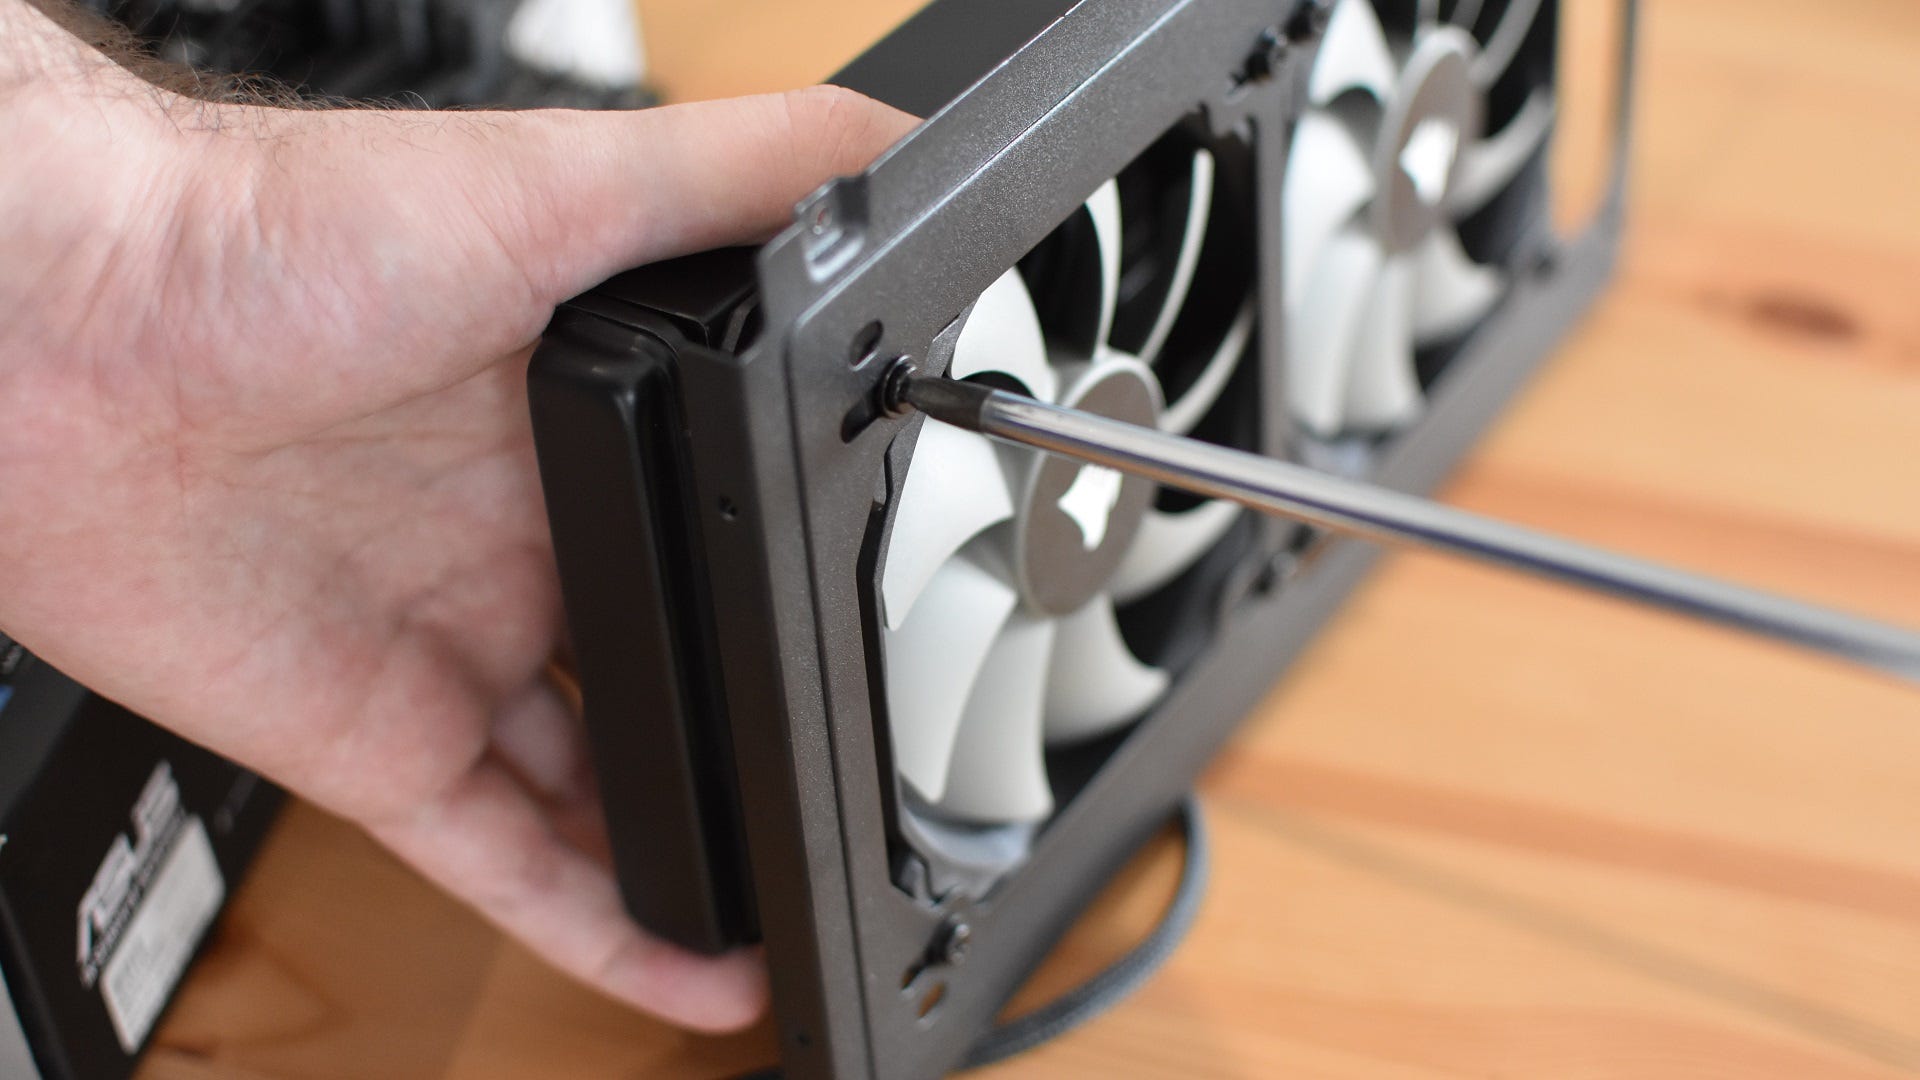
If you’re lucky, your case might have detachable fan/radiator mounting brackets, like the one in the photo above. These aren’t necessary (obviously, given how I’ve just described how to install an AIO cooler without them) but the fact that they let you do the more difficult screwdriver work outside the case, before reattaching everything at once with just one or two thumbscrews, is a definite bonus.
Step 7: I know that was a long step, but we’re almost done. You just need to connect the cooler’s remaining cables, chiefly the fan connector(s). At least one of these should always go into the CPU_FAN header on the motherboard, and if you have multiple fans, it’s best if you can use a splitter to connect them all to this same header. If your cooler didn’t include a splitter, the SYS_FAN headers will work as well, though CPU_FAN will always need an active connection for your PC to boot.
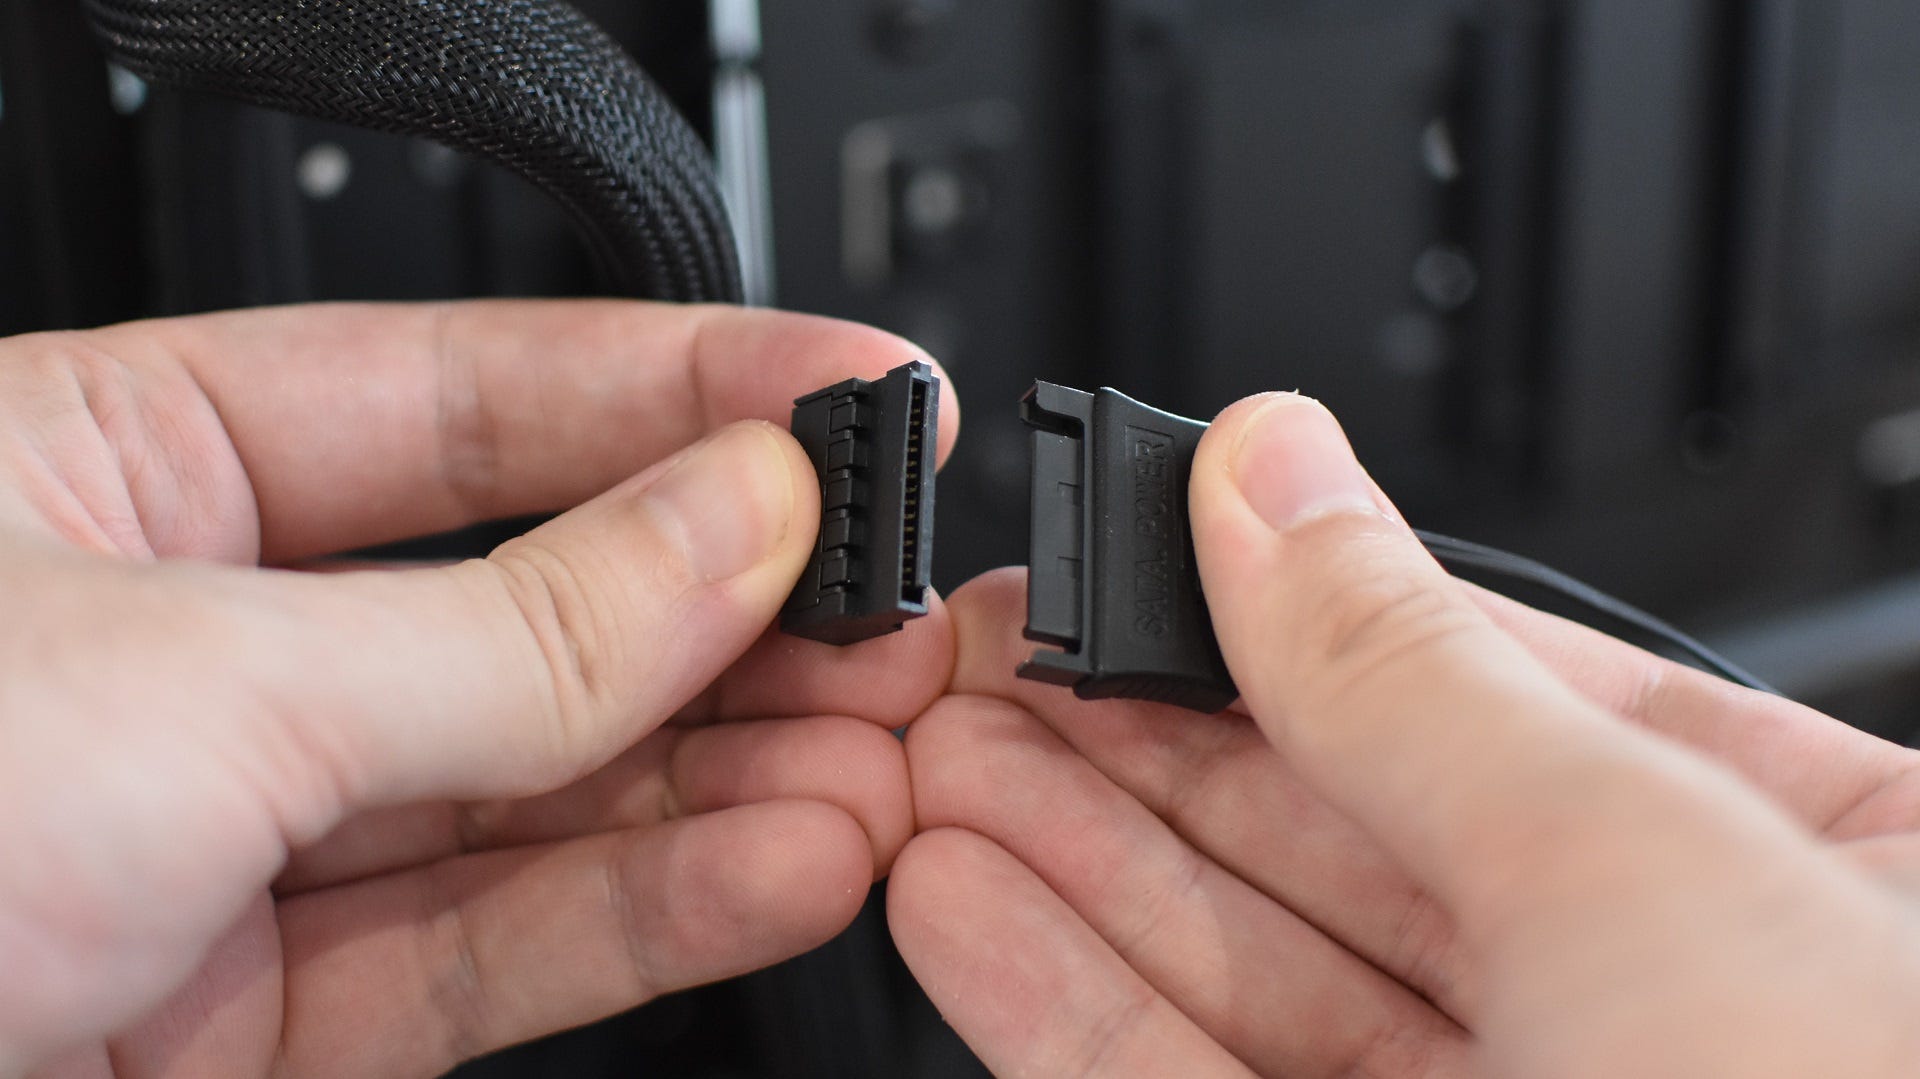
Many AIO liquid coolers also have a few other cables, to enable features like RGB lighting or customizable pump displays. Go through these one by one and make sure they’re all connected, safe in the knowledge that it’s practically impossible to connect them to the wrong socket: SATA power cables, for instance, can only connect to the SATA power connectors of the PSU. Some coolers may also need to connect to a USB2 header on the motherboard (these headers are usually along the bottom edge of the board), or to 12V/5V RGB headers (bottom edge or right edge, usually).
A quick guide to CPU temperature monitors
Assuming you followed this guide – and feel free to imagine me looming over you like an embittered headmaster upon you reading that – there should be no reason for your processor to run at anything other than healthy temperatures.
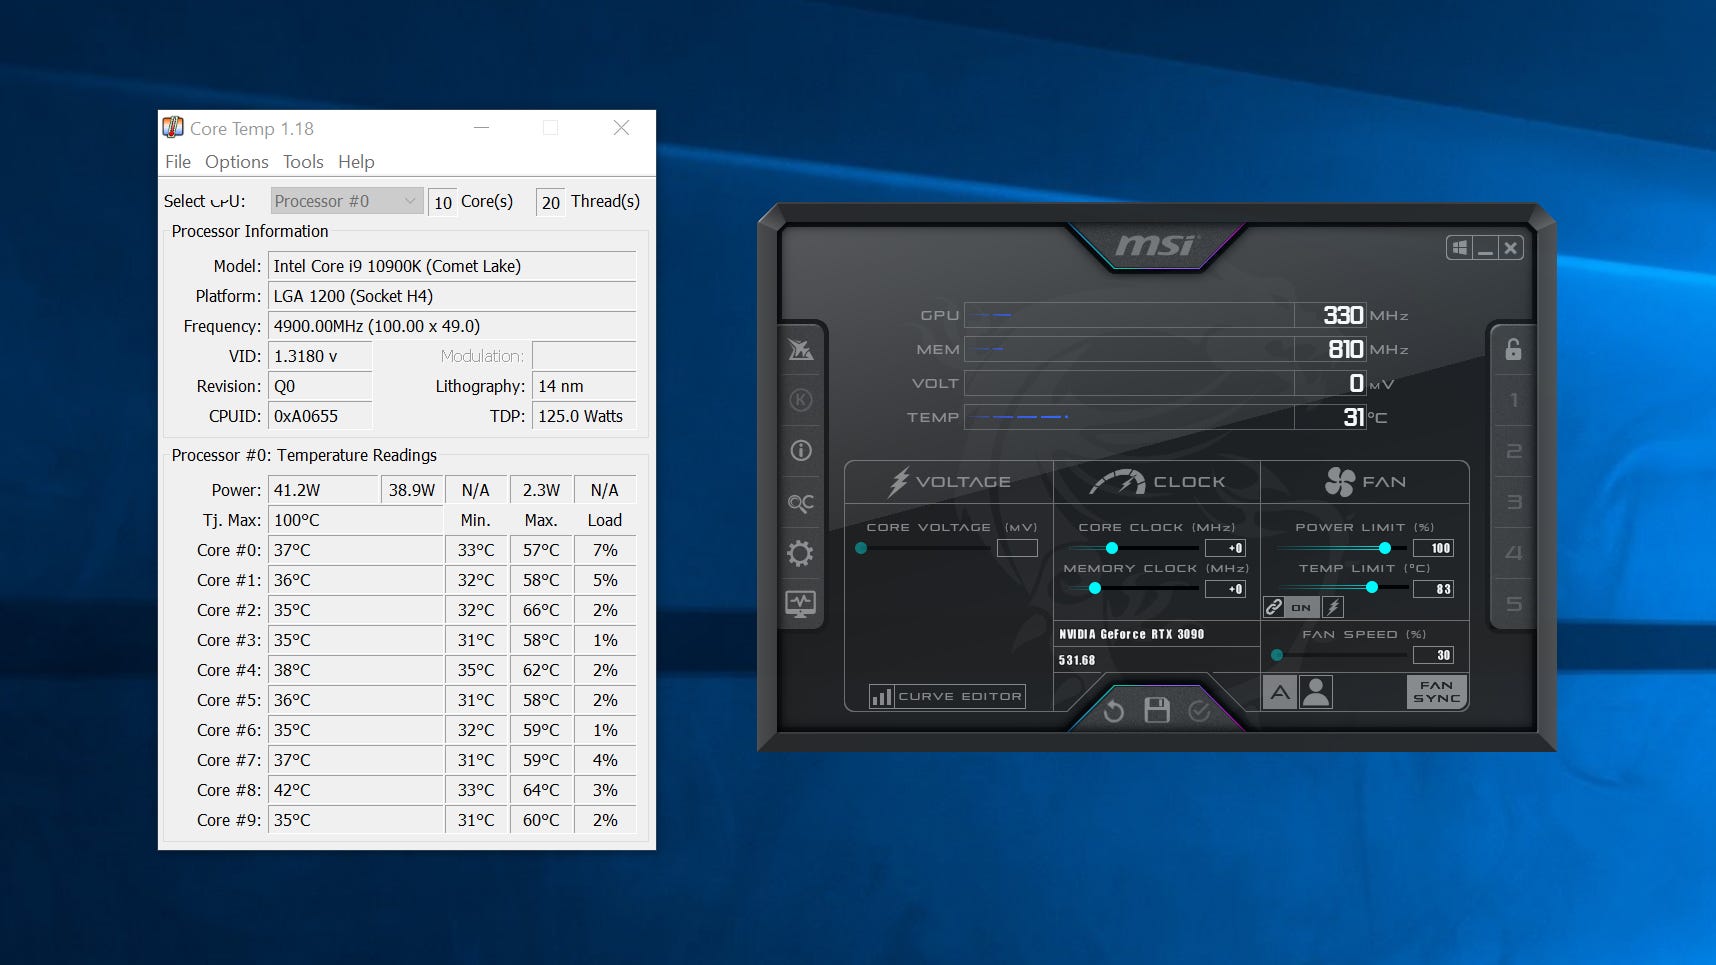
If you just want to check your CPU temps, though, there are a few different monitoring tools you can install once your finished PC is up and running. Core Temp, for example, is a convenient, simple, lightweight monitor that shows the current temperatures of every individual CPU core at once.
For more detailed, wider-ranging insight into your PC parts, HWMonitor is a good alternative. It’s a one-stop shop for all the monitoring data a budding PC nerd could want: not just CPU core temperatures, but voltages, current clock speeds, fan speeds, SSD temperatures, graphics cards temperatures and power usage, and much more besides. It’s especially useful if you ever decide to get into manual overclocking.
These two are mainly for desktop usage, so for keeping an eye on temperatures while you’re running games, try MSI Afterburner. It takes a little manual setup, but CPU temperature is one of many metrics you can set to display on an in-game overlay. Afterburner is stuffed with other useful gubbins, like overclocking tools and a benchmarking feature, so is nice to have in any event – though its future, in terms of continuing updates, is uncertain.