Skip to Content

13 Best Yoga Stretches to Do Every Day to Ease Stiffness and Pain

These poses will open up your whole body, increase blood flow, and make you feel stronger in no time.
By
preview for The Best Stretches for Pain Relief

For many, yoga is a path to physical health. A solid, consistent practice can improve your strength, flexibility, coordination—and even your mental well-being. While all of these benefits are appealing, it can be difficult to know how to start your own practice. This is especially true if you're not comfortable going to a studio—and suffer from back pain and stiffness.

The image of yoga on social media can also be daunting. Some of the most popular yoga ambassadors are praised for doing acrobatic stunts and complicated stretches (which is awesome for them!). But because of that, sometimes people assume yoga is only for those who are super athletic or flexible—or who are of a certain body shape.

Know that yoga can be done by anybody given the proper modifications. And it can also be practiced in the comfort of your own home. If you're experiencing pain or stiffness, know that yoga is for you, too—and it can even help you find relief. A study published in Annals of Internal Medicine found that yoga designed for back pain can be as effective as relieving pain as physical therapy. The American Osteopathic Association says that a regular yoga practice can increase flexibility, improve energy, and help you stay protected from future injury.

So, there's never been a better time to start stretching. The poses below are some of the most common positions you'll find in yoga flows, whether you're in a class or at home. Get familiar with these essential moves (along with their modifications) so when you do hop into a flow, you can be confident that you're going to feel your best.

Equipment: See our favorite yoga mats

Hold Time for Each Position: 5–10 breaths

1

Downward Dog

Image no longer available

This pose—one of the most common in yoga—is an excellent morning stretch. You'll open up the shoulders, hamstrings, and calves as well as the arches of your feet. Down dogs also help to strengthen your shoulders and upper back. And by bending so that your heart is over your head, you'll increase blood flow to the brain—a great way to kickstart alertness in the early morning hours.

How to do it: Start in a tabletop position with your hands beneath your shoulders and your knees beneath your hips. Inhale. Exhale and lift your knees off the floor, positioning your hips toward the ceiling. Reach your heels to the floor and straighten out your knees as much as you can without locking them up. Press through your fingertips and keep your head between your arms as you gaze between your calves.

Modifications: If you have difficulty opening your shoulders, raise your hands up on blocks or a chair. And, if your hamstrings are tight, keep your knees bent as you send your hips up to the sky.

RELATED: 20 Best Yoga Pants and Leggings With Pockets

2

Child's Pose

Image no longer available

This restorative yoga pose is a great shoulder opener and can be used to rest in between more difficult positions. Come back to it any time—but don’t idle. You want to feel like you're reaching out toward the opposite end of the room for maximum benefits.

How to do it: Start in a tabletop position. Touch your big toes together. Then sit back on your heels and put your torso on your thighs. Place your arms straight in front of you with your palms facing the floor. This will help open up your hips.

Modifications: If it’s painful for you to sit over your heels, fold a blanket or towel and place it in between the back of your thighs and calves. To open up your lower back, you can bring the knees together and place your forehead on the tips of your knees as your hands extend back towards your feet.

3

High Lunge and Warrior I

Image no longer available

If you want flexible hips and strong legs, lunge positions are where it’s at. High lunge and Warrior 1 are especially good for opening the front of the hip flexors as well as the shoulders.

How to do it: Start by standing over the long side of your mat. Rotate your hips and torso toward your right foot. Inhale. Exhale and bend your right knee so that it stacks over your right ankle. Keep your left leg strong as you root down through the outer edges of your left foot. Raise your arms overhead. Be careful not to overarch your back—keep a slight tuck of the tailbone. Repeat on the other side. For Warrior I, the position is the same except your back foot is planted on the floor, nearly parallel to the front of your mat. This creates more external rotation in the hips.

Modifications: If you’re having trouble getting your front knee to a 90-degree angle, put your hands on your hips. This helps you to focus on the power of your legs. If your front leg is fatigued, bend your left knee and bring your left leg to the floor. From here you can even bring your hands to the floor to lessen to the intensity.

Advertisement - Continue Reading Below
4

Triangle Pose

Image no longer available

This standing pose stretches your hips, hamstrings, calves, chest, shoulders and your spine. It's also great for strengthening your knees, quads, and ankles.

How to do it: Stand over the long side of your mat. Raise your arms parallel to the floor and keep your palms facing down. Face your right foot and angle it to the front of your mat. The left foot should be at a 45-degree angle to the right. Both heels are in line with each other. Take a deep breath in as you face the right leg. Inhale as you hinge forward and reach toward an imaginary wall at the top of your mat. When you can go forward any farther, exhale and extend your torso over your right leg, hinging from the hip joint. Rotate your torso to the left and rest your right hand on your right shin, ankle or the floor on the outside of your right foot. Reach your left arm toward the ceiling and make sure that both shoulders are in one line. Keep your head in a neutral position by softly gazing up at your left hand. Repeat on the other side.

Modifications: Reaching the floor can be really challenging. If you want to challenge your flexibility a bit more but can’t quite touch the ground, use a block.

5

Warrior II

Image no longer available

This pose is known for increasing strength and stamina, particularly in the legs and arms. Fun fact: All of the warrior poses (or Virabhadrasana in Sanskrit) is named after an incarnation of the Hindu deity, Shiva. This incarnation is a warrior who was said to have a thousand heads, a thousand clubs, and was always wearing a tiger’s skin. Embody this fierceness when you enter Warrior II and see how you feel afterward!

How to do it: Stand nice and tall over the long side of your mat. Take up space; your feet should be about 3-4 feet apart. Lift your arms until they are parallel to the floor, palms facing the floor. Turn your right foot to face the front of the mat and angle your left foot 45 degrees. Bend your right knee until it’s directly over your right ankle. Check to see that your right ankle is in line with the arch of your back foot. Try to get your left thigh as parallel to the floor as possible. Hold your gaze over your right hand. Step back and repeat on the other side.

Modifications: If you’re having trouble holding this pose, grab a chair and position it to face the outside of the front knee that you’re going to bend. As you bend the knee, slide the chair beneath your thigh for support.

6

Mountain Pose

Image no longer available

Doing Mountain Pose might feel at first like you’re just standing. But when performed intentionally, it’s a great way to rest between poses and improve your posture. It can even firm up your abs and butt!

How to do it: Stand with your big toes touching and your heels slightly apart. Lift and spread your toes, then place them on the floor. Rock back and forth, then side-to-side. When you’re done exploring your balance, come to a standstill. Contract your thigh muscles and lift your kneecaps. Imagine a line of energy traveling up from your toes to your head. Pinch your shoulder blades together then pull them down. Raise your sternum to the ceiling without raising your lower ribs. Tuck your tailbone slightly under as you pull your belly button in towards your spine. Arms are by your sides with your palms facing the front. Your head should be in line with your spine. Maintain a soft gaze.

Modifications: A great way to check your alignment is to do this pose against the wall. (Just don’t lean the back of your head on the wall. That will compromise your neck position.)

Advertisement - Continue Reading Below
7

Cat/Cow Pose

Image no longer available

Cat/Cows can be a fun way to warm up the spine. These are great to prep for more difficult back bends and to release stress.

How to do it: Start in the tabletop position with your hands beneath your shoulders and your knees beneath you hips. Your spine and head will begin in a neutral position. Inhale. Exhale and enter cat: Round your spine to the ceiling and gently release your head toward the floor. Inhale and enter cow: Lift your chest, head and butt to the ceiling and be careful not to over strain the neck. Instead of holding each pose for 5 to 10 breaths, oscillate between these two positions 5 to 10 times going at your own pace.

Modifications: If you are experiencing wrist pain, you can do these positions from your forearms. For achy knees, a folded pillow can add some cushion. And if your neck is bothering you, keep your neck in a neutral position throughout the movements.

8

Bridge Pose

Image no longer available

Bridges are awesome glute strengtheners and a great way to open up the chest and shoulders. They are a precursor to the wheel pose, which will have you back bending in an upside-down “U."

How to do it: Start by lying on your back with your feet on the ground and knees pointed toward the ceiling. Bring your heels as close to your butt as possible. Inhale. Exhale and squeeze your glutes and lift your hips off of the floor. Keep your knees over your ankles. Clasp your hands beneath you and stay on the tops of your shoulders. Pinch your shoulder blades together and hold as you press your pinkies into the ground.

Modifications: If holding your pelvis up is too hard, place a block beneath your sacrum (lower back) and rest there.

9

Warrior III (with Blocks)

Image no longer available

The last of the three Warriors, this one is especially demanding on balance and coordination. It’s great to strengthen the ankles, legs, and the muscles in the upper back.

How to do it: Stand with a pair of blocks in front of your feet. Inhale. Exhale and reach for the blocks. Inhale and as you exhale, extend your right leg and try to keep your spine and leg in one line. Actively press through the heel. As you feel comfortable you can also raise your arms in front of you until they are in alignment with your right leg. This will strengthen your upper back. Hold. Repeat on the other side.

Modifications: If you are using blocks, make sure they're at a height that allows your legs and back to be in one line. You can also use a wall for assistance to understand where that back leg should end up. Stand in front of the wall about a leg's distance away. When you raise that leg, press the heel into the wall to maintain the balance and alignment.

Advertisement - Continue Reading Below
10

Seated Forward Bend

Image no longer available

Want more flexible hamstrings and a healthy spine? Try forward folds. In this variation you’ll be on the floor, so you won’t get as much of a head rush like you might in a standing version.

How to do it: Sit on your mat with your legs straight in front of you. Keep your hands on the ground by your hips as you actively press your heels forward and descend your thighs into the floor. Take a deep inhale. As you exhale, lean forward from the hip joints. If you can, you can grab your big toes or the outside of your feet. You may also start with your knees bent, and then slowly straighten them once you relax into the posture. Never force your body to go too far. Just observe where your body is at today.

Modifications: For added support in this pose, place a folded blanket under your butt. If your hamstrings are tight, loop a strap around your feet instead of trying to reach for them. If you are really tight, roll up a blanket and place them under your knees.

11

Tree Pose

Image no longer available

This position stretches the groin, thighs, torso, and shoulders. Because you’re standing on one leg, it also challenges your ability to balance. If you’re feeling particularly “unbalanced” in your life, this pose might help you to refocus and center yourself.

How to do it: Begin standing on your mat with your arms by your sides (i.e. Mountain Pose). Shift your weight onto your right foot and lift your left off the ground. Place your left foot against your calf, ankle, or inner right thigh. Avoid placing it directly on the knee. Above or below the joint is fine. Stare at an unmoving point in front of you and bring your arms to a prayer position at the center of your chest. Depending on how flexible you are, you might be able to get to this position without grabbing your foot. Raise your arms overhead if you want an extra balance challenge. Repeat on the other side.

Modification: For many people, the goal of this pose is to be able to bring your foot to the inside of the standing thigh. If that’s a struggle, it’s OK to place that foot on the inside of the standing calf or ankle. You can also rest the toes of the raised foot on the floor for added support. For even more assistance, try doing this position with your back to the wall or try resting one hand on a chair placed by the side of the standing leg.

12

Pigeon Pose

Image no longer available

Pigeon Pose is excellent for increasing hip mobility. This is a particularly good stretch if you find yourself sitting for long periods at a time. Depending on how tight you are, it can feel very intense. Go slowly and explore the position.

How to do it: Start in downward dog. Shoot that right leg back behind you and bring your right knee toward your right wrist (or as far as you can). Rotate your right foot toward your left arm. Rest that right leg on the ground with your shin either perpendicular to the front of the mat (making a 90-degree angle) or pointed more toward your groin (more of a 45-degree angle). Adjust yourself to make sure you’re not putting too much pressure on the right knee. You can keep your hands on the ground by your sides or you can reach ahead of the shin that’s on the ground. To increase the intensity, extend the left leg straight behind you. Gently return to the tabletop position and repeat on the other side.

Modifications: To lessen the intensity of the stretch, move your shin closer to your groin. If your pelvis is far away from the floor, it’s going to be hard to really let go in this stretch. If that’s you, grab a block or a rolled blanket and place it under your pelvis for support. You can also rest your arms on blocks in front of you if you feel like reaching the floor is too much.

Advertisement - Continue Reading Below
13

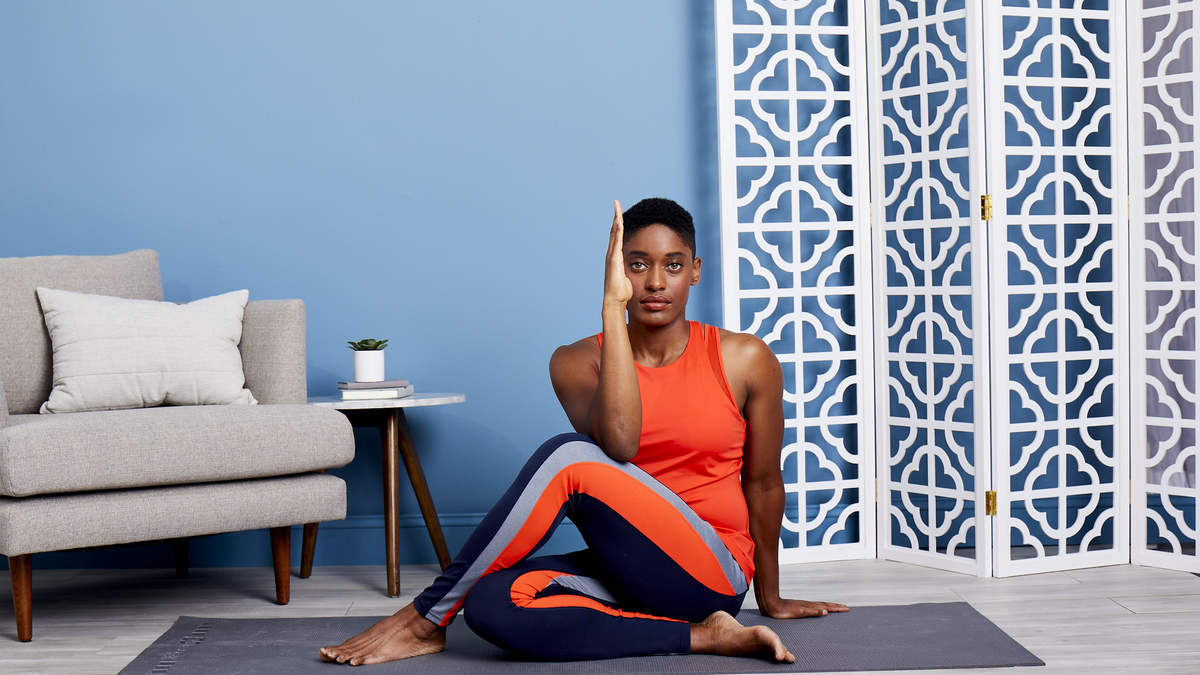
Half Lord of the Fishes

Image no longer available

This regal-sounding pose will have you standing taller and more energized. It’s great for aligning the spine, stretching the shoulders, hips, and neck, as well as stimulating the digestive organs.

How to do it: Start sitting on your mat with your legs straight in front of you. Bend your knees and have your feet flat on the ground. Slip your right foot under your right leg until your left foot meets your right hip. Then place the outside of your left leg on the floor. Take your right foot and place it closer to the outside of your left hip. Your right knee will be pointed towards the ceiling. Inhale. Then as you exhale twist your torso to the inside of your right thigh. Keep your right hand behind your sit bones for support. Place your left arm on the outside of your right leg, just below the knee. Twist your torso to your right thigh as you press your right thigh into your torso. Look over your right shoulder. As you breathe lift the sternum and stay tall in the torso. Try to twist a little bit more every time you exhale. Repeat on the other side.

Modifications: If it’s challenging to get your torso close to the inner thigh, use a wall for assistance. Start with your back facing the wall with about a foot’s distance in between. As you twist, reach back for the wall. Your elbow should be nearly straight (not fully locked out). If you have long arms, move farther away from the wall as to avoid jamming your shoulder. Once you reach the wall, push away from it to deepen the twist. Make sure to keep your torso long and upright.

14

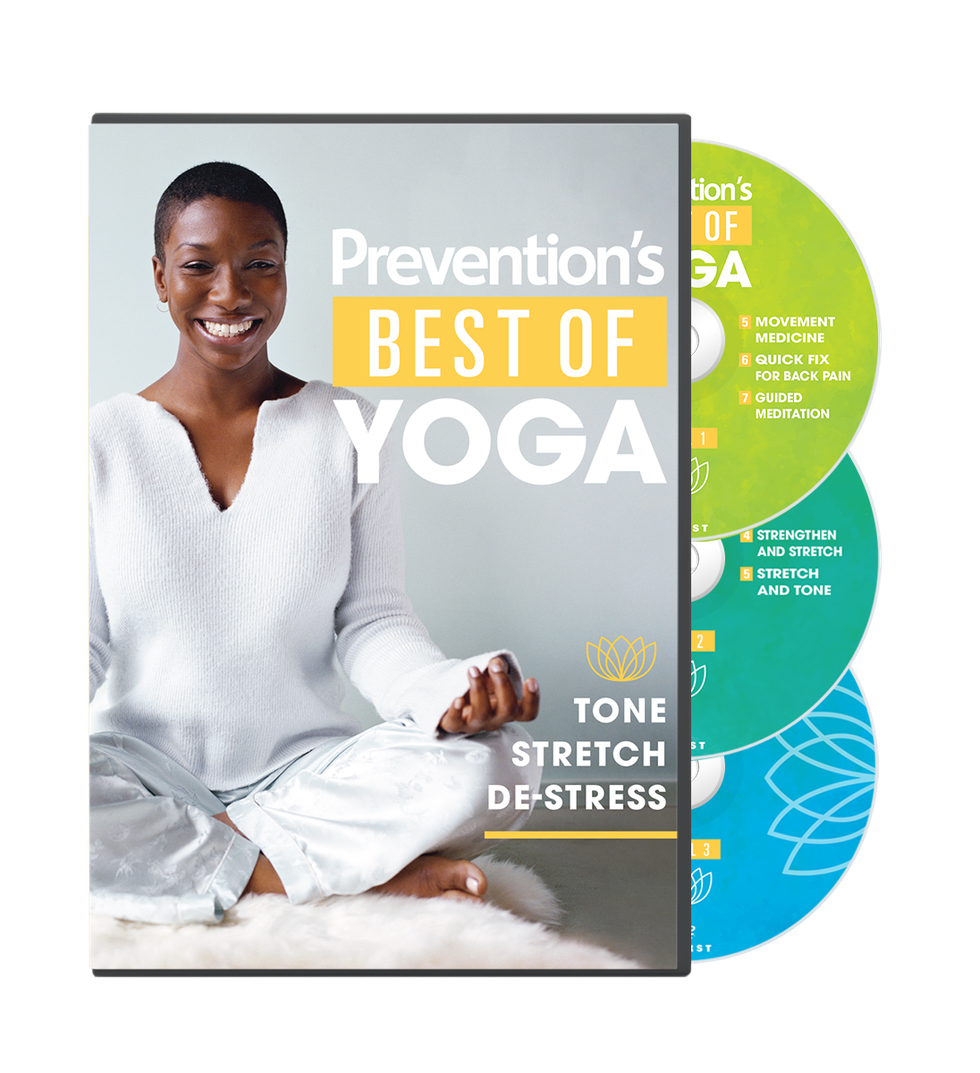
Tone. Stretch. De-Stress.

prevention's best of yoga
.

Prevention's Best of Yoga is our largest collection of yoga routines ever! This 3-disc set features our most popular instructors, guiding you through each move to help you strengthen your body, boost your mood, ease your pain, and more.

Shop Now

Headshot of Adele Jackson-Gibson
Adele Jackson-Gibson
Senior Editor

Adele Jackson-Gibson is a certified fitness coach, model, and writer. She earned her master's in Journalism from NYU, her bachelor's in Literature from Yale University, and has since written for various sports, fitness, beauty, and culture outlets. 
Advertisement - Continue Reading Below

Workouts

denise austin skechers' 9th annual pier to pier friendship walk

Denise Austin Shares ‘Mini Squat’ Workout

denise austin at 2022 espys arrivals in pink dress

Denise Austin Shares 3 Moves You Can Do ‘Anytime’
denise austin skechers' 9th annual pier to pier friendship walk

Denise Austin Demonstrates ‘Lower Belly’ Move

denise austin 2022 espys arrivals

Denise Austin Shares Tips for ‘Strong’ Legs

Advertisement - Continue Reading Below