
Related Manuals for Brocade Communications Systems NetIron MLXe Series


Summary of Contents for Brocade Communications Systems NetIron MLXe Series
- Page 1 HARDWARE INSTALLATION GUIDE Brocade NetIron MLXe Series Hardware Installation Guide 53-1004203-04 22 September 2017...
- Page 2 United States government. The authors and Brocade Communications Systems, Inc. assume no liability or responsibility to any person or entity with respect to the accuracy of this document or any loss, cost, liability, or damages arising from the information contained herein or the computer programs that accompany it.
-
Page 3: Table Of Contents
Pre-Installation notice for the Brocade MLXe chassis bundles............................87 Installation precautions............................................87 General precautions............................................88 Power precautions............................................88 Lifting precautions............................................90 Installing 2x100GbE CFP2 interface modules in Brocade MLXe Series routers.......................90 Installation considerations for 2x100GbE interface module............................90 Installing 2x100GbE CFP2 interface modules................................90 Brocade NetIron MLXe Series Hardware Installation Guide 53-1004203-04... - Page 4 Connecting DC power..........................................168 Removing Brocade MLXe Series-32 router DC power supplies...........................170 Final steps..............................................171 Attaching a management station........................................171 Attaching a PC or terminal to the console port or Ethernet port..........................171 Activating the power source..........................................172 Brocade NetIron MLXe Series Hardware Installation Guide 53-1004203-04...
- Page 5 Displaying device status and temperature readings..............................204 Displaying the Syslog configuration and static and dynamic buffers........................206 Router Headless State by MP Presence from LP ............................... 208 Rolling Reboot..............................................209 Line Module Configuration Deletion in Interactive Boot Mode..........................209 Brocade NetIron MLXe Series Hardware Installation Guide 53-1004203-04...
- Page 6 Setting the threshold for power supply monitoring..............................250 Clearing power supply failure timestamps..................................250 Displaying power supply monitoring timestamps................................ 251 Enabling a power supply shutdown....................................252 Powering on the power supply through the CLI ................................252 Brocade NetIron MLXe Series Hardware Installation Guide 53-1004203-04...
- Page 7 Caution and Danger Notices....................................... 293 Cautions................................................... 293 General cautions............................................293 Electrical cautions............................................294 Cautions related to equipment weight....................................300 Danger Notices..............................................301 General dangers............................................301 Electrical dangers............................................301 Dangers related to equipment weight....................................304 Laser dangers.............................................. 305 Brocade NetIron MLXe Series Hardware Installation Guide 53-1004203-04...
- Page 8 Brocade NetIron MLXe Series Hardware Installation Guide 53-1004203-04...
-
Page 9: Preface
Identifies command names. Identifies keywords and operands. Identifies the names of GUI elements. Identifies text to enter in the GUI. italic text Identifies emphasis. Identifies variables. Identifies document titles. Identifies CLI output. Courier font Brocade NetIron MLXe Series Hardware Installation Guide 53-1004203-04... -
Page 10: Command Syntax Conventions
By sending your feedback to documentation@brocade.com Provide the publication title, part number, and as much detail as possible, including the topic heading and page number if applicable, as well as your suggestions for improvement. Brocade NetIron MLXe Series Hardware Installation Guide 53-1004203-04... -
Page 11: Contacting Brocade Technical Support
Brocade Supplemental Support augments your existing OEM support contract, providing direct access to Brocade expertise. For more information, contact Brocade or your OEM. • For questions regarding service levels and response times, contact your OEM/solution provider. Brocade NetIron MLXe Series Hardware Installation Guide 53-1004203-04... - Page 12 Brocade NetIron MLXe Series Hardware Installation Guide 53-1004203-04...
-
Page 13: About This Document
You must use one of MR2-X internal 2 GB CF drive, 1 external CF slot, 2 the relevant MR2 GB card (included), RS-232 serial console modules starting port and 10/100/1000 Ethernet port. from NetIron R05.8.00. Brocade NetIron MLXe Series Hardware Installation Guide 53-1004203-04... - Page 14 MLXe-32 modules. Twenty (20)-port 10-GbE/1-GbE (X2) combo MLXe-4, NetIron R05.7.00. Requires SFP+ and MLX-10Gx20- module with IPv4/IPv6/MPLS hardware MLXe-8, SFP optics and high support. Supports simultaneous 2M IPv4 and Brocade NetIron MLXe Series Hardware Installation Guide 53-1004203-04...
- Page 15 MLX-16 and R05.6.00. optics. MLX-32 EOL initiated. Copper SFPs are Support supported at discontinued. 1000Mbps only. 20-port FE/GE (100/1000) module with NetIron R05.2.00. NetIron Requires SFP XMR-1GX20- IPv4/IPv6/MPLS hardware support. R05.6.00. optics. Brocade NetIron MLXe Series Hardware Installation Guide 53-1004203-04...
- Page 16 IPv4/IPv6/MPLS hardware MLXe-8, R05.4.00. fans NIBI-16-FAN- support. MLXe-16 and EXH-A on MLX-16. MLXe-32 MLX-4, MLX-8 MLX-16 and MLX-32 The following table describes all supported switch fabric modules for the Brocade MLXe Series routers. Brocade NetIron MLXe Series Hardware Installation Guide 53-1004203-04...
- Page 17 Not available for and MLXe-16 or earlier purchase. MLX-8 and MLX-16 NI-X-DCPWR DC 1200W power supply. MLXe-4, MLXe-8 NetIron R05.4.00. EOL initiated. Not available for and MLXe-16 or earlier purchase. MLX-8 and MLX-16 Brocade NetIron MLXe Series Hardware Installation Guide 53-1004203-04...
-
Page 18: Supported Software
This document is specific to the Brocade MLXe Series routers running NetIron software release 6.0.00. What’s new in this document This document has been updated to add information about EMC, safety, and environmental regulatory compliance.There is no new hardware supported for this release. Brocade NetIron MLXe Series Hardware Installation Guide 53-1004203-04... -
Page 19: How Command Information Is Presented In This Guide
NetIron Command Reference for your software release. Notice to the reader This document contains references to Phillips screws. This trademark is the property of the Phillips Screw Company, Inc. This reference is made for informational purposes only. Brocade NetIron MLXe Series Hardware Installation Guide 53-1004203-04... - Page 20 Brocade NetIron MLXe Series Hardware Installation Guide 53-1004203-04...
-
Page 21: Product Overview
This section describes the available hardware components of the Brocade MLXe Series routers, including the slots available in the chassis for each component. For installation instructions, refer to the Installing a Brocade MLXe Router on page 87. Brocade NetIron MLXe Series Hardware Installation Guide 53-1004203-04... -
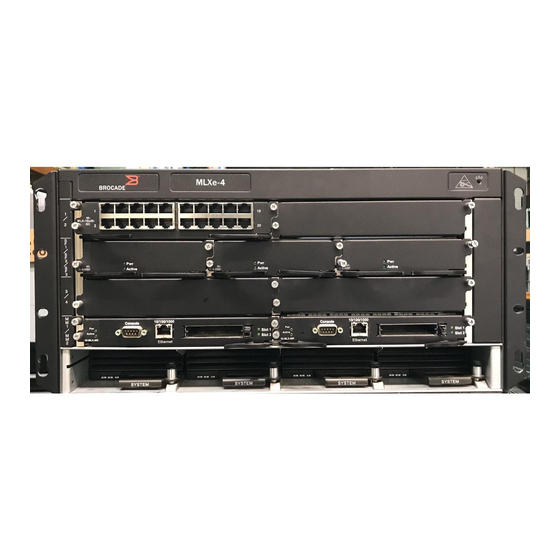
Page 22: Brocade Mlxe Series Routers
10. Interface slot 4 ESD connector 11. Power supply 1 Interface slot 1 12. Power supply 2 Switch fabric slot 1 13. Power supply 3 Interface slot 3 14. Power supply 4 Brocade NetIron MLXe Series Hardware Installation Guide 53-1004203-04... - Page 23 Interface slot 6 18. ESD connector Brocade MLXe Series-16 router components You can install the following components in the router slots: • Up to two management modules (one active and one redundant). Brocade NetIron MLXe Series Hardware Installation Guide 53-1004203-04...
- Page 24 Up to 16 interface modules. • Up to eight power supplies (AC or DC). For a detailed list of components that ships with each router, refer to Brocade MLXe Chassis Bundles on page 277. Brocade NetIron MLXe Series Hardware Installation Guide 53-1004203-04...
- Page 25 Hardware features FIGURE 3 Brocade MLXe Series-16 router Brocade NetIron MLXe Series Hardware Installation Guide 53-1004203-04...
- Page 26 Up to 32 interface modules. – Up to eight power supplies (AC or DC). For a detailed list of components that ships with each router, refer to Brocade MLXe Chassis Bundles on page 277. Brocade NetIron MLXe Series Hardware Installation Guide 53-1004203-04...
- Page 27 Hardware features FIGURE 4 Brocade MLXe Series-32 router Brocade NetIron MLXe Series Hardware Installation Guide 53-1004203-04...
-
Page 28: Router Modules
NI-MLX-MR (MR) Brocade MLXe Series and Brocade NetIron MLX This module is no longer supported from Series management module, 1 GB SDRAM, dual NetIron R05.7.xx. auxiliary flash slots, EIA or TIA-232 and Brocade NetIron MLXe Series Hardware Installation Guide 53-1004203-04... - Page 29 Management modules are installed in dedicated slots marked M1 and M2. By default, the module installed in slot M1 is the active management module. Management modules are hot-swappable, which means you can remove and replace them without powering down the system. Brocade NetIron MLXe Series Hardware Installation Guide 53-1004203-04...
- Page 30 If you insert the card backwards, you will see continuous messages in the console and the card inserted/ card removed syslog. If this occurs, you must remove the card and reinsert it the correct way. Brocade NetIron MLXe Series Hardware Installation Guide 53-1004203-04...
- Page 31 Send Syslog packets. • Access the system through RADIUS AAA. Management module LEDs The LEDs on all management module models are the same. The following table describes the LEDs on the management module. Brocade NetIron MLXe Series Hardware Installation Guide 53-1004203-04...
-
Page 32: Interface Modules
Generation BR-MLX-100GX2-CFP2-M Brocade MLXe two (2)-port 100- Gen 3 GbE (M) module with IPv4/IPv6/ MPLS hardware support. Requires CFP2 optics. Supports 512K IPv4 routes in FIB. Requires high speed switch fabric modules. Brocade NetIron MLXe Series Hardware Installation Guide 53-1004203-04... - Page 33 NI-MLX-10GX4 NetIron MLX Series 4-port 10- Gen 1.1 GbE module with IPv4/IPv6/MPLS hardware support. Requires XFP optics. NI-XMR-10GX4 NetIron XMR Series 4-port 10- Gen 1.1 GbE module with IPv4/IPv6/MPLS Brocade NetIron MLXe Series Hardware Installation Guide 53-1004203-04...
- Page 34 FE/GE (100/1000) module with IPv4/IPv6/MPLS hardware support. Requires SFP optics. Note: Copper SFPs are supported at 1000Mbps only. NI-MLX-1GX20-GC NetIron MLX Series 20-port Gen 1 10/100/1000 copper module with IPv4/IPv6/MPLS hardware support. Brocade NetIron MLXe Series Hardware Installation Guide 53-1004203-04...
- Page 35 The 100GbE 2-port CFP2 optics based high density blade is a half slot module card for the MLXe chassis. The 2x100GbE CFP2 interface module is supported on all Brocade MLXe Series routers. Brocade NetIron MLXe Series Hardware Installation Guide 53-1004203-04...
- Page 36 E-Chassis and hSFMs are required with the 2x100GbE CFP2 module. • Each 2x100GbE CFP2 TM can support one full 100Gbps wire speed ports. • For best performance, Turbo mode is recommended; 1024B credit size; and full fabric connectivity. Brocade NetIron MLXe Series Hardware Installation Guide 53-1004203-04...
- Page 37 Chassis support for the 2x100GbE CFP2 based high density blade is shown in the following table. TABLE 10 2x100GbE CFP2 Chassis Support Ports Chassis Supported Description 2x100GbE CFP2 MLXe Support in MLXe. Brocade NetIron MLXe Series Hardware Installation Guide 53-1004203-04...
- Page 38 For more information about fiber-optic transceivers and associated cabling, refer to Installing a fiber-optic transceiver on page 197. Power supply requirements for 2x100GbE modules For power supply requirements for the 2x100GbE modules, refer to Hardware Specifications on page 271. Brocade NetIron MLXe Series Hardware Installation Guide 53-1004203-04...
- Page 39 0x8021_0022 0x8021_1051 System Version 0x8031_0021 0x80e3_0021 Core Version E500V2 E500V2 Clock Speed 1.3GHz 1.2Ghz Cache Support 32KB L1 instruction cache 32KB L1 instruction cache 32KB L1 data cache 32KB L1 data cache Brocade NetIron MLXe Series Hardware Installation Guide 53-1004203-04...
- Page 40 2.4M for IPv4 and 1.8M for IPv6. The -X2 scaling software is compatible with both MR2-M and MR2-X management modules so that you can deploy M, X, and -X2 modules in the same device. NOTE MR2 management modules require High Speed Switch Fabric modules. Brocade NetIron MLXe Series Hardware Installation Guide 53-1004203-04...
- Page 41 [IP VPN] 196608(size), 196608(free), 0. 0%(used) [IP] 262144(size), 262123(free), 0. 0%(used) [IPV6] 65536(size), 65534(free), 0. 0%(used) [IPV6 VPN] 131072(size), 131068(free), 0. 0%(used) History Release version Command history NetIron R05.8.00 This command was introduced. Brocade NetIron MLXe Series Hardware Installation Guide 53-1004203-04...
- Page 42 3 minutes with the following information: • Indicating the number of packet drops and CRC errors in each lane group. • Indicating if ports are not disabled by the port shut down option. Brocade NetIron MLXe Series Hardware Installation Guide 53-1004203-04...
- Page 43 1/1 100GigabitEthernet1/1 is down(interlaken crc error), line protocol is down STP Root Guard is disabled, STP BPDU Guard is disabled NP transmitted 0 packets, Received from TM 0 packets Brocade NetIron MLXe Series Hardware Installation Guide 53-1004203-04...
- Page 44 The threshold time is configured using the sysmon task-threshold time global configuration command for active MP and all LPs, and is available across resets. The range of user configured threshold time is from 20ms to 1000ms. Default value recommended is 60ms. Brocade NetIron MLXe Series Hardware Installation Guide 53-1004203-04...
- Page 45 Data encrypted with a public key cannot be decrypted using a public key and vice versa. Users of a public key are confident that the associated private key is owned by the correct remote subject. Brocade NetIron MLXe Series Hardware Installation Guide 53-1004203-04...
- Page 46 IKE, the certificates can be sent in two ways: Inline certificate and HTTP and URL format. NOTE IKE or another module should not store the PKI certificates for later reference. Whenever needed, the PKI module should be queried with the certificate DN or Subject alternate name. Brocade NetIron MLXe Series Hardware Installation Guide 53-1004203-04...
- Page 47 For a given source/destination and IKE Profile, if multiple IKE SA can be created. This will be applicable only for incoming IKE session. Default is disabled. This will be used for inter-op with other vendors. Brocade NetIron MLXe Series Hardware Installation Guide 53-1004203-04...
- Page 48 Hash algorithm to be used to generate key material for IKE SA negotiation. Multiple algorithms may be specified, separated by commas. encryption {3des} {aes-cbc-128} Encryption algorithm to be used to protect IKEv2 data. Multiple algorithms may be specified. Allowed values are: {aes-cbc-192} {aes-cbc-256} • 3des • aes-cbc-128 • aes-cbc-192 Brocade NetIron MLXe Series Hardware Installation Guide 53-1004203-04...
- Page 49 { vrf-name <name> | (Optional) The FVRF in which the local IP address on the IKEv2 packet should be matched. If not configured, it will any } match the any-vrf. Brocade NetIron MLXe Series Hardware Installation Guide 53-1004203-04...
- Page 50 (Optional) In responder-only mode, this host acts as the responder and does not initiate negotiation and rekeying. Otherwise, this host acts as initiator; negotiation starts when the IKE Peer is reachable. By default the router behave as both initiator and responder. Brocade NetIron MLXe Series Hardware Installation Guide 53-1004203-04...
- Page 51 Only ipv4 domain will be supported in first release. Ipv6 domains will be considered in future release. pre-shared-key <key> If the authentication method is used as pre-shared, then the pre-shared key should be configured. NOTE There is no default value for this parameter. Brocade NetIron MLXe Series Hardware Installation Guide 53-1004203-04...
- Page 52 (Optional) Lifetime of the IPsec SA in minutes. By default it is 8 hours, 480 minutes. The new security association will be started 5 minutes before the old one is about to expire. Brocade NetIron MLXe Series Hardware Installation Guide 53-1004203-04...
- Page 53 Name : ikev2-default-proposal Encryption : AES-CBC-256 Integrity : sha384 : sha384 DH Group : 384_ECP/Group 20 show ikev2 policy: device# show ikev2 policy Name : ike_policy_red : Default Brocade NetIron MLXe Series Hardware Installation Guide 53-1004203-04...
- Page 54 : Initiator Local SPI : 0xf327d32cd0df9106 Remote SPI: 0x34bec986ed6c232e Ike Profile : mlx2_1 Ike Policy : mlx2_1 Auth Proposal : def-ike-auth-prop show ikev2 session: device# show ikev2 session IKE count:1, CHILD count:1 Brocade NetIron MLXe Series Hardware Installation Guide 53-1004203-04...
- Page 55 : red show ipsec sa: device#show ipsec sa IPSEC Security Association Database(Entries:2) SPDID(vrf:if) Dir Encap SPI Destination AuthAlg EncryptAlg Status Mode 0:v2 out ESP sha1 Null TRAN 0:v2 FE80:: sha1 Null TRAN Brocade NetIron MLXe Series Hardware Installation Guide 53-1004203-04...
- Page 56 SA: SPDID(vrf:if) Dir Encap SPI Destination OSPF FE80::/10:any ::/0:any SA: 0:v2 FE80:: out OSPF FE80::/10:any ::/0:any SA: 0:v2 out ESP 0.0.0.0/0:any 0.0.0.0/0:any SA: 1:Tun1 0xBD481319 1.2.10.2 0.0.0.0/0:any 0.0.0.0/0:any SA: 1:Tun1 0x9EAB77D6 1.2.10.2 Brocade NetIron MLXe Series Hardware Installation Guide 53-1004203-04...
- Page 57 1G, 10G, 100G and 40G ports. The MLX-10GX4-IPSEC-M card is designed for the MLXe chassis, and its features include the following: • CAM1 and CAM3 interface parallel look-ups. NOTE Transparent to MLX-10GX4-IPSEC-M forwarding application. Brocade NetIron MLXe Series Hardware Installation Guide 53-1004203-04...
- Page 58 3 minutes with the following information: • Indicating the number of packet drops and CRC errors in each lane group. • Indicating if ports are not disabled by the port shut down option. Brocade NetIron MLXe Series Hardware Installation Guide 53-1004203-04...
- Page 59 1/1 100GigabitEthernet1/1 is down(interlaken crc error), line protocol is down STP Root Guard is disabled, STP BPDU Guard is disabled NP transmitted 0 packets, Received from TM 0 packets Brocade NetIron MLXe Series Hardware Installation Guide 53-1004203-04...
- Page 60 Exit the configuration level of the CLI. device(config)# exit Issue command to write memory to the device. device# write memory Issue command to reload the device. device# reload Brocade NetIron MLXe Series Hardware Installation Guide 53-1004203-04...
- Page 61 Gen-2 8x10GE-X modules require high speed switch fabric modules to operate. You can replace switch fabric modules with high-speed switch fabric modules while the system is powered on and running. For more information about high-speed switch fabric modules, refer to High-speed switch fabric modules on page 78. Brocade NetIron MLXe Series Hardware Installation Guide 53-1004203-04...
- Page 62 When you install Gen-1 2-port or 4-port 10 Gbps Ethernet interface modules, you must upgrade the software on all interface modules and management modules to the appropriate software release. For more information on the appropriate software release refer to the Hardware Installation Notes that shipped with the interface module. Brocade NetIron MLXe Series Hardware Installation Guide 53-1004203-04...
- Page 63 For a list of XFP-compliant fiber-optic transceivers supported for Gen-1 2-port or 4-port modules, refer to the latest version of the Brocade Optics Family Data Sheet. For more information about fiber-optic transceivers and associated cabling, refer to Installing a fiber-optic transceiver on page 197. Brocade NetIron MLXe Series Hardware Installation Guide 53-1004203-04...
- Page 64 10 Gbps. BR-MLX-10Gx4-X-ML supports up to 512K IPv4 routes in hardware. BR-MLX-10Gx4-X supports up to 1M IPv4 routes. BR-MLX-10Gx4-X-ML can be upgraded to an X version through a software license. Please contact Brocade to purchase the license upgrade. Brocade NetIron MLXe Series Hardware Installation Guide 53-1004203-04...
- Page 65 For more information about high-speed switch fabric modules, refer to High-speed switch fabric modules on page 78. FIGURE 11 NI-MLX-10Gx8-M and NI-MLX-10Gx8-D module faceplate Brocade NetIron MLXe Series Hardware Installation Guide 53-1004203-04...
- Page 66 Module 7 is -d class, it can't work when router mpls is enabled. Reset slot 7 SYSLOG: May 28 16:22:48 :<13>May 28 16:22:48 Module 7 is reset by mgmt (reason: boot to interactive mode) Brocade NetIron MLXe Series Hardware Installation Guide 53-1004203-04...
- Page 67 FIGURE 13 BR-MLX-1GCx24-X copper interface module front panel The front panel includes the following features: • LEDs to the left support the top ports, LEDs to the right support the bottom ports • 24 1 Gbps RJ-45 copper ports Brocade NetIron MLXe Series Hardware Installation Guide 53-1004203-04...
- Page 68 When installing 24-port copper or fiber interface modules, you must change the ifIndex allocation to 64 before you install the module, or the module will not operate properly when installed. Brocade NetIron MLXe Series Hardware Installation Guide 53-1004203-04...
- Page 69 LEDs to the left support the top ports, LEDs to the right support the bottom ports • 20 100/1000 Ethernet SFP ports FIGURE 15 20-port 100/1000 Ethernet module front panel The following table describes the port LED status of the 20-port 100/1000 Ethernet module. Brocade NetIron MLXe Series Hardware Installation Guide 53-1004203-04...
- Page 70 NI-MLX-1Gx48-T-A interface module The front panel includes the following features: • A power LED located below the part number • Eight mini-RJ21 connectors, each supporting six 10/100/1000 Mbps Ethernet ports Brocade NetIron MLXe Series Hardware Installation Guide 53-1004203-04...
- Page 71 SYSLOG: Mar 26 14:19:53:<12>R1, 48X1G modules in slots 10,11,13,16 shouldn't be running without high speed fans NOTE The NIBI-16-FAN-EXH-A fan module does not ship with some Brocade NetIron MLX Seriese-16 routers. Contact Brocade to purchase this module. Brocade NetIron MLXe Series Hardware Installation Guide 53-1004203-04...
- Page 72 Number of ports and the type of ports. • LED indicator for a port. • LED indicator for module power. FIGURE 18 BR-MLX-40Gx4-M module front panel FIGURE 19 BR-MLX-40Gx4-M module front panel side view Brocade NetIron MLXe Series Hardware Installation Guide 53-1004203-04...
-
Page 73: Auto-Tuning Links
There are two instances when auto-tuning for a link is triggered: • Slow rate CRCs are encountered. • Burst CRCs are encountered. NOTE The feature for auto-tuning links for burst CRC was introduced in release 5.7. Brocade NetIron MLXe Series Hardware Installation Guide 53-1004203-04... - Page 74 The following example demonstrates the CLI command necessary to execute the no sysmon fe auto-tune command for disabling high rate auto-tuning on FE for burst CRC. device# no sysmon fe auto-tune Brocade NetIron MLXe Series Hardware Installation Guide 53-1004203-04...
-
Page 75: Forward Error Correction Mode
FEC mode is applied on a per link basis. Both sides of the link (TM side and FE side) must be in the same mode. In a Brocade MLXe series chassis, the following applies: • All fabric facing links on the 4x40G, 2x100G and 24x10G TMs will have FEC enabled Brocade NetIron MLXe Series Hardware Installation Guide 53-1004203-04... -
Page 76: Switch Fabric Modules
TABLE 23 Switch fabric modules available for Brocade MLXe Series routers Part number Description NI-X-SF1 Switch fabric module for 4-slot routers NI-X-SF3 Switch fabric module for 8- and 16-slot routers NI-X-32-SF Switch fabric module for 32-slot routers Brocade NetIron MLXe Series Hardware Installation Guide 53-1004203-04... - Page 77 The switch fabric is on (active) and ready to switch user routers only) packets. Blinking (32-slot routers The switch fabric is on (active) and being accessed by the only) Management Module CPU. This indicates normal operation. Brocade NetIron MLXe Series Hardware Installation Guide 53-1004203-04...
-
Page 78: High-Speed Switch Fabric Modules
The Brocade CFP2 to QSFP28 conversion module in the following illustration inserts into 100 GbE CFP2 port cages (ports) on the 2x100GbE CFP2 optics based high density module to allow connection to 100 GbE QSFP28 ports. Brocade NetIron MLXe Series Hardware Installation Guide 53-1004203-04... - Page 79 40GbE QSFP to QSFP cable, 10m AOC QSFP28 form factor media must be installed in the conversion module. The conversion module has a bicolor (green and amber) LED which functions as follows: Brocade NetIron MLXe Series Hardware Installation Guide 53-1004203-04...
-
Page 80: Power Supplies
16-slot router: Can accommodate eight 1200W or 1800W AC and DC power supplies. Because power is supplied over a common power bus, any power supply installed in addition to the minimum required provides backup for any power supply that Brocade NetIron MLXe Series Hardware Installation Guide 53-1004203-04... -
Page 81: Rack Mounting Brackets
All routers ship with pre-installed mounting brackets that allow you to front-mount the router in a standard 19-inch (EIA310-D) rack. For instructions about how to mount the router in a rack, refer to the installation chapter that is appropriate for your router model. Brocade NetIron MLXe Series Hardware Installation Guide 53-1004203-04... -
Page 82: Cooling System For Brocade Mlxe Series Routers
You can install an optional upward air deflector on the fans of 32-slot routers using a fan deflector kit from Brocade. The following figures show the fan locations for 4- 8-, 16-, and 32-slot routers. FIGURE 23 Fan locations for Brocade MLXe Series-4 routers Fans in rear of chassis Brocade NetIron MLXe Series Hardware Installation Guide 53-1004203-04... - Page 83 Router modules FIGURE 24 Fan locations for Brocade MLXe Series-8-routers Fan modules Brocade NetIron MLXe Series Hardware Installation Guide 53-1004203-04...
- Page 84 Router modules FIGURE 25 Rear fan location for Brocade MLXe Series-16 routers Rear fan assemblies Brocade NetIron MLXe Series Hardware Installation Guide 53-1004203-04...
- Page 85 By default, the router polls the temperature sensor on each module every 60 seconds for a temperature reading. Depending on the results, the router will: • Leave the fan speed as is • Increase the fan speed • Decrease the fan speed Brocade NetIron MLXe Series Hardware Installation Guide 53-1004203-04...
-
Page 86: Nibi-16-Fan-Exh-A High-Speed Fan Assemblies
Supported software features For a complete list of software features supported on Brocade MLXe Series and Brocade NetIron XMR Series routers, refer to the Brocade Multi-Service IronWare Configuration Guide. Brocade NetIron MLXe Series Hardware Installation Guide 53-1004203-04... -
Page 87: Installing A Brocade Mlxe Router
Additional power supplies can be ordered through Brocade. For additional information on upgrade procedures, refer to the Multi-Service IronWare Software Upgrade Guide . Installation precautions Read the following cautions and danger notices before installing Brocade MLXe Series routers. Brocade NetIron MLXe Series Hardware Installation Guide 53-1004203-04... -
Page 88: General Precautions
The mark is your assurance that the power cord can be used safely with the device. Brocade NetIron MLXe Series Hardware Installation Guide 53-1004203-04... - Page 89 (provided with the chassis) attached to one end, with the other end attached to building ground. The connector must be crimped with the proper tool, allowing it to be connected to both ground screws on the enclosure. Brocade NetIron MLXe Series Hardware Installation Guide 53-1004203-04...
-
Page 90: Lifting Precautions
2x100GbE modules require a minimum software version of R05.7.00. Please upgrade all software on the system to a minimum version of R05.7.00 before you install your 100GbE module. • 2x100GbE modules require high-speed switch fabric modules to operate. Brocade NetIron MLXe Series Hardware Installation Guide 53-1004203-04... -
Page 91: Installing Br-Mlx-10Gx24-Dm Interface Modules In Brocade Mlxe Series Routers
BR-MLX-10Gx24-DM interface modules are supported only on devices running NetIron R05.4.00 or later. For the latest upgrade instructions, refer to the Multi-Service IronWare Upgrade Guide on the Brocade web site. • Pull off the GBX connector cover before installing the module in the chassis. Brocade NetIron MLXe Series Hardware Installation Guide 53-1004203-04... -
Page 92: Installation Procedure
Install the BR-MLX-24x10G-DM module. Verify that the module comes up, NOTE For known limitations, please refer to the Release Notes shipped with your module. Brocade NetIron MLXe Series Hardware Installation Guide 53-1004203-04... -
Page 93: Installing A Brocade Mlxe Series-4 Router
MLXe Series-8 routers in a 4-post EIA rack on page 121. NOTE Because of the weight of a fully loaded Brocade MLXe Series-4 router, Brocade recommends mounting it in a rack before installing the modules and AC power supplies. Brocade NetIron MLXe Series Hardware Installation Guide 53-1004203-04... - Page 94 When tightening these screws, leave approximately 1/4 inch of clearance between the back of the screw head and the rack post. Brocade NetIron MLXe Series Hardware Installation Guide 53-1004203-04...
- Page 95 FIGURE 27 Positioning the mounting screws in rack posts Unequal flange equipment rack Network equipment rack FIGURE 28 Positioning the mounting screws in rack posts Unequal flange equipment rack Network equipment rack Brocade NetIron MLXe Series Hardware Installation Guide 53-1004203-04...
-
Page 96: Installing Brocade Mlxe Series-4 Modules
For instructions about installing 2x100GbE interface modules, refer to Installing BR-MLX-10Gx24-DM interface modules in Brocade MLXe Series routers on page 91. NOTE Installation procedures are identical for interface, management and switch fabric modules. Brocade NetIron MLXe Series Hardware Installation Guide 53-1004203-04... - Page 97 The Brocade MLXe Series-4 router ships with slot blanks installed in all empty module slots. The slot blanks help ensure proper airflow inside the router. You must remove the slot blank to install a module into a slot. Brocade NetIron MLXe Series Hardware Installation Guide 53-1004203-04...
-
Page 98: Installing Power Supplies In A Brocade Mlxe Series-4 Router
Installing power supplies in a Brocade MLXe Series-4 router Follow these steps to install a power supply. Remove the power supply slot blank and store it for future use. Remove the power supply from the packaging. Brocade NetIron MLXe Series Hardware Installation Guide 53-1004203-04... -
Page 99: Connecting Ac Power
Follow these steps to connect the AC power cord. Locate the power supply AC inlet on rear of chassis for the associated installed power supply. Lift the cord retainer and connect the AC power cord to the AC inlet. Brocade NetIron MLXe Series Hardware Installation Guide 53-1004203-04... -
Page 100: Connecting Dc Power
However, the LED functions are identical. NOTE The 1200W and the 1800W power supplies are for use with the Brocade MLXe Series-4, Brocade MLXe Series-8, and Brocade MLXe Series-16 routers. Brocade NetIron MLXe Series Hardware Installation Guide 53-1004203-04... - Page 101 Screws holding transparent cover Power lug screws FIGURE 32 The Brocade MLXe Series DC 1800W power supply Screws holding transparent cover Power lug screws Use a #2 Phillips screwdriver to remove the power lugs. Brocade NetIron MLXe Series Hardware Installation Guide 53-1004203-04...
-
Page 102: Final Steps
Complete these steps in the order listed: Perform the step Attaching a management station on page 171. Perform the step Activating the power source on page 172. Perform the step Verifying proper operation on page 172. Brocade NetIron MLXe Series Hardware Installation Guide 53-1004203-04... -
Page 103: Installing A Brocade Mlxe Series-8 Router
You can install up to six Brocade MLXe Series-8 routers in a standard 19-inch (EIA310-D) rack using the standard rack installation method. If you use the EIA rack mounting kit, you can install up to 4 Brocade MLXe Series-8 routers in a standard 19-inch rack. Brocade NetIron MLXe Series Hardware Installation Guide 53-1004203-04... - Page 104 When tightening these screws, leave approximately 1/4 inch of clearance between the back of the screw head and the rack post. FIGURE 34 Positioning the mounting screws in rack posts Unequal flange equipment rack Network equipment rack Brocade NetIron MLXe Series Hardware Installation Guide 53-1004203-04...
-
Page 105: Installing Brocade Mlxe Series-8 Modules
For instructions about installing BR-MLX-10Gx24-DM interface modules, refer to Installing BR-MLX-10Gx24-DM interface modules in Brocade MLXe Series routers on page 91. NOTE installation instructions are identical for interface, management, and switch fabric modules. Brocade NetIron MLXe Series Hardware Installation Guide 53-1004203-04... - Page 106 Although the slot blanks differ in size, the procedure for removing them is identical. You will need a flat-blade screwdriver to perform this task. Brocade NetIron MLXe Series Hardware Installation Guide 53-1004203-04...
-
Page 107: Installing Power Supplies In The Brocade Mlxe Series-8 Router
Installing power supplies in the Brocade MLXe Series-8 router Follow these steps to install a power supply in the Brocade MLXe Series-8 router. Remove the power supply slot blank. Remove the power supply from the packaging. Brocade NetIron MLXe Series Hardware Installation Guide 53-1004203-04... -
Page 108: Connecting Ac Power
Follow these steps to connect the AC power cord. Locate the AC inlet on rear of chassis for the associated installed AC power supply. Brocade NetIron MLXe Series Hardware Installation Guide 53-1004203-04... -
Page 109: Connecting Dc Power
However, the LED functions are identical. NOTE The 1200W and the 1800W power supplies are for use with the Brocade MLXe Series-4, Brocade MLXe Series-8, and Brocade MLXe Series-16 routers. Brocade NetIron MLXe Series Hardware Installation Guide 53-1004203-04... - Page 110 Screws holding transparent cover Power lug screws FIGURE 38 The Brocade MLXe Series DC 1800W power supply Screws holding transparent cover Power lug screws Use a #2 Phillips screwdriver to remove the power lugs. Brocade NetIron MLXe Series Hardware Installation Guide 53-1004203-04...
-
Page 111: Final Steps
Complete these final steps in the order listed: Perform the step Attaching a management station on page 171. Perform the step Activating the power source on page 172. Perform the step Verifying proper operation on page 172. Brocade NetIron MLXe Series Hardware Installation Guide 53-1004203-04... -
Page 112: Installing A Brocade Mlxe Series-16 Router
Do not attempt to lift a fully configured router by yourself. Use two people to lift the router. • It is recommended that you remove router components before installing the router in a rack. Brocade NetIron MLXe Series Hardware Installation Guide 53-1004203-04... -
Page 113: Installing A Brocade Mlxe Series-16 Router In An Eia Rack
Determine the position of each router in the rack. For example, place routers with the fewest modules near the top of the rack, routers with more modules near the middle of the rack, and fully populated routers near the bottom of the rack. Brocade NetIron MLXe Series Hardware Installation Guide 53-1004203-04... - Page 114 FIGURE 41 Mounting the Brocade MLXe Series-16 router in a rack Front-mount configuration Mid-mount configuration Slide the router down so that the mounting screw heads are in the narrow portion of the keyhole slots. Brocade NetIron MLXe Series Hardware Installation Guide 53-1004203-04...
-
Page 115: Installing Modules In A Brocade Mlxe Series 16-Slot Router
Brocade NetIron MLX Series and Brocade NetIron Family Configuration Guide for information about how the redundant module works, optional software configurations that you can perform, and how to manage the redundancy feature. Brocade NetIron MLXe Series Hardware Installation Guide 53-1004203-04... - Page 116 If you are hot-swapping a module, allow a minimum of two seconds after a module (or power supply or fan tray) has been removed before inserting a module in the same slot. Follow this procedure to install modules in the router. Brocade NetIron MLXe Series Hardware Installation Guide 53-1004203-04...
-
Page 117: Installing Power Supplies In A Brocade Mlxe Series-16 Router
For information about connecting power to the router, refer to Connecting AC power on page 118. For information about powering on the system, refer to Activating the power source on page 172. Brocade NetIron MLXe Series Hardware Installation Guide 53-1004203-04... -
Page 118: Connecting Ac Power
However, the LED functions are identical. NOTE The 1200W and the 1800W power supplies are for use with the Brocade MLXe Series-4, Brocade MLXe Series-8, and Brocade MLXe Series-16 routers. Brocade NetIron MLXe Series Hardware Installation Guide 53-1004203-04... - Page 119 Screws holding transparent cover Power lug screws FIGURE 44 The Brocade MLXe Series DC 1800W power supply Screws holding transparent cover Power lug screws Use a #2 Phillips screwdriver to remove the power lugs. Brocade NetIron MLXe Series Hardware Installation Guide 53-1004203-04...
-
Page 120: Final Steps
• Perform the step Attaching a management station on page 171. • Perform the step Activating the power source on page 172. • Perform the step Verifying proper operation on page 172. Brocade NetIron MLXe Series Hardware Installation Guide 53-1004203-04... -
Page 121: Mounting Brocade Mlxe Series-4, -8, Or -16 Routers In A 4-Post Eia Rack
Installing Brocade MLXe Series-4 and Brocade MLXe Series-8 routers in a 4-post EIA rack This section describes how to install Brocade MLXe Series-4 or MLXe-8 routers in a 4-post EIA rack using the RMK-CAB-MLXE-4 or RMK-CAB-MLXE-8 4-Post Rack Mount Kits. Brocade NetIron MLXe Series Hardware Installation Guide 53-1004203-04... - Page 122 Place routers in the rack according to their weight. For example, mount the router with the fewest modules near the top of the rack, a router with more modules near the middle of the rack, and a fully populated router near the bottom of the rack. Remove the factory-installed mounting brackets from the chassis. Brocade NetIron MLXe Series Hardware Installation Guide 53-1004203-04...
- Page 123 Do not mix A and B brackets. Refer to the following figure. The process is identical for 4- slot and 8-slot routers. FIGURE 46 Attach front mounting brackets to the router (MLXe-4 shown) Brocade NetIron MLXe Series Hardware Installation Guide 53-1004203-04...
- Page 124 Install the mounting shelf to the rack rails using eight 10-32 screws, as shown in the following figure. FIGURE 48 Install the mounting shelf in the rack Brocade NetIron MLXe Series Hardware Installation Guide 53-1004203-04...
- Page 125 Install the side duct to the mounting shelf, using the tab and slot features at the base of the duct assembly. Refer to Figure FIGURE 49 Install side air ducts to the mounting shelf (MLXe-4 and MLXe-8) Brocade NetIron MLXe Series Hardware Installation Guide 53-1004203-04...
- Page 126 EIA rack rails using four 10-32 screws. Attach the top rail to the duct assembly using two 6-32 flat-head screws, as shown in the following figure. FIGURE 50 Install top rails to the rack Rail extender Brocade NetIron MLXe Series Hardware Installation Guide 53-1004203-04...
- Page 127 Install the router in the EIA rack. The router slides into the rack on top of the mounting shelf. Secure the router to the rack rails using eight 10-32 screws. Refer to the following figure (MLXe-4 slot router shown). FIGURE 51 Install the router on the mounting shelf Brocade NetIron MLXe Series Hardware Installation Guide 53-1004203-04...
-
Page 128: Installing A Brocade Mlxe Series-16 Router In A 4-Post Eia Rack
Mount the devices you install in a rack as low as possible. Place the heaviest device at the bottom and progressively place lighter devices above. To install your Brocade MLXe Series-16 router in a 4-post EIA rack, perform the following steps. Remove the factory-installed mounting brackets from the sides of the router. Brocade NetIron MLXe Series Hardware Installation Guide 53-1004203-04... - Page 129 Attach the EIA rack mounting brackets to the front of the router using the 12 8-32 flat head screws, as shown in the following figure. FIGURE 53 Attach the mounting brackets to the front of the router Brocade NetIron MLXe Series Hardware Installation Guide 53-1004203-04...
- Page 130 FIGURE 54 Attach the side plates to the rear sides of the device Attach the telescoping rails to the mounting posts in the EIA rack. Refer to the following figure. FIGURE 55 Attach telescoping rails to EIA rack mounting posts (one rail shown) Brocade NetIron MLXe Series Hardware Installation Guide 53-1004203-04...
- Page 131 Mounting Brocade MLXe Series-4, -8, or -16 routers in a 4-post EIA rack Install the router in the EIA rack using 8 10-32 screws, as shown in the following figure. FIGURE 56 Install the router in the EIA rack Brocade NetIron MLXe Series Hardware Installation Guide 53-1004203-04...
- Page 132 The transport brackets provide extra stability, and must be installed if you plan to ship the device while it is mounted in the EIA rack. Before you install the transport brackets, you must first remove any installed fans. FIGURE 57 Secure transport brackets to the device and EIA rack mounting posts Brocade NetIron MLXe Series Hardware Installation Guide 53-1004203-04...
- Page 133 Mounting Brocade MLXe Series-4, -8, or -16 routers in a 4-post EIA rack Attach the air block bracket to the front of the EIA rack. Refer to the following figure. FIGURE 58 Install the air block bracket Brocade NetIron MLXe Series Hardware Installation Guide 53-1004203-04...
-
Page 134: Installing A Brocade Mlxe Series-32 Router
Additionally, it may be installed in either a Common Bonding Network (CBN) or Isolated Bonding Network (IBN). It is not intended for Outside Plant (OSP) installations. You will need to use a mechanical lift to move and install the router. Be sure to allow enough working room for the lift. Brocade NetIron MLXe Series Hardware Installation Guide 53-1004203-04... -
Page 135: Brocade Mlxe Series-32 Router Shipping Carton Contents
The Brocade MLXe Series-32 router ships in a wooden crate bolted to a wooden platform that rests on a pallet. Follow these steps to uncrate the router. The router shipping crate must be in the upright position with enough space to slide the crate off of the pallet. Brocade NetIron MLXe Series Hardware Installation Guide 53-1004203-04... -
Page 136: Installing A Brocade Mlxe Series-32 Router In An Eia Rack
Make sure the rack housing the device is adequately secured to prevent it from becoming unstable or falling over. DANGER Mount the devices you install in a rack as low as possible. Place the heaviest device at the bottom and progressively place lighter devices above. Brocade NetIron MLXe Series Hardware Installation Guide 53-1004203-04... -
Page 137: Installation Requirements
A strap to secure and stabilize the device while it is being moved on the mechanical lift • A power drill with the following attachments: – Large #2 Phillips screwdriver attachment – A 7/16 inch socket wrench attachment – Large 3/8 inch flat blade screwdriver attachment Brocade NetIron MLXe Series Hardware Installation Guide 53-1004203-04... - Page 138 For a mid-mount configuration, simply remove the factory-installed mounting brackets from the front edges of the device and re-attach them to the center sides of the device using the pre-drilled holes. Brocade NetIron MLXe Series Hardware Installation Guide 53-1004203-04...
- Page 139 Allow 35U in the rack to accommodate the router. Refer to the following figure for system alignment. • The saddle requires 1U of permanent space in the rack. • The router requires 33U of space in the rack, plus 1U temporary space above for installation. Brocade NetIron MLXe Series Hardware Installation Guide 53-1004203-04...
- Page 140 See Figure NOTE Additional screws may be used for more support. FIGURE 62 Align the saddle in the rack Saddle Seat of saddle aligns with U marking on mounting posts as shown Brocade NetIron MLXe Series Hardware Installation Guide 53-1004203-04...
- Page 141 Use the provided standard #12-24, #10-32 or M6 pan head screws (dependent on the specifications of your rack) in each available hole on the rack mount bracket to attach the router to the rack mounting poles, as shown in the following figure. Brocade NetIron MLXe Series Hardware Installation Guide 53-1004203-04...
- Page 142 If you are installing the router in a standard rack, install a mounting screw and a cage nut into each of the holes on the rack posts aligned with the threaded holes in the spacer bars. NOTE When connecting the chassis to the rack frame, use thread-forming screws and paint-piercing washers. Brocade NetIron MLXe Series Hardware Installation Guide 53-1004203-04...
- Page 143 Because you will need to use a mechanical lift to move and install the device, make sure you allow enough space to operate the lift. You will also need at least two people to slide the router off the lift and into the rack. Brocade NetIron MLXe Series Hardware Installation Guide 53-1004203-04...
- Page 144 FIGURE 66 Attach front right and left mounting brackets to the router chassis Adjust the telescoping rails to fit your rack. The rails can accommodate rack depths from 27 - 31 inches. Brocade NetIron MLXe Series Hardware Installation Guide 53-1004203-04...
- Page 145 Attach the side rails to the front and back of the rack, using M6 screws. Refer to the following figure. NOTE The narrow telescoping ends of the side rails should attached at the back of the rack. FIGURE 67 Attach the telescoping side rails to the rack. Brocade NetIron MLXe Series Hardware Installation Guide 53-1004203-04...
- Page 146 Use the mechanical lift to position the chassis as close to the rack as possible. Slide the chassis off the lift and onto the side rails and gently guide the chassis into the rack. Refer to the following figure. FIGURE 68 Slide the chassis in the rack Brocade NetIron MLXe Series Hardware Installation Guide 53-1004203-04...
- Page 147 The RMK-4POST-MLXE-32 rack-mount kit cannot be used for installing the Brocade MLXe Series 32-slot routers in an EIA rack with doors. For installing a Brocade MLXe Series-32 in an EIA rack with doors, use the RMK-CAB- MLXE-32 rack mount kit which can be purchased from Brocade. Brocade NetIron MLXe Series Hardware Installation Guide 53-1004203-04...
- Page 148 Because you will need to use a mechanical lift to move and install the device, make sure you allow enough space to operate the lift. You will also need at least two people to slide the router off the lift and into the rack. NOTE Brocade NetIron MLXe Series Hardware Installation Guide 53-1004203-04...
- Page 149 FIGURE 70 Attaching front right and left mounting brackets to the router chassis Adjust the rails to fit your rack. The rails are telescoping and can accommodate rack depths from 27 through 31 inches. Brocade NetIron MLXe Series Hardware Installation Guide 53-1004203-04...
- Page 150 10. Attach the rails to the front and back of the rack, using screws provided in the kit (refer to the following figure). NOTE The narrow telescoping ends of the rails should attached at the back of the rack. FIGURE 71 Attaching the telescoping side rails to the rack. Brocade NetIron MLXe Series Hardware Installation Guide 53-1004203-04...
- Page 151 To prevent damage to the chassis and components, never attempt to lift the chassis using the fan or power supply handles. These handles were not designed to support the weight of the chassis. FIGURE 72 Sliding the chassis into the rack Brocade NetIron MLXe Series Hardware Installation Guide 53-1004203-04...
-
Page 152: Installing Modules In The Brocade Mlxe Series-32 Router
The Brocade MLXe Series-32 router ships with empty module slots and upper and lower shipping panels installed. For instructions about installing 2x100GbE interface modules, refer to Installing 2x100GbE CFP2 interface modules in Brocade MLXe Series routers on page 90. Brocade NetIron MLXe Series Hardware Installation Guide 53-1004203-04... - Page 153 If you do not install a module or a power supply in a slot, you must keep the slot filler panel in place. If you run the chassis with an uncovered slot, the system will overheat. Brocade NetIron MLXe Series Hardware Installation Guide 53-1004203-04...
- Page 154 Rotate the ejectors until they are flush with the module faceplate. This action will fully seat the module in the backplane. Tighten the screws at each end of the module faceplate by pushing them in and turning them clockwise. Complete the tightening process using the flat-blade screwdriver. Brocade NetIron MLXe Series Hardware Installation Guide 53-1004203-04...
- Page 155 RJ-45 and optical connectors. An insertion and extraction tool has been provided in the Brocade MLXe Series-32 accessory kit to make this task easier. The following figure shows this tool and how it is used. Brocade NetIron MLXe Series Hardware Installation Guide 53-1004203-04...
-
Page 156: Brocade Mlxe Series-32 Cable Management
Cables for modules in the lower half of the router follow a similar path downwards, above the power supplies. The following figure shows the cable routing, with the upper and lower cable management system covers removed for clarity. The following sections describe cable routing for each quadrant of the router. Brocade NetIron MLXe Series Hardware Installation Guide 53-1004203-04... - Page 157 Be sure not to exceed the minimum recommended bend radius for the cables: 2" for MRJ-21 cables, and 1.5" for Category 5 (RJ-45) and fiber-optic cables. CAUTION Before plugging a cable into any port, be sure to discharge the voltage stored on the cable by touching the electrical contacts to ground surface. Brocade NetIron MLXe Series Hardware Installation Guide 53-1004203-04...
- Page 158 Route cables for slots #1 and #2 directly to the left through the side comb, as shown in the following figure. FIGURE 77 Routing upper-left quadrant cables Upper left quadrant Side combs (18) Cables from slot #1 Cables from slot #2 Brocade NetIron MLXe Series Hardware Installation Guide 53-1004203-04...
- Page 159 Route cables from slots #3 and #4 up through comb A, as showin in the previous figure. Route cables from slots #5 and #6 up through comb B. Route cables from slots #7 and #8 up through comb C. Brocade NetIron MLXe Series Hardware Installation Guide 53-1004203-04...
- Page 160 Route cables from slots #15 and #16 directly to the right through the side comb, as shown in the following figure. FIGURE 79 Routing Upper-right quadrant cables to the right Upper right quadrant Side combs (18) Cables from slot #15 Cables from slot #16 Brocade NetIron MLXe Series Hardware Installation Guide 53-1004203-04...
- Page 161 Route cables from slots #13 and #14 up through comb A, as shown in the previous figure. Route cables from slots #11 and #12 up through comb B. Route cables from slots #9 and #10 up through comb C. Brocade NetIron MLXe Series Hardware Installation Guide 53-1004203-04...
- Page 162 Route cables from slots #18 and #17 directly to the left through the side comb, as shown in the following figure. FIGURE 81 Routing lower-left quadrant cables Lower left quadrant Cables from slot #17 Cables from slot #18 Side combs (18) Brocade NetIron MLXe Series Hardware Installation Guide 53-1004203-04...
- Page 163 Route cables from slots #20 and #19 down through comb A, as shown in the previous figure. Route cables from slots #22 and #21 down through comb B. Route cables from slots #24 and #23 down through comb C. Brocade NetIron MLXe Series Hardware Installation Guide 53-1004203-04...
- Page 164 Route cables from slots #32 and #31 directly to the right through the side comb, as shown in the following figure. FIGURE 83 Routing the lower-right quadrant cables Lower right quadrant Cables from slot #31 Cables from slot #32 Side combs (18) Brocade NetIron MLXe Series Hardware Installation Guide 53-1004203-04...
-
Page 165: Accessing Modules For Service
This procedure is easier with two people. One person can hold the cable bundles aside while the other person loosens the connectors and removes the module. NOTE Be careful not to overtighten or cross-thread cable connector screws. Brocade NetIron MLXe Series Hardware Installation Guide 53-1004203-04... -
Page 166: Installing Power Supplies In A Brocade Mlxe Series-32 Router
Installing power supplies in a Brocade MLXe Series-32 router DANGER High Touch Current. Earth connection essential before connecting supply. Follow these steps to install a power supply in a Brocade MLXe Series-32 router. Remove the blank power supply faceplate. Brocade NetIron MLXe Series Hardware Installation Guide 53-1004203-04... - Page 167 Push the power supply front panel toward the back of the router to engage the backplane connector. Pull the release latch on the power supply front panel up to lock the power supply in place. Use a #2 Phillips to screw the locking screw into place. Brocade NetIron MLXe Series Hardware Installation Guide 53-1004203-04...
-
Page 168: Connecting Ac Power
2400W DC-to-DC supply provides the DC power to the router at 12 V and 200 A. The 3000W DC-to-DC power supply provides the DC power to the router at 12 V and 245 A. DANGER The procedures in this manual are for qualified service personnel. Brocade NetIron MLXe Series Hardware Installation Guide 53-1004203-04... - Page 169 Use a #2 Phillips screwdriver to unscrew the power lugs. Refer to the following figure. FIGURE 89 Removing the power lugs (2400W power supply and 3000W power supply displayed) Power lug screws Power lug Brocade NetIron MLXe Series Hardware Installation Guide 53-1004203-04...
-
Page 170: Removing Brocade Mlxe Series-32 Router Dc Power Supplies
Use a #1 Phillips screwdriver to remove screw that secures the safety cover, as shown in Connecting DC power on page 168. Remove the safety cover. Use a #2 Phillips screwdriver to remove the screws securing the power lugs. Refer to Connecting DC power on page 168. Brocade NetIron MLXe Series Hardware Installation Guide 53-1004203-04... -
Page 171: Final Steps
Follow these steps to attach a PC or terminal to the console port or Ethernet port. Connect a PC or terminal to the console port or Ethernet port using the appropriate cable. Brocade NetIron MLXe Series Hardware Installation Guide 53-1004203-04... -
Page 172: Activating The Power Source
Verify that the router has initialized successfully. Refer to Verifying proper operation on page 172. Verifying proper operation To verify that your router is operating properly, observe the LEDs, or display the status of the modules using the CLI. Brocade NetIron MLXe Series Hardware Installation Guide 53-1004203-04... -
Page 173: Observing The Leds
• Verify that the connection to the other router has been properly made. Also, make certain that the other router is powered on and operating correctly. • Try using a different cable. Brocade NetIron MLXe Series Hardware Installation Guide 53-1004203-04... - Page 174 • Check the Pwr LED on the management module. If it is on, the management module may be preventing power Brocade NetIron MLXe Series Hardware Installation Guide 53-1004203-04...
- Page 175 Check the following: • Make certain that the module is installed properly. For more information, refer to the module installation section in this chapter that applies to your router model. Brocade NetIron MLXe Series Hardware Installation Guide 53-1004203-04...
- Page 176 The power supply is not receiving power from the receiving power from a DC DC power source. power source You can do the following: • Make sure that the power supply cables are Brocade NetIron MLXe Series Hardware Installation Guide 53-1004203-04...
- Page 177 Meaning or Action column for the AC power supply LED. If these actions do not resolve the problem, check the LED on each power supply or Brocade NetIron MLXe Series Hardware Installation Guide 53-1004203-04...
-
Page 178: Displaying The Module Status
Enter to display the CLI prompt in the terminal emulation window. This example is a prompt for a 16-slot router. device> If you do not see this prompt, check the following items. Make sure the cable is securely connected to your PC or terminal and the console port or Ethernet port. Brocade NetIron MLXe Series Hardware Installation Guide 53-1004203-04... - Page 179 CARD_DOWN_REASON_ explanation - The module is in a nonfunctional state. This status appears with an explanation for why the module is down. For example, CARD_DOWN_REASON_BOOT_FAILED. If the explanation does not help you resolve the problem, contact technical support and provide the explanation included with this status. Brocade NetIron MLXe Series Hardware Installation Guide 53-1004203-04...
-
Page 180: Forced Card Deletion
This is best pulled directly from the running configuration. Answer "yes" to the prompt by pressing y . Wait for the new module to come up. Apply the appropriate configuration to the interfaces of the new module. Brocade NetIron MLXe Series Hardware Installation Guide 53-1004203-04... - Page 181 (enter 'y' or 'n'): y Reset slot 2 device(config)#end device# device#show module Module Status Ports Starting MAC M1 (left ):BR-MLX-MR2-M Management Module Active M2 (right):NI-MLX-MR Management Module Standby(Ready State) F2: NI-X-HSF Switch Fabric Module Active Brocade NetIron MLXe Series Hardware Installation Guide 53-1004203-04...
- Page 182 | include module module 1 br-mlx-4-port-40g-m module 2 ni-mlx-8-port-10g-m module 3 ni-mlx-8-port-10g-d module 4 ni-mlx-8-port-10g-m module 5 ni-mlx-8-port-10g-m module 6 ni-mlx-20-port-1g-copper module 7 ni-mlx-8-port-10g-m module 8 br-mlx-4-port-40g-m snmp-server max-ifindex-per-module 64 device# Brocade NetIron MLXe Series Hardware Installation Guide 53-1004203-04...
-
Page 183: Using Brocade Structured Cabling Components
Position the cable cinch with the open end to the left (no slot), as shown in the following figure. FIGURE 91 Cable cinch overview Slot 1 Slot 3 Open end Front Slot 2 Slot 4 Rear Brocade NetIron MLXe Series Hardware Installation Guide 53-1004203-04... -
Page 184: Mrj21 Procedures
To secure two mRJ21 cables, place the Velcro strap through slot one and use the front and rear left recesses as shown in the following figure. FIGURE 92 Two mRJ21 cables Cable cinch with three mRJ21 cables Three mRJ21 cables may be secured as shown in the following figure. Brocade NetIron MLXe Series Hardware Installation Guide 53-1004203-04... -
Page 185: Cable Cinch With Four Mrj21 Cables
Four mRJ21 cables may be secured as shown in the following figure. FIGURE 94 Four mRJ21 cables Cable cinch with five mRJ21 cables Five mRJ21 cables may be secured as shown in the following figure. Brocade NetIron MLXe Series Hardware Installation Guide 53-1004203-04... -
Page 186: Cable Cinch With Six Mrj21 Cables
Six mRJ21 cables may be secured as shown in the following figure. FIGURE 96 Six mRJ21 cables Cable cinch with seven mRJ21 cables Seven mRJ21 cables may be secured as shown in the following figure. Brocade NetIron MLXe Series Hardware Installation Guide 53-1004203-04... -
Page 187: Cable Cinch With Eight Mrj21 Cables
Eight mRJ21 cables may be secured as shown in the following figure. FIGURE 98 Eight mRJ21 cables RJ-45 procedures Use the following guidelines when using the cable cinch clips with RJ-45 cables. Brocade NetIron MLXe Series Hardware Installation Guide 53-1004203-04... -
Page 188: Cable Cinch With One Group Of Rj-45 Cables
FIGURE 99 One group of RJ-45 cables Cable cinch with two groups of RJ-45 cables 12 RJ-45 cables, in two groups, may be secured as shown in the following figure. FIGURE 100 12 RJ-45 cables in two groups Brocade NetIron MLXe Series Hardware Installation Guide 53-1004203-04... -
Page 189: Cable Cinch With Three Groups Of Rj-45 Cables
FIGURE 101 18 RJ-45 cables in three groups Cable cinch with four groups of RJ-45 cables 24 RJ-45 cables, in four groups, may be secured as shown in the following figure. FIGURE 102 24 RJ-45 cables in four groups Brocade NetIron MLXe Series Hardware Installation Guide 53-1004203-04... -
Page 190: Cable Cinch With Five Groups Of Rj-45 Cables
FIGURE 103 30 RJ-45 cables in five groups Cable cinch with six groups of RJ-45 cables 36 RJ-45 cables, in six groups, may be secured as shown in the following figure. FIGURE 104 36 RJ-45 cables in six groups Brocade NetIron MLXe Series Hardware Installation Guide 53-1004203-04... -
Page 191: Cable Cinch With Seven Groups Of Rj-45 Cables
FIGURE 105 42 RJ-45 cables in seven groups Cable cinch with eight groups of RJ-45 cables 48 RJ-45 cables, in eight groups, may be secured as shown in the following figure. FIGURE 106 48 RJ-45 cables in eight groups Brocade NetIron MLXe Series Hardware Installation Guide 53-1004203-04... - Page 192 Brocade NetIron MLXe Series Hardware Installation Guide 53-1004203-04...
-
Page 193: Connecting A Router To A Network Device
At the opening CLI prompt, enter enable to change to the Privileged level of the EXEC mode. device enable device# Access the CONFIG level of the CLI by entering the configure terminal command. device# configure terminal device(config)# Brocade NetIron MLXe Series Hardware Installation Guide 53-1004203-04... -
Page 194: Configuring Ip Addresses
To enter a prefix number for a network mask, enter a forward slash (/) and the number of bits in the mask immediately after the IP address. For example, enter "209.157.22.99/24" for an IP address that has a network mask with 24 significant ("mask") bits. Brocade NetIron MLXe Series Hardware Installation Guide 53-1004203-04... -
Page 195: Assigning An Ip Address To A Management Interface
By default, you can configure up to 24 IP addresses on each interface, virtual interface, and loopback interface. For example, to assign the IP address 192.22.3.44 and subnet mask 255.255.255.0 to Ethernet interface 1/1, do the following. At the opening CLI prompt, enter enable . device# enable Brocade NetIron MLXe Series Hardware Installation Guide 53-1004203-04... -
Page 196: Enabling And Disabling The Interfaces
You cannot enable and run routing protocols on the management port. • You cannot configure routes from the management interface. • The management port uses static IP routes from the interface routing tables. Brocade NetIron MLXe Series Hardware Installation Guide 53-1004203-04... -
Page 197: Connecting The Router To A Network Device
Remove the metal cover from the port on the interface module. Gently insert the fiber-optic transceiver into the port until the transceiver clicks into place. Transceivers are keyed to prevent incorrect insertion. Brocade NetIron MLXe Series Hardware Installation Guide 53-1004203-04... -
Page 198: Cabling A Fiber-Optic Transceiver
LED, possible abnormal states of each LED, and what to do if an LED indicates an abnormal state. TABLE 37 Network connection-related LED states Desired state Meaning Abnormal state Meaning or action Interface module Brocade NetIron MLXe Series Hardware Installation Guide 53-1004203-04... - Page 199 Off for an extended period. The port is not transmitting receiving user packets. or receiving user packets. Try the following: • Check the Link LED to make sure the link is still Brocade NetIron MLXe Series Hardware Installation Guide 53-1004203-04...
-
Page 200: Testing Network Connectivity
The CLI displays traceroute information for each hop on the route as soon as the information is received. Traceroute requests display all responses to a given TTL. If there are multiple equal-cost routes to the destination, the router displays up to three responses by default. Brocade NetIron MLXe Series Hardware Installation Guide 53-1004203-04... -
Page 201: Managing Routers And Modules
To re-enable power to all interfaces or to a specific interface, enter the power-on lp command, as shown in this example: device# power-on lp Syntax: power-on lp [slot-number|all ] • all - enables power to all interface modules Brocade NetIron MLXe Series Hardware Installation Guide 53-1004203-04... -
Page 202: Monitoring I2C Failures On Management Modules
Severity of the failure: major or minor • MUX index number: – 0-1 - there are total of 2 MUX indexes in Brocade NetIron XMR Series 32000 and Brocade NetIron MLX Series-32 devices. Brocade NetIron MLXe Series Hardware Installation Guide 53-1004203-04... - Page 203 Apr 16 18:21:25:A:System: Power Supply 3 , top, Not Installed (FAILED) Dynamic Log Buffer (50 lines): Mar 28 12:36:47:A:System: Set fan speed to MED (75%) Mar 25 21:40:47:A:System: Set fan speed to MED-HI (90%) Brocade NetIron MLXe Series Hardware Installation Guide 53-1004203-04...
-
Page 204: Displaying Device Status And Temperature Readings
(fan 1): Status = OK, Speed = MED-HI (90%) right fan tray (fan 2): Status = OK, Speed = MED-HI (90%) --- TEMPERATURE READINGS --- Active Mgmt Module: 36.500C 49.625C Standby Mgmt Module: 36.250C 51.0C SNM1: 37.0C SNM2: 38.0C Brocade NetIron MLXe Series Hardware Installation Guide 53-1004203-04... - Page 205 Slot1 - Slot1632-slot device: Slot1 - Slot32 slots with the lowest priority will likely lose power. For information about using the lp-slot-priority command, refer to Changing priority of slots for interface modules on page 224. Brocade NetIron MLXe Series Hardware Installation Guide 53-1004203-04...
-
Page 206: Displaying The Syslog Configuration And Static And Dynamic Buffers
Static and dynamic buffers on page 207. overruns The number of times the dynamic log buffer has filled up and been cleared to hold new entries. For example, if the buffer is set for 100 Brocade NetIron MLXe Series Hardware Installation Guide 53-1004203-04... - Page 207 Syntax: clear logging [ dynamic-buffer | static-buffer] Specify the dynamic-buffer keyword to clear the dynamic buffer, or the static-buffer keyword to clear the static buffer. If you do not specify a buffer, both buffers are cleared. Brocade NetIron MLXe Series Hardware Installation Guide 53-1004203-04...
-
Page 208: Router Headless State By Mp Presence From Lp
When LP detects no MPs are present, LP will reset in another 35 seconds. The below warning message is displayed in LP console before reset. WARNING mp_presence_threshold_log: LP will go for a reset in another 35 seconds. Brocade NetIron MLXe Series Hardware Installation Guide 53-1004203-04... -
Page 209: Rolling Reboot
High speed switch fabric (HSF) modules can operate in Normal mode or Turbo mode. Standard switch fabric modules (SFM) can only operate in Normal mode. The HSF module is classified as a G2 module and SFM module is classified as a G1 module. Brocade NetIron MLXe Series Hardware Installation Guide 53-1004203-04... -
Page 210: Forcing Hsf Modules To Operate In Normal Mode
This procedure requires that you restart your router. In a router with both standard (G1) switch fabric modules and G2 HSF modules, you can block the discovery of the G1 switch fabric modules by entering the system-init block-g1-sfm command. Brocade NetIron MLXe Series Hardware Installation Guide 53-1004203-04... -
Page 211: Managing The Cooling System
If the temperature of a management module, switch fabric module, or one interface module exceeds the high threshold specified for a fan speed, the fan changes to the next higher speed. If the temperature of any of the modules exceeds the high Brocade NetIron MLXe Series Hardware Installation Guide 53-1004203-04... - Page 212 113 ° C Medium-high 70 ° C 87 ° C Medium 66 ° C 85 ° C -1 ° 83 ° C Switch fabric module High 47 ° C 75 ° C Brocade NetIron MLXe Series Hardware Installation Guide 53-1004203-04...
- Page 213 (79 ° C) is lower than the high temperature threshold (82 ° C) for the medium-high speed. Fan speed Low temperature threshold High temperature threshold High 79 ° C 87 ° C Medium-high 69 ° C 82 ° C Brocade NetIron MLXe Series Hardware Installation Guide 53-1004203-04...
- Page 214 = 0 0 0 0 0 0 0 0 0 0 0 0 0 0 0 0 === Thermal Sensor Control Block (THERMAL_SENSOR_TEST_RULE_STANDBY_MP_CPU) === Fan Speed Low: -1 - 60 Fan Speed Med: 57 - 70 Fan Speed Med-Hi: 67 - 80 Fan Speed Hi: 77 - 95 Brocade NetIron MLXe Series Hardware Installation Guide 53-1004203-04...
- Page 215 SFM FE2 reading THERMAL_SENSOR_TEST_RULE_SNM fan-threshold switch-fabric SFM FE3 reading THERMAL_SENSOR_TEST_RULE_SNM fan-threshold switch-fabric hSFM FE1 reading THERMAL_SENSOR_TEST_RULE_SNM_G2 fan-threshold switch-fabric-g2 hSFM FE2 reading THERMAL_SENSOR_TEST_RULE_SNM_G2 fan-threshold switch-fabric-g2 hSFM FE3 reading THERMAL_SENSOR_TEST_RULE_SNM_G2 fan-threshold switch-fabric-g2 Brocade NetIron MLXe Series Hardware Installation Guide 53-1004203-04...
- Page 216 For the seconds parameter, you can specify a value from 30 - 120. NOTE Adjusting temperature polling interval out of the default setting can negatively affect the efficient cooling of blades and may cause a blade to overheat and shutdown. Brocade NetIron MLXe Series Hardware Installation Guide 53-1004203-04...
-
Page 217: Manually Setting The Fan Speed
Back fan tray 4: Status = OK, Speed = LOW (50%) For information about all output generated by the show chassis command, refer to Displaying device status and temperature readings page 204. Brocade NetIron MLXe Series Hardware Installation Guide 53-1004203-04... -
Page 218: Temperature Log Reduction
The verbose option generates logs whenever a temperature threshold is crossed. This is the operational mode of previous versions of Multi-Service IronWare software and provides backward compatibility. • The high option generates logs only when the high threshold is crossed. Brocade NetIron MLXe Series Hardware Installation Guide 53-1004203-04... -
Page 219: Managing Interface Modules
You want to disable synchronization; for example, you have upgraded the image of one interface module but want to continue running the older image on all other interface modules. The following sections discuss how to manage software image synchronization in these situations. Brocade NetIron MLXe Series Hardware Installation Guide 53-1004203-04... - Page 220 By default, the interface modules boot from the primary image located in flash memory. You can change the boot source of one or all interface modules to one of the following sources: • Management module – auxiliary flash card in slot 1 or 2 – Primary or secondary image in the management module flash memory Brocade NetIron MLXe Series Hardware Installation Guide 53-1004203-04...
- Page 221 The slot-number parameter specifies the device slot number that contains the interface module that will undergo an immediate boot.You can specify 1 - 4 for 4-slot devices, 1 - 8 for 8-slot devices, 1 - 16 for 16-slot devices, or 1 - 32 for 32-slot devices. Brocade NetIron MLXe Series Hardware Installation Guide 53-1004203-04...
- Page 222 CONFIG level. If you save this configuration by entering the write memory command, the system implements the automatic boot starting with the next software reload or system reset and each reload or reset after that. Brocade NetIron MLXe Series Hardware Installation Guide 53-1004203-04...
- Page 223 The ip-address parameter specifies the IP address of the TFTP server from which the interface modules will be booted. • The filename parameter specifies the name of the image from which to boot the interface modules. Brocade NetIron MLXe Series Hardware Installation Guide 53-1004203-04...
-
Page 224: Changing Priority Of Slots For Interface Modules
1, enter the following command at the Privileged EXEC level of the CLI. device# power-off lp 1 To disable power on all interface modules, enter the following command: device# power-off lp all Brocade NetIron MLXe Series Hardware Installation Guide 53-1004203-04... -
Page 225: Monitoring Link Status
This feature is included by default in NetIron R05.3.00 and later; no configuration is required to enable it. Disabling monitoring link status To disable the link status monitoring feature, enter the following command: no system-monitoring tm port-control Brocade NetIron MLXe Series Hardware Installation Guide 53-1004203-04... -
Page 226: Displaying Fabric Link Status
DOWN - In a non-operational condition Syslog messages The following syslog messages are related to link monitoring: • System: Interface Ethernet 3/1, state down -fabric connectivity down • System: Interface Ethernet 3/1, state up -fabric connectivity up Brocade NetIron MLXe Series Hardware Installation Guide 53-1004203-04... -
Page 227: Traffic Manager Xpp Link Monitoring
Two recovery actions are possible which are listed below: sysmon tmnif-check action disable-ports NOTE disable-ports is default action. [no] sysmon tmnif-check actionreset-linecard Parameters count Number of link error events occurred within this polling period. polling period Period for polling. Brocade NetIron MLXe Series Hardware Installation Guide 53-1004203-04... -
Page 228: Using Alarms To Collect And Monitor Device Status
To take advantage of this feature, you should first set the alarm history buffer size. This is optional, but you have the option to limit how many entries are stored in the alarm history so you can free up space for other resources. Refer to Configuring Alarm History Buffer Size on page 229 for more information. Brocade NetIron MLXe Series Hardware Installation Guide 53-1004203-04... -
Page 229: Configuring Alarm History Buffer Size
By default, all hardware status alarm levels of major severity and higher are logged. If you have configured different levels to be logged, only those levels of alarms can be displayed using the show alarm command. Brocade NetIron MLXe Series Hardware Installation Guide 53-1004203-04... - Page 230 [history] chassis subsystem all | x To display all alarms in the alarm log for all management modules and subsystems for the show alarm management modules. [history] mp all Brocade NetIron MLXe Series Hardware Installation Guide 53-1004203-04...
- Page 231 If the temperature increases into shutdown range, a critical level alarm is reported and logged in the alarm logs. Optics Alarms and warnings are monitored only for optic devices that support optical monitoring. If optical monitoring is disabled, then no alarms are generated. Brocade NetIron MLXe Series Hardware Installation Guide 53-1004203-04...
-
Page 232: Clearing The Alarm History Log
To disable Syslog fan-speed-change logging, enter the following command: device(config)# no logging enable fan-speed-change For additional information on SNMP traps and logging, refer to the Unified MIB Reference . Brocade NetIron MLXe Series Hardware Installation Guide 53-1004203-04... -
Page 233: Displaying Mr2 Management Module Memory Usage
To enable the usage averaging calculations, enter the following command at the global CONFIG level of the CLI. device(config)# cpu-usage on Syntax: cpu-usage on To disable the usage averaging calculations, enter the following command at the global CONFIG level of the CLI. device(config)# cpu-usage off Syntax: cpu-usage off Brocade NetIron MLXe Series Hardware Installation Guide 53-1004203-04... -
Page 234: Displaying Cpu Usage
2478 mpls mpls_glue bgp_io ospf ospf_r_calc isis isis_spf mcast msdp vrrp ripng ospf6 ospf6_rt mcast6 gvrp_mgr snmp rmon lacp dot1x dot1ag hw_access 1049 ospf_msg_task telnet_0 telnet_1 Syntax: show cpu Brocade NetIron MLXe Series Hardware Installation Guide 53-1004203-04... -
Page 235: Displaying Management Module Cpu Usage
All MAC address entries for a specified interface module • All MAC address entries for a specified Ethernet port • All MAC address entries for a specified VLAN • A specified MAC address entry in all VLANs Brocade NetIron MLXe Series Hardware Installation Guide 53-1004203-04... -
Page 236: Ipv6 Nd Proxy
If the received packet is an ICMPv6 Neighbor Advertisement (NA), the neighbor cache on the receiving interface is first updated as if the NA were locally destined, and then the NA is proxied. Brocade NetIron MLXe Series Hardware Installation Guide 53-1004203-04... -
Page 237: Ipv6 Nd Proxy Configuration Tasks
As per the topology mentioned in the packet flow if the proxy is configured on R2, this static route can be configured on R1 with a destination prefix of 2002::/64. The static route can also be configured ve as an outgoing interface. Brocade NetIron MLXe Series Hardware Installation Guide 53-1004203-04... - Page 238 ( Truncated output showing only static route) ipv6 route 2002::/64 ethernet 1/1 ipv6 route 2003::/64 ve 10 vrf green rd 66:66 address-family ipv6 ipv6 route 2002::/64 ethernet 1/1 ipv6 route 2003::/64 ve 10 exit-vrf Brocade NetIron MLXe Series Hardware Installation Guide 53-1004203-04...
- Page 239 The IPv6 nd proxy is not supported for the IPsec tunnels and on MCT. Examples To enable the IPv6 ND proxy feature for the node: R2>#en No password has been assigned yet... R2#conf t R2(config)# ipv6 nd proxy R2(config)# Brocade NetIron MLXe Series Hardware Installation Guide 53-1004203-04...
- Page 240 The ipv6 nd local-proxy command is supported for the VE interface, but not for the VE over VPLS interface. To enable the IPv6 ND local-proxy feature for the node: R2>#en No password has been assigned yet... R2#conf t R2(config)#int eth3/1 R2(config-if-e10000-3/1)#ipv6 nd local-proxy R2(config-if-e10000-3/1)# Brocade NetIron MLXe Series Hardware Installation Guide 53-1004203-04...
-
Page 241: Ipv6 Route
Causes packets to the selected destination to be dropped by shunting them to the "null0" interface. (This is the only available option.) ethernet slot/port Specifies the Ethernet slot or port. ve ve-id Specifies the virtual Ethernet (VE) interface VE ID. Brocade NetIron MLXe Series Hardware Installation Guide 53-1004203-04... - Page 242 The no form of the command removes the IPv6 static route. If the route is named, the no command must be used twice, the first time to remove the name and the second time to remove the route. Brocade NetIron MLXe Series Hardware Installation Guide 53-1004203-04...
-
Page 243: Drbg Health Test On Ipsec Lp
The type of DRBG mechanism and the cryptographic primitives used (e.g., AES-128 or SHA-256), are as follows: • Type of DRBG mechanism: Hash Based • Cryptographic primitives used: SHA-256 Security strengths of the cryptographic algorithms supported by the implementation: 256 Brocade NetIron MLXe Series Hardware Installation Guide 53-1004203-04... - Page 244 NetIron XMR/MLX Boot Monitor Version 5.9.0 Enter 'b' to stop at boot monitor sent IPC_MSGTYPE_REBOOT to slot 16 (my_slot = 0, ipc_post_rx32_mode = 0) received IPC_MSGTYPE_REBOOT_ACK from fid d020 get_module_type: board_class = 244 Brocade NetIron MLXe Series Hardware Installation Guide 53-1004203-04...
-
Page 245: Maintenance And Field Replacement
Replace the air filters quarterly. You can also replace the following hardware components, as needed: • All modules (management, interface, and switch fabric). • Fiber-optic transceivers. • AC or DC power supplies. • Fan assemblies. Brocade NetIron MLXe Series Hardware Installation Guide 53-1004203-04... -
Page 246: Replacing A Management Module
Remove the two screws holding the compact flash card cover in place using a flat head or Phillips screw driver. Put the screws and cover plate aside; you will need to reattach the cover using the screws after installing the card. Slide the compact flash card into the slot. Brocade NetIron MLXe Series Hardware Installation Guide 53-1004203-04... -
Page 247: Replacing An Interface Module
Removing and replacing an interface module To remove or replace an interface module, see the module instructions in the installation chapter that is appropriate for your router model. Brocade NetIron MLXe Series Hardware Installation Guide 53-1004203-04... -
Page 248: Replacing A Switch Fabric Module
Replacing a fiber-optic transceiver You can replace a fiber-optic transceiver in a 10 Gigabit Ethernet port while the device is powered on and running. Brocade NetIron MLXe Series Hardware Installation Guide 53-1004203-04... -
Page 249: Cabling A Fiber-Optic Transceiver
Determining which power supply failed To determine which power supply has failed, enter the show chassis command at any CLI command prompt. device# show chassis Brocade NetIron MLXe Series Hardware Installation Guide 53-1004203-04... -
Page 250: Setting The Threshold For Power Supply Monitoring
You are asked to verify this command by entering "yes" or "no". Syntax: power-supply monitoring clear decimal | all ] By default, no power-supply monitoring is configured. The decimal variable specifies a power supply number, The all keyword clears all available power supplies. Brocade NetIron MLXe Series Hardware Installation Guide 53-1004203-04... -
Page 251: Displaying Power Supply Monitoring Timestamps
Use the following command to show the uptime of modules: device#show version | include time Active Management uptime is 9 minutes 30 seconds Standby Management uptime is 8 minutes 45 seconds LP Slot 3 uptime is 8 minutes 48 seconds Brocade NetIron MLXe Series Hardware Installation Guide 53-1004203-04... -
Page 252: Enabling A Power Supply Shutdown
Enabling a power supply shutdown on page 252. To turn on a power supply that has shut down, enter the following command. device# power-on power-supply 1 AC Power Supply 1 is OK Brocade NetIron MLXe Series Hardware Installation Guide 53-1004203-04... -
Page 253: Replacing A Power Supply
To prevent damage to the chassis and components, never attempt to lift the chassis using the fan or power supply handles. These handles were not designed to support the weight of the chassis. Disconnect the power supply from the power source. Disconnect the power cables from the power supply. Brocade NetIron MLXe Series Hardware Installation Guide 53-1004203-04... - Page 254 Latch handle open AC power input LED (AC OK) Lift up latch handle to lock DC power output LED (DC OK) 7 & 8 Power supply blank cover Alarm LED (ALM) Power supply Brocade NetIron MLXe Series Hardware Installation Guide 53-1004203-04...
-
Page 255: Replacing Fan Assemblies
This section describes how to replace fan assemblies in MLXe 32-slot routers. CAUTION Removal of Brocade NetIron MLXe Series 32 rear fan modules allows access to bus bars and backplane. Avoid contact with these parts. There are hazardous energy levels at these locations. - Page 256 Put on the ESD wrist strap and ground yourself by inserting the plug into the ESD connector on the router. Using the screwdriver, remove the screws that secure the fan assembly faceplate to the rear of the router. Brocade NetIron MLXe Series Hardware Installation Guide 53-1004203-04...
- Page 257 Be careful not to accidently insert your fingers into the fan tray while removing it from the chassis. The fan may still be spinning at a high speed. FIGURE 111 32-slot router fan assemblies Fan module 1 Fan module 6 Fan module 2 Fan module 7 Brocade NetIron MLXe Series Hardware Installation Guide 53-1004203-04...
-
Page 258: Replacing Fan Assemblies In 16-Slot Routers
Put on the ESD wrist strap and ground yourself by inserting the plug into the ESD connector on the router. Loosen the four captive screws that secure the fan assembly to the router. Brocade NetIron MLXe Series Hardware Installation Guide 53-1004203-04... -
Page 259: Replacing The Fan Tray Assembly In 4-Slot And 8-Slot Routers
To replace a fan tray assembly, have these items available: • A new fan tray assembly, which you can order from Brocade. • An ESD wrist strap with a plug for connection to the ESD connector on the router. Brocade NetIron MLXe Series Hardware Installation Guide 53-1004203-04... - Page 260 Follow these steps to replace fan tray assemblies in 4-slot routers. Put on the ESD wrist strap and ground yourself by inserting the plug into the ESD connector on the router. Brocade NetIron MLXe Series Hardware Installation Guide 53-1004203-04...
- Page 261 Tighten the four captive screws to secure the fan to the router. Access the CLI, and enter the show chassis command to verify that the fans are operating normally. Brocade NetIron MLXe Series Hardware Installation Guide 53-1004203-04...
-
Page 262: Replacing The Air Filters
FIGURE 115 32-slot router air inlet panel. Captive screws Remove the old air filter by pulling it straight out from the router, as shown in the following figure. Brocade NetIron MLXe Series Hardware Installation Guide 53-1004203-04... - Page 263 Replacing the air filter in Brocade MLXe 4-slot and 8-slot routers Follow these steps to replace the air filter in Brocade MLXe Series 4-slot and 8-slot routers. Loosen the two screws in the front of the filter tray. Brocade NetIron MLXe Series Hardware Installation Guide 53-1004203-04...
- Page 264 Remove the old air filter from the tray and discard it. Insert the replacement air filter into the air filter tray. Replace the filter tray in the router and tighten the two screws. Brocade NetIron MLXe Series Hardware Installation Guide 53-1004203-04...
-
Page 265: Installing Upward Deflectors On Fan Assemblies
The following items are required for this procedure: • Phillips screwdriver • Small flathead screwdriver • ESD wrist strap DANGER For safety reasons, the ESD wrist strap should contain a series 1 megaohm resistor. Brocade NetIron MLXe Series Hardware Installation Guide 53-1004203-04... - Page 266 CAUTION Removal of Brocade NetIron MLXe Series 32 rear fan modules allows access to bus bars and backplane. Avoid contact with these parts. There are hazardous energy levels at these locations. Remove the fan assembly by grasping the handle on the faceplate and pulling the fan assembly toward you. Pulling the fan assembly unseats the fan connector from the router.
- Page 267 If present, remove and discard the tape that stabilizes louvers in some fan assembly models. When present, the tape is located on the right and left sides of the fan assembly. FIGURE 120 Removing the fan assembly faceplate FIGURE 121 Removing tape from the fan assembly Brocade NetIron MLXe Series Hardware Installation Guide 53-1004203-04...
- Page 268 Orient the upward deflector on the fan assembly faceplate so that the exhaust will flow upward and the holes in the upward deflector align with the holes where the screws secure the handle to the fan assembly faceplate. Refer to the previous figure. Brocade NetIron MLXe Series Hardware Installation Guide 53-1004203-04...
- Page 269 Check the fan status LED in the lower left corner of the faceplate. It will glow red momentarily when power is applied, and then it will change to green when the fan comes up to speed. To verify that the fan is operating correctly, access the CLI and enter the show chassis command. Brocade NetIron MLXe Series Hardware Installation Guide 53-1004203-04...
- Page 270 Brocade NetIron MLXe Series Hardware Installation Guide 53-1004203-04...
-
Page 271: Hardware Specifications
80A maximum per power supply (3000W PSU) • DC Operating Range: -40 to -60V – Inrush current <70A peak for any initial current surge or spike of 10mS or less at either cold or warm start. Brocade NetIron MLXe Series Hardware Installation Guide 53-1004203-04... - Page 272 146W 24-port 1 Gbps Ethernet copper RJ45 interface module 160W 24-port 1 Gbps Ethernet fiber interface module 160W 24-port 10 Gbps Ethernet interface module 320W 48-port Gbps Ethernet with MRJ-21 interface 260W Brocade NetIron MLXe Series Hardware Installation Guide 53-1004203-04...
-
Page 273: Physical Dimensions
4060 13858 4060 13858 4060 13858 MLXe- 7107 24255 7107 24255 7107 24255 MLXe- 14232 48575 14232 48575 Physical dimensions The following table provides the physical dimensions for Brocade MLXe Series routers. Brocade NetIron MLXe Series Hardware Installation Guide 53-1004203-04... -
Page 274: Operating Environment
EN 60825-1 Safety of Laser Products - Part 1: Equipment Classification, Requirements and User’s Guide • EN 60825-2 Safety of Laser Products - Part 2: Safety of Optical Fibre Communications Systems • EN 60950-1:2006\IEC 60950-1:2005, Second Edition, Safety of Information Technology Equipment Brocade NetIron MLXe Series Hardware Installation Guide 53-1004203-04... -
Page 275: Electromagnetic Approvals
The console port is a standard male DB-9 connector, as shown in the following figure. For information about how you can use this port, refer to Console port on page 31. FIGURE 124 Console port pin and signaling details Brocade NetIron MLXe Series Hardware Installation Guide 53-1004203-04... -
Page 276: Management Port Pin Assignments
10/100/1000 Ethernet port on page 31. TABLE 55 Management port pin assignments Pin number MDI-X ports Not used (10BaseT)CMT (100BaseTX) Not used (10BaseT)CMT (100BaseTX) Not used (10BaseT)CMT (100BaseTX) Not used (10BaseT)CMT (100BaseTX) Brocade NetIron MLXe Series Hardware Installation Guide 53-1004203-04... -
Page 277: Brocade Mlxe Chassis Bundles
Bundle contents: • 1 Brocade MLXe-4 AC chassis • 1 MR management module(NI-XMR-MR) • 2 high speed switch fabric modules(NI-X-4-HSF) • 1 1200W AC power supply(NI-X-ACPWR) • 4 exhaust fan assembly kits(BR-MLXE-4-FAN) Brocade NetIron MLXe Series Hardware Installation Guide 53-1004203-04... - Page 278 1 MR2 (X) management module(BR-MLX-MR2-X) • 2 high speed switch fabric modules(NI-X-4-HSF) • 1 1800W DC power supply(BR-MLXE-DCPWR-1800) • 4 exhaust fan assembly kits(BR-MLXE-4-FAN) • 1 air filter(BR-MLXE-4-FLTR) Power cord is not included. Brocade NetIron MLXe Series Hardware Installation Guide 53-1004203-04...
- Page 279 2 exhaust fan assembly kits(BR-MLXE-8-FAN) • 1 air filter(BR-MLXE-8-FLTR) Power cord is not included. BR-MLXE-8-MR-X-DC Bundle contents: • 1 Brocade MLXe-8 DC chassis • 1 MR management module(NI-XMR-MR) • 2 high speed switch fabric modules(NI-X-16-8-HSF) Brocade NetIron MLXe Series Hardware Installation Guide 53-1004203-04...
- Page 280 TABLE 58 Brocade MLXe Series-16 chassis bundles Part number Hardware BR-MLXE-16-AC Bundle contents: • 1 Brocade MLXe Series-16 chassis • 3 high speed switch fabric modules(NI-X-16-8-HSF) • 4 1200W AC power supplies(NI-X-ACPWR) • 2 exhaust fan assembly kits(BR-MLXE-16-FAN) Brocade NetIron MLXe Series Hardware Installation Guide 53-1004203-04...
- Page 281 1 MR management module(NI-XMR-MR) • 3 high speed switch fabric modules(NI-X-16-8-HSF) • 4 1200W DC power supply(NI-X-ACPWR) • 2 exhaust fan assembly kits(BR-MLXE-16-FAN) • 1 air filter(BR-MLXE-16-FLTR) Power cord is not included. Brocade NetIron MLXe Series Hardware Installation Guide 53-1004203-04...
- Page 282 1 Brocade MLXe Series-16 spare chassis Brocade MLXe, NetIron MLX, and NetIron XMR Hardware Installation Guide BR-MLXE-32-S 1 Brocade MLXe Series-32 spare chassis Brocade MLXe, NetIron MLX, and NetIron XMR Hardware Installation Guide Brocade NetIron MLXe Series Hardware Installation Guide 53-1004203-04...
- Page 283 2 air filters(BR-MLXE-32-FLTR) • Cable management system Power cord is not included. BR-MLXE-32-MR-X-AC Bundle contents: • 1 Brocade MLXe-32 AC chassis • 1 MR management module(BR-MLX-32-MR) • 7 high speed switch fabric modules(NI-X-32-HSF) Brocade NetIron MLXe Series Hardware Installation Guide 53-1004203-04...
- Page 284 1 MR2 (X) management module(BR-MLX-32-MR2-X) • 7 high speed switch fabric modules(NI-X-32-HSF) • 4 3000W AC power supplies(BR-MLXE-32-ACPWR-3000) • 2 power supply fans (NIBI-32-PSFAN) • 8 exhaust fan assembly kits(BR-MLXE-32-FAN) • 2 air filters(BR-MLXE-32-FLTR) Brocade NetIron MLXe Series Hardware Installation Guide 53-1004203-04...
- Page 285 7 high speed switch fabric modules(NI-X-32-HSF) • 4 3000W DC power supplies(BR-MLXE-32-DCPWR-3000) • 2 power supply fans(NIBI-32-PSFAN) • 8 exhaust fan assembly kits(BR-MLXE-32-FAN) • 2 air filters (BR-MLXE-32-FLTR) • Cable management system Power cord is not included. Brocade NetIron MLXe Series Hardware Installation Guide 53-1004203-04...
- Page 286 Brocade NetIron MLXe Series Hardware Installation Guide 53-1004203-04...
-
Page 287: Regulatory Statements
This Class A digital apparatus meets all requirements of the Canadian Interference-Causing Equipment Regulations, ICES-003 Class A. Cet appareil numérique de la classe A est conforme à la norme NMB-003 du Canada. Brocade NetIron MLXe Series Hardware Installation Guide 53-1004203-04... -
Page 288: China Cc Statement
Europe and Australia (CISPR 22 Class A Warning) This is a Class A product. In a domestic environment this product may cause radio interference in which case the user may be required to take adequate measures. Brocade NetIron MLXe Series Hardware Installation Guide 53-1004203-04... -
Page 289: Fcc Warning (Us Only)
Class A device (Broadcasting Communication Device for Office Use): This device obtained EMC registration for office use (Class A), and may be used in places other than home. Sellers and/or users need to take note of this. Brocade NetIron MLXe Series Hardware Installation Guide 53-1004203-04... -
Page 290: Vcci Statement
2006/66/EC - batteries and accumulators and waste batteries and accumulators (EU battery directive). • 1907/2006 of the European Parliament and of the Council of 18 December 2006 concerning the Registration, Evaluation, Authorisation and Restriction of Chemicals (EU REACH). Brocade NetIron MLXe Series Hardware Installation Guide 53-1004203-04... - Page 291 • 30/2011/TT-BCT - Vietnam circular. • SJ/T 11363-2006 Requirements for Concentration Limits for Certain Hazardous Substances in EIPs (China). • SJ/T 11364-2006 Marking for the Control of Pollution Caused by EIPs (China). Brocade NetIron MLXe Series Hardware Installation Guide 53-1004203-04...
- Page 292 Brocade NetIron MLXe Series Hardware Installation Guide 53-1004203-04...
-
Page 293: Caution And Danger Notices
Never leave tools inside the chassis. VORSICHT Lassen Sie keine Werkzeuge im Chassis zurück. MISE EN GARDE Ne laissez jamais d'outils à l'intérieur du châssis PRECAUCIÓN No deje nunca herramientas en el interior del chasis. Brocade NetIron MLXe Series Hardware Installation Guide 53-1004203-04... -
Page 294: Electrical Cautions
Utilisez un circuit de dérivation différent pour chaque cordon d’alimentation ainsi, il y aura un circuit redondant en cas de panne d’un des circuits. PRECAUCIÓN Use un circuito derivado separado para cada cordón de alimentación, con lo que se proporcionará redundancia en caso de que uno de los circuitos falle. Brocade NetIron MLXe Series Hardware Installation Guide 53-1004203-04... - Page 295 Se entiende como área de acceso restringido un lugar al que solo puede acceder personal de servicio mediante el uso de una herramienta especial, llave y cerrojo u otro medio de seguridad similar, y que esté controlado por la autoridad responsable de esa ubicación. Brocade NetIron MLXe Series Hardware Installation Guide 53-1004203-04...
- Page 296 A-Leistungsschalter (min. -48VDC) am Eingang zur Reihenklemme installiert wird. Beim Eingangsdraht für den Anschluss am Produkt muss es sich um einen zulässigen Kupferdraht (12 AWG gekennzeichnet mit VW-1), der für mindestens 90° C ausgelegt ist, handeln. Brocade NetIron MLXe Series Hardware Installation Guide 53-1004203-04...
- Page 297 Eingangskabelschuhen zur Stromversorgung ein zweipoliger Schalter mit UL-Zulassung, 80 Ampere und mindestens -48 V Gleichstrom vorhanden ist. Die Eingangsleitung zum Anschluss an das Produkt sollte als Kupferdraht, angegeben, als VW-1 gekennzeichnet und für mindestens 90 °C bemessen sein. Brocade NetIron MLXe Series Hardware Installation Guide 53-1004203-04...
- Page 298 (suministrado con el chasis) acoplado a un extremo, y el otro extremo debe estar conectado a la tierra del edificio. El conector debe rizarse con la herramienta apropiada, de manera que se conecte a los dos tornillos de tierra del recinto. Brocade NetIron MLXe Series Hardware Installation Guide 53-1004203-04...
- Page 299 Si no instala un módulo o un fuente de alimentación en la ranura, deberá mantener el panel de ranuras en su lugar. Si pone en funcionamiento el chasis con una ranura descubierta, el sistema sufrirá sobrecalentamiento. Brocade NetIron MLXe Series Hardware Installation Guide 53-1004203-04...
-
Page 300: Cautions Related To Equipment Weight
No inserte nunca el suministro de energía de manera invertida. CAUTION Removal of Brocade NetIron MLXe Series 32 rear fan modules allows access to bus bars and backplane. Avoid contact with these parts. There are hazardous energy levels at these locations. -
Page 301: Danger Notices
Disconnect the power cord from all power sources to completely remove power from the device. GEFAHR Ziehen Sie das Stromkabel aus allen Stromquellen, um sicherzustellen, dass dem Gerät kein Strom zugeführt wird. Brocade NetIron MLXe Series Hardware Installation Guide 53-1004203-04... - Page 302 à la source d'alimentation. PELIGRO Verifique que circuitos de la fuente de corriente están conectados a tierra correctamente; luego use el cordón de potencia suministrado con el instrumento para conectarlo a la fuente de corriente Brocade NetIron MLXe Series Hardware Installation Guide 53-1004203-04...
- Page 303 Hoher Ableitstrom. Vor Anschluss ans Netz Schutzerdung herstellen. DANGER Courant de fuite élevé. Mise à la terre obligatoire avant la connexion de l'alimentation. PELIGRO Alta tensión al tacto. La conexión a tierra es esencial antes de conectar la alimentación. Brocade NetIron MLXe Series Hardware Installation Guide 53-1004203-04...
-
Page 304: Dangers Related To Equipment Weight
INTERFAZ Y DE ALIMENTACIÓN (administración, matriz de conmutación, y todas las tarjetas de línea). Utilice un elevador mecánico para levantar el chasis. Hacen falta cuatro personas o más para colocar el chasis no poblado en el interior del armazón. Brocade NetIron MLXe Series Hardware Installation Guide 53-1004203-04... -
Page 305: Laser Dangers
Rayonnement de laser. Ne regardez pas directement avec les instruments optiques. Produits de laser de la classe 1M. PELIGRO Radiacion de Laser. No vea directamente con Instrumentos Opticos. Clase 1M de Productos de Laser. 警告 レーザ放射 光学器具で直接ビームを見ないこと クラス1 M レーザ製品 Brocade NetIron MLXe Series Hardware Installation Guide 53-1004203-04...