Table of Contents
Advertisement
Quick Links
Advertisement
Table of Contents

Related Manuals for InFocus INF5520A


Summary of Contents for InFocus INF5520A
-
Page 3: Table Of Contents
Ataching the HD Video Conferencing Camera ..........................13 Connecing to Other Devices ................................. 14 Connecing AC Power ..................................15 Turning the INF5520a On/Of ................................16 Seing up the Wireless Mouse and Keyboard ............................. 17 Wireless Mouse ..................................... 17 Wireless Keyboard ..................................17 Using the Remote .................................... -
Page 5: Declaration Of Conformity
Adobe Systems Incorporated. HDMI logo and “High Deiniion Mulimedia Interface” are registered trademarks of HDMI Licensing LLC. Vidtel is a trademark of Vidtel, Inc. InFocus, In Focus, and INFOCUS (stylized) are either registered trademarks or trademarks of InFocus Corporaion in the United States and other countries. All other trademarks are the property of their respecive owners. Any other trademarks, service marks, personal names or product names are assumed to be the property of their respecive owners and are used only for reference. - Page 6 Canada This Class A digital apparatus complies with Canadian ICES-003. Cet appareil numérique de la classe A est conforme à la norme NMB- 003 du Canada. INFORMATION FOR RADIO FREQUENCY DEVICES ONLY: This device complies with part 15 of the FCC Rules / RSS-210. Operaion is subject to the following two condiions: (1) This device may not cause harmful interference and (2) this device must accept any interference received, including interference that may cause undesired operaion.
- Page 7 Energy Star As an ENERGY STAR Partner, InFocus Corporaion has determined that this product meets the ENERGY STAR guidelines for energy eiciency. ENERGY STAR® is a joint program of the U.S. Environmental Protecion Agency and the U.S. Department of Energy aimed at saving money and protecing the environment through energy eicient products and pracices.
-
Page 8: Safety Considerations
Safety Considerations Please read and follow all safety instrucions provided below and on the monitor before connecing the monitor to a power source. Failure to comply with safety instrucions may result in ire, electrical shock, or personal injury and may damage or impair protecion provided by the equipment. - Page 9 Refer all service to qualiied service personnel. Do not remove the cover or back. Servicing your own monitor can be dangerous to you and will void the warranty. • Only use replacement parts speciied by InFocus. Unauthorized subsituions may result in ire, electrical shock or injury and may void the warranty. •...
-
Page 10: Informaion About This Hardware Guide
Although this product comes pre-installed with the Mondopad sotware, you must irst assemble the product. This Hardware Guide will assist you in seing up the INF5520a. Ater the product is fully installed, please refer to the Mondopad Sotware Guide at www.infocus.com/support for more informaion. Page 8... -
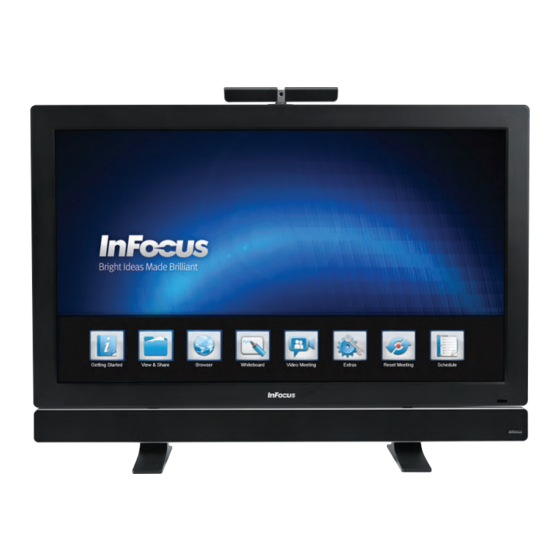
Page 11: What's Included
(set of two) *Not included for all countries. For setup purposes, a keyboard and mouse are recommended. For addiional accessory opions, such as stands, carts and wall mounts, see the InFocus website (www.infocus.com/store) or your local dealer. INF5520a Hardware Guide... -
Page 12: Setup
Carefully place your monitor face-down on a clean, cushioned surface with the top edge hanging of of the cushioned surface by 4-5” (10-13cm). Do NOT place the INF5520a on its back. Atach the four small rectangular brackets to the sound bar speakers with the provided screws as shown below. - Page 13 Connect the other end of the AC power cord to the AC Out jack on the Botom Connector Panel of the monitor. Plug the sound bar’s audio cable into the Audio Out (RCA R/L) jack on the Side Connector Panel located on the back of the monitor. Turn the power switch ON. INF5520a Hardware Guide Page 11...
-
Page 14: Installing The Feet
If you have not already done so, carefully place your monitor face-down on a clean, cushioned surface with the top edge hang- ing of of the cushioned surface by 4-5” (10-13cm). Do NOT place the INF5520a on its back. Remove the monitor feet slot covers with a Philips screwdriver. Discard or save for future use. -
Page 15: Attaching The Hd Video Conferencing Camera
Align the camera bracket with the screw holes on the top edge of the backside of the monitor and then secure the camera to the monitor with the two provided thumb screws. Plug the USB cable into an available USB slot on the back of the monitor. Manually ilt and pan the camera (+/- 40°) as desired. INF5520a Hardware Guide Page 13... -
Page 16: Connecting To Other Devices
Connecting to Other Devices A full range of digital and analog video inputs and audio source devices can be connected to the connecion panels on the back and side of the monitor. Available jacks include: HDMI® (2), VGA, Component (RCA), S-Video, Composite, RS232, Audio in RCA (1 – R/L), Audio in 3.5mm (1), Audio Out (1 –... -
Page 17: Connecing Ac Power
Your monitor should only be operated from the power source indicated on the label. • Always unplug the AC power cord from the power outlet when you are not using your monitor for an extended period of ime. INF5520a Hardware Guide Page 15... -
Page 18: Turning The Inf5520A On/Of
Turning the Monitor On/Off Verify that the power cord is connected to a power outlet and that the power switch on the Botom Connector Panel is ON. Press the Power buton located on either: the remote the right side of the monitor or the back of the monitor on the PC box. -
Page 19: Seing Up The Wireless Mouse And Keyboard
Insert two (2) AAA bateries (not included) into the keyboard, by aligning the + and – ends of the bateries and sliding them in place. Replace the cover. Press the CONNECT buton and hold it for one second to allow the keyboard to bind with the dongle. INF5520a Hardware Guide Page 17... -
Page 20: Using The Remote
Using the Remote The remote uses two (2) AAA bateries (not included). Install the bateries by removing the cover from the remote’s back, aligning the + and – ends of the bateries, sliding them in place and replacing the cover. To operate, point the remote at the monitor sensor at the botom right-hand corner of the monitor. - Page 21 CONTRAST Back: Returns the user to the previous menu. BACK Let, Right, Up, Down Arrows and OK: Use these butons to navi- gate through and make changes to the Onscreen Menu features. INF5520a Hardware Guide Page 19...
-
Page 22: Using The Keypad
Info: n/a INFO Vol up: Increases the audio volume. VOL UP Vol down: Decreases the audio volume. Mute: Switches the audio on or of. MUTE Using the Keypad The keypad, located on the right-edge of the monitor, has the following butons: Menu buton: Turns the OSD menu on and of. -
Page 23: Osd (On-Screen Display) Menu System
GAMMA SELECTION SCAN MODE UNDER SCAN SCAN CONVERSION PROGRESSIVE AUTO FILM MODE IR CONTROL KEYBOARD CONTROL TILING HEAT STATUS DATE AND TIME SCHEDULE MONITOR ID DDC/CI ADVANCED OPTION RESET < > Adjust Enter Back Quit INF5520a Hardware Guide Page 21... -
Page 24: Picture Menu
Picture Menu PICTURE BRIGHTNESS CONTRAST SHARPNESS BLACK LEVEL NOISE REDUCTION TINT COLOR 10000K COLOR TEMPERATURE COLOR CONTROL ADAPTIVE CONTRAST STANDARD PICTURE MODE PICTURE RESET < > Adjust Enter Back Quit Brightness: changes the intensity of the image. Range: 0-100. (Default 70.) Contrast: controls the degree of diference between the lightest and darkest parts of the picture and changes the amount of black and white in the image. -
Page 25: Screen Menu
Custom Zoom: allows the user to adjust zoom, horizontal zoom, verical zoom, horizontal posiion and verical posiion of the image. Aspect Raio must be set to Custom to access this feature. Range: 0-100 for each item. Screen Reset: resets all Screen menu items to factory default seings. Opions: Yes and No. INF5520a Hardware Guide Page 23... -
Page 26: Audio Menu
Audio menu AUDIO BALANCE TREBLE BASS SPEAKER INTERNAL AUDIO SOURCE AUDIO RESET < > Adjust Enter Back Quit Balance: adjusts the balance between the let and right audio outputs. Range: 0-100. (Default 50.) Treble: adjusts higher pitched (treble) audio sounds. Range: 0-100. (Default 50.) Bass: adjusts lower-pitched (bass) audio sounds. -
Page 27: Pip Menu
HDMI2 Component S-video Composite INF5520a Hardware Guide Page 25... - Page 28 When the Main picture is PC, the following coniguraions are available: Main Corner-to-Corner When the Main picture is not PC, the following coniguraions are available: Main Main Main Main Picture-on-Picture Side-by-Side Side-by-Side Corner-to-Corner Naive Stretched To change the PiP source: Press remote PiP Input buton. To swap the main and PiP sources: Press the remote’s PiP Swap buton.
-
Page 29: Coniguraion 1
Blank Screen Type: deines the image displayed when the monitor is in Monitor mode (see Operaion Mode above) and no source is detected. Opions include: Black (default), Blue, White and (InFocus) Logo. Coniguraion Reset: resets all Coniguraion 1 and Coniguraion 2 menu items to factory default seings. Opions: Yes and No. -
Page 30: Coniguraion 2
Configuration 2 CONFIGURATION 2 OSD TURN OFF INFORMATION OSD SLEEP TIMER OSD H POSITION OSD V POSITION MONITOR INFORMATION < > Adjust Enter Back Quit OSD Turn Of: controls how many seconds the OSD menu remains on the screen Range: 5-120 (seconds). (Default: 45) Informaion OSD: controls how many seconds the Informaion OSD remains on the screen. -
Page 31: Advanced Opion
Monitor ID: set the ideniicaion number of the monitor via the RS232C connecion. Each monitor must have a unique ideniicaion number when muliple monitors are connected. Range: 1-26. (Default; 1) DDC/CI: enables and disables DDC/CI communicaion. Opions include: On (default) and Of. INF5520a Hardware Guide Page 29... -
Page 32: Troubleshooing
Verify that the INF5520a is turned on (the front LED should be solid green). • Verify that the INF5520a PC is turned on (the PC LED on the back of the INF5520a should be solid green). • Check the Operaion mode in the OSD menu. To see the Mondopad sotware, the Coniguraion 1>... - Page 33 No sound • If using the INF5520a sound bar, verify that the sound bar is connected properly and that the sound bar power switch is turned on. • If the sound bar or an external sound system is not being used, verify that the Speaker seing in the OSD Audio menu is set to Internal.
- Page 34 • The monitor is in standby mode. Press the Power buton on the remote or keypad. Green Green • The monitor is powered on. For Addiional Troubleshooing Support, please contact: InFocus Corporaion Technical Support 6am-5pm PST 877-388-8385 www.infocus.com/support Page 32...
-
Page 35: Speciicaions
Specifications To read the latest speciicaions on the INF5520a, be sure to visit our support website at www.infocus.com/support, as speciicaions are subject to change. Size (viewable) 54.6” (138.7 cm diagonal) Resoluion 1920 x 1080 Refresh rate 60 Hz Viewing angle ±89˚... - Page 36 Camera Resoluion 1280 x 720 pixels Frame rate 720p/30 fps HD MJPEG Lens and Field of View F/2.0, 3P Lens, FOV(D) 56.8° in HD mode, FOV(D) 50° in VGA mode 1.0x zoom, FOV(D) 30° in VGA mode 1.6x zoom Audio support 4 built-in Unidirecional microphones Interface USB 2.0 High Speed...
- Page 37 59.2 x 103.6 x 34.8mm Weight ~68g excluding bateries Bateries Two (2) AAA alkaline Operaing Voltage 2.0V~3.2VDC Power Consumpion <8.5mA @3V Batery Life 150 working hours coninuous operaion Operaing Distance 10M without signal disturbance and no direcion limit INF5520a Hardware Guide Page 35...
-
Page 38: Limited Warranty
If a hardware defect arises and a valid claim is received within the Warranty Period, at its op- ion and to the extent permited by law, InFocus will either (1) repair the hardware defect at no charge, using new parts or refurbished... - Page 39 16 hours coninuously per day with a minimum 8 hour period of coninuous rest in the powered of state; or (m) if any InFocus serial number has been removed or defaced. In addiion, LCD burn-in as a result of excessive display of staic images on the product is not covered under the terms of this Limited Warranty.
- Page 40 InFocus will provide warranty service either (i) at an ASP locaion, where service is performed at the loca- ion, or the ASP may send the product to an InFocus repair service locaion for service, (ii) by sending you prepaid way bills (and if you...
- Page 41 InFocus may uilize a doorstep swap process, which involves an InFocus delivery person delivering the replacement product or CSR part to the Customer and picking up the defecive product or part at the ime of delivery for return to InFocus. Upon receipt of the replacement product or part, the original product or part becomes the property of InFocus and you agree to follow instrucions, including arranging the return of original product or part to InFocus in a imely manner.