

Introduction: MutantC - an Easy to Build Raspberry Pi Handheld/UMPC


A Raspberry-pi handheld platform with a physical keyboard, Display and Expansion header for custom boards (Like Arduino Shield).
First take a look at this in 3D usingAutoDesk Fusion 360 Online.
Now see some key features.
- mutantC v1.4
- It is fully open-source hardware. So you can hack it as you wish.
- You can make your expansion-card like gps, Radio etc and attach them.
- You can use any Raspberry-pi form factor like Asus Tinker Board S / PINE H64 Model B/ Banana Pi BPI-M4B etc. You can use Pi zero to 3.
- You can acess all the ports of the pi and the back part is attached with 4 screw.
- It can hold a 4" or 3.5" touch screen. Also have a physical keyboard attached via USB.
- It don't need any custom image of Raspbian. You can use vanilla Raspbian and install the LCD driver, that's it.
- So little parts needed to make one. See the parts_list .
- You can use C Suite Application suite made more touch based device in this. This apps are suitable for small screens. See the C Suite .
So make yours and help us to make a Community around it.
Youtube channel.
Step 1: Getting Started


Again take a look at this in 3D using AutoDesk Fusion 360 Online.
A Raspberry-pi handheld platform with a physical keyboard, Display and Expansion header for add-on baords (Like Arduino Shield).
Here we will discusses what you need to build one. This device is very easy to make, you don't need lots of tools and parts.
No codding skill is needed. just basic stuff like upload a code to Arduino, little skill in Linux CMD line to install the driver. Little soldering skill that's all.
You need this parts to make one for your self (this are not affiliate links):
- Raspberry-pi - zero, 2, 3. (pi4 is not supported, also it is too hot for this application without a fan).
- LCD - 3.5 inch gpio LCD or 4.0 inch gpio LCD
- Ardinuo for keyboard - SparkFun Pro Micro.
- Push buttons - 6x5x5 mm, 43 peices.
- Printed PCB - 3.5 inch gpio LCD or 4.0 inch gpio LCD
- 3d parts - 6 (1 optional)
- FPC-connector - 2 pis (1mm pitch- 16 pin) link .
- FPC-cable - 1 pis (1mm pitch- 16 pin) link .
- Screw - 10 mm, 1.8mm width.
Step 2: Print PCB and 3d Parts


Download all the Parts STL files from here print by your self or use printedsolid.
And use this two garber files from display_PCB and main_PCB order the pcbs from JLC_PCB or pcb way or oshpark .
Step 3: Solder the Ardiuno Pro Micro and Buttons and FPC Connector


You have cut the headers to keep a low profile.
Don't wast your solder by soldering 4 pins of the PushBottons. Only solder the 2 pins that are connected.
Step 4: Now Put the LCD


Here you also hove to cut the header to fit in the case.
Step 5: Solder the Micro Usb Connector.


Step 6: Now Put All Togather


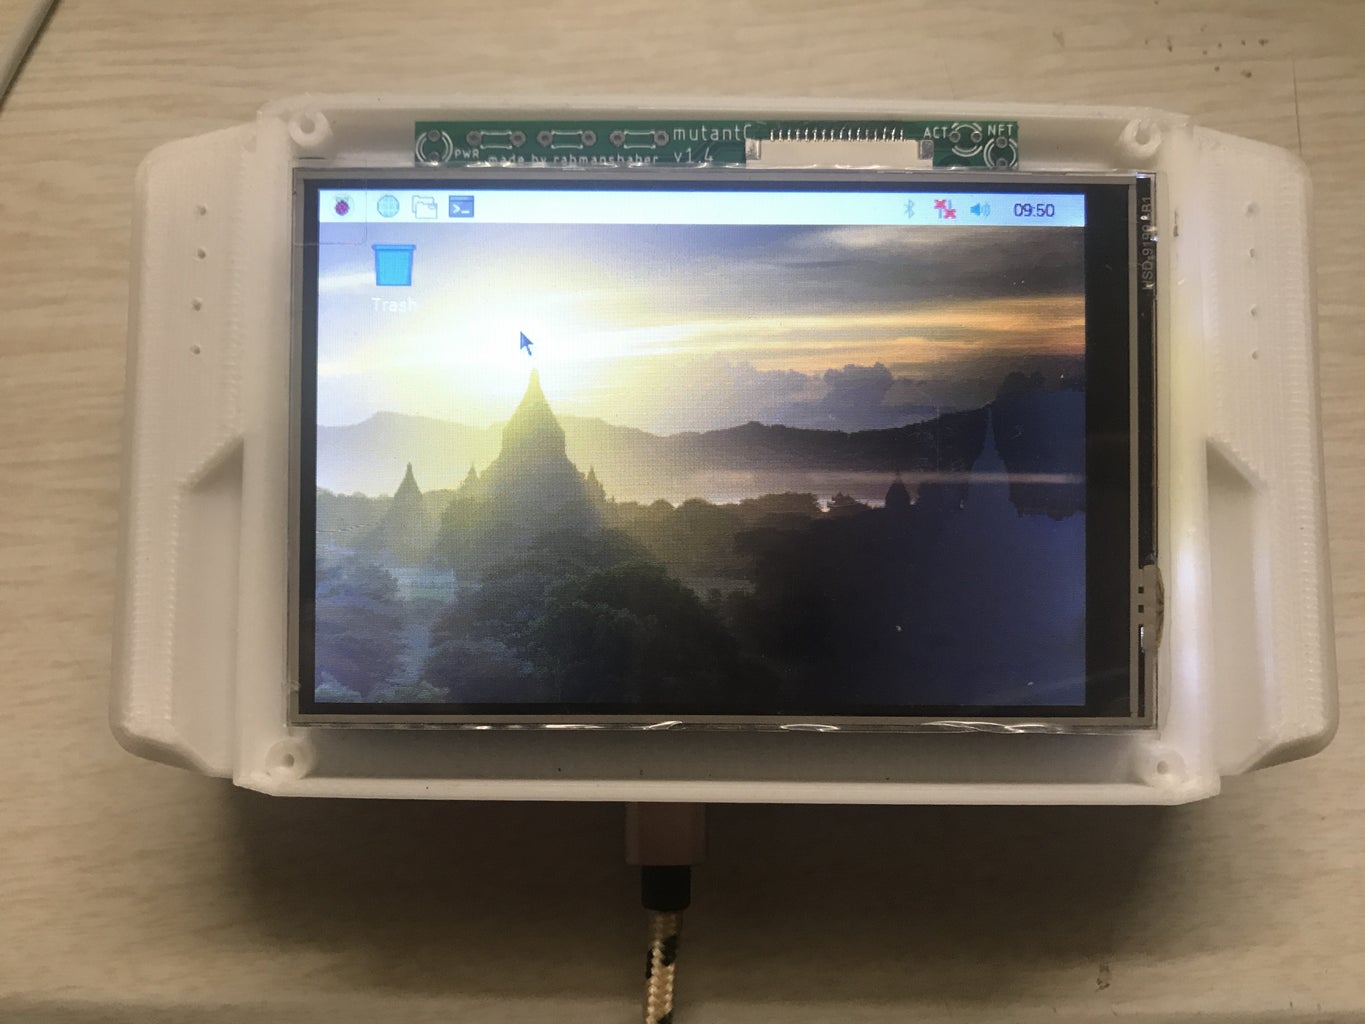
Step 7: Now Install the Raspbian and Install the LCD Driver


Install the Raspbian in the sd card.
connect the sd card and boot.
Now follow the guide here to install the driver.
https://github.com/goodtft/LCD-show
After the driver installed it will reboot. Now you can see the boot in the Pi screen.
I will add an image that have the LCD driver installed. But don't know hoe to make. if you know let me know it will be very helpful.
Email . rahmanshaber@yahoo.com
Step 8: Use Othe Boards


See in a picture i used a pi zero. you can use any raspbery pi or same form factor
Step 9: There Is No Battery??


Yes. You got it right. you can power it using the PI or other boards Micro USB.
You can make a Add-On of battery to make it more portable.
I am working on it.
In picture that is the place where add-on goes.
There is prototype add-on for now.
https://gitlab.com/mutantC/add-on-proto_board

![Tim's Mechanical Spider Leg [LU9685-20CU]](https://content.instructables.com/FFB/5R4I/LVKZ6G6R/FFB5R4ILVKZ6G6R.png?auto=webp&crop=1.2%3A1&frame=1&width=306)


