On this last field trip day, we saw the melted contact region, more of the Marginal Border Series, and more autolith blocks, and xenoliths of foundered roof rock. Then, it’s back to the ship.

The morning of our last day on Skaergaard was cool and foggy. This iceberg in Kangerlussuak Bay is ~600 m long, contrasting with the 66 m length or our ship
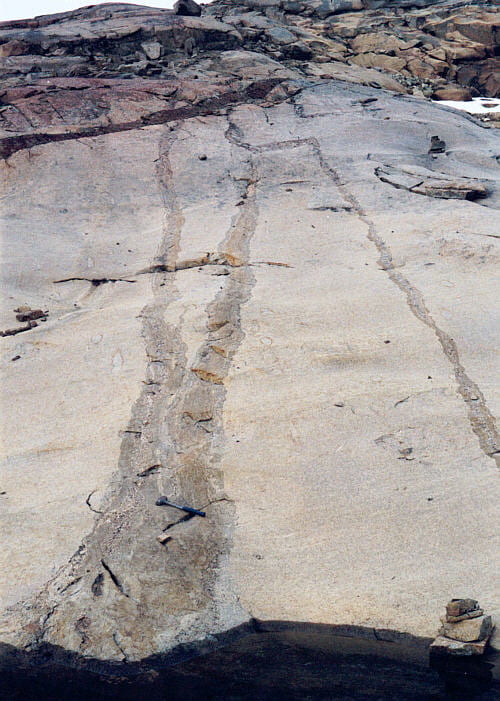
Melting in the contact region
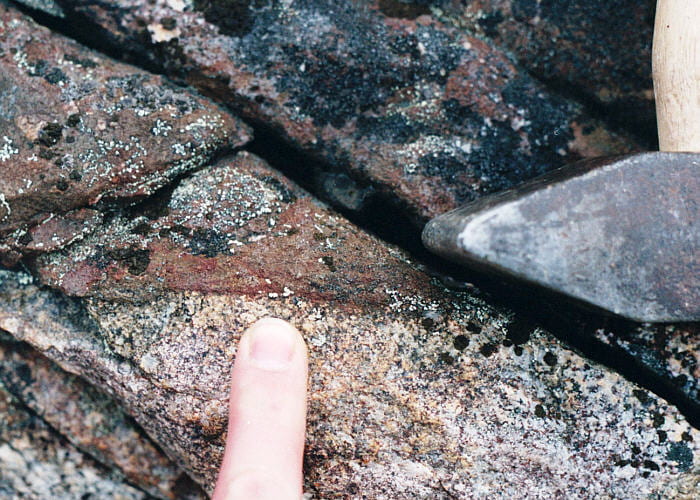
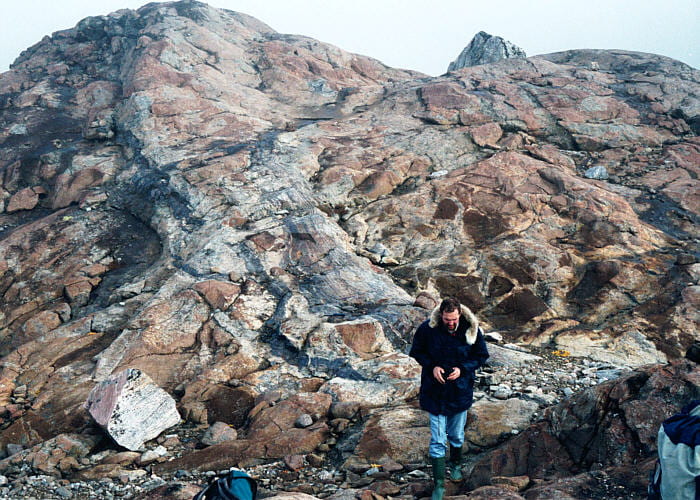
From our landing spot we immediately walked to the western contact of the Skaergaard with host Archean gneisses. This is the contact between Skaergaard gabbro and Archean gneiss. The gabbro is quite fine-grained in this chilled marginal zone, having crystals ~1 mm across. 5 m inward from this contact the gabbro has crystals up to 1 cm across.

Archean gneiss just outside of the contact, showing layering, extensive partial melting, and layer disruption.
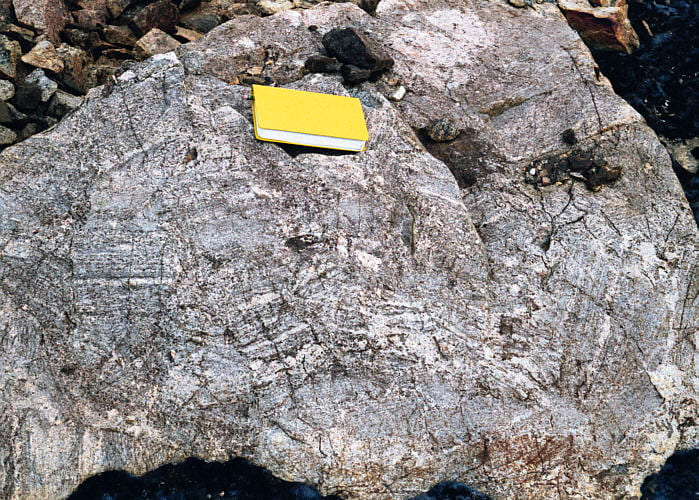
Contact between the Skaergaard and the enclosing Archean gneiss. Notice how fine-grained the gabbro is here, and that the contact is smoothly irregular.
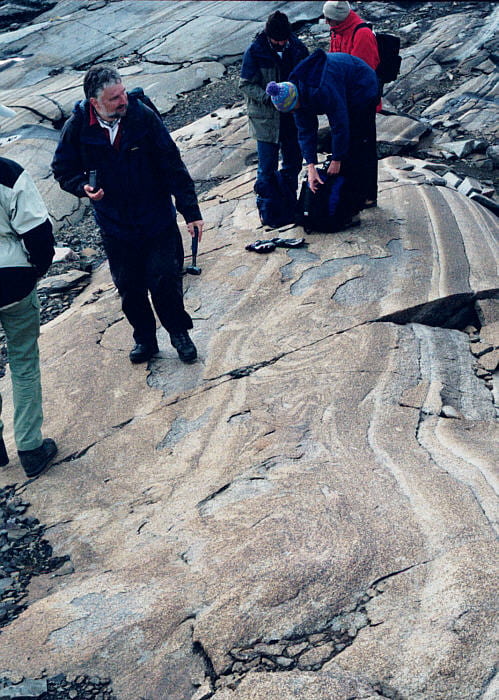
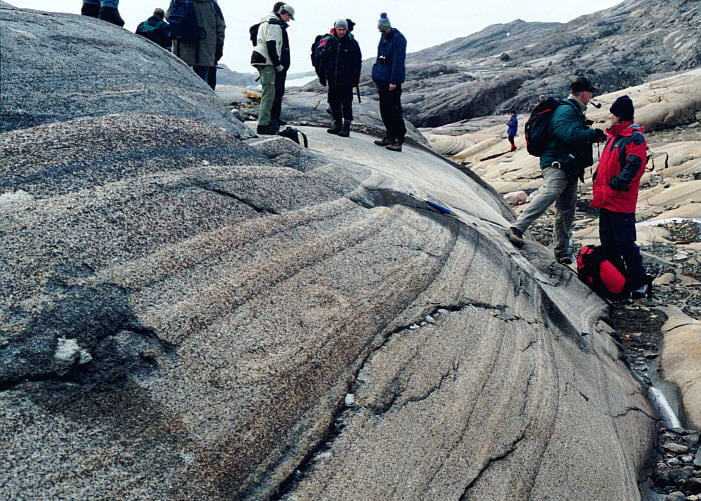
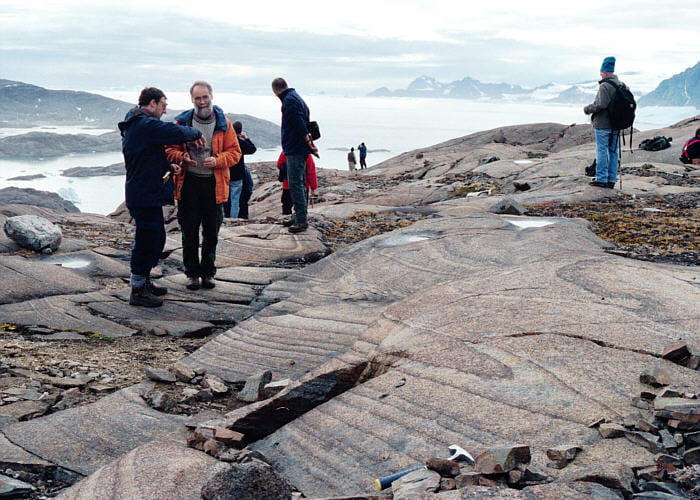
View to the west, from the pluton interior toward the contact, ~10 m above the shoreline and ~10 m inward from the contact. The main Skaergaard contact is under the left-to-right line of people at intermediate distance. The near man, walking away, is on a light-colored rock, which is a dike made of a mixture of gneiss and gabbro blocks in a matrix of melted gneiss. This dike back-intruded the dark gabbro, which crops out on either side of the dike. The most distant rocks are the Archean gneiss. The gneiss-gabbro main contact is visible just to the right of the two right-most people.
View of the top of the felsic, back-intruding dike in the photo immediately above, with a granitic matrix enclosing blocks of unmelted gneiss and fine-grained gabbro. Yes, the perspective looks strange, but rotating the image only makes it look stranger.
Disrupted gneissic layering in Archean gneiss, common near the contact as a result of partial melting, and deformation and fracture of the more competent layers.
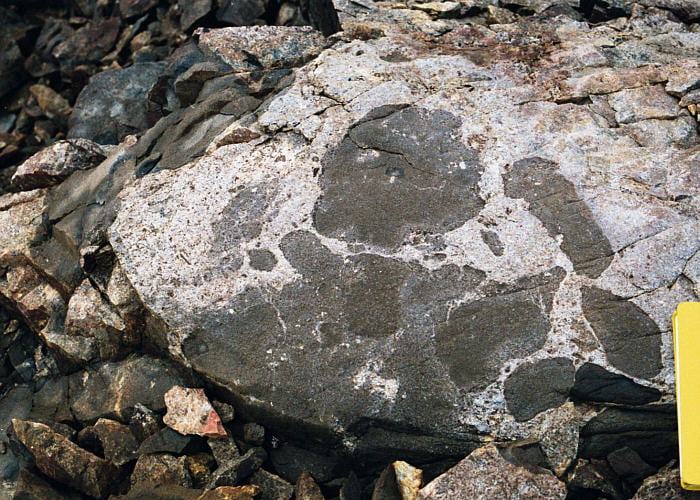
Pillow-like structures along the contact of the Skaergaard. These pillows (or possibly rounded xenoliths) are encased in mobilized, melted gneiss.

Gneiss and gabbro breccia at the Skaergaard margin, just south of the little lake on southeastern Kraemer Island at 59 m elevation.

Looking southwest at deformed amphibolite layers (now pyroxene granulite) in the gneiss ~15 m outside of the contact with the Skaergaard gabbro.
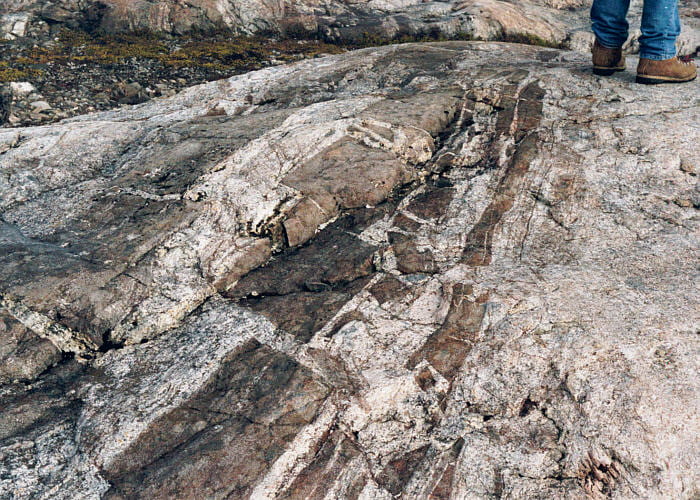
Looking northeast at the same deformed amphibolite layers (now pyroxene granulite) as in the photo immediately above. Competent mafic layers have fractured, faulted, and separated.
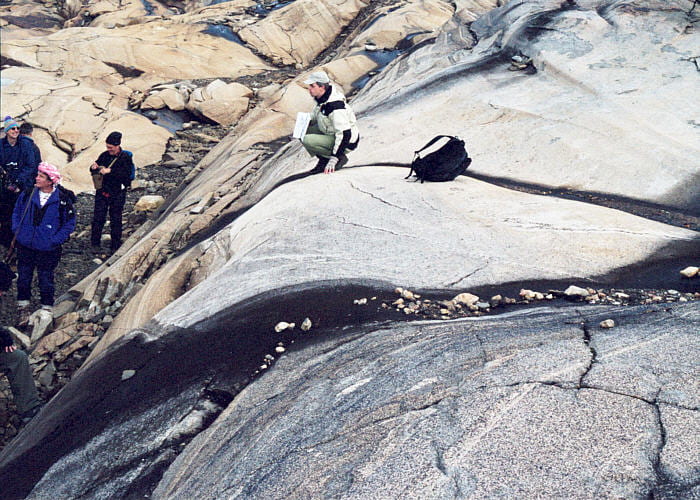
Marginal Border Series

Fabulous wavy pyroxene rock ~10 m inside the pluton margin at an elevation of ~70 m. Layering of the coarse-grained segregations is horizontal, possibly suggesting an underlying ledge.
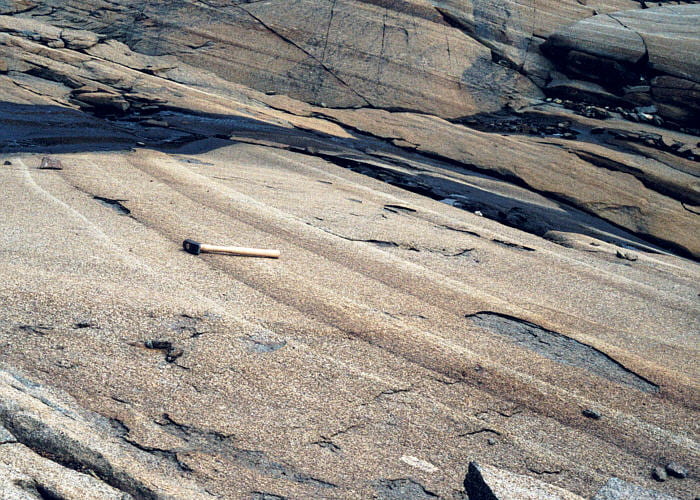
An example of the common perpendicular feldspar rock in this area, near where the photo above was taken. The feldspars here are more dendritic and less perpendicular than in some places. Pluton center is to the left.

View to the southwest looking across Kangerlussuaq Bay, from the lake at elevation 107 m. An iceberg is peeking through the fog.
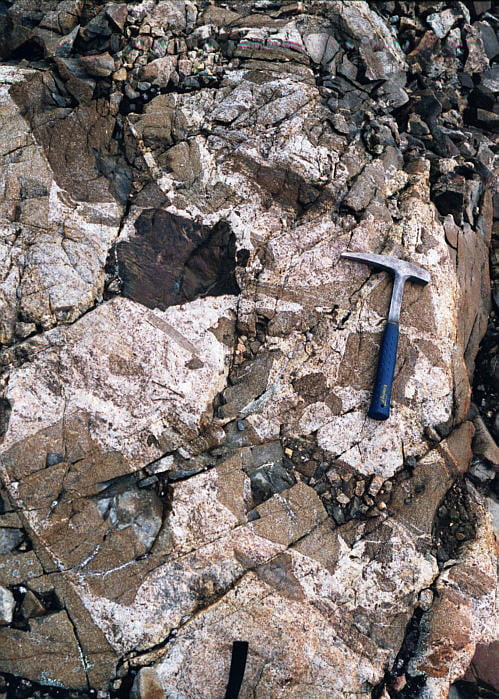
Xenolith breccia at ~160 m near the western Skaergaard contact. Most of the smaller, dark xenoliths are ultramafic, similar to the wherlite xenoliths below the Uttental Plateau. The large, light-colored, layered, elongate block slightly below and left of center is metamorphosed Cretaceous sediment, containing spinel, plagioclase, magnetite, ilmenite, and cordierite. Unfortunately, my sample from it contained little more than magnetite and plagioclase.

Closer view of some of the ultramafic xenoliths, seen in the photo immediately above, with the large, layered sedimentary xenolith on the far left.

A surface weathered just right to show especially well the ultramafic xenoliths, and a few of partially melted sediment xenoliths.
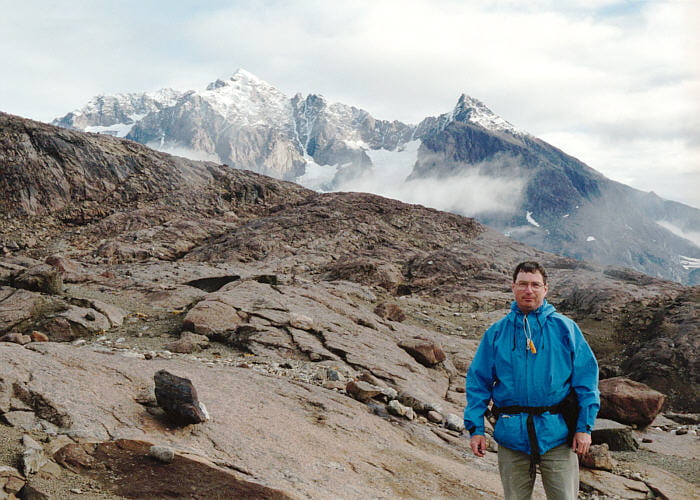
Me, photographed close to the xenolith breccia in the photos above, with Wager’s Top (left) and Pukugagryggen (right) in the distance.

Super-bright fog, roiling out of Uttental Sund. View is to the east.
Autolith blocks in the Layered Series
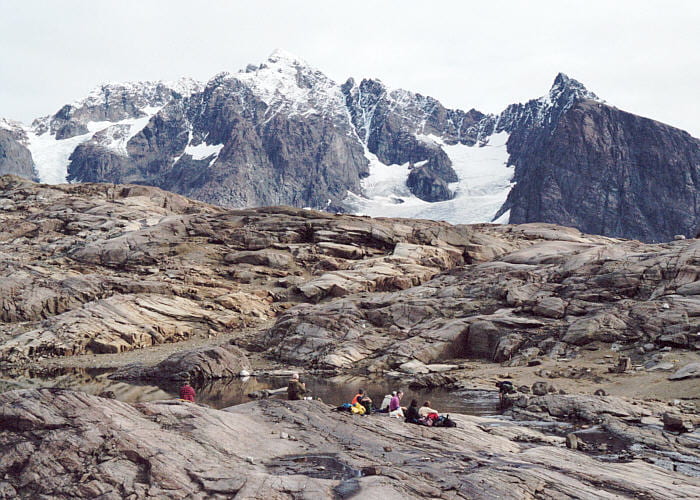
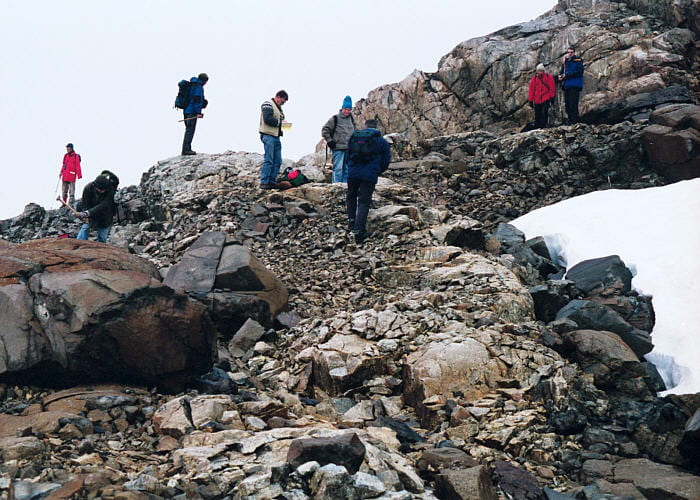
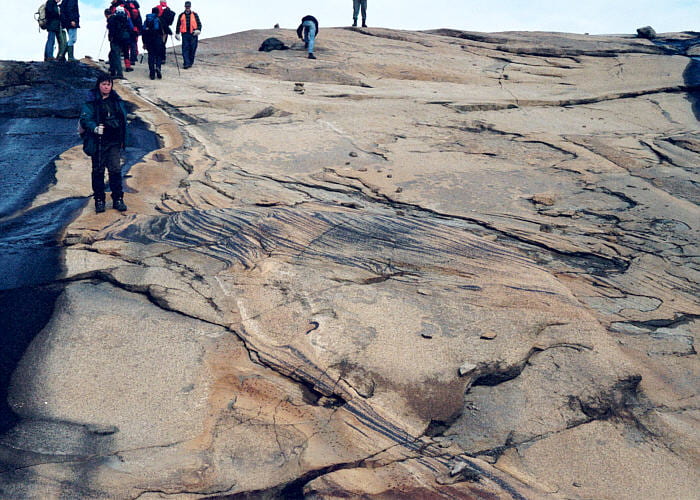
Lunch stop at the small lake at 200 m elevation. This is near the lower contact of the MZ, with Wager’s Top (left) and Pukugagryggen (right) in the background, and Bjørneskinds Glacier in between. The dip of the MZ macrorhythmic layered section, doen to the right, is prominent on the distant cliffs.

Lovely modally graded beds in the MZ, with an unusual contorted layer interpreted to be a slump deposit. This slump layer contains autolith fragments farther on, and so these slumps can carry autoliths. It might also be disturbed mush splashed out from the bottom of an impacting autolith, that happens to be out of the plane of the current erosion surface. Such contorted layers always occur in sections with modally graded beds, and always have sharp tops and bottoms.
A different view of the slump bed shown in the photo immediately above.

The next several photos are of the same autolith block. This is looking northeast at a medium-size, light-colored, weakly layered anorthositic gabbro autolith, with deformation in the layering underneath it. Some of the deformed layers are here visible on the underside of the block. Wager’s Top is peeking up over the near horizon.

Close-up view of the bottom of the block, shown in the photo immediately above. Strongly deformed and folded layers are visible within 30 cm of the block base, and thin, black magnetite replacement veins are visible within the block.

Close-up view of the north end of the block, seen in the previous photos. Here, mush from the block itself, and layers under the block, were squished-out as the block impacted. Downward-bent layers are visible to the lower right, contorted layers in the lower center, and upward lapping layers were deposited after block impacted, are visible to the left.
Contorted layer north of the block in the photos above. It occurs at the level where downward-bent layers, below the block, meet upward-onlapped layers deposited after block impact. This layer is therefore interpreted to be the impact horizon on which some of the poorly consolidated floor material squirted out from under the block at the time of impact. The beds below the contorted layer are not very regular, but this may be due to the fact that this area has a great many autolith blocks.
View of the south end of the same block, shown in the photos above, showing the onlapping and thinning of layers on the block edge. Also seen is a somewhat contorted layer. These are sometimes seen on the upper part of block draping sequences, possibly from turbulence in the magma flowing over the block.
Very nice graded beds, just southwest of and a few meters down-section from the block in the photos, above.

This next set of photos highlight a couple of adjacent, large autolith blocks. This shows the lower margin of a large gabbroic autolith. The man is standing on the block. The view is looking downhill to the southeast. Stratigraphic up is to the left, so the rusty layer is interpreted to be an olivine-rich reaction rim on the bottom of the block. There was quite a bit of argument that the reaction rim might actually be on the top of the underlying block, which is the light-gray rock to the lower right (mostly covered with water). The strongly layered area to the right of and beyond the man is magnetite-rich trough filling on the block margin.
The same area in the photo above, but looking in the opposite direction, uphill and to the northwest. The large gabbro autolith in the photo above occupies the entire visible surface to the upper right. The magnetite-rich trough filling layers, in the photo above, are in the center. The olivine-rich reaction rind, possibly on the top of a poorly visible block on the left, extends from the upper left to the bottom center, with some offset along the irregular top of the underlying block. The near woman is standing on the rusty rind, and so is standing on the top of the block to the left or the bottom of the block on the right. There may be yet another block in front of her at the rind offset.

Another view of the large gabbro block of the photos above, better showing the trough infill layers, the rusty reaction rind is next to the water, under the person with orange pants. The large block is under the two people sitting down and the two in the upper right. Another block lies behind the people, in the wet area, and still another is downhill from the people forming the near margin of the trough layering.

Close-up of onlapping magnetite-rich layers on the south side of another block, just south of the blocks in the photos above.
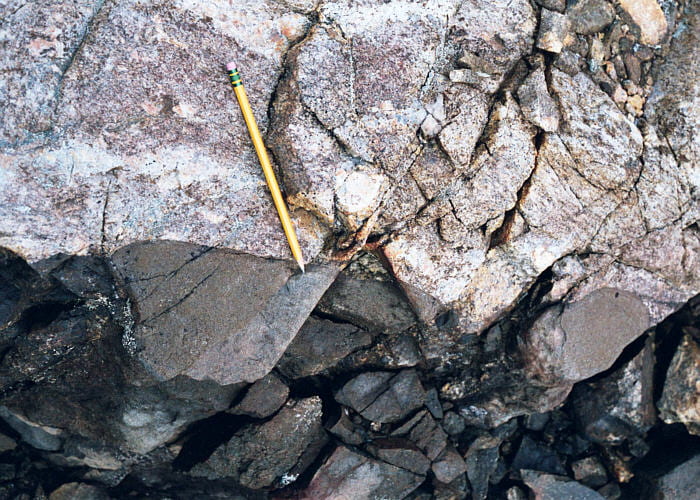
This next set of photos were taken within and around the large, weakly layered block seen here, which has dikes cutting across it. This view is from the bottom of the block looking toward the top. The zoned gabbroic dikes cut the block but are truncated at the block margins, so the dikes were emplaced before block detachment from the roof. The block is quite primitive, from UBZT, whereas the dike mineralogy is that of the more evolved UBZγ.

Lower end of two of the dikes (here in contact with each other) at the base of the block in the photo above, where the dikes end against MZ gabbro. The enclosing MZ gabbro is under the pencil, the block is above the pencil, and the pencil point is at the contact.

Close-up of a zoned dike cutting the large autolith block in the photos above.

Another of one of the pre-detachment dikes crosscutting the block in the photos above. Notice how this dike has irregular layers near the margins and becomes pegmatitic toward the interior, somewhat different from the dike in the photo immediately above.

Mushroom-shaped anorthositic replacement bodies in the block shown in the photos above. These replacement bodies elsewhere are cut by the dikes, and so predate both the dikes and block detachment. Notice how the anorthositic material has more mafic margins in their lower parts, but not at the caps at the tops.
View to the south, showing the layers beneath the block in the photos above. Folded, modally graded layers can be seen, with the folding caused by block impact.

This view, looking south, shows folded and disrupted layering on the underside of the block in the photos above. The block itself is the light colored rock on the right side.

Thinly graded beds below the block in the photos above.
View to the southeast, across Uttental Sund toward the Homestead area and Skaergaard Bay. At the left end of this steep-walled bay (not quite visible) a geologic base camp was left for the winter, only to be destroyed by an avalanche off of the steep valley sides. The steep slopes in the midground show the spectacular macrorhythmic layering of the MZ.
View to the east toward Basistoppen. The foreground is the ridge on the southeast margin of Kramer Island. The light-colored rock on the left is a giant autolith, with onlapping macrorhythmic layering visible on the right side. Despite its size, this autolith is missing from the McBirney (1989) map.
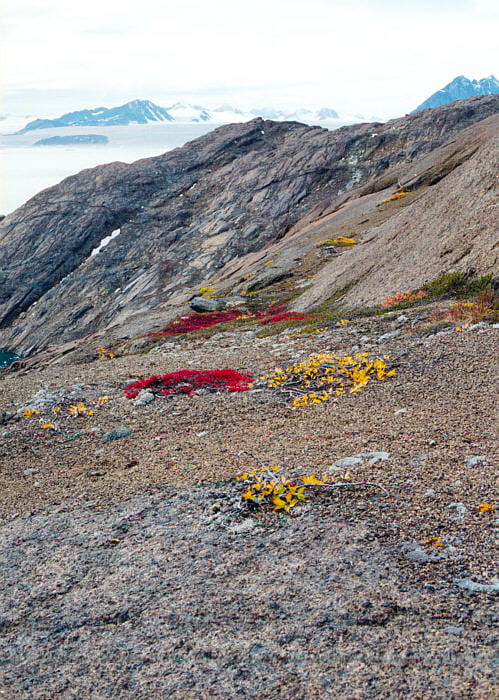
View to the southwest, across a little meadow. Reds and yellows are not flowers, but leaves that have turned color on this early September, mid-autumn day.
Xenolith blocks

This and the next two photos below are of the same basaltic xenolith. This is sort of a farewell gathering at the head of the bay, north of Lille Mellemø, this being the last part of the last field excursion. This part of the MZ has a belt containing abundant basaltic xenoliths, representing collapse of portion of the Skaergaard roof. One block, difficult to see, is the light-colored, yellowish rock most obvious in the lower center and occupying all of the lower part of the photo. The macrorhythmic layering section of the MZ begins immediately above this layer of xenoliths. It was suggested that roof collapse might have reorganized the convection system, replacing previous common graded beds with thicker, more diffusely graded macrorhythmic layers.

Top of the block in the photo above, showing the sharp contact, some magnetite in a reaction rind, and small magnetite-rich gabbro dikelets that were emplaced in fractures during or soon after block impact.
Close-up view of one of the magnetite-rich dikelets crosscutting the block in the photos above. These dikes have MZ mineralogy, though they are somewhat richer in magnetite that most of the host gabbro.

A small, rusty, olivine-bearing, fine-grained, basalt xenolith. Another rusty xenolith with weathered-out pits is visible on the bottom of the photo.

Outer margin of the rusty, olivine-bearing xenolith in the photo immediately above, showing a prominent magnetite-rich reaction rind. This block has pits weathering out in a pattern that resembles amygdules, but may be weathering out olivines.

A block containing layered rocks of the Upper Border Series UBZT, and attached basalt. This block is therefore part of the roof contact. This photo has basalts that look a little like pillow lavas, with the more featureless rock just in front of the people being from the UBZT.

A different view of the same block as in the photo above. The basalts are the irregularly mottled rock on the left, under the woman in red. The layered UBZT rock is under all the people wearing blue. The contact is just under the man in white pants. The UBS layering in the block dips steeply to the left, at a high angle to layering in the host rock that dips shallowly down to the right, visible in the distance. An en echelon offset basalt dike occurs in the contact region in the block.

A large rusty basalt block (top), with MZ gabbro, below, that contains small chips of rusty, fine-grained basalt mini-xenoliths.

Close-up of pits on a rusty basalt block. To my eye these pits are not shaped like round amygdules, but rather look like irregular, perhaps radiating, crystals.
Return to the ship

The three Zodiacs approaching shore, with small icebergs near the shore. Ivnarmiut is in the distance.
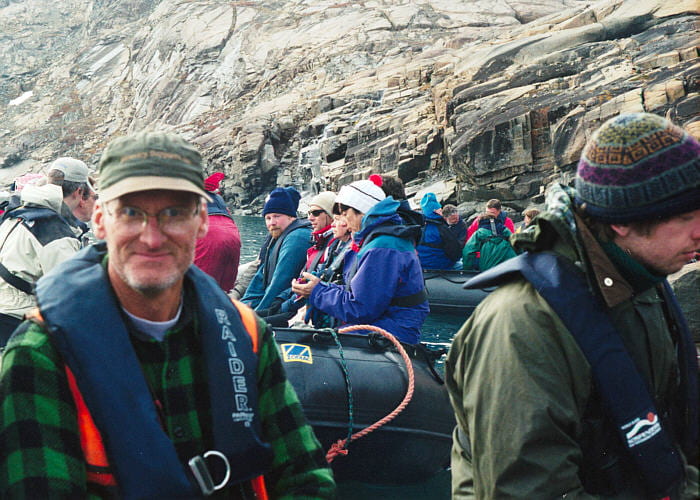
Loading up the Zodiacs.

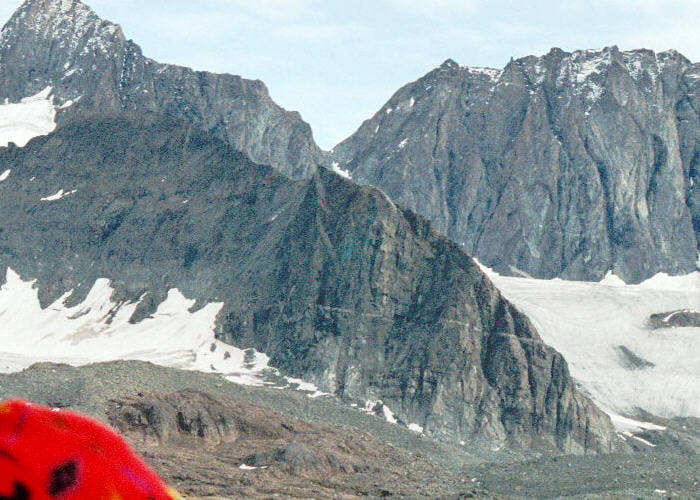
View to the southeast from Uttental Sund. Some shacks are visible that are occasionally occupied by Inuit people. Cliff in the center is Kobbernunatak, peak to the right is Tinden, peak on the horizon just left of center is Sydtoppen, and the rounded rise on the left horizon is Brødretoppen.
Click the left or right arrows to see an enlarged view of the image center, with the green, copper-stained patch that Kobbernunatak is named after. The patch is entirely in the Basistoppen sheet.

View of more shacks on Skaergaard Peninsula, including a Quonset-shaped hut, with Pilespidsen (769 m) being the highest (not sharpest) peak in the background.

Shacks and trash on Skaergaard Peninsula, with Tinden on the left.
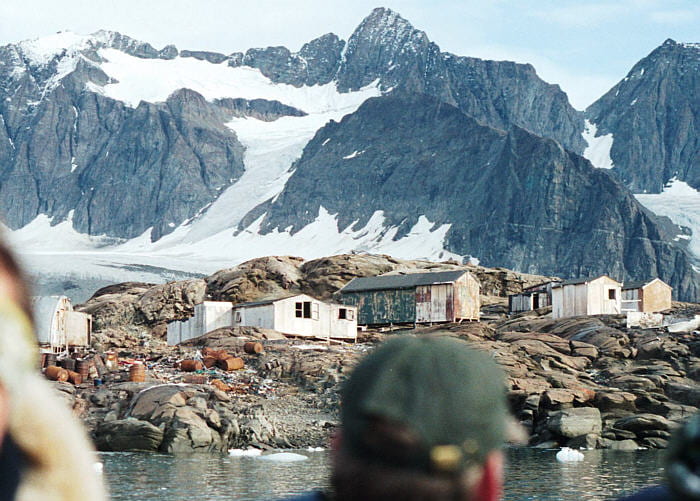
More shacks on Skaergaard Peninsula, with a better view of all the trash lying about. Empty fuel drums, boat parts, sheet metal, bones, clothing, plastic. A real mess.
Brødretoppen (top left) and Sydtoppen (top center) are in the background. The midground cliff is made entirely of the Basistoppen sheet.
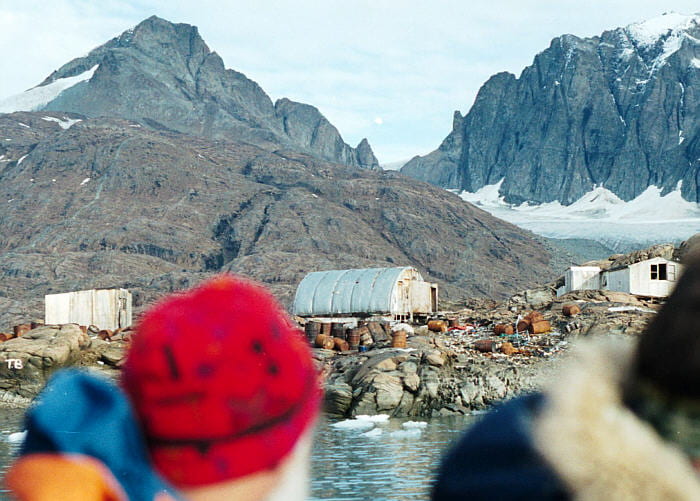
A closer view of the Quonset hut, covered in insulation, with lots of trash scattered about.
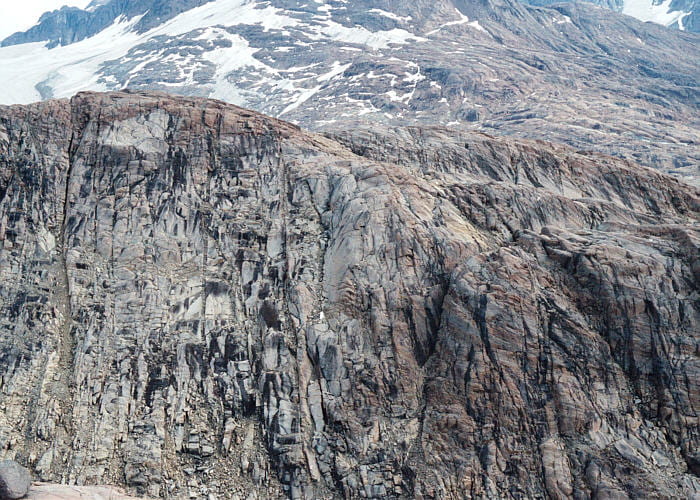
Basistoppen is on the left, Brødretoppen on the right, and the Basis Glacier between. The top of Basistoppen and the lower 3/4 of the dark wall on the right is of the Basistoppen sheet. Some internal layering of the sheet is visible, so the sheet is obviously differentiated.

More huts and trash on Skaergaard Peninsula, with Basistoppen in the back-right.

Lifting a Zodiac onto the mid-deck of the ship.
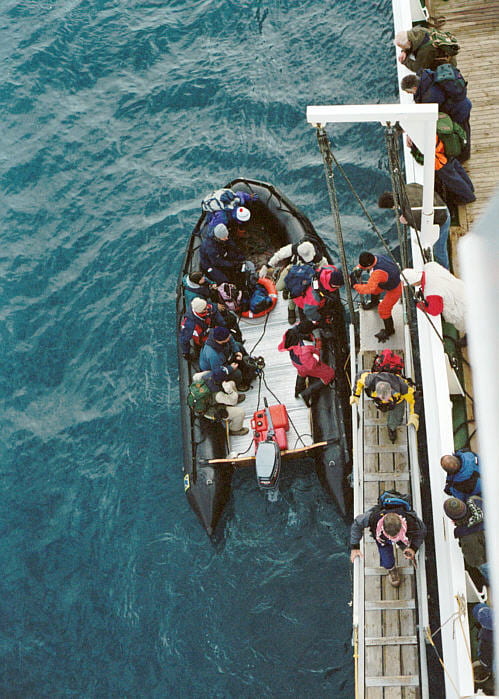
Overhead view of the gangplank, and people unloading from the Zodiac.
