
StarTech PM1115U2 Ethernet to USB 2.0 Network Print Server

Compliance Statements
FCC Compliance Statement
This equipment has been tested and found to comply with the limits for a Class B digital device, pursuant to part 15 of the FCC Rules. These limits are designed to provide reasonable protection against harmful interference in a residential installation. This equipment generates, uses, and can radiate radio frequency energy and, if not installed and used in accordance with the instructions, may cause harmful interference to radio communications. However, there is no guarantee that interference will not occur in a particular installation. If this equipment does cause harmful interference to radio or television reception, which can be determined by turning the equipment off and on, the user is encouraged to try to correct the interference by one or more of the following measures:
- Reorient or relocate the receiving antenna
- Increase the separation between the equipment and the receiver
- Connect the equipment to an outlet on a circuit different from that to which the receiver is connected
- Consult the dealer or an experienced radio/TV technician for help
Industry Canada Statement
This Class B digital apparatus complies with Canadian ICES-003. CAN ICES-3 (B)/NMB-3(B)
Use of Trademarks, Registered Trademarks, and Other Protected Names and Symbols
This manual may make reference to trademarks, registered trademarks, and other protected names and/or symbols of third-party companies not related in any way to StarTech.com. Where they occur these references are for illustrative purposes only and do not represent an endorsement of a product or service by StarTech.com, or an endorsement of the product(s) to which this manual applies by the third-party company in question. Regardless of any direct acknowledgment elsewhere in the body of this document, StarTech.com hereby acknowledges that all trademarks, registered trademarks, service marks, and other protected names and/or symbols contained in this manual and related documents are the property of their respective holders.
Safety Statements
Safety Measures
- Wiring terminations should not be made with the product and/or electric lines under power.
- Cables (including power and charging cables) should be placed and routed to avoid creating electric, tripping or safety hazards.
Product Diagram
Front View

- Power LED
- Power Jack
- Link LED
- RJ45 Port
- Activity LED
Rear View

- Recessed Reset Button (side)
- USB-A Port
Product Information
Packaging Contents
- Print Server x 1
- Universal Power Adapter (NA/UK/EU/AU) x 1
- RJ45 Cable x 1
- Driver CD x 1
- Quick-Start Guide x 1
System Requirements
Operating system requirements are subject to change. For the latest requirements, please visit www.startech.com/PM1115U2.
Operating Systems
- The Print Server is Operating System (OS) independent.
Hardware Installation
Installing the Power Adapter Clip
- Remove the Power Adapter from the box.
- Locate the Power Clip specific to your region (e.g. U.S.).
- Align the Power Clip with the Contact Prongs on the Power Adapter so that the two Tabs on the Power Clip are aligned with the cutouts on the Power Adapter.
- Rotate the Power Clip clockwise until you hear an audible click indicating that the Power Clip is properly attached to the Power Adapter.
Removing the Power Adapter Clip
- Push and hold the Power Clip Release button on the Power Adapter just below the Power Clip.
- While holding the Power Clip Release button rotate the Power Clip counter-clockwise until the Power Clip releases from the Power Adapter.
- Gently pull the Power Clip away from the Power Adapter.
Connecting a Printer
- Connect a USB 2.0 Cable (not included) to the USB-A Port on the Print Server and the other end to a USB-A port on a Printer.
- Connect the Universal Power Adapter to the Power Jack on the back of the Print Server and to an AC Electrical Outlet. The Power LED will illuminate green to indicate that the Print Server is turned on and correctly connected to the Network.
Software Installation
Installing the Print Server Setup Software
- Connect a CAT5e/6 Cable to the RJ45 Port on the Print Server and to a Router or Network Device.
- On the computer that’s connected to the same router or network, download the drivers from www.startech.com/PM1115U2.
- Click on the Support tab, under Drivers, and select the appropriate driver package.
- Once you have downloaded and unzipped the driver. Click on the Installation Guide PDF and follow the instructions.
Setting Up the Print Server Using the Software
- Click the Network Printer Wizard shortcut on your desktop.
- The Network Printer Wizard will appear.
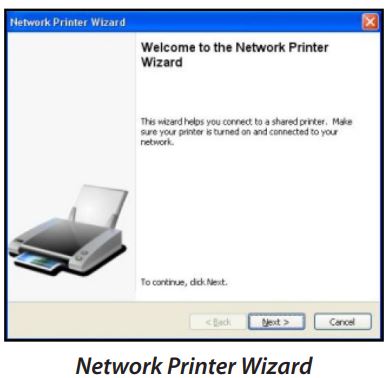
- Click the Next button.
- Select a Printer from the list to setup and click the Next button.
Note: If no Printers are listed, make sure that the Printer and the LPR Print Server is powered on and connected to the network. - Select a Driver from the list and click the Next button, proceed to step 9.

- If the Driver is not listed either insert the Driver CD that came with the printer into the Host Computer’s CD or DVD Drive and click the Have Disk button or access the printer’s manufacturer website to download the required driver.
- Navigate to the correct Driver folder based on the printer and click on the Driver folder.
- Select the correct Driver and click Open. The Driver will now appear on the list of drivers within the Network Printer Wizard.
- When you have selected the correct Driver from the list click the Finish button.

Manually Setting up the Print Server
- Connect a CAT5e/6 Cable to the RJ45 Port on the Print Server and to a Computer.
- Set your network adapter to the following settings:
- IP Address: 169.254.xxx.xxx
- Subnet Mask: 255.255.0.0
- Gateway: n/a
- Go to the Command Prompt(on Windows) or Terminal (on macOS) and enter the command arp –a. The Print Server’s IP Address and MAC Address will appear. The MAC Address will match the one on the bottom of the Print Server.
Note: The Print Server may take several minutes for it to appear in the arp table. - Access the web interface by entering the IP address you got from the previous step in the address bar of a web browser.
- Set the print server to a static IP address within the subnet your computer & networking equipment is on (For further information, refer to the section Viewing/Configuring Network Settings to change the Print Server’s IP Address).
- Change the IP address for your network adapter back to its original IP address.
- Disconnect the CAT5e/6 Cable from the Computer and connect it to a RJ45 Port on a Router or Network Device.
- Add the printer using Operating System (OS) specific steps.
Setting Up a Printer in Windows
- Navigate to the Control Panel screen and select the Devices and Printers icon.
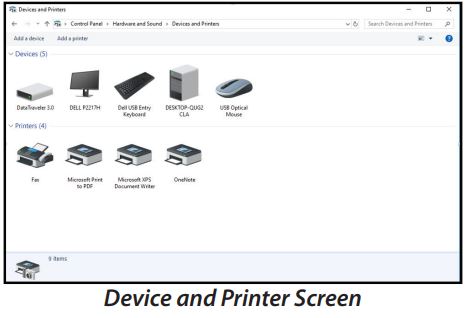
- Click the Add a Printer link at the top of the screen.
- On the Add a Device screen, click on the The printer that I want isn’t listed link.

- On the Add Printer screen, select Add a printer using a TCP/IP address or hostname then click the Next button.

- On the Hostname or IP address field enter the IP address assigned to the print server, then click the Next button, Windows will detect the TCP/IP port and move to the next screen automatically.

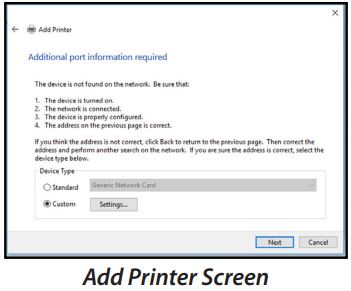
- Set the Device Type field to Custom, then click Settings.
- On the Configure Standard TCP/IP Port Monitor screen, set the Protocol to LPR.
- Under LPR Settings, enter lp1 into the Queue Name field then click OK.

- The Add Printer screen will appear, click the Next button.
- Windows will attempt to automatically detect the printer driver:
- If Windows fails to detect the proper printer driver: Select your printer’s Manufacturer and Model from the Install the Printer Driver screen that appears.
- If your printer model doesn’t appear in the list: Select Windows Update (this update may take several minutes) to update the list of printer models. When the update is complete select your printer’s Manufacturer and Model from the Install the Printer Driver screen that appears.
- Windows will start to install the printer driver. Click the Finish button when the installation is complete.
Setting Up a Printer in macOS
- From the System Preferences screen, click on the Printers & Scanners icon.

- The Printers & Scanners screen will appear, click the + icon on the left side of the screen.
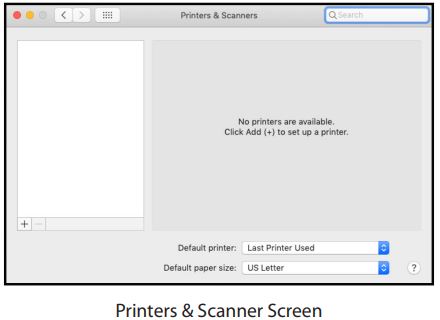
- The Add screen will appear, if the printer appears on the Default tab, select it and click the Add button.

- If the printer does not appear, select the IP tab at the top of the screen.

- Enter the IP address of the Print Server in the Address field.
- Set the Protocol to Line Printer Daemon – LPD and Queue as lp1.
- The wizard should automatically attempt to detect the driver needed for the printer. When it has settled on one, click the Add button.
Performing a Hard Factory Reset
- Insert the tip of a pen into the Recessed Reset button on the side of the Print Server.
- Gently press and hold the Recessed Reset button for 5 seconds to reset all settings back to factory defaults.
Software Operation
Accessing the Web Interface
- Navigate to a web page and enter the Print Server’s IP Address.
- The Network Print Server screen will appear.
Changing the Screen Language
- From any screen on the Network Print Server Web Interface, click on the Select Language drop-down list.
- Select the desired language from the drop-down menu.

- The Menu will refresh with the selected language loaded.
Viewing Server Information/Device Information
- From any screen on the Network Print Server Web Interface, click on the Status Link.
- The Status screen will appear.

- The following information is available on the Status screen:
Server Information- Server Name: The name of the server
- Manufacturer: The name of the manufacturer of the server
- Model: The server model
- Firmware Version: The latest firmware version number
- Server UP-Time: The amount of time the server has been operational.
- Web Page Version: The latest web page version number.
Device Information - Device Name: The name of the connected device
- Link Status: The link status of the connected device (whether it is linked to the print server or not)
- Device Status: The status of the connected device.
- Current User: The user name of the user currently using the device.
Viewing/Configuring Network Settings
- From any screen on the Network Print Server Web Interface, click on the Network Link.
- The Network screen will appear.

- The following information is available on the Network Information section of the Network screen:
- IP Setting: Shows the Print Server’s current IP Setting, either Fixed IP or Automatic (DHCP) depending on how the print server was set up.
- IP Address: Shows the Print Server’s current IP Address.
- Subnet Mask: Shows the Print Server’s current Subnet Mask.
- MAC Address: Shows the Print Server’s MAC Address.
- The following fields on the Network Settings section of the Network screen can be configured:
- DHCP Setting: Assigns a dynamic IP Address to the connected device each time the device connects to a network. Select either Enable or Disable Dynamic Host Configuration Protocol (DHCP).
- IP Address: If the DHCP field is disabled you can manually enter an IP Address. If the DHCP field is Enabled the IP Address will be generated automatically.
- Subnet Mask: Allows you to enter a subnet mask.
- Server Name: Allows you to enter a server name.
- Password: Enter the user-defined password in order to apply changes to the Network Settings.
Note: If no password has been created a password is not required to make changes to the Network Settings.
- Click the Submit button to save any changes made to the Network Settings.
- Click the Clear button to clear a Password if one has been entered in the Password field.
Restarting a Device
- From any screen on the Network Print Server Web Interface, click on the Restart Device Link.
- The Restart Device screen will appear.
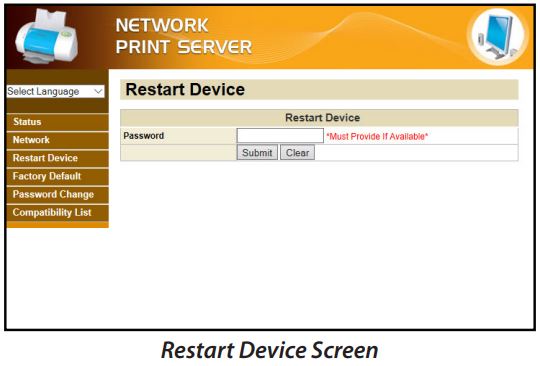
- Enter the user defined password in order to restart the device.
Note: If no password has been created a password is not required to restart the device. - Click the Submit button to restart the device.
- Click the Clear button to clear a Password if one has been entered in the Password field.
Resetting the Device to Factory Settings
- From any screen on the Network Print Server Web Interface, click on the Factory Default Link.
- The Factory Default screen will appear.

- Enter the user defined password in order to reset the device to factory defaults.
Note: If no password has been created a password is not required to reset the device to factory defaults. - Click the Submit button to reset the device to factory defaults.
- Click the Clear button to clear a Password if one has been entered in the Password field.
Creating/Changing a Password
- From any screen on the Network Print Server Web Interface, click on the Factory Default Link.
- The Factory Default screen will appear.

- Enter the user-defined password in the Current Password field. When creating a new password for the first time leave the Current Password field blank.
- Enter a new password in the New Password field. The password can contain alphanumeric and special characters and is 1 – 20 characters in length.
- Re-enter the new password in the Confirm New Password field.
- Click the Submit button to create/reset the password.
- Click the Clear button to clear a Password if one has been entered in the Password field.
Warranty Information
This product is backed by a two-year warranty. For further information on product warranty terms and conditions, please refer to www.startech.com/warranty.
Limitation of Liability
In no event shall the liability of StarTech.com Ltd. and StarTech.com USA LLP (or their officers, directors, employees or agents) for any damages (whether direct or indirect, special, punitive, incidental, consequential, or otherwise), loss of profits, loss of business, or any pecuniary loss, arising out of or related to the use of the product exceed the actual price paid for the product. Some states do not allow the exclusion or limitation of incidental or consequential damages. If such laws apply, the limitations or exclusions contained in this statement may not apply to you.
Hard-to-find made easy. At StarTech.com, that isn’t a slogan. It’s a promise.
StarTech.com is your one-stop source for every connectivity part you need. From the latest technology to legacy products — and all the parts that bridge the old and new — we can help you find the parts that connect your solutions. We make it easy to locate the parts, and we quickly deliver them wherever they need to go. Just talk to one of our tech advisors or visit our website. You’ll be connected to the products you need in no time.
Visit www.startech.com for complete information on all StarTech.com products and to access exclusive resources and time-saving tools. StarTech.com is an ISO 9001 Registered manufacturer of connectivity and technology parts. StarTech.com was founded in 1985 and has operations in the United States, Canada, the United Kingdom, and Taiwan servicing a worldwide market.
Reviews
Share your experiences using StarTech.com products, including product applications and setup, what you love about the products and areas for improvement.
StarTech.com Ltd. 45 Artisans Cres. London, Ontario N5V 5E9 Canada
FR: startech.com/fr
DE: startech.com/de
FAQ’s
What is the StarTech PM1115U2 Ethernet to USB 2.0 Network Print Server?
The StarTech PM1115U2 is a device that allows you to share USB printers over a network by converting a USB printer into a network printer accessible to multiple users.
How does the PM1115U2 Print Server work?
The PM1115U2 connects to your network via Ethernet and your USB printer through its USB 2.0 port. It allows users to print to the USB printer over the network as if it were directly connected to their computer.
What type of USB printers are compatible with the PM1115U2?
The PM1115U2 is generally compatible with most USB printers, including inkjet, laser, and multifunction printers.
What network protocols does the PM1115U2 support?
The PM1115U2 supports network protocols such as TCP/IP, HTTP, DHCP, BOOTP, and SNMP.
Is any software required for installation?
Yes, the PM1115U2 typically requires the installation of software drivers on each computer that will use the network printer. The software can be downloaded from the manufacturer's website.
Can I connect multiple USB printers to the PM1115U2?
The PM1115U2 generally supports one USB printer per unit. If you need to connect multiple printers, you may require additional print servers.
Can I use the PM1115U2 to share other USB devices over the network?
The PM1115U2 is specifically designed for USB printers. If you want to share other USB devices, you may need a different type of USB network device.
How do I configure the PM1115U2 for my network?
You typically configure the PM1115U2 using a web-based interface accessed through a web browser. Consult the user manual for detailed setup instructions.
Can the PM1115U2 work on both wired and wireless networks?
The PM1115U2 is designed for wired Ethernet networks. It does not have built-in wireless capabilities.
Is the PM1115U2 compatible with Mac and Windows operating systems?
Yes, the PM1115U2 is generally compatible with both Mac and Windows operating systems. Make sure to install the appropriate software drivers for your system.
Does the PM1115U2 support printer management and monitoring?
Yes, the PM1115U2 often includes management features such as remote printer monitoring, status alerts, and firmware updates.
Can the PM1115U2 support printing from mobile devices?
The PM1115U2 is primarily designed for network-connected computers. Printing from mobile devices may require additional software or solutions.
References: StarTech PM1115U2 Ethernet to USB 2.0 Network Print Server – Device.report
