The DIY Kayak Trailer That Saves Your Back and Your Budget
Build a custom trailer for under $800, and never hoist a kayak over your head again.
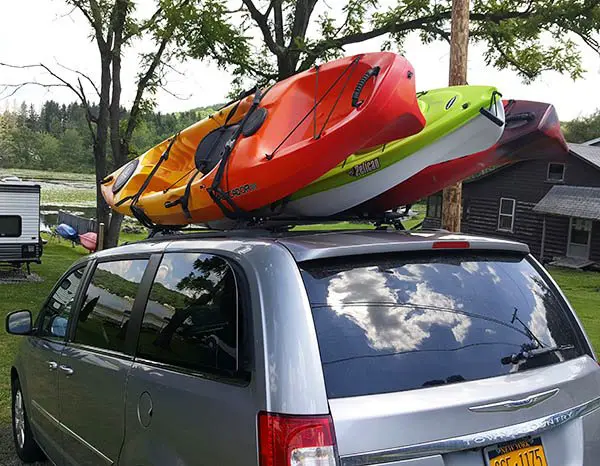
I’ve strained my back loading and unloading kayaks from our stylish minivan more times than I care to remember.
It’s an exhausting process of hoisting, balancing, and sliding them on, one by one. Then balancing on a tire to get straps in place and secure. It’s the worst part of kayaking.
I end up tired, sore, and in a bad mood before we even leave the driveway. Worse yet, I have dented and scratched the Town and Country more than once.
There are better options, and you don’t have to spend $1500 or more on a custom kayak trailer or expensive roof rack.
For under $800, you can build a DIY kayak trailer that will save your back and a heap of money, this article will show you how.
What Are Your Options?
There are expensive roof racks, and then there are expensive trailers.
Unless you have $1500 or more to spend, your options are limited. I looked at every kayak rack and trailer on the market, and none of them can hold more than two kayaks, and the starting price is very high.
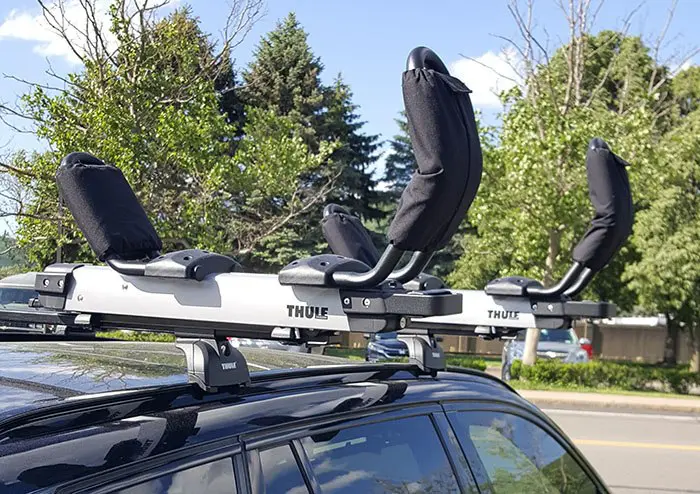
The only roof rack offering a solution to the pain of loading and unloading kayaks is the Thule Hullavator. It’s a set of two kayak holders that lower over the side of your car, making loading and unloading very easy, but they cost $950 per kayak… and that doesn’t include the base rack to attach them to.
You can fit two sets on a vehicle to carry two kayaks, and the total will be around $2500!
The other option is a kayak-specific trailer. Malone makes the most popular, but the base trailer is still over a thousand dollars! Fully rigged, they run over $1500 and only hold 2 kayaks. Not working for me.
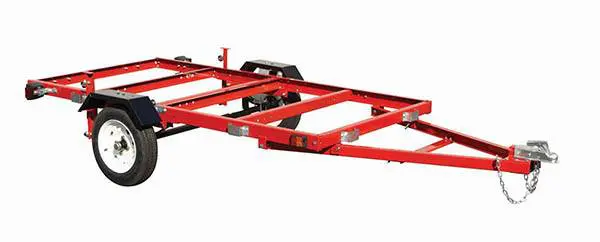
A quick Google search for ‘DIY Kayak Trailer’ will serve up some interesting rigs, many built on the Harbor Freight 4′ x 8′ Heavy Duty Foldable Trailer.
You can pick one up at your local Harbor Freight store for under $600 or buy it on their website and pay to have it shipped. Use the shipping estimator on their site to see what the cost will be.
It’s a solid steel platform that’s easily customized to fit your needs with some lumber and PVC or aluminum pipe.
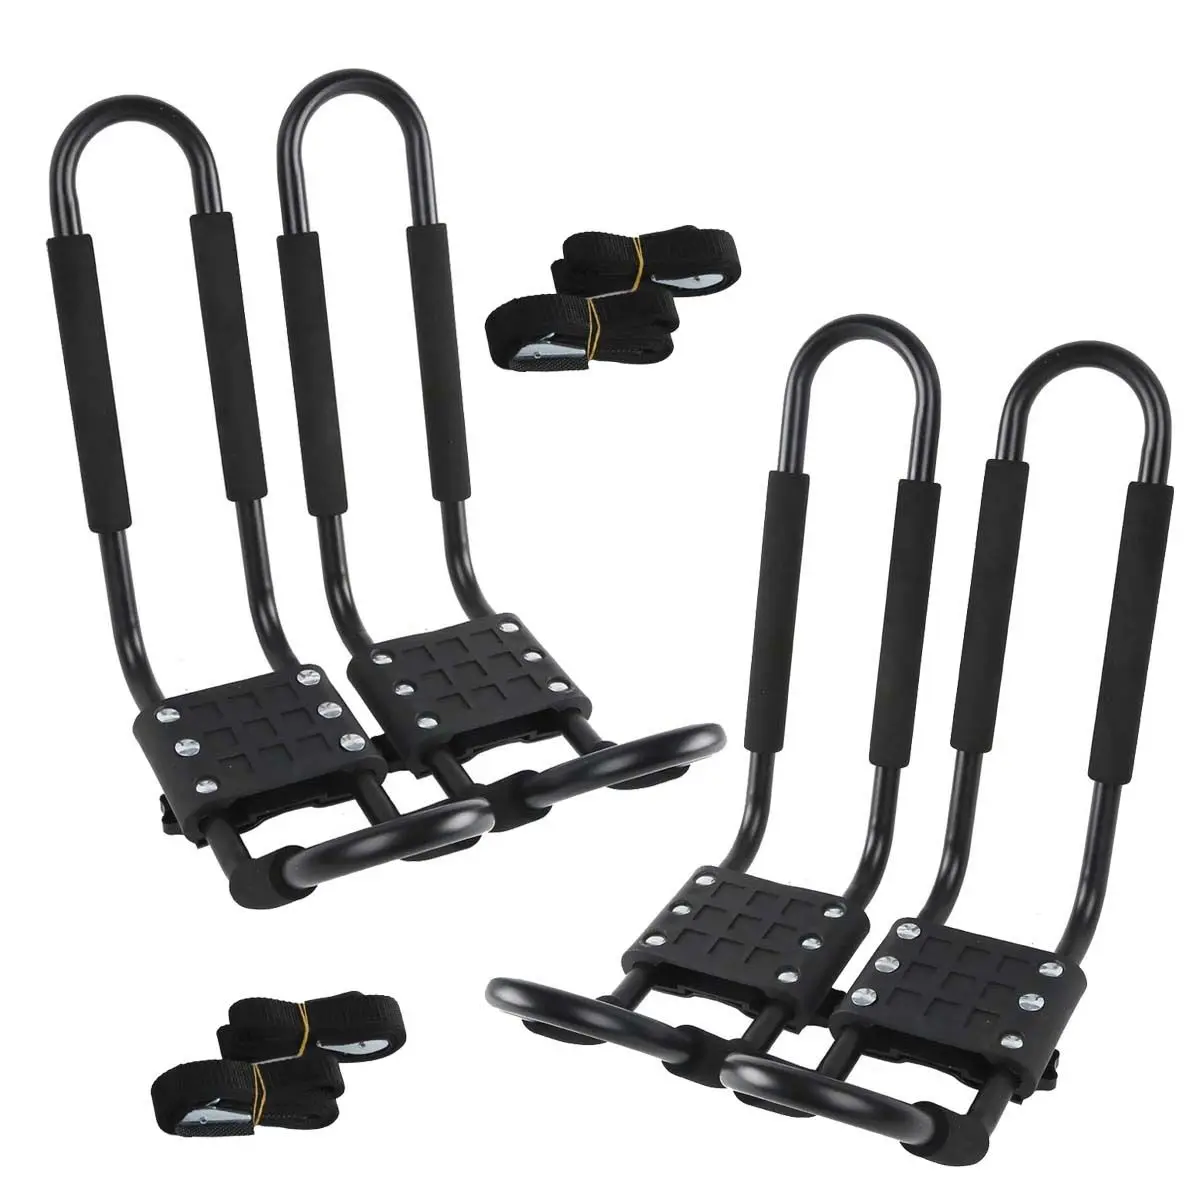
Attach as many kayak carriers as you need, and your DIY kayak trailer will be a hauling machine. You can get a set of 2 Kayak Carriers for under $50.
They are powder-coated steel with solid hardware. I have used the same set for the past 3 years, and they are rust-free and as strong as the day I got them. Compare that price to the big brands that cost 4 or 5 times more!
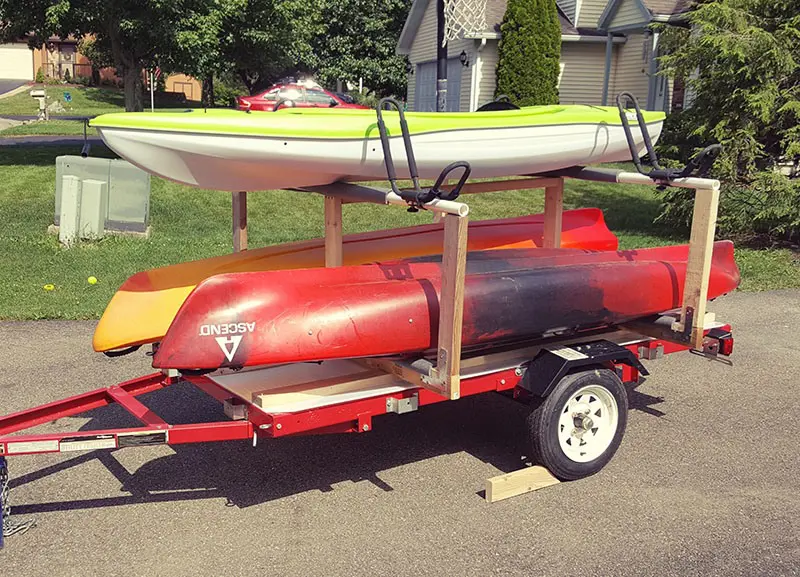
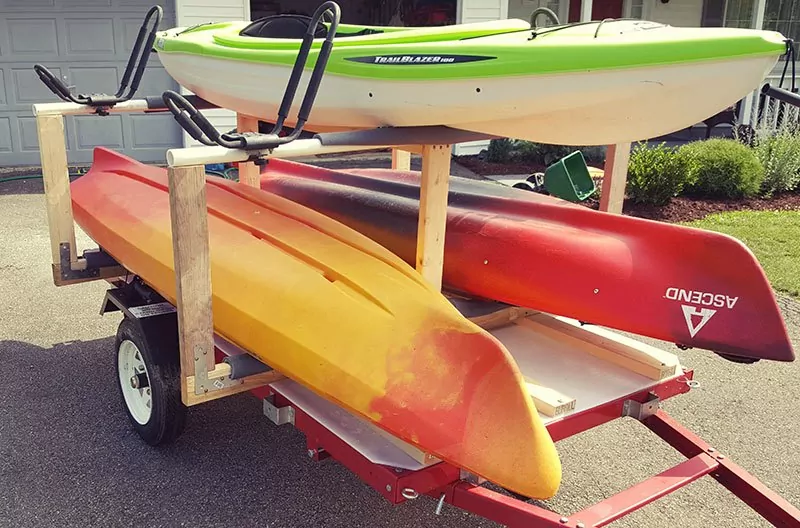
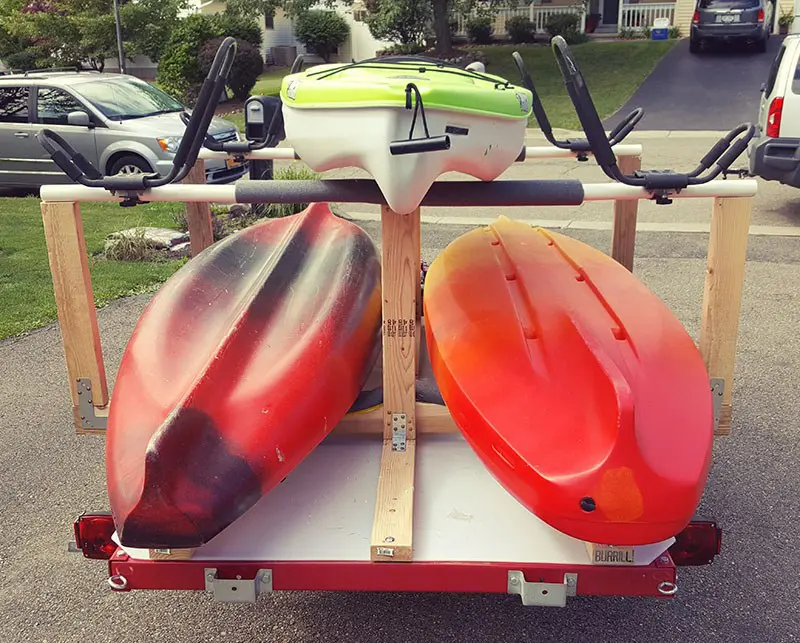
The rest of this article describes my out-of-the-box trailer build and customized rack that holds five kayaks.
DIY Kayak Trailer Build: Assembling the Harbor Freight Trailer
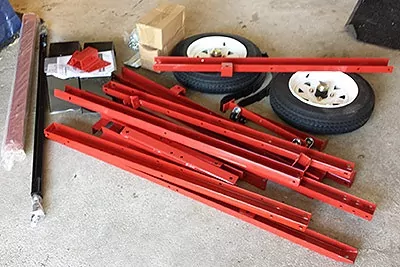
Out of the box, it’s a heap of metal, a box full of hundreds of nuts and bolts, and some decent (not great) directions. The components are solid steel, and the hardware is beefy. Assembling the trailer is actually quite simple for anyone a little handy, and it can be built in an afternoon with the help of a friend and the right tools.
Before getting started, I highly recommend buying two wrenches that will make your build ten times faster and easier! There are over 75 sets of the bolt/lock nut combination pictured below. Some of the spots are tough to reach and frustrating to tighten with a normal socket or crescent wrench.
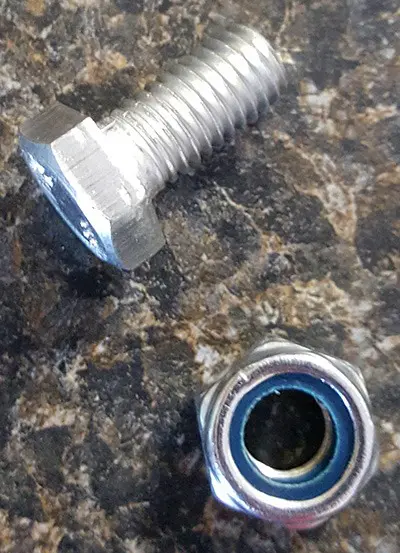
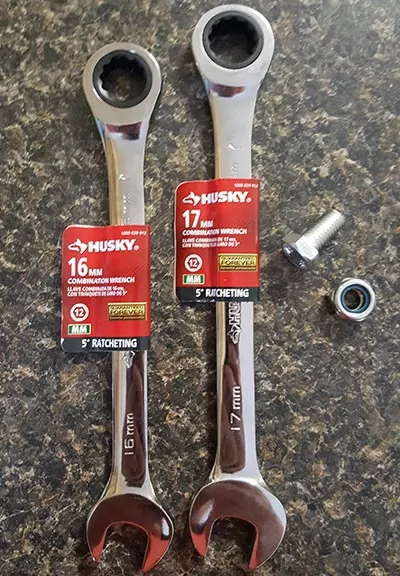
You can pick up a 16 mm and 17 mm Combination Wrench. With a ratchet on one end and a fixed wrench on the other, they reach into tight spaces and do the job. They are the correct size, and I would never try building this trailer without them; they were worth their weight in gold.
In the first few steps, you’ll assemble the two decks and the tongue of the trailer. It’s made of steel, so it gets heavy as it’s assembled. If you don’t want to scrape it up as you move it around, have some help, or put something under it, like a carpet remnant.
The decks are then attached with a hinge on each side, and the trailer is folded over. Ensure you have adequate headroom to flip it over as it is large.
The part of the project I was most concerned about, the suspension and axles, turned out to be the simplest. They attach with only a few pieces of hardware and tighten down easily.
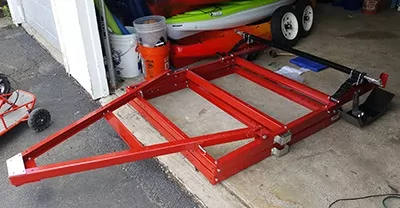
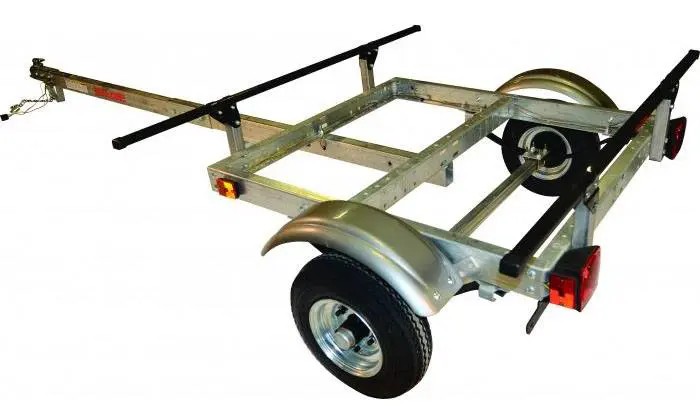
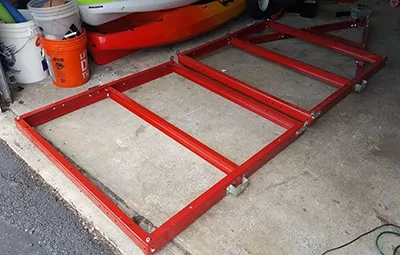
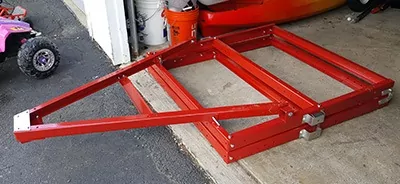
The final steps… put the wheels on, flip it over and lock the two decks of the bed. You have a trailer!
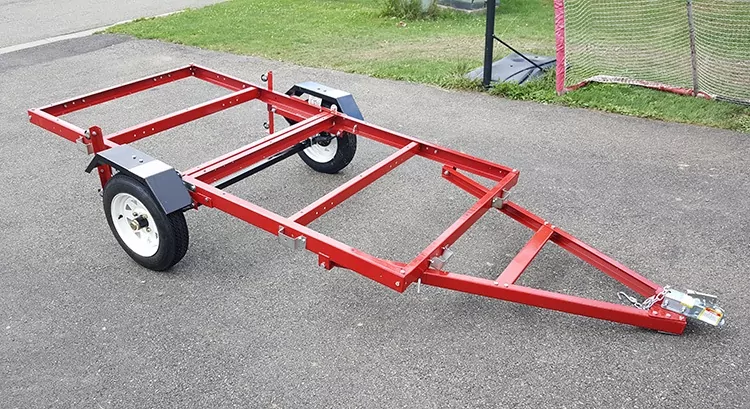
In the image above, you can see the vertical set of casters, just behind the wheels, that are used when you fold the trailer to save space. Since I didn’t plan to do that, I removed them. This also clears space you’ll need for kayak storage.
Now comes the fun part! The trailer is complete it’s time to start customizing.
DIY Kayak Trailer Build: Customize the Trailer for Your Needs
The Harbor Freight trailer is made to be customized. Holes along the top and sides of the frame allow you to bolt all kinds of material needed for kayaks in any configuration you can think of.
This particular build can be broken down into three parts:
- Attaching the Deck
- Building the Lower Rack
- Building the Upper Racks
Attaching the Deck
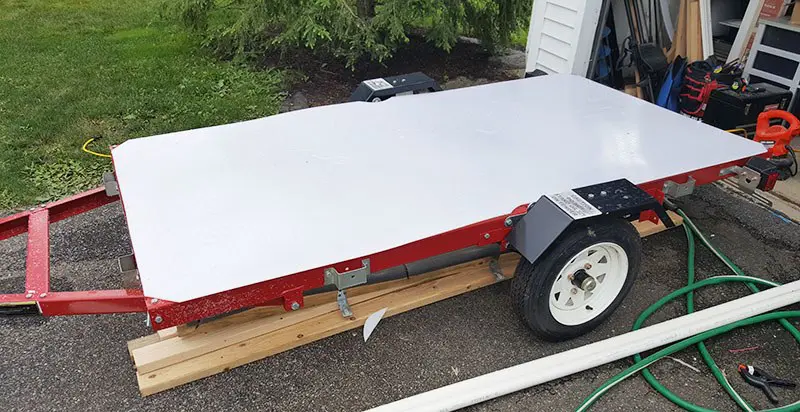
Laying a solid deck on top of the trailer will protect your kayaks from anything that the road might kick up. Half-inch plywood is inexpensive and works well. I got a piece of thin, industrial plastic for my build, which won’t rot or rust.
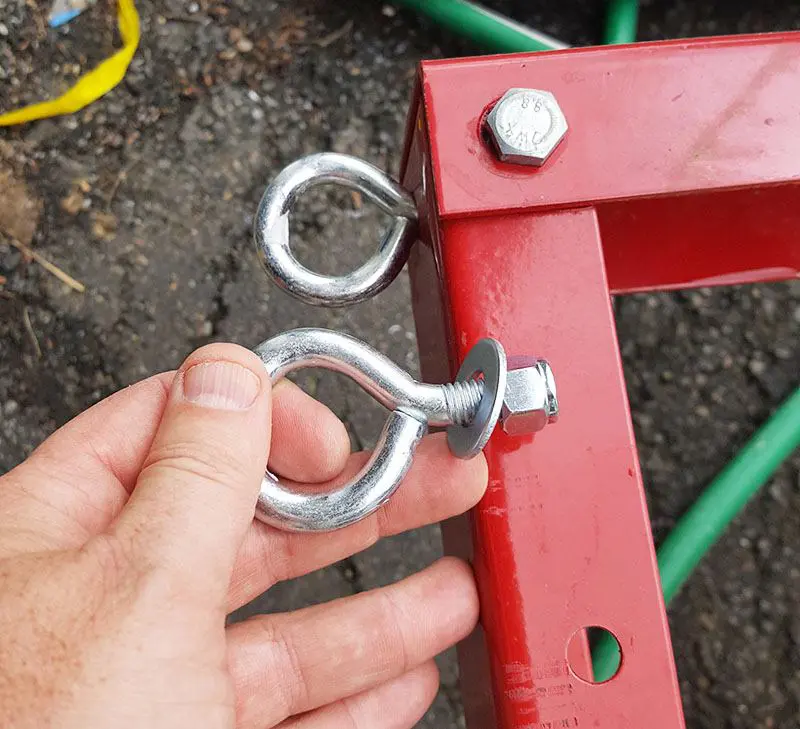
But before you attach the deck, it’s a good idea to install some hardware for kayak straps while you have easy access to both sides of the frame. Simple eye bolts and lock nuts are easy to install in the existing holes on the back and sides of the frame.
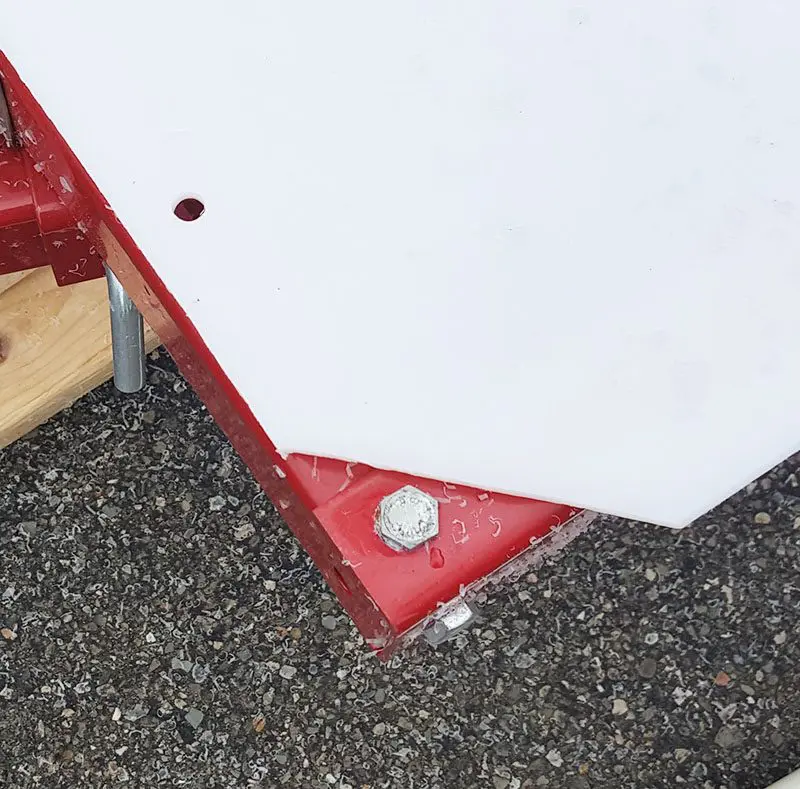
At each corner of the trailer is a large hex bolt that sticks up. It’s a good idea to make a diagonal cut in your decking to expose this and allow your deck to lay flat and flush to the frame. Next, clamp the deck to the frame and start drilling mounting holes for the next step, which is attaching 8-foot beams to the trailer.
The frame has three sets of holes on the front and back that can be used to bolt eight-foot 2x4s that will serve as the main beams the rest of the structure will attach to. 2 1/2 inch, 5/16 hex bolts secured with lock nuts underneath worked perfectly.
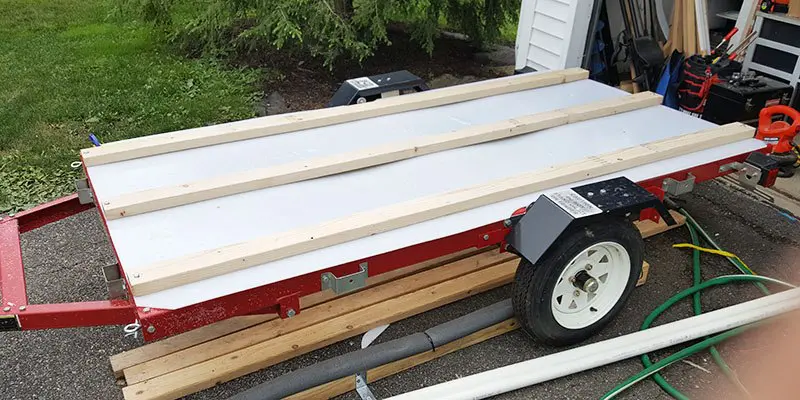
From this point, many ways exist to build a kayak rack on top of the deck. I need the trailer to hold five kayaks, so I plan on building a lower deck that holds two and an upper deck holding three more.
Building the Lower Rack
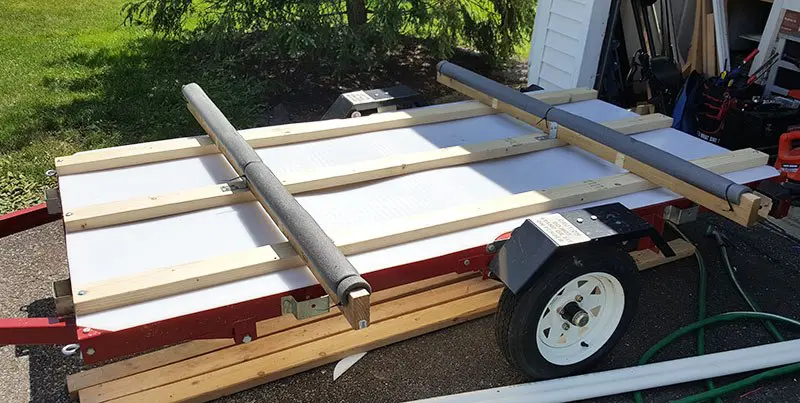
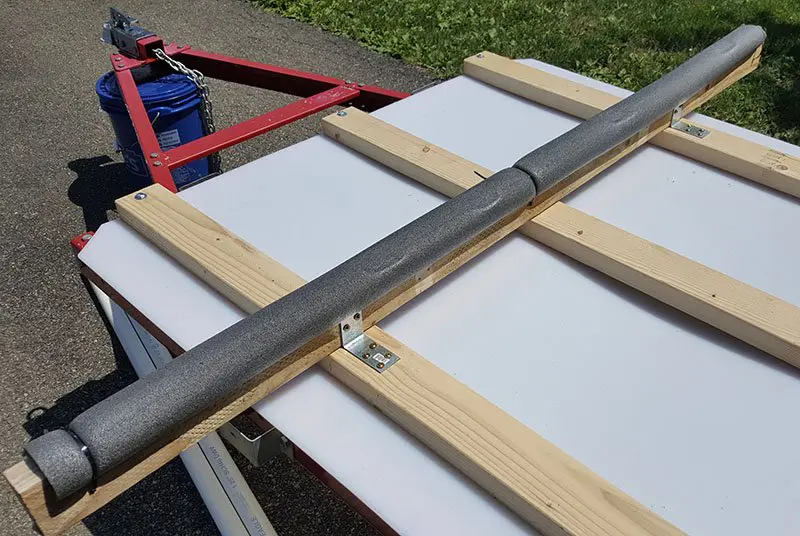
This is a relatively simple step that involves laying two 6-foot 2x4s across the beams and attaching them with L brackets and screws. These are your crossbars, which will be much stronger if you set them on the short edge.
This will also allow you to attach a pool noodle or pipe insulator over them to protect your kayak.
Using a total of 3 brackets per crossbar will give you one per beam and create a rock solid rack.
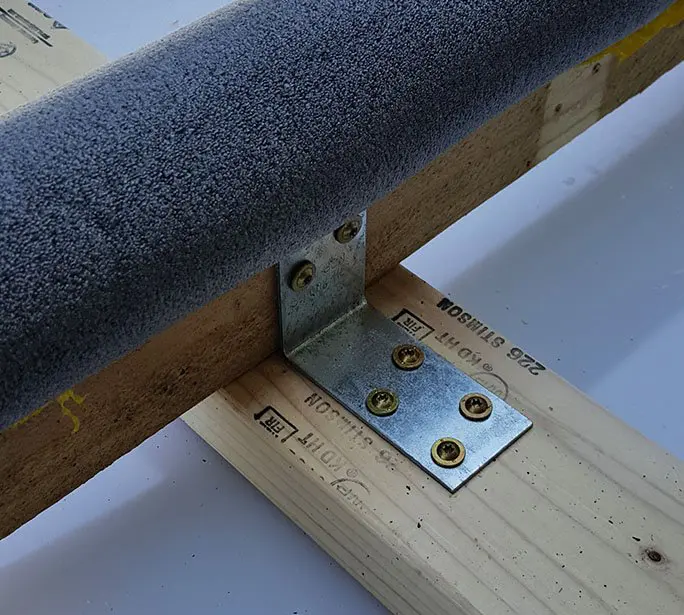
Another view of the finished lower crossbar. Drill small holes through the crossbar and use zip strips to hold the foam in place.
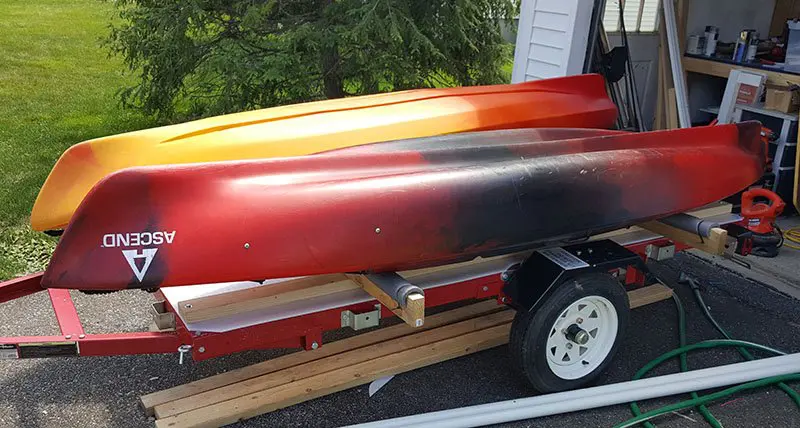
If you only have two kayaks to haul, your DIY kayak trailer is finished. Load them up and go for a paddle. But if you have more than two, read on, as we will add the upper racks to hold 3 more kayaks.
Building the Upper Racks
The upper racks will be held up by the structure you will build on the center beam, so it’s a good idea to put your kayaks on the lower rack to see how much room you have. The two kayaks pictured are around 30 inches wide, leaving plenty of space in the center and on the sides.

Measure a 2×4 to the height you need, in this case, it’s 28 inches, and using an L-bracket, attach it to the center of the lower beam and crossbar.
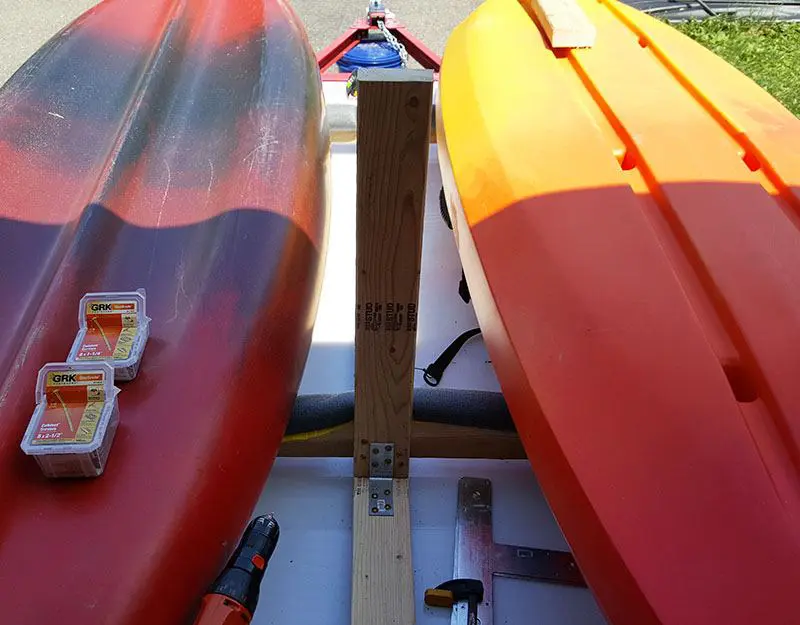
Attach an identical post to the front beam and crossbar, followed by another 2×4 connecting the two at the top. This creates a solid center structure to attach the upper racks.
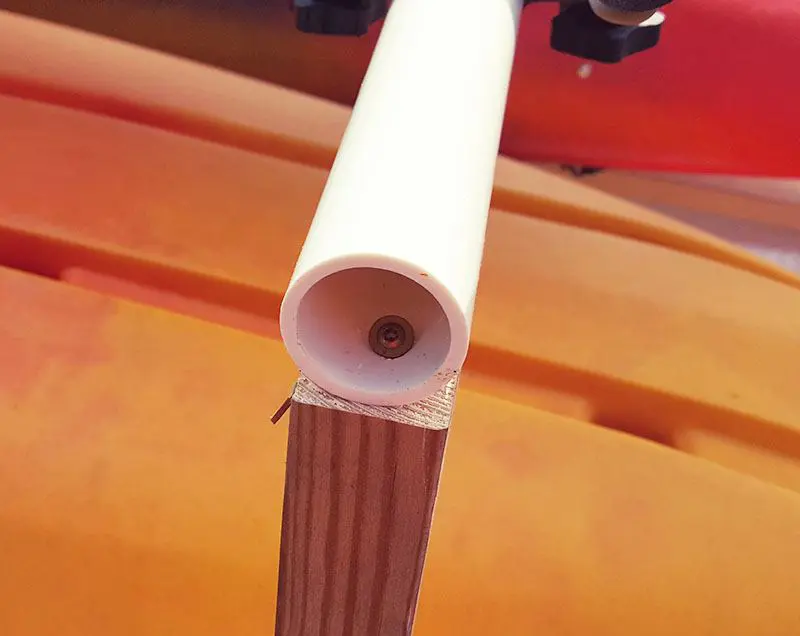
The next step is to attach the upper rack crossbars. For this trailer, I chose two 1.25-inch PVC pipes cut to six-foot lengths. You could use 2x4s, but you won’t be able to attach the steel kayak carriers mentioned earlier. This size PVC is stiff and the perfect size for kayak carriers.
Drill two holes in the center of the top of the tube. The need to be large enough for the heads of the self-tapping fasteners to fit through.
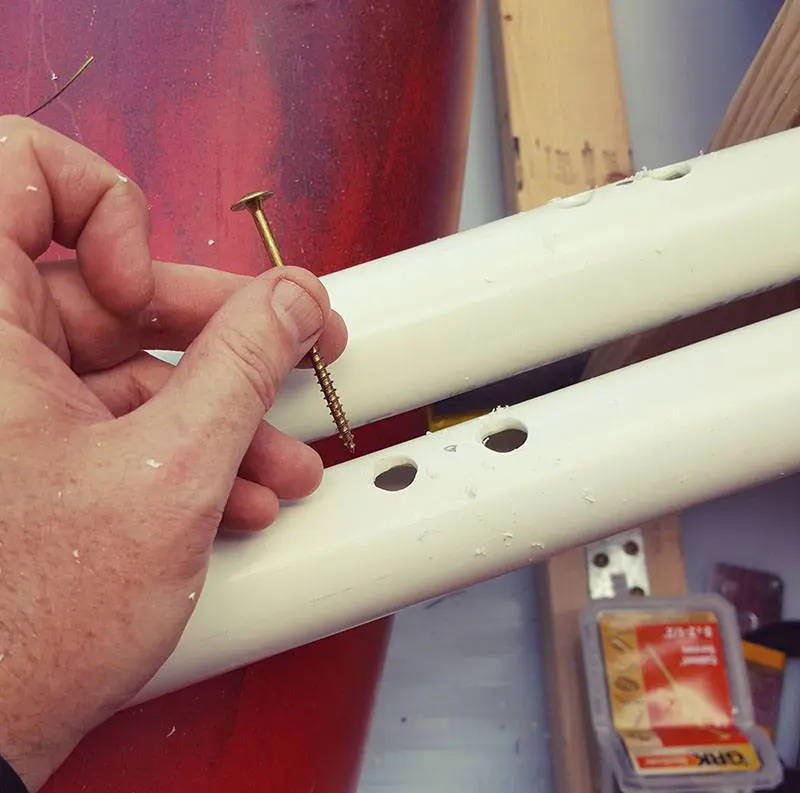
Screw the fasteners through the bottom of the tubes and tighten them to the posts.
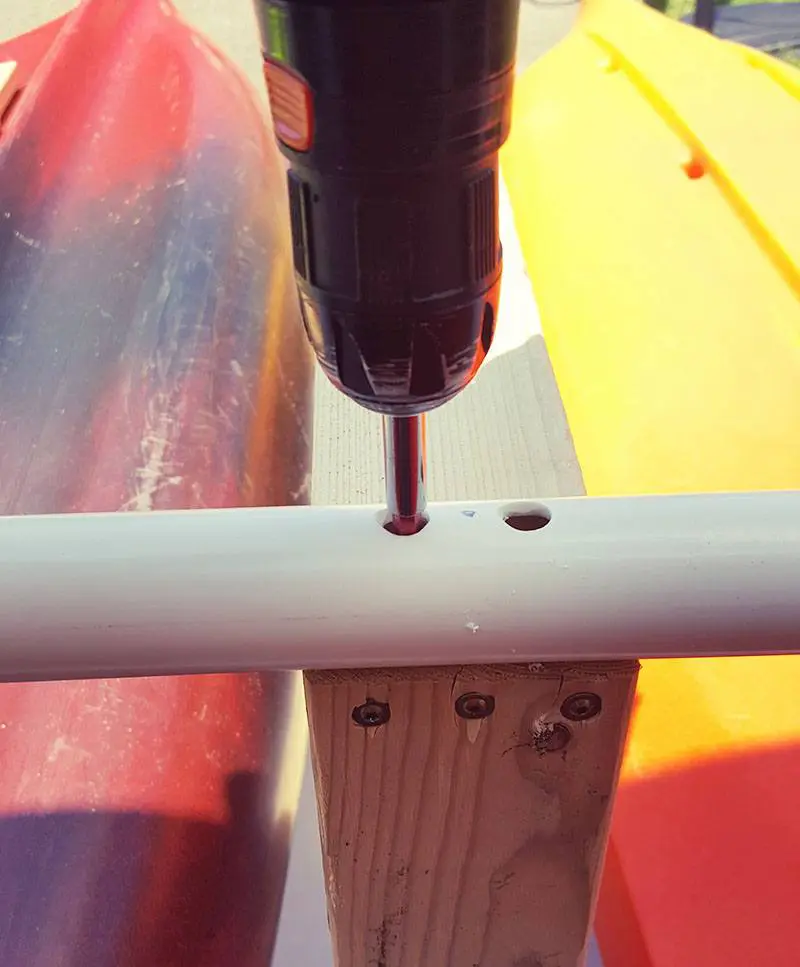
Your PVC crossbars should be at a 90-degree angle to the center structure of the upper rack.
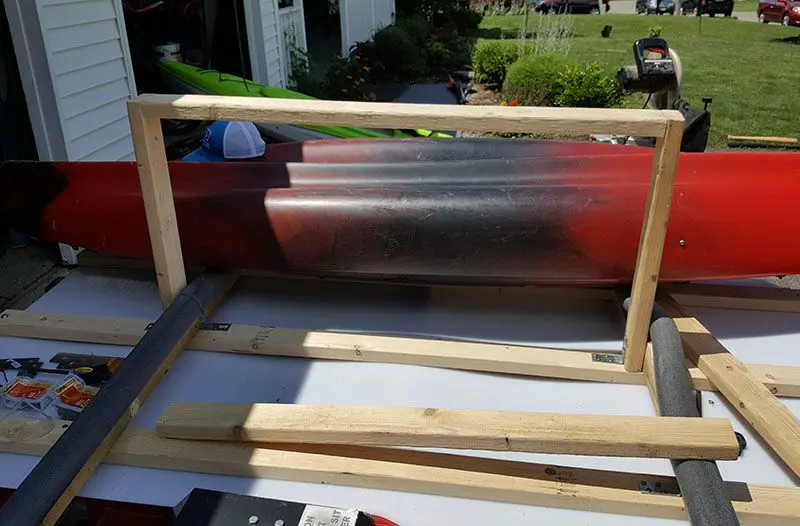
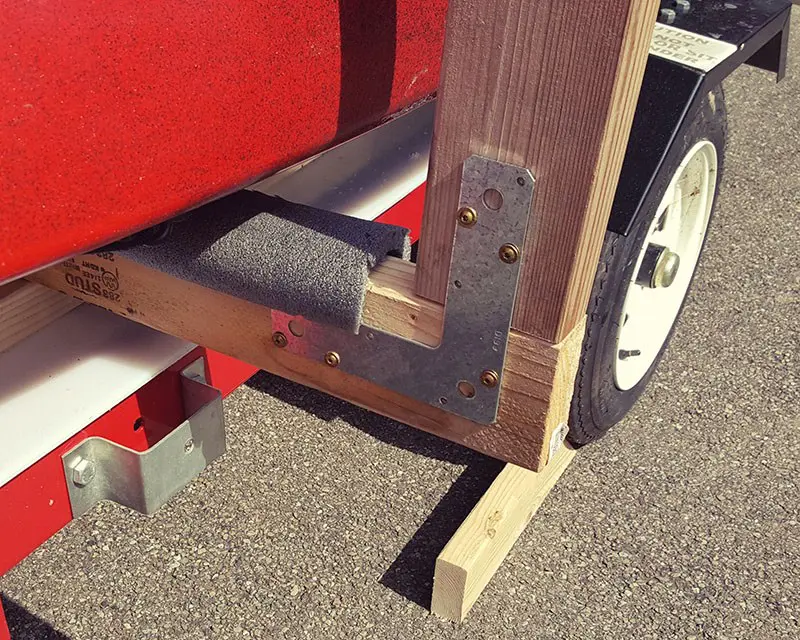
The last step in building the upper racks of your DIY kayak trailer is attaching the outer supports. You will need to measure and cut. Four 2x4s to a height equal to the center posts so the top crossbar is level.
Sit the support on top of the lower rack crossbar and attach it with an L bracket like the one pictured on both sides of the support to create a super strong rack.
Lastly, attach your PVC crossbar to the top of the support. You can do this a few ways, but the simplest is to drill a 45-degree pilot hole through the end of the PVC and attach it will a self-tapping fastener.
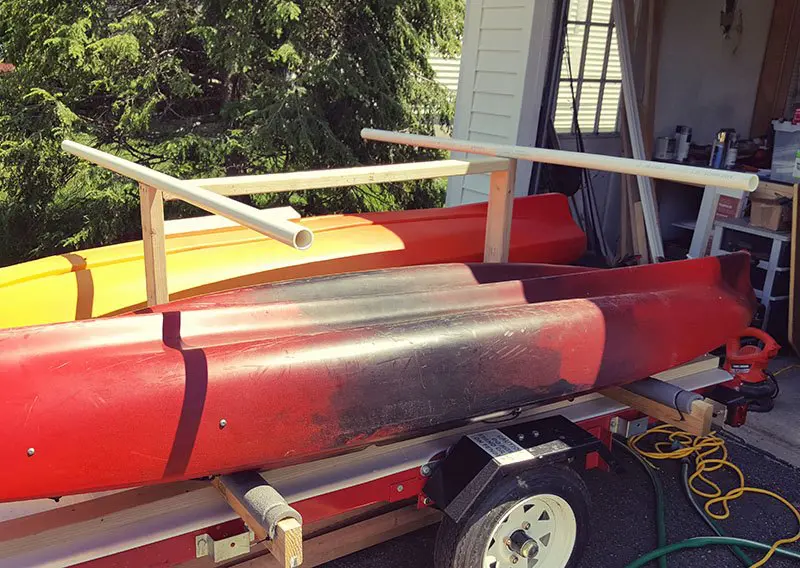
You now have a top rack to attach your steel kayak carriers to. For my needs, I laid a single kayak in the middle and attached two carriers giving me space for 5 kayaks.
The hardware included with the carriers is perfect for a round tube and doesn’t move once it’s tightened down.
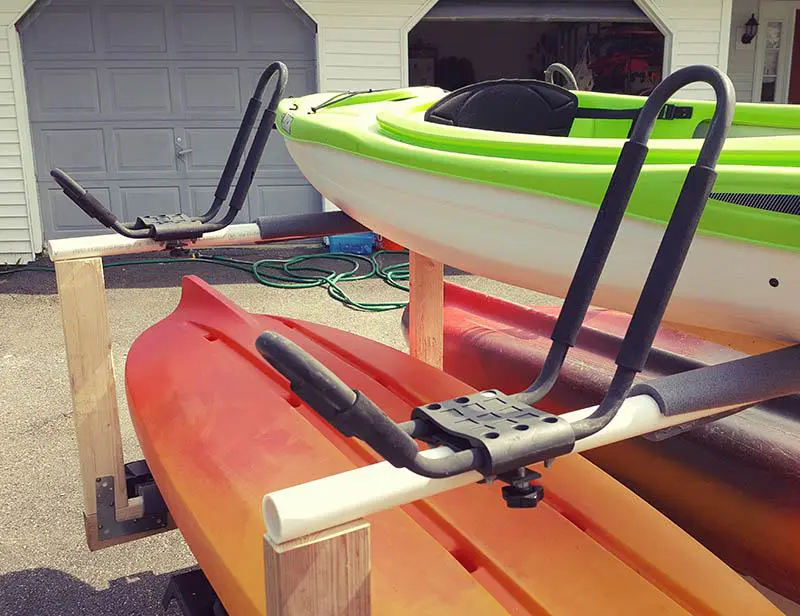
The rack is six feet wide and easily fits in a garage. You could substitute an aluminum pipe on the top rack and attach two more kayak carriers to hold six kayaks if needed.
Or, if you only have two kayaks, use the lower deck for super easing, loading and unloading.
There are lots of options for customizing, and all you need is some lumber, hardware, and pipes from Home Depot and some J-style kayak carriers.
Wrapping It Up
If you are sick and tired of loading and unloading kayaks from the top of your car or SUV, there is a better option. A DIY kayak trailer like this one is inexpensive, easy to build, and easy to tow.
Once you start using one, you will never return to car top carriers, especially if you have a big heavy kayak.