
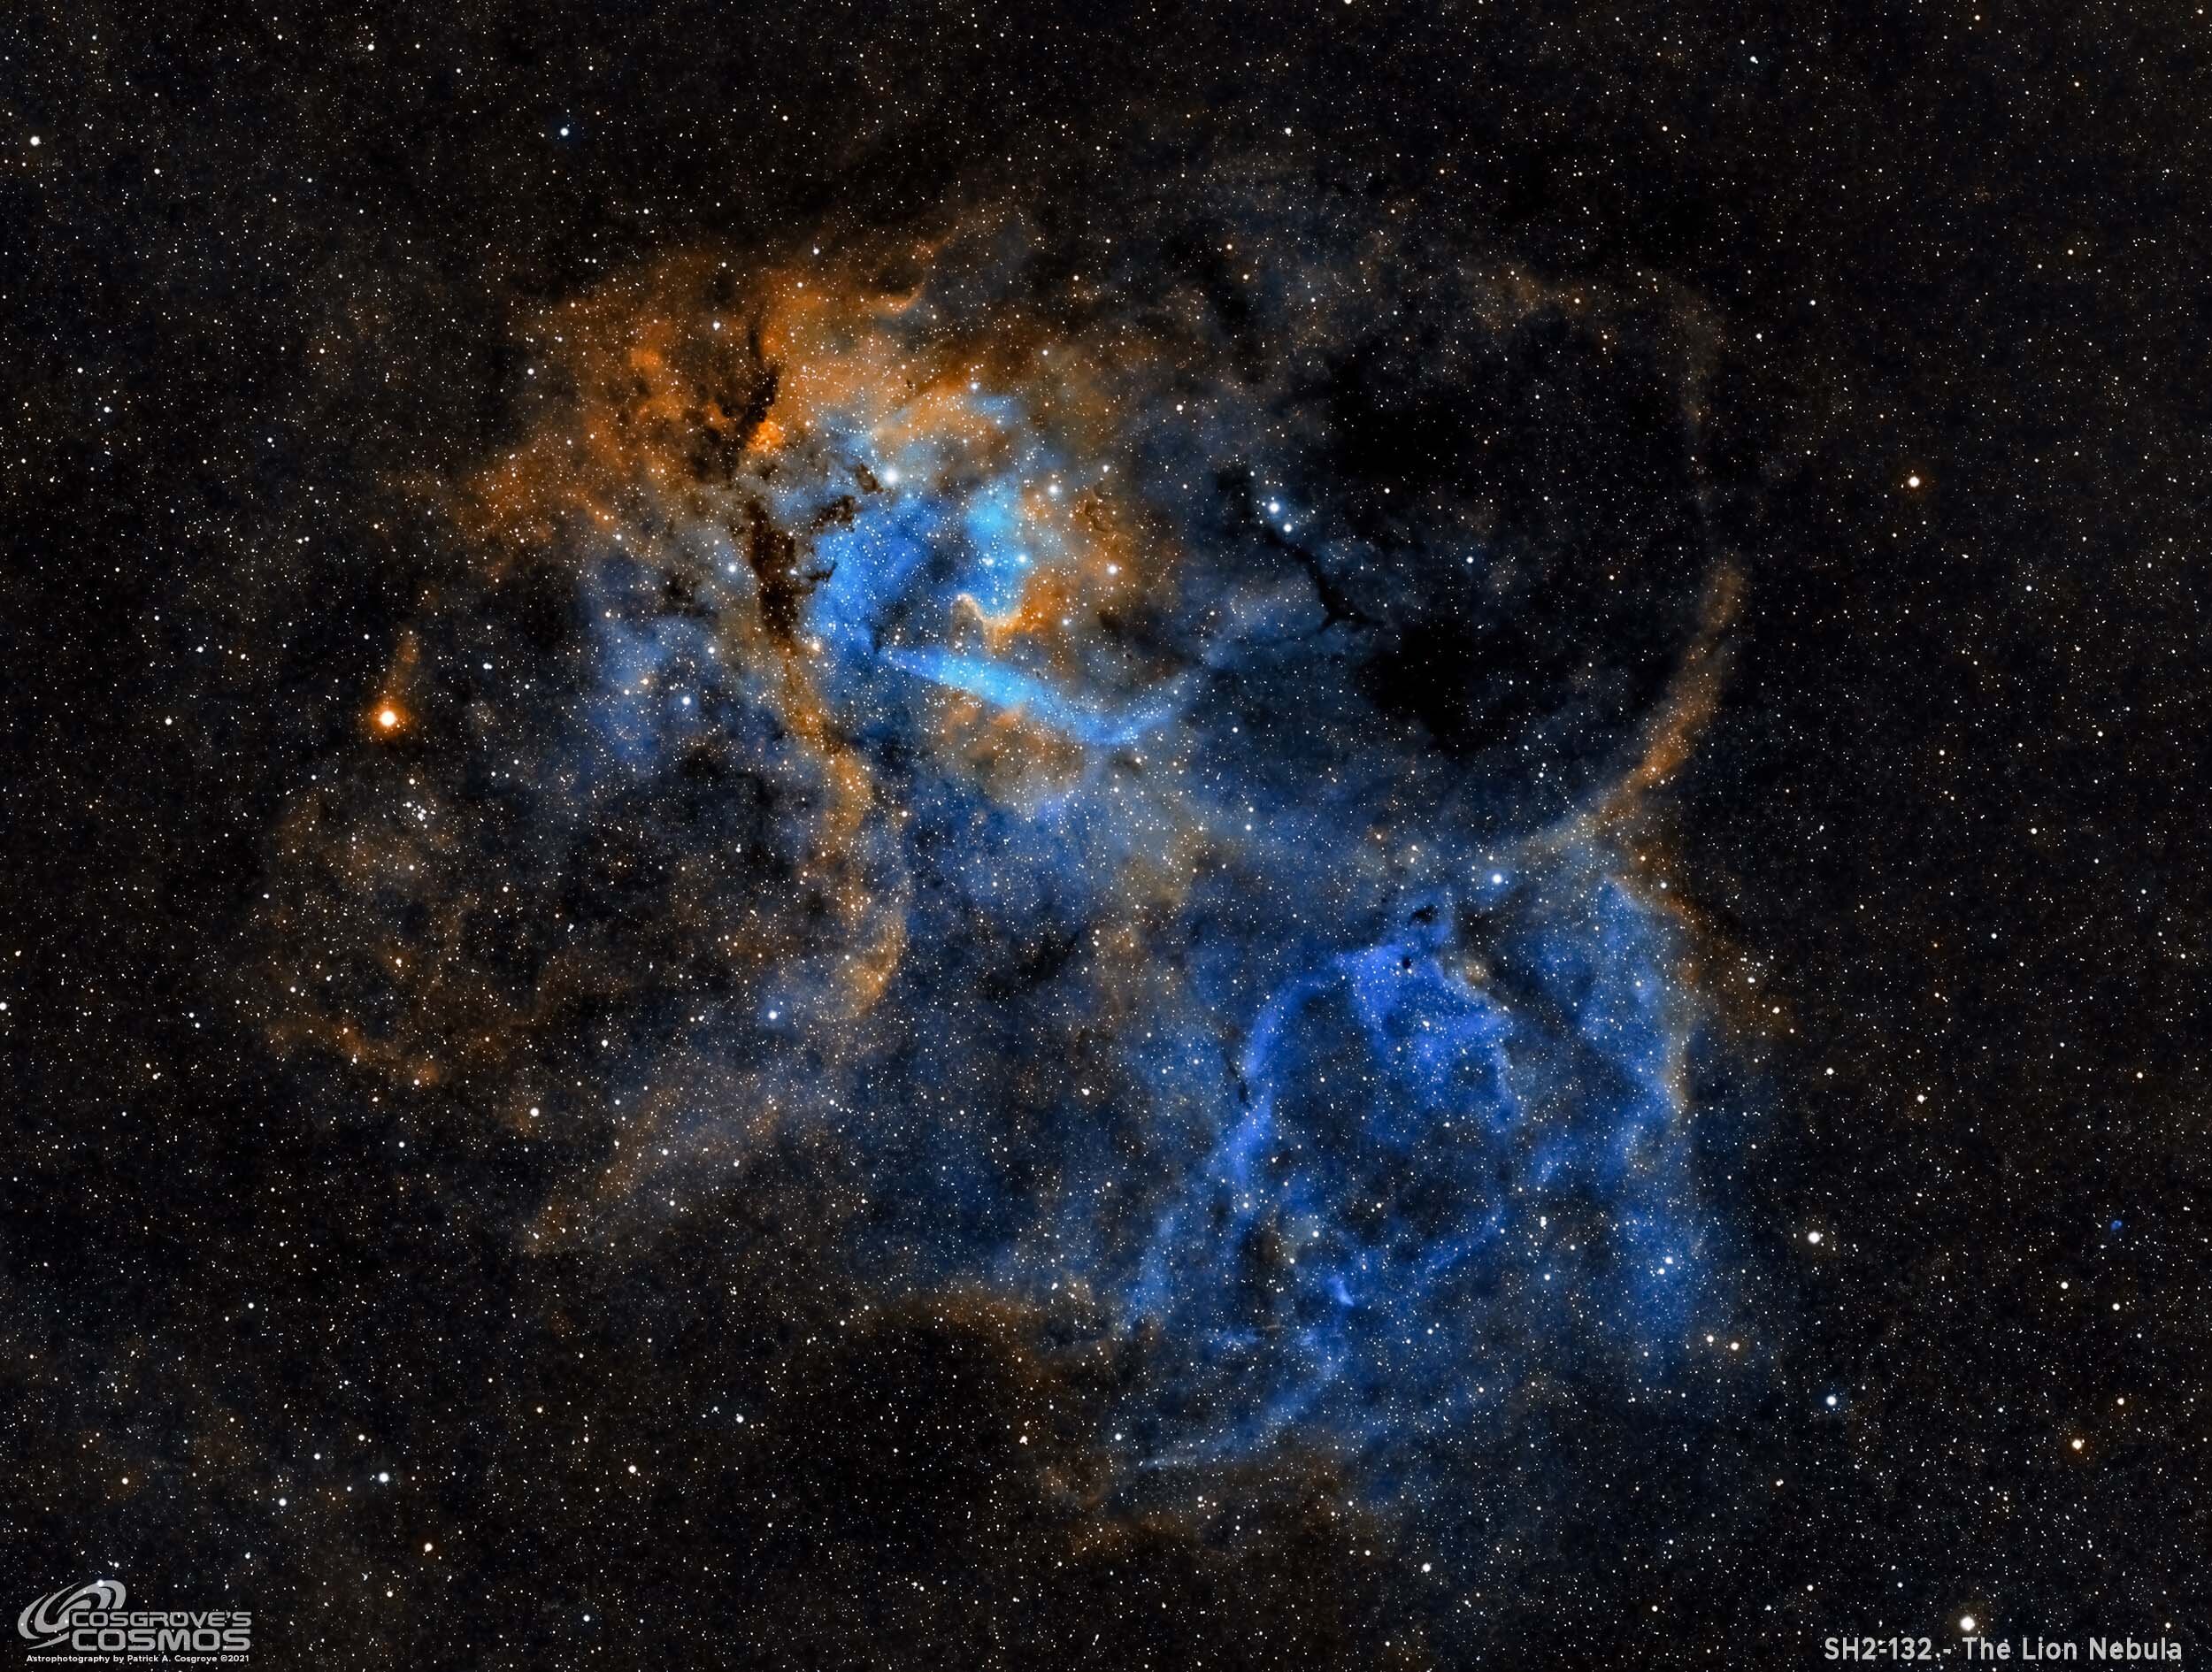
SH2-132 - A Reprocess of The Lion Nebula in SHO (8.33 hours)
Date: August 26, 2023
Cosgrove’s Cosmos Catalog ➤#0127

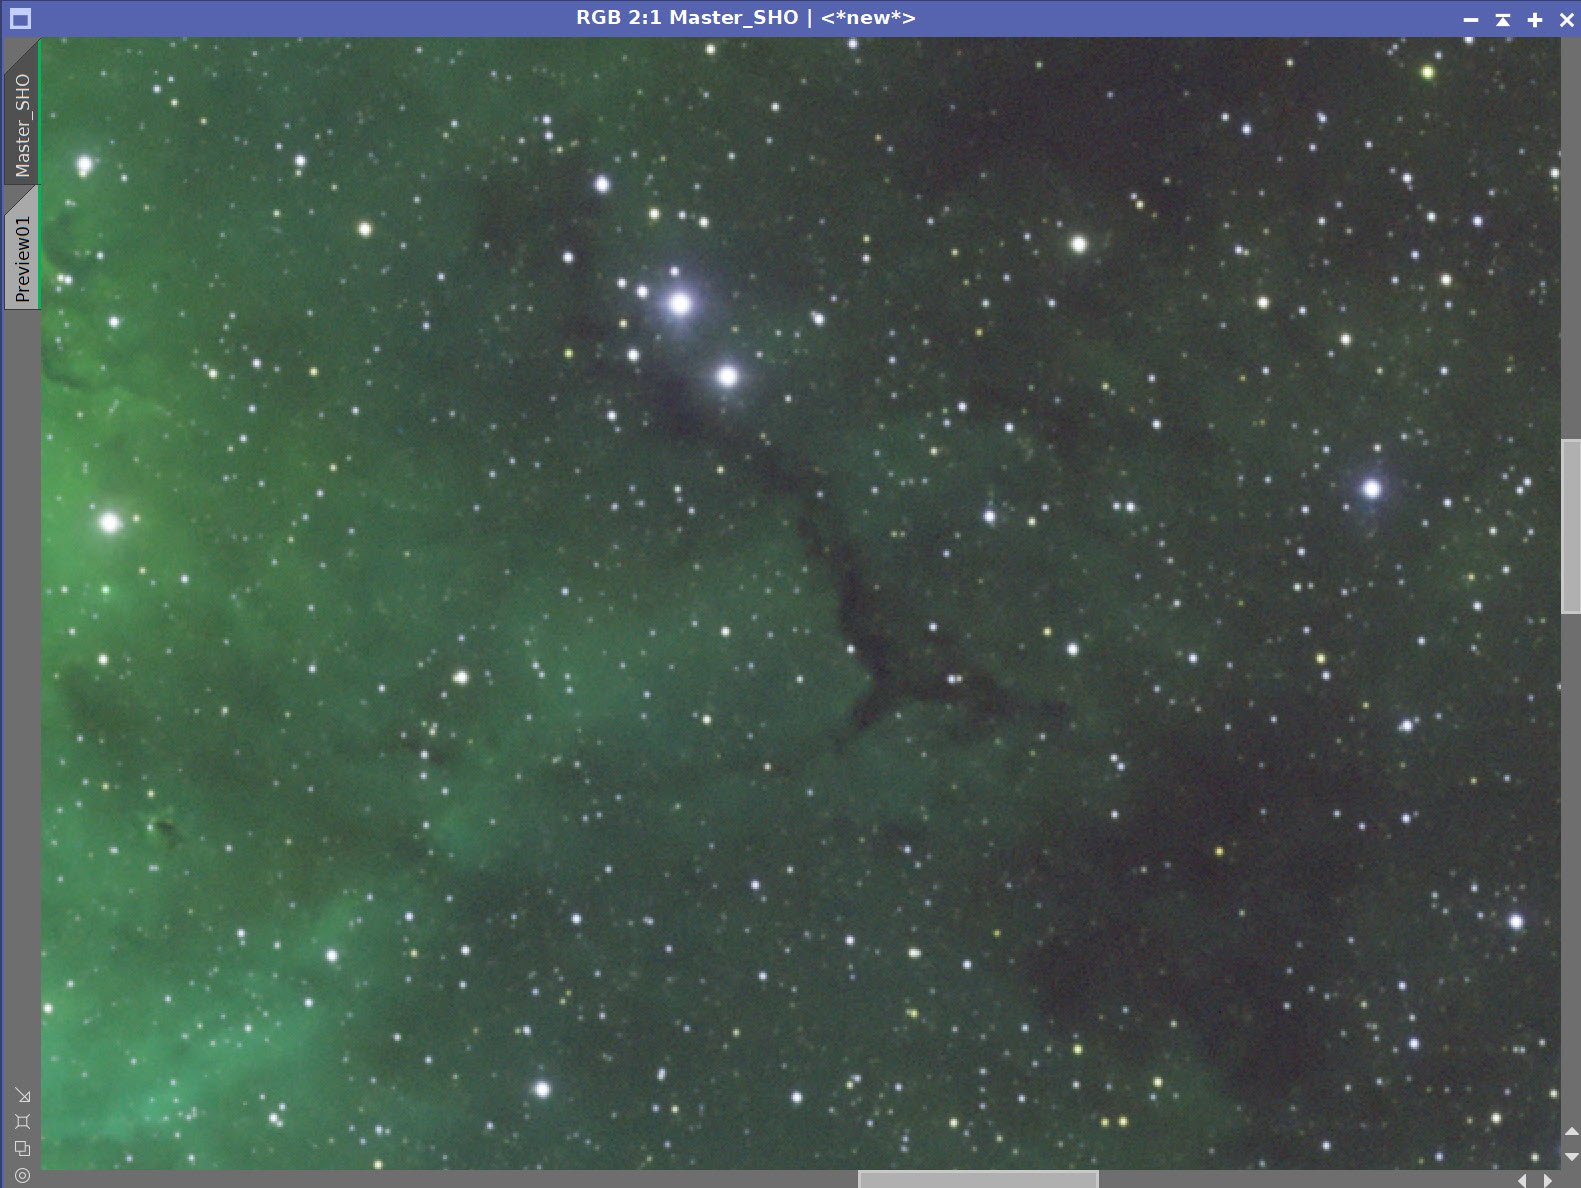
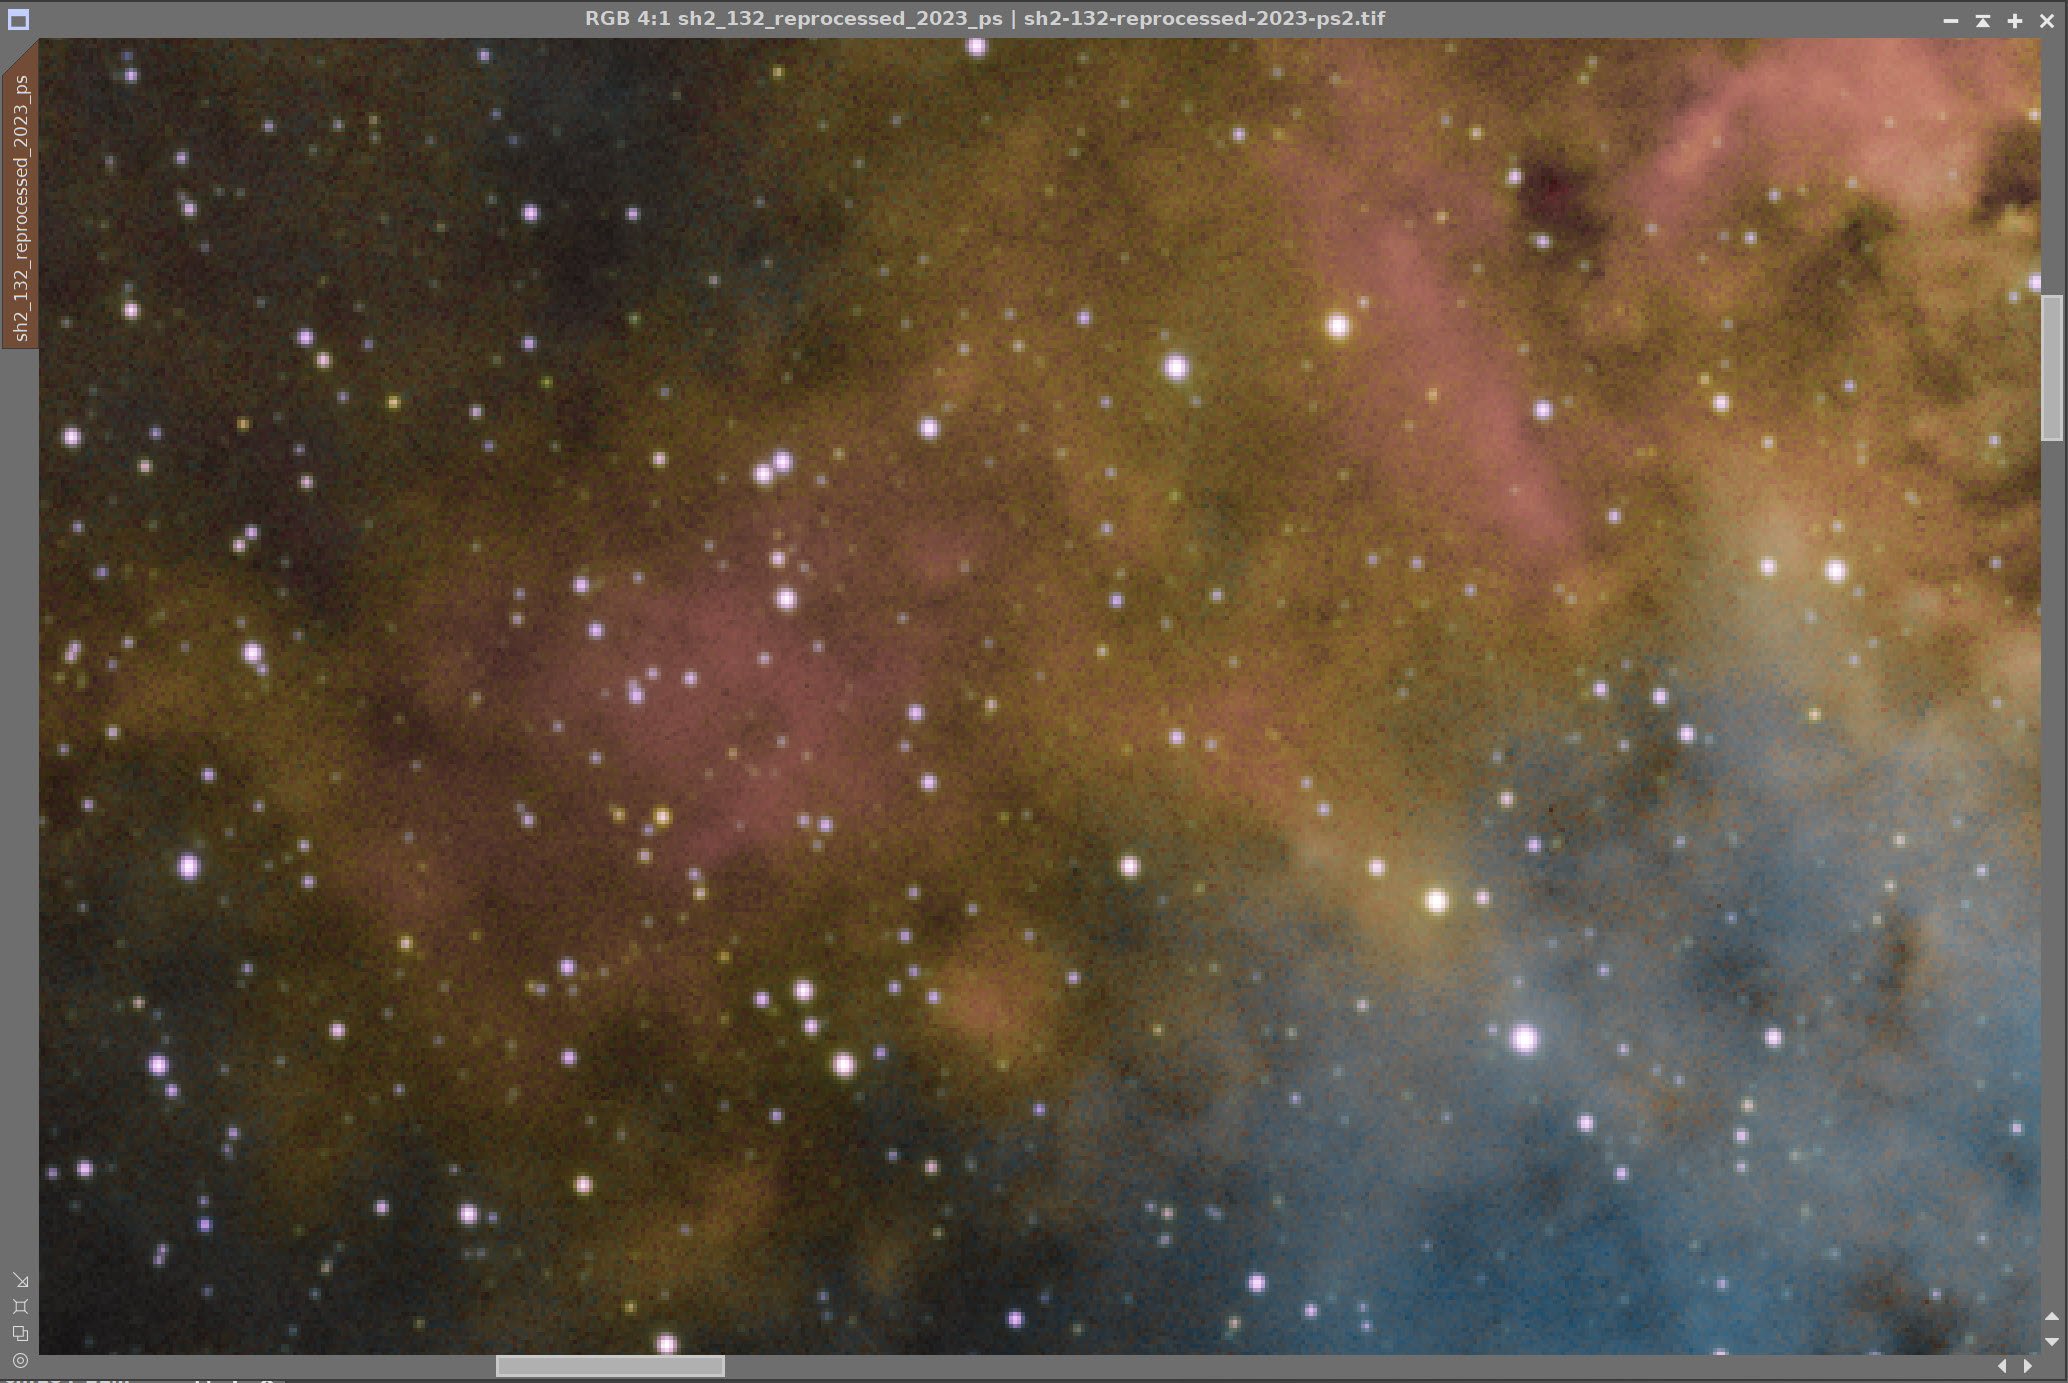
SH2-132 - The Lion Nebula - This is the new processed version that I am much happier with! (click for high res version via Astrobin.com)
Awarded Flickr “Explore” Status for Aug 26!

Table of Contents Show (Click on lines to navigate)
A Reprocessing Project!
The Summer of 2023 has proven to be - just like the rest of the year so far - a very poor year for astrophotography. Between health issues, poor weather, and unprecedented levels of wildfire smoke in the atmosphere, I have had little opportunity to collect new data.
So, I have been revisiting older projects and seeing if my current skills and techniques could extract a better image from that data set.
About the Target (from the original post)
SH2-132, known as The Lion Nebula, is a rich HII region with star clusters, emission nebulae, and dark dust regions. Located in the southern portion of the constellation Cepheus, the Lion Nebula is roughly 10,00 light-years away in the Perseus Arm of the Milky Way Galaxy.
This is primarily an emission nebula with some massive stars responsible for ionizing the gas in this region. In particular, two Wolf-Rayet stars have been identified - with the designation HD 211564 and HD 211853.
Wolf-Rayet stars are massive and hot and have a white-blue coloration. These stars are at least 20 times more massive than our Sun and can be hundreds of thousands or even millions of times brighter! In addition, they tend to be eruptive and possess extremely high solar winds.
This whole region is believed to be an area of new star formation.
The Annotated Image
The annotated image was created using the ImageSolver and AnnotateImage scripts in Pixinsight. (Click to enlarge)
The Location in the Sky

This finding chart was created using the Pixinsight ImageSolver and FindingChart Processes.
About the Project
As I considered what data I set, I wanted to try reprocessing; I came across my image of the Lion Nebula.
This is a fairly large section of sky measuring about one degree in diameter - and would be the first reprocessing project that was based on data captured with my wide-field Askar FRA400 platform.
I always liked the target - and to my surprise - it was one of the first items highlighted by Google Search when the Terms “Lion Nebula” were used!
Having said that - it is also one of the images that I did a couple of years back that I thought looked over-processed.
My original version of the Lion Nebula.
I thought that the background sky was too dark. The stars looked bloated, and the nebula looked unnatural. I hoped that I could do better with the data.
When the original data was processed, I had just started to document my processing steps. These early descriptions lacked detail and did not show many interim image results.
I hope to change that with this effort!
Image Processing Discussion
Since I did this image the first time, a lot of things have changed in how I process images.
I now tend to use a Lum vs. Color processing path. This is not always true, but in general I do. This time around, however, I ended up with surprising results with this mode of processing. I will talk about this more later.

Basic process flow used for this image.
I also now use starless processing methods.
I also now make extensive use of RC-Astros smart AI Tools: BlurXTerminator, NoiseXTerminator, and StarXTerminator. These are best-in-class tools that have changed how I process images.
Plus, I have personally evolved in how I apply the tools at my disposal.
I have always said that some images seem to process themselves. Others are a real struggle. This one processed itself. In fact - I was really surprised at how this worked out.
Typically, when using the Lum vs. Color processing paths, the Lum image is processed for peak detail and sharpness, and the color image is more focused on color position and low noise. Then, the two images are combined to get the best of both worlds.
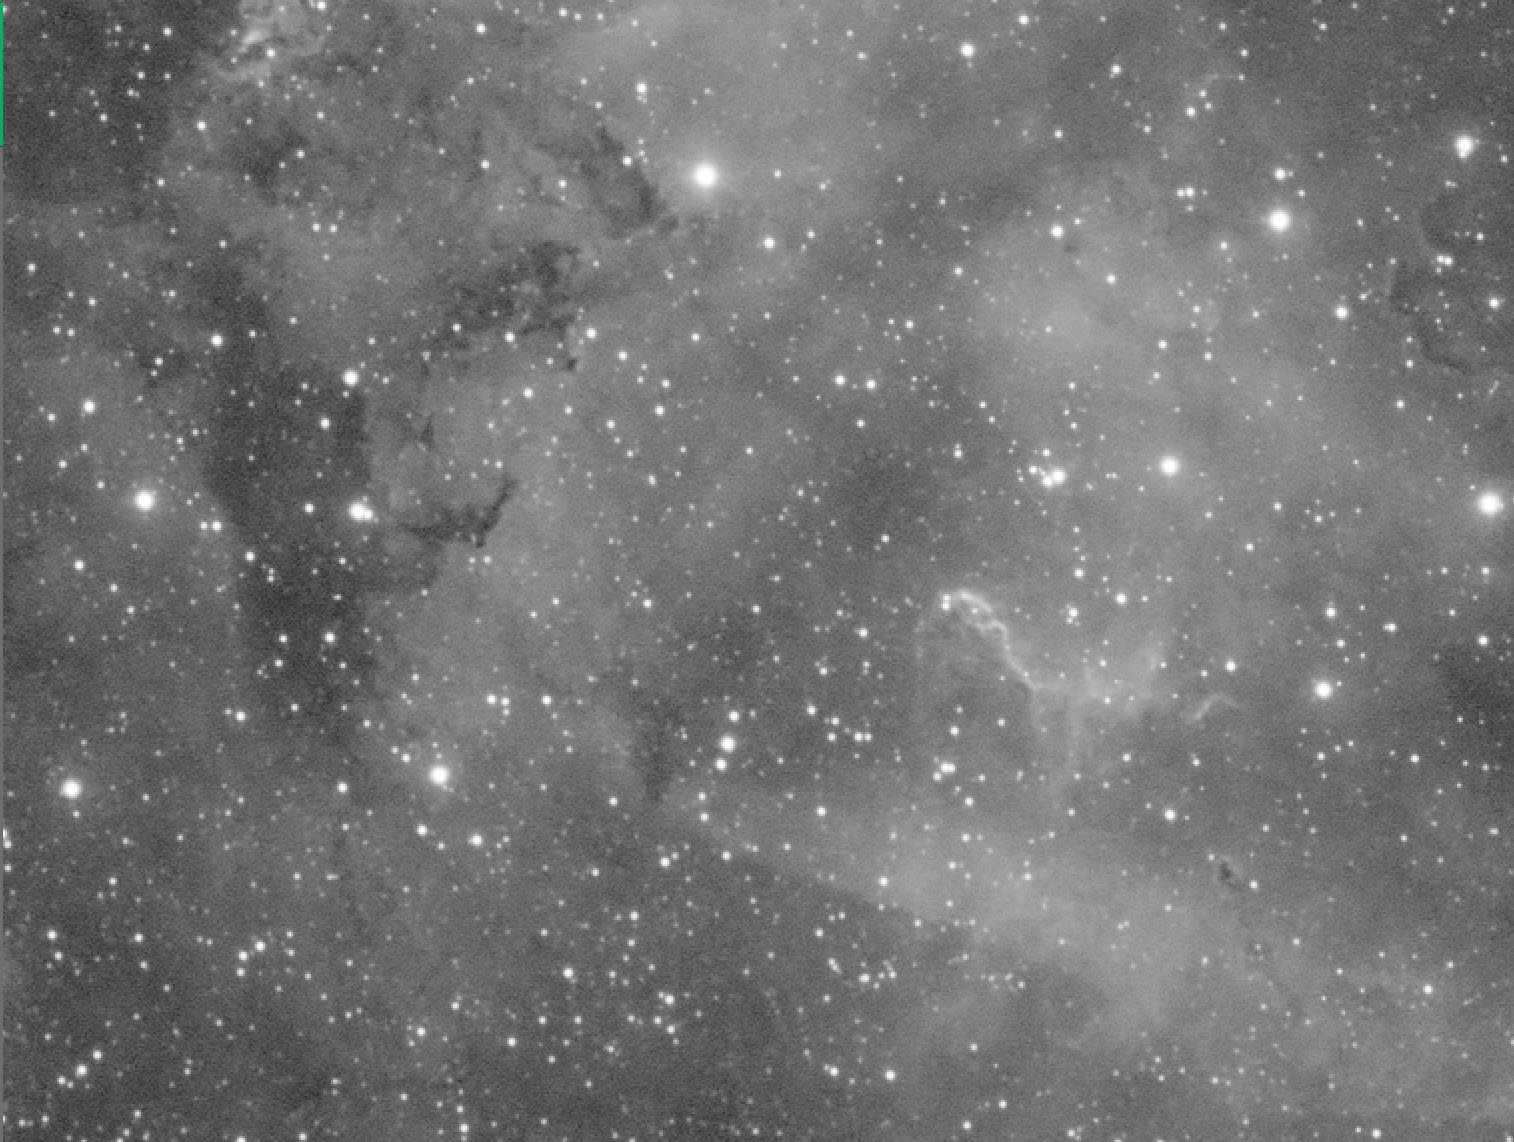
But this time - the exact opposite happened! The color image seemed to have the most detail, so I processed it to maximize that detail. The Lum image - in this case, a synthetic Lum image - seemed to be more smoothed out!
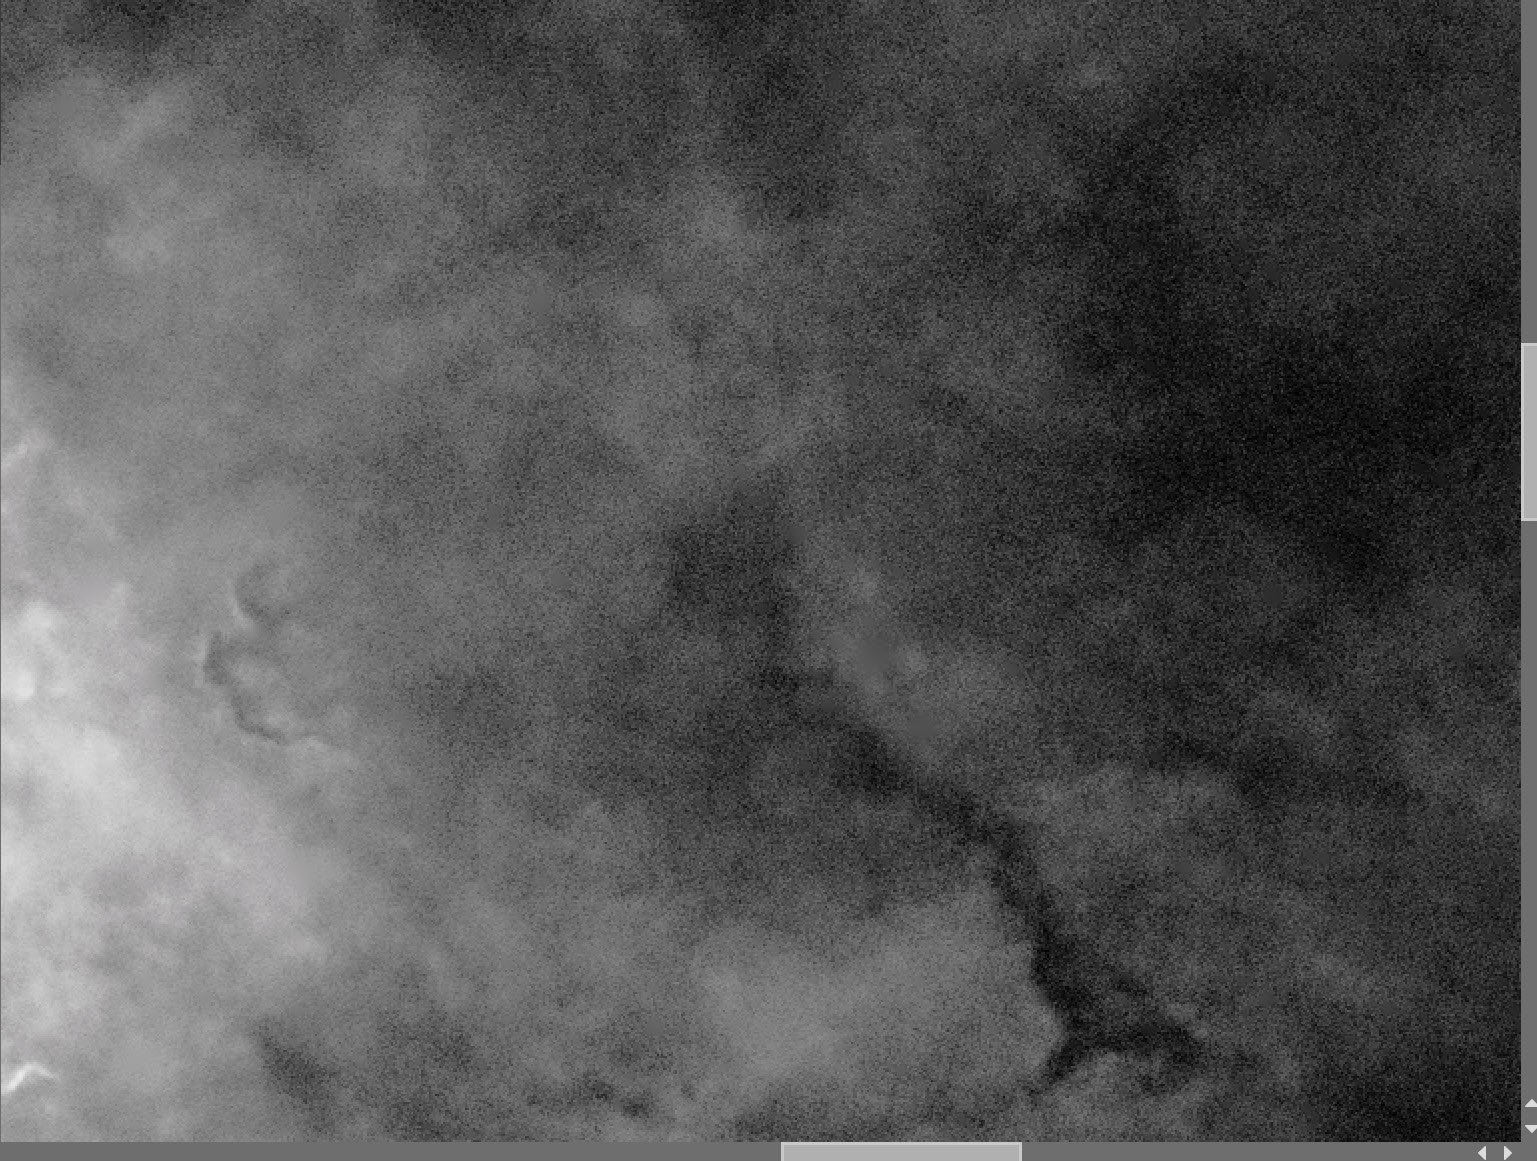
The Nonlinear Lum Starless image - softer than expected! (click to enlarge)
The Nonlinear SHO Starless Image - a surprising amount of detail! (click to enlarge)

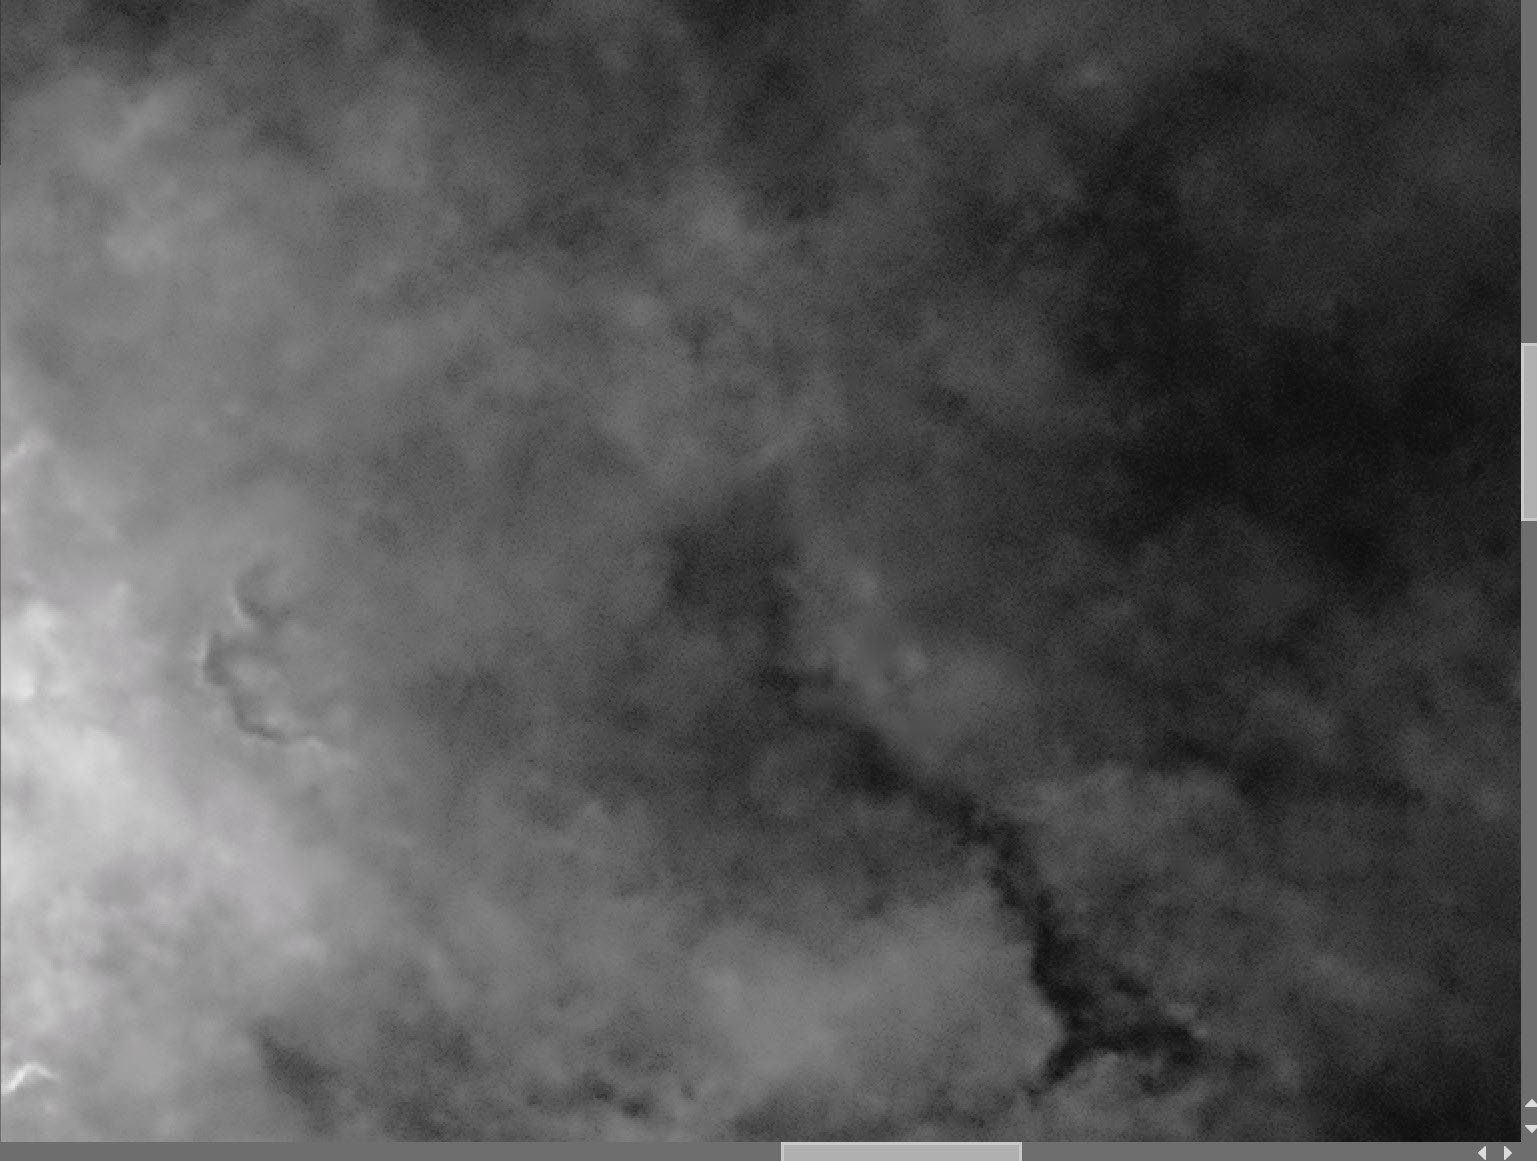
The images after combination - much softer! (click to enlarge)
When I combined them, the Lum image seemed to smooth out some of the harsher details of the color. I did not plan this - it just worked out that way.
Capture Information
Light Frames
Captured on September 1st, 4th, and 6th 2021
37 x 300 seconds, bin 1x1 @ -15C, unity gain, Astronomiks 6nm Ha Filter
38 x 300 seconds, bin 1x1 @ -15C, Unity gain, Astronomiks 6nm OIII Filter
25 x 300 seconds, bin 1x1 @ -15C, unity gain, Astronomiks 6nm SII Filter
Total of 8.33 hours
Cal Frames
30 Darks at 300 seconds, bin 1x1, -15C, gain unity
30 Dark Flats at Flat exposure times, bin 1x1, -15C, gain unity (taken for each night)
Flats collected separately for each evening to account for camera rotator variances:
15 Ha Flats
15 OIII Flats
15 SII Flats
Capture Hardware
Scope: Askar FRA400 73MM F/5.5 Quintuplet Astrograph
Guide Scope: Sharpstar 61EDPHII
Camera: ZWO ASI1600mm-pro
Filter Wheel: ZWO EFW 8x1.23 with ZWO LRGB filter set,
Astronomiks 6nm Narrowband filter set
Guide Camera: ZWO ASI290Mini
Focus Motor: ZWO EAF 5V
Mount: Ioptron CEM 26
Polar Alignment: Ipolar camera
Software
Capture Software: PHD2 Guider, Sequence Generator Pro controller
Image Processing: Pixinsight, Photoshop - assisted by Coffee, extensive processing indecision and second-guessing, editor regret, and much swearing….. Given the problems on this image, more than the usual whining….
Click below to see the telescope platform version used for this image
SH2-132 Processing Log (Using Pixinsight & Photoshop)
1. Blinking the Images
All lights and cal frames were blinked
I was surprised that everything looked very good.
Stars were all around, and tracking looked good.
There are no visible gradients or at least very few subtle ones.
No problems with airplanes or other issues
No subs were eliminated!
2. WBPP v2.5.9
Reset everything
loaded all lights
Load all flats
Load all darks
Set Max Quality
Set keyword NIGHT
Set Exposure Tolerance to zero for lights and darks
Set cosmetic correction to CC script for all images
Set the Pedastal Image to auto for all images
Set up for full integration
Mapped 300-second darks to be used for all nights
Set auto crop to true
Executed in 39:14 with no errors
WBPP - Calibration View

WBPP -Post Calibration View

WBPP- The Pipeline View
3. Set Up Master Images
Open Master Ha, O3, and S2 Images
Rename them
Write each Master image out to a file (so that I could access them from ImageIntegraton in the next step)
Use ImageIntegratioon with no reject mode to create a synthetic Luminance image.
Use the ChannelCombination Tool to create the initial SHO color image.
Master Ha Image (click to enlarge)
Master O3 Image (click to enlarge)
Master S2 image (click to enlarge)

The ImageIntegration setting used to create the synthetic Lum image.
Master Lum image (click to enlarge)

The Initial Master SHO image
4. Remove Color Gradients in the Master SHO image.
Some slight color gradients can be seen in the SHO color image. We will use DBE to remove them.
Subtraction mode used.
SHO Sampling (click to enlarge)
SHO image before DBE (click to enlarge)
SHO image after DBE (click to enlarge)
SHO Background from DBE (click to enlarge)
5. Run Deconvolution on SHO and Lum Images
Run the script PFSimage on the SHO image.
Get the X and Y FWHM star sizes: 2.24 and 2.12. Sizes are pretty close
Experiment with BlurXTerminator (BXT) settings
Use the final settings shown in BXT Panel Snap below
Use the same values for BXT for the Lum images
Apply a little noise reduction to “knock the fizz” off. Use NoiseXTerminator (NXT) with a value of 0.5.

PFSImage Script is used to get FWHN star size measures.

BXT setting is used for both the SHO and Lum images.
SHO image Before BXT, After BXT, and After NXT= 0.5


Lum image Before BXT, After BXT, and After NXT= 0.5
6. Go Starless
Use StarXTerminator (STX) to create the starless version of the SHO image.
Create star images using the unscreened method
Use STX to create the starless version of the Lum image. No need to preserve stars
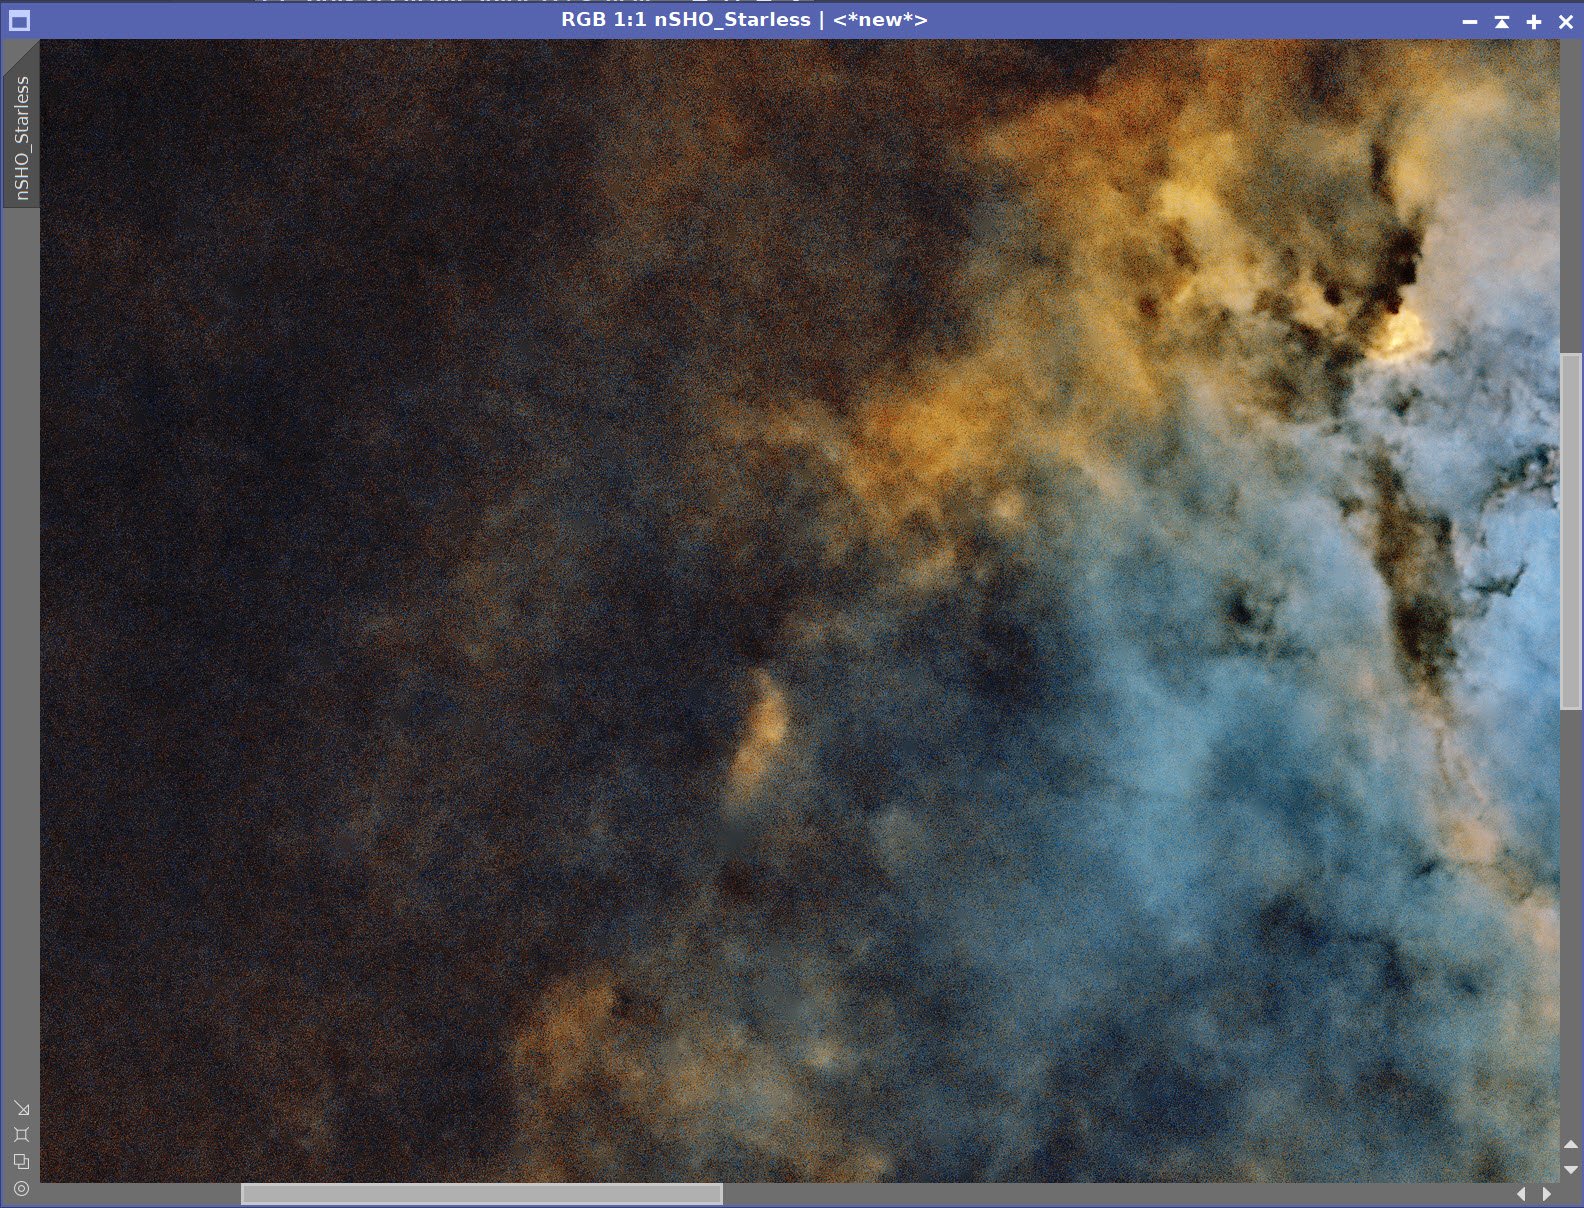
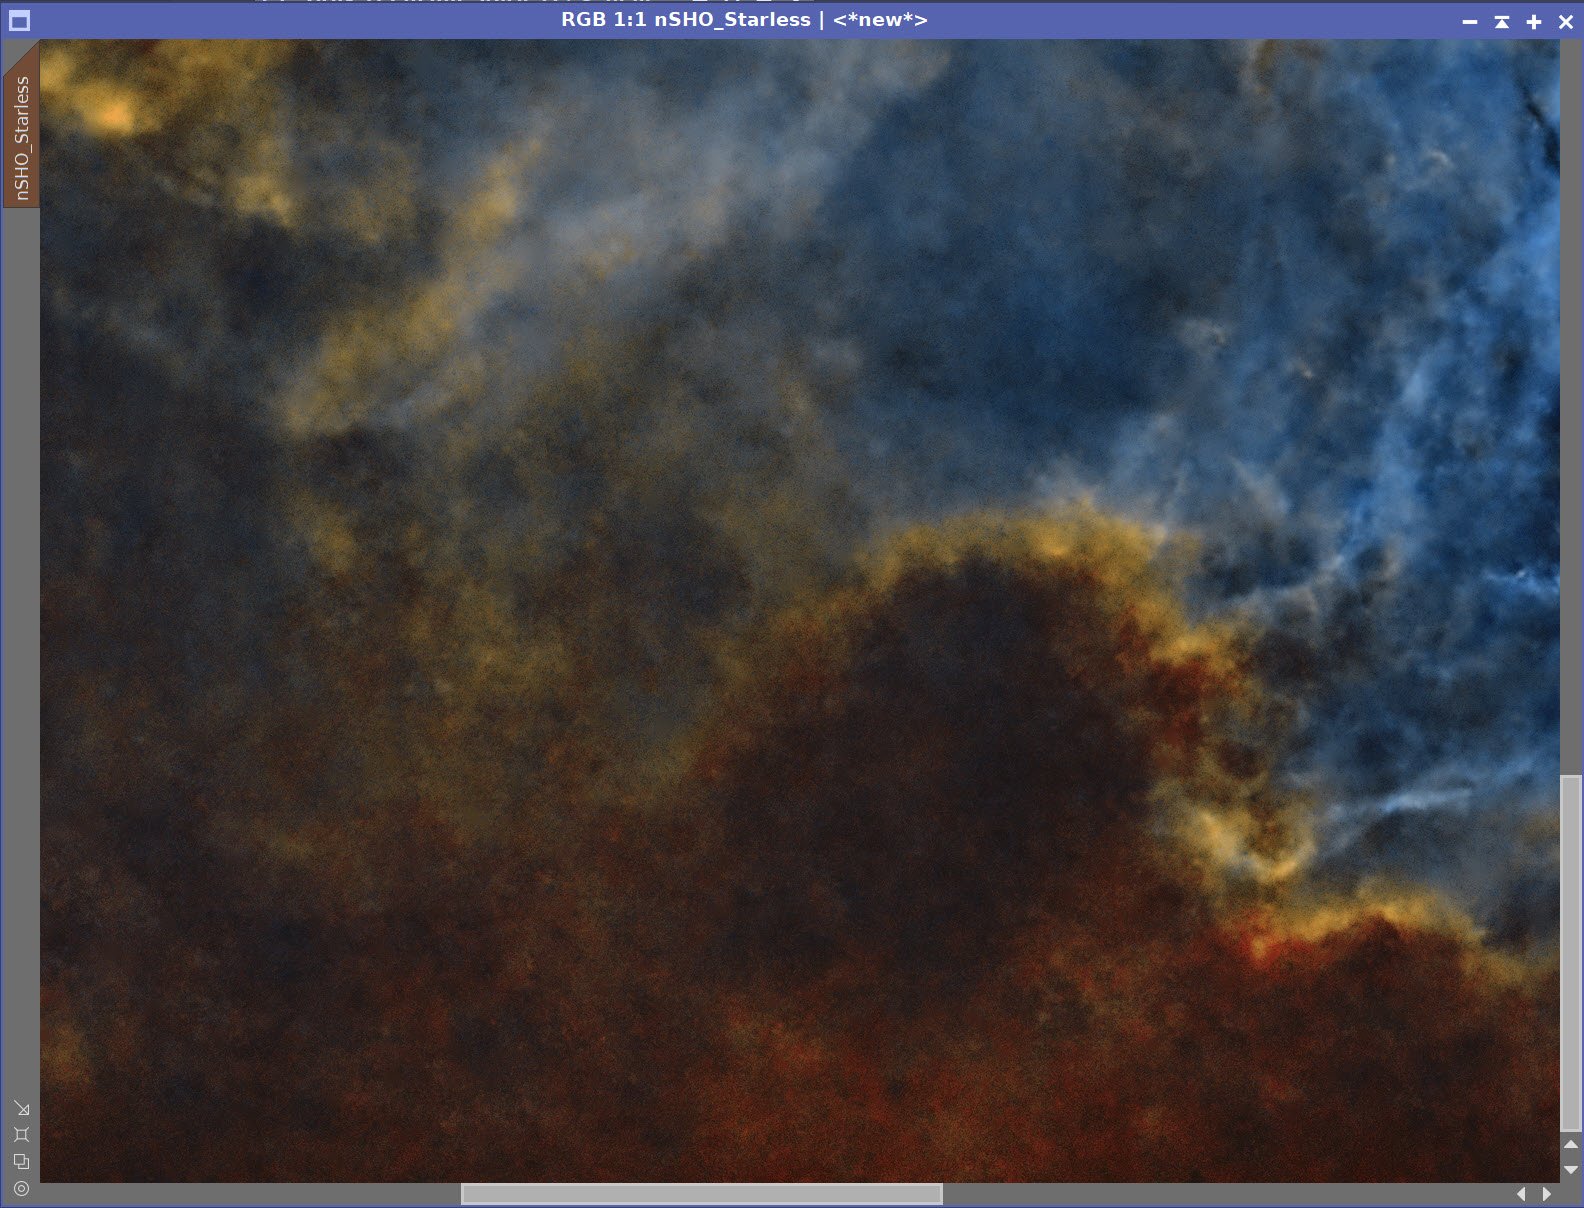
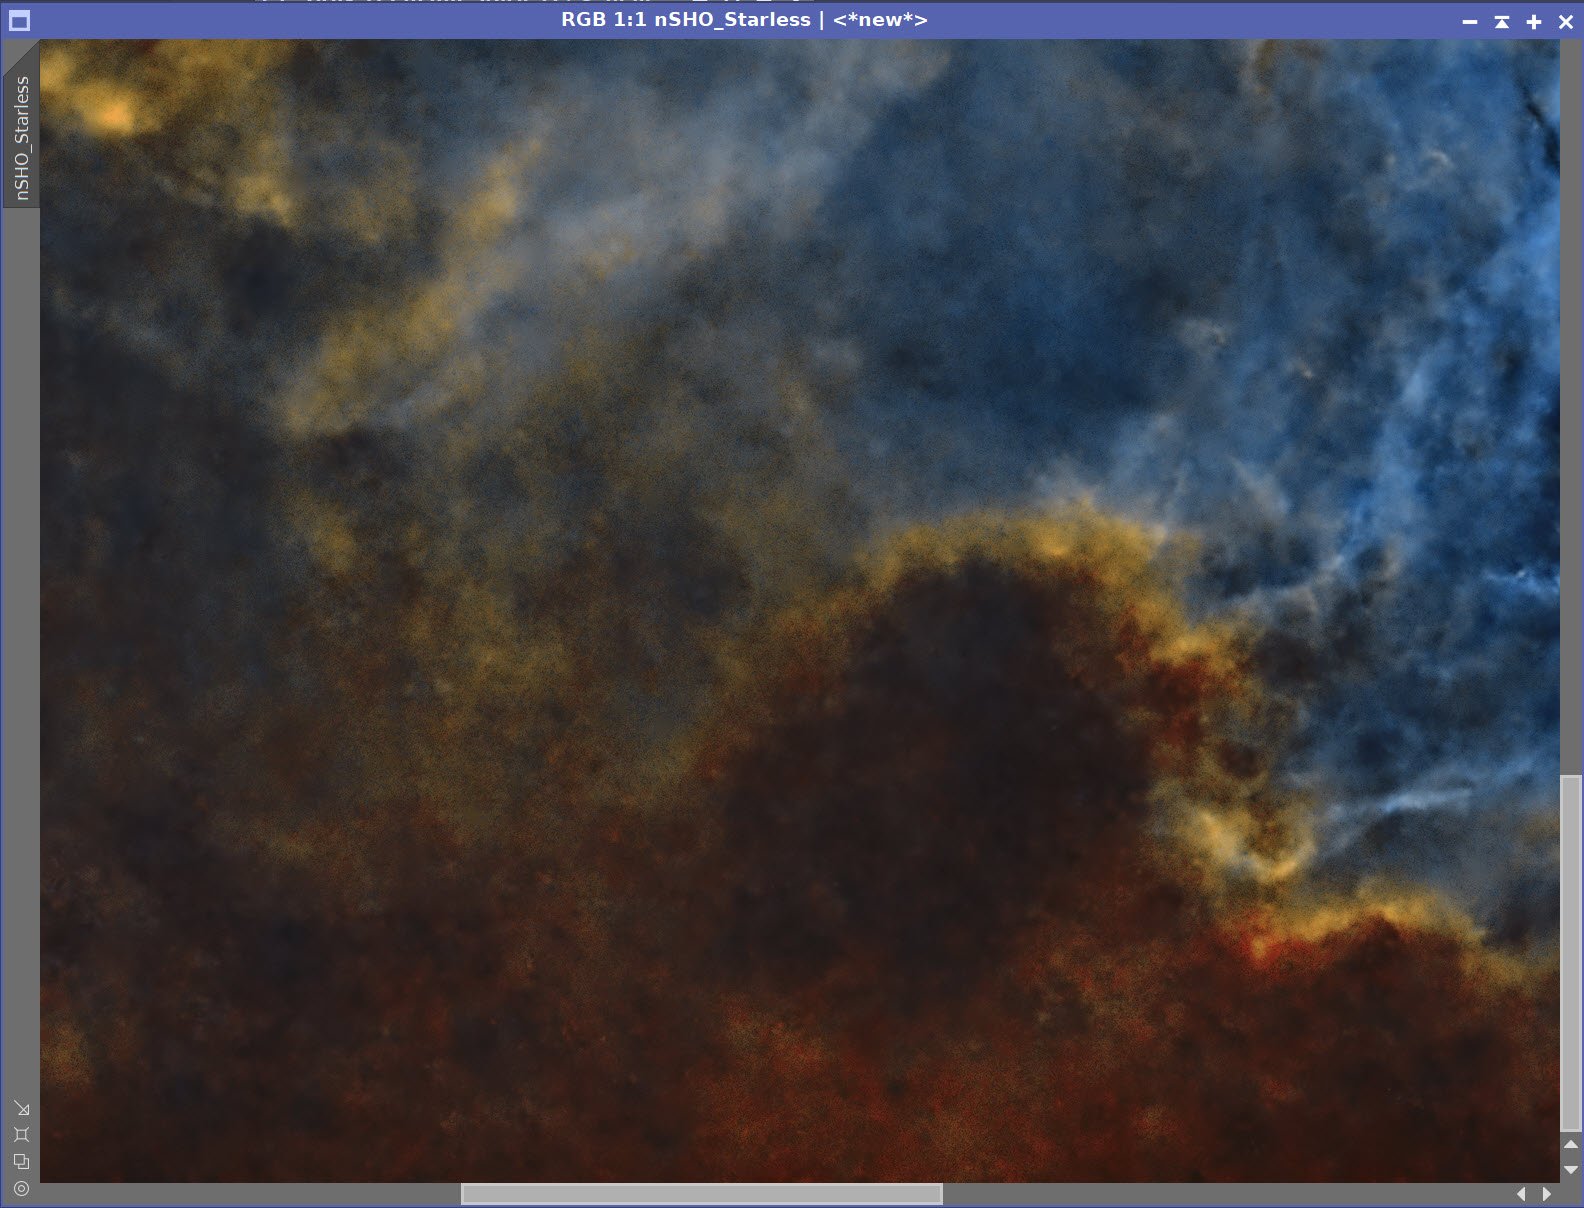
Master SHO Starless Image (click to enlarge)
Master SHO Stars Only Image (click to Enlarge)
Master Lum Starless (click to enlarge)
7. Take Lum image Nonlinear and Process
Use the STF->HT method to go Nonlinear
Do a global CurvesTransform(CT) tool adjustment to modify the tone scale
Adjust the local contrast using the LocalHisogramEqualization (LHE)Process
Use a setting of a 300 radius, 2.0 contrast limit, an amount of 0.2, and a 12-bit histogram
This will work on the larger scales of the image.
Do another Global CT adjust
Do Noise Reduction with NXT = 0.7
The stating nonlinear Lum image (click to enlarge)
After LHE operate - see details above (click to enlarge)
After a global CT adjust (click to enlarge)
Additional CT performed. (click to enlarge)
Lum Starless Image - Before and After NXT = 0.7

Final Lum Starless Image.
8. Process the Initial Color Processing for the Nonlinear SHO Image
Take SHO Starless image nonlinear using the STF->HT method
Do an SCNR for the green with 0.9 amount to eliminate the strong green balance.
Invert the Image
Do an SCNR for the green with 0.9 amount - this will get rid of any magenta funkiness in the image
Invert the Image
Do global CT
Starting SHO Starless Image (click to enlarge)
Invert the image - any green here is actually magenta funkiness (click to enlarge)
After SNCR Green at 0.8 (click to enlarge)
After SCNR Green at 0.9 (click to enlarge)
Invert the Image (click to enlarge)
9. Create the Needed Color Masks
Create a Green Mask
Green masks often do well, isolating the golden areas of an SHO image. I used this at first but later decided to create a more “orange” specific mask using the ColorMask_Mod script.
Use Bill Blanshan’s Color Mask Script (BBCM) for Green to blur
Use CT to enhance
Use the Bill Blanshan Blur Script (BBB) to blur it a bit
Do a final CT to tweak
BBCM used to create Green Mask (click to enlarge)
After BBB Script (click to enlarge)
Use CT to Enhance (click to enlarge)
And a final CT to tweak (click to enlarge)
Create a Red Mask
Use the BBCM Red script
Use the BBB Script to blur
The initial Red Mask (click to enlarge)
After a final blur (click to enlarge)
Do a boost with CT (click to enlarge)
Create an Orange Mask
This one is highly tailored to the image colors on the edges of the nebula
This is created using the ColoRMask_Mod Script - see screen nap below

The ColorMask Mod Script Panel - as used to create the Orange Mask
The Orange Mask (click to enlarge)
Create a Blue-Cyan Mask
This one is highly tailored to the image colors on the edges of the nebula
This is created using the ColoRMask_Mod Script - see screen nap below

The Setting used to create the Blue Cyan Mask (click to enlarge)
The Blue Cyan Mask (click to enlarge)
Create A GAME Mask
To focus on the brighter portions of the nebula

The GAME Mask to focus on the bright region of the Nebula (click to enlarge)
10. Finish Processing the SHO Starless Image
Apply the Green Mask
Adjust CT
Remove the Green Mask
Run HDRMT with levels set to 7 and “To Lightness” engaged.
Do a global CT
Do Noise reduction with NXT = 0.7
Apply the Blue-Cyan Mask
Apply CT
Apply the Orange Mask
Apply CT
Remove the Mask
Run SCNR with Green at amount 1.0 to clean up excess green
Apply the Orange Mask
Apply CT
Apply the Blue-Cyan Mask
Apply CT
Apply the Orange Mask
Run LHE with a radius of 50, contrast max of 2.0, an amount of 0.24, and a 10-bit histogram
Apply the BlueCyan Mask
Run LHE 50,2,0.24, 10-bits
Create a RangeMask using Select Range
This mask will target outlying dark areas to do some more Noise Reduction
Apply NXT = 0.7 with the Range Mask.
Add in the Lum Image
The color image has pretty strong details! Usually, it has little detail!
The Lum image seems softer
Now is the time to combine them!
Apply the Red Mask
Run CT
Apply the GAME Mask
Run CT
Run LHE with a radius of 64, a max contrast of 2.0,an amount of 0,3, and an 8-bit histogram
Starting SHO image before color mask work(Click to enlarge)
After HDRMT with Level= 7 w/ no mask (click to enlarge)
After CT Adjust with Green Mask (Click to enlarge)

After Global CT (click to enlarge)

Before and After NXT=0.7
After CT with the BlueMask (click to enlarge)
After SCNR Green with Amt= 1.0 (click to enlarge)
After LHE with the OrangeMask (click to enlarge)
The RangeMask (click to enlarge)
After CT with the YellowMask (click to enlarge)
CT with the OrangeMask (Click to enlarge)
After Lum Image added back in (click to enlarge)
Image with RangeMask Applied. Now we can do selective NXT. (click to enlarge)
Before and After NXT = 0.7 with RangeMask
After CT with RedMask Applied (click to enlarge)
With the GAME Mask Applied - note area of focus. (click to enlarge)
After CT with Game Mask Applied (click to enlarge)
DarkMask Created with the EnhanceDarkStructures Script (click to enlarge)
After LHE with Game Mask Applied (click to enlarge)
After CT with the DarkMask Applied (click to enlarge)

After CT with the BlueCyan Mask Applied.
11. Process the Stars
Adjust Linear Star Image HT to go nonlinear
Stars looks too small to me, so boost with CT to make them bigger
Adjust with CT to remove green balance - making the stars look more normal.
Starting Nonlnear SHO Star Image (click to enlarge)
Before Color fix - zoomed-in view (click to enlarge)
Stars After CT Boost (click to enlarge)
Stars after color fix - zoomed-in view (click to enlarge)

Final Star image.
12. Add Stars Back In
Use Bill Blanshan’s ScreenStars to add stars back in.

Screen Stars Panel Snap

After the stars have been restored!
13. Export to Photoshop and Polish Image
Export the image as a 16-bit TIFF file.
Run Photoshop, and load the image.
Crop the image to center the nebula better
Do global tweaks using the Camera Raw filter
Light adjustment of Clarity
Light adjustment of Texture
Light adjustment of Curves
Run the color mixer and tweak the blues and oranges.
Do Local Tweaks - using the lasso selection tool with 100-pixel feather settings, select key feature areas of the image and do subtle enhancements
Target:
Dark clouds in the circle area
Gold regions - Color Mix - boost sat for gold
For selected areas - tweak with the Camera Raw filter. These are very small tweaks.
Clarity
Texture
Curves
In PhotoShop - Showing the new image crop - and after Global Camera Raw Adjustments (click to enlarge)

After Local tweaks. This is the first Release Image that I used for sharing with others for early feedback.
14. Get feedback on the initial release image
Share the image with local Astro friends and ask for feedback
Feedback received:
The contrast in the orange areas is a little high
Blue regions are a bit bright
Yellow spots need more Noise reduction.
15. Final Tweaks
Photoshop was used to adjust the contrast of orange areas
Exported back to PI via a Tiff Image
Create a new Color Mask for Orange Areas (needed as the image is now cropped).
Apply the mask and do a final NXT run with the Mask
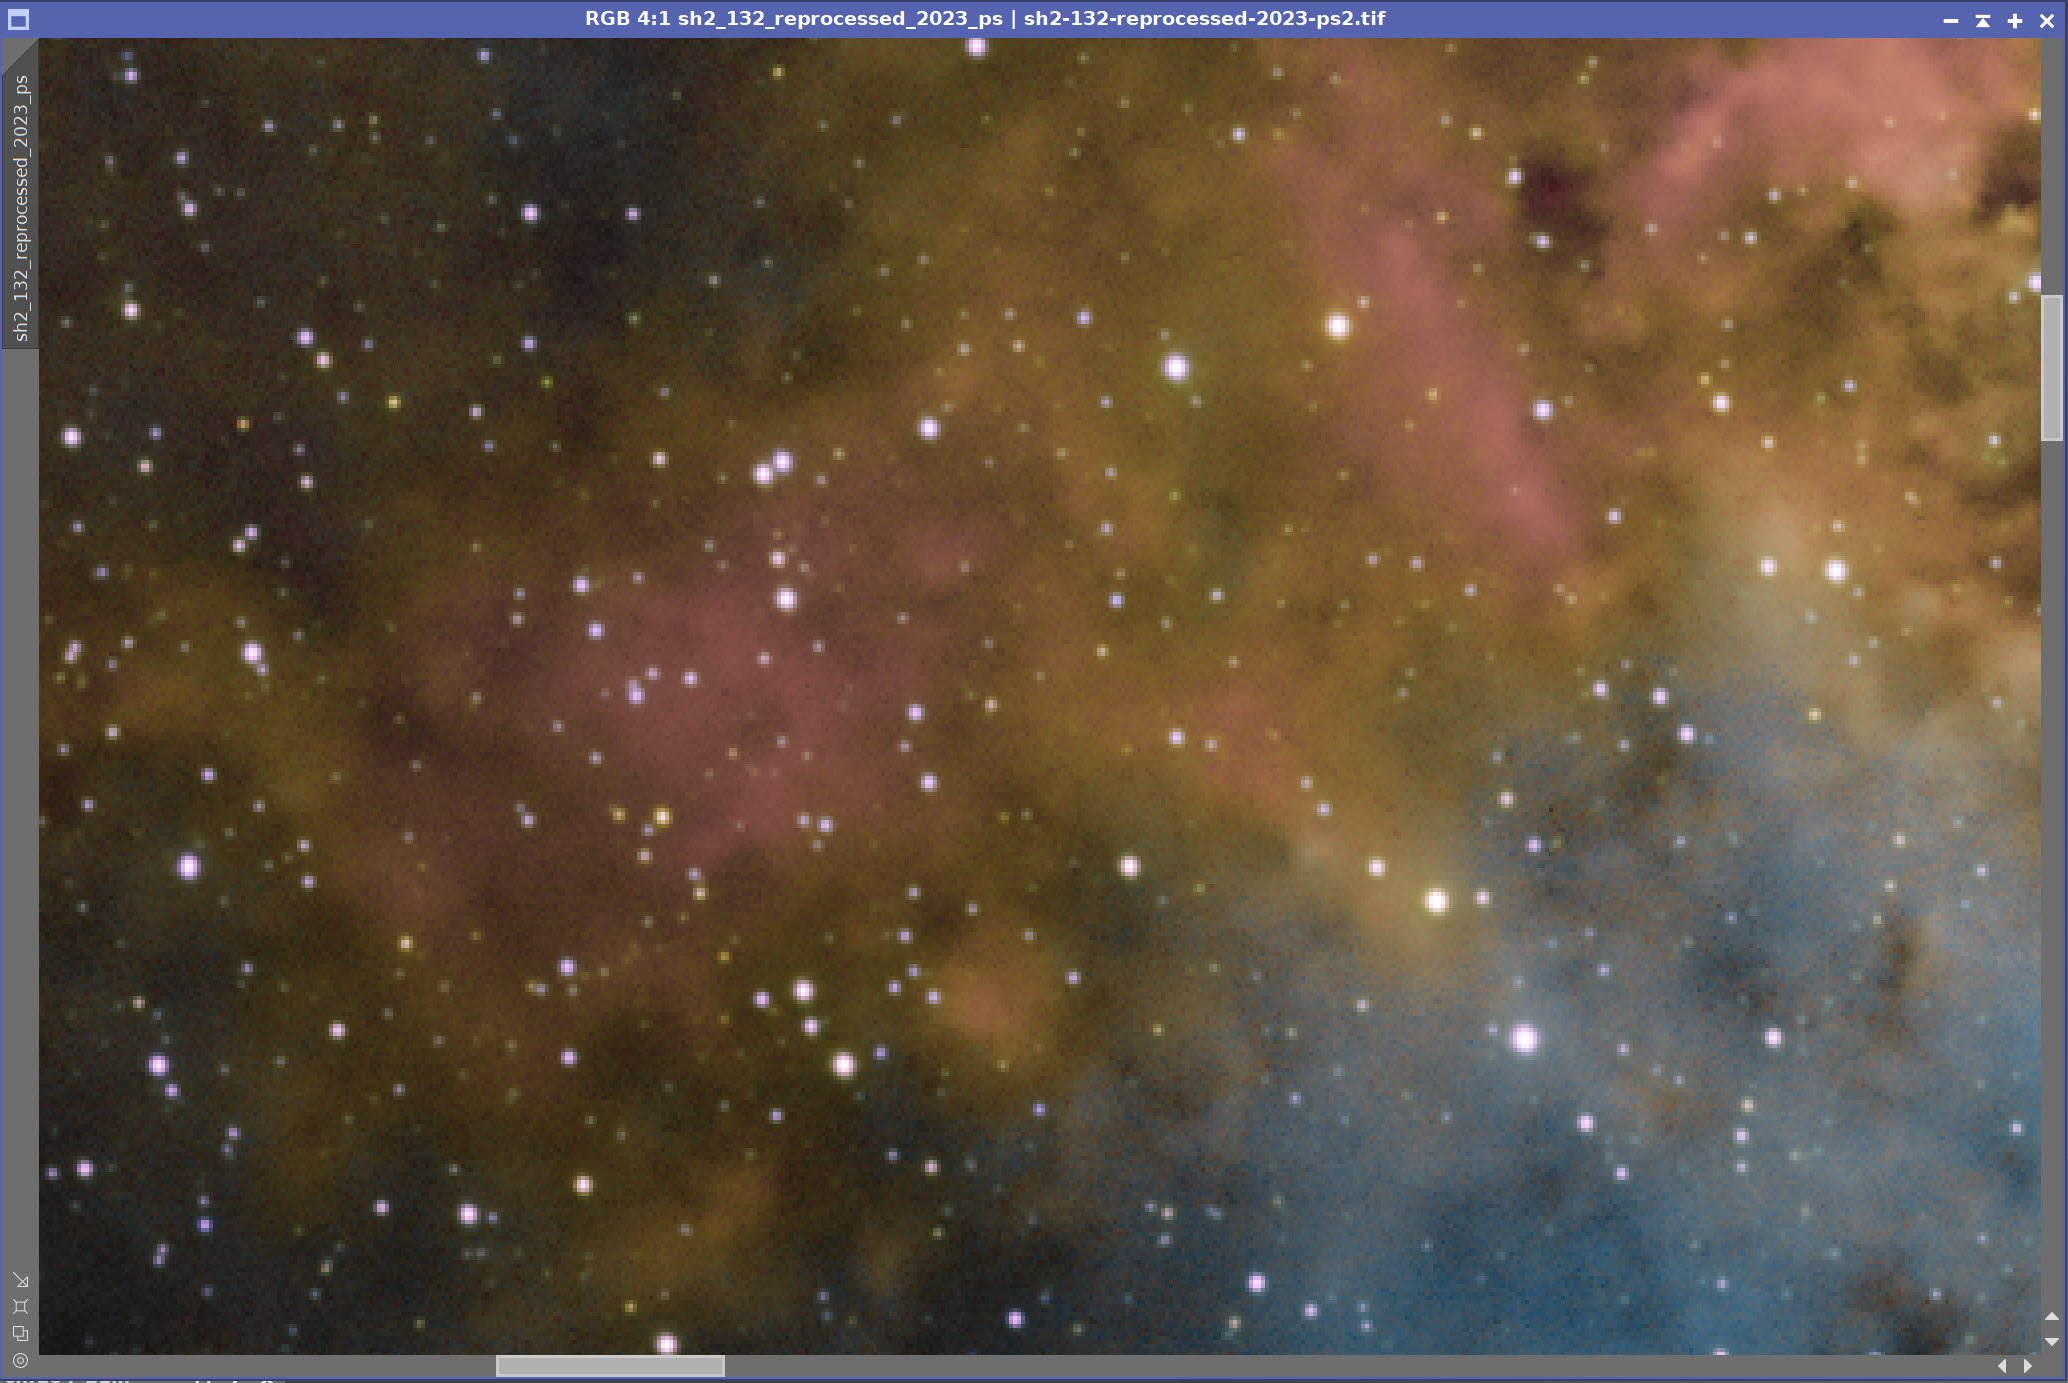
Do an MLT Sharpening run - as I forgot to do this before. See panel snapshot below for details.
Export back to PS
Add watermarks
Export needed image variations

ColorMask_Mod Panel settings used.

The resulting Mask (click to enlarge)
Before and After Masked NXT=0.7
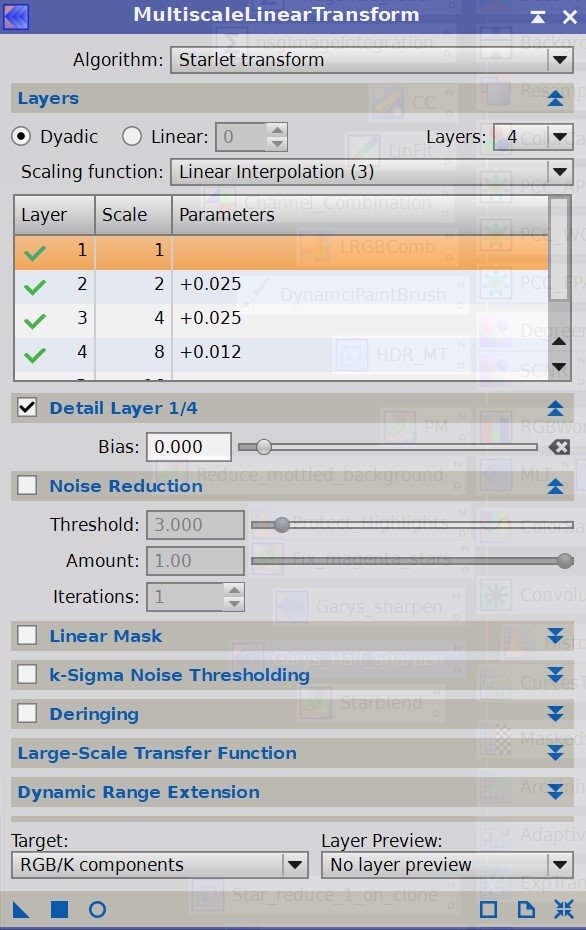
The modest sharpening parameters used with MLT.

Final Image
The portable scope platform is supposed to be, well, portable. That means light and compact. In determining how to pack this platform for travel, I realized that the finder scope mounting rings made no sense in this application and I changed them out with something both more rigid and compact - the William Optics 50mm base-slide ring set.